Here are seven cattle cloud Element-ui Upload component in how to upload pictures of (free version, there are traffic restrictions)
First, the preparatory work
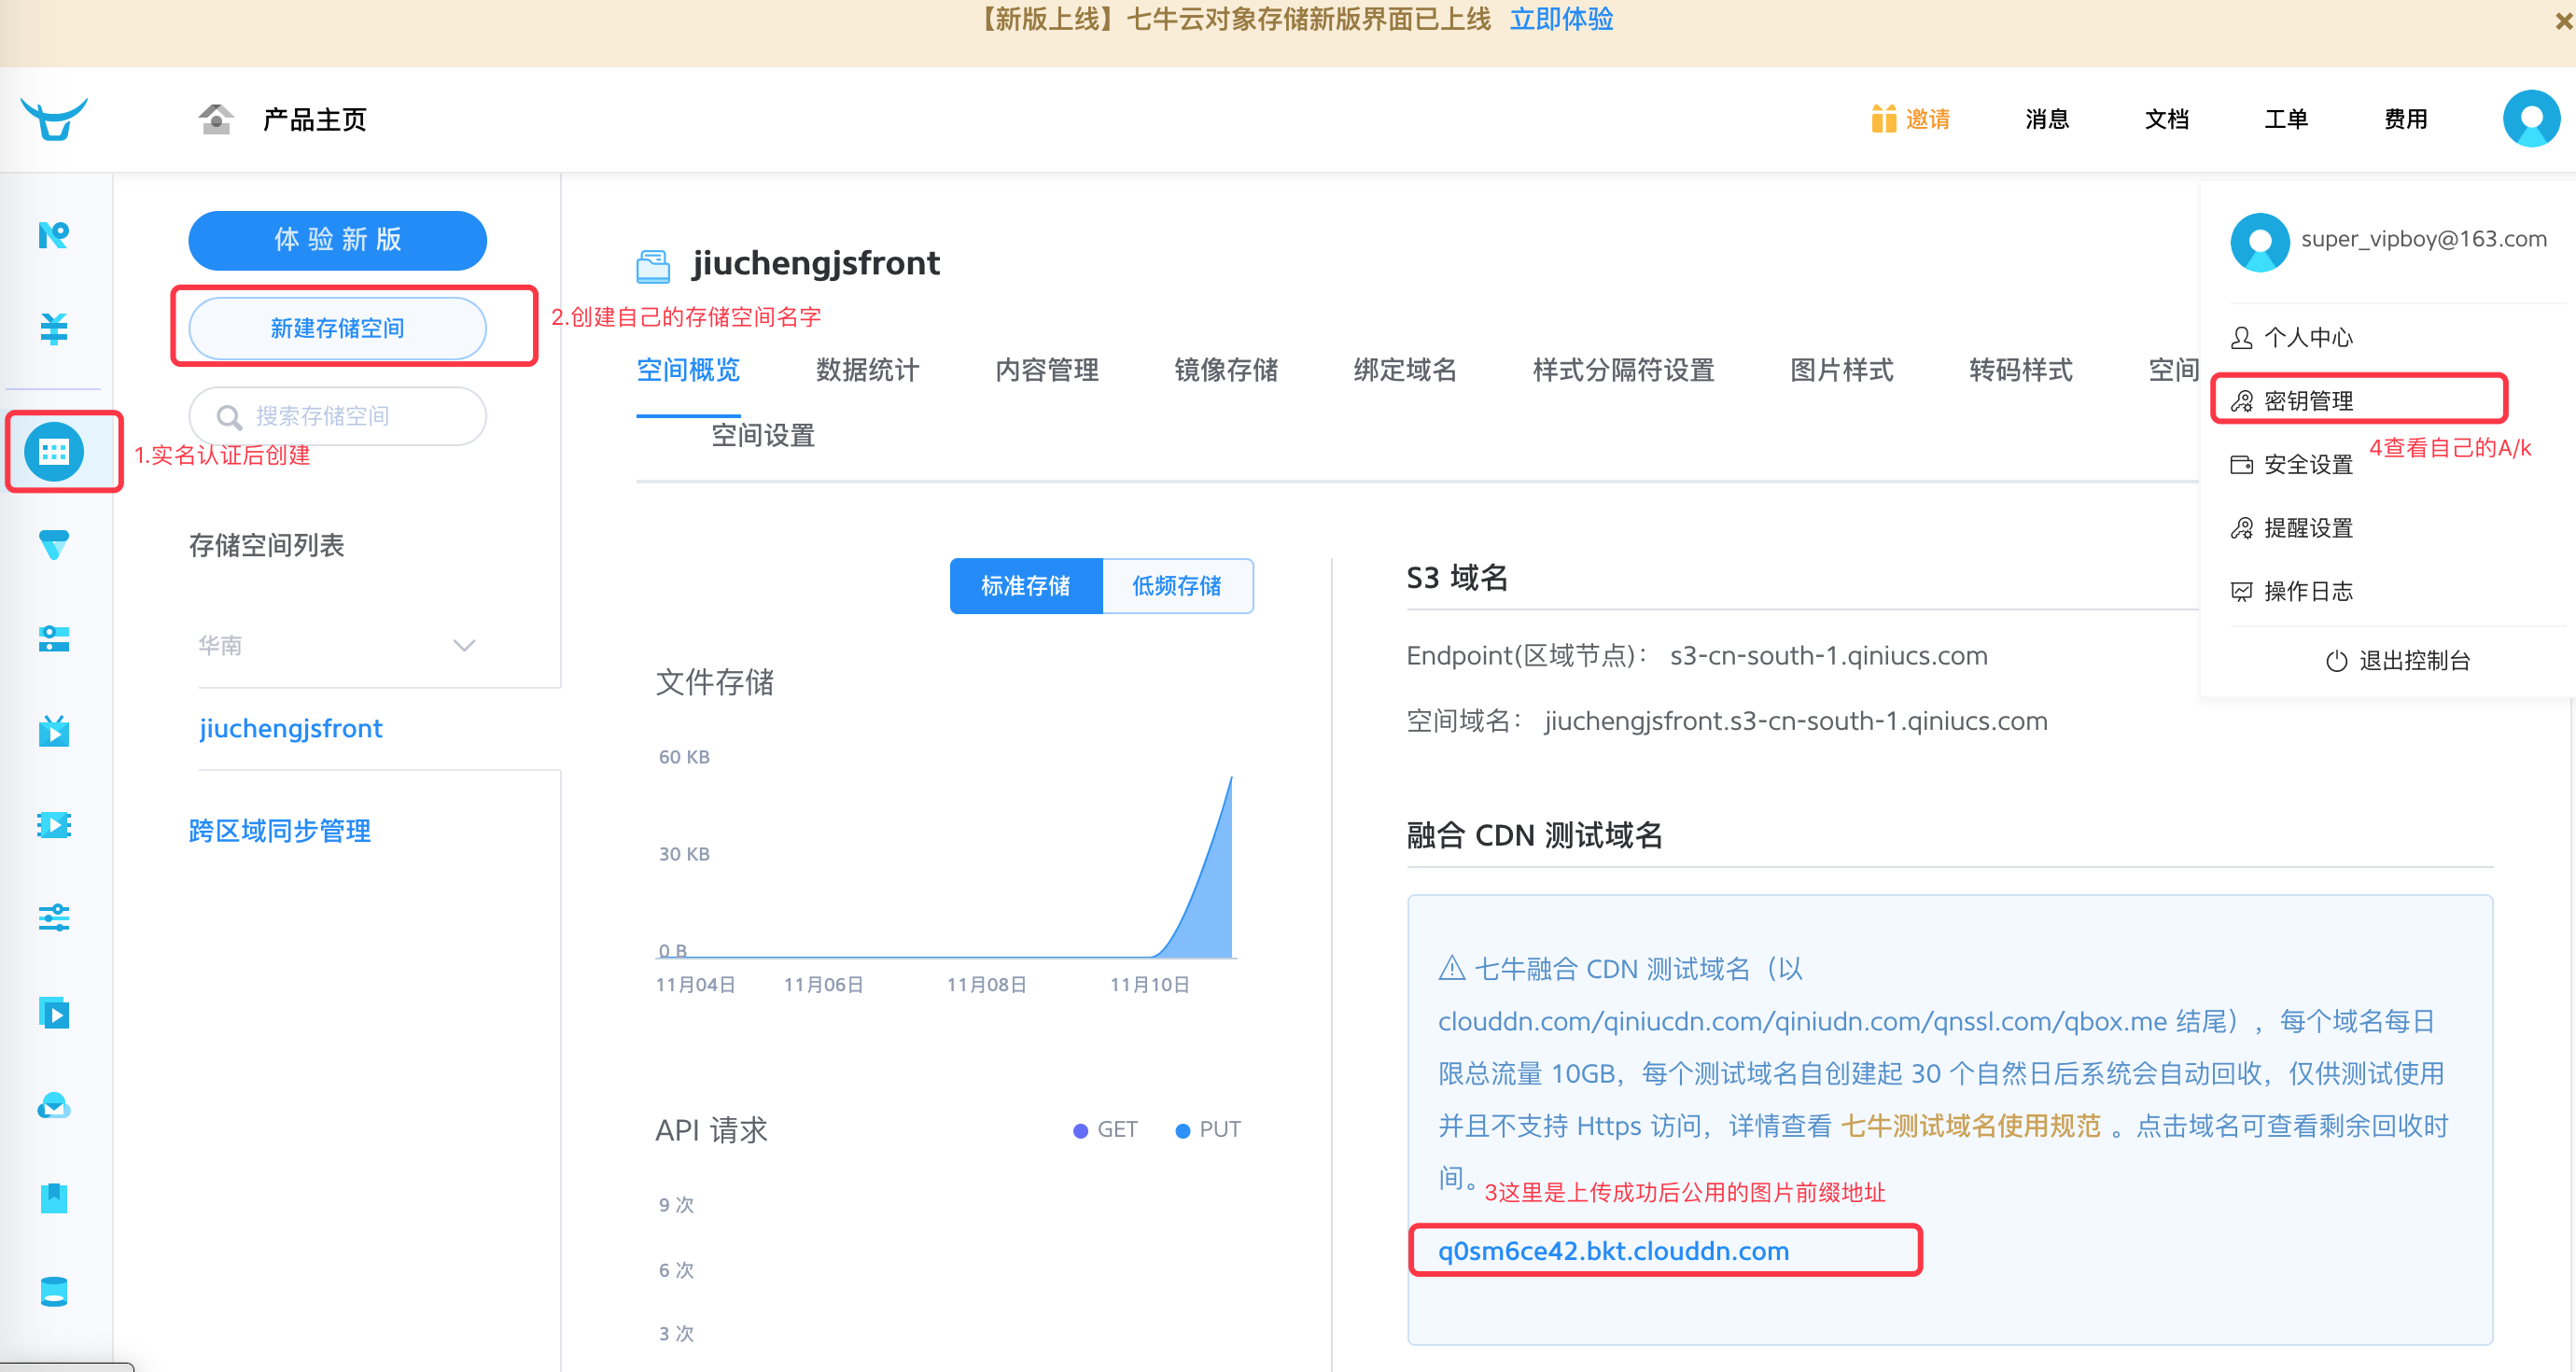
1. Sign up to seven cattle cloud account, and the real-name authentication, no authentication can not create storage space
2. Understand Element-ui component
Second, create the upload page (direct use here the official snippet)
<template>
  <div class="editor">
    <h3>上传图片</h3>
    <el-form label-width="70px" @submit.native.prevent="save">
      <el-form-item label="图标">
        <el-upload
          class="avatar-uploader"
          :action="qiniuDomain"
          :http-request="upLoadToQiniu"
          :show-file-list="false"
          :before-upload="beforeUpload"
        >
          <img v-if="model.icon" :src="model.icon" class="avatar" />
          <i v-else class="el-icon-plus avatar-uploader-icon"></i>
        </el-upload>
      </el-form-item>
    </el-form>
  </div>
</template>

<script>
export default {
  data() {
    return {
    upload address storage space created after the real-name authentication corresponding // (east, south, and so is not the same: https://developer.qiniu.com/kodo/manual/1671/region-endpoint )
      qiniuDomain: " https://upload-z2.qiniup.com " ,
   // create a public address prefix official pictures randomly assigned after successful that after a successful upload the corresponding public address prefixes Pictures
      qiniuViewHost: "http://q0sm6ce42.bkt.clouddn.com",
      model: {
        name: "",
        icon: ""
      }
    };
  },
  methods: {
    async upLoadToQiniu(req) {
      const config = {
        headers: { "Content-Type": "multipart/form-data" }
      };
      let fileType = "";
      if (req.file.type === "image/png") {
        fileType = "png";
      } else {
        fileType = "jpg";
      }
      // rename files to upload
      const KeyName = `$ { new new a Date () the getTime ().} {$ Math.random () toString (. 36 ) .slice ( 2 )} {$` fileType};.
       @ Upload time Token, can generate their own front-end, back-end to generate safe!
    // this is the rear end of the express generated the Token
       const RES = the await the this $ http.get (. " / Token " );
      const token = res.data.uploadToken;
      const formdata = new FormData();
      formdata.append("file", req.file);
      formdata.append("token", token);
      formdata.append("key", keyname);
      const result = await this.$http.post(this.qiniuDomain, formdata, config);
      this.model.icon = `${this.qiniuViewHost}/${result.data.key}`;
    },
    beforeUpload(file) {
      // debugger
      const isJPG = file.type === "image/jpeg" || file.type === "image/png";
      const isLt10M = file.size / 1024 / 1024 < 10;

      if (!isJPG) {
        this.$message({
          showClose: true,
          the Message: " upload pictures only JPG / PNG format! " ,
          type: "error"
        });
      }
      if (!isLt10M) {
        this.$message({
          showClose: true,
          the Message: " Upload avatar picture size can not exceed 10MB! " ,
          type: "error"
        });
      }
      return isJPG && isLt10M;
    },
  },
  created() {
    // Other ajax
  }
};
</script>
Third, upload certificate (Token) How to get: https://developer.qiniu.com/kodo/manual/1208/upload-token
// seven cattle cloud CDK official node.js
const qiniu = The require ( 'qiniu' );

config const = {
   // Personal Center -> secret key management -> AccessKey
  "AK": "xxxxxx your own" ,
   // personal center -> secret key management -> SecretKey
  "SK": "xxxxxx your own" ,
   // Object storage -> name of the new storage space :( create your own space when the name), where I created is: jiuchengjsfront
  "Bucket": "jiuchengjsfront"
}
  // This is returned to the client according to express defined interfaces: token
  app.get ( '/ ADMIN / API / token', the async (REQ, RES) => {
    const mac = new qiniu.auth.digest.Mac(config.AK, config.SK);
    const options = {
        scope: config.Bucket,
        expires: 3600 * 24
    };
    const putPolicy =  new qiniu.rs.PutPolicy(options);
    const uploadToken= putPolicy.uploadToken(mac);
    res.send({
      uploadToken
    })
  })
May not get from the interface, define their own successful method. Do not expose to others safe
// seven cattle cloud CDK official node.js
const qiniu = The require ( 'qiniu' );

config const = {
   // Personal Center -> secret key management -> AccessKey
  "AK": "Your own Accesskey" ,
   // personal center -> secret key management -> SecretKey
  "SK": "Your own SecretKey" ,
   // Object storage -> name of the new storage space when creating your own :( name)
  "Bucket": "jiuchengjsfront"
}
// official document: HTTPS: //developer.qiniu.com/kodo/manual/1208/upload-token
const mac = new new qiniu.auth.digest.Mac (config.AK, config.SK);
const options = {
  scope: config.Bucket,
  expires: 3600 * 24
};
const putPolicy = new qiniu.rs.PutPolicy(options);
const uploadToken = putPolicy.uploadToken(mac);

export default uploadToken

// use the time to be replaced
formdata.append("token", uploadToken);
const result = await this.$http.post(this.qiniuDomain, formdata, config);
this.model.icon = `${this.qiniuViewHost}/${result.data.key}`;
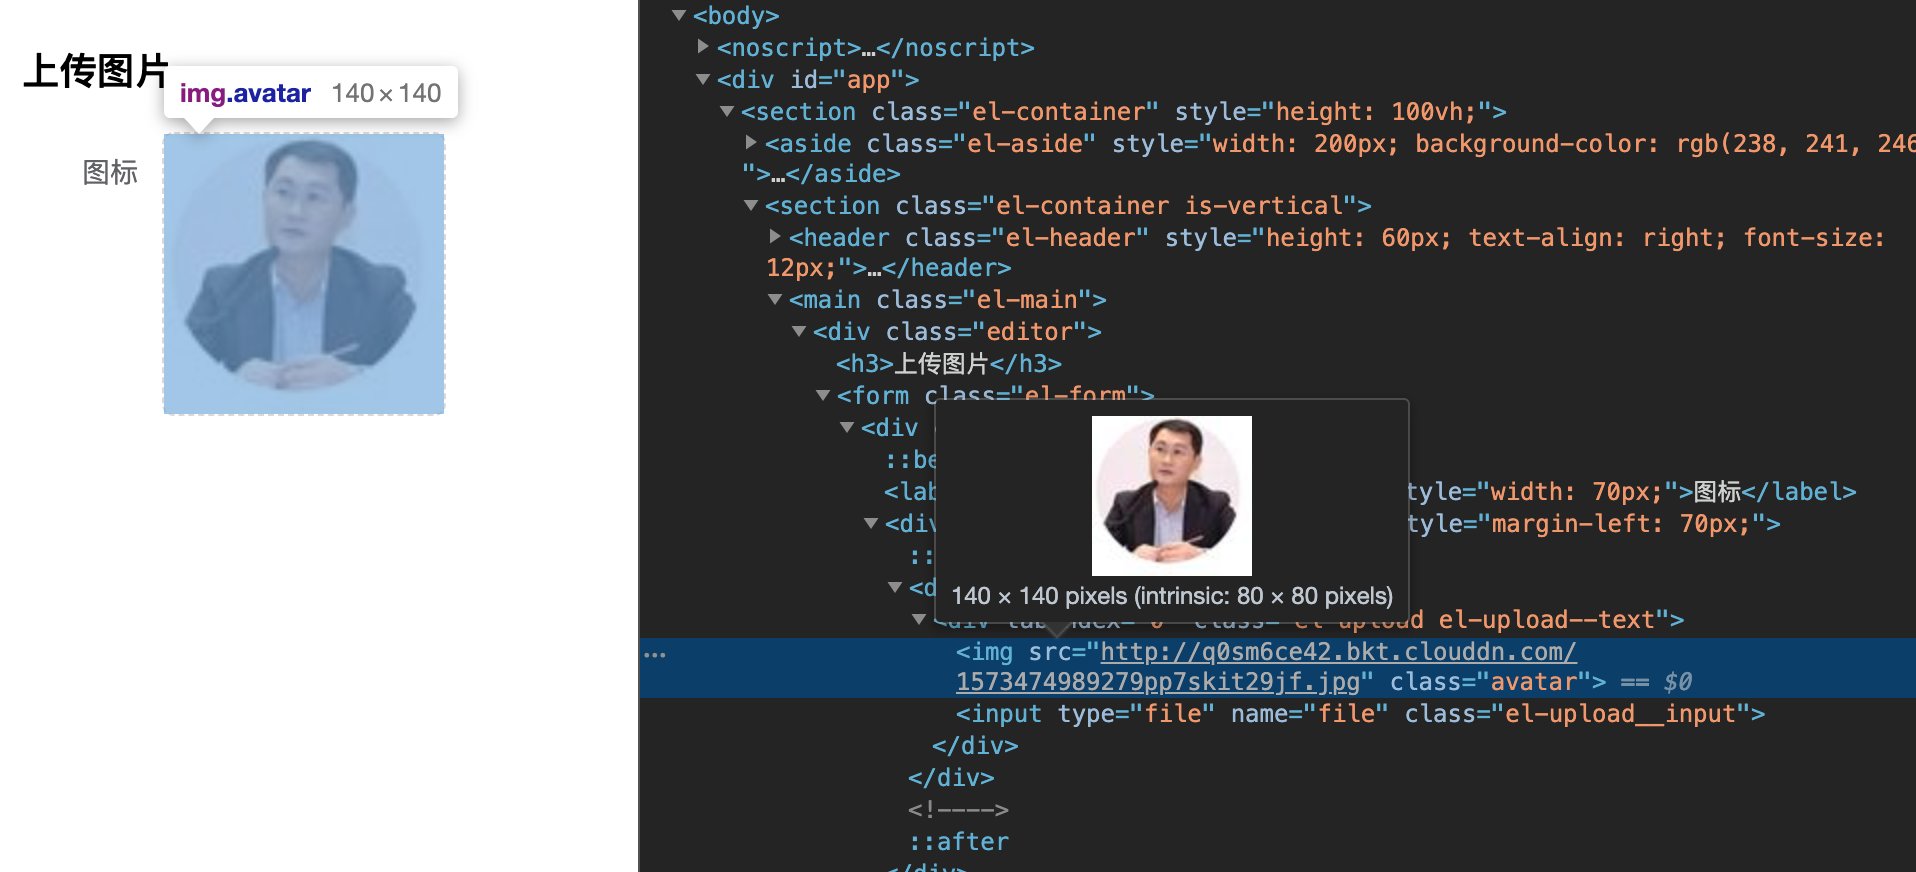
Fourth, after a successful upload, such as: