In the previous article we installed the ROS environment. In this article we will be familiar with some of the concepts (Concept) ROS in, and try to use C ++ to implement a publisher (Publisher) and a subscriber (Subscriber).
This article is a personal process of learning ROS record, the reference book is the Chinese version of "ROS Robot Programming: Principles and Applications" , the English version is A Systematic Approach to Learning Robot Programming with ROS , the book code is hosted on the author wsnewman GitHub , thanks to the author's hard to pay.
The article is divided into the following sections:
- ROS concept
- Implement a publisher in the ROS
- Run your publisher
1. ROS
I just to name a few concepts This article will relate to the definition of these concepts derived ROS Wiki , are interested in further insight.
1.1 ROS file system
It is to introduce in the way of organizing files in ROS, similar to the Python Package (Package) form of organization documents.
- The Packages : package of ROS is the main program organizational unit of ROS, the package may contain a series of related nodes (nodes), ROS dependent libraries, profiles and the like. ROS package is the smallest unit you can compile and issue, and most of the time when you compile operation is to compile the package.
- Package.xml : mainly used to describe the package, provide information about the package, including the package name, version, briefly, copyright information, and so dependent.
- Message Type: in the topic (Topic) is defined in the message, so that publisher / subscriber can be properly encoded / decoded byte stream.
1.2 ROS concept
Nodes (Nodes) : node is an executable file, the executable file may you use
roscpporrospycreate.Master : In the last article we run through command
roscoreone of the command's role is to startROS Master, Master mainly to provide name registration and resolution, so that each node can find another node by name.Message (Message) : the node is accomplished by the exchange of messages between each other, the message is similar to a
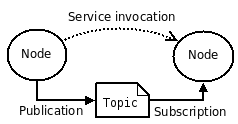
structdata structure, which may contain several fields. For example: in the path/opt/share/melodic/share/std_msgs/msg(if you are like my last article as installed), you can see a lot of messages defined, for example, open a ColorRGBA.msg, reads as follows:float32 r; float32 g; float32 b; float32 a;Topic (Topic) : topic represented by the topic name (topic name), you can think of it as a mailbox, publisher think I just need to put the message to the mailbox on the line, and subscriber think I just need to get this mailbox message on the line, because the nature of the exchange node is to pass a message, just specify a topic the two sides agreed to exchange good path. The whole process can be represented as in FIG.
2. Implement a publisher in the ROS
2.1 to create a workspace and packages
Before writing ROS program, first to suggest a ROS Workspace, the preparation after all will be in the work area, the work area has a certain format, you can choose your homecreate directory, in turn enter the following commands
mkdir -p ~/catkin_ws/src # 创建工作区
cd ~/catkin_ws/src # 进入工作区
# catkin_create_pkg package_name(包名称) dependencies(依赖)
catkin_create_pkg my_minimal_node roscpp std_msgs #新建一个ROS包
After the creation is complete, we can see in the catalog my_minimal_nodemore than two files ( package.xml, CMakeLists.txt) and two folders ( src, include).
Which package.xmlis the previously mentioned ROS package configuration file, descriptive information about the package. CMakeLists.txtIs used to configure the compilation process, these are two of the main documents used by this article.
2.2 Modifypackage.xml
首先我们来修改package.xml,在编辑器中打开该文件,可以看到文件中包含了大量的注释,这些注释都是来指导你该如何书写该文件。
一般说来我们应该包括<name>,<version>,<description>,<maintanner>,<license>,<author>,<build_depend>,<build_export_depend>, <exec_depend>便可以了,这部分大家可以按照自己的信息进行修改。
修改后的package.xml类似于下面的内容,当然你也可以不修改,对于这一篇内容来说,这无关紧要。
<?xml version="1.0"?>
<package format="2">
  <name>my_minimal_node</name>
  <version>0.1.0</version>
  <description>The my_minimal_node package</description>
  <maintainer email="[email protected]">gnc</maintainer>
  <license>MIT</license>
  <author email="sharku">Jane Doe</author>
  <buildtool_depend>catkin</buildtool_depend>
  <build_depend>roscpp</build_depend>
  <build_depend>std_msgs</build_depend>
  <build_export_depend>roscpp</build_export_depend>
  <build_export_depend>std_msgs</build_export_depend>
  <exec_depend>roscpp</exec_depend>
  <exec_depend>std_msgs</exec_depend>
</package>
2.3 编写第一个简单的ROS程序-发布器
进入到目录~/catkin_ws/src/my_minimal_node/下,在该目录下的src文件夹创建minimal_publisher.cpp,内容如下,代码内容也可以在文章最开始给出的github中找到。
#include <ros/ros.h>
#include <std_msgs/Float64.h>

int main(int argc, char **argv) {
    ros::init(argc, argv, "minimal_publisher"); // 初始化节点名
    ros::NodeHandle n; //
    ros::Publisher my_publisher_object = n.advertise<std_msgs::Float64>("topic1", 1); // 创建一个发布器,调用advertise通知ROS Master话题名称以及话题类型
    //"topic1" 是话题名
    // 参数 "1" 是queue_size,表示缓冲区大小

    std_msgs::Float64 input_float; // 创建一个发布器将要使用的消息变量
    // 该消息定义在: /opt/ros/indigo/share/std_msgs
    // 在ROS中发布的消息都应该提前定义,以便订阅者接收到消息后该如何解读
    // Float64消息的定义如下,其中包含一个数据字段data:
    // float64 data

    input_float.data = 0.0; // 设置数据字段


    // 程序所要做的工作将在下面的循环里完成
    while (ros::ok())
    {
        // 该循环没有sleep,因此将一直处于运行状态,不断消耗CPU资源
        input_float.data = input_float.data + 0.001; //每循环一次+0.01
        my_publisher_object.publish(input_float); // 发布消息到对应的话题
    }
}代码中,#include <ros/ros.h>表示包含ROS头文件,#include <std_msgs/Float64.h>表示包含标准消息类型中的Float64,它的具体类型是float64。
在上述代码中,在main函数中,首先对ROS进行初始化,调用ros::init定义了节点名称。然后定义了ros::NodeHandle该变量用来创建一个发布者,通过调用函数.advertise,表示向Master声明我要注册一个话题名为topic1,然后我将会向该话题发布消息,然后返回一个发布器对象。随后我们便可以调用该发布器的.publish来进行消息的发布。
其余部分的解释可以看代码中的注释。
2.4 修改CMakeLists.txt文件
在编写了发布器的程序以后,我们还必须在CMakeLists文件中进行声明,以便让编译器知道应该编译新增的文件。
在CMakeLists文件的最后一行加入下面两行代码:
add_executable(my_minimal_publisher src/minimal_publisher.cpp) # 第一个参数是生成后的可执行文件名 第二个参数
# 是源文件路径名
target_link_libraries(my_minimal_publisher ${catkin_LIBRARIES}) # 链接库然后关闭文件,打开终端,导航到目录~/catkin_ws/下,运行命令catkin_make即可编译我们刚刚创建的文件。
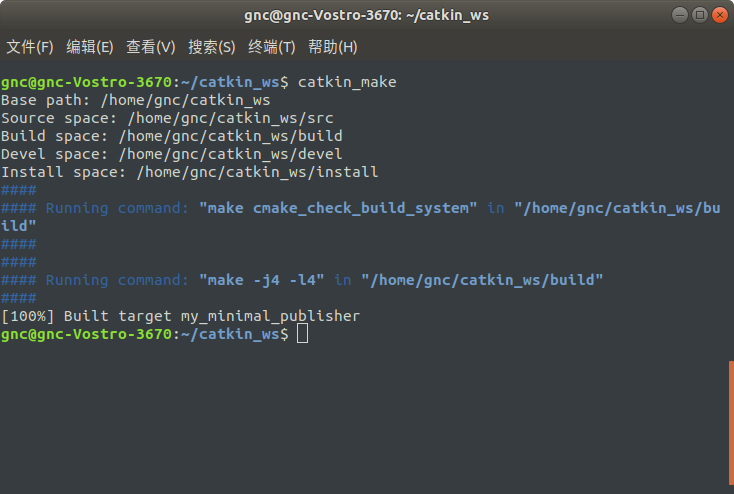
有可能你的输出结果和我这里显示的不同,因为我已经编译过了,所以编译器没有执行任何动作。
3. 运行你的发布器
在上面的编译过程没有出现问题的情况下,那么你的编译就成功了,接下来我们来运行我们刚刚编写的发布器。
3.1 将工作区路径加入你的终端
类似于$PATH变量,ROS也有自己的路径变量,用来搜索所有的ROS包,因为到这里我们还没有将我们的ROS包加入到ROS路径中去,因此在运行的时候会找不到我们的ROS包。
不过幸运的是,ROS帮我们生成了一个方便的编译脚本,位于路径~/catkin_ws/devel/setup.bash下。如果我们直接运行source ~/catkin_ws/devel/setup.bash那么只会在当前的终端下生效,当你重新打开一个终端,又会无效。因此,我们需要将上面的命令加入到启动脚本中,运行下面的命令完成:
echo "source ~/catkin_ws/devel/setup.bash" >> ~/.bashrc之后你的终端在启动时都将首先运行该命令,然后ROS就可以找到你的程序了。
3.2 启动发布器
打开终端,运行命令:
roscore # 启动ROS Master
然后运行:
rosrun my_minimal_node my_minimal_publisher # 启动发布器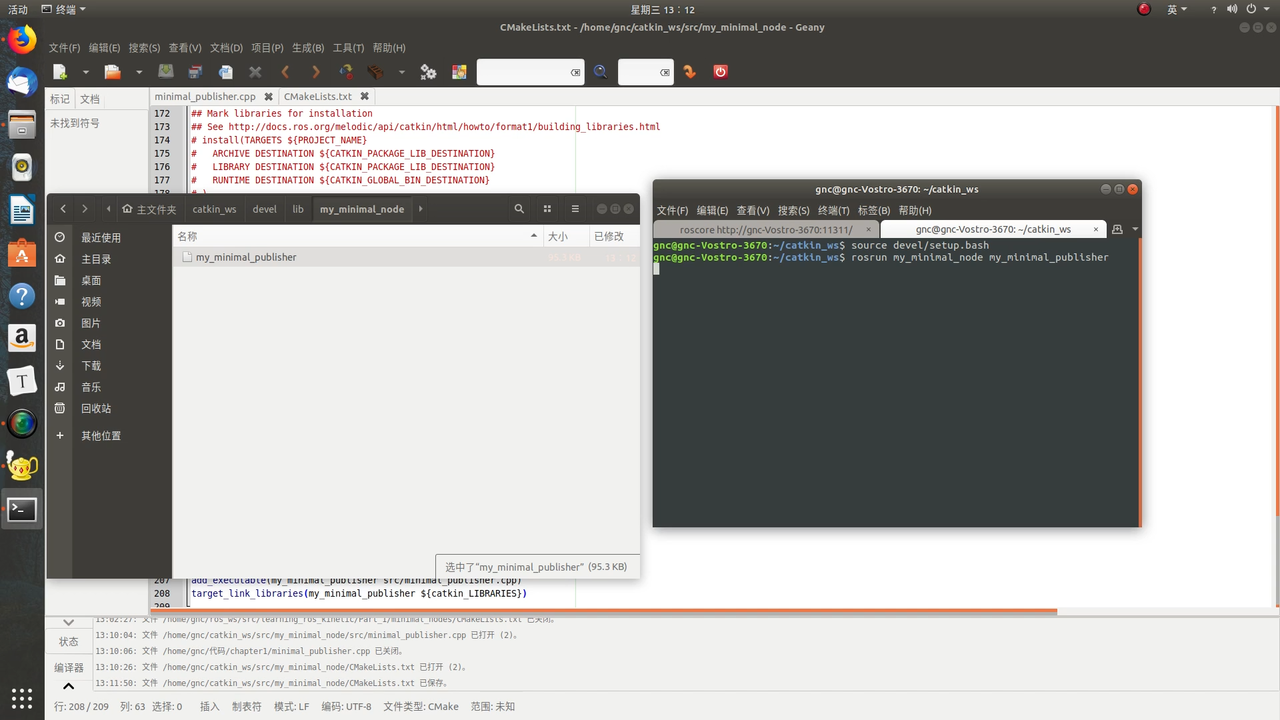
启动以后,尽管看起来什么都没有发生,但是事实上发布器已经在不断发布消息了。下面我们用ros工具来查看该发布器。
运行命令:
rosnode list # rosnode list 用来列出当前ROS中运行的节点名 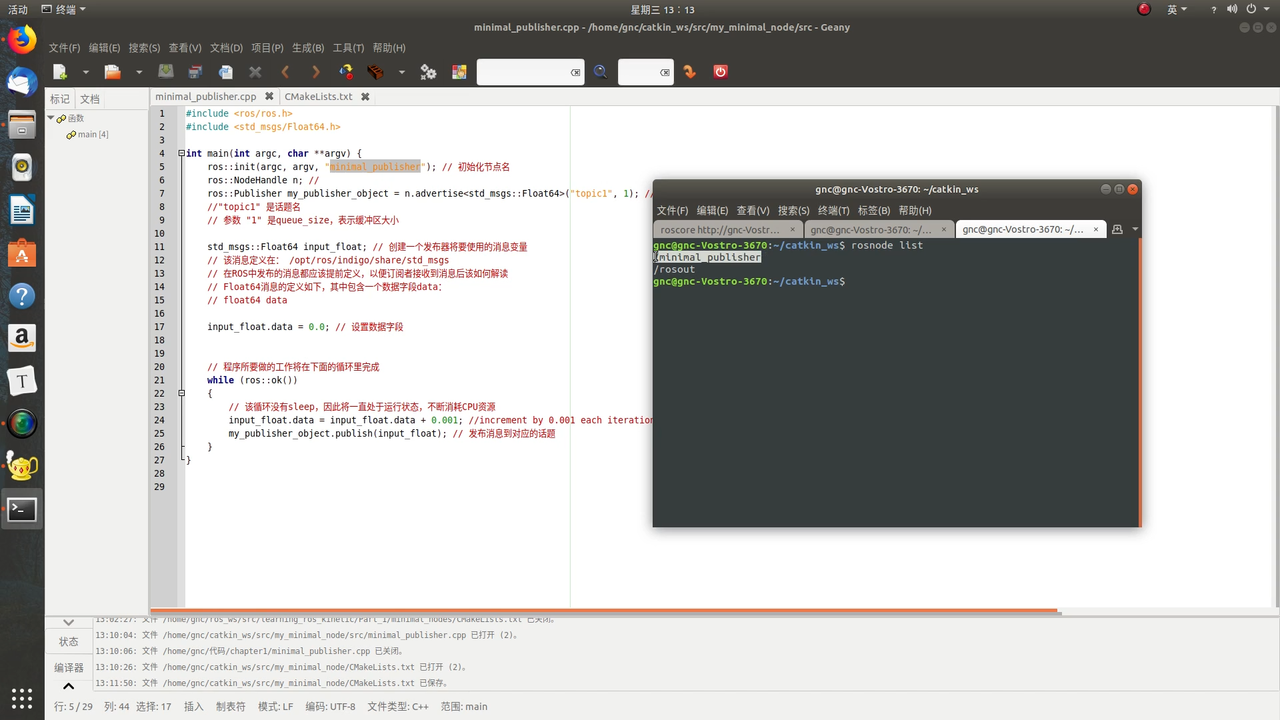
我们可以得到当前ROS系统运行的节点名称,可以看到我们初始化的节点名称出现在了该列表中,证明我们的发布器的确在运行中。
然后运行命令:
rostopic list # rostopic list 用来列出当前ROS中所有的话题名
同样可以看到我们注册的话题名称topic1。
然后运行命令:
rostopic hz /topic1 # rostopic hz 用来检查话题的发布频率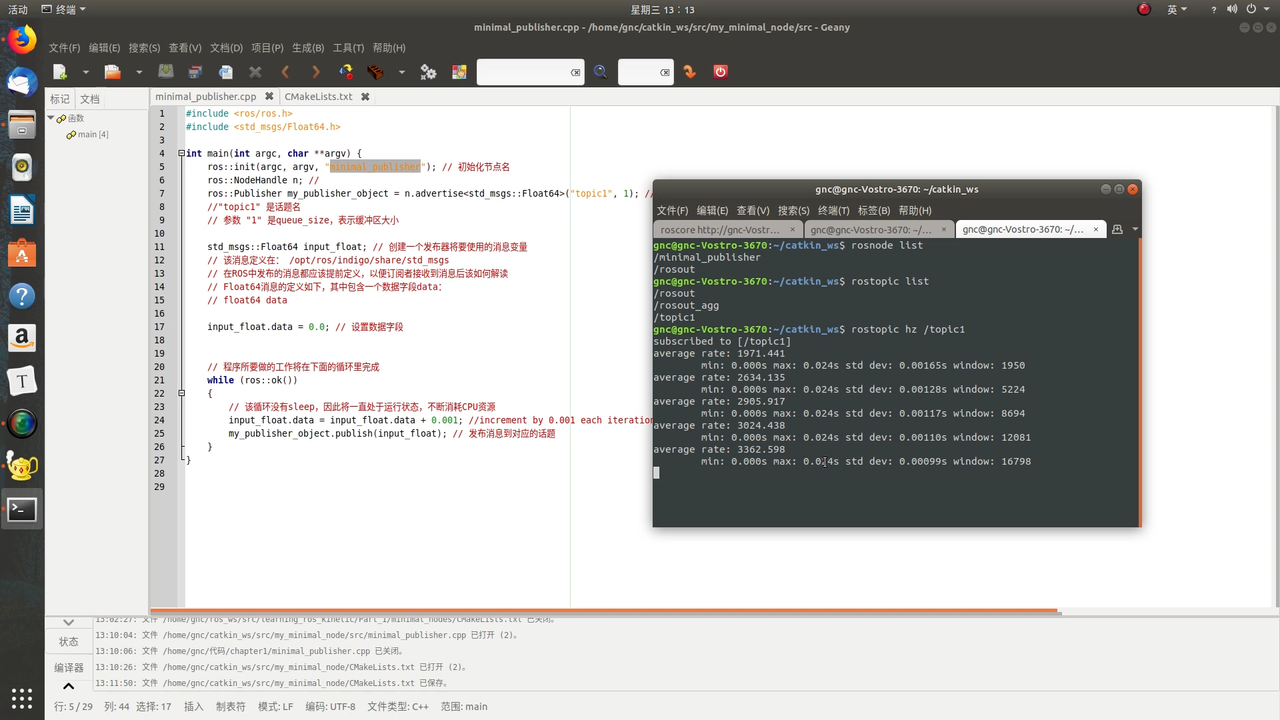
可以看到发布平均频率是3.3kHz,发布频率比较高,因此造成的问题是长时间占用CPU。如下图所示:
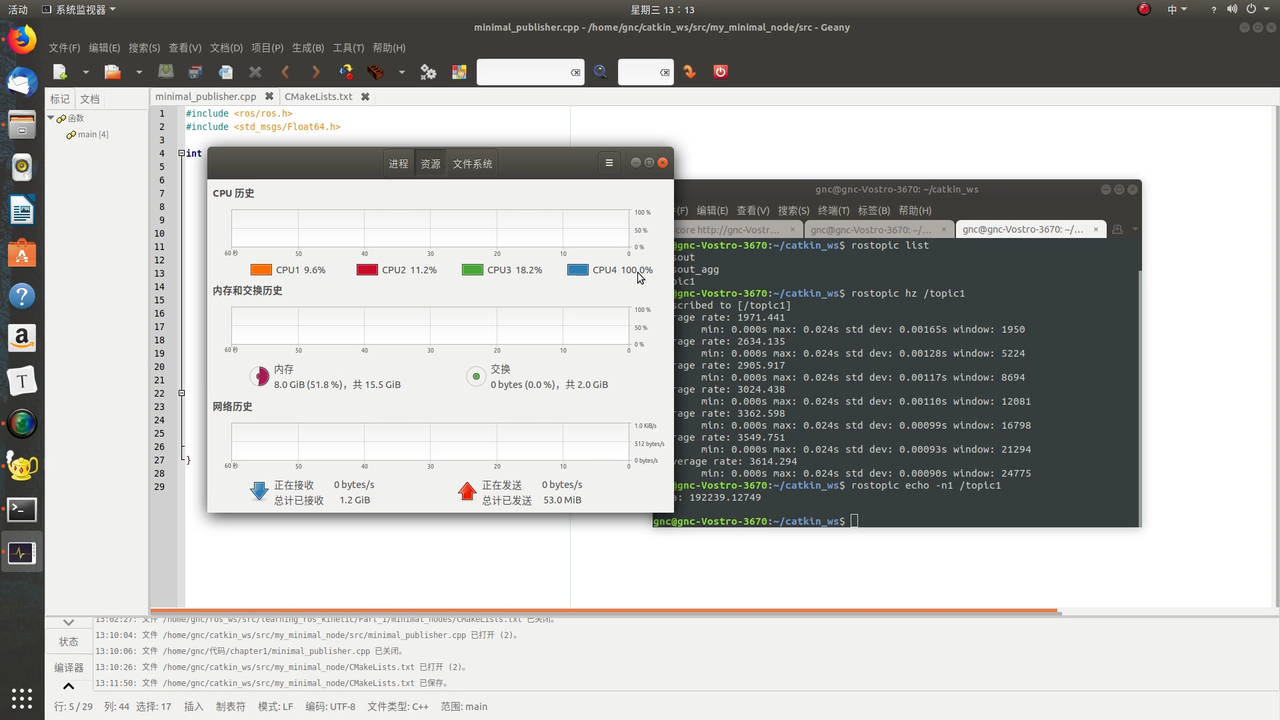
这一问题在之后我们将使用sleep方法来设置一个合适的发布频率。
然后运行命令:
rostopic echo -n1 /topic1 # rostopic echo 用来显示话题的消息 -n1代表只接收一次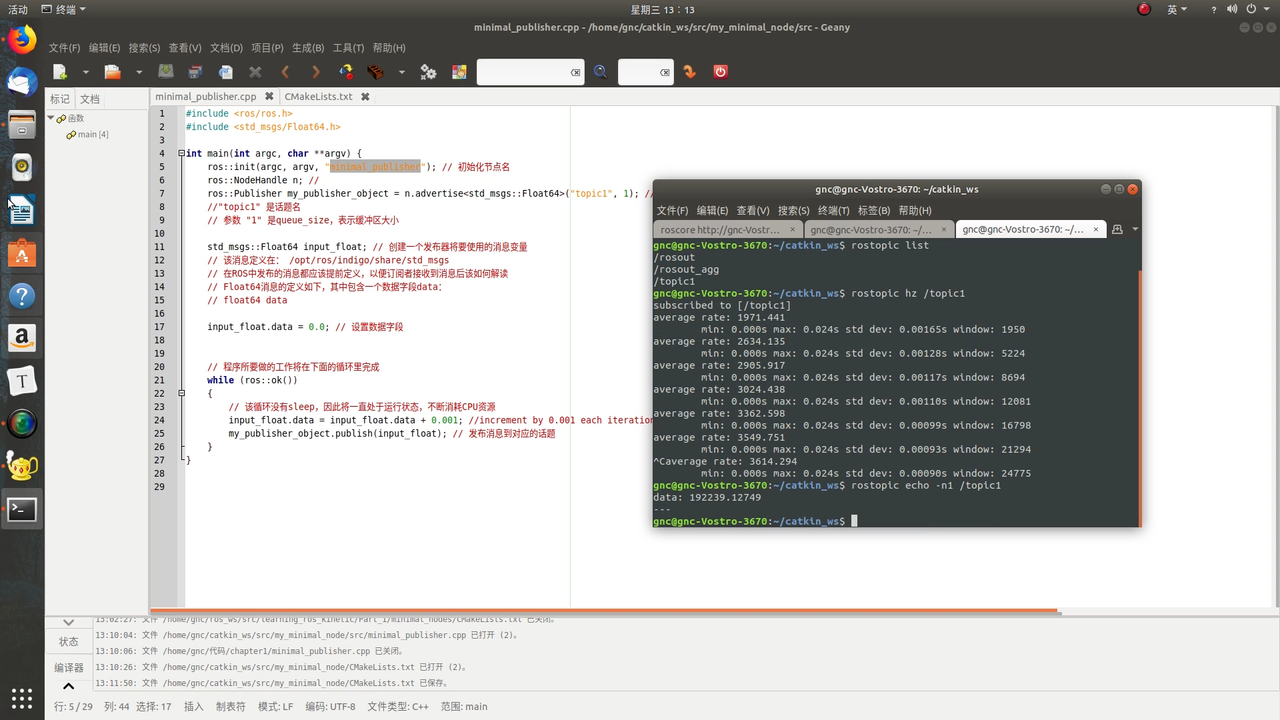
可以看出输出值为192239.12749,因此通过简单的计算便可以得出程序已经循环了19223912次左右。
视频
All of the above process I recorded a video, in the process of browsing the article if you have problems, you can view the video to see how I was doing.