This article is reproduced in: https://blog.csdn.net/wangmx1993328/article/details/88614821#pom.xml%C2%A0
Needs analysis
1, web Java web application development after the completion If you are importing external Tomcat webapps directory, then upload the file directly on the application directory go on just fine, the browser can easily access it.
2, Spring Boot default embedded Tomcat, the future packaged into an executable Jar file for deployment, apparently after labeled jar package, the total is no longer possible to upload files in the resources directory anymore.
3, Spring Boot thus providing the url address matches a local virtual path function:
1) upload files to the server, save the file to a local, such as: E: \ WMX \ UploadFiles \ 222.png

2) user access should be the server address, such as: http: // localhost: 9393 / fileServer / uploadFiles / 222 .png

3) so by configuring resource mapping, so that the url / uploadFiles / mapped to the local E: \ wmx \ uploadFiles \ can, E: \ wmx \ uploadFiles then the virtual path.
File Upload
1, Java JDK 1.8 + Spring Boot 2.1.3 new web project, different spring boot versions may differ slightly.


2, spring boot of web components org.springframework: spring-web has integrated file upload function, no longer need to import the previous commons-io, and commons-fileupload up, use and before commons-fileupload exactly the same.
pom.xml
1, pom.xml as follows, in order to write the page easy to use Thymeleaf template engine, java web application, you need to import natural web components.
<?xml version="1.0" encoding="UTF-8"?>
<project xmlns="http://maven.apache.org/POM/4.0.0" xmlns:xsi="http://www.w3.org/2001/XMLSchema-instance"
         xsi:schemaLocation="http://maven.apache.org/POM/4.0.0 http://maven.apache.org/xsd/maven-4.0.0.xsd">
    <modelVersion>4.0.0</modelVersion>
    <parent>
        <groupId>org.springframework.boot</groupId>
        <artifactId>spring-boot-starter-parent</artifactId>
        <version>2.1.3.RELEASE</version>
        <relativePath/>
        <!-- lookup parent from repository -->
    </parent>
    <groupId>www.wmx.com</groupId>
    <artifactId>fileServer</artifactId>
    <version>0.0.1-SNAPSHOT</version>
    <name>fileServer</name>
    <description>Demo project for Spring Boot</description>

    <properties>
        <java.version>1.8</java.version>
    </properties>

    <dependencies>
        <!-- thymeleaf 模板引擎-->
        <dependency>
            <groupId>org.springframework.boot</groupId>
            <artifactId>spring-boot-starter-thymeleaf</artifactId>
        </dependency>
        <!-- web 组件-->
        <dependency>
            <groupId>org.springframework.boot</groupId>
            <artifactId>spring-boot-starter-web</artifactId>
        </dependency>

        <!-- spring boot 测试组件-->
        <dependency>
            <groupId>org.springframework.boot</groupId>
            <artifactId>spring-boot-starter-test</artifactId>
            <scope>test</scope>
        </dependency>
    </dependencies>

    <build>
        <plugins>
            <plugin>
                <groupId>org.springframework.boot</groupId>
                <artifactId>spring-boot-maven-plugin</artifactId>
            </plugin>
        </plugins>
    </build>

</project>
application.yml
1、应用全局配置文件内容如下:
#配置服务器
server:
  port: 9393 #服务器端口
  servlet:
    context-path: /fileServer #应用上下文路径

spring:
  servlet:
    multipart: #配置文件上传
      max-file-size: 1000MB #设置上传的单个文件最大值,单位可以是 MB、KB,默认为 1MB
      max-request-size: 1024MB #设置多文件上传时,单次内多个文件的总量的最大值,单位可以是 MB、KB,默认为 10 M

uploadFile:
  location: E:/wmx/uploadFiles #自定义上传文件本地保存路径
2、文件上传官网介绍:Handling Multipart File Uploads,除了配置上面的单个文件最大值已经单次上传总量以外,官网还提供了如下配置:
# MULTIPART (MultipartProperties)
spring.servlet.multipart.enabled=true # Whether to enable support of multipart uploads.
spring.servlet.multipart.file-size-threshold=0B # Threshold after which files are written to disk.
spring.servlet.multipart.location= # Intermediate location of uploaded files.
spring.servlet.multipart.max-file-size=1MB # Max file size.
spring.servlet.multipart.max-request-size=10MB # Max request size.
spring.servlet.multipart.resolve-lazily=false # Whether to resolve the multipart request lazily at the time of file or parameter access.
3、上传文件存放的目录,不应该写死在代码中,所以上面提供了在配置文件中配置 uploadFile.location 属性,将来类中使用 @Value 取值即可。
UploadFileController
1、文件上传后台控制台层代码如下,后期实现 虚拟路径映射本地路径会修改。
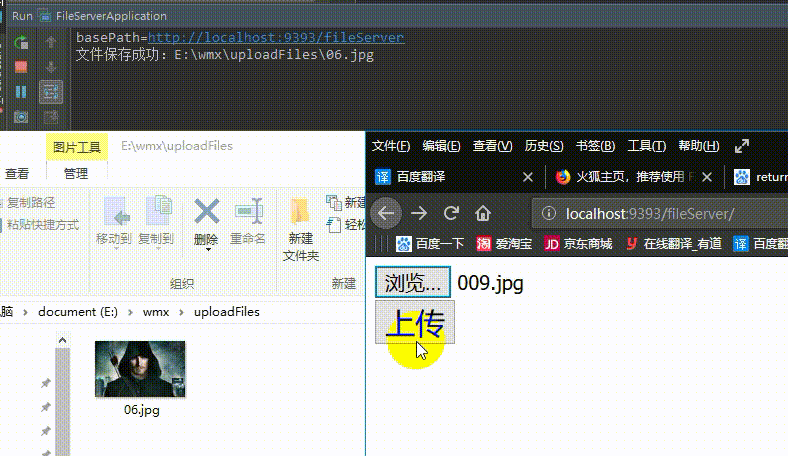
import org.springframework.beans.factory.annotation.Value;
import org.springframework.stereotype.Controller;
import org.springframework.web.bind.annotation.PostMapping;
import org.springframework.web.bind.annotation.ResponseBody;
import org.springframework.web.multipart.MultipartFile;

import javax.servlet.http.HttpServletRequest;
import java.io.File;
import java.io.IOException;

/**
 * Created by Administrator on 2019/3/17 0017.
 */
@Controller
public class UploadFileController {

    @Value("${uploadFile.location}")
    private String uploadFileLocation;//上传文件保存的本地目录,使用@Value获取全局配置文件中配置的属性值

    /**
     * 文件上传,因为只是演示,所以使用 @ResponseBody 将结果直接返回给页面
     *
     * @param multipartFile
     * @param request
     * @return
     * @throws IOException
     */
    @PostMapping("uploadFile")
    @ResponseBody
    public String uploadFile(MultipartFile multipartFile, HttpServletRequest request) throws IOException {
        if (multipartFile == null || multipartFile.isEmpty()) {
            return "上传文件为空...";
        }
        //basePath拼接完成后,形如:http://192.168.1.20:8080/fileServer
        String basePath = request.getScheme() + "://" + request.getServerName() + ":" + request.getServerPort() + request.getContextPath();
        System.out.println("basePath=" + basePath);

        String fileName = multipartFile.getOriginalFilename();
        File saveFile = new File(uploadFileLocation, fileName);
        System.out.println("文件保存成功:" + saveFile.getPath());
        multipartFile.transferTo(saveFile);//文件保存

        return saveFile.getPath().toString();
    }
}
index.html
1、前端文件上传 form 表单如下:
<!DOCTYPE html>
<html>
<head lang="en">
    <meta charset="UTF-8">
    <title>文件服务器</title>
</head>
<body>

<form id="uploadForm" method="post" action="http://localhost:9393/fileServer/uploadFile" enctype="multipart/form-data">
    <input type="file" name="multipartFile" style="font-size: 20px"/><br>
    <input type="submit" id="uploadButton" value="上传" style="font-size: 30px">
</form>

</body>
</html>
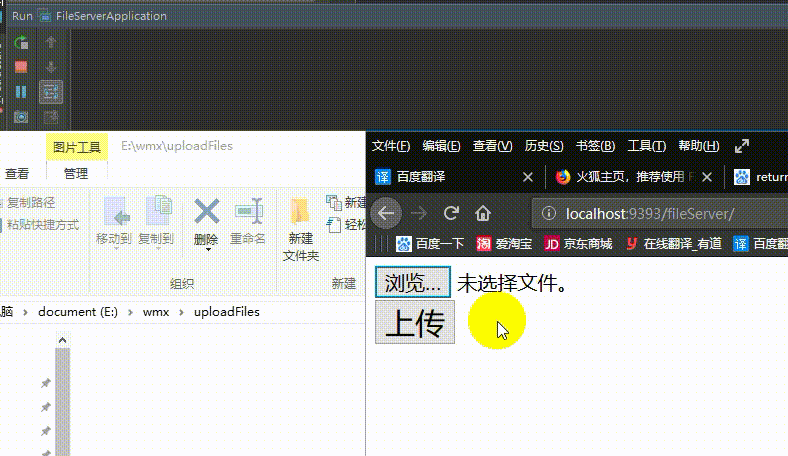
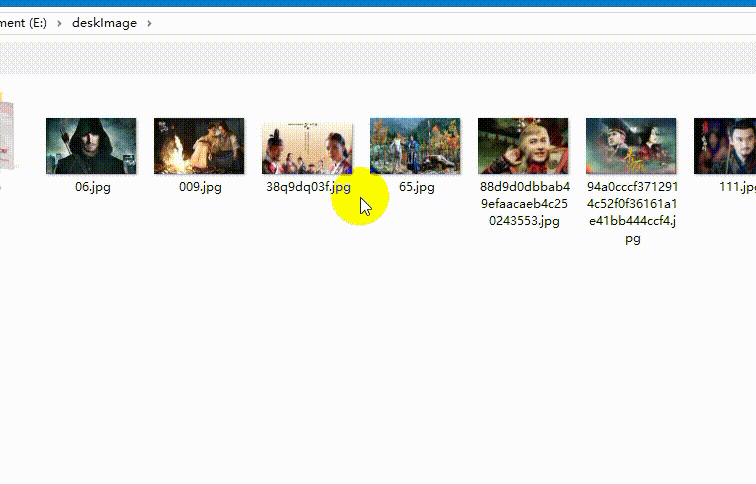
上传测试
url 映射虚拟路径
1、使用资源映射虚拟路径很简单,使用 WebMvcConfigurer 扩展配置即可,不熟悉的可以参考《Web 项目 tiger 之3 WebMvcConfigurer 实现登录与拦截、过滤静态资源》中的“自定义资源映射”部分。
application.yml
1、首先修改一下 application.yml 文件:
#配置服务器
server:
  port: 9393 #服务器端口
  servlet:
    context-path: /fileServer #应用上下文路径

spring:
  servlet:
    multipart: #配置文件上传
      max-file-size: 1000MB #设置上传的单个文件最大值,单位可以是 MB、KB,默认为 1MB
      max-request-size: 1024MB #设置多文件上传时,单次内多个文件的总量的最大值,单位可以是 MB、KB,默认为 10 M

uploadFile:
  resourceHandler: /uploadFiles/**   #请求 url 中的资源映射
  location: E:/wmx/uploadFiles/ #自定义上传文件本地保存路径
WebMvcConfigurer
1、再扩展 webMvc 配置,设置资源映射:

import org.springframework.beans.factory.annotation.Value;
import org.springframework.context.annotation.Configuration;
import org.springframework.web.servlet.config.annotation.ResourceHandlerRegistry;
import org.springframework.web.servlet.config.annotation.WebMvcConfigurer;

/**
 * WebMvc 扩展配置类,应用一启动,本类就会执行
 * Created by Administrator on 2019/3/17 0017.
 */
@Configuration
public class MyWebMvcConfigurer implements WebMvcConfigurer {

    @Value("${uploadFile.resourceHandler}")
    private String resourceHandler;//请求 url 中的资源映射,不推荐写死在代码中,最好提供可配置,如 /uploadFiles/**

    @Value("${uploadFile.location}")
    private String location;//上传文件保存的本地目录,使用@Value获取全局配置文件中配置的属性值,如 E:/wmx/uploadFiles/

    /**
     * 配置静态资源映射
     *
     * @param registry
     */
    @Override
    public void addResourceHandlers(ResourceHandlerRegistry registry) {
        //就是说 url 中出现 resourceHandler 匹配时,则映射到 location 中去,location 相当于虚拟路径
        //映射本地文件时,开头必须是 file:/// 开头,表示协议
        registry.addResourceHandler(resourceHandler).addResourceLocations("file:///" + location);
    }
}
UploadFileController
1、改写一下控制器。特别提醒一句:实际应用中,文件上传之后,应该往数据库插入记录,如 url 相对路径: uploadFiles/222.png,下面因为只是作为演示,文件上传之后,直接返回了浏览器访问的 url 路径了,并没有保存数据。
import org.springframework.beans.factory.annotation.Value;
import org.springframework.stereotype.Controller;
import org.springframework.web.bind.annotation.PostMapping;
import org.springframework.web.bind.annotation.ResponseBody;
import org.springframework.web.multipart.MultipartFile;

import javax.servlet.http.HttpServletRequest;
import java.io.File;
import java.io.IOException;

/**
 * Created by Administrator on 2019/3/17 0017.
 */
@Controller
public class UploadFileController {

    @Value("${uploadFile.resourceHandler}")
    private String resourceHandler;//请求 url 中的资源映射,不推荐写死在代码中,最好提供可配置,如 /uploadFiles/**

    @Value("${uploadFile.location}")
    private String uploadFileLocation;//上传文件保存的本地目录,使用@Value获取全局配置文件中配置的属性值,如 E:/wmx/uploadFiles/

    /**
     * 文件上传,因为只是演示,所以使用 @ResponseBody 将结果直接返回给页面
     *
     * @param multipartFile
     * @param request
     * @return
     * @throws IOException
     */
    @PostMapping("uploadFile")
    @ResponseBody
    public String uploadFile(MultipartFile multipartFile, HttpServletRequest request) throws IOException {
        if (multipartFile == null || multipartFile.isEmpty()) {
            return "上传文件为空...";
        }
        //basePath拼接完成后,形如:http://192.168.1.20:8080/fileServer
        String basePath = request.getScheme() + "://" + request.getServerName() + ":" + request.getServerPort() + request.getContextPath();
        String fileName = multipartFile.getOriginalFilename();
        String fileServerPath = basePath + resourceHandler.substring(0, resourceHandler.lastIndexOf("/") + 1) + fileName;
        System.out.println("文件访问路径:" + fileServerPath);

        File saveFile = new File(uploadFileLocation, fileName);
        multipartFile.transferTo(saveFile);//文件保存

        System.out.println("文件保存路径:" + saveFile.getPath());

        return "<a href='" + fileServerPath + "'>" + fileServerPath + "</a>";
    }
}
上传与访问测试

注意事项:
1、spring boot指定了server.servlet.context-path之后 各种url 应该如何设置。
未改之前:http://localhost:8080/sc/save
修改:server.servlet.context-path = /a
改动之后:http://localhost:8080/a/sc/save
你说到的页面请求路径的那些,如果之前是写的死路径,那么一个一个的改是必然的,如果是IDEA的话,可以用ctrl+shift+r进行路径全部替换。
但是个人建议的话,还是写一个JS公共配置文件,用于配置路径这些共有属性,方便以后再次改动之后不会一个一个的改。