Foreword
When implementing automated UI tests, often meet operational upload files, then upload the files for you several ways to know it? Today, we summarize several common way to upload files, and analyze the efficiency advantages and disadvantages of each method and which method, higher stability
HTML code under test
<!--upload_file.html-->


<!DOCTYPE html>
<html lang="en">
<head>
    <meta charset="UTF-8">
    <title>上传文件</title>
</head>
<body>
    <input id="upload_file" type="file">
</body>
</html>
The first method: Method using webdriver api provided send_keys upload files
send_keys method
Examples
------------------------------------
@Time : 2019/7/17 19:03
@Auth : linux超
@File : upload_file_send_keys.py
@IDE  : PyCharm
@Motto: Real warriors,dare to face the bleak warning,dare to face the incisive error!
@QQ   : 28174043@qq.com
@GROUP: 878565760
------------------------------------
"""
from selenium import webdriver
import time


driver = webdriver.Firefox()
driver.get(r'file:///e:/CnblogCode/upload_file.html')
upload_element = driver.find_element_by_xpath('//*[@id="upload_file"]')
time.sleep(3)  # 为了看效果
upload_element.send_keys(r'E:\CnblogCode\upload_file.html')
Implementation process

You can see the implementation process went smoothly, and the code is simple, there is no error
But often the reality is cruel, because some sites are not using the file upload input tags to define the upload file button, so you can not use send_keys upload method, which is the limit of this method
AutoIt Tool
The second method is AutoIT tool, it is a scripting language similar software, we can use this software to facilitate the realization of analog keyboard, mouse, windows and other operations, automate
installation
Official website address: https://www.autoitscript.com/site/autoit/downloads/
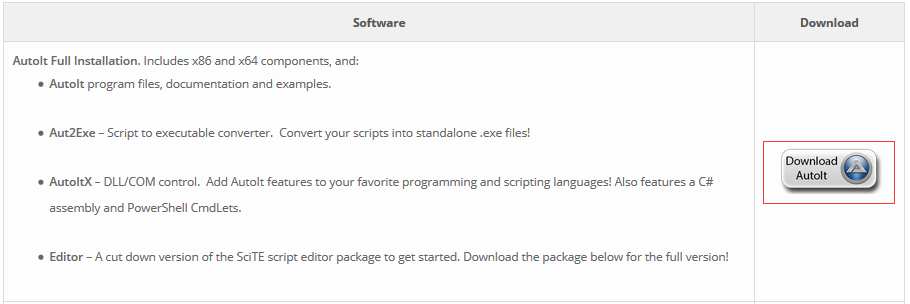
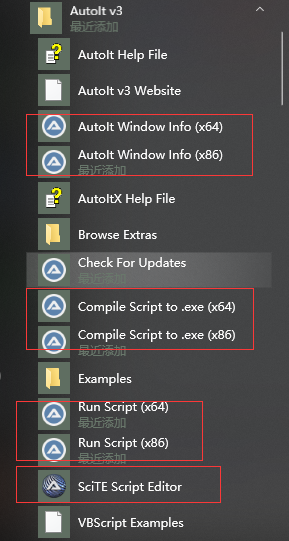
After installation you can find some of the following tools
use
1. Open the test HTML page, and click upload files, file upload pop-up window, and keep the current window
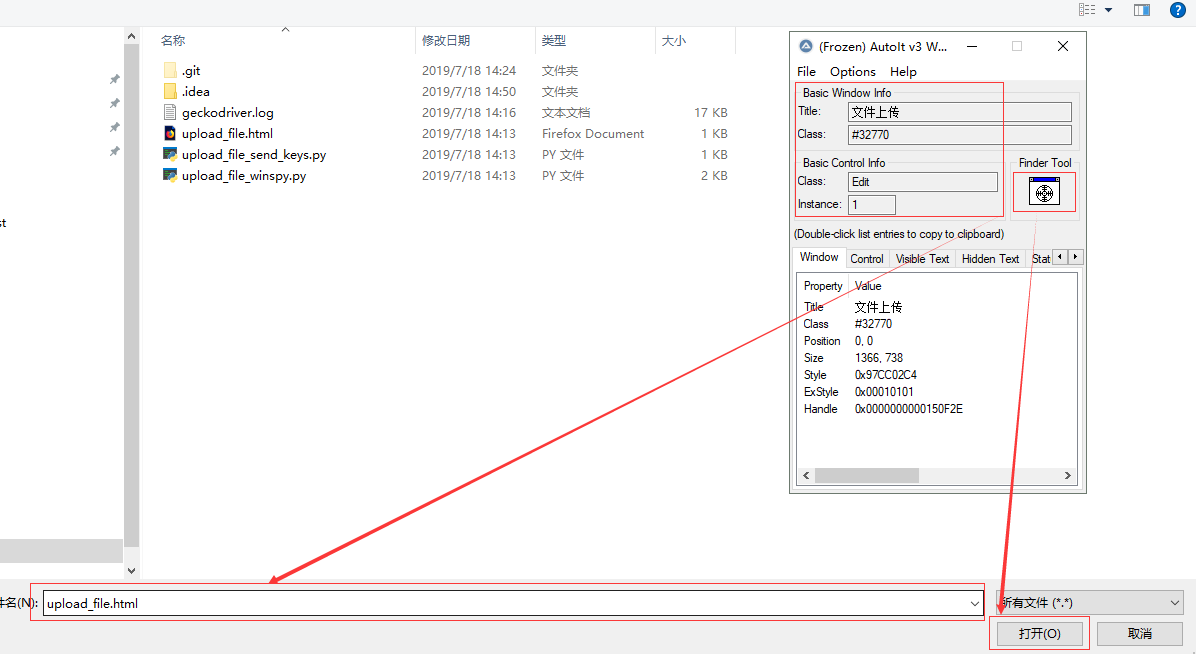
2. Open the AutoIt Window Info (x86 / x64) Tools
3. Click the Tools button in the Finder Tool tab to begin positioning each uploaded file input box [] and [Open] button and record (information shown in red window) Title, Class, Instance
Note: Different browsers crawl Title is not the same (Firefox: file upload, Chrome: Open, IE: Select the file to load)
4. Open SciTE Script Editor ![]() tool to start writing the script (note that the script is Edit1 class and instance stitching)
tool to start writing the script (note that the script is Edit1 class and instance stitching)
;first make sure the number of arguments passed into the scripts is more than 1
If $CmdLine[0]<2 Then Exit EndIf ;if parmas num <2 ,then break
;$CmdLine[0] ;参数的数量
;$CmdLine[1] ;第一个参数 (脚本名称后面)
;$CmdLine[2] ;第二个参数
;都是从cmd传入参数
 handleUpload($CmdLine[1],$CmdLine[2])

;定义上传函数,有两个参数,第一个是浏览器名字,第二参数是文件路径
 Func handleUpload($browser, $uploadfile)
     Dim $title                          ;定义一个title变量
            ;根据弹窗的title来判断是什么浏览器
            If $browser="ie" Then                          ; 代表IE浏览器
                  $title="选择要加载的文件"
            ElseIf $browser="chrome" Then               ; 代表谷歌浏览器
                 $title="打开"
            ElseIf    $browser="firefox" Then             ; 代表火狐浏览器
                  $title="文件上传"
            EndIf

            if WinWait($title,"",4) Then ;等待弹出出现,最大等待时间是4秒
                   WinActivate($title)                  ;找到弹出窗口之后,激活当前窗口
                   ControlSetText($title,"","Edit1",$uploadfile)   ;把文件路径放入输入框,此”Edit1“是用FinderTool获取到的
                   ControlClick($title,"","Button1")                ;点击保存或者打开或者上传按钮,此“Button1”使用FinderTool获取到的
            Else
            Return False
            EndIf
 EndFunc
5. 编译脚本为exe可执行文件
编写完脚本之后,保存文件并打开Compile Script to .exe(x64/x86)工具 ![]() ,将保存后的脚本.au3文件转换为.exe可执行文件
,将保存后的脚本.au3文件转换为.exe可执行文件
6. 执行转换后的脚本
在执行脚本之前,先确保上传文件的窗口已经打开,接下来打开cmd执行exe程序 C:\Users\v-xug\Desktop>upload_file_new.exe firefox E:\CnblogCode\upload_file.html
7. 执行效果

8. 编写selenium脚本
实例
"""
------------------------------------
@Time : 2019/7/18 16:20
@Auth : linux超
@File : base.py
@IDE  : PyCharm
@Motto: Real warriors,dare to face the bleak warning,dare to face the incisive error!
@QQ   : [email protected]
@GROUP: 878565760
------------------------------------
"""
from selenium.webdriver.common.action_chains import ActionChains
import os
from selenium import webdriver
import time


class Base(object):

    @staticmethod
    def upload_file(exe, browser, filename):
        """
        使用autoIt上传文件
        :param exe: 上传文件的exe程序所在目录
        :param browser: 浏览器类型: firefox chrome ie
        :param filename: 待上传文件路径
        :return: none
        """
        cmd = exe + ' ' + browser + ' ' + filename
        os.system(cmd)


if __name__ == '__main__':
    driver = webdriver.Firefox()
    driver.get(r'file:///e:/CnblogCode/upload_file.html')  # 打开被测html
    upload_element = driver.find_element_by_xpath('//*[@id="upload_file"]')
    action = ActionChains(driver)
    action.move_to_element(upload_element).click().perform()  # 点击上传文件弹出上传文件窗口
    action.release()
    time.sleep(3)  # 为了看效果
    Base.upload_file(r'E:\CnblogCode\upload_file_new.exe', 'firefox', r'E:\CnblogCode\upload_file.html')  # 上传文件
执行过程
以上就是使用AutoId工具完成上传文件的过程,其实还是挺复杂的, 但是配置一次之后,以后就可以重复使用编译生成的exe文件了,执行效果还是不错的 没出什么错误,执行效率也还可以
模拟键盘
第三种方法:模拟键盘的粘贴与回车操作并结合剪切板的操作来完成上传文件,基本原理是向剪切板中发送文件(文件路径字符串),然后再从剪切板中获取到文件,最后通过模拟键盘的ctrl+v与enter键来完成文件上传
这种方法需要第三方库的支持,安装pypiwin32库: pip install pypiwin32
实例
模拟键盘操作代码


"""
------------------------------------
@Time : 2019/7/18 17:14
@Auth : linux超
@File : keyboard.py
@IDE  : PyCharm
@Motto: Real warriors,dare to face the bleak warning,dare to face the incisive error!
@QQ   : [email protected]
@GROUP: 878565760
------------------------------------
"""
import win32api
import win32con
import time


class KeyBoard(object):
    """模拟按键"""
    # 键盘码
    vk_code = {
        'enter' : 0x0D,
        'ctrl' : 0x11,
        'v' : 0x56
    }

    @staticmethod
    def keyDown(key_name):
        """按下键"""
        key_name = key_name.lower()
        try:
            win32api.keybd_event(KeyBoard.vk_code[key_name], 0, 0, 0)
        except Exception as e:
            print('未按下enter键')
            raise e

    @staticmethod
    def keyUp(key_name):
        """抬起键"""
        key_name = key_name.lower()
        win32api.keybd_event(KeyBoard.vk_code[key_name], 0, win32con.KEYEVENTF_KEYUP, 0)

    @staticmethod
    def oneKey(key):
        """模拟单个按键"""
        key = key.lower()
        KeyBoard.keyDown(key)
        time.sleep(2)
        KeyBoard.keyUp(key)

    @staticmethod
    def twoKeys(key1, key2):
        """模拟组合按键"""
        key1 = key1.lower()
        key2 = key2.lower()
        KeyBoard.keyDown(key1)
        KeyBoard.keyDown(key2)
        KeyBoard.keyUp(key1)
        KeyBoard.keyUp(key2)


if __name__ == '__main__':
    pass
剪切板操作代码
"""
------------------------------------
@Time : 2019/7/18 17:18
@Auth : linux超
@File : clipboard.py
@IDE  : PyCharm
@Motto: Real warriors,dare to face the bleak warning,dare to face the incisive error!
@QQ   : [email protected]
@GROUP: 878565760
------------------------------------
"""
import win32con
import win32clipboard as WC


class ClipBoard(object):
    """设置剪切板内容和获取剪切板内容"""

    @staticmethod
    def getText():
        """获取剪切板的内容"""
        WC.OpenClipboard()
        value = WC.GetClipboardData(win32con.CF_TEXT)
        WC.CloseClipboard()
        return value

    @staticmethod
    def setText(value):
        """设置剪切板的内容"""
        WC.OpenClipboard()
        WC.EmptyClipboard()
        WC.SetClipboardData(win32con.CF_UNICODETEXT, value)
        WC.CloseClipboard()


if __name__ == '__main__':
    pass
上传文件代码
"""
------------------------------------
@Time : 2019/7/18 17:20
@Auth : linux超
@File : upload_file_board.py
@IDE  : PyCharm
@Motto: Real warriors,dare to face the bleak warning,dare to face the incisive error!
@QQ   : [email protected]
@GROUP: 878565760
------------------------------------
"""
from clipboard import ClipBoard
from keyboard import KeyBoard

from selenium import webdriver
import time
from selenium.webdriver.common.action_chains import ActionChains


if __name__ == '__main__':
    ClipBoard.setText(r'E:\CnblogCode\upload_file.html')  # 待上传文件设置到剪切板
    driver = webdriver.Firefox()
    driver.get(r'file:///e:/CnblogCode/upload_file.html')
    upload_element = driver.find_element_by_xpath('//*[@id="upload_file"]')
    action = ActionChains(driver)
    action.move_to_element(upload_element).click().perform()
    action.release()
    time.sleep(3)  # 为了看效果
    KeyBoard.twoKeys('ctrl', 'v')
    KeyBoard.oneKey('enter')
执行过程

失败

可以看到第二个动画上传文件未成功,这也就这个方法的弊端,只要移动了鼠标就有可能就不会成功,毕竟模拟的是enter键,这个过程你点击了别的地方,那么enter的效果就变了,所以这种方法很不稳定,也不难发现,代码量也很多,而且需要掌握模拟键盘和剪切板的操作,最不推荐使用的就是这种方法
之前我的实战项目里面,用到过这种方法, 当时我已经发现了这种方法的弊端, 但是为了掌握这种模拟键盘的方法,所以才使用的,当然模拟键盘操作用到一些特殊的情况还是能解决很多实际问题的
WinSpy工具
第四种方法:这个工具其实和AutoIt工具的元素定位方式一样,但是不需要生成exe文件,其实只是个辅助工具,主要用来获取windows窗口句柄,进而通过python脚本来控制
WinSpy安装
https://sourceforge.net/projects/winspyex/
下载完直接解压打开WinSpy32(64).exe即可使用
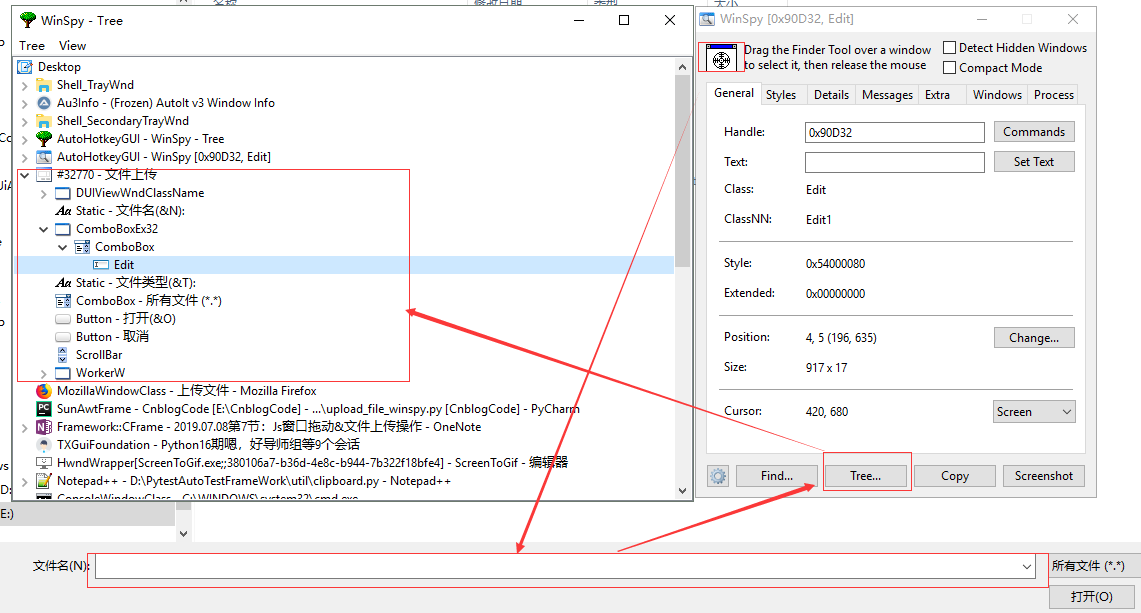
使用方法和autoId一样,请按照下图的步骤操作,记录winspy-Tree中红框信息
编写代码之前,同样需要提前安装 pypiwin32库
实例
"""
------------------------------------
@Time : 2019/7/17 19:14
@Auth : linux超
@File : upload_file_winspy.py
@IDE  : PyCharm
@Motto: Real warriors,dare to face the bleak warning,dare to face the incisive error!
@QQ   : [email protected]
@GROUP: 878565760
------------------------------------
"""
from selenium.webdriver.common.action_chains import ActionChains
from selenium import webdriver
import win32con
import win32gui
import time


def upload_file(browser: str, file: str):
    browser_type = {
        "firefox": "文件上传",
        "chrome": "打开",
        "ie": "选择要加载的文件"
    }
    time.sleep(2)
    dialog = win32gui.FindWindow("#32770", browser_type[browser])  # 火狐浏览器为”文件上传“,谷歌为”打开“
    combobox_ex32 = win32gui.FindWindowEx(dialog, 0, "ComboBoxEx32", None)
    combobox = win32gui.FindWindowEx(combobox_ex32, 0, 'ComboBox', None)
    edit = win32gui.FindWindowEx(combobox, 0, 'Edit', None)
    button = win32gui.FindWindowEx(dialog, 0, 'Button', None)
    win32gui.SendMessage(edit, win32con.WM_SETTEXT, None, file)
    win32gui.SendMessage(dialog, win32con.WM_COMMAND, 1, button)


if __name__ == '__main__':
    driver = webdriver.Firefox()
    driver.get(r'file:///e:/CnblogCode/upload_file.html')
    upload_element = driver.find_element_by_xpath('//*[@id="upload_file"]')
    action = ActionChains(driver)
    action.move_to_element(upload_element).click().perform()
    action.release()
    time.sleep(3)  # 为了看效果
    upload_file('firefox', r'E:\CnblogCode\upload_file.html')
执行过程
此方法也比较稳定,只要通过传递不同的浏览器参数,即可完成不同浏览器中的上传文件操作,而且相比于AutoId而言,这种方法可以直接使用python编写代码且不需要编译成exe程序,可以随时对代码进行修改,易维护
总结
最后总结一下每个方法的优缺点
1. send_keys(): 如果所遇见的上传文件使用的是input标签且属性type=file,均可使用,也最好采用此方法,方便,简单,执行效率高
2. AutoId: 需编写VBS代码并编译为exe可执行文件,过程繁琐,编写selenium测试用例时无法随时调试内部代码,但send_keys()无法使用时,可以采用此方法,执行效率较高,稳定性也算可以
3. 模拟键盘和剪切板: 此方法需要掌win32api,win32gui模块的使用,且代码编写繁琐,上传文件时如果鼠标点击其他地方会导致上传失败,脚本稳定性差,且效率低,但是如果用到一些特殊地方会起到比较好的效果
4. WinSpay:windows窗口句柄抓取工具,不需要编译脚本为exe文件,且上传文件操作使用的脚本是python第三方库实现,易维护,执行效率也较高,推荐send_keys()不可使用时,首先考虑此方法