Case Code: https: //github.com/q279583842q/springcloud-e-book
In the actual development process, the communication between the service and the service is often used to messaging middleware, and middleware which in the past used such as RabbitMQ, then coupling the middleware and the system will be very high, if we are to be replaced Kafka then the change will be relatively large, then we can use SpringCloudStream to integrate our messaging middleware to reduce the coupling system and middleware.
First, what is SpringCloudStream
The official definition of Spring Cloud Stream is building a message-driven framework for micro-services.
Application through inputs or outputs to the Spring Cloud Stream in the binder interact with our configuration binding, and Spring Cloud Stream of binder responsible for interaction with the messaging middleware. So, we just need to figure out how to interact with Spring Cloud Stream you can easily use the message-driven way.
Message broker middleware to connect by using Spring Integration to implement event-driven messages. Spring Cloud Stream as some suppliers of messaging middleware products provide automated personalized configurations, cited release - three core concepts subscriptions, consumer groups, partitions. Currently only supports RabbitMQ , Kafka used to live .
Two, Stream solve the problem?
Stream solves the problem of the use of messaging middleware developers no perception, because Stream further package of messaging middleware, the middleware can be done without the code level perception, and even dynamic switching middleware (rabbitmq switched to kafka) so highly decoupled micro-service development, service may be more concerned about their own business processes
Official website structure diagram
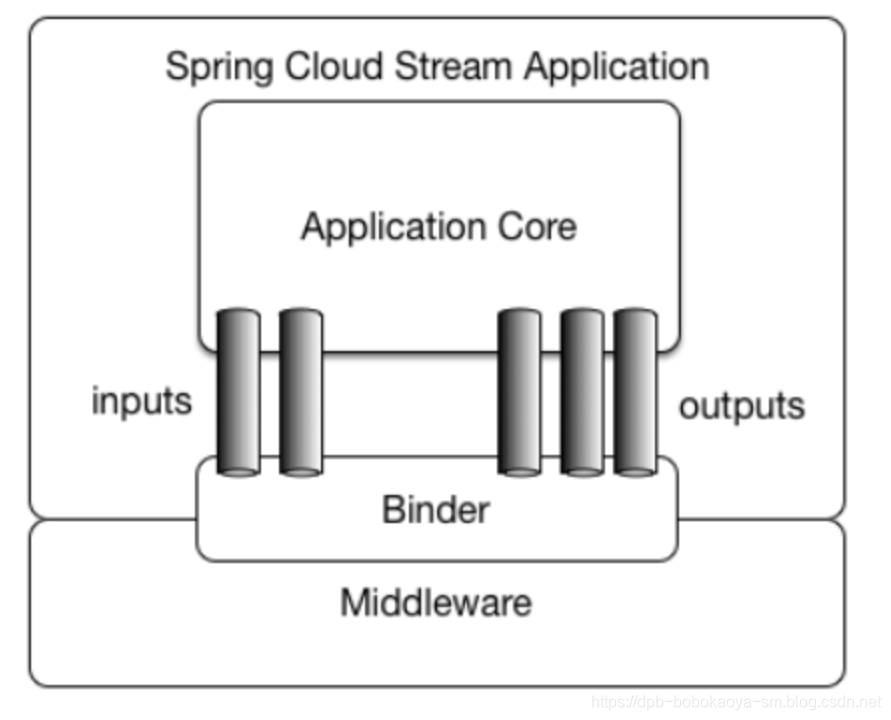
| composition | Explanation |
|---|---|
| Middleware | Middleware, currently only supports RabbitMQ and Kafka |
| Binder | Binder is encapsulated between the application and the messaging middleware, the implementation of the present RabbitMQ of Binder and Kafka, by Binder can easily connect middleware to dynamically change the message type (corresponding to the Topic Kafka, the RabbitMQ Exchange), which You can be achieved through the configuration file |
| @Input | Annotations input channel identifier, received through the input channel enters the application message |
| @Output | Notes identifies output channels, the news release will leave the application through the channel |
| @StreamListener | Queue the queue listener, the consumer's message received |
| @EnableBinding | It refers to a channel and channel exchange bound |
Third, the message-driven entry case
The effect of asynchronous communication to demonstrate our next entry by a case to integrate RabbitMQ be achieved through the stream of news, so we must first open RabbitMQ service, RabbitMQ is not clear, please refer to this article: https: //dpb-bobokaoya-sm.blog. csdn.net/article/details/90409404
1. Create a message sender service
1.1 Creating project
Creating a project SpringCloud
1.2 pom file
pom file priority is to add a spring-cloud-starter-stream- rabbit this dependency
<project xmlns="http://maven.apache.org/POM/4.0.0" xmlns:xsi="http://www.w3.org/2001/XMLSchema-instance"
    xsi:schemaLocation="http://maven.apache.org/POM/4.0.0 http://maven.apache.org/xsd/maven-4.0.0.xsd">
    <modelVersion>4.0.0</modelVersion>
    <parent>
        <groupId>org.springframework.boot</groupId>
        <artifactId>spring-boot-starter-parent</artifactId>
        <version>1.5.13.RELEASE</version>
    </parent>
    <groupId>com.bobo</groupId>
    <artifactId>stream-sender</artifactId>
    <version>0.0.1-SNAPSHOT</version>
    <dependencyManagement>
        <dependencies>
            <dependency>
                <groupId>org.springframework.cloud</groupId>
                <artifactId>spring-cloud-dependencies</artifactId>
                <version>Dalston.SR5</version>
                <type>pom</type>
                <scope>import</scope>
            </dependency>
        </dependencies>
    </dependencyManagement>
    <dependencies>
        <dependency>
            <groupId>org.springframework.boot</groupId>
            <artifactId>spring-boot-starter-web</artifactId>
        </dependency>
        <dependency>
            <groupId>org.springframework.cloud</groupId>
            <artifactId>spring-cloud-starter-eureka</artifactId>
        </dependency>
        <dependency>
            <groupId>org.springframework.cloud</groupId>
            <artifactId>spring-cloud-starter-stream-rabbit</artifactId>
        </dependency>
        <dependency>
            <groupId>org.springframework.boot</groupId>
            <artifactId>spring-boot-starter-test</artifactId>
            <scope>test</scope>
        </dependency>
    </dependencies>
    <build>
        <plugins>
            <plugin>
                <groupId>org.springframework.boot</groupId>
                <artifactId>spring-boot-maven-plugin</artifactId>
            </plugin>
        </plugins>
    </build>
</project>
1.3 configuration files
配置文件中除了必要的服务名称,端口和Eureka的信息外我们还要添加RabbitMQ的注册信息
spring.application.name=stream-sender
server.port=9060
#设置服务注册中心地址,指向另一个注册中心
eureka.client.serviceUrl.defaultZone=http://dpb:123456@eureka1:8761/eureka/,http://dpb:123456@eureka2:8761/eureka/

#rebbitmq 链接信息
spring.rabbitmq.host=192.168.88.150
spring.rabbitmq.port=5672
spring.rabbitmq.username=dpb
spring.rabbitmq.password=123
spring.rabbitmq.virtualHost=/
1.4 创建消费发送者接口
创建一个发送消息的接口。具体如下:方法名称自定义,返回类型必须是SubscribableChannel,在Output注解中指定交换器名称。
/**
 * 发送消息的接口
 * @author dengp
 *
 */
public interface ISendeService {

    /**
     * 指定输出的交换器名称
     * @return
     */
    @Output("dpb-exchange")
    SubscribableChannel send();
}
1.5 启动类
在启动类中通过@EnableBinding注解绑定我们创建的接口类。
@SpringBootApplication
@EnableEurekaClient
// 绑定我们刚刚创建的发送消息的接口类型
@EnableBinding(value={ISendeService.class})
public class StreamSenderStart {

    public static void main(String[] args) {
        SpringApplication.run(StreamSenderStart.class, args);
    }
}
2.创建消息消费者服务
2.1 创建项目
2.2 pom文件
添加的依赖和发送消息的服务是一致的
<project xmlns="http://maven.apache.org/POM/4.0.0" xmlns:xsi="http://www.w3.org/2001/XMLSchema-instance"
    xsi:schemaLocation="http://maven.apache.org/POM/4.0.0 http://maven.apache.org/xsd/maven-4.0.0.xsd">
    <modelVersion>4.0.0</modelVersion>
    <parent>
        <groupId>org.springframework.boot</groupId>
        <artifactId>spring-boot-starter-parent</artifactId>
        <version>1.5.13.RELEASE</version>
    </parent>
    <groupId>com.bobo</groupId>
    <artifactId>stream-receiver</artifactId>
    <version>0.0.1-SNAPSHOT</version>
    <dependencyManagement>
        <dependencies>
            <dependency>
                <groupId>org.springframework.cloud</groupId>
                <artifactId>spring-cloud-dependencies</artifactId>
                <version>Dalston.SR5</version>
                <type>pom</type>
                <scope>import</scope>
            </dependency>
        </dependencies>
    </dependencyManagement>
    <dependencies>
        <dependency>
            <groupId>org.springframework.boot</groupId>
            <artifactId>spring-boot-starter-web</artifactId>
        </dependency>
        <dependency>
            <groupId>org.springframework.cloud</groupId>
            <artifactId>spring-cloud-starter-eureka</artifactId>
        </dependency>
        <dependency>
            <groupId>org.springframework.cloud</groupId>
            <artifactId>spring-cloud-starter-stream-rabbit</artifactId>
        </dependency>
    </dependencies>
    <build>
        <plugins>
            <plugin>
                <groupId>org.springframework.boot</groupId>
                <artifactId>spring-boot-maven-plugin</artifactId>
            </plugin>
        </plugins>
    </build>
</project>
2.3 配置文件
注意修改服务名称和端口
spring.application.name=stream-receiver
server.port=9061
#设置服务注册中心地址,指向另一个注册中心
eureka.client.serviceUrl.defaultZone=http://dpb:123456@eureka1:8761/eureka/,http://dpb:123456@eureka2:8761/eureka/

#rebbitmq 链接信息
spring.rabbitmq.host=192.168.88.150
spring.rabbitmq.port=5672
spring.rabbitmq.username=dpb
spring.rabbitmq.password=123
spring.rabbitmq.virtualHost=/
2.4 创建接收消息的接口
此接口和发送消息的接口相似,注意使用的是@Input注解。
/**
 * 接收消息的接口
 * @author dengp
 *
 */
public interface IReceiverService {

    /**
     * 指定接收的交换器名称
     * @return
     */
    @Input("dpb-exchange")
    SubscribableChannel receiver();
}
2.5 创建处理消息的处理类
注意此类并不是实现上面创建的接口。而是通过@EnableBinding来绑定我们创建的接口,同时通过@StreamListener注解来监听dpb-exchange对应的消息服务
/**
 * 具体接收消息的处理类
 * @author dengp
 *
 */
@Service
@EnableBinding(IReceiverService.class)
public class ReceiverService {

    @StreamListener("dpb-exchange")
    public void onReceiver(byte[] msg){
        System.out.println("消费者:"+new String(msg));
    }
}
2.6 启动类
同样要添加@EnableBinding注解
@SpringBootApplication
@EnableEurekaClient
@EnableBinding(value={IReceiverService.class})
public class StreamReceiverStart {

    public static void main(String[] args) {
        SpringApplication.run(StreamReceiverStart.class, args);
    }
}
3.编写测试代码
通过单元测试来测试服务。
import org.junit.Test;
import org.junit.runner.RunWith;
import org.springframework.beans.factory.annotation.Autowired;
import org.springframework.boot.test.context.SpringBootTest;
import org.springframework.messaging.Message;
import org.springframework.messaging.support.MessageBuilder;
import org.springframework.test.context.junit4.SpringRunner;
import com.bobo.stream.StreamSenderStart;
import com.bobo.stream.sender.ISendeService;
@RunWith(SpringRunner.class)
@SpringBootTest(classes=StreamSenderStart.class)
public class StreamTest {
@Autowired
private ISendeService sendService;
@Test
public void testStream(){
String msg = "hello stream ...";
// 将需要发送的消息封装为Message对象
Message message = MessageBuilder
.withPayload(msg.getBytes())
.build();
sendService.send().send(message );
}
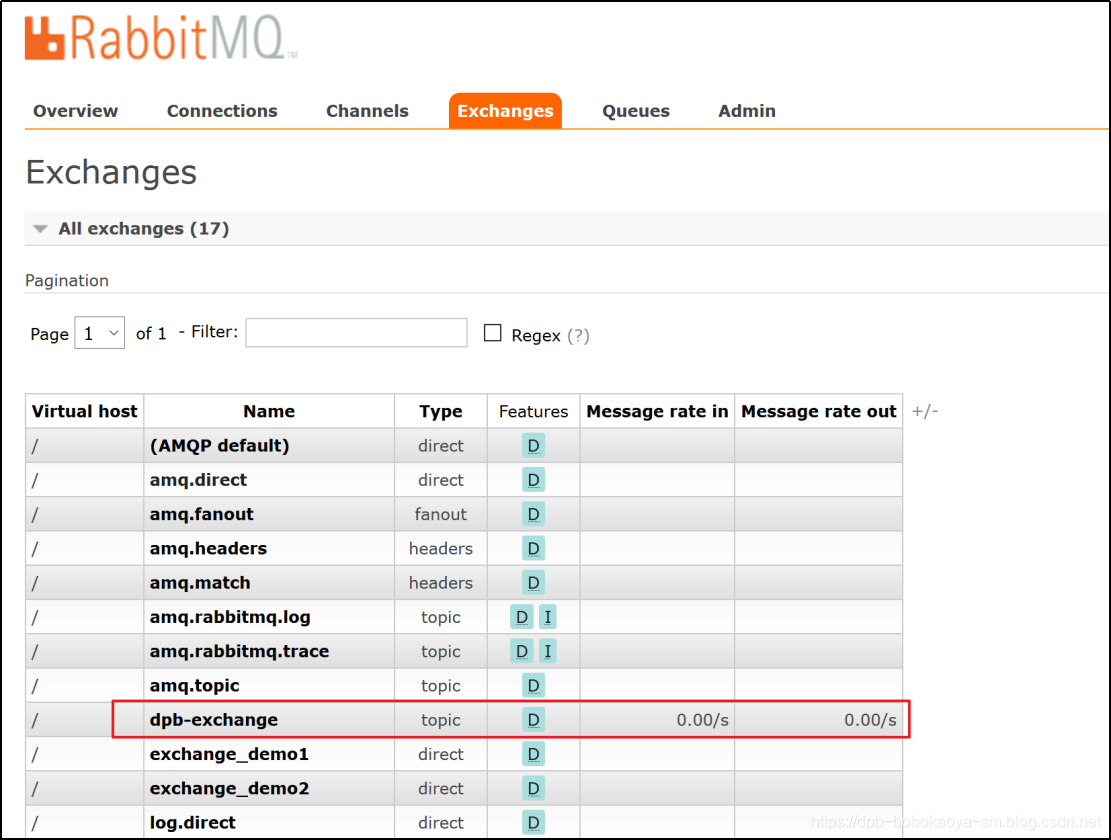
}启动消息消费者后,执行测试代码。结果如下:
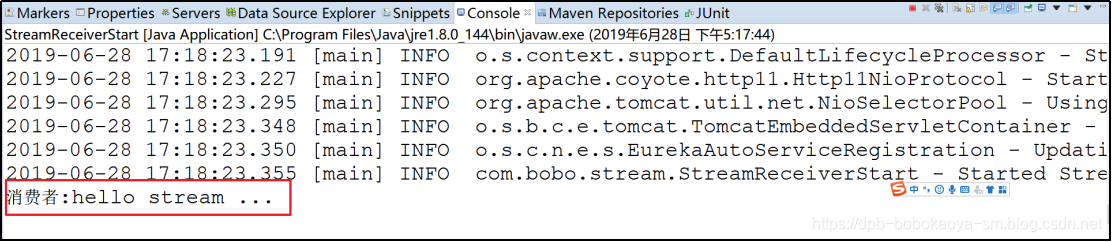
消息接收者获取到了发送者发送的消息,同时我们在RabbitMQ的web界面也可以看到相关的信息
总结
We use the same message stream implement middleware, we found only two with a coupling RabbitMQ and address, first is dependent pom file, the second is that the configuration information of RabbitMQ application.properties, and in particular RabbitMQ any relevant code of business processes did not occur, then if we are to be replaced Kafka, then we only need to replace these two, namely to achieve a high degree of decoupling middleware and services .