CITRIX NETSCALER commonly used functions: LB, CS, GSLB, SSL
LB is the function of server load balancing, CS Based on seven (domain name, IP, etc.) load balancing, GSLB function is to achieve global load balancing, SSL is the function of SSL acceleration.
Configuration steps:
System Configuration:
Configuration feature
<一>,system------>setting -----------> basic feature -------------> feature
Select feature, are not close.
Advanced feature -----> feature
<Two> modified nsroot user's password:
The default password is Netscaler nsroot
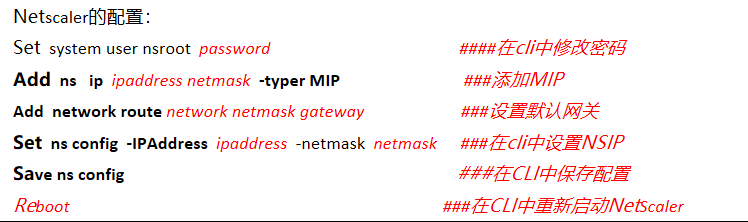
Change Password: systemusers Double-click nsroot modify Set system user nsroot password
Configuration mode
Netscaler is not enabled by default Layer 2 forwarding, if you need to enable Layer 2 functions, you need to configure the mode in
System ------> setting ------> mode ------- > Modify
Configuring the system time:
Into the operating system, and then modify the current time with the SHELL command with the date command
Tzsetup command input setting region, date yymmddhhmm input command to change the system time in the format: year, month, day hours minutes
Configuring the Time Synchronization:
Two files with a text editor, ntp.conf and rc.conf, which reads as follows:
Ntp.conf:
server 61.129.42.44 burst
restrict default ingore
restrict 127.0.0.1 mask 255.255.255.255
###corresponds to "server" entry above
restrict 61.129.42.44 mask 255.255.255.255
Note: 61.129.42.44 as ntp server, such a server on the Internet can be found to
rc.conf:
ntpd_enable="YES"
After editing two files, log NetScaler with WinSCP3 tool, and then copy these two files to the next / nsconfig directory. Then restart the NetScaler
IP configuration:
Configuration NSIP
Configuring a NSIP, to ensure that this IP address does not conflict with other IP, the IP-IP devices, user management system may need to reboot the device after configuring NSIP.
如:set ns config -ipAddress 192.168.2.3 -netmask 255.255.255.0
Then enter save config to save the configuration, the last input reboot reboot, restart after the device becomes 192.168.2.3 NSIP
SNIP and routing configuration
Configuring SNIP, ie the interface IP, and then configure the second line and default routing:
Enter the menu network, click IPS, and then click Add to add the SNIP, such as the IP address of 219.142.6.94, the mask is 24. If you want to manage through this IP NetScaler then, in the box under application access control check mark.
Into the network --- routing ---- routes, click Add to add routing and default gateway, such as: a gateway bit 219.142.6.93; bit surprised to 192.168.3.0 subnet 192.168.2.1.
"" "" "" "Configuration file reference document is not finished https://wenku.baidu.com/view/cad76510866fb84ae45c8daf.html" "" "" "" "