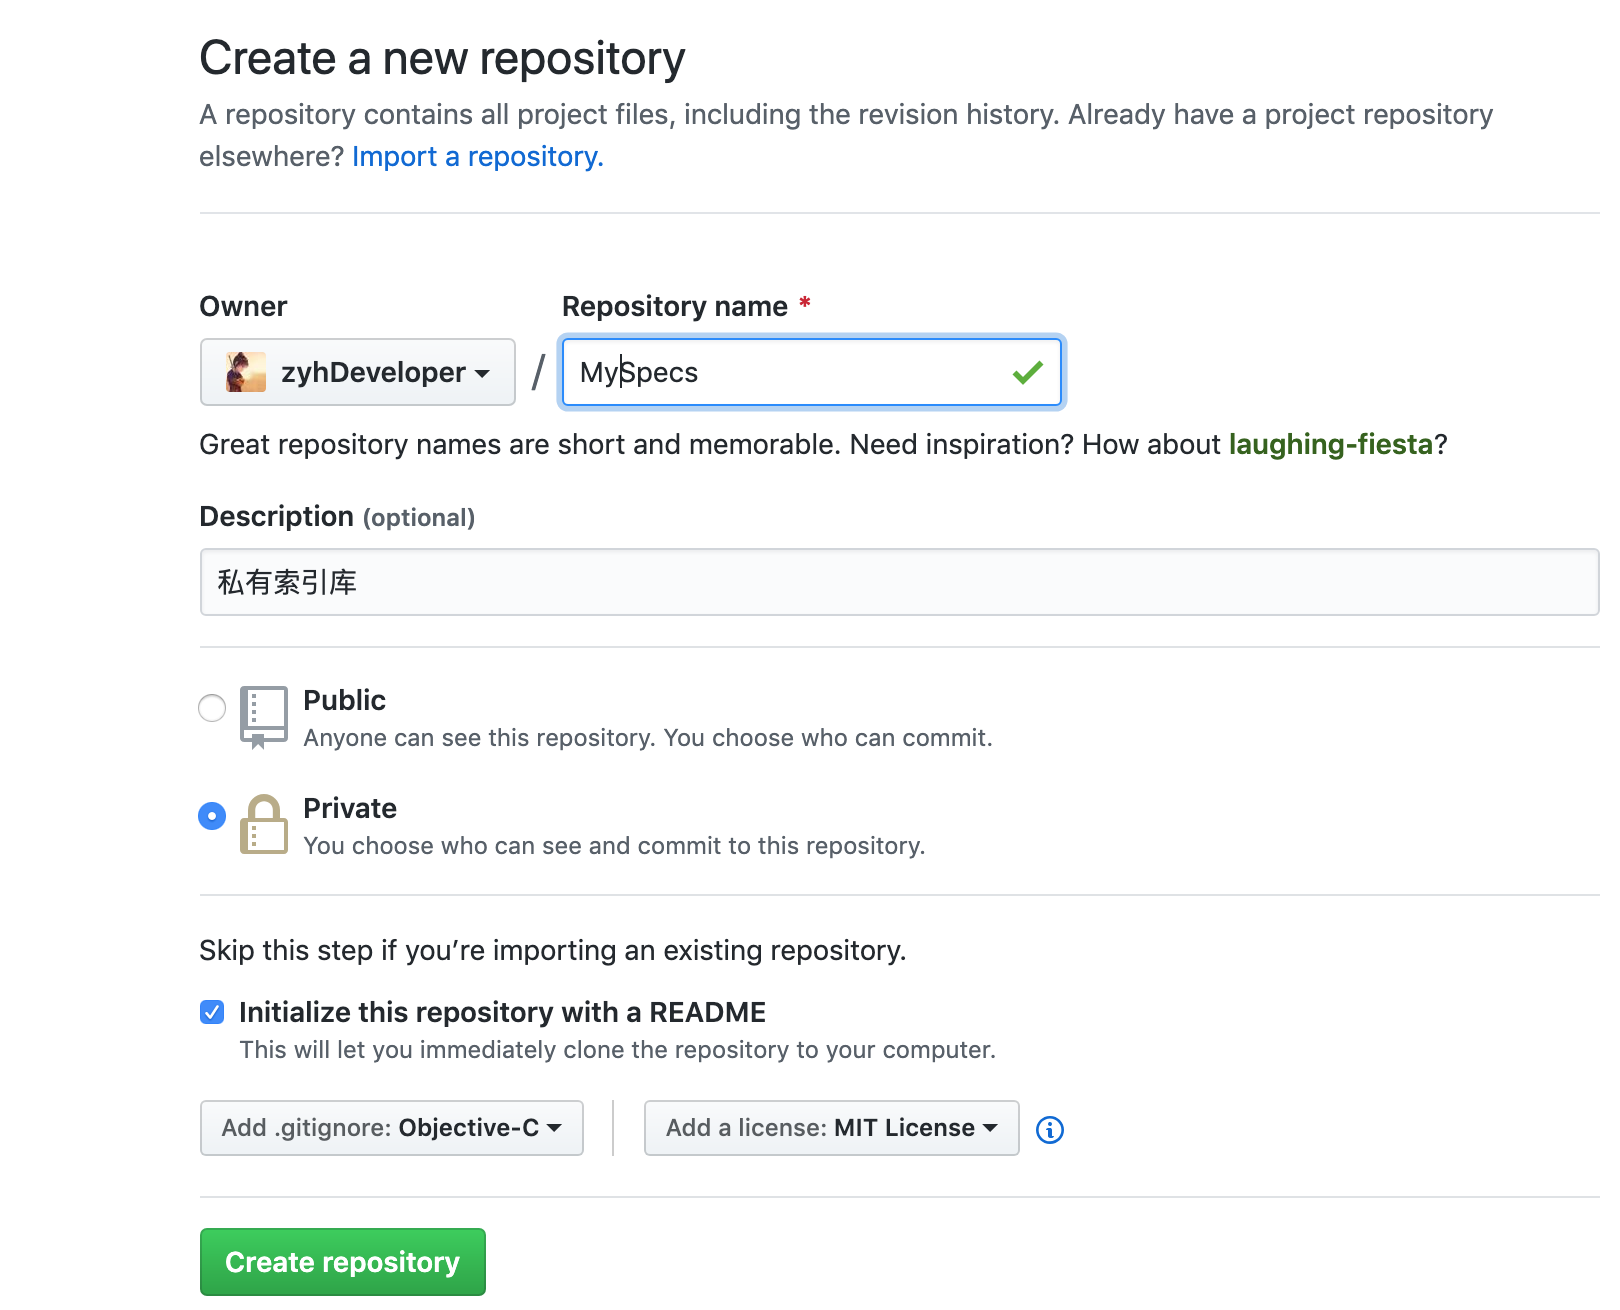
First, create a private library index
Or selected from Github cloud code may, as an example of the present embodiment to Github. Creating a private index library is used as an index component library of their own:
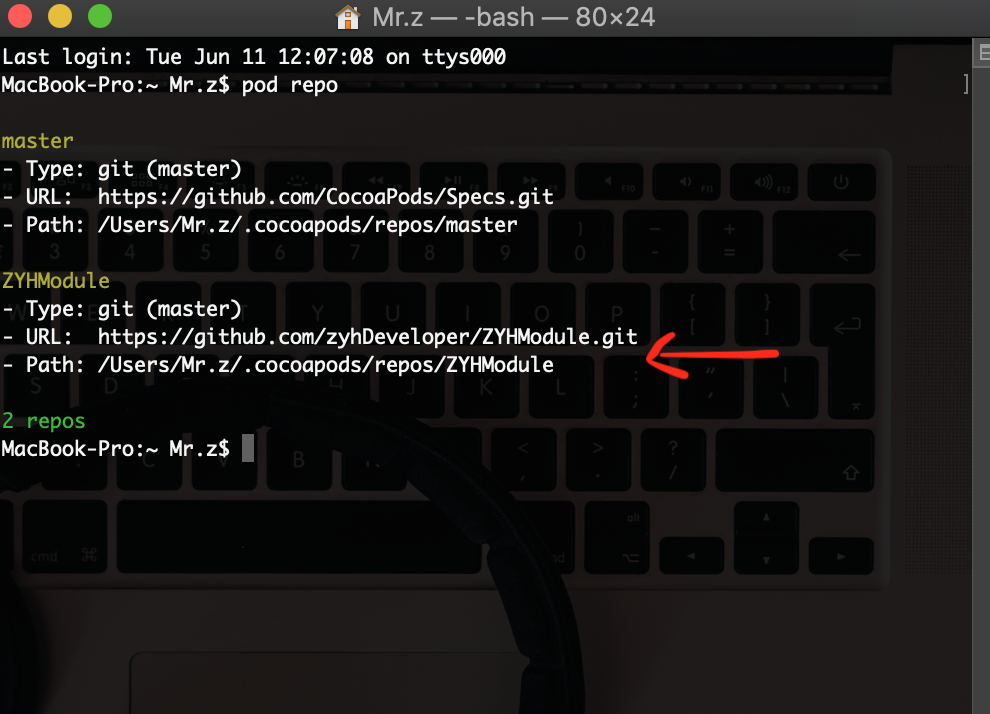
Second, add a private local index database
Add: pod repo add the library name index index Library Address
例: Pod repo Add ZYHModule https://github.com/zyhDeveloper/ZYHModule.git
Query: pod repo
Third, create a component library (the same one step operation, creating a cloud in the Github or code)
Fourth, create a component project
1, quickly create template library
In the command-line tool in cd into the desktop folder
Execution: pod lib create component name
例:pod lib create XXModules

2, add components content
We put things thrown into basic components associated Classes folder, and the ReplaceMe.mdeleted file

carried out:
git rm XXModule/Classes/ReplaceMe.m
git add .
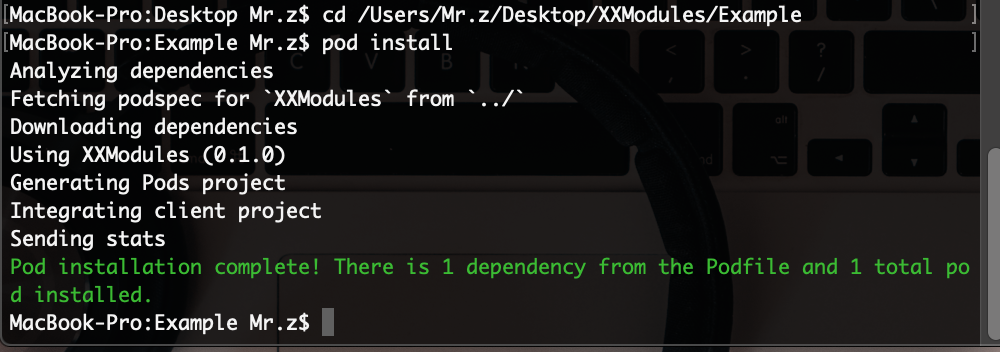
3, install and test the local library
In Podfile file Example project can be seen in "POD 'LXFBase',: path => '../'", the default template library has helped us specify LXFBase.podspec position Podfile, we do not need to operate directly in cd command-line tool in the Example folder, execute pod install
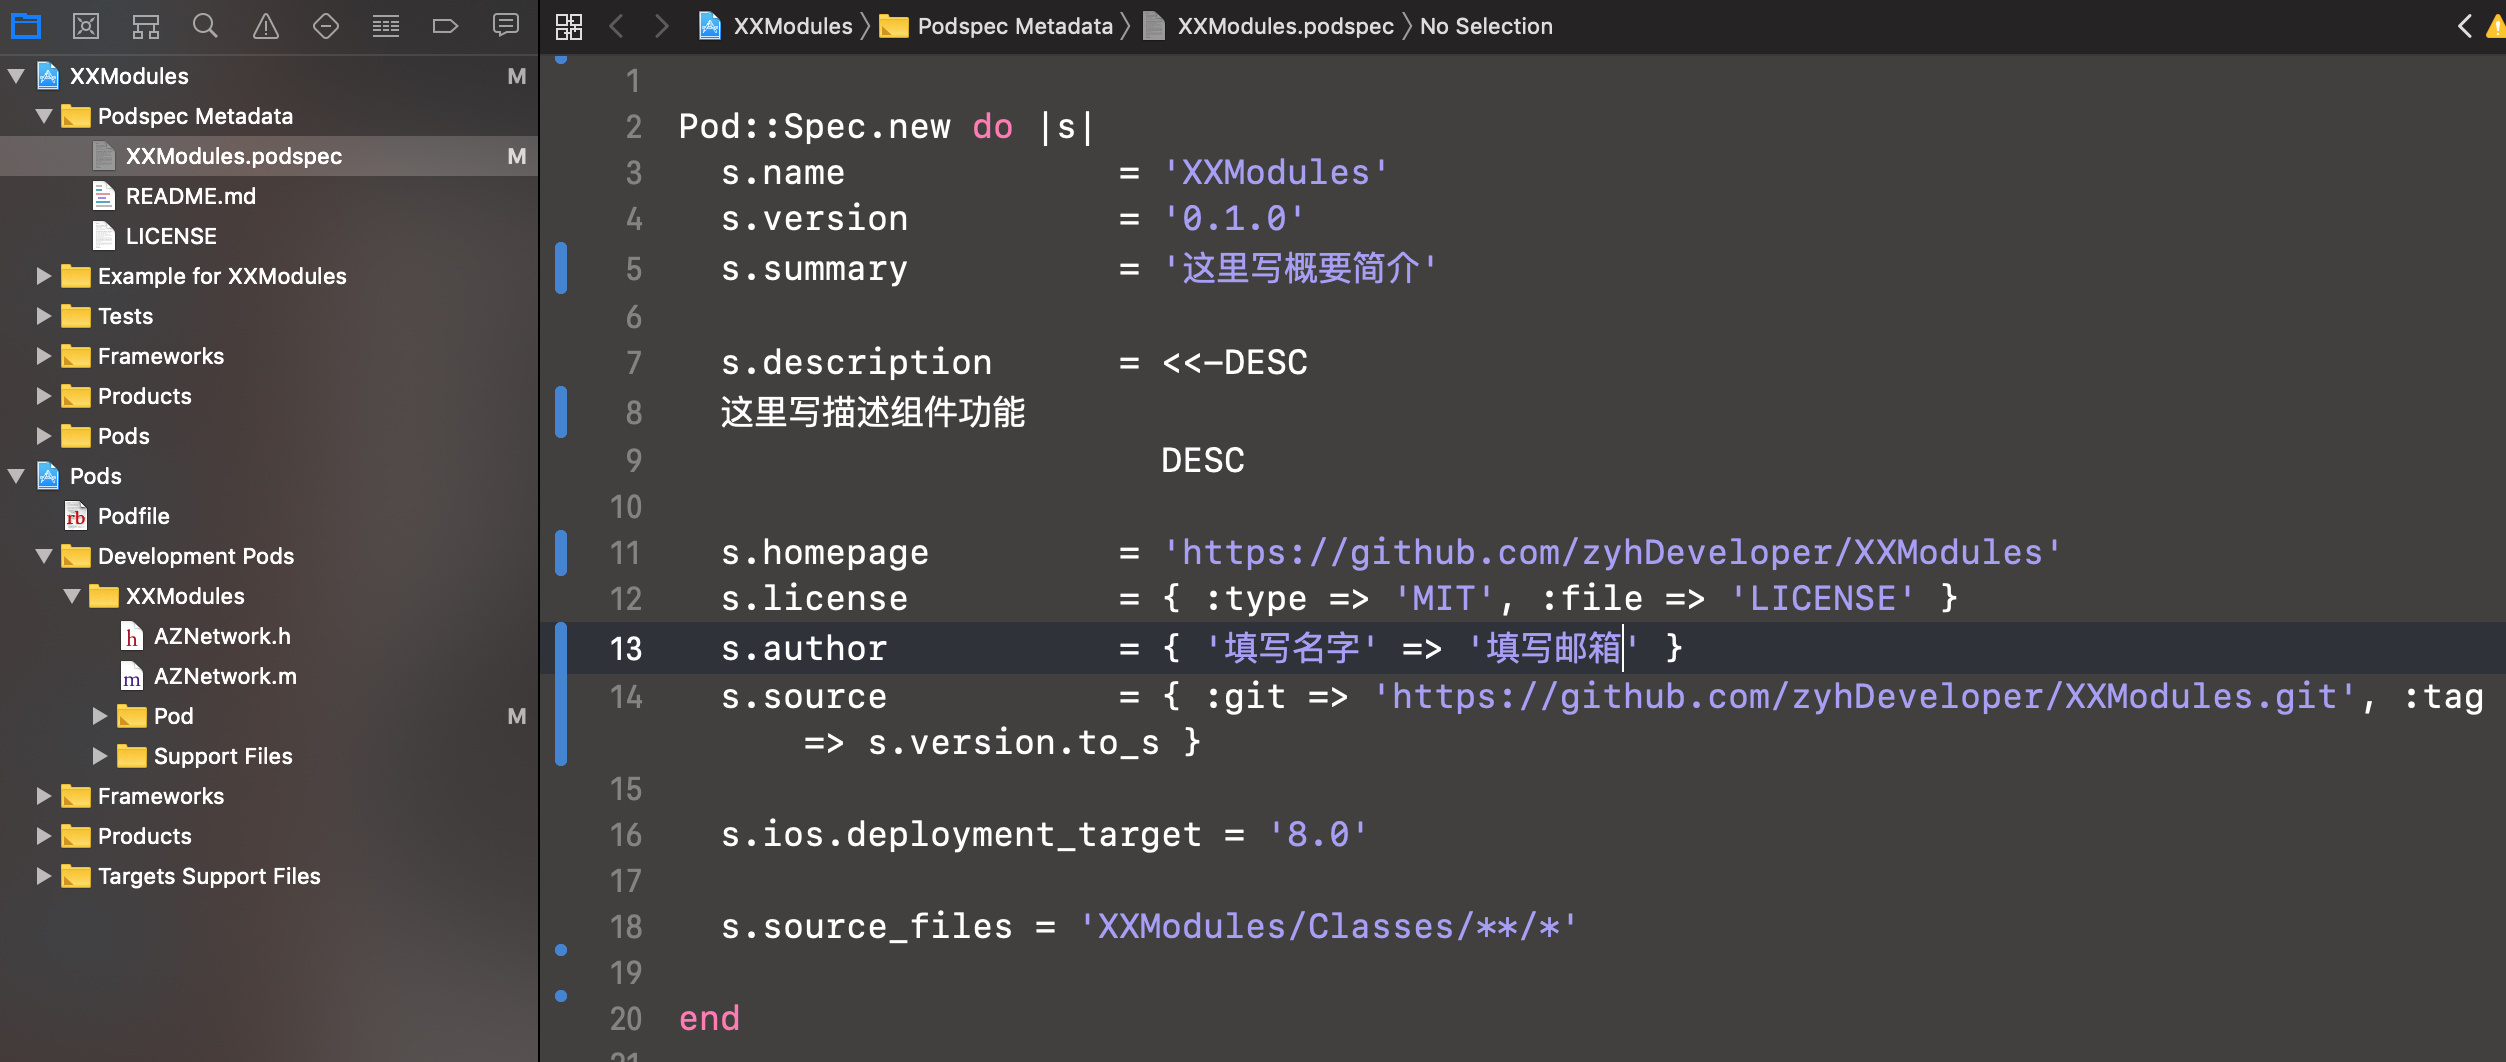
4, modify Spec
Fourth, the upload component code
1, the code will be submitted to the component warehouse
2、打标签
标签与spec中的s.version保持一致
git tag -a 0.1.0 -m "Release version 0.1.0"
git push origin --tags
五、提交podspec到私有索引库
先做个本地和远程验证
1、本地验证
pod lib lint --allow-warnings
2、远程验证
3、提交podspec
六、使用私有库
测试下搜索我们的组件:pod search XXModules
1、添加Podfile文件
cd到开发的项目工程文件
执行:pod init
2、在Podfile的最顶部添加如下描述
// 第二行是为了保证公有库的正常使用
source 'https://github.com/zyhDeveloper/ZYHModule.git'
source 'https://github.com/CocoaPods/Specs.git'
添加:pod 'XXModules'
3、安装组件
执行:pod install
七、私有库的更新迭代
组件库当有新文件或者修改发生时,更新迭代执行:
git add .
git commit -m '更新描述'
git push origin master
1、版本更新
版本更新 这一步非常重要,为更新索引库做准备
git tag -a 0.2.0 -m "Release version 0.2.0"
git push origin --tags
2、修改spec文件
打开你的xx.podspec文件,将原本的版本号改为0.2.0,与刚刚的tag保持一致
git add .
git commit -m '更新描述'
3、验证Spec
pod spec lint --allow-warnings
4、更新索引库
// pod repo push 索引库名称 xxx.podspec
pod repo push ZYHModule XXModule.podspec --allow-warnings
5、更新使用
// --no-repo-update 不更新本地索引库 ,因为刚刚已经自己手动更新过了,所以这里我们选择跳过更新
pod update --no-repo-update
八、子库Subspecs的使用
如果我们只需要用到SDWebImage中的GIF功能,那么并不需要将整个SDWebImage都下载下来,在Podfile中将~~pod 'SDWebImage'~~ 改为 pod SDWebImage/GIF即可单独使用这一功能。
子库格式
s.subspec '子库名称' do |别名|

end
因为这里已经分离出子库了,所以s.source_files和s.dependency就不能这么使用了,需要我们在子库里分别指定,所以我们直接把原来的s.source_files和s.dependency都注释掉。写法参考如下
#s.source_files = 'XXModule/Classes/**/*'# s.dependency 'SDWebImage', '~> 4.3.3'
s.subspec 'Cache' do |c|
c.source_files = 'XXModule/Classes/Manager/**/*'
c.dependency 'SDWebImage', '~> 4.3.3'end
s.subspec 'Category' do |c|
c.source_files = 'XXModule/Classes/Category/**/*'
c.dependency 'SDWebImage', '~> 4.3.3'
end修改后再按之前的步骤更新索引库和组件库就可以了
pod spec lint --allow-warnings
pod repo push ZYHModule XXModule.podspec --allow-warnings
pod update --no-repo-update
如需在某个工程添加子库,可执行:
pod 'XXModule/Manager'
pod install