Apply for a test account for debugging and development. The test account has the interface permissions of most service accounts.
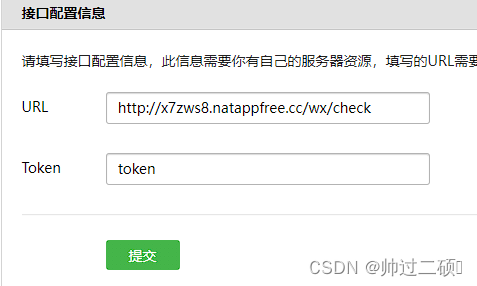
1. Fill in and verify the interface configuration information
Here you need to fill in a URL and a Token verification string.
I used natapp intranet penetration to map the local backend 8080 port service to http://x7zws8.natappfree.cc
https://natapp.cn/ on the natapp official website Register an account and apply for a free tunnel.
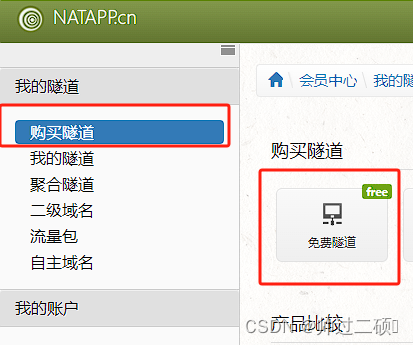
After applying, bind the domain name to your own backend
backend interface:
    @RequestMapping(value = "/check", produces = "text/plain;charset=UTF-8", method = {

    RequestMethod.GET, RequestMethod.POST})
    //微信服务器根据配置的token,结合时间戳timestamp和随机数nonce通过SHA1生成签名,发起get请求,检验token的正确性,
    //检验正确原样返回随机字符串echostr,失败返回空字符串
    public String check(HttpServletRequest request, HttpServletResponse response,
                        @RequestParam("signature") String signature,
                        @RequestParam("timestamp") String timestamp,
                        @RequestParam("nonce") String nonce,
                        String echostr) throws Exception {


        //若是为get请求,则为开发者模式验证
        if ("get".equals(request.getMethod().toLowerCase())) {


            String checkSignature = SHA1.creatSHA1("token", timestamp, nonce);
            if (checkSignature.equals(signature)) {


                return echostr;
            }
        }
        return null;
    }
SHA1:
import java.security.MessageDigest;
import java.util.Arrays;

//SHA1加密算法类
public class SHA1 {


    /**
     *
     * @param token
     * @param timestamp 时间戳
     * @param nonce 随机字符串
     * @return 安全签名
     * @throws AesException
     */
    public static String creatSHA1(String token, String timestamp, String nonce) throws AesException
    {


        try {


            String[] array = new String[] {

     token, timestamp, nonce};
            StringBuffer sb = new StringBuffer();
            // 字符串排序
            Arrays.sort(array);
            for (int i = 0; i < 3; i++) {


                sb.append(array[i]);
            }
            String str = sb.toString();
            // SHA1签名生成
            MessageDigest md = MessageDigest.getInstance("SHA-1");
            md.update(str.getBytes());
            byte[] digest = md.digest();

            StringBuffer hexstr = new StringBuffer();
            String shaHex = "";
            for (int i = 0; i < digest.length; i++) {


                shaHex = Integer.toHexString(digest[i] & 0xFF);
                if (shaHex.length() < 2) {


                    hexstr.append(0);
                }
                hexstr.append(shaHex);
            }
            return hexstr.toString();
        } catch (Exception e) {


            e.printStackTrace();
            throw new AesException(AesException.ComputeSignatureError);
        }
    }
}
AesException:
public class AesException extends Exception {


    public final static int OK = 0;
    public final static int ValidateSignatureError = -40001;
    public final static int ParseXmlError = -40002;
    public final static int ComputeSignatureError = -40003;
    public final static int IllegalAesKey = -40004;
    public final static int ValidateAppidError = -40005;
    public final static int EncryptAESError = -40006;
    public final static int DecryptAESError = -40007;
    public final static int IllegalBuffer = -40008;

    private int code;

    private static String getMessage(int code) {


        switch (code) {


            case ValidateSignatureError:
                return "签名验证错误";
            case ParseXmlError:
                return "xml解析失败";
            case ComputeSignatureError:
                return "sha加密生成签名失败";
            case IllegalAesKey:
                return "SymmetricKey非法";
            case ValidateAppidError:
                return "appid校验失败";
            case EncryptAESError:
                return "aes加密失败";
            case DecryptAESError:
                return "aes解密失败";
            case IllegalBuffer:
                return "解密后得到的buffer非法";
            default:
                return null; // cannot be
        }
    }

    public int getCode() {


        return code;
    }

    public AesException(int code) {


        super(getMessage(code));
        this.code = code;
    }
}
After the verification is completed, configure the webpage authorization under the webpage service in the test account to obtain the basic user

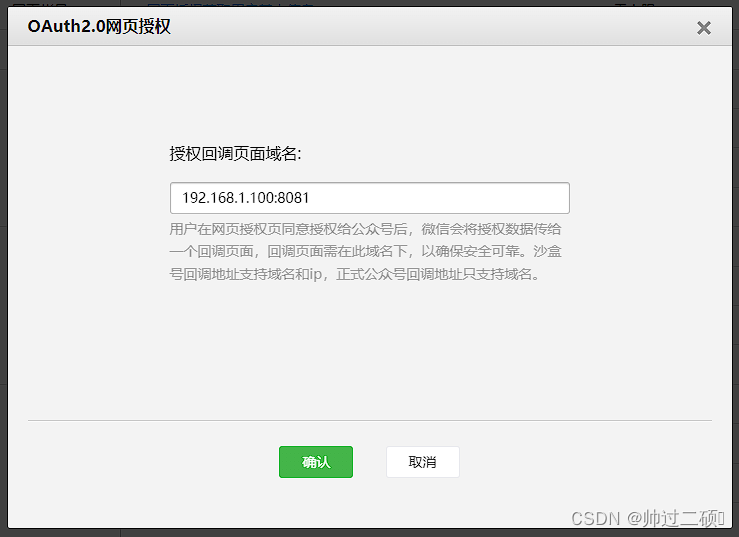
Here fill in the address of your front-end project after running. My back-end project port is 8080. After the uniapp front-end is running, the port is 8081, so I configured the local ipv4 ip + port number.
2. Backend configuration + Assembling URL + Obtaining user OpenID and basic information through Code
Introduce dependencies into the pom of the SpringBoot project
        <dependency>
            <groupId>com.github.binarywang</groupId>
            <artifactId>weixin-java-mp</artifactId>
            <version>4.6.0</version>
        </dependency>
Create configuration class
import com.ruoyi.system.domain.WechatConfig;
import com.ruoyi.system.service.IWechatConfigService;
import me.chanjar.weixin.mp.api.WxMpService;
import me.chanjar.weixin.mp.api.impl.WxMpServiceImpl;
import me.chanjar.weixin.mp.config.WxMpConfigStorage;
import me.chanjar.weixin.mp.config.impl.WxMpDefaultConfigImpl;
import org.springframework.beans.factory.annotation.Autowired;
import org.springframework.context.annotation.Bean;
import org.springframework.context.annotation.Configuration;

@Configuration
public class WxMpConfig {


    @Autowired
    private IWechatConfigService wechatConfigService;

    @Bean
    public WxMpConfigStorage wxMpConfigStorage() {


        WxMpDefaultConfigImpl configStorage = new WxMpDefaultConfigImpl();
        WechatConfig wechatConfig = wechatConfigService.selectWechatConfigById(1L);
        //我这里是做成了获取数据库中保存的AppID和AppSercret正常情况下写死就可以
        configStorage.setAppId(wechatConfig.getAppId());
        configStorage.setSecret(wechatConfig.getAppSecret());
        return configStorage;
    }

    @Bean
    public WxMpService wxMpService(WxMpConfigStorage configStorage) {


        WxMpService wxMpService = new WxMpServiceImpl();
        wxMpService.setWxMpConfigStorage(configStorage);
        return wxMpService;
    }
}
After that, you can use it normally in the Controller.
The /authorize interface actually only does one step: building the url to get the code. After the construction is completed, it returns to the front end. The front end directly redirects the
three parameters of buildAuthorizationUrl.
The first one is the callback address.
The second one is filled in. snsapi_base or snsapi_userinfo
snsapi_base can get the openid, while snsapi_userinfo can get the basic user information.
snsapi_base can be obtained silently, while snsapi_userinfo requires the user to click for authorization.
@RestController
@RequestMapping("/wx")
public class WeChatController extends BaseController {


    @GetMapping("/authorize")
    public AjaxResult test() {


        WxOAuth2Service oAuth2Service = wxMpService.getOAuth2Service();
        String redirectUrl = oAuth2Service.buildAuthorizationUrl("http://192.168.1.100:8081", "snsapi_userinfo", null);
        return success(redirectUrl);
    }

    @GetMapping("/userInfo")
    public AjaxResult userInfo(@RequestParam("code") String code) throws WxErrorException {


        WxOAuth2Service oAuth2Service = wxMpService.getOAuth2Service();
        WxOAuth2AccessToken wxMpOAuth2AccessToken = oAuth2Service.getAccessToken(code);
        logger.info("【wxMpOAuth2AccessToken:】{}", wxMpOAuth2AccessToken);
        String openId = wxMpOAuth2AccessToken.getOpenId();
        logger.info("【openid:】{}", openId);
        WxOAuth2UserInfo userInfo = oAuth2Service.getUserInfo(wxMpOAuth2AccessToken, "zh_CN");
        logger.info("【用户信息:】{}", userInfo.toString());
        return success(userInfo);
    }
}
2. Uniapp front-end call
The front end first calls /authorize to get the assembled address and then redirects and gets the code
getUrlCode to determine whether the address contains code. If so, use the code to get the user's basic information and openid.
<template>
	<view class="content">
		<image class="logo" :src="loginUser.headImgUrl ? loginUser.headImgUrl : '/static/logo.png'"></image>
		<view class="text-area">
			<text class="title">{

    {

    loginUser.openid}}</text>
		</view>
		<button type="default" @click="login">登录</button>
	</view>
</template>

<script>
	export default {


		data() {


			return {


				loginUser:{

    }
			}
		},
		onLoad(query) {


			const that = this;
			let code = that.getUrlCode();
			if (code) {


				console.log("有code")
				console.log(code)
				uni.request({


					url: "http://192.168.1.100:8080/wx/userInfo",
					data: {


						code: code
					},
					success(res) {


						console.log("获取到用户信息")
						console.log(res.data.data);
						that.loginUser = res.data.data;
					}
				})
			} else {


				console.log("没有code")
			}
		},
		methods: {


			login() {


				uni.request({


					url: "http://192.168.1.100:8080/wx/authorize",
					success(res) {


						window.location.href = res.data.msg;
					}
				})
			},
			getUrlCode() {


				return (
					decodeURIComponent(
						(new RegExp("[?|&]" + "code" + "=" + "([^&;]+?)(&|#|;|$)").exec(
							location.href
						) || [, ""])[1].replace(/\+/g, "%20")
					) || null
				);
			},
		}
	}
</script>