Preface
I recently received a request for Google EDLA certification. I am responsible for the modification of Google's native desktop layout. By studying the source code, I will post some modification ideas involved. You can refer to it to see if there is any useful information for you. The main modifications include:
1. The search bar and bottom navigation bar are not centered.
2. The applications in the middle are not arranged as required. Please refer to Mocke for details.
3. Neutral S-write, screen mirroring Kshare, and welcome page applications are not added to the native Google desktop.
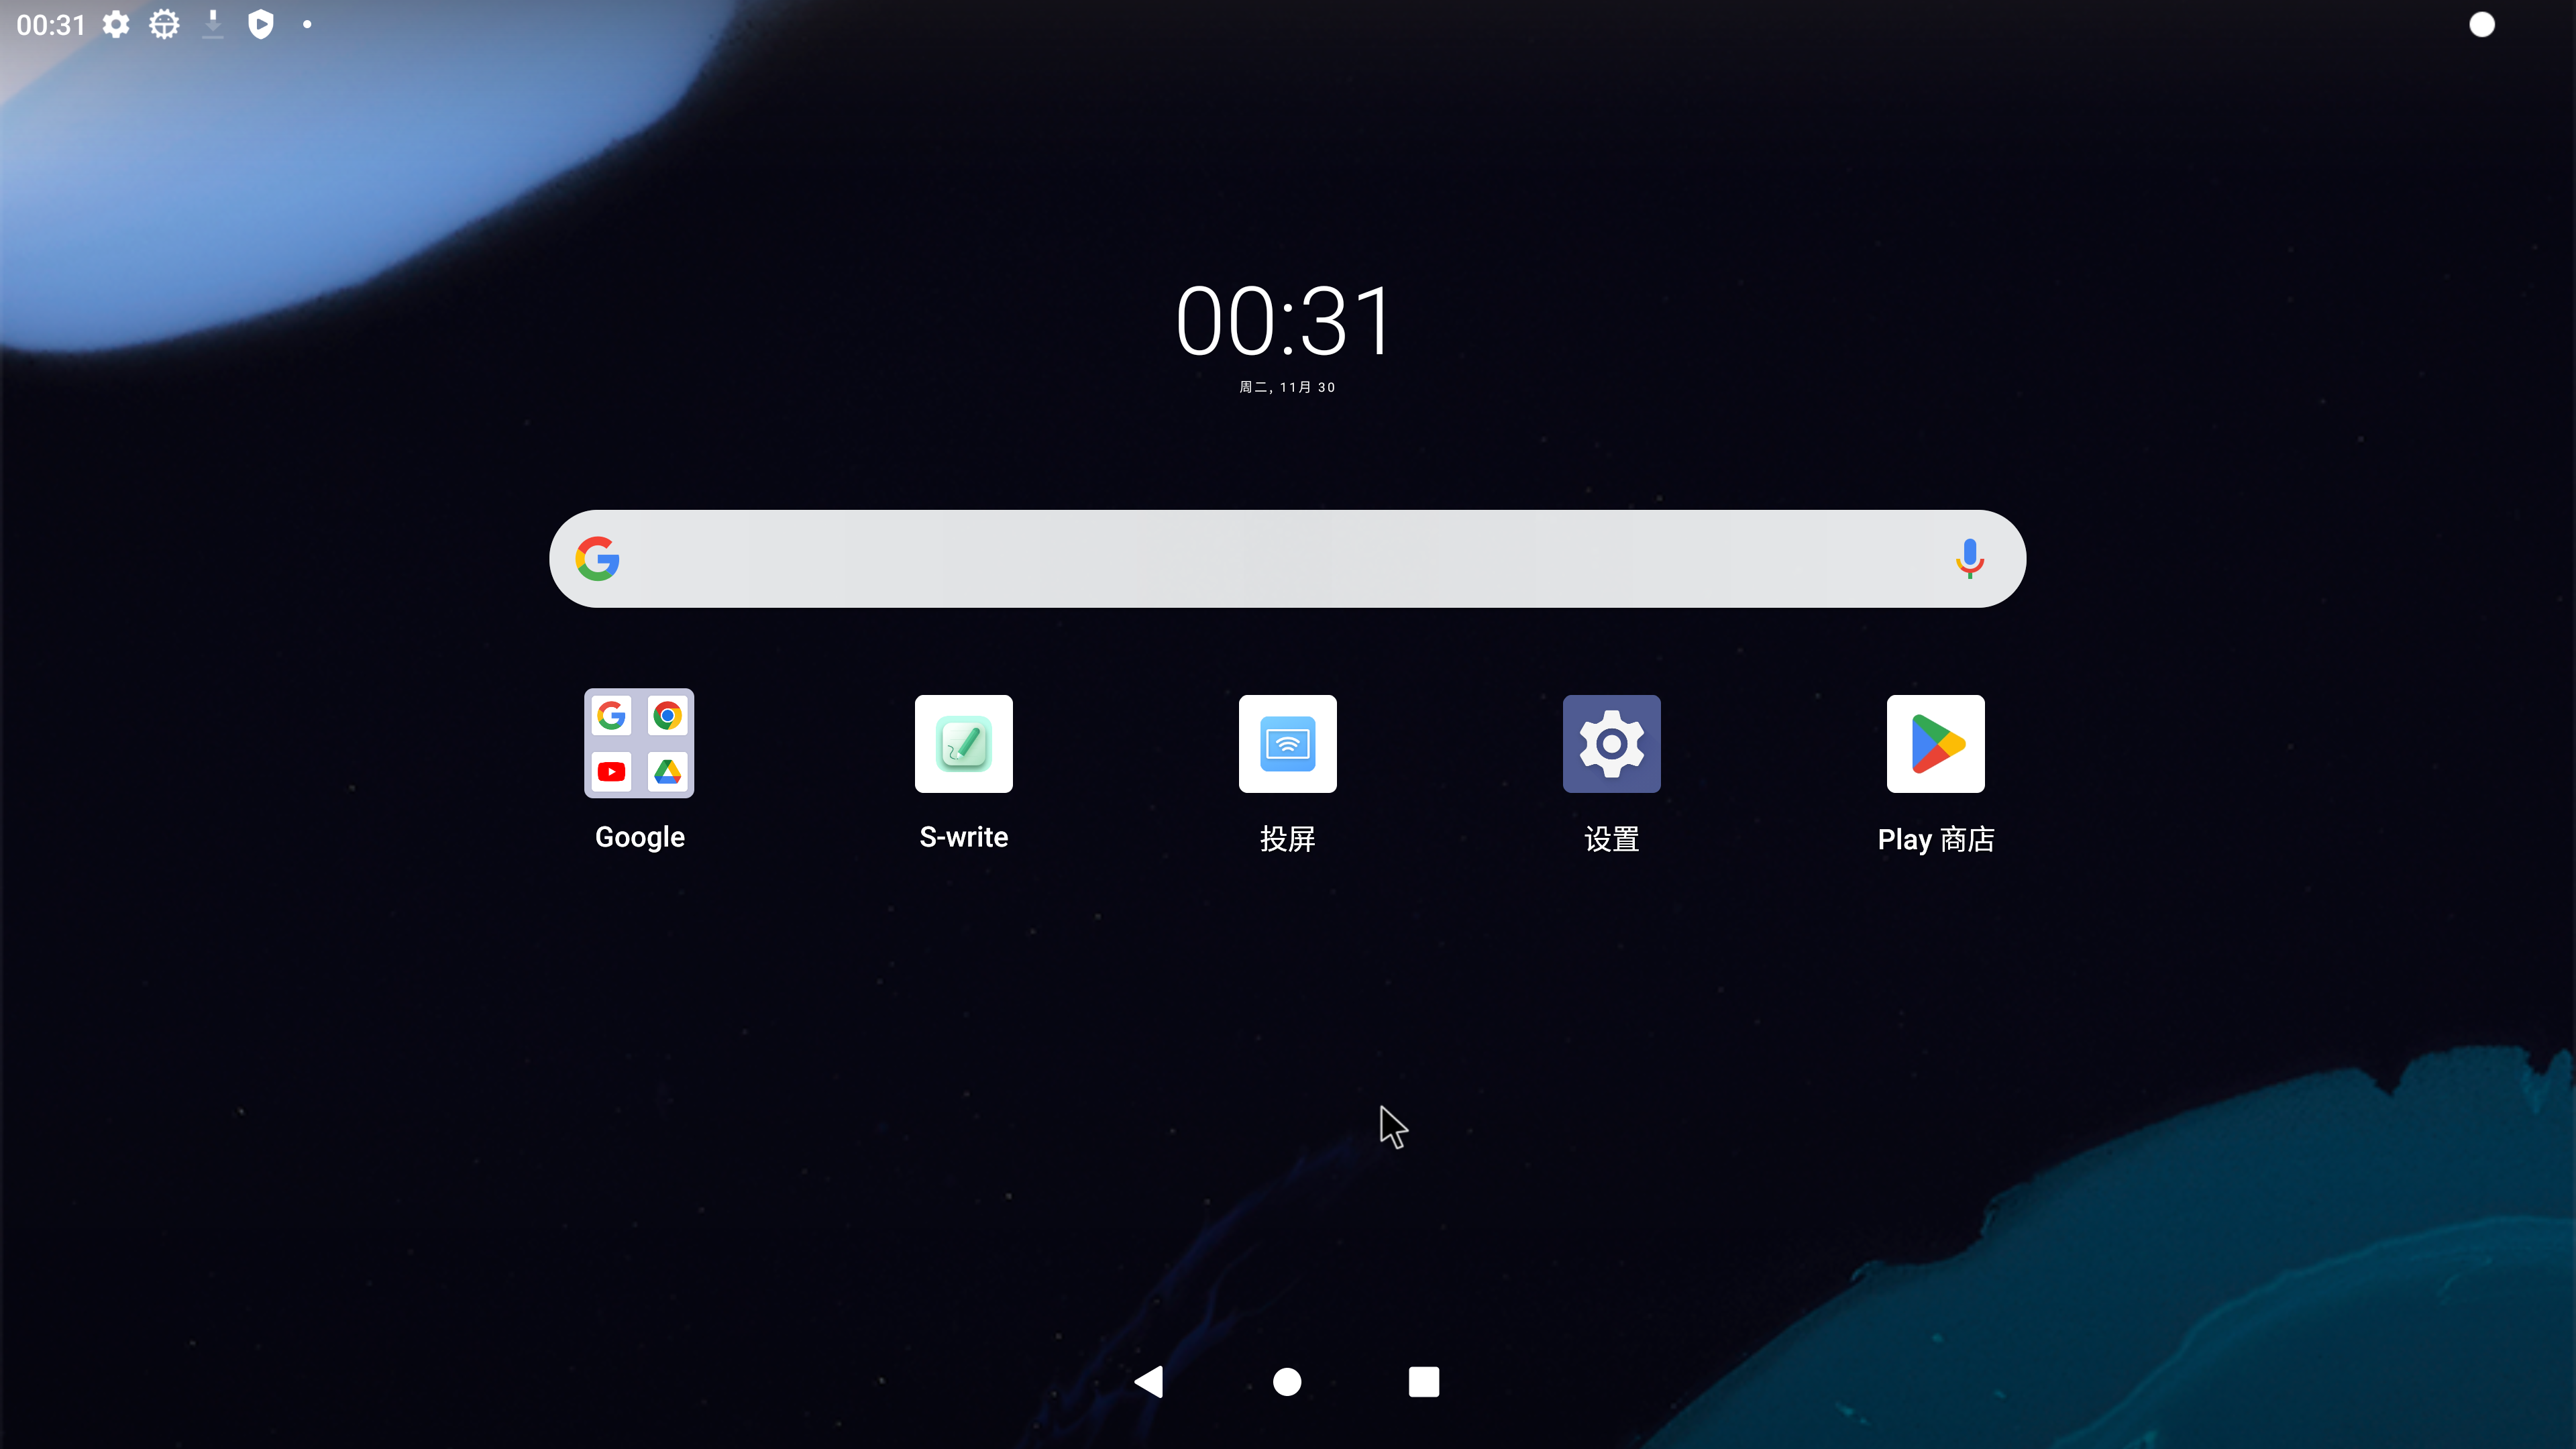
FIG Situation:
Reference picture: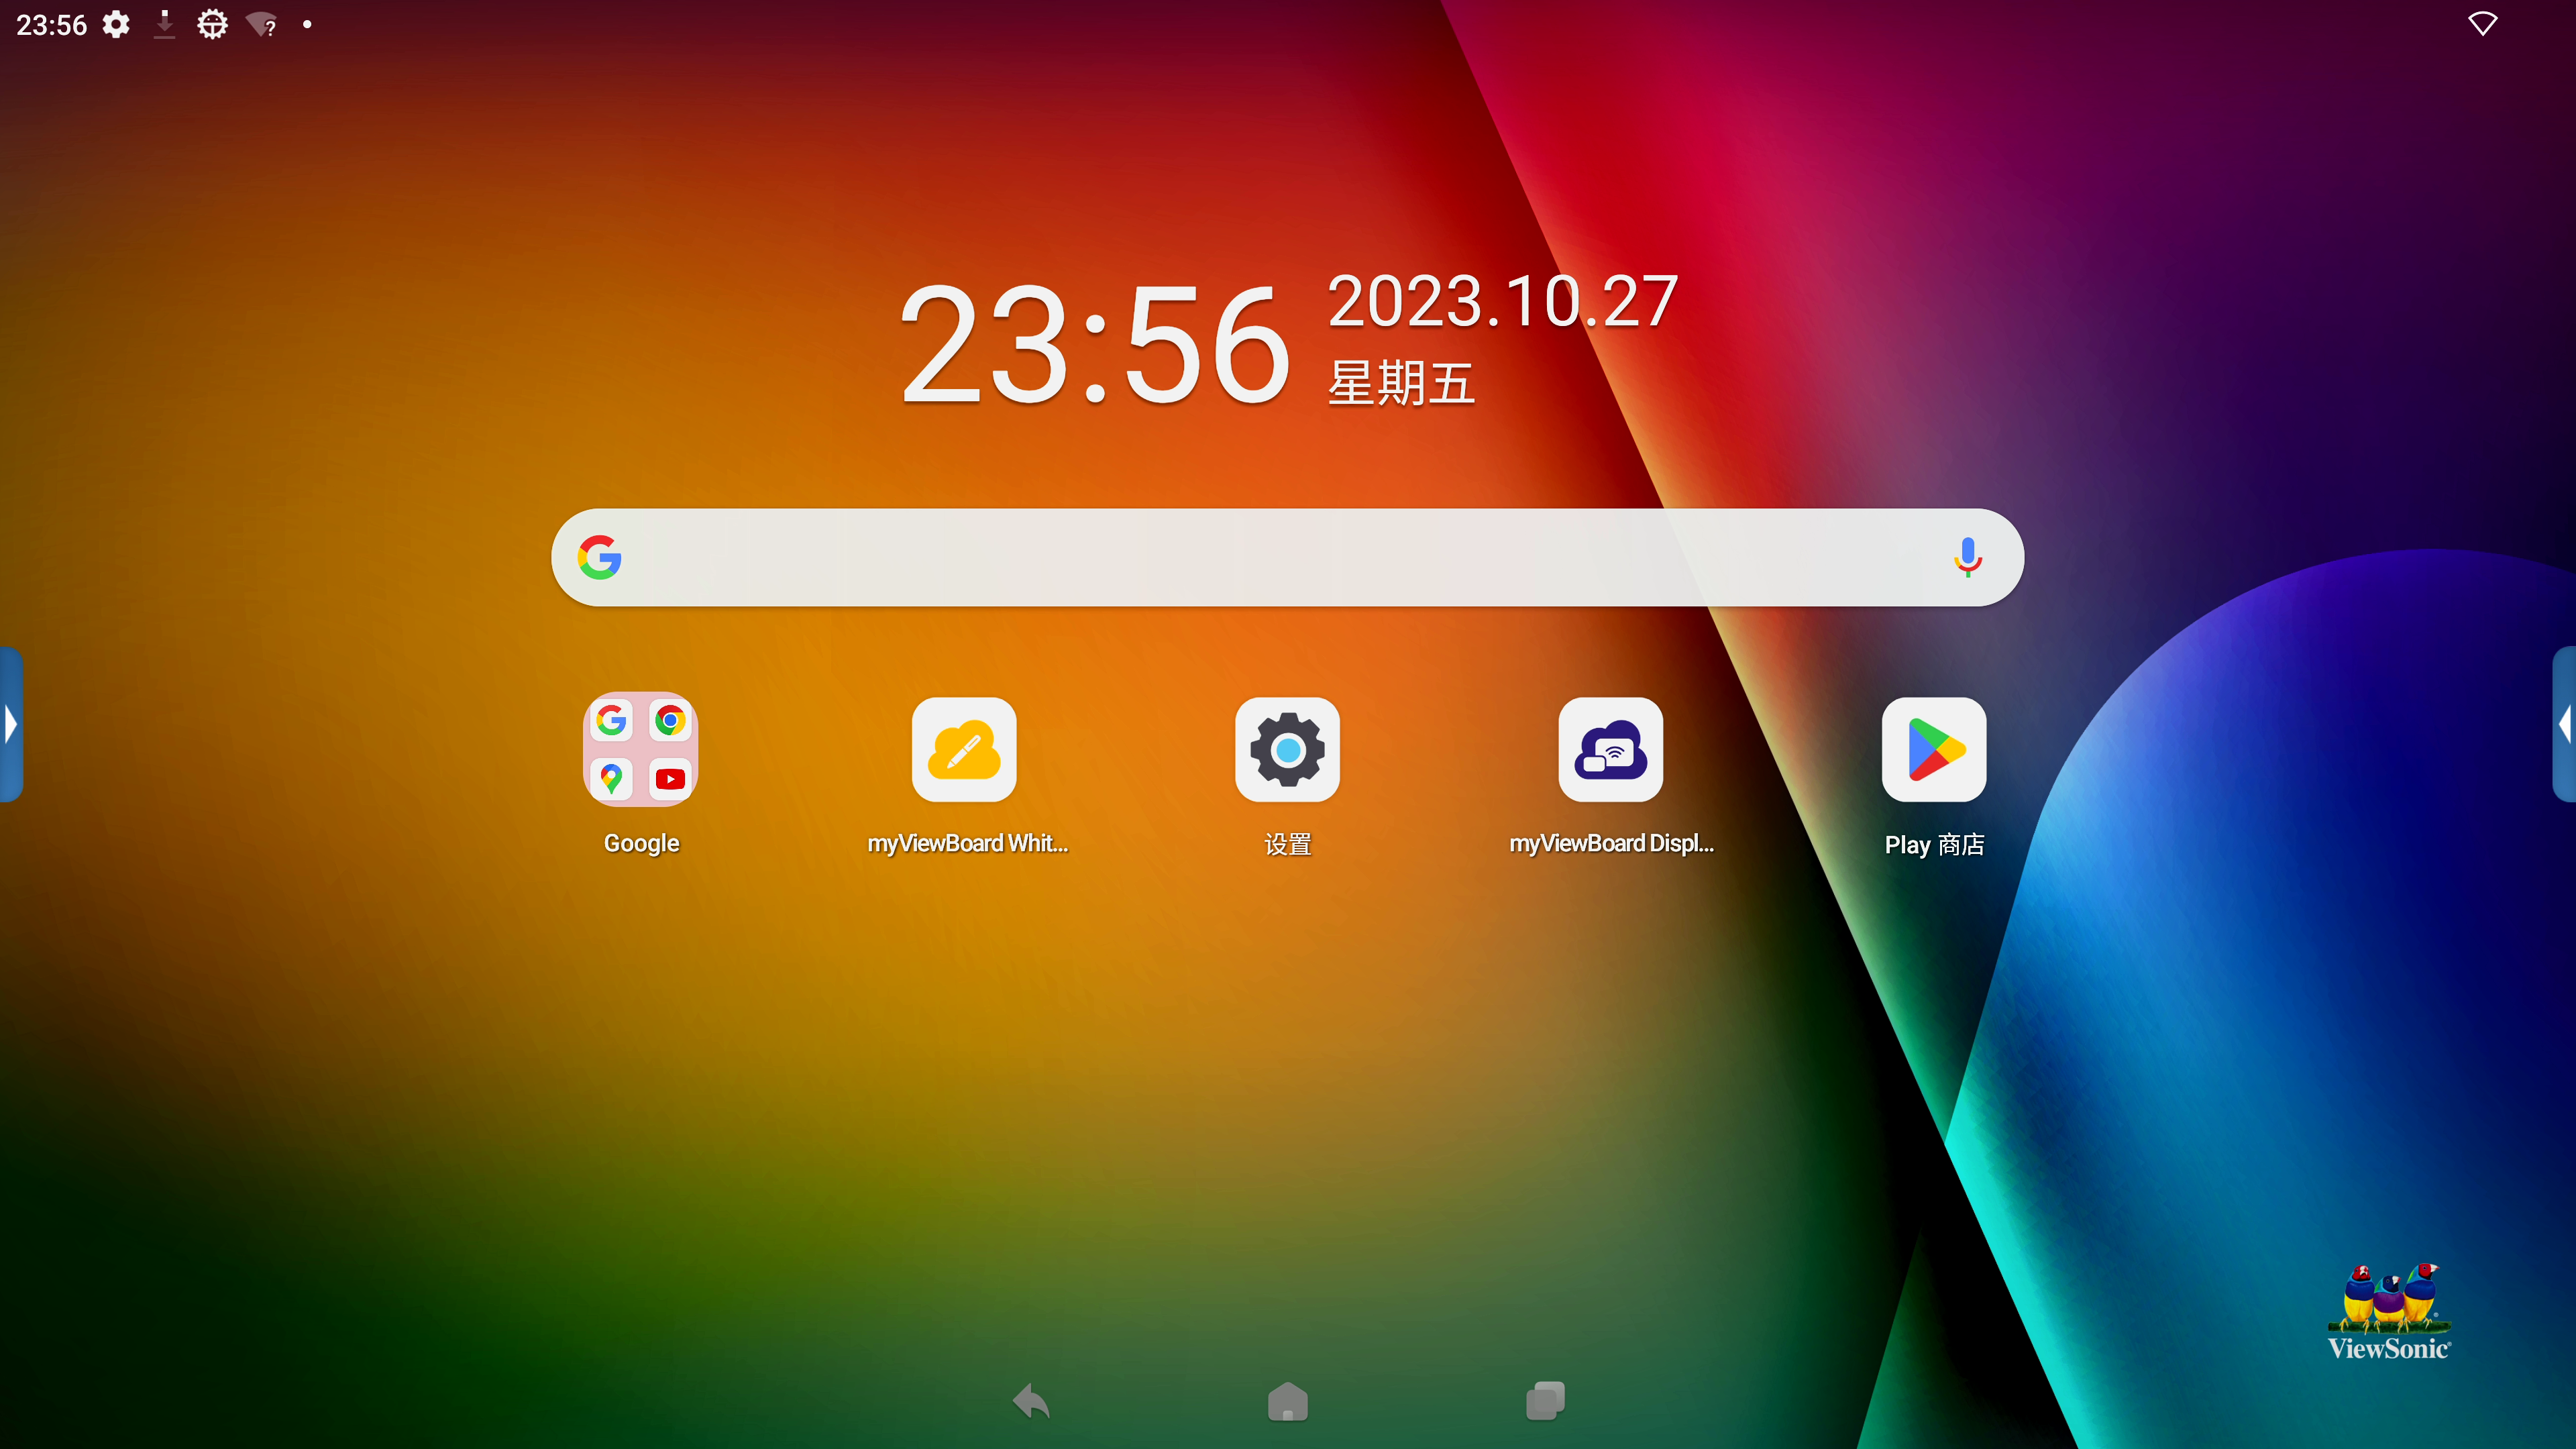
1. Modifications to the Google search box
The areas involved in the modifications are:
1、Launcher3\res\xml\device_profiles.xml
2、com/android/launcher3/Workspace.java
1. First observe the device_profiles.xml code. Generally, large-screen (tablet) devices will load the 6*5 layout, and mobile devices will load the layout of the mobile phone. There are 4 different layout types defined in this file. How to determine which layout is loaded by the device? Woolen cloth? You can long press the application icon on the desktop, then observe how many grids can be moved, and then find the layout position to be modified based on the number of rows and columns. For example, my device loads a 6 * 5 layout. I modify here **launcher:numSearchContainerColumns="5"** to modify the Google search box to occupy 5 grids (a total of 7 grids in horizontal screen)
<--这个行数可以根据自己想要的效果修改,比如我就改了7*6布局,6行7列--/>
	<grid-option
        launcher:name="6_by_5"
        launcher:numRows="6"
        launcher:numColumns="7"
        launcher:numSearchContainerColumns="5"
        launcher:numFolderRows="3"
        launcher:numFolderColumns="4"
        launcher:numHotseatIcons="0"
        launcher:hotseatColumnSpanLandscape="2"
        launcher:numAllAppsColumns="6"
        launcher:isScalable="true"
        launcher:inlineNavButtonsEndSpacing="@dimen/taskbar_button_margin_6_5"
        launcher:devicePaddingId="@xml/paddings_6x5"
        launcher:dbFile="launcher_6_by_5.db"
        launcher:defaultLayoutId="@xml/default_workspace_6x5"
        launcher:deviceCategory="tablet" >

        <display-option
            launcher:name="Tablet"
            launcher:minWidthDps="900"
            launcher:minHeightDps="820"
            launcher:minCellHeight="120"
            launcher:minCellWidth="102"
            launcher:minCellHeightLandscape="104"
            launcher:minCellWidthLandscape="120"
            launcher:iconImageSize="60"
            launcher:iconTextSize="14"
            launcher:borderSpaceHorizontal="16"
            launcher:borderSpaceVertical="64"
            launcher:borderSpaceLandscapeHorizontal="64"
            launcher:borderSpaceLandscapeVertical="16"
            launcher:horizontalMargin="54"
            launcher:horizontalMarginLandscape="120"
            launcher:allAppsCellWidth="96"
            launcher:allAppsCellHeight="142"
            launcher:allAppsCellWidthLandscape="126"
            launcher:allAppsCellHeightLandscape="126"
            launcher:allAppsIconSize="60"
            launcher:allAppsIconTextSize="14"
            launcher:allAppsBorderSpaceHorizontal="8"
            launcher:allAppsBorderSpaceVertical="16"
            launcher:allAppsBorderSpaceLandscape="16"
            launcher:hotseatBarBottomSpace="30"
            launcher:hotseatBarBottomSpaceLandscape="40"
            launcher:canBeDefault="true" />

    </grid-option>

</profiles>
2. Modify the position of the Google search box in workspace.java. Find this method in the class: bindAndInitFirstWorkspaceScreen and locate it here.
    public void bindAndInitFirstWorkspaceScreen() {


        if (!FeatureFlags.QSB_ON_FIRST_SCREEN) {


            return;
        }

        // Add the first page
        CellLayout firstPage = insertNewWorkspaceScreen(Workspace.FIRST_SCREEN_ID, getChildCount());
        // Always add a first page pinned widget on the first screen.
        if (mFirstPagePinnedItem == null) {


            // In transposed layout, we add the first page pinned widget in the Grid.
            // As workspace does not touch the edges, we do not need a full
            // width first page pinned widget.
            mFirstPagePinnedItem = LayoutInflater.from(getContext())
                    .inflate(R.layout.search_container_workspace, firstPage, false);
        }

        int cellHSpan = mLauncher.getDeviceProfile().inv.numSearchContainerColumns;
        //格子数从0开始算,这里表示搜索框位置从X轴第2格子,y轴第3个格子算起,x轴占据5(cellHSpan)个格子,y轴占据1个格子
        CellLayoutLayoutParams lp = new CellLayoutLayoutParams(1, 2, cellHSpan, 1, FIRST_SCREEN_ID);
        lp.canReorder = false;
        if (!firstPage.addViewToCellLayout(
                mFirstPagePinnedItem, 0, R.id.search_container_workspace, lp, true)) {


            Log.e(TAG, "Failed to add to item at (0, 0) to CellLayout");
            mFirstPagePinnedItem = null;
        }
    }
Tip: If there is no Google search box on the desktop at the beginning, you can add it in the form of a widget. There are two situations when adding a widget. The specific method to use depends on whether the system has read the configuration file. If not, use it. The first one is to add it directly to the layout file, such as res/xml/default_workspace_6x5.xml:
<appwidget
    container="-100"
    screen="0"
    x="1"
    y="2"
    spanX="5"
    spanY="1"
    packageName="com.google.android.googlequicksearchbox"
    className="com.google.android.googlequicksearchbox.SearchWidgetProvider"/>
Another way is to add: release\vendor\partner_gms\apps\GmsSampleIntegration\res_dhs_full\xml\partner_default_layout.xml to the configuration file under the google_gms package, for example
<?xml version="1.0" encoding="utf-8"?>
<!-- Copyright (C) 2017 Google Inc. All Rights Reserved. -->
<favorites>
  <!-- Hotseat (We use the screen as the position of the item in the hotseat) -->
  <!-- Dialer Messaging Calendar Contacts Camera -->
  <!--<favorite container="-101" screen="0" x="0" y="0" packageName="com.google.android.dialer" className="com.google.android.dialer.extensions.GoogleDialtactsActivity"/>-->
  <!--<favorite container="-101" screen="1" x="1" y="0" packageName="com.google.android.apps.messaging" className="com.google.android.apps.messaging.ui.ConversationListActivity"/>-->
  <!-- <favorite container="-101" screen="0" x="0" y="0" packageName="com.android.settings" className="com.android.settings.Settings"/> -->
  <!-- <favorite container="-101" screen="1" x="1" y="0" packageName="com.android.deskclock" className="com.android.deskclock.DeskClock"/> -->
  <!-- <favorite container="-101" screen="2" x="2" y="0" packageName="com.google.android.calendar" className="com.android.calendar.event.LaunchInfoActivity"/> -->
  <!-- <favorite container="-101" screen="3" x="3" y="0" packageName="com.google.android.contacts" className="com.android.contacts.activities.PeopleActivity"/> -->
  <!-- <favorite container="-101" screen="4" x="4" y="0" packageName="com.android.camera2" className="com.android.camera.CameraLauncher"/> -->
  <!-- In Launcher3, workspaces extend infinitely to the right, incrementing from zero -->
  <!-- Google folder -->
  <!-- Google, Chrome, Gmail, Maps, YouTube, (Drive), (Music), (Movies), Duo, Photos -->
  <folder title="@string/google_folder_title" screen="0" x="1" y="3">
    <favorite packageName="com.google.android.googlequicksearchbox" className="com.google.android.googlequicksearchbox.SearchActivity"/>
    <favorite packageName="com.android.chrome" className="com.google.android.apps.chrome.Main"/>
    <favorite packageName="com.google.android.gm" className="com.google.android.gm.ConversationListActivityGmail"/>
    <favorite packageName="com.google.android.apps.maps" className="com.google.android.maps.MapsActivity"/>
    <favorite packageName="com.google.android.youtube" className="com.google.android.youtube.app.honeycomb.Shell$HomeActivity"/>
    <favorite packageName="com.google.android.apps.docs" className="com.google.android.apps.docs.app.NewMainProxyActivity"/>
    <favorite packageName="com.google.android.apps.youtube.music" className="com.google.android.apps.youtube.music.activities.MusicActivity"/>
    <favorite packageName="com.google.android.videos" className="com.google.android.videos.GoogleTvEntryPoint"/>
    <favorite packageName="com.google.android.apps.tachyon" className="com.google.android.apps.tachyon.MainActivity"/>
    <favorite packageName="com.google.android.apps.photos" className="com.google.android.apps.photos.home.HomeActivity"/>
  </folder>
  <favorite screen="0" x="5" y="3" packageName="com.android.vending" className="com.android.vending.AssetBrowserActivity"/>

  <appwidget screen="0" x="2" y="0" packageName="com.android.deskclock" className="com.android.alarmclock.DigitalAppWidgetProvider" spanX="3" spanY="2" />
  <appwidget screen="0" x="1" y="2" packageName="com.google.android.googlequicksearchbox" className="com.google.android.googlequicksearchbox.SearchWidgetProvider" spanX="5" spanY="1" />
</favorites>
The commented out content is the application that defines the hotSeat display on the desktop. The appwidget tag is used to add widgets. The desktop clock can be added like this. The folder tag defines a desktop folder, which can define the applications to be stored in the folder. .
2. Modify the first screen application position
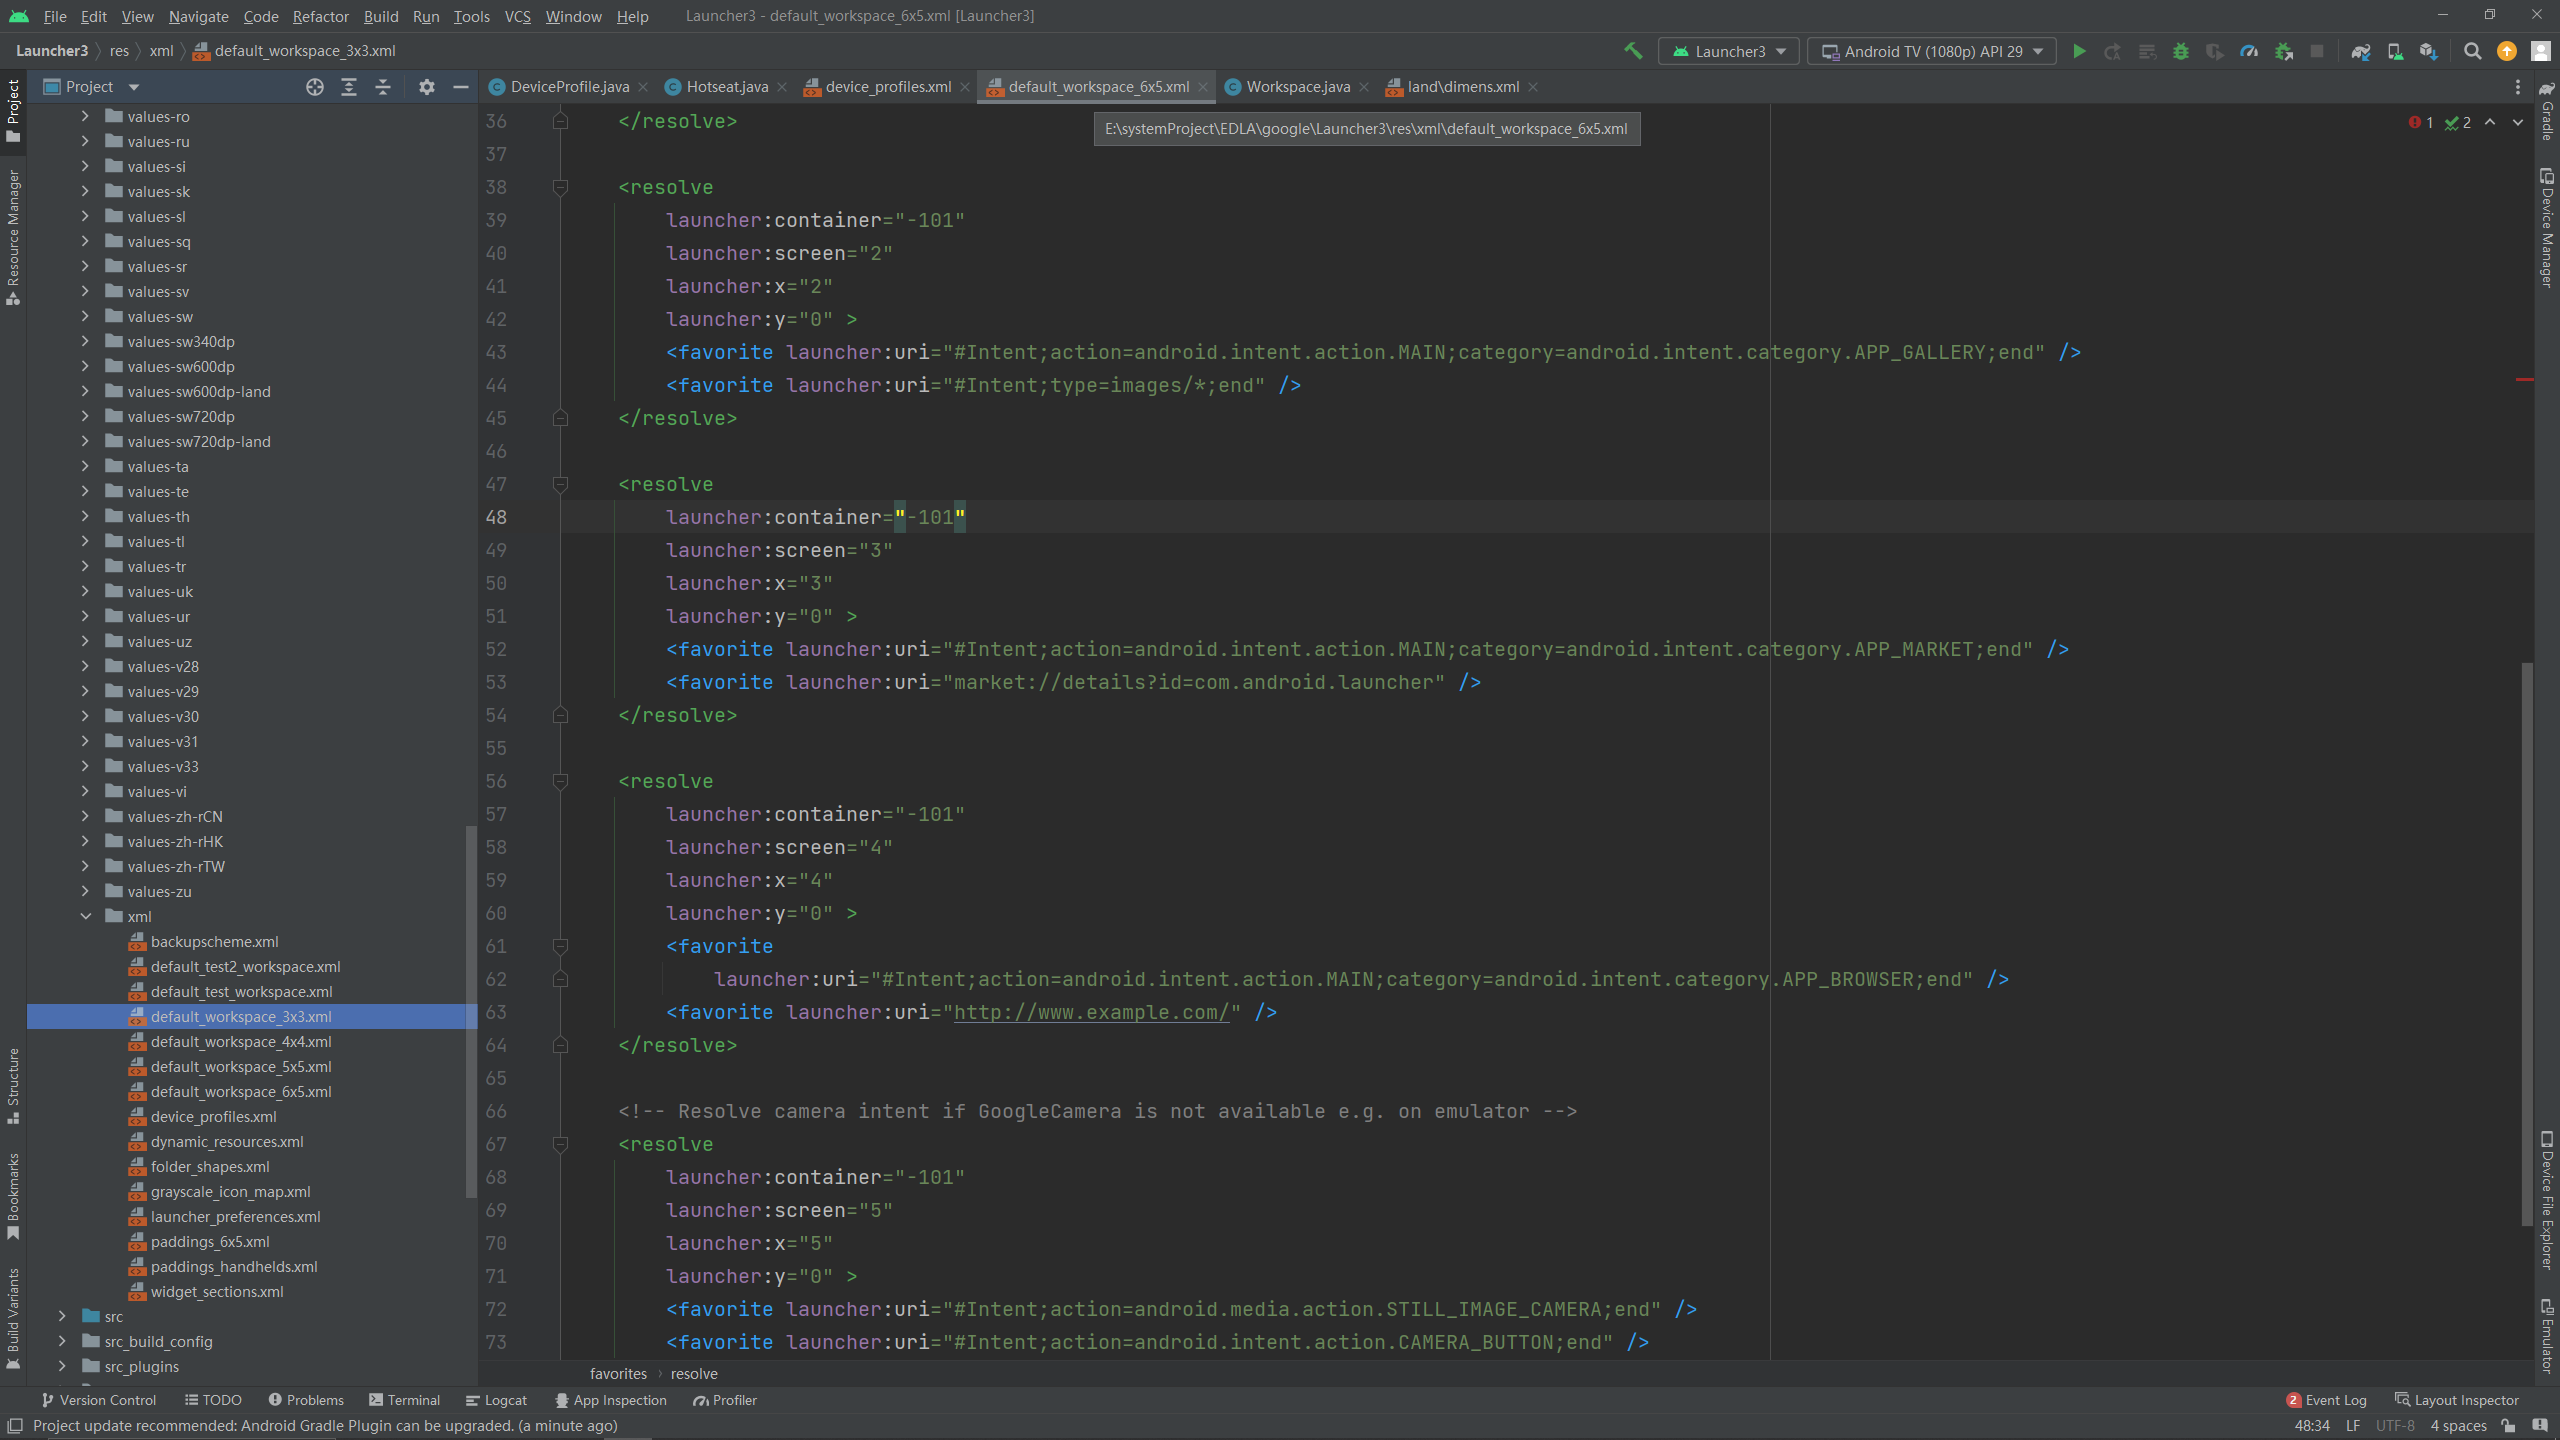
Like the Google search box, the number of rows and columns of the desktop is defined in the device_profiles.xml file, and then the modified location is determined based on whether the system reads the partner_default_layout.xml layout file; (1) If it is read, it is in partner_default_layout.xml Define the package name, type and location information of the application. For example, <favorite screen="0" x="5" y="3" packageName="com.android.vending" className="com.android.vending.AssetBrowserActivity"/>add the Google Store app in the 6th column of screen="0" (first screen) and the 4th row of the grid. (2) If the partner_default_layout.xml layout file is not read, modify the application location in the corresponding X×X.xml.
3. Modification of the bottom taskbar and navigation bar
1. If the hotSeat application is set to be at the bottom, that is, the container="-101" tag defined in partner_default_layout.xml (part of the code commented out in the file), then the application fixed at the bottom will be displayed on the desktop. Display the recent taskbar. If hotSeat pinned applications are blocked, the recent taskbar will be displayed by default to replace the pinned applications. The number of icons displayed in the recent taskbar is related to the launcher:numHotseatIcons="0" attribute in the device_profiles.xml file. , here I set numHotSeatIcon=0 to not display the recent taskbar. If you want to remove the taskbar, you can use this method. There are other blogs that remove the taskbar by setting the isTablet attribute to false , which means setting the device to On the mobile phone screen, the recent taskbar is not displayed on the mobile phone screen, and the navigation bar will be centered by default. I have tried this method but it does not work on large-screen devices and cannot achieve the desired effect. You can read what he wrote: Large-screen devices Navigation bar right
2. If you use my method, set the number of icons displayed by hotSeat to 0: launcher:numHotseatIcons="0"
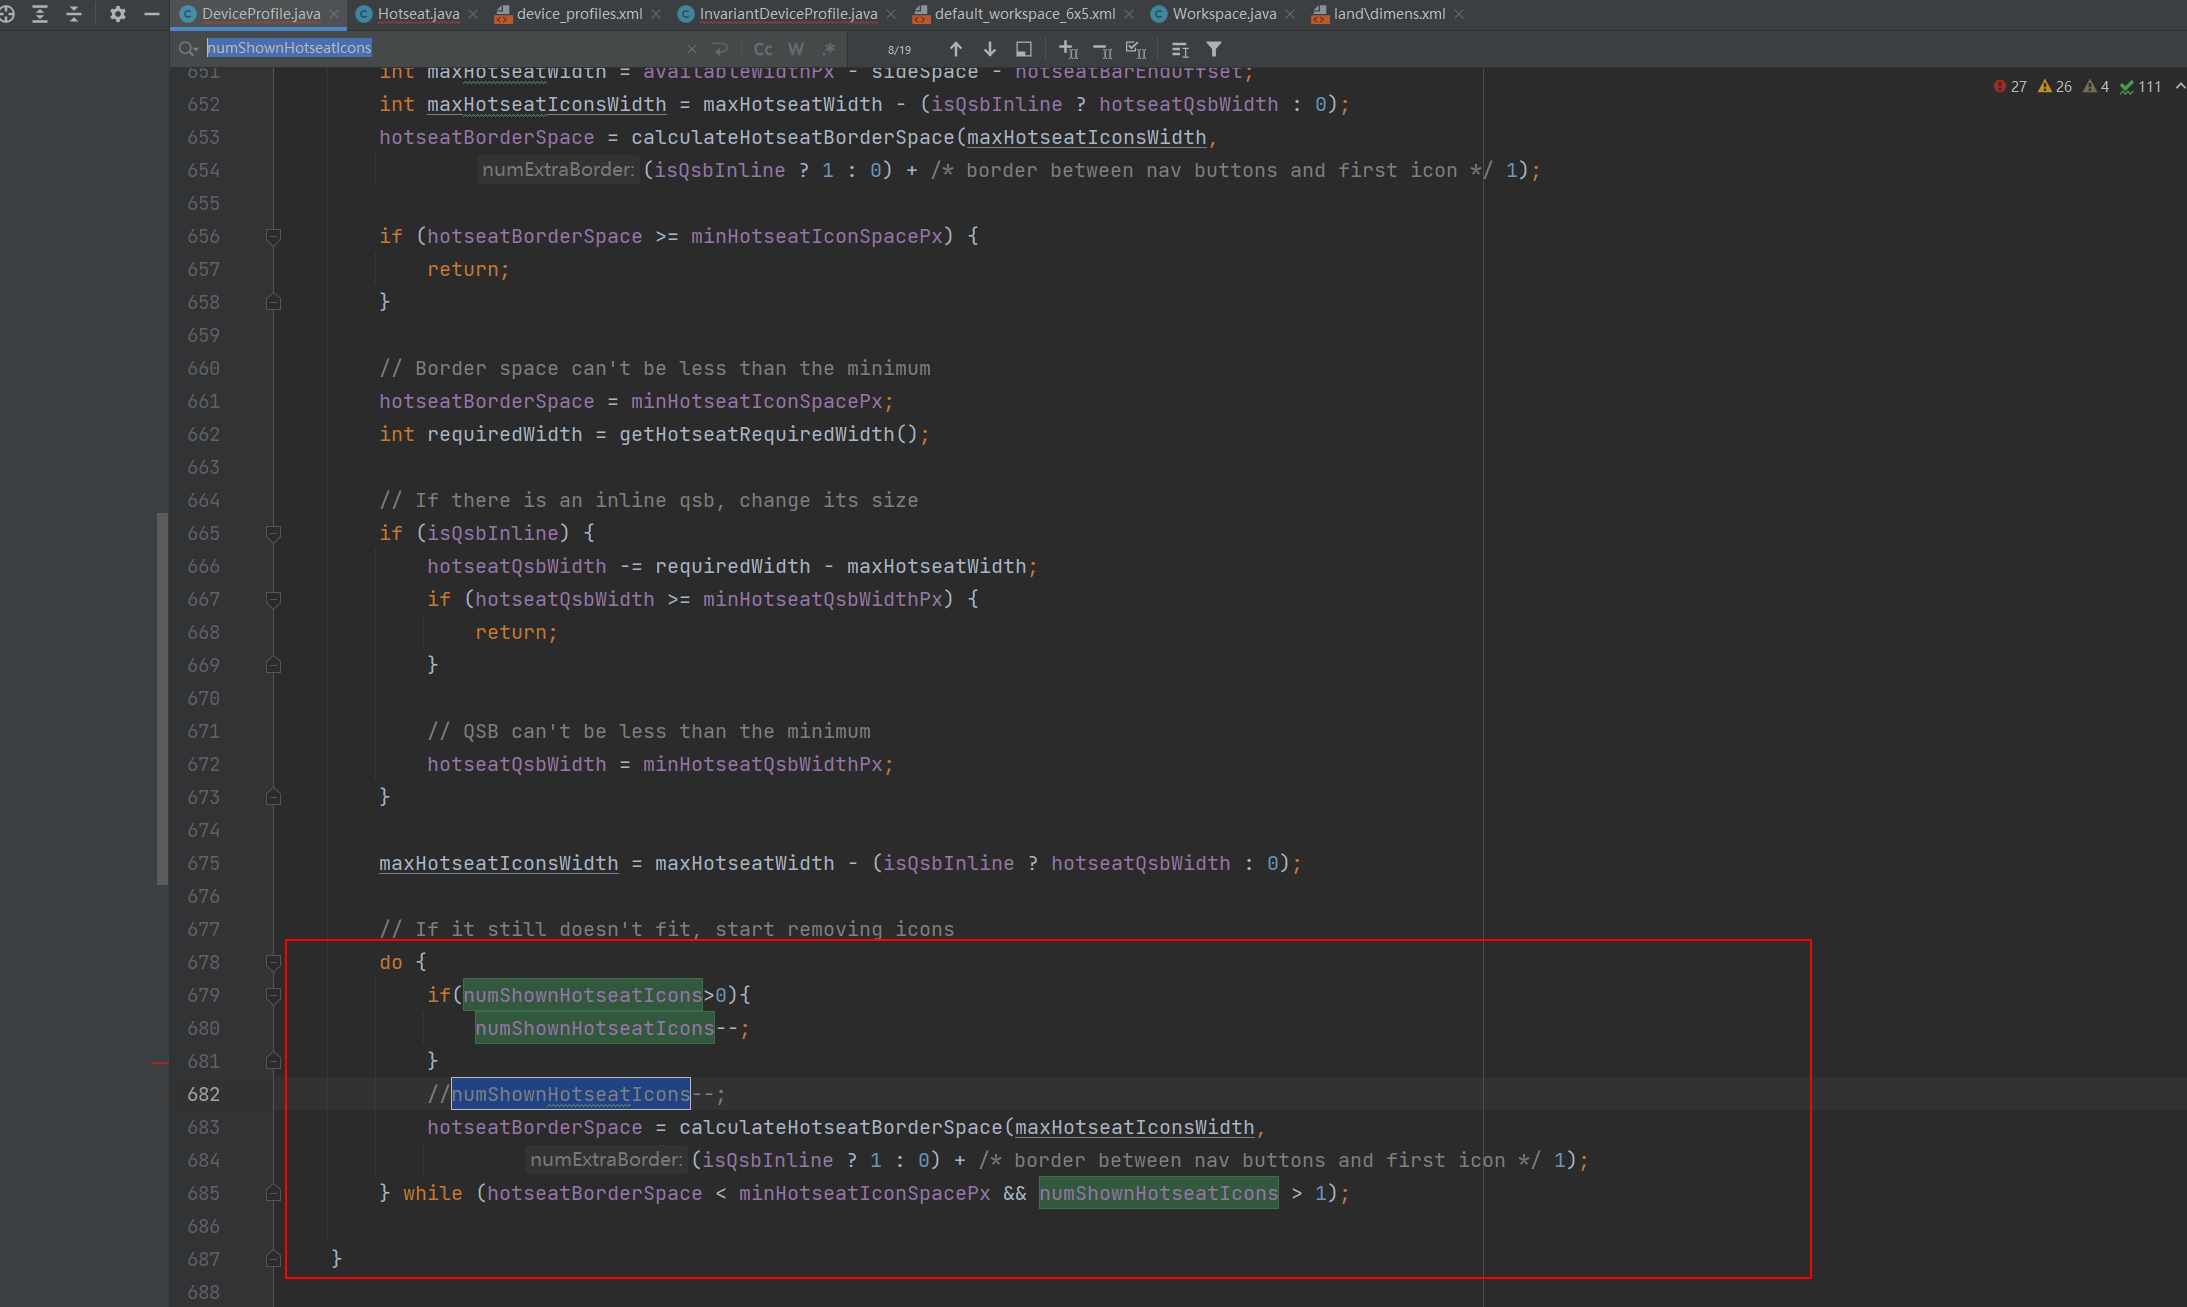
If you compile it directly, a runtime exception will occur during runtime. By grabbing the log, you will find that there are many places in the source code that will be removed when calculating the layout. Take numHotseatIcons, and we know that the divisor cannot be 0, so the desktop crashes with an error. At this time, we need to modify the place where the exception is caused ( note that setting numHotseatIcons to 1 and 0 will cause an exception , because there is a -1 operation on numHotseatIcons). The modified location is as follows:
com/android/launcher3/DeviceProfile.java
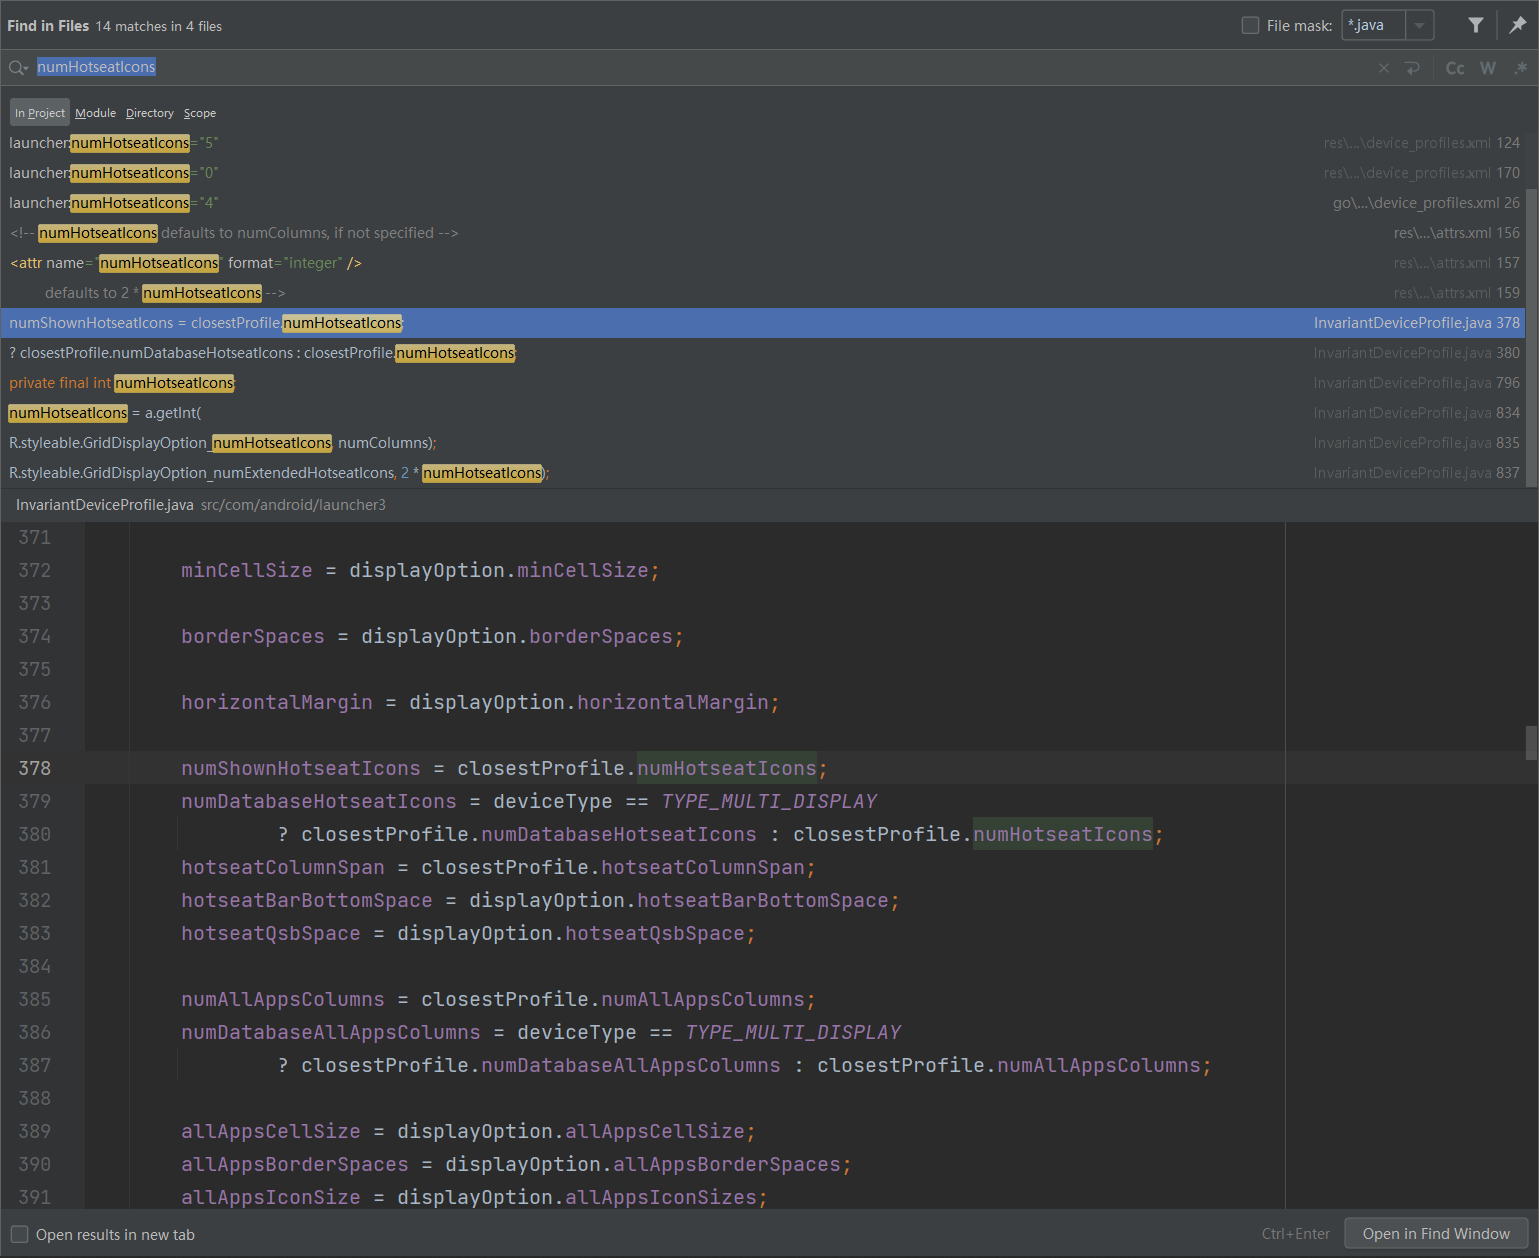
In this category, press ctrl+F to search for numShownHotseatIcons. All calculations related to numShownHotseatIcons will be judged. If it is 0, you can change the algorithm to another one. You

can also search and track the variable numHotseatIcons globally in device_profiles.xml first, and track it step by step. Go to the DeviceProfile.java class, which will make the whole process clearer.
Here is the specific location of my modifications. The screenshots have line numbers for your reference:
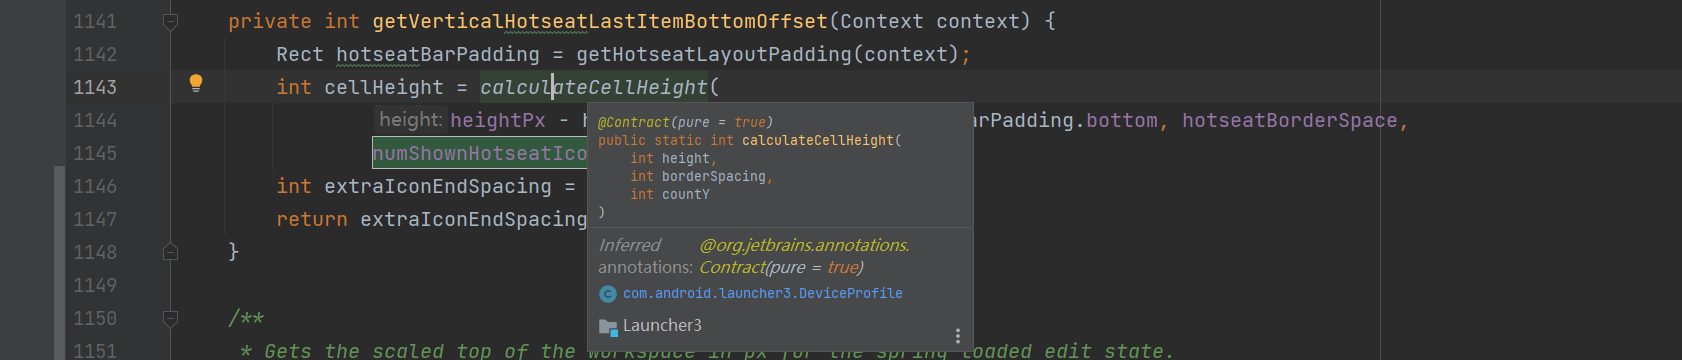
Notice this method, which is also used in it.
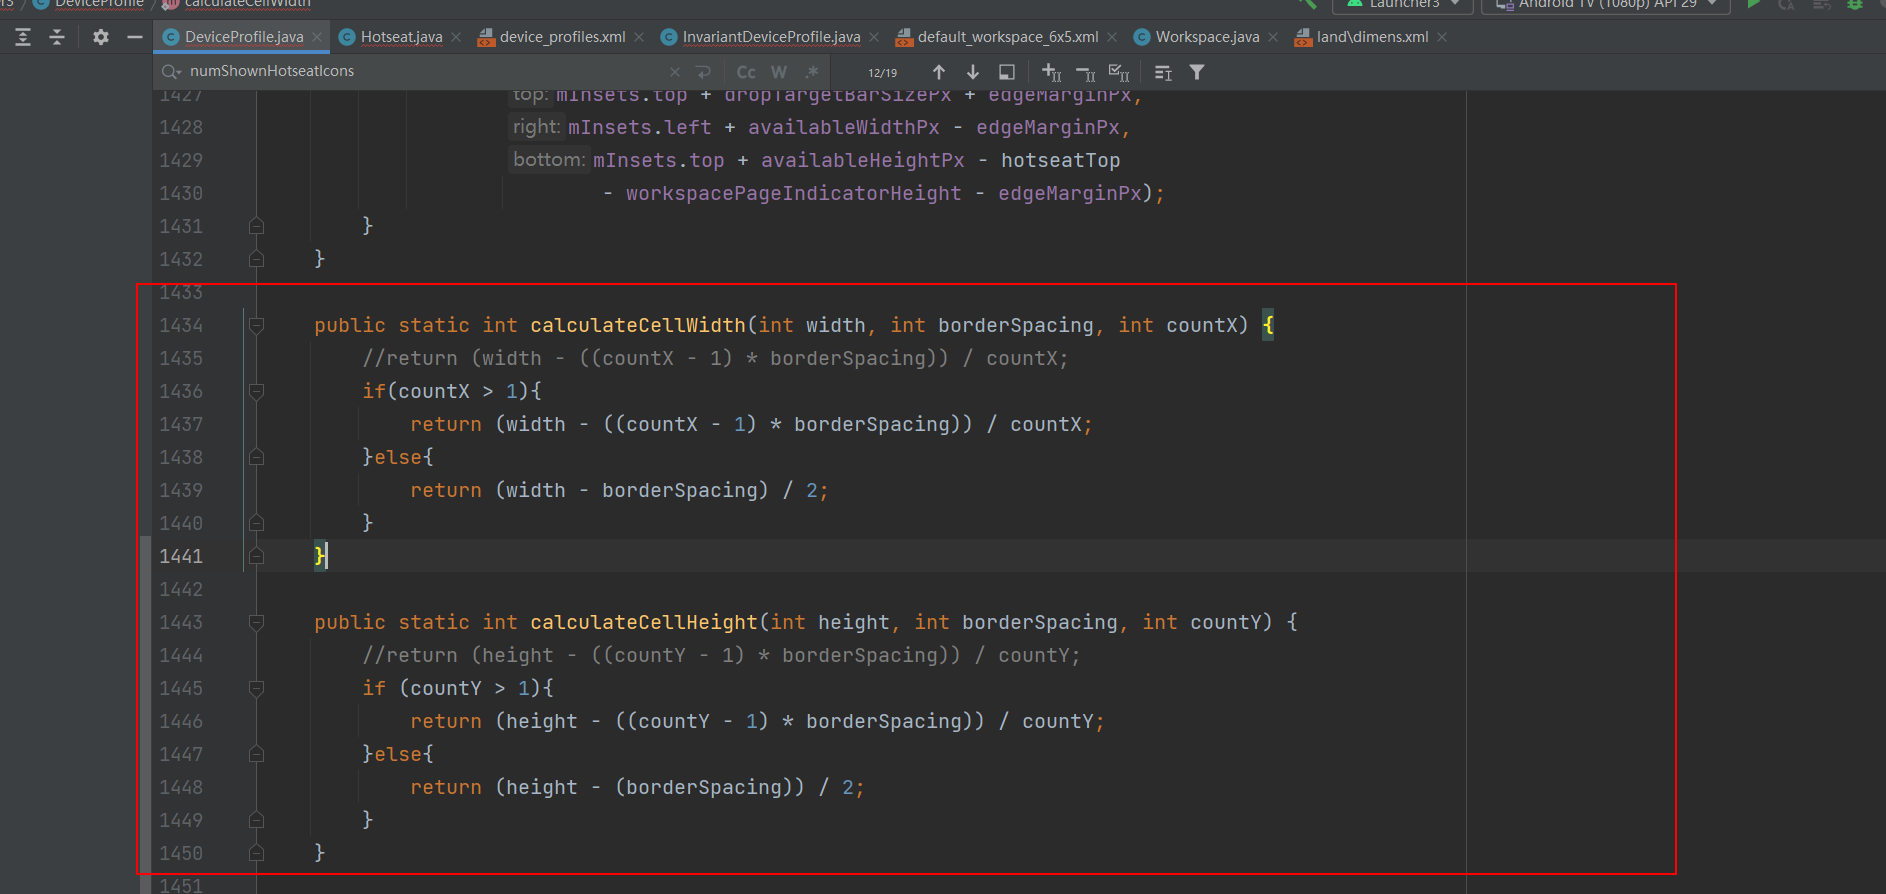
Modify these two calculation methods
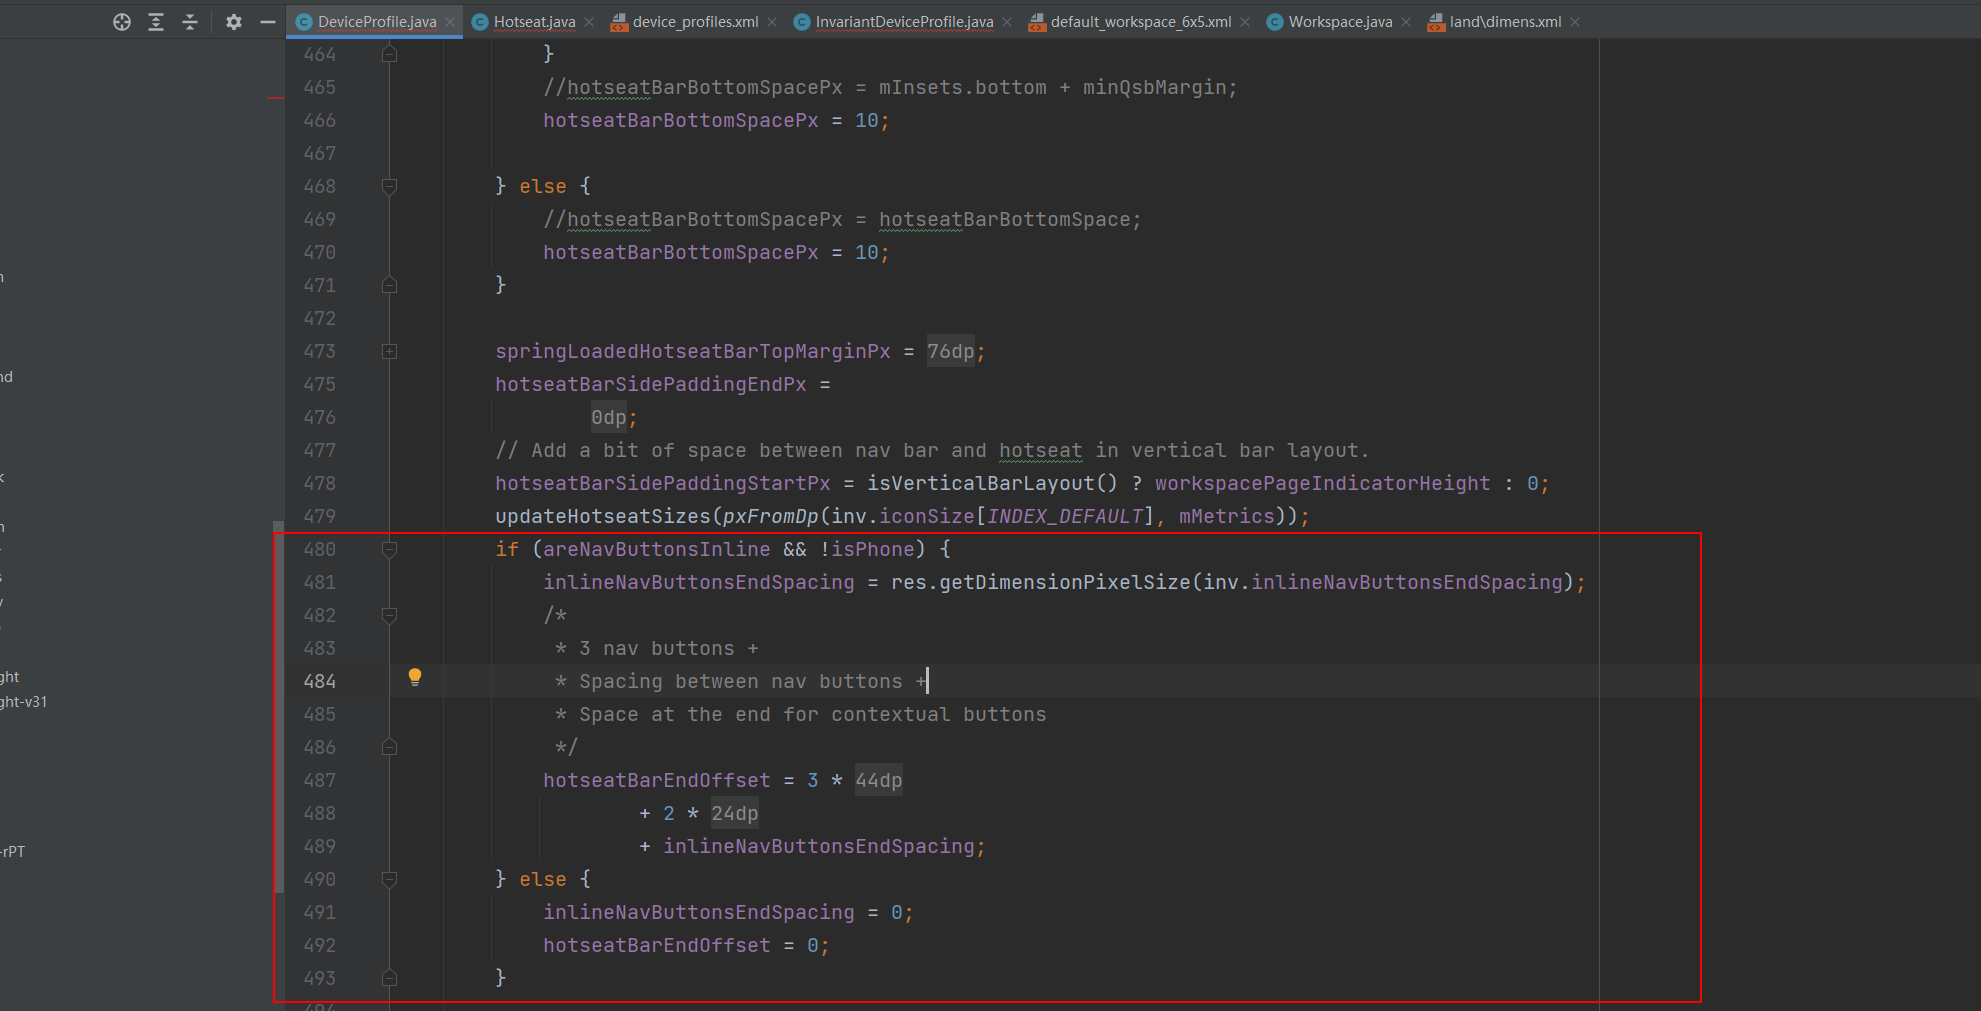
and modify them here. We have removed the recent taskbar! !
4. The next step is to center the navigation bar
First, we observe the device_profiles.xml file and notice that there is this variable.

Looking for this variable, we trace the code and find that this variable controls the dp value of the bottom navigation bar from the right border. The larger the value, the closer it is to the middle. With this idea, let It is not difficult to center the navigation bar. First of all, we know that the navigation bar is centered on the right because the system determines that it is a large-screen device tablet. Since we want to retain the tablet attribute, we cannot control the navigation bar to be centered by changing the device to mobile mode. So you can control the right margin!
Changing this value is very simple. You only need to change the referenced resource value.

We enter the file and change the right margin.
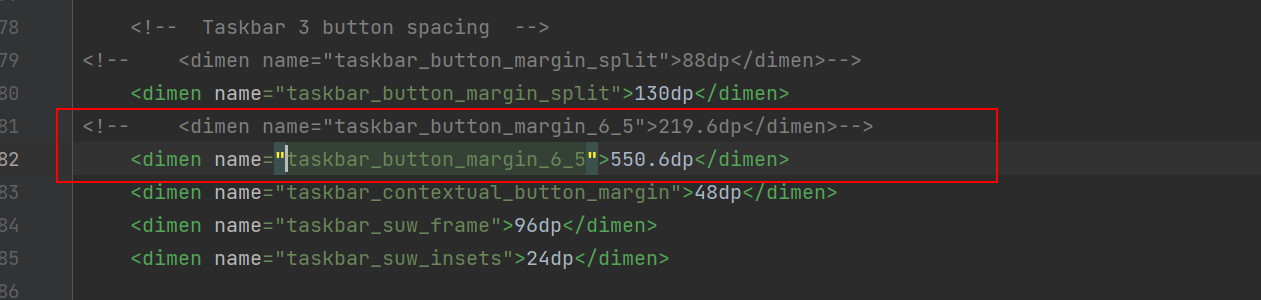
You can debug this value slowly. I have it centered here.
5. Summary
Write a summary: First, determine whether the system loads the layout file in partner_gms, and then modify the layout code. I have studied this source code for more than a week. There is insufficient information on the launcher3 of Android 13 on the Internet. In the end, I have to study the source code tracking code myself, and compile and debug during the period. Dozens of times! !
final effect