Compiler: IDEA
Database: Mysql 8.0
Project requirements: Realize the transfer from Zhang San to Li Si
If you have a project of your own, you can modify it based on this article
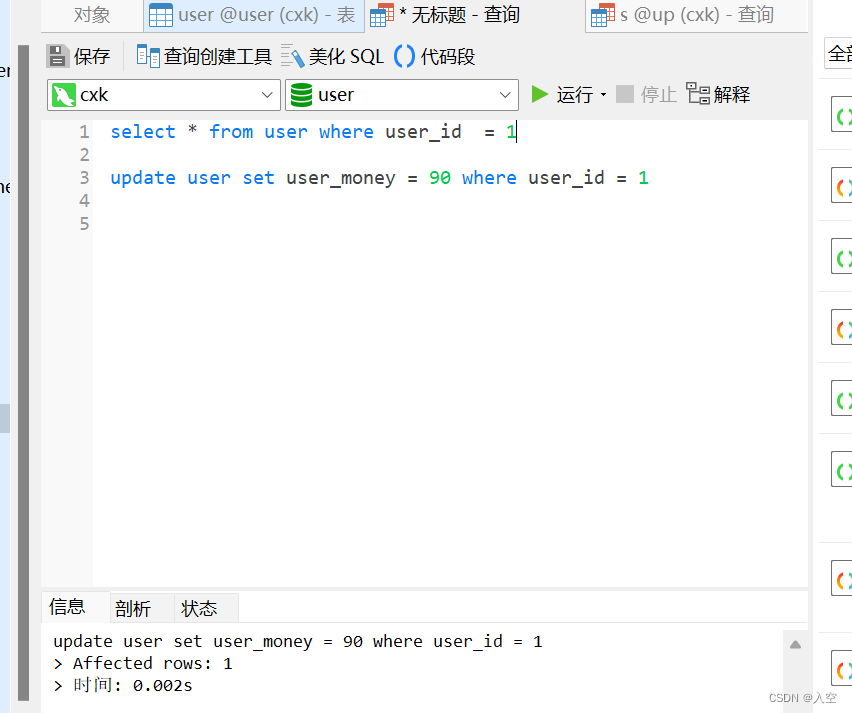
1. Import the database
-- Because the goal of our project is to implement a simple transfer, we only use one user table with a total of three fields, id, name, and balance.

You can build it yourself, or you can use the following
SET NAMES utf8mb4;
SET FOREIGN_KEY_CHECKS = 0;

-- ----------------------------
-- Table structure for user
-- ----------------------------
DROP TABLE IF EXISTS `user`;
CREATE TABLE `user`  (
  `user_id` int(11) NOT NULL,
  `user_name` varchar(50) CHARACTER SET utf8mb4 COLLATE utf8mb4_0900_ai_ci NULL DEFAULT NULL,
  `user_money` float(50, 0) NULL DEFAULT NULL,
  PRIMARY KEY (`user_id`) USING BTREE
) ENGINE = InnoDB CHARACTER SET = utf8mb4 COLLATE = utf8mb4_0900_ai_ci ROW_FORMAT = Dynamic;

-- ----------------------------
-- Records of user
-- ----------------------------
INSERT INTO `user` VALUES (1, '张三', 90);
INSERT INTO `user` VALUES (2, '李四', 20);
INSERT INTO `user` VALUES (3, '王五', 90);
INSERT INTO `user` VALUES (4, '赵六', 0);

SET FOREIGN_KEY_CHECKS = 1;
Know what functions you need and prepare the corresponding SQL statements

2. Create project
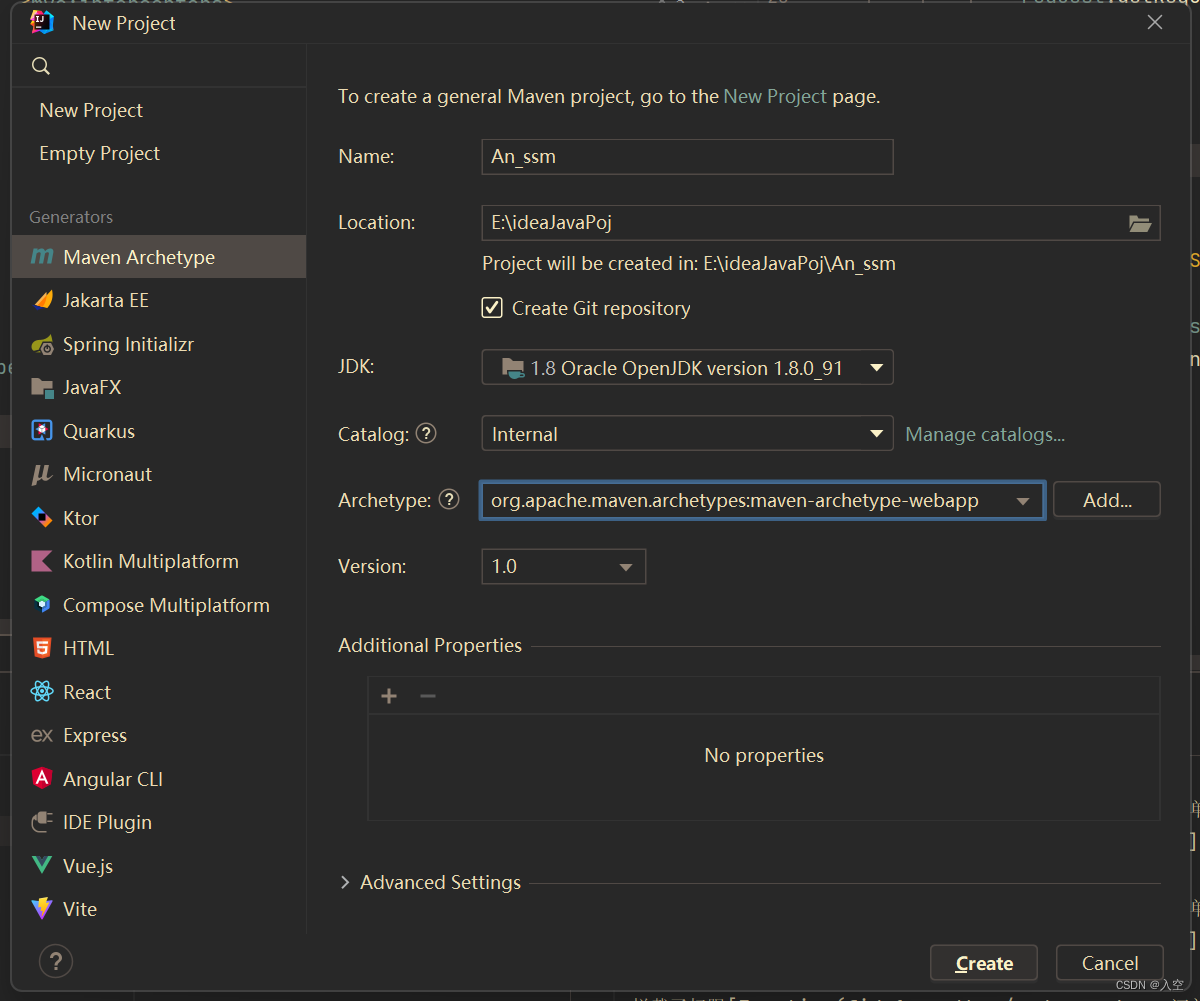
(1) Create directory structure and classes
Controller, Dao, entity, service

( ![]() It’s a class,
It’s a class, ![]() it’s an interface)
it’s an interface)
Then add a Tom cat

3. Guide package
Open pom.xml, remember to brush it after pasting it. If you can't brush it, you can right-click --> meven --> Reload project

<?xml version="1.0" encoding="UTF-8"?>

<project xmlns="http://maven.apache.org/POM/4.0.0" xmlns:xsi="http://www.w3.org/2001/XMLSchema-instance"
         xsi:schemaLocation="http://maven.apache.org/POM/4.0.0 http://maven.apache.org/xsd/maven-4.0.0.xsd">
  <modelVersion>4.0.0</modelVersion>

  <groupId>com.fix</groupId>
  <artifactId>hellossm</artifactId>
  <version>1.0-SNAPSHOT</version>
  <packaging>war</packaging>

  <name>hellossm Maven Webapp</name>
  <!-- FIXME change it to the project's website -->
  <url>http://www.example.com</url>

  <!-- 统一 spring 版本  -->
  <properties>
    <spring.version>5.1.8.RELEASE</spring.version>
  </properties>

  <dependencies>
    <dependency>
      <groupId>org.springframework</groupId>
      <artifactId>spring-test</artifactId>
      <version>${spring.version}</version>
    </dependency>
    <!--    日志-->
    <dependency>
      <groupId>log4j</groupId>
      <artifactId>log4j</artifactId>
      <version>1.2.17</version>
    </dependency>
    <!--    测试-->
    <dependency>
      <groupId>junit</groupId>
      <artifactId>junit</artifactId>
      <version>4.12</version>
      <scope>test</scope>
    </dependency>

    <!-- spring   -->
    <dependency>
      <groupId>org.springframework</groupId>
      <artifactId>spring-webmvc</artifactId>
      <version>${spring.version}</version>
    </dependency>
    <!-- 切入点解析 -->
    <dependency>
      <groupId>org.aspectj</groupId>
      <artifactId>aspectjweaver</artifactId>
      <version>1.8.7</version>
    </dependency>
    <dependency>
      <groupId>org.springframework</groupId>
      <artifactId>spring-jdbc</artifactId>
      <version>${spring.version}</version>
    </dependency>
    <!-- springmvc 返回json数据   -->
    <dependency>
      <groupId>com.fasterxml.jackson.core</groupId>
      <artifactId>jackson-databind</artifactId>
      <version>2.9.8</version>
    </dependency>
    <!-- servlet,jsp ,jstl -->
    <dependency>
      <groupId>javax.servlet</groupId>
      <artifactId>javax.servlet-api</artifactId>
      <version>3.1.0</version>
      <scope>provided</scope>
    </dependency>
    <dependency>
      <groupId>javax.servlet.jsp</groupId>
      <artifactId>jsp-api</artifactId>
      <version>2.0</version>
      <scope>provided</scope>
    </dependency>
    <dependency>
      <groupId>javax.servlet</groupId>
      <artifactId>jstl</artifactId>
      <version>1.2</version>
    </dependency>

    <!--    这里装的是mysql5的话可以换成5-->
    <dependency>
      <groupId>mysql</groupId>
      <artifactId>mysql-connector-java</artifactId>
      <version>8.0.15</version>
    </dependency>
    <!--  阿里的连接池 -->
    <dependency>
      <groupId>com.alibaba</groupId>
      <artifactId>druid</artifactId>
      <version>1.1.10</version>
    </dependency>
    <!-- mybatis 依赖  -->
    <dependency>
      <groupId>org.mybatis</groupId>
      <artifactId>mybatis</artifactId>
      <version>3.3.0</version>
    </dependency>
    <!-- mybatis 跟spring整合 依赖  -->
    <dependency>
      <groupId>org.mybatis</groupId>
      <artifactId>mybatis-spring</artifactId>
      <version>1.2.3</version>
    </dependency>
    <!-- 分页插件 pagehelper -->
    <dependency>
      <groupId>com.github.pagehelper</groupId>
      <artifactId>pagehelper</artifactId>
      <version>5.1.8</version>
    </dependency>

    <dependency>
      <groupId>org.projectlombok</groupId>
      <artifactId>lombok</artifactId>
      <version>1.18.12</version>
    </dependency>
  </dependencies>
</project>
4. Configuration file
(1) Create configuration file
Create five files in the resources directory under the directory
jdbc.properties mybatis-config.xml spring-dao.xml spring-web-xml
userMapper.xml (to build the mapper package in resources and put it in the package)

jdbc.properties
(Replace your mysql account password and database name)
jdbc.driver=com.mysql.cj.jdbc.Driver
jdbc.url=jdbc:mysql://localhost:3306/up?useUnicode=true&characterEncoding=utf8&serverTimezone=Asia/Shanghai
jdbc.username=root
jdbc.password=a123
mybatis-config.xml
<?xml version="1.0" encoding="UTF-8" ?>
<!DOCTYPE configuration
        PUBLIC "-//mybatis.org//DTD Config 3.0//EN"
        "http://mybatis.org/dtd/mybatis-3-config.dtd">
<configuration>
    <settings>
        <!-- 使用jdbc 获取数据库自增主键 -->
        <setting name="useGeneratedKeys" value="true"/>
<!--    驼峰命名转换-->
<!--        <setting name="mapUnderscoreToCamelCase"  value="true"/>-->
        <!-- 打印查询语句 打印mybatis使用的sql语句 -->
        <setting name="logImpl" value="STDOUT_LOGGING" />
    </settings>
</configuration>
spring-dao.xml
<?xml version="1.0" encoding="UTF-8"?>
<beans xmlns="http://www.springframework.org/schema/beans"
       xmlns:xsi="http://www.w3.org/2001/XMLSchema-instance"
       xmlns:context="http://www.springframework.org/schema/context"
       xmlns:tx="http://www.springframework.org/schema/tx"
       xsi:schemaLocation="http://www.springframework.org/schema/beans
 http://www.springframework.org/schema/beans/spring-beans.xsd
 http://www.springframework.org/schema/context
 http://www.springframework.org/schema/context/spring-context.xsd
 http://www.springframework.org/schema/tx
 http://www.springframework.org/schema/tx/spring-tx.xsd">

    <!-- 扫描service 包下所有使用注解的类 -->
    <context:component-scan base-package="com.an"/>

    <!-- 配置整合 mybatis 过程 -->
    <context:property-placeholder location="classpath:jdbc.properties"/>

    <!-- 数据库连接池 -->
    <bean id="dataSource"
          class="com.alibaba.druid.pool.DruidDataSource" destroy-method="close">
        <!-- 数据库连接相关信息 -->
        <property name="url" value="${jdbc.url}"/>
        <property name="driverClassName" value="${jdbc.driver}"/>
        <property name="username" value="${jdbc.username}"/>
        <property name="password" value="${jdbc.password}"/>
    </bean>

    <bean id="sessionFactory" class="org.mybatis.spring.SqlSessionFactoryBean">
        <!-- 注入连接池 -->
        <property name="dataSource" ref="dataSource"/>
        <!-- 配置mybatis 全局配置文件 mybatis-config.xml -->
        <property name="configLocation" value="classpath:mybatis-config.xml"/>
        <!-- 扫描entity  -->
        <property name="typeAliasesPackage" value="com.an.entity"/>
        <!-- 扫描 mapper   -->
        <property name="mapperLocations" value="classpath:mapper/*.xml"/>
    </bean>

    <!-- 配置扫描dao 接口包,动态实现DAO 接口,注入spring 容器 -->
    <bean class="org.mybatis.spring.mapper.MapperScannerConfigurer">
        <!-- 注入 sessionFactory -->
        <property name="sqlSessionFactoryBeanName" value="sessionFactory"/>
        <!-- 给出扫描dao 接口包 -->
        <property name="basePackage" value="com.an.dao"/>
    </bean>

    <!-- 事务管理器 -->
    <bean id="txManager" class="org.springframework.jdbc.datasource.DataSourceTransactionManager">
        <!--  注入连接池  -->
        <property name="dataSource" ref="dataSource"/>
    </bean>
    <!-- 基于注解的声明式事务  -->
    <tx:annotation-driven transaction-manager="txManager"/>

</beans>
spring-web.xml
<?xml version="1.0" encoding="UTF-8"?>
<beans xmlns="http://www.springframework.org/schema/beans"
       xmlns:xsi="http://www.w3.org/2001/XMLSchema-instance"
       xmlns:context="http://www.springframework.org/schema/context"
       xmlns:mvc="http://www.springframework.org/schema/mvc"
       xsi:schemaLocation="
        http://www.springframework.org/schema/beans http://www.springframework.org/schema/beans/spring-beans.xsd
        http://www.springframework.org/schema/context http://www.springframework.org/schema/context/spring-context.xsd
        http://www.springframework.org/schema/mvc http://www.springframework.org/schema/mvc/spring-mvc.xsd">

    <!-- 扫描service 包下所有使用注解的类 -->
    <context:component-scan base-package="com.an"/>

    <!-- 配置springmvc  开启注解-->
    <mvc:default-servlet-handler/>

<!--    中文乱码问题解决-->
    <mvc:annotation-driven>
        <mvc:message-converters>
            <bean class="org.springframework.http.converter.StringHttpMessageConverter">
                <property name="supportedMediaTypes">
                    <list>
                        <value>text/plain;charset=UTF-8</value>
                        <value>text/html;charset=UTF-8</value>
                        <value>application/json;charset=UTF-8</value>
                    </list>
                </property>
            </bean>
        </mvc:message-converters>
    </mvc:annotation-driven>

    <!-- 视图解析器   -->
    <bean class="org.springframework.web.servlet.view.InternalResourceViewResolver">
        <property name="prefix" value="/WEB-INF/pages/"></property>
        <property name="suffix" value=".jsp"></property>
    </bean>

</beans>
userMapper.xml
Fill in the sql statement here #{ } is a placeholder
<mapper namespace="com.an.dao.UserDao"> specifies the interface. The tag id in the mapper tag specifies the interface method, and the placeholder is mapped to the parameters passed in by the method.
<?xml version="1.0" encoding="UTF-8"?>
<!DOCTYPE mapper PUBLIC "-//mybatis.org//DTD Mapper 3.0//EN" "http://mybatis.org/dtd/mybatis-3-mapper.dtd">
<mapper namespace="com.an.dao.UserDao">
    <select id="selectUser" resultType="User">
        select * from user where user_id = #{uid}
    </select>

    <update id="updateUserMoney">
        update user set user_money = #{money} where user_id = #{uid}
    </update>

</mapper>
(2) web.xml, open spring
<?xml version="1.0" encoding="UTF-8"?>
<web-app xmlns:xsi="http://www.w3.org/2001/XMLSchema-instance" xmlns="http://java.sun.com/xml/ns/javaee"
         xsi:schemaLocation="http://java.sun.com/xml/ns/javaee http://java.sun.com/xml/ns/javaee/web-app_3_0.xsd"
         id="WebApp_ID" version="3.0">

  <display-name>ssm</display-name>

<--  开启spring -->
  <servlet>
    <servlet-name>spring</servlet-name>
    <servlet-class>org.springframework.web.servlet.DispatcherServlet</servlet-class>
    <init-param>
      <param-name>contextConfigLocation</param-name>
      <param-value>classpath:spring-*.xml</param-value>
    </init-param>
    <load-on-startup>1</load-on-startup>
  </servlet>
  <servlet-mapping>
    <servlet-name>spring</servlet-name>
    <url-pattern>/</url-pattern>
  </servlet-mapping>

</web-app>
3. Category
If you have built the package as before , you can start writing classes.
(1) Entity
Package: entity
User
The variable name in the entity class is the same as the name of the database (to avoid unnecessary conflicts)
Lombok is used here to dynamically generate get set
package com.an.entity;

import lombok.Data;

@Data
public class User {
    int user_id;
    String user_name;
    float user_money;
}
(2) Dao
UserDao
Type interface, used to negotiate with mapper
package com.an.dao;
import com.an.entity.User;
import org.apache.ibatis.annotations.Param;

import java.util.List;

public interface UserDao {
     User selectUser(int uid);
//    查询某人

     int updateUserMoney(@Param("uid") int uid,@Param("money") float money);
//    修改余额,这里用@param是因为要映射到mapper,之前试了不写就会说匹配不到参数
}
(3) Services and service implementation
UserService
Just write it the same as Userdao (don’t write the class name the same)
     package com.an.service;
     import com.an.entity.User;
     import java.util.List;

     public interface UserService {
          User selectUser(int uid);
     //    查询某人

          int updateUserMoney(int uid,float money);
     //    修改余额
     }
UserServiceImpl
The last four letters are capital I, m, p, io, l.
package com.an.service.Impl;

import com.an.dao.UserDao;
import com.an.entity.User;
import com.an.service.UserService;
import org.springframework.beans.factory.annotation.Autowired;
import org.springframework.stereotype.Service;
@Service
public class UserServiceImpl implements UserService {

    @Autowired
    UserDao userdao;

    @Override
    public User selectUser(int uid) {
        System.out.println("selectUser  进入服务层");
        User userAll = userdao.selectUser(uid);
        return userAll;
    }

    @Override
    public int updateUserMoney(int uid,float money) {
        System.out.println("updateUserMoney  进入服务层  uid  -->" +uid  +";  money --> "+ money);
        int succ = userdao.updateUserMoney(uid,money);
        return succ;
    }
}
4. Test
After writing, you can enter the testing process.
We can create a test class here in dao

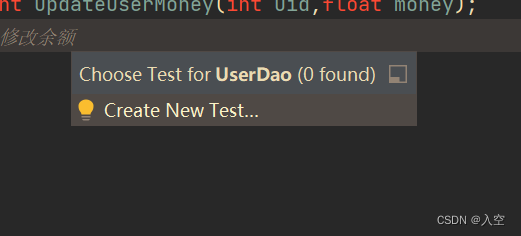

Select junit4 and check the following two methods
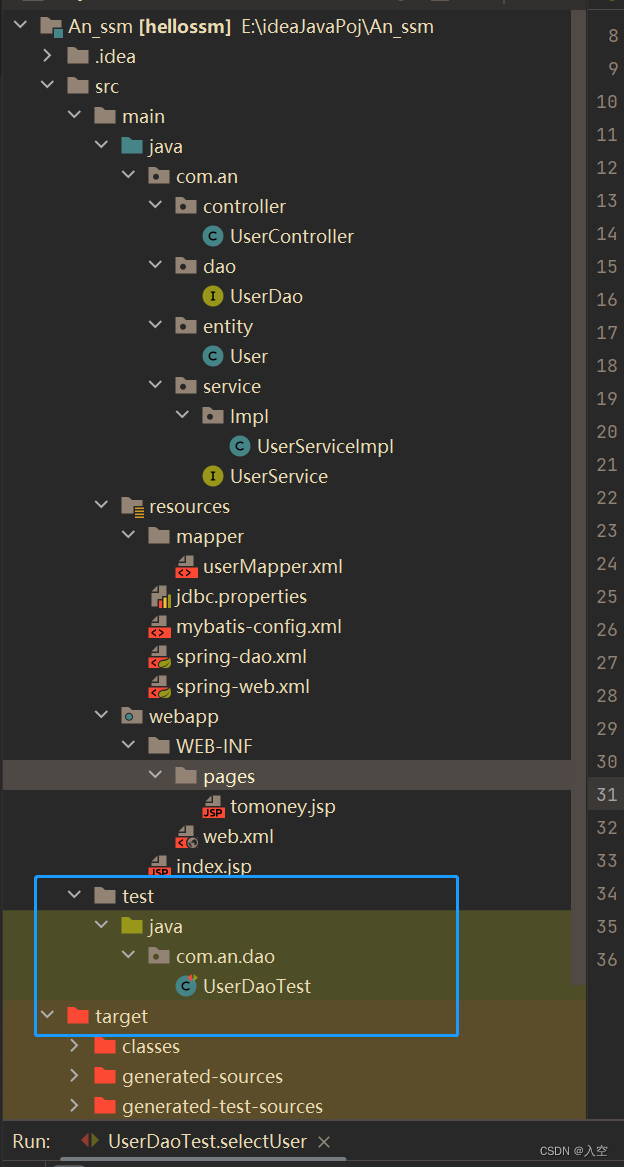
The test class will be placed in this place and will not be run or compiled. The method will be run separately.
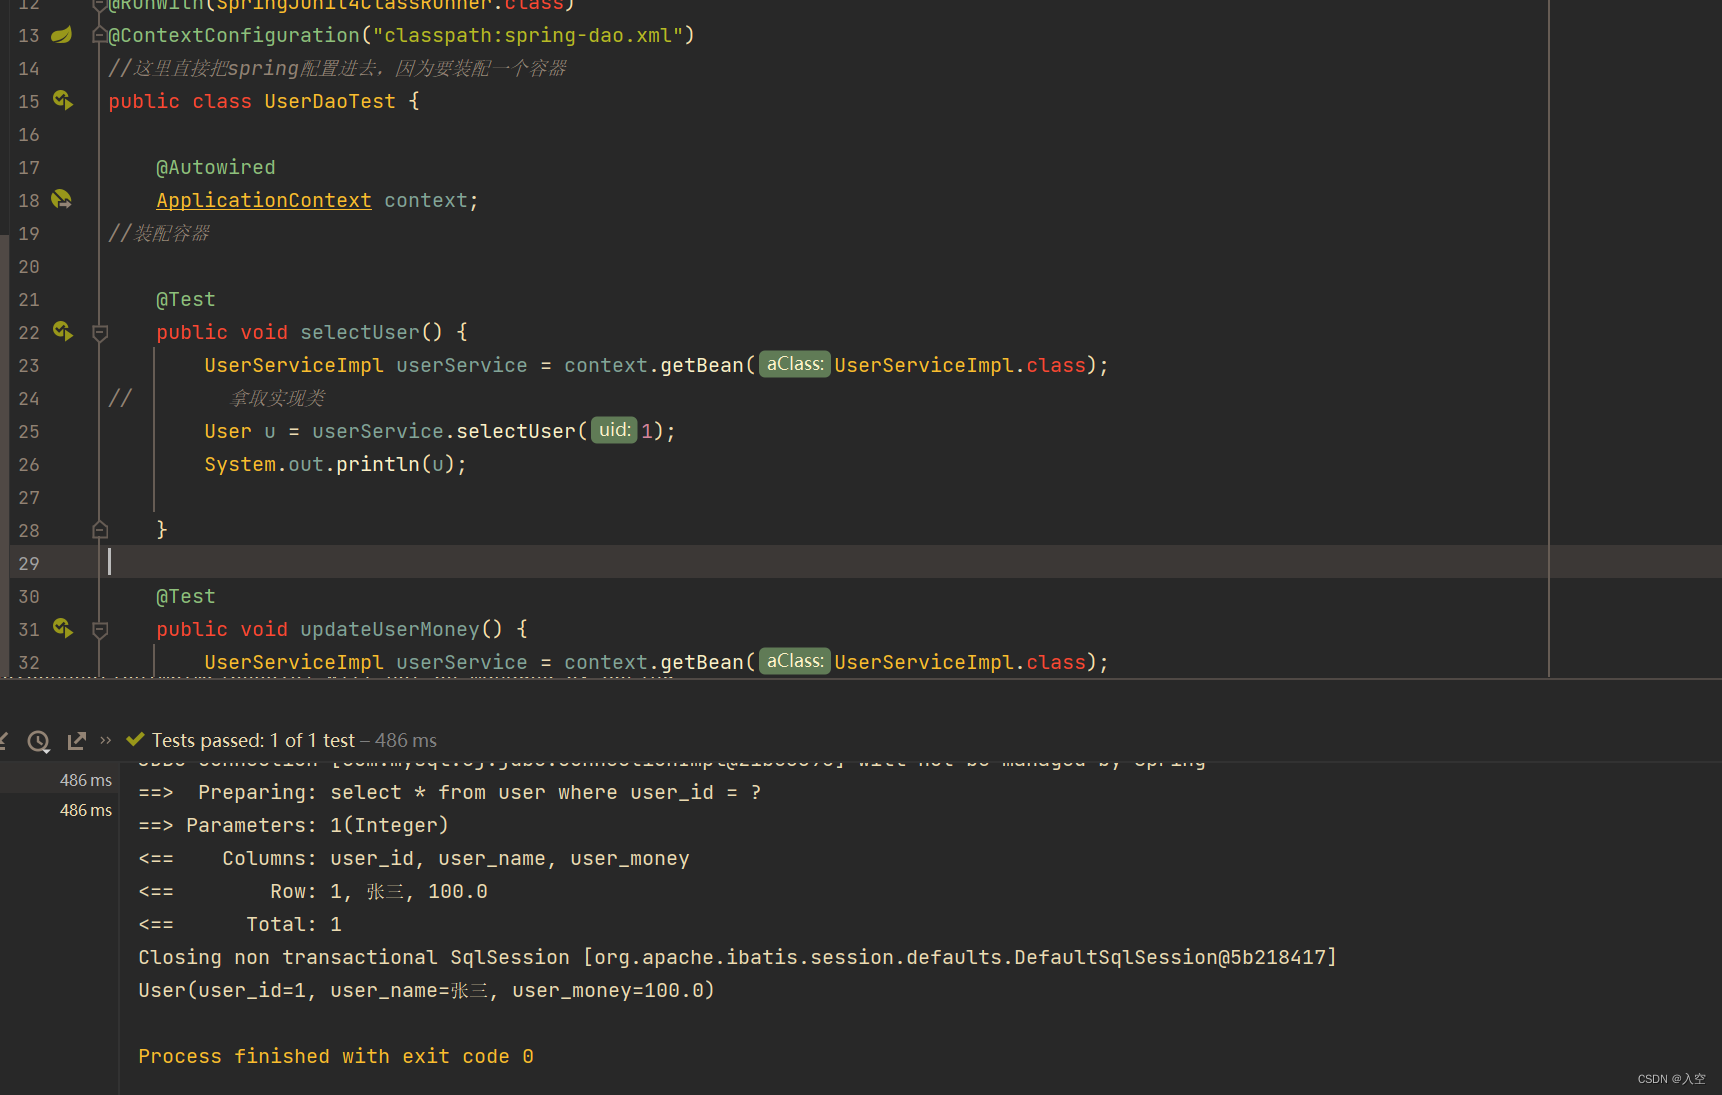
UserDaoTest
start testing
package com.an.dao;
import com.an.entity.User;
import com.an.service.Impl.UserServiceImpl;
import org.junit.Test;
import org.junit.runner.RunWith;
import org.springframework.beans.factory.annotation.Autowired;
import org.springframework.context.ApplicationContext;
import org.springframework.test.context.ContextConfiguration;
import org.springframework.test.context.junit4.SpringJUnit4ClassRunner;
@RunWith(SpringJUnit4ClassRunner.class)
@ContextConfiguration("classpath:spring-dao.xml")
//这里直接把spring配置进去,因为要装配一个容器
public class UserDaoTest {
@Autowired
ApplicationContext context;
//装配容器
@Test
public void selectUser() {
UserServiceImpl userService = context.getBean(UserServiceImpl.class);
// 拿取实现类
User u = userService.selectUser(1);
System.out.println(u);
}
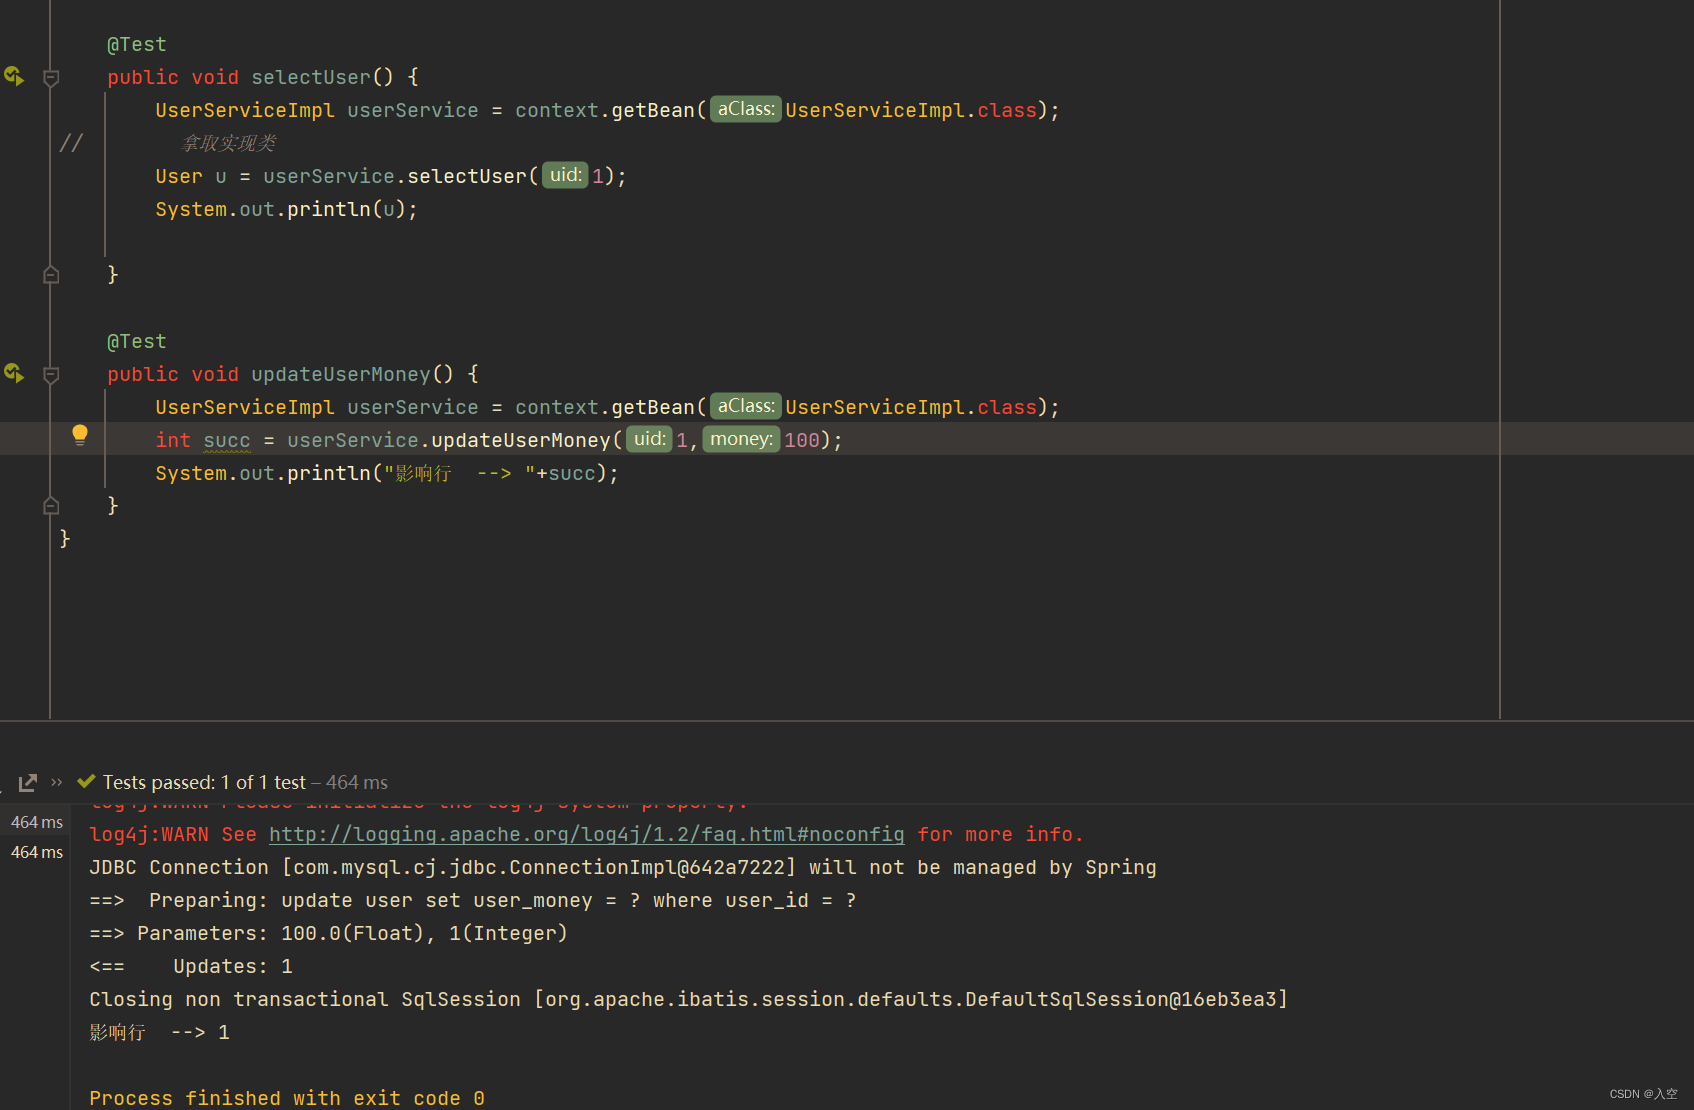
@Test
public void updateUserMoney() {
UserServiceImpl userService = context.getBean(UserServiceImpl.class);
int succ = userService.updateUserMoney(1,100);
System.out.println("影响行 --> "+succ);
}
}All tests were successful
(1) Control category
UserController
After the test is successful, you can write the control class
package com.an.controller;

import com.an.entity.User;
import com.an.service.Impl.UserServiceImpl;
import org.apache.ibatis.annotations.Param;
import org.springframework.beans.factory.annotation.Autowired;
import org.springframework.stereotype.Controller;
import org.springframework.web.bind.annotation.RequestMapping;
import org.springframework.web.bind.annotation.ResponseBody;

@Controller
public class UserController {

    @Autowired
    UserServiceImpl userService;
//    这里直接注入服务实现类

    @RequestMapping("view")
    public String selectUserAll(){
        System.out.println("进入视图");
//        这里直接跳转到user.jsp
        return "tomoney";
//        返回users   ,usersjsp的名字,在spring-web中配置了视图解析器,返回jsp名就会被解析并实现视图
    }

    @RequestMapping("toFoMoney")
    @ResponseBody//不跳转页面,只是返回字符串
    public String updateUserMoney(@Param("uid") int uid,@Param("money")float money,@Param("touid") int touid){
        System.out.println("进入修改余额");
        User u1 =  userService.selectUser(uid);
        float u1moeny = u1.getUser_money();
        float _u1money;//u1转账后的余额
        float _u2money;//u2转账后的余额
//转账人的余额

        User u2 = userService.selectUser(touid);
        float u2money = u2.getUser_money();
//收款人的余额

        if(u1moeny>=money){
            //判断转账人是否满足转账金额,如果余额大于或等于正在转账的金额,那么直接进入转账
            _u1money = u1moeny - money;
             userService.updateUserMoney(uid,_u1money);
            System.out.println(_u1money+" u1转账后余额");
            //            u1新的余额

            _u2money = u2money += money;
            userService.updateUserMoney(touid,_u2money);
            System.out.println(_u1money+" u2收款后余额");
            //            u2新的余额
        }else{
            return "转账失败"+u1.getUser_name()+"的钱不够"+money+"无法转账给"+u2.getUser_name();
        }
        return "转账成功"+u1.getUser_name()+"成功给"+u2.getUser_name()+"转账"+money+"  转账人" + u1.getUser_name()+"余额还有"+_u1money+" 收款人"+u2.getUser_name()+"余额还有"+_u2money;
    }

}
Create the jsp path. This is also the final structure of this article.

index.jsp
<%@ page contentType="text/html;charset=UTF-8" language="java" %>
<html>
<head>
    <title>Title</title>
</head>
<body>
<a href="view">转账</a>
</body>
</html>
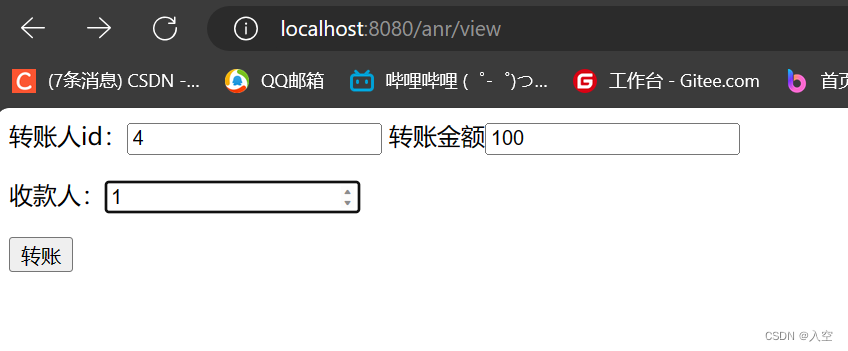
tomoney.jsp
<%@ page contentType="text/html;charset=UTF-8" language="java" %>
<html>
<head>
    <title>Title</title>
</head>
<body>
<form action="toFoMoney">
    <p>转账人id:<input type="number" name="uid">   转账金额<input type="number" name="money" placeholder="转账金额"></p>
    <p>收款人:<input type="number" name="touid">  </p>
    <p><button type="submit">转账</button> </p>
</form>

</body>
</html>
Finally open Tom Cat
final effect:
Click Transfer to enter the controller's view


For example, Zhang San currently has 100 yuanzi and transfers 50 yuanzi to Li Si.

Transfer successful


Zhao Liu has no money and wants to transfer 100 to Zhang San
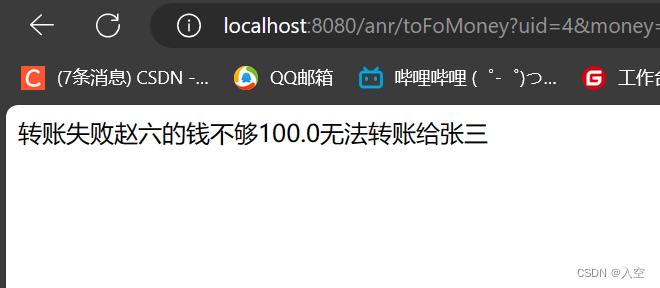
Transfer failed