
For deep learning beginners, the script running form of JupyterNoteBook is obviously more friendly. Relying on the cross-platform features of the Python language, JupyterNoteBook can run in a local offline environment or on an online server. As the leader of the free GPU computing platform, GoogleColab makes JupyterNoteBook's script running mode even more powerful.
This time we used the final version of Bert-vits2 Bert-vits2-v2.3 and the script of JupyterNoteBook to reproduce the popular character Ada Wong from Resident Evil 6.
Debugging JupyterNoteBook locally
As we all know, although GoogleColab can provide GPUs for free for users to use for model training and inference, each JupyterNoteBook file script can only run for up to 12 hours, and then it will be restricted. Therefore, in order to avoid wasting precious GPU usage time, we can go offline Debug your own JupyterNoteBook script. After successful debugging, you can upload the script directly to the GoogleColab platform.
First install it locally through the pip command:
python3 -m pip install jupyter
Then run the startup command:
jupyter notebook
At this point, access the local notebook address:
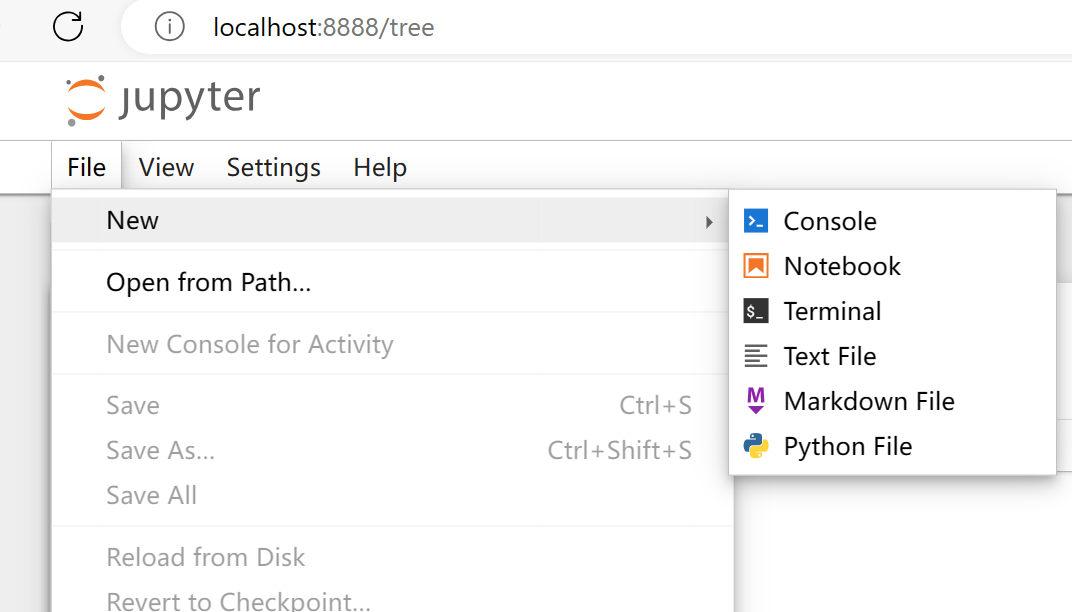
Then select File->New->Notebook.
Enter note content:
#@title 查看显卡
!nvidia-smi
Click to run the cell:
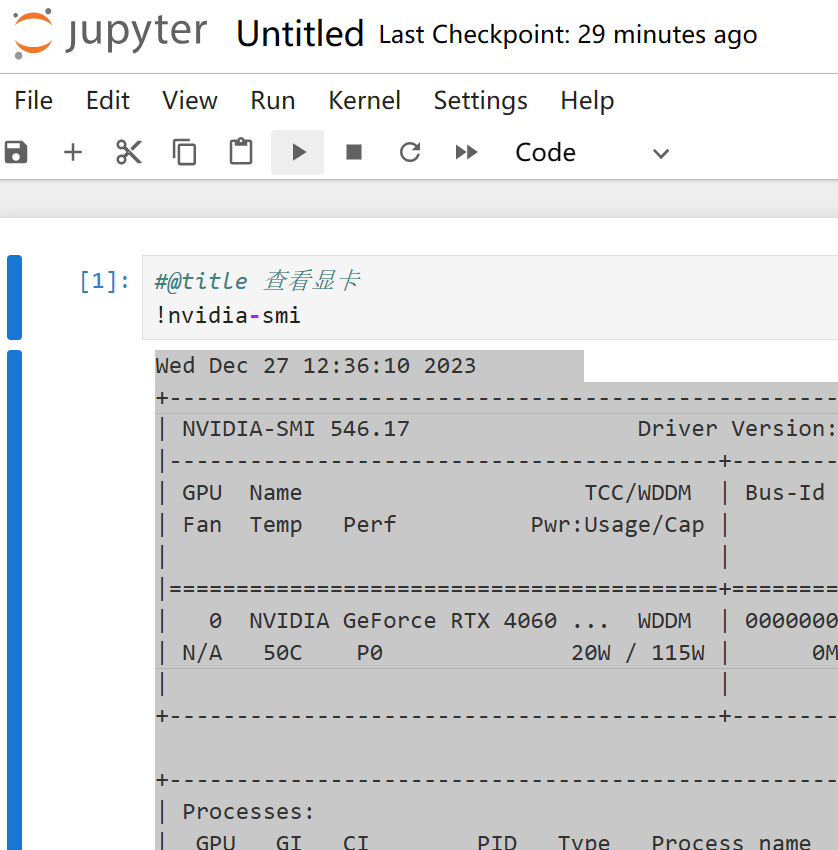
The program returns:
#@title 查看显卡
!nvidia-smi
Wed Dec 27 12:36:10 2023
+---------------------------------------------------------------------------------------+
| NVIDIA-SMI 546.17                 Driver Version: 546.17       CUDA Version: 12.3     |
|-----------------------------------------+----------------------+----------------------+
| GPU  Name                     TCC/WDDM  | Bus-Id        Disp.A | Volatile Uncorr. ECC |
| Fan  Temp   Perf          Pwr:Usage/Cap |         Memory-Usage | GPU-Util  Compute M. |
|                                         |                      |               MIG M. |
|=========================================+======================+======================|
|   0  NVIDIA GeForce RTX 4060 ...  WDDM  | 00000000:01:00.0 Off |                  N/A |
| N/A   50C    P0              20W / 115W |      0MiB /  8188MiB |      0%      Default |
|                                         |                      |                  N/A |
+-----------------------------------------+----------------------+----------------------+

+---------------------------------------------------------------------------------------+
| Processes:                                                                            |
|  GPU   GI   CI        PID   Type   Process name                            GPU Memory |
|        ID   ID                                                             Usage      |
|=======================================================================================|
|  No running processes found                                                           |
+---------------------------------------------------------------------------------------+
At this point, you can debug NoteBook locally.
Install ffmpeg
Add new cells:
#@title 安装ffmpeg
import os, uuid, re, IPython
import ipywidgets as widgets
import time

from glob import glob
from google.colab import output, drive

from IPython.display import clear_output
import os, sys, urllib.request
HOME = os.path.expanduser("~")
pathDoneCMD = f'{HOME}/doneCMD.sh'
if not os.path.exists(f"{HOME}/.ipython/ttmg.py"):
    hCode = "https://raw.githubusercontent.com/yunooooo/gcct/master/res/ttmg.py"
    urllib.request.urlretrieve(hCode, f"{HOME}/.ipython/ttmg.py")

from ttmg import (
    loadingAn,
    textAn,
)

loadingAn(name="lds")
textAn("Cloning Repositories...", ty='twg')
!git clone https://github.com/XniceCraft/ffmpeg-colab.git
!chmod 755 ./ffmpeg-colab/install
textAn("Installing FFmpeg...", ty='twg')
!./ffmpeg-colab/install
clear_output()
print('Installation finished!')
!rm -fr /content/ffmpeg-colab
!ffmpeg -version
Since speech transcription requires the participation of ffmpeg, the latest version of ffmpeg needs to be installed.
The program returns:
Installation finished!
c Copyright (c) 2000-2023 the FFmpeg developers
built with gcc 9 (Ubuntu 9.4.0-1ubuntu1~20.04.1)
configuration: --prefix=/home/ffmpeg-builder/release --pkg-config-flags=--static --extra-libs=-lm --disable-doc --disable-debug --disable-shared --disable-ffprobe --enable-static --enable-gpl --enable-version3 --enable-runtime-cpudetect --enable-avfilter --enable-filters --enable-nvenc --enable-nvdec --enable-cuvid --toolchain=hardened --disable-stripping --enable-opengl --pkgconfigdir=/home/ffmpeg-builder/release/lib/pkgconfig --extra-cflags='-I/home/ffmpeg-builder/release/include -static-libstdc++ -static-libgcc ' --extra-ldflags='-L/home/ffmpeg-builder/release/lib -fstack-protector -static-libstdc++ -static-libgcc ' --extra-cxxflags=' -static-libstdc++ -static-libgcc ' --extra-libs='-ldl -lrt -lpthread' --enable-ffnvcodec --enable-gmp --enable-libaom --enable-libass --enable-libbluray --enable-libdav1d --enable-libfdk-aac --enable-libfontconfig --enable-libfreetype --enable-libfribidi --enable-libgme --enable-libkvazaar --enable-libmp3lame --enable-libopus --enable-libopencore_amrnb --enable-libopencore_amrwb --enable-libopenh264 --enable-libopenjpeg --enable-libshine --enable-libsoxr --enable-libsrt --enable-libsvtav1 --enable-libtheora --enable-libvidstab --ld=g++ --enable-libvmaf --enable-libvorbis --enable-libvpx --enable-libx264 --enable-libx265 --enable-libxvid --enable-libzimg --enable-openssl --enable-zlib --enable-nonfree --extra-libs=-lpthread --enable-pthreads --extra-libs=-lgomp
libavutil      58.  2.100 / 58.  2.100
libavcodec     60.  3.100 / 60.  3.100
libavformat    60.  3.100 / 60.  3.100
libavdevice    60.  1.100 / 60.  1.100
libavfilter     9.  3.100 /  9.  3.100
libswscale      7.  1.100 /  7.  1.100
libswresample   4. 10.100 /  4. 10.100
libpostproc    57.  1.100 / 57.  1.100
What is installed here is the latest version of ffmpeg version 6.0
Clone the repository
Then clone the code base:
#@title 克隆代码仓库
!git clone https://github.com/v3ucn/Bert-vits2-V2.3.git
The program returns:
Cloning into 'Bert-vits2-V2.3'...
remote: Enumerating objects: 234, done.
remote: Counting objects: 100% (234/234), done.
remote: Compressing objects: 100% (142/142), done.
remote: Total 234 (delta 80), reused 232 (delta 78), pack-reused 0
Receiving objects: 100% (234/234), 4.16 MiB | 14.14 MiB/s, done.
Resolving deltas: 100% (80/80), done.
Install project dependencies
Then go to the project directory and install the dependencies:
#@title 安装所需要的依赖
%cd /content/Bert-vits2-V2.3
!pip install -r requirements.txt
Download necessary models
Add new cells and download the model:
#@title 下载必要的模型
!wget -P slm/wavlm-base-plus/ https://huggingface.co/microsoft/wavlm-base-plus/resolve/main/pytorch_model.bin
!wget -P emotional/clap-htsat-fused/ https://huggingface.co/laion/clap-htsat-fused/resolve/main/pytorch_model.bin
!wget -P emotional/wav2vec2-large-robust-12-ft-emotion-msp-dim/ https://huggingface.co/audeering/wav2vec2-large-robust-12-ft-emotion-msp-dim/resolve/main/pytorch_model.bin
!wget -P bert/chinese-roberta-wwm-ext-large/ https://huggingface.co/hfl/chinese-roberta-wwm-ext-large/resolve/main/pytorch_model.bin
!wget -P bert/bert-base-japanese-v3/ https://huggingface.co/cl-tohoku/bert-base-japanese-v3/resolve/main/pytorch_model.bin
!wget -P bert/deberta-v3-large/ https://huggingface.co/microsoft/deberta-v3-large/resolve/main/pytorch_model.bin
!wget -P bert/deberta-v3-large/ https://huggingface.co/microsoft/deberta-v3-large/resolve/main/pytorch_model.generator.bin
!wget -P bert/deberta-v2-large-japanese/ https://huggingface.co/ku-nlp/deberta-v2-large-japanese/resolve/main/pytorch_model.bin
Download the base mold file
Then download the base model of the pre-trained model:
#@title 下载底模文件

!wget -P Data/ada/models/ https://huggingface.co/OedoSoldier/Bert-VITS2-2.3/resolve/main/DUR_0.pth
!wget -P Data/ada/models/ https://huggingface.co/OedoSoldier/Bert-VITS2-2.3/resolve/main/D_0.pth
!wget -P Data/ada/models/ https://huggingface.co/OedoSoldier/Bert-VITS2-2.3/resolve/main/G_0.pth
!wget -P Data/ada/models/ https://huggingface.co/OedoSoldier/Bert-VITS2-2.3/resolve/main/WD_0.pth
Note that version 2.3 has 4 base molds.
Split the dataset
Then upload King Ada’s audio material to Data/ada/raw/ada.wav
Then create a new cell:
#@title 切分数据集

!python3 audio_slicer.py
The material will be divided.
Transcription and annotation
At this point we need to transcribe the sliced material:
#@title 转写和标注
!pip install git+https://github.com/openai/whisper.git
!python3 short_audio_transcribe.py
Note that whisper is installed separately here. Many people use pip install whisper directly. In fact, this is not the correct installation method. You need to specify the installation source separately: pip install git+https://github.com/openai/whisper.git. Remember, otherwise it will Report an error.
After execution, the transcription file esd.list will be generated in the role directory:
./Data\ada\wavs\ada_0.wav|ada|EN|I do. The kind you like.
./Data\ada\wavs\ada_1.wav|ada|EN|Now where's the amber?
./Data\ada\wavs\ada_10.wav|ada|EN|Leave the girl. She's lost no matter what.
./Data\ada\wavs\ada_11.wav|ada|EN|You walk away now, and who knows?
./Data\ada\wavs\ada_12.wav|ada|EN|Maybe you'll live to meet me again.
./Data\ada\wavs\ada_13.wav|ada|EN|And I might get you that greeting you were looking for.
./Data\ada\wavs\ada_14.wav|ada|EN|How about we continue this discussion another time?
./Data\ada\wavs\ada_15.wav|ada|EN|Sorry, nothing yet.
./Data\ada\wavs\ada_16.wav|ada|EN|But my little helper is creating
./Data\ada\wavs\ada_17.wav|ada|EN|Quite the commotion.
./Data\ada\wavs\ada_18.wav|ada|EN|Everything will work out just fine.
./Data\ada\wavs\ada_19.wav|ada|EN|He's a good boy. Predictable.
./Data\ada\wavs\ada_2.wav|ada|EN|The deal was, we get you out of here when you deliver the amber. No amber, no protection, Louise.
./Data\ada\wavs\ada_20.wav|ada|EN|Nothing personal, Leon.
./Data\ada\wavs\ada_21.wav|ada|EN|Louise and I had an arrangement.
./Data\ada\wavs\ada_22.wav|ada|EN|Don't worry, I'll take good care of it.
./Data\ada\wavs\ada_23.wav|ada|EN|Just one question.
./Data\ada\wavs\ada_24.wav|ada|EN|What are you planning to do with this?
./Data\ada\wavs\ada_25.wav|ada|EN|So, we're talking millions of casualties?
./Data\ada\wavs\ada_26.wav|ada|EN|We're changing course. Now.
./Data\ada\wavs\ada_3.wav|ada|EN|You can stop right there, Leon.
./Data\ada\wavs\ada_4.wav|ada|EN|wouldn't make me use this.
./Data\ada\wavs\ada_5.wav|ada|EN|Would you? You don't seem surprised.
./Data\ada\wavs\ada_6.wav|ada|EN|Interesting.
./Data\ada\wavs\ada_7.wav|ada|EN|Not a bad move
./Data\ada\wavs\ada_8.wav|ada|EN|Very smooth. Ah, Leon.
./Data\ada\wavs\ada_9.wav|ada|EN|You know I don't work and tell.
There are a total of 27 sliced voices here, corresponding to 27 transcribed texts. Note that the language is English.
audio resampling
To resample source audio:
#@title 重新采样
!python3 resample.py --sr 44100 --in_dir ./Data/ada/raw/ --out_dir ./Data/ada/wavs/
Preprocess tag files
Then process the transcribed file to generate a training set and a validation set:
#@title 预处理标签文件
!python3 preprocess_text.py --transcription-path ./Data/ada/esd.list --t
The program returns:
pytorch_model.bin: 100% 1.32G/1.32G [00:10<00:00, 122MB/s]
spm.model: 100% 2.46M/2.46M [00:00<00:00, 115MB/s]
The cache for model files in Transformers v4.22.0 has been updated. Migrating your old cache. This is a one-time only operation. You can interrupt this and resume the migration later on by calling `transformers.utils.move_cache()`.
0it [00:00, ?it/s]
[nltk_data] Downloading package averaged_perceptron_tagger to
[nltk_data]     /root/nltk_data...
[nltk_data]   Unzipping taggers/averaged_perceptron_tagger.zip.
[nltk_data] Downloading package cmudict to /root/nltk_data...
[nltk_data]   Unzipping corpora/cmudict.zip.
100% 27/27 [00:00<00:00, 4457.63it/s]
总重复音频数:0,总未找到的音频数:0
训练集和验证集生成完成!
Generate BERT feature file
Finally, the bert feature file is generated:
#@title 生成 BERT 特征文件
!python3 bert_gen.py --config-path ./Data/ada/configs/config.json
Corresponding to 27 materials:
100% 27/27 [00:33<00:00,  1.25s/it]
bert生成完毕!, 共有27个bert.pt生成!
Model training
Everything is ready to start training:
#@title 开始训练
!python3 train_ms.py
The model will be generated in the models directory. The project's default training interval is 50 steps. You can modify the config.json configuration file according to your own needs.
Model reasoning
Under normal circumstances, after training for about 50 or 100 steps, you can reason and check the effect, and then continue training:
#@title 开始推理
!python3 webui.py
return:
| numexpr.utils | INFO | NumExpr defaulting to 2 threads.
/usr/local/lib/python3.10/dist-packages/torch/nn/utils/weight_norm.py:30: UserWarning: torch.nn.utils.weight_norm is deprecated in favor of torch.nn.utils.parametrizations.weight_norm.
  warnings.warn("torch.nn.utils.weight_norm is deprecated in favor of torch.nn.utils.parametrizations.weight_norm.")
| utils | INFO | Loaded checkpoint 'Data/ada/models/G_150.pth' (iteration 25)
推理页面已开启!
Running on local URL:  http://127.0.0.1:7860
Running on public URL: https://814833a6f477ba151c.gradio.live
Just click on the second public network address to perform inference.
Conclusion
So far, we have completed the data segmentation, transcription, preprocessing, training and inference processes based on JupyterNoteBook. Finally, I present the online GoogleColab to everyone:
https://colab.research.google.com/drive/1-H1DGG5dTy8u_8vFbq1HACXPX9AAM76s?usp=sharing