I. Introduction
1. If our app is similar to stocks, with a lot of data and very fast, the tomcat we used before comes with itwebsocket or spring-boot-starter-websocke integrated , but performance will have problems when data concurrency is large.
2. The article I wrote earlier about springBoot+webosket did not use nettySeveral ways in which springBoot uses webSocket and problems and solutions in high concurrency< /span>, which includes the following two methods, both of which have instructions. If the amount is not large, the following two methods are also acceptable.
- comes with tomcat
websocket spring-boot-starter-websockeintegrated
2. Use Netty to complete webSocket
1. How to use, you can refer to netty + webSocket + SpringBott which is a reference articleSpringBoot integrates Netty to process WebSocket (supports url parameters) This article The article is, what it says is pretty good
2. However, the above article is still insufficient, because I need to add token authentication. Only after authentication can the link be established. The above article only obtains parameters, but it is still insufficient in terms of authentication and cannot be satisfied. this condition. I can post my method in the future by writing an article
2.1. getBasePath method of RequestUriUtils
2. For example, your link is ws://192.168.172.139:1234/ws/id=1. After using the acquisition method in the article, you will get /ws/. It is recommended to change it to the following. After acquisition, it will be . a>/ws
    /**
     * 获取URI中参数以外部分路径
     *
     * @param uri
     * @return
     */
    public static String getBasePath(String uriStr) {


        String pathWithSlash ="";
        try {


            // 使用URI解析URL字符串
            URI uri = new URI(uriStr);
            // 获取路径部分
            pathWithSlash = uri.getPath();
            // 去掉末尾的斜杠
            return pathWithSlash.replaceAll("/$", "");
        } catch (URISyntaxException e) {


            log.error("解析path错误", e);
        }
        return pathWithSlash;
    }
2.2. ChannelPipeline description in WebSocketChannelInitializer
The main reason for adding .addLast(new HttpServerCodec()) in the construction of the WebSocket server is that the WebSocket handshake is based on the HTTP protocol, and the establishment of a WebSocket connection requires the following steps:
- The client sends an HTTP request to the server, requesting an upgrade to the WebSocket protocol.
- After the server receives this request, it needs to perform protocol upgrade processing and switch the HTTP protocol to the WebSocket protocol.
- Once the upgrade is successful, the WebSocket connection is established and two-way communication between the client and the server can be carried out through the WebSocket protocol.
Therefore, the beginning phase of the WebSocket handshake is still the HTTP request and response. In order to handle this initial HTTP request, you need to add .addLast(new HttpServerCodec()) to Netty's ChannelPipeline to ensure that this HTTP request can be parsed and processed, and upgraded to a WebSocket connection if needed. In short, the role of .addLast(new HttpServerCodec()) is to enable the WebSocket server to correctly handle the HTTP request and response before the WebSocket handshake, ensuring that the WebSocket connection can be successfully established. Once the WebSocket connection is established, real-time two-way communication is possible via the WebSocket protocol.
This is a standard operation in WebSocket server builds. The websocket protocol itself is based on the http protocol, so the http decoder must also be used here.
2.3、addLast(new ChunkedWriteHandler())
.addLast(new ChunkedWriteHandler())It is a ChannelHandler in Netty. Its main function is to support asynchronous writing of large data streams (such as file transfer).
In some cases, you may need to send a large amount of data to the client, such as the contents of a file, rather than writing the entire data to a buffer at once, as this may cause excessive memory usage. Instead, you can break the data into chunks and write them to the client chunk by chunk to avoid memory issues.
ChunkedWriteHandlerThe function is as follows:
- Supports asynchronous writing of large data streams: It allows you to chop data into small chunks and write those chunks to the client asynchronously. This is useful for transferring large files or large amounts of data, as it avoids loading the entire data into memory.
- Maintain write order: It ensures that data blocks are written in the order they were added to the Channel. This helps keep your data organized.
- Improving performance: By writing data blocks asynchronously,
ChunkedWriteHandlercan improve network performance because it does not block threads waiting for the data transfer to complete.
This processor is usually used together with other processors to complete the complete data transfer process. For example, if you want to implement file transfer, you will usually use ChunkedWriteHandler to cut the file data into small pieces, and then use other processors to handle the file transfer, such as encoding and decoding of file blocks.
In short, .addLast(new ChunkedWriteHandler()) is used to support asynchronous writing of large data streams to improve performance and reduce memory usage, which is especially useful when large amounts of data need to be transmitted.
2.4、addLast(new HttpObjectAggregator(1024 * 64))
Aggregate HttpMessage and HttpContents into a completed FullHttpRequest or FullHttpResponse, which is a FullHttpRequest object or a FullHttpResponse object depending on whether it is a request or a response
.addLast(new HttpObjectAggregator(1024 * 64))It is a ChannelHandler in Netty, mainly used to aggregate multiple parts of an HTTP request or response into a complete HTTP message. This is very useful for processing HTTP messages, especially when you need to process large amounts of HTTP data.
The following are the main functions of.addLast(new HttpObjectAggregator(1024 * 64)):
- Message aggregation: In HTTP communication, a request or response may be divided into multiple parts (for example, HTTP request headers and HTTP request body).
HttpObjectAggregatoris responsible for aggregating these parts into a completeFullHttpRequestorFullHttpResponsefor easier handling and manipulation.- Memory Management: This processor also has memory management features. You can specify a maximum aggregate size in bytes in the constructor (64 KB in the example). If the received HTTP data exceeds this size,
HttpObjectAggregatorwill throw an exception to prevent memory leaks.- Simplified HTTP message processing: Aggregating HTTP messages makes it easier for you to process complete HTTP requests and responses without having to manually process each part. This is useful for building web servers or HTTP proxies.
Example usage:
pipeline.addLast(new HttpServerCodec()); // 添加HTTP编解码器
pipeline.addLast(new HttpObjectAggregator(1024 * 64)); // 聚合HTTP消息,最大64KB
pipeline.addLast(new MyHttpRequestHandler()); // 自定义的HTTP请求处理器
In the above example, the HTTP codec is first added using
HttpServerCodec, then the HTTP messages are aggregated usingHttpObjectAggregator, and finally a custom HTTP request handler.
In short,.addLast(new HttpObjectAggregator(1024 * 64))is used to aggregate multiple parts of an HTTP request or response into a complete HTTP message to simplify and improve the process of processing HTTP messages. And provide memory management functions. This is useful in building applications that support HTTP.
2.5、addLast(new WebSocketServerCompressionHandler())
webSocket data compression extension, when adding this, the third parameter of WebSocketServerProtocolHandler needs to be set to true
.addLast(new WebSocketServerCompressionHandler()) is a ChannelHandler in Netty, used to support compression and decompression of WebSocket messages . WebSocket message compression can reduce the size of messages and improve network transmission efficiency, which is especially useful in low-bandwidth environments.
The following are the main functions of .addLast(new WebSocketServerCompressionHandler()):
- WebSocket message compression: When a large amount of data is transmitted between the client and the server through the WebSocket protocol, compression technology can be used to compress the message into a smaller size to reduce network bandwidth. usage of.
WebSocketServerCompressionHandleris responsible for handling message compression.- WebSocket message decompression: For compressed WebSocket messages received, the server needs to decompress them to obtain the original message.
WebSocketServerCompressionHandleris also responsible for decompressing compressed messages.- Supports multiple compression algorithms:
WebSocketServerCompressionHandlerSupports multiple compression algorithms, including the usual DEFLATE and GZIP compression algorithms, as well as custom compression algorithms.
In WebSocket applications, it is often necessary to negotiate whether compression is enabled and which compression algorithm to use when the WebSocket connection is established. If both the client and server support compression, they can enable compression during message transmission.
To use .addLast(new WebSocketServerCompressionHandler()), you need to add the handler to your WebSocket server's processing pipeline. For example:
pipeline.addLast(new HttpServerCodec()); // 添加HTTP编解码器
pipeline.addLast(new HttpObjectAggregator(1024 * 64)); // 聚合HTTP消息,最大64KB
pipeline.addLast(new WebSocketServerCompressionHandler()); // 添加WebSocket消息压缩处理器
pipeline.addLast(new MyWebSocketHandler()); // 自定义的WebSocket处理器
In the above example, the HTTP codec was first added using HttpServerCodec, then the HTTP messages were aggregated using HttpObjectAggregator, and next a>WebSocketServerCompressionHandler to support WebSocket message compression, and finally a custom WebSocket handler was added.
In short, .addLast(new WebSocketServerCompressionHandler()) is used to add message compression and decompression functions to the WebSocket server to reduce message size and improve network transmission efficiency. This is useful in WebSocket applications that need to transfer large amounts of data.
2.6、.addLast(new MyWebSocketHandler())
Custom processor - handles web socket messages (the parent class of messages is WebSocketFrame, which has many subclasses, such as BinaryWebSocketFrame TextWebSocketFrame, etc.)
If you are using the parent class WebSocketFrame, you need to determine what type of data it is inside. If you use a specific subclass, then only the specific message type will go there.
2.7、 .addLast(new WebSocketServerProtocolHandler(WebSocketProperties.path, null, true, 10485760));
The web socket endpoint exposed by the server. When the client passes a relatively large object, the value of the maxFrameSize parameter needs to be increased.
WebSocketServerProtocolHandlerIs a key component in Netty that handles WebSocket handshakes and protocol upgrades, as well as managing the life cycle of WebSocket connections. Its main functions are as follows:
- WebSocket handshake processing: When a client initiates a WebSocket handshake via an HTTP request,
WebSocketServerProtocolHandleris responsible for identifying and processing these handshake requests. It can inspect the Upgrade header and Protocol headers in HTTP requests to determine whether an upgrade to the WebSocket protocol is required.- WebSocket handshake protocol upgrade: If the client sends a request that conforms to the WebSocket handshake specification,
WebSocketServerProtocolHandlerwill handle the protocol upgrade and change the connection from the HTTP protocol Switch to WebSocket protocol. This process includes the construction of the upgrade response and the processing of the upgrade handshake.- WebSocket lifecycle management: Once the WebSocket handshake is successful,
WebSocketServerProtocolHandlermanages the lifecycle of the WebSocket connection. It handles events such as connection opening, closing, exceptions, and message delivery.- Ping/Pong handling: The WebSocket protocol supports Ping and Pong messages, which are used to keep the connection active.
WebSocketServerProtocolHandlerThese heartbeat messages are automatically processed to ensure that the connection remains active.
Here is an example showing how to use WebSocketServerProtocolHandler in Netty:
pipeline.addLast(new HttpServerCodec()); // 添加HTTP编解码器
pipeline.addLast(new HttpObjectAggregator(1024 * 64)); // 聚合HTTP消息,最大64KB
pipeline.addLast(new WebSocketServerProtocolHandler("/websocket")); // 添加WebSocket握手处理器
pipeline.addLast(new MyWebSocketHandler()); // 自定义的WebSocket处理器
In the above example, WebSocketServerProtocolHandler is added to the processing pipeline and specifies the path to the WebSocket (in the example, "/websocket"). Once the handshake is successful, the connection switches to the WebSocket protocol and WebSocket messages can be processed in MyWebSocketHandler.
In summary,WebSocketServerProtocolHandler is a key component for handling WebSocket handshakes and protocol upgrades, making it easier to create WebSocket servers in Netty.
3. Web Socket performance comparison - Spring Boot vs Tomcat vs Netty
Reference article Web Socket performance comparison - Spring Boot vs Tomcat vs Netty That’s pretty good.
4. Use four frameworks to implement servers with millions of websocket connections (very well written, a must-read)
1. The article contains some online parameter adjustments, which are all work
Original address: https://colobu.com/2015/05/22/implement-C1000K -servers-by-spray-netty-undertow-and-node-js/
5. Performance comparison of seven WebSocket frameworks
Original address: https://colobu.com/2015/07/14/performance-comparison-of-7-websocket-frameworks/
6. Use python script to test
1. Mainly test two parts
- A large number of clients are online at the same time, checking performance and memory consumption issues
- A large number of clients are online at the same time, data transmission efficiency
2. Python installation will not be discussed here.
3. In Sections 4 and 5 of this article, please be sure to understand that you need to modify the corresponding parameters such as the number of server TCP links and so on.
4. My webSocket link format isws://192.168.172.226:7081/ws/token the last onetoken, which is used for online authentication. Only authenticated users will Establish a channel. For the convenience of testing, here we directly replace it with a numerical value, as follows. In this way, it represents the user ID. After all, if I test 500,000 clients later, I cannot generate 500,000 tokens first.
ws://192.168.172.226:7081/ws/1ws://192.168.172.226:7081/ws/2
6.1, python script
1. Script content
import threading
import time
import websocket

# 定义带有顺序编号的 WebSocket URL
url_base = "ws://192.168.172.226:7081/ws/"
num_connections = 10000  # 要模拟的连接数
running_connections = 0  # 跟踪当前正在运行的连接数

# 创建线程本地存储对象来存储每个线程的文件名
local = threading.local()


# 建立 WebSocket 连接的函数
def connect_websocket():
    global running_connections
    try:
        # 使用顺序编号生成 URL
        url = url_base + str(running_connections)

        # 为当前线程创建文件名
        local.filename = f"{

      running_connections}.txt"

        while True:
            # 创建 WebSocket 连接
            ws = websocket.create_connection(url)

            while True:
                # 接收来自服务端的消息
                message = ws.recv()

                # 保存消息到文件
                with open(local.filename, "a") as file:
                    file.write(message + "\n")

    except Exception as e:
        print(f"WebSocket 连接失败: {

      e}")

    running_connections -= 1


# 开始模拟 WebSocket 连接
while running_connections < num_connections:
    t = threading.Thread(target=connect_websocket)
    t.start()
    running_connections += 1

# 等待所有连接完成
while running_connections > 0:
    time.sleep(1)

print("所有 WebSocket 连接完成。")
2. Run
# 安装  websocket-client
pip install websocket-client

# 运行test.py 文件
python test.py
3. Description
The function of the script is to generate the specified number of webSocket connectionsnum_connections and always monitor the messages returned by the server. If there is a message from the server It will be saved under the folder of the corresponding link, including the content returned by the server.
6.2. netty server
1. I won’t go into the specific link code here.
2. Mainly need to write two interfaces. One interface is to send a message to all online clients, and the other interface is to send a specified numbermockCount to all online clients. News
package cn.jt.thermalapi.common.controller;

import cn.jt.thermalapi.response.Response;
import cn.jt.thermalapi.websocket.session.SessionFactory;
import io.swagger.annotations.Api;
import lombok.extern.slf4j.Slf4j;
import org.springframework.web.bind.annotation.GetMapping;
import org.springframework.web.bind.annotation.PathVariable;
import org.springframework.web.bind.annotation.RequestMapping;
import org.springframework.web.bind.annotation.RestController;
import springfox.documentation.annotations.ApiIgnore;

import java.util.concurrent.atomic.AtomicInteger;

/**
 * @author GXM
 * @version 1.0.0
 * @Description TODO
 * @createTime 2023年10月13日
 */
@ApiIgnore
@Api(tags = "测试api")
@RestController
@RequestMapping("/test")
@Slf4j
public class TestController {


    @GetMapping("mockOne")
    public Response<String> mockOne() {


        AtomicInteger count = new AtomicInteger(0);
        SessionFactory.getSession().broadcast(count.getAndIncrement() + "");
        return Response.buildSuccess();
    }

    @GetMapping("mockMany/{mockCount}")
    public Response<String> mockMany(@PathVariable("mockCount") int mockCount) {


        AtomicInteger count = new AtomicInteger(0);

        while (count.getAndIncrement() <= mockCount) {


            SessionFactory.getSession().broadcast(count.getAndIncrement() + "");
        }

        return Response.buildSuccess();
    }
}
6.3. Demonstration
1. Start your netty server
2. Start the test script
python test.py
3. Server-side log output, I tested it, 1w link takes about 30 seconds, it depends on your own machine, I still run it in idea.

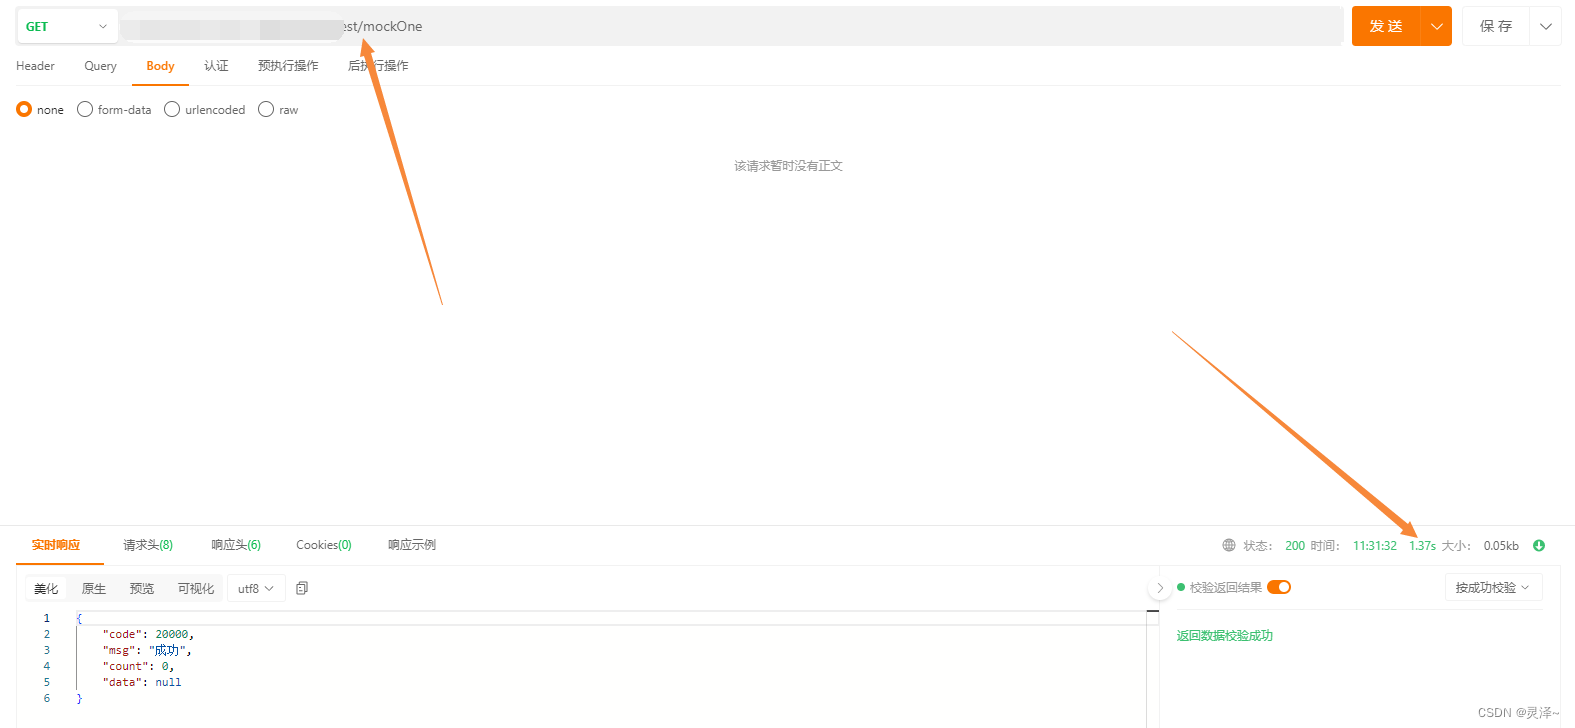
4. Requesttest/mockOne interface, greater than 1s
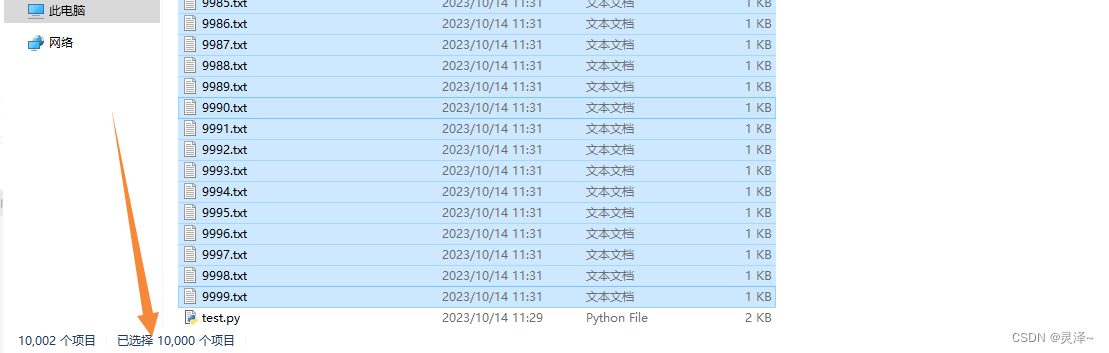
5. Under the test.py file, the corresponding 1w client file is generated, and its content is sent by the server.
5. Request test/mockMany/100 interface, you can test this yourself, or wait until I finish the server test and then sort out this article, because This test was all done on my local machine, and is just a preliminary understanding. But the script can already be used. If you test it on the server later, the steps will be the same