Smart home system based onARMvoice recognition
In our last article, we implemented compiling a program under a Linux system. We first used two small exercises to familiarize ourselves with how to compile. Today, we will introduce the basic use of LCD screens.
1. Basic use of LCD screen
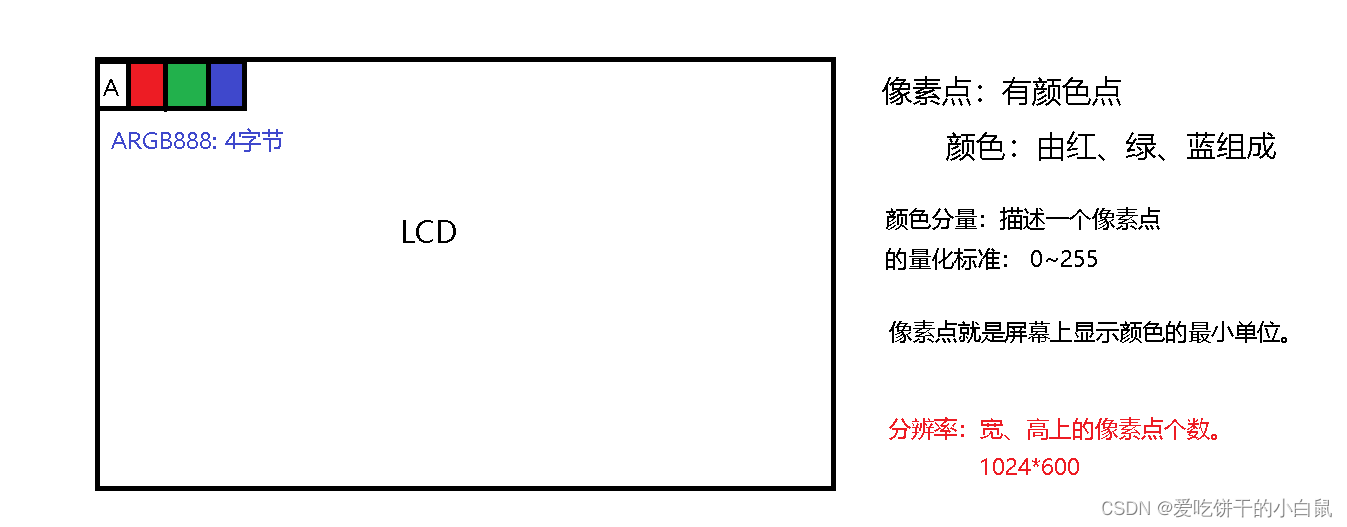
How to use the LCD screen?
1. Open the development board LCD device driver file. (/dev/fb0)
2. Prepare color data.
3. Write color pixel data.
4. Close the device file.

Sample code:
#include <stdio.h>
#include <sys/types.h>  //open()
#include <sys/stat.h>
#include <fcntl.h>
#include <unistd.h>    //write()

int main()
{
	//1、打开开发板LCD设备驱动文件。  (/dev/fb0)
	int lcd_fd = open("/dev/fb0", O_RDWR);
	if(lcd_fd == -1)
	{
		perror("open lcd_fd failed!");  //通过错误码打印错误信息
		return -1;   //程序非正常结束
	}

	//2、准备颜色数据。
	int buf[1024*600] = {0};        //像素数据缓冲区
	// A R G B :  0 255 0 0  -----> 0x00FF0000;
	int R = 0x00FF0000;

	int i;
	for(i = 0; i<1024*600; i++)
	{
		buf[i] =  R;
	}

	//3、写入颜色像素点数据。
	int w_size = write(lcd_fd, buf, 1024*600*4);

	//4、关闭设备文件。
	close(lcd_fd);

	return 0;
}
2. Development board running program
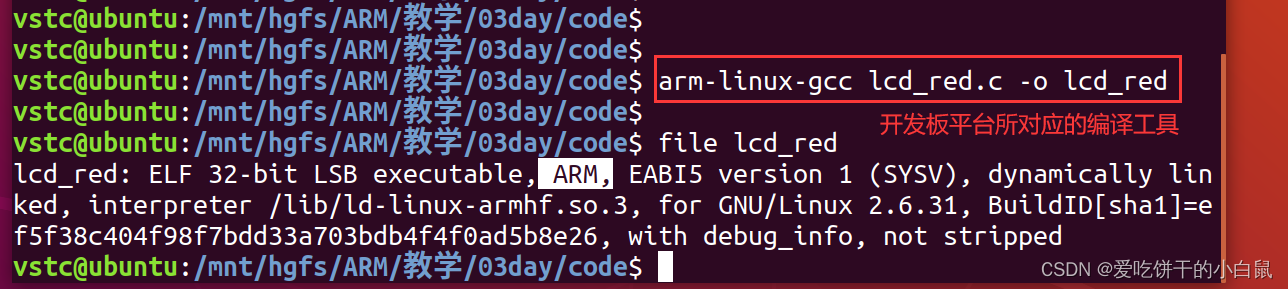
1. Use the cross-compiler arm-linux-gcc to compile the program on the Ubuntu platform.
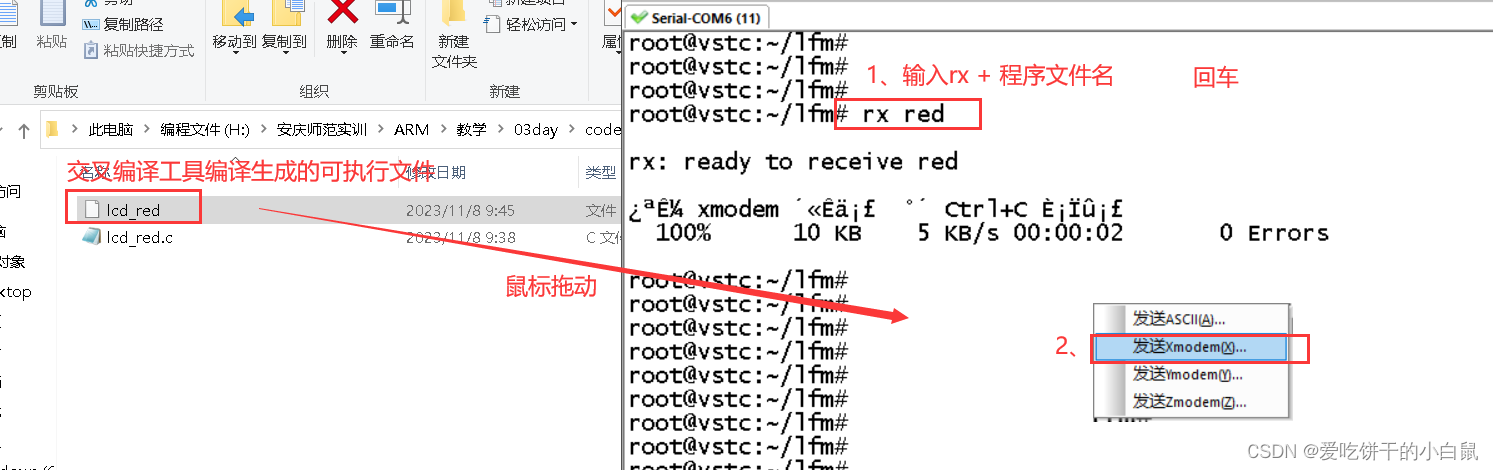
2. Download the program to the development board.

3. Grant permission and run the program.

3. Interface display (bmp picture)
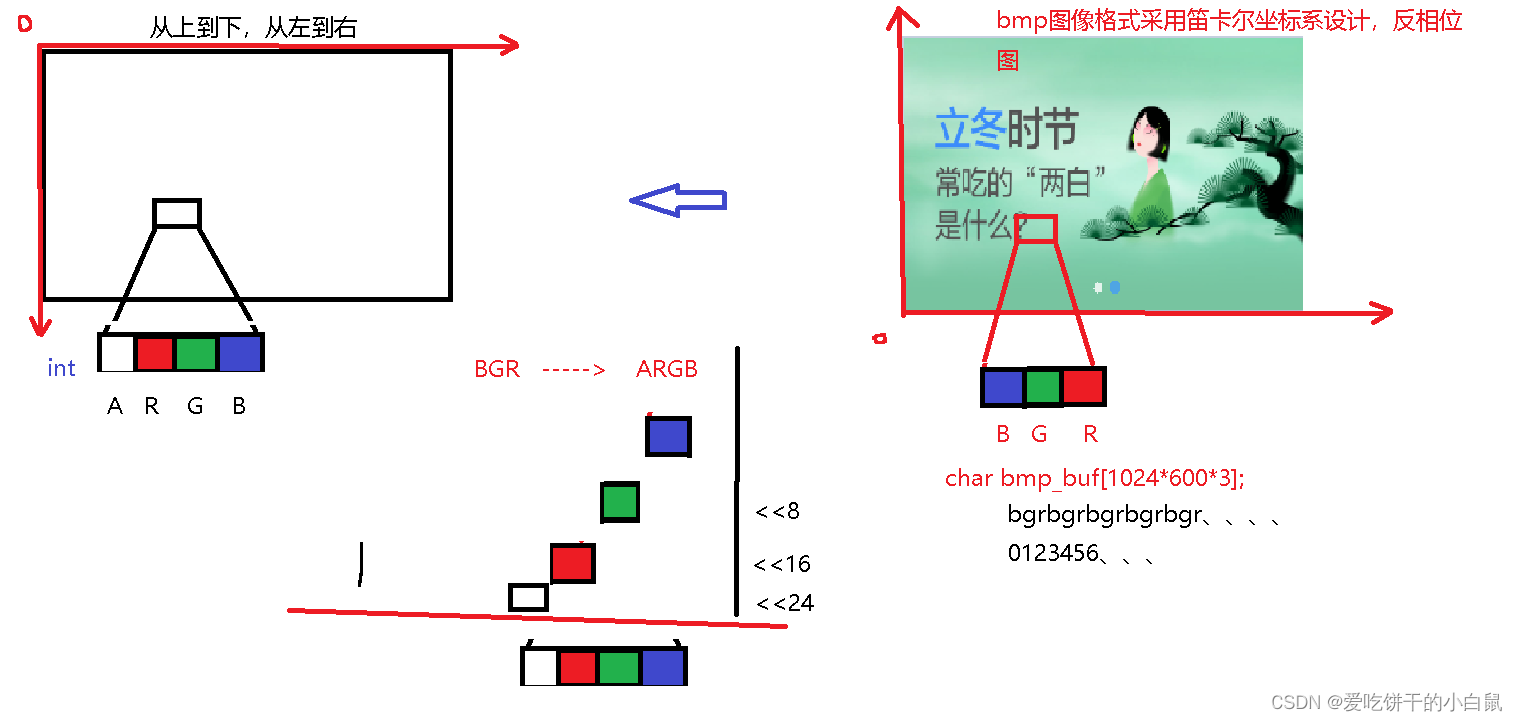
bmp: BMP is the abbreviation of English Bitmap (bitmap), which is the standard image file format in the Windows operating system. It is an image format that uses bitmap storage, and the RGB data in the image data can be used directly.
1. Picture preparation

2. Display bmp pictures
1. Open the development board LCD device driver file. (/dev/fb0)
2. Open the bmp image file.
3. Read the pixel color data of the bmp image.
4. Write color pixel data to LCD.
5. Close the device and close the file.
Header file:
    #include <unistd.h>
Function prototype:
    ssize_t read(int fd, void *buf, size_t count);
    Read count bytes of data from the file pointed to by file descriptor fd and store it in the buffer pointed to by buf.
Parameter list:
    int fd: The file descriptor of the target file to be read.
    void *buf: The memory buffer that stores the read data.
    size_t count: The number of bytes to be read.
Return value:
    Success: The number of bytes successfully read.
    Failure: -1 and errno is set.


Sample code:
#include <stdio.h>
#include <sys/types.h> //open()
#include <sys/stat.h>
#include <fcntl.h>
#include <unistd.h> //write()
int showBmp(char *bmp_path)
{
//1、打开开发板LCD设备驱动文件。 (/dev/fb0)
int lcd_fd = open("/dev/fb0", O_RDWR);
if(lcd_fd == -1)
{
perror("open lcd failed!"); //通过错误码打印错误信息
return -1; //程序非正常结束
}
//2、打开bmp图片文件。
int bmp_fd = open(bmp_path, O_RDWR);
if(bmp_fd == -1)
{
perror("open bmp failed!"); //通过错误码打印错误信息
return -1; //程序非正常结束
}
//3、读取bmp图片像素颜色数据。
//文件偏移量(光标),从文件开始位置偏移54字节,去除无效数据。
char buf[54] = {0};
read(bmp_fd, buf, 54);
char bmp_buf[1024*600*3] = {0};
read(bmp_fd, bmp_buf, 1024*600*3);
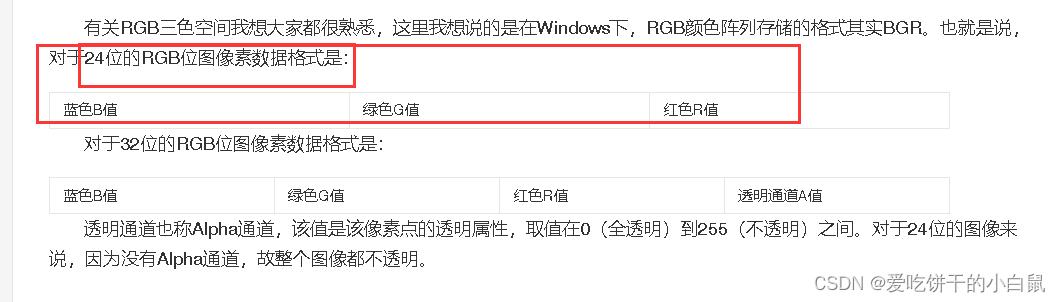
//3.1数据处理
//将3字节的bgr 的bmp图像像素点数据处理为 lcd 屏幕所需要的 argb像素数据
int lcd_buf[1024*600] = {0}; //lcd 像素数据缓冲区
int i, j = 0;
for(i = 0; i<1024*600; i++, j+=3)
{
// ARGB b g r a
lcd_buf[i] = bmp_buf[0+j]<<0 | bmp_buf[1+j]<<8 | bmp_buf[2+j]<<16 | 0x00<<24;
}
//3.2 图片上下翻转
int show_buf[1024*600] = {0}; //lcd 像素数据缓冲区
int x, y;
for(y = 0; y<600; y++)
{
for(x = 0; x<1024; x++)
{
show_buf[y*1024+x] = lcd_buf[(599-y)*1024+x];
}
}
//4、写入颜色像素点数据到LCD。
write(lcd_fd, show_buf, 1024*600*4);
//5、关闭设备,关闭文件。
close(lcd_fd);
close(bmp_fd);
return 0;
}
int main()
{
showBmp("./1.bmp");
return 0;
}4. Audio and video playback:
mplayer is an open source multimedia player that can be used to play audio and video. mplayer comes with decoders in multiple formats and does not require us to install them separately. The development board does not have mplayer installed and configured, and needs to be transplanted by yourself.
Directly port the mplayer I provided:
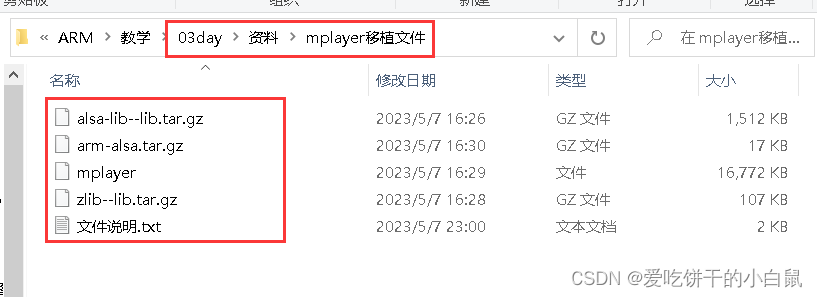
File usage instructions:
alsa-lib--lib.tar.gz:
This is the compilation result of alsa-lib. The lib library file is compressed. First, copy the file to the development board.
tftp下载命令为: tftp 192.168.1.100 -gr alsa-lib--lib.tar.gz
Unzip and copy all library files in this directory to the /usr/lib directory of the development board.
解压命令为: tar -zxvf alsa-lib--lib.tar.gz进入解压目录: cd lib/
拷贝到/usr/lib目录下: cp ./* /usr/lib -r
arm-alsa.tar.gz:
This is a compressed package of the configuration file compiled by alsa-lib. Copy the file to the development board.
tftp下载命令为: tftp 192.168.1.100 -gr arm-alsa.tar.gz
After decompression, copy all the files in this directory to the /usr/share/arm-alsa directory of the development board. (You need to create a /usr/share/arm-alsa directory in the root file system of the development board first)
- Create a new arm-alsa/ directory: mkdir /usr/share/arm-alsa (space) -p
- Create a new arm-alsa/ directory: mkdir /usr/share/arm-alsa (space) -p
- Copy to the /usr/share/arm-alsa directory: cp ./arm-alsa/* /usr/share/arm-alsa/ -r

zlib--lib.tar.gz:
This file is the lib library file compression package of the compilation result of zlib. First copy the file to the development board.
tftp下载命令为: tftp 192.168.1.100 -gr zlib--lib.tar.gz
After decompression, copy the lib library file in this directory to the /usr/lib directory of the development board root file system.
The decompression command is: tar -zxvf zlib--lib.tar.gzCopy to /usr/lib directory: cd lib/ //Enter the decompressed lib directory cp ./* /usr/lib -r //Copy

mplayer:
This is the executable file of mplayer, this is the mplayer player we need! Copy it to the /bin directory of the development board's root file system and give it execution permission.
cd /usr/bin/The tftp download command is: tftp 192.168.1.100 -gr mplayerGive execution permission: chmod +x mplayer


use:
mplayer is a command line audio and video playback tool.
Code method:
system function#include <stdlib.h>
int system(const char *command);
command:命令Foreground playback can be stopped directly. Background playback can only be stopped, paused and continued by sending a signal
killall -19 mplayer Pause
killall -18 mplayer Continue
killall -9 mplayer Kill process
#include <stdlib.h>

int main(int argc, char const *argv[])
{

	system("mplayer 1.mp3 </dev/null &");

	return 0;
}