Table of contents
1. Introduction to yaml and json
1. Introduction to yuml language
2. File formats supported by k8s
2. Declarative object management
1. Detailed explanation of deployment.yaml file
2. Detailed explanation of Pod yaml file
3. Detailed explanation of Service yaml file
3. Prepare resource allocation list
2. Create and view pod resources
3. Create a service service to provide external access and test it
4. Create resources and view services
2. View the generated yaml format
3. View the generated json format
4. Export the generated template using yaml format
5. Export existing resource generation templates
1. Introduction to yaml and json
1. Introduction to yuml language
YAML is a markup language similar to XML and JSON. It emphasizes being data-centered and not focusing on markup language. The definition of YAML itself is relatively simple. Known as "a humanized data format language".
YAML syntax format:
- Case Sensitive
- Use indentation to identify hierarchical relationships
- Tabs are not allowed for indentation, only spaces are allowed (lower version restrictions)
- The number of spaces for indentation does not matter, as long as elements at the same level are left aligned
- "#" indicates comment
2. File formats supported by k8s
Kubernetes supports YAML and JSON formats to manage resource objects
- JSON format: mainly used for message transmission between API interfaces
- YAML format: used for configuration and management. YAML is a concise, non-markup language with user-friendly content format and easier to read.
2. Declarative object management
##查看 api 资源版本标签
kubectl api-versions

#如果是业务场景一般首选使用 apps/v1
#带有beta字样的代表的是测试版本,不用在生产环境中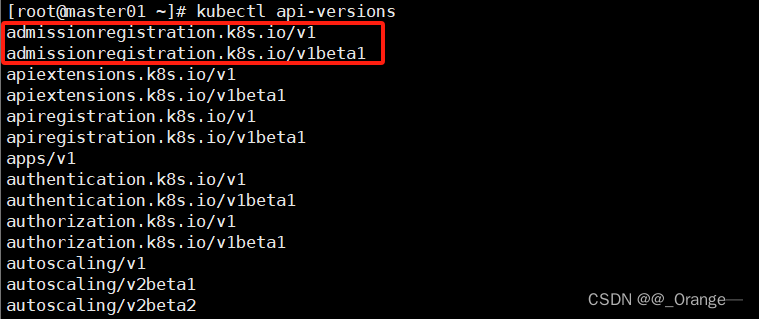
1. Detailed explanation of deployment.yaml file
apiVersion: extensions/v1beta1   #接口版本
kind: Deployment                 #接口类型
metadata:
  name: cango-demo               #Deployment名称
  namespace: cango-prd           #命名空间
  labels:
    app: cango-demo              #标签
spec:
  replicas: 3
  strategy:
    rollingUpdate:  ##由于replicas为3,则整个升级,pod个数在2-4个之间
      maxSurge: 1      #滚动升级时会先启动1个pod
      maxUnavailable: 1 #滚动升级时允许的最大Unavailable的pod个数
  template:
    metadata:
      labels:
        app: cango-demo  #模板名称必填
    sepc: #定义容器模板,该模板可以包含多个容器
      containers:
        - name: cango-demo                                                           #镜像名称
          image: swr.cn-east-2.myhuaweicloud.com/cango-prd/cango-demo:0.0.1-SNAPSHOT #镜像地址
          command: [ "/bin/sh","-c","cat /etc/config/path/to/special-key" ]    #启动命令
          args:                                                                #启动参数
            - '-storage.local.retention=$(STORAGE_RETENTION)'
            - '-storage.local.memory-chunks=$(STORAGE_MEMORY_CHUNKS)'
            - '-config.file=/etc/prometheus/prometheus.yml'
            - '-alertmanager.url=http://alertmanager:9093/alertmanager'
            - '-web.external-url=$(EXTERNAL_URL)'
    #如果command和args均没有写,那么用Docker默认的配置。
    #如果command写了,但args没有写,那么Docker默认的配置会被忽略而且仅仅执行.yaml文件的command(不带任何参数的)。
    #如果command没写,但args写了,那么Docker默认配置的ENTRYPOINT的命令行会被执行,但是调用的参数是.yaml中的args。
    #如果如果command和args都写了,那么Docker默认的配置被忽略,使用.yaml的配置。
          imagePullPolicy: IfNotPresent  #如果不存在则拉取
          livenessProbe:       #表示container是否处于live状态。如果LivenessProbe失败,LivenessProbe将会通知kubelet对应的container不健康了。随后kubelet将kill掉container,并根据RestarPolicy进行进一步的操作。默认情况下LivenessProbe在第一次检测之前初始化值为Success,如果container没有提供LivenessProbe,则也认为是Success;
            httpGet:
              path: /health #如果没有心跳检测接口就为/
              port: 8080
              scheme: HTTP
            initialDelaySeconds: 60 ##启动后延时多久开始运行检测
            timeoutSeconds: 5
            successThreshold: 1
            failureThreshold: 5
          readinessProbe:
            httpGet:
              path: /health #如果没有心跳检测接口就为/
              port: 8080
              scheme: HTTP
            initialDelaySeconds: 30 ##启动后延时多久开始运行检测
            timeoutSeconds: 5
            successThreshold: 1
            failureThreshold: 5
          resources:              ##CPU内存限制
            requests:
              cpu: 2
              memory: 2048Mi
            limits:
              cpu: 2
              memory: 2048Mi
          env:                    ##通过环境变量的方式,直接传递pod=自定义Linux OS环境变量
            - name: LOCAL_KEY     #本地Key
              value: value
            - name: CONFIG_MAP_KEY  #局策略可使用configMap的配置Key,
              valueFrom:
                configMapKeyRef:
                  name: special-config   #configmap中找到name为special-config
                  key: special.type      #找到name为special-config里data下的key
          ports:
            - name: http
              containerPort: 8080 #对service暴露端口
          volumeMounts:     #挂载volumes中定义的磁盘
          - name: log-cache
            mount: /tmp/log
          - name: sdb       #普通用法,该卷跟随容器销毁,挂载一个目录
            mountPath: /data/media
          - name: nfs-client-root    #直接挂载硬盘方法,如挂载下面的nfs目录到/mnt/nfs
            mountPath: /mnt/nfs
          - name: example-volume-config  #高级用法第1种,将ConfigMap的log-script,backup-script分别挂载到/etc/config目录下的一个相对路径path/to/...下,如果存在同名文件,直接覆盖。
            mountPath: /etc/config
          - name: rbd-pvc                #高级用法第2中,挂载PVC(PresistentVolumeClaim)

#使用volume将ConfigMap作为文件或目录直接挂载,其中每一个key-value键值对都会生成一个文件,key为文件名,value为内容,
  volumes:  # 定义磁盘给上面volumeMounts挂载
  - name: log-cache
    emptyDir: {}
  - name: sdb  #挂载宿主机上面的目录
    hostPath:
      path: /any/path/it/will/be/replaced
  - name: example-volume-config  # 供ConfigMap文件内容到指定路径使用
    configMap:
      name: example-volume-config  #ConfigMap中名称
      items:
      - key: log-script           #ConfigMap中的Key
        path: path/to/log-script  #指定目录下的一个相对路径path/to/log-script
      - key: backup-script        #ConfigMap中的Key
        path: path/to/backup-script  #指定目录下的一个相对路径path/to/backup-script
  - name: nfs-client-root         #供挂载NFS存储类型
    nfs:
      server: 10.42.0.55          #NFS服务器地址
      path: /opt/public           #showmount -e 看一下路径
  - name: rbd-pvc                 #挂载PVC磁盘
    persistentVolumeClaim:
      claimName: rbd-pvc1         #挂载已经申请的pvc磁盘
2. Detailed explanation of Pod yaml file
apiVersion: v1			#必选,版本号,例如v1
kind: Pod				#必选,Pod
metadata:				#必选,元数据
  name: string			  #必选,Pod名称
  namespace: string		  #必选,Pod所属的命名空间
  labels:				  #自定义标签
    - name: string		    #自定义标签名字
  annotations:			    #自定义注释列表
    - name: string
spec:					#必选,Pod中容器的详细定义
  containers:			  #必选,Pod中容器列表
  - name: string		    #必选,容器名称
    image: string		    #必选,容器的镜像名称
    imagePullPolicy: [Always | Never | IfNotPresent]	#获取镜像的策略:Alawys表示总是下载镜像,IfnotPresent表示优先使用本地镜像,否则下载镜像,Nerver表示仅使用本地镜像
    command: [string]		#容器的启动命令列表,如不指定,使用打包时使用的启动命令
    args: [string]			#容器的启动命令参数列表
    workingDir: string		#容器的工作目录
    volumeMounts:			#挂载到容器内部的存储卷配置
    - name: string			  #引用pod定义的共享存储卷的名称,需用volumes[]部分定义的的卷名
      mountPath: string		  #存储卷在容器内mount的绝对路径,应少于512字符
      readOnly: boolean		  #是否为只读模式
    ports:					#需要暴露的端口库号列表
    - name: string			  #端口号名称
      containerPort: int	  #容器需要监听的端口号
      hostPort: int			  #容器所在主机需要监听的端口号,默认与Container相同
      protocol: string		  #端口协议,支持TCP和UDP,默认TCP
    env:					#容器运行前需设置的环境变量列表
    - name: string			  #环境变量名称
      value: string			  #环境变量的值
    resources:				#资源限制和请求的设置
      limits:				  #资源限制的设置
        cpu: string			    #Cpu的限制,单位为core数,将用于docker run --cpu-shares参数
        memory: string			#内存限制,单位可以为Mib/Gib,将用于docker run --memory参数
      requests:				  #资源请求的设置
        cpu: string			    #Cpu请求,容器启动的初始可用数量
        memory: string		    #内存清楚,容器启动的初始可用数量
    livenessProbe:     		#对Pod内个容器健康检查的设置,当探测无响应几次后将自动重启该容器,检查方法有exec、httpGet和tcpSocket,对一个容器只需设置其中一种方法即可
      exec:					#对Pod容器内检查方式设置为exec方式
        command: [string]	  #exec方式需要制定的命令或脚本
      httpGet:				#对Pod内个容器健康检查方法设置为HttpGet,需要制定Path、port
        path: string
        port: number
        host: string
        scheme: string
        HttpHeaders:
        - name: string
          value: string
      tcpSocket:			#对Pod内个容器健康检查方式设置为tcpSocket方式
         port: number
       initialDelaySeconds: 0	#容器启动完成后首次探测的时间,单位为秒
       timeoutSeconds: 0		#对容器健康检查探测等待响应的超时时间,单位秒,默认1秒
       periodSeconds: 0			#对容器监控检查的定期探测时间设置,单位秒,默认10秒一次
       successThreshold: 0
       failureThreshold: 0
       securityContext:
         privileged:false
    restartPolicy: [Always | Never | OnFailure]		#Pod的重启策略,Always表示一旦不管以何种方式终止运行,kubelet都将重启,OnFailure表示只有Pod以非0退出码退出才重启,Nerver表示不再重启该Pod
    nodeSelector: obeject		#设置NodeSelector表示将该Pod调度到包含这个label的node上,以key:value的格式指定
    imagePullSecrets:			#Pull镜像时使用的secret名称,以key:secretkey格式指定
    - name: string
    hostNetwork:false			#是否使用主机网络模式,默认为false,如果设置为true,表示使用宿主机网络
    volumes:					#在该pod上定义共享存储卷列表
    - name: string				  #共享存储卷名称 (volumes类型有很多种)
      emptyDir: {}				  #类型为emtyDir的存储卷,与Pod同生命周期的一个临时目录。为空值
      hostPath: string			  #类型为hostPath的存储卷,表示挂载Pod所在宿主机的目录
        path: string			    #Pod所在宿主机的目录,将被用于同期中mount的目录
      secret:					#类型为secret的存储卷,挂载集群与定义的secre对象到容器内部
        scretname: string
        items:
        - key: string
          path: string
      configMap:				#类型为configMap的存储卷,挂载预定义的configMap对象到容器内部
        name: string
        items:
        - key: string
3. Detailed explanation of Service yaml file
apiVersion: v1
kind: Service
matadata:                                #元数据
  name: string                           #service的名称
  namespace: string                      #命名空间
  labels:                                #自定义标签属性列表
    - name: string
  annotations:                           #自定义注解属性列表
    - name: string
spec:                                    #详细描述
  selector: []                           #label selector配置,将选择具有label标签的Pod作为管理
                                         #范围
  type: string                           #service的类型,指定service的访问方式,默认为
                                         #clusterIp
  clusterIP: string                      #虚拟服务地址
  sessionAffinity: string                #是否支持session
  ports:                                 #service需要暴露的端口列表
  - name: string                         #端口名称
    protocol: string                     #端口协议,支持TCP和UDP,默认TCP
    port: int                            #服务监听的端口号
    targetPort: int                      #需要转发到后端Pod的端口号
    nodePort: int                        #当type = NodePort时,指定映射到物理机的端口号
  status:                                #当spce.type=LoadBalancer时,设置外部负载均衡器的地址
    loadBalancer:                        #外部负载均衡器
      ingress:                           #外部负载均衡器
        ip: string                       #外部负载均衡器的Ip地址值
        hostname: string                 #外部负载均衡器的主机名
3. Prepare resource allocation list
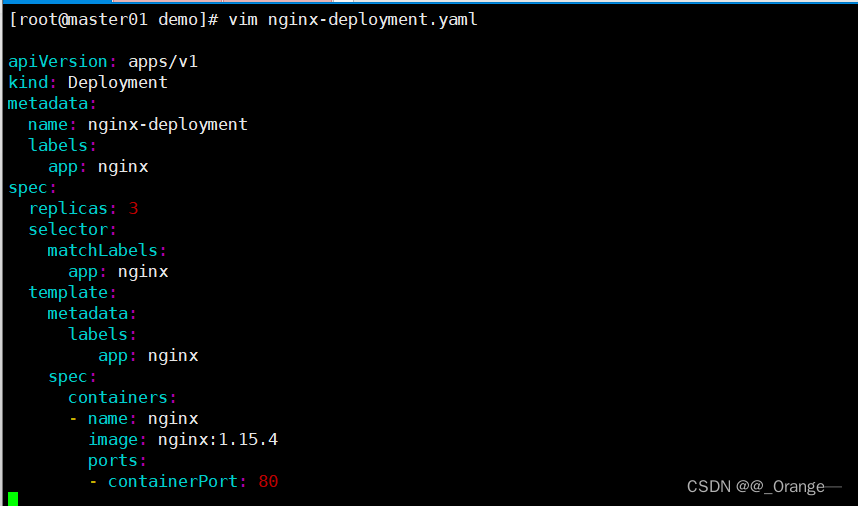
1. Write yaml file
vim nginx-deployment.yaml
apiVersion: apps/v1		#指定api版本标签
kind: Deployment		#定义资源的类型/角色,deployment为副本控制器,此处资源类型可以是Deployment、Job、Ingress、Service等
metadata:					#定义资源的元数据信息,比如资源的名称、namespace、标签等信息
  name: nginx-deployment	#定义资源的名称,在同一个namespace空间中必须是唯一的
  labels:				#定义Deployment资源标签
    app: nginx
spec:					#定义deployment资源需要的参数属性,诸如是否在容器失败时重新启动容器的属性
  replicas: 3			#定义副本数量
  selector:				#定义标签选择器
    matchLabels:		#定义匹配标签
      app: nginx		#需与 .spec.template.metadata.labels 定义的标签保持一致
  template:				#定义业务模板,如果有多个副本,所有副本的属性会按照模板的相关配置进行匹配
    metadata:
      labels:           #定义Pod副本将使用的标签,需与 .spec.selector.matchLabels 定义的标签保持一致
        app: nginx
    spec:
      containers:				#定义容器属性
      - name: nginx				#定义一个容器名,一个 - name: 定义一个容器
        image: nginx:1.15.4		#定义容器使用的镜像以及版本
        ports:
        - containerPort: 80		#定义容器的对外的端口

---------------------------------------------------------------
vim nginx-deployment.yaml

apiVersion: apps/v1
kind: Deployment
metadata:
  name: nginx-deployment
  labels:
    app: nginx
spec:
  replicas: 3
  selector:
    matchLabels:
      app: nginx
  template:
    metadata:
      labels:
         app: nginx
    spec:
      containers:
      - name: nginx
        image: nginx:1.15.4
        ports:
        - containerPort: 80
2. Create and view pod resources
//创建资源对象
kubectl apply -f nginx-deployment.yaml

//查看创建的pod资源
kubectl get pods -o wide

3. Create a service service to provide external access and test it
vim nginx-service.yaml
apiVersion: v1
kind: Service
metadata:
  name: nginx-service
  labels:
    app: nginx
spec:
  type: NodePort
  ports:
  - port: 80
    targetPort: 80
  selector:
    app: nginx

4. Create resources and view services
kubectl apply -f nginx-service.yaml

//查看创建的service
kubectl get svc

5. Browser access test
##在浏览器输入 nodeIP:nodePort 即可访问
http://192.168.247.10:31562

Detailed explanation of ports in k8s:
- port:port is the port used to access the service within the k8s cluster, that is, the service can be accessed from the Node where the Pod is located through clusterIP: port
- nodePort:nodePort is the port for external access to the service in the k8s cluster. A service can be accessed from the outside through nodeIP: nodePort.
- targetPort:targetPort is the port of the Pod. Traffic from the port or nodePort is forwarded to the targetPort of the backend Pod through the kube-proxy reverse proxy load balancing, and finally enters the container. .
- containerPort:containerPort is the port of the container inside the Pod, and targetPort maps to containerPort.
4. Trial operation and format
1. -dry-run: trial run
- –dry-run: means trial run, which does not actually perform naming (used to test whether the command is correct), that is, it will not actually create pod and deployment instances. Remove them. After this parameter, the command can actually be executed.
kubectl run nginx-test --image=nginx --port=80 --dry-run=client
kubectl create deployment nginx-deploy --image=nginx --port=80 --replicas=3 --dry-run=client

2. View the generated yaml format
- Use –dry-run to test run without triggering the generated command, and then use -o yaml to view its yaml resource configuration list
kubectl run nginx-test --image=nginx --port=80 --dry-run=client -o yaml
#试运行一个pod,并将它的yaml配置格式显示出来

3. View the generated json format
- You can view the json configuration list generated by this command through -o json
kubectl run nginx-test --image=nginx --port=80 --dry-run=client -o json
#试运行一个pod控制器,并显示的pod的配置信息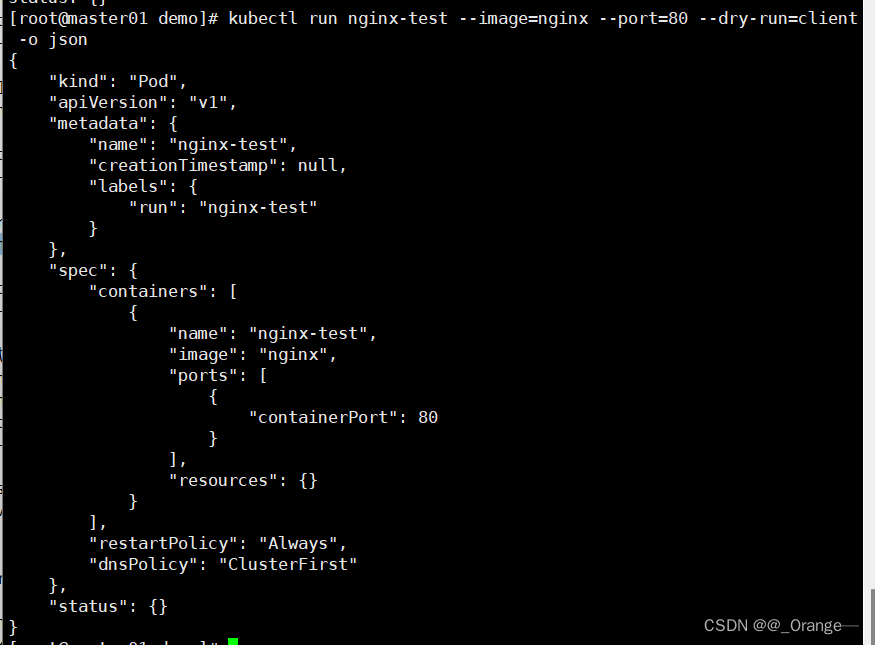
4. Export the generated template using yaml format
kubectl run nginx-test --image=nginx --port=80 --dry-run=client -o yaml > nginx-test.yaml
#试运行pod控制器,并以yaml格式显示出来,将结构追加到指定的yaml文件中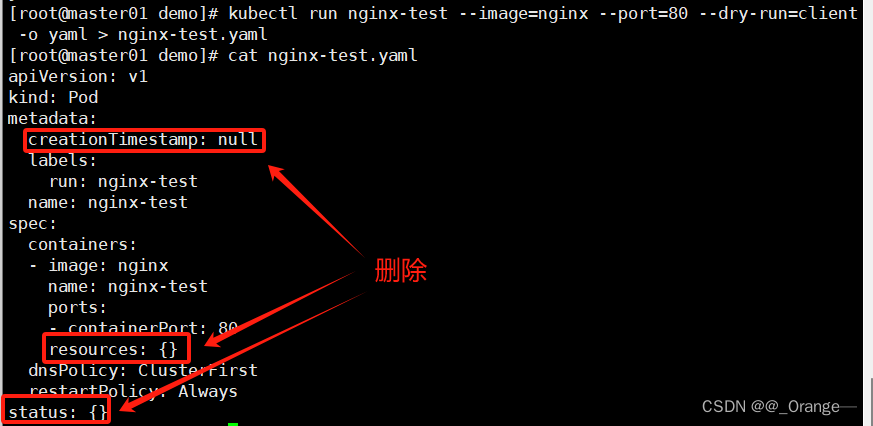
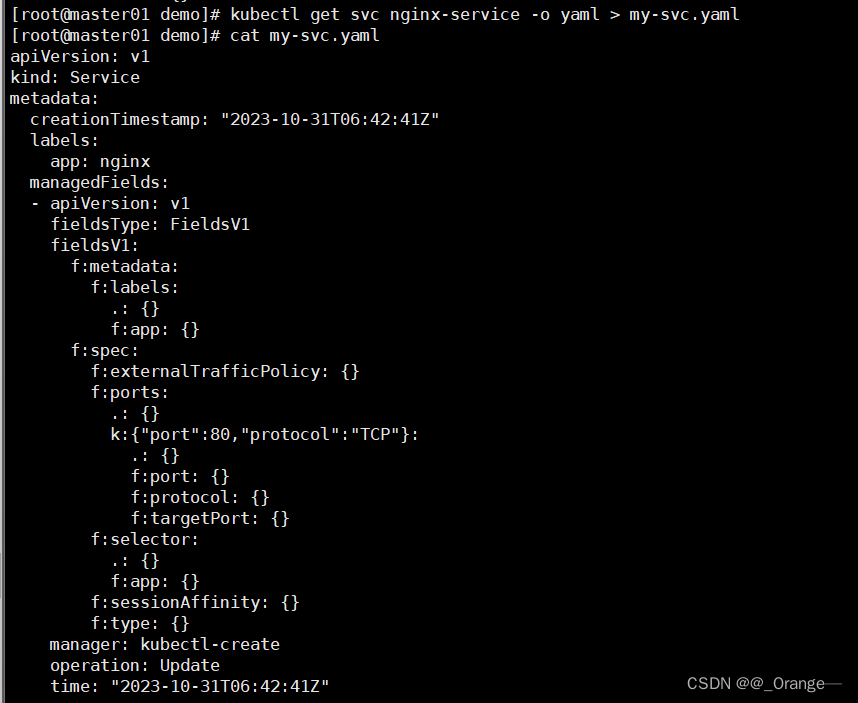
5. Export existing resource generation templates
#生成模板
kubectl get svc nginx-service -o yaml
#生成并导出模板
kubectl get svc nginx-service -o yaml > my-svc.yaml
View field help information, you can view the help information of related resource objects layer by layer
kubectl explain deployments.spec.template.spec.containers
或
kubectl explain pods.spec.containers
问:yaml文件如何写?
1、用 --dry-run 命令生成
2、用get命令导出