In this issue, I will introduce to you a campus information wall system, which can publish information, confession wall, sharing wall, campus second-hand sales, consultation and sharing and other wall information. The entire project is relatively systematic, divided into server side, management backend, user Web side, and mini program C side. The coding style is relatively mature and has reference and learning significance. It is good for studying and doing graduation projects, and interviewing and developing experience.
1. Business introduction
This system is divided into the following modules:
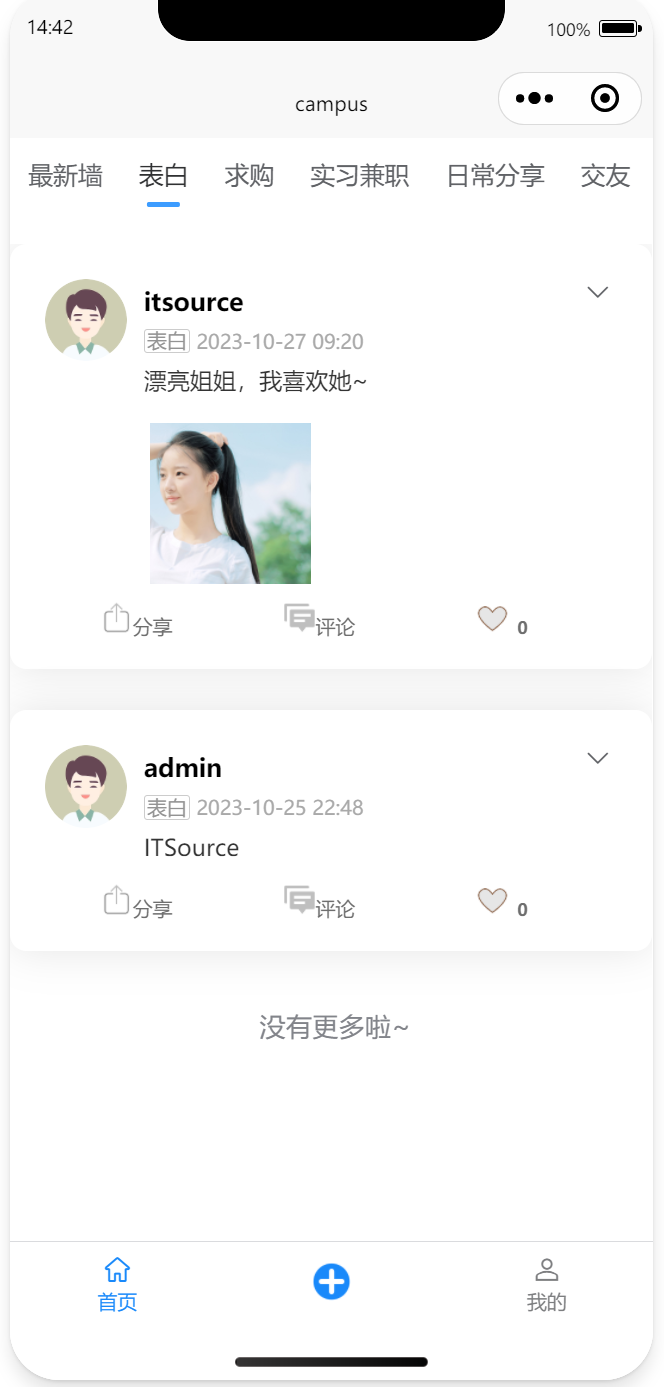
1. Classification display of wall information module
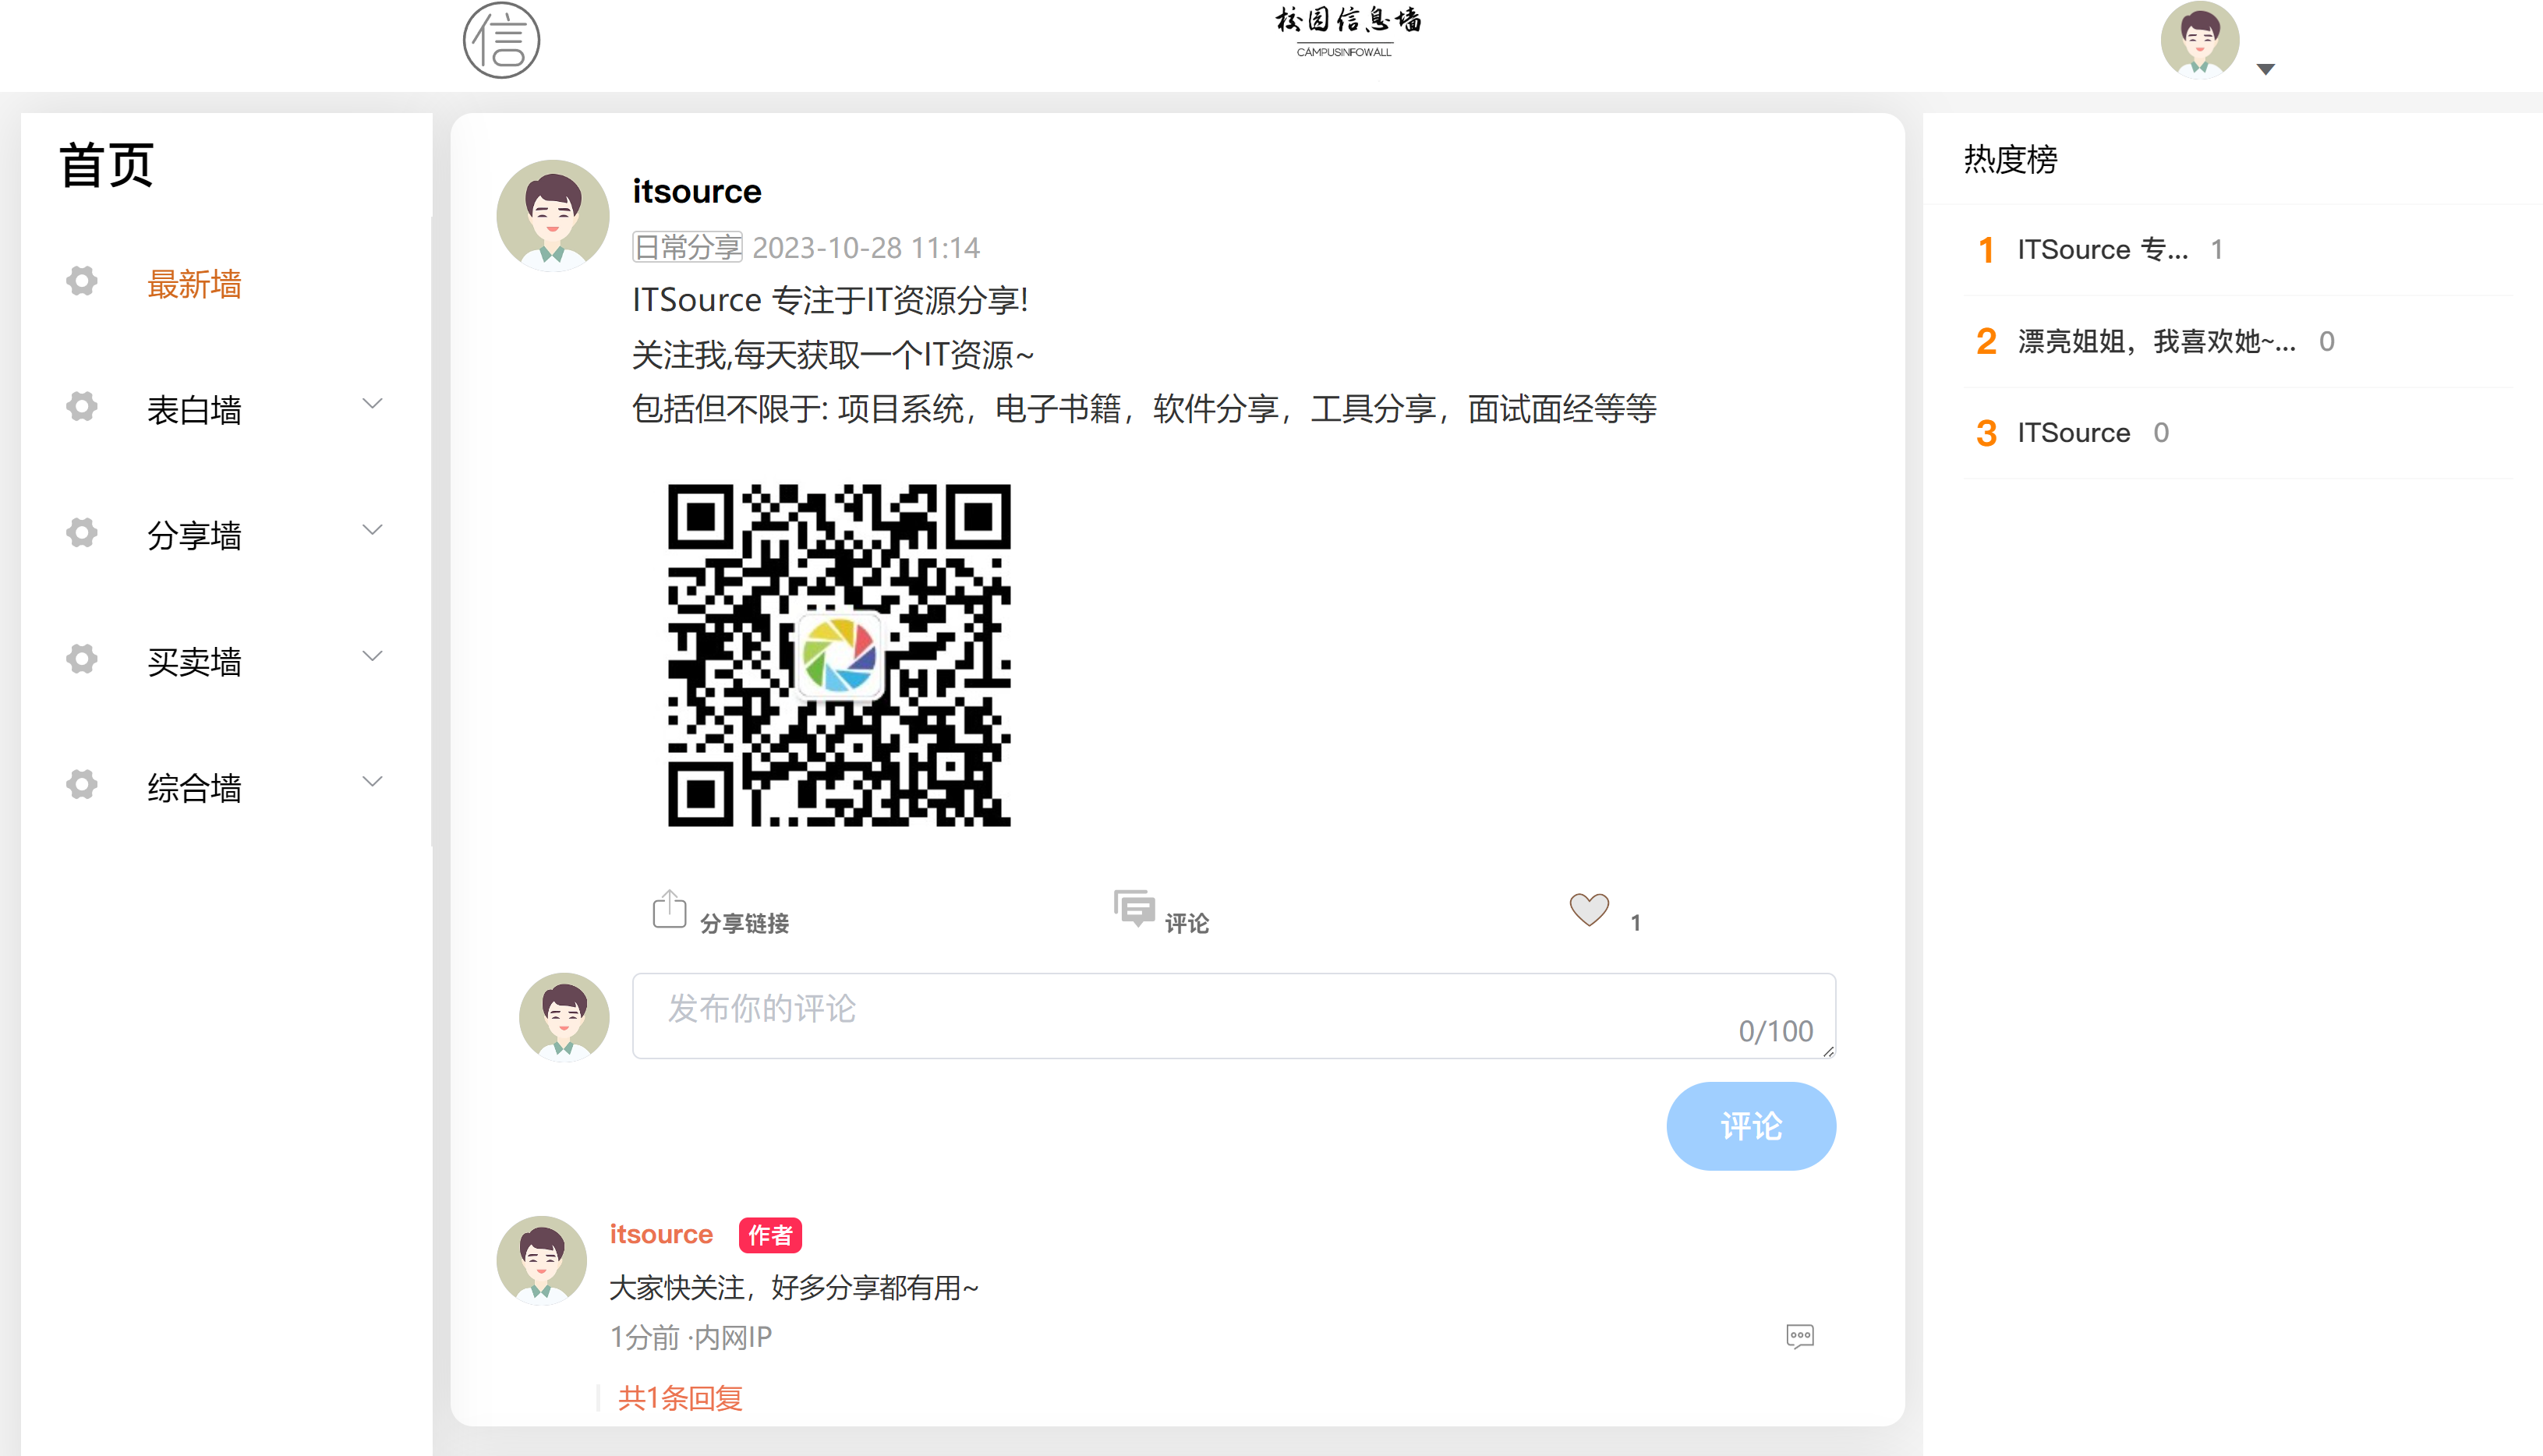
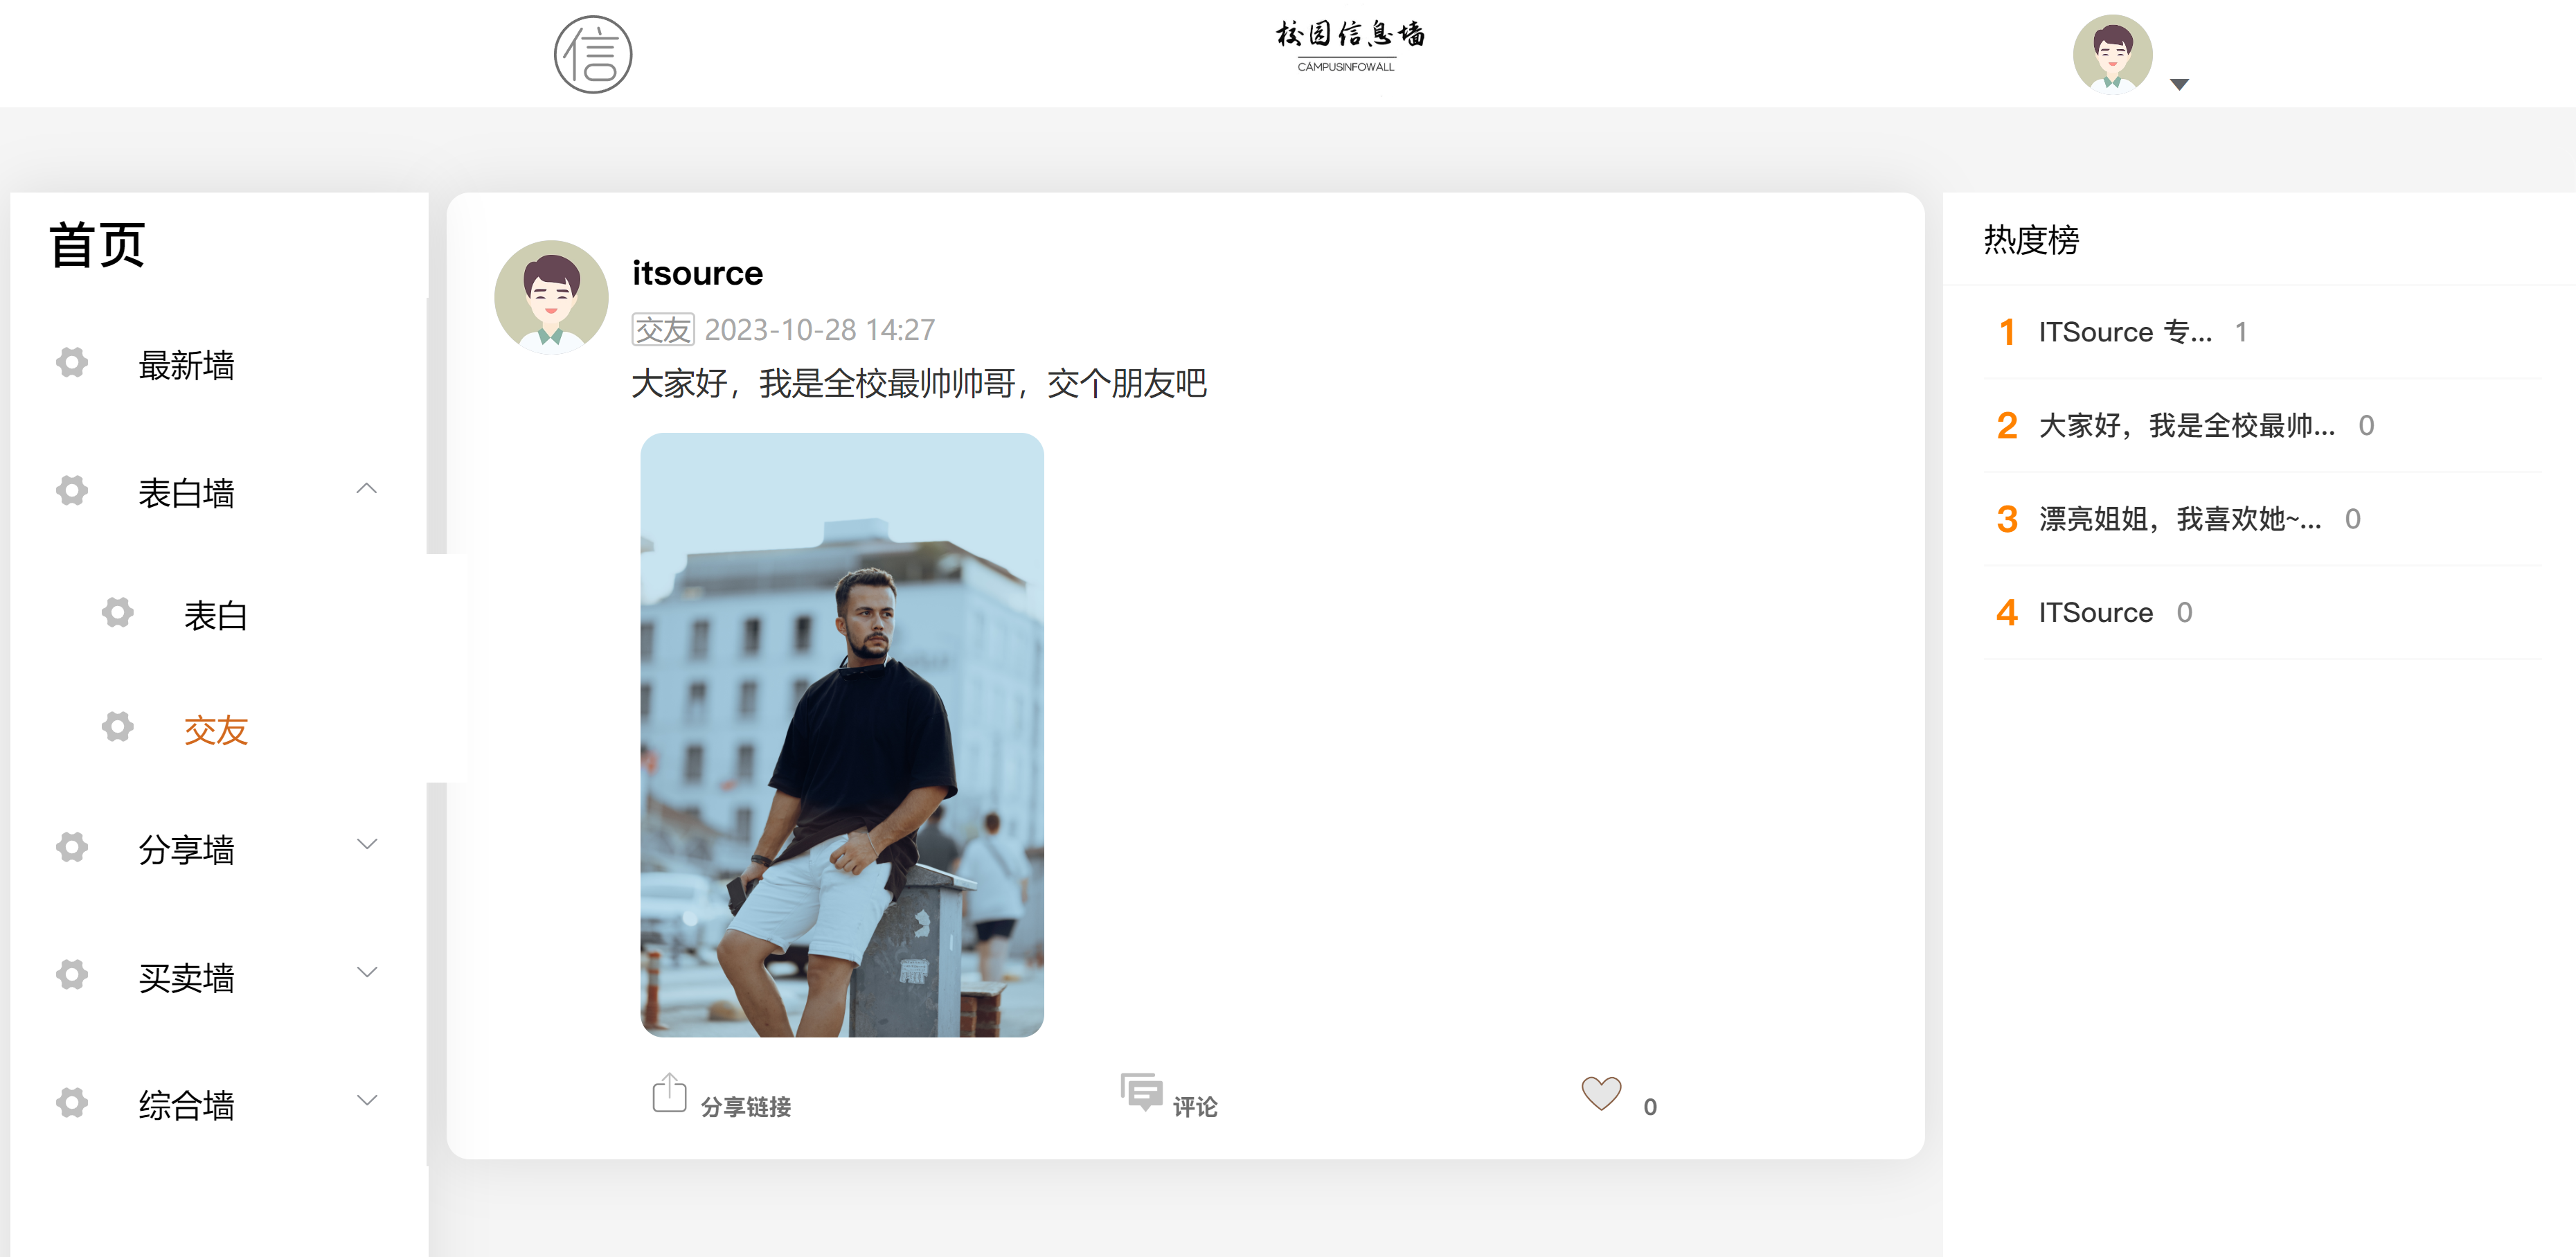
Web client
“
Latest wall: Display wall information according to the information wall update time
“
There are also confession walls, transaction walls, comprehensive walls, etc., and the categories can be customized.
Mini program display:
image.png
You can also share videos:
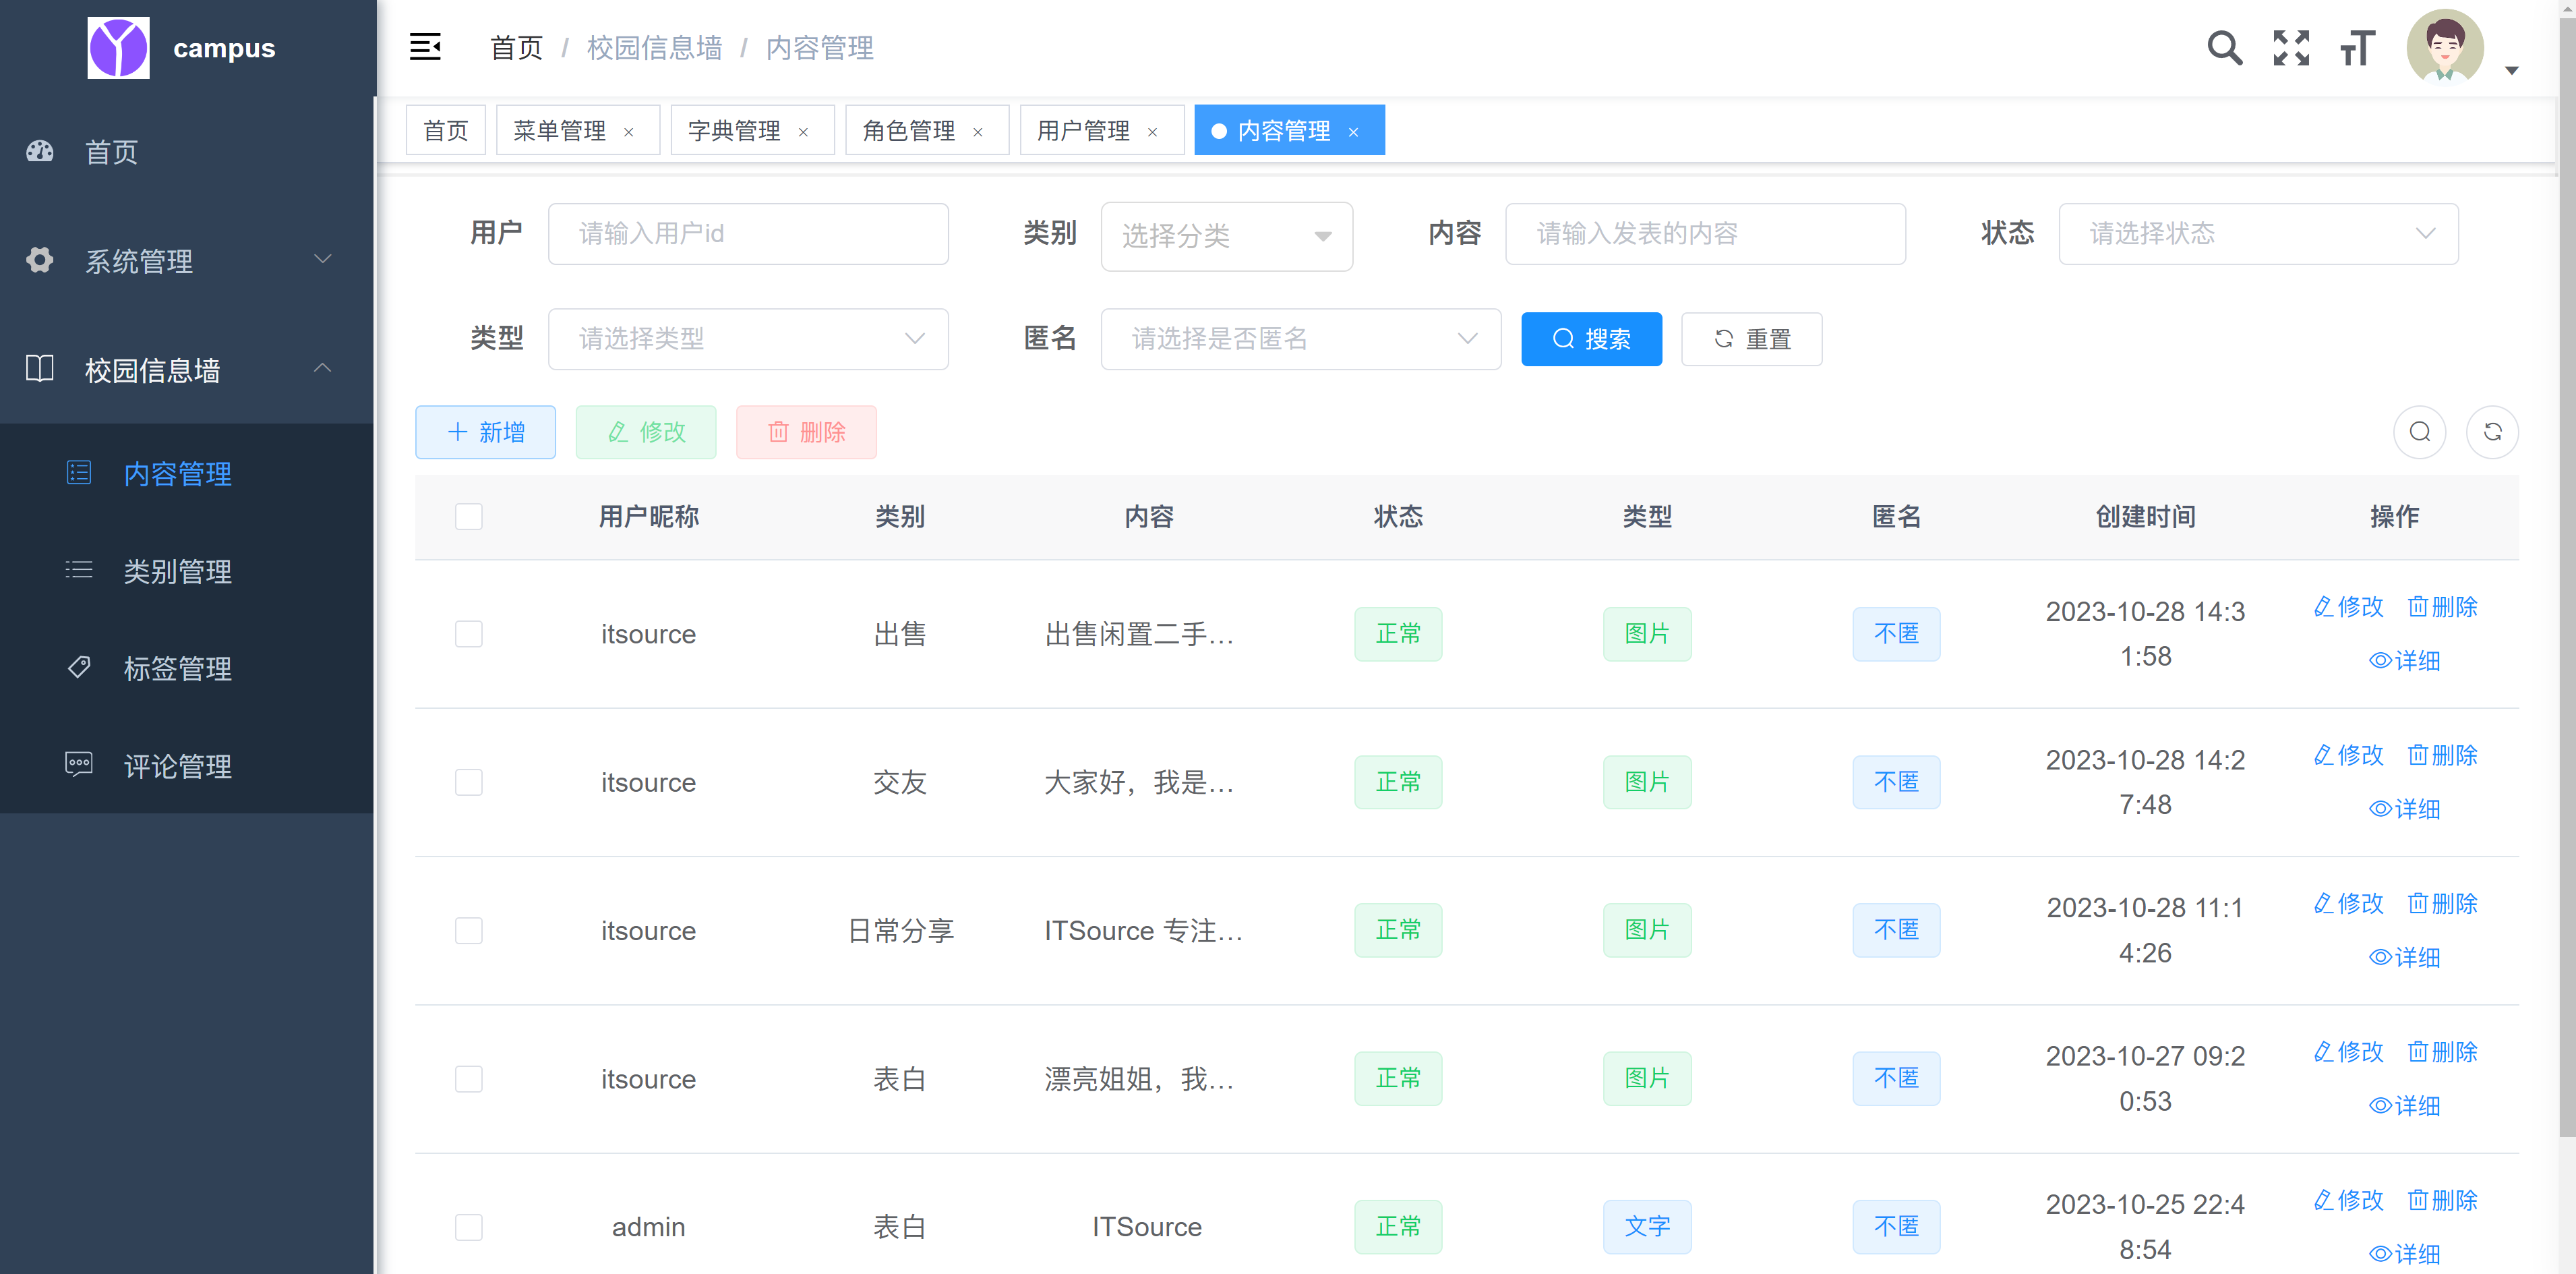
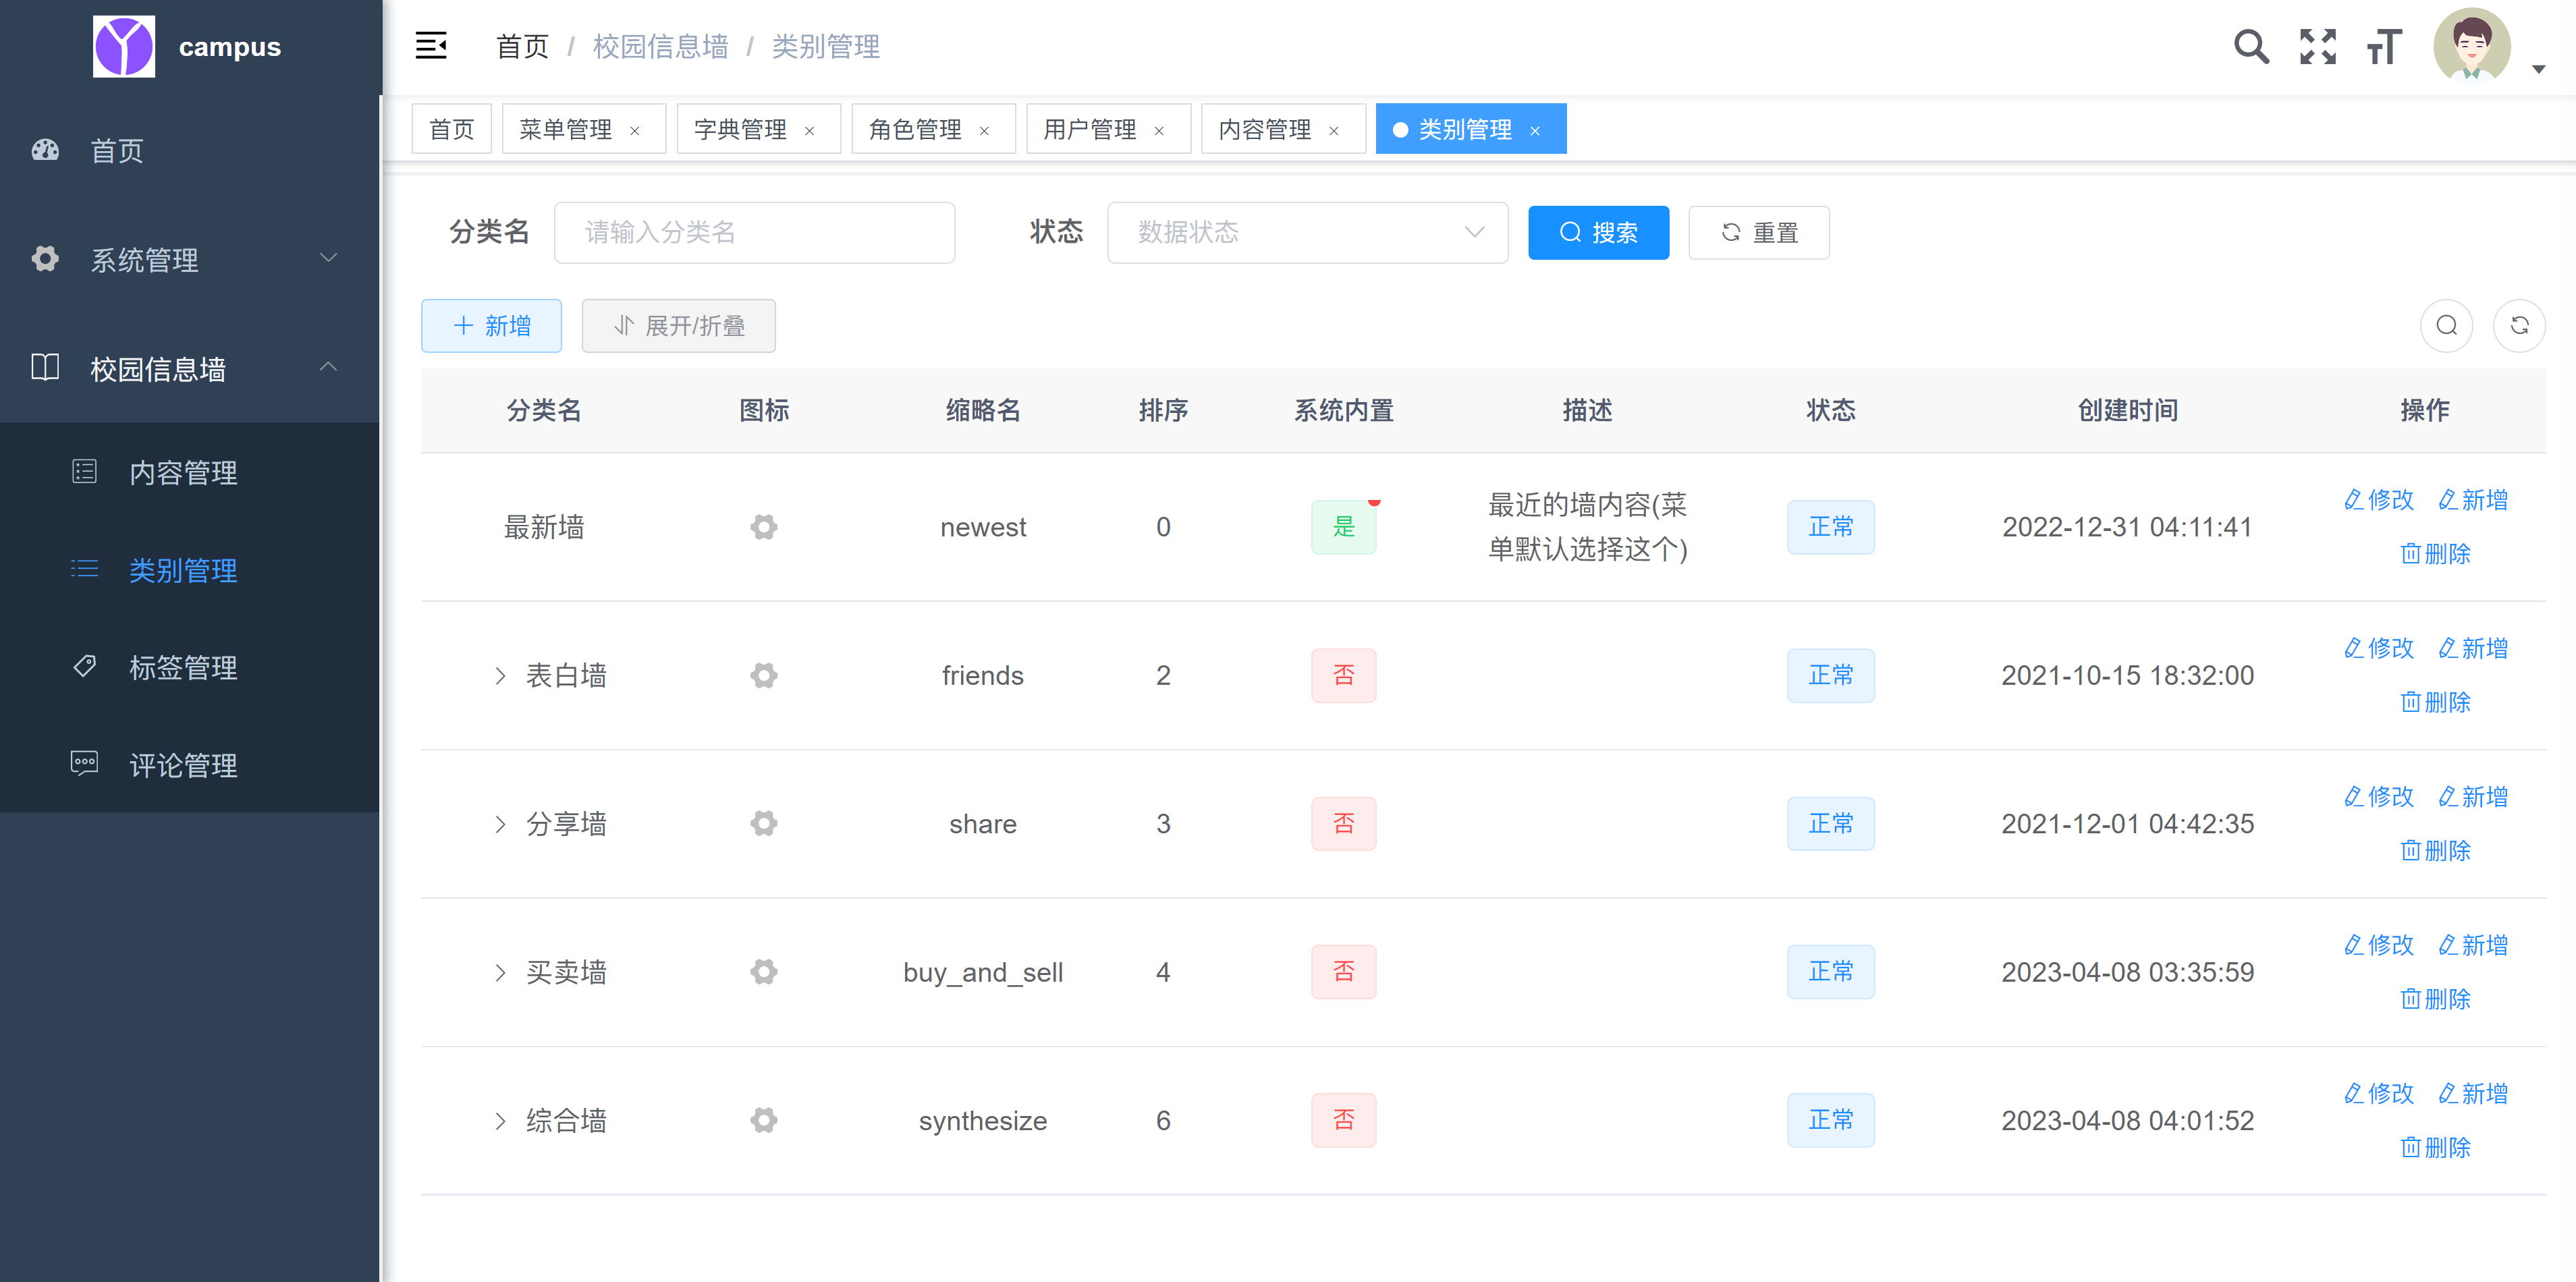
2. Information wall management background
“
The management background can manage the mini program and modify categories, tags, etc.
image.png
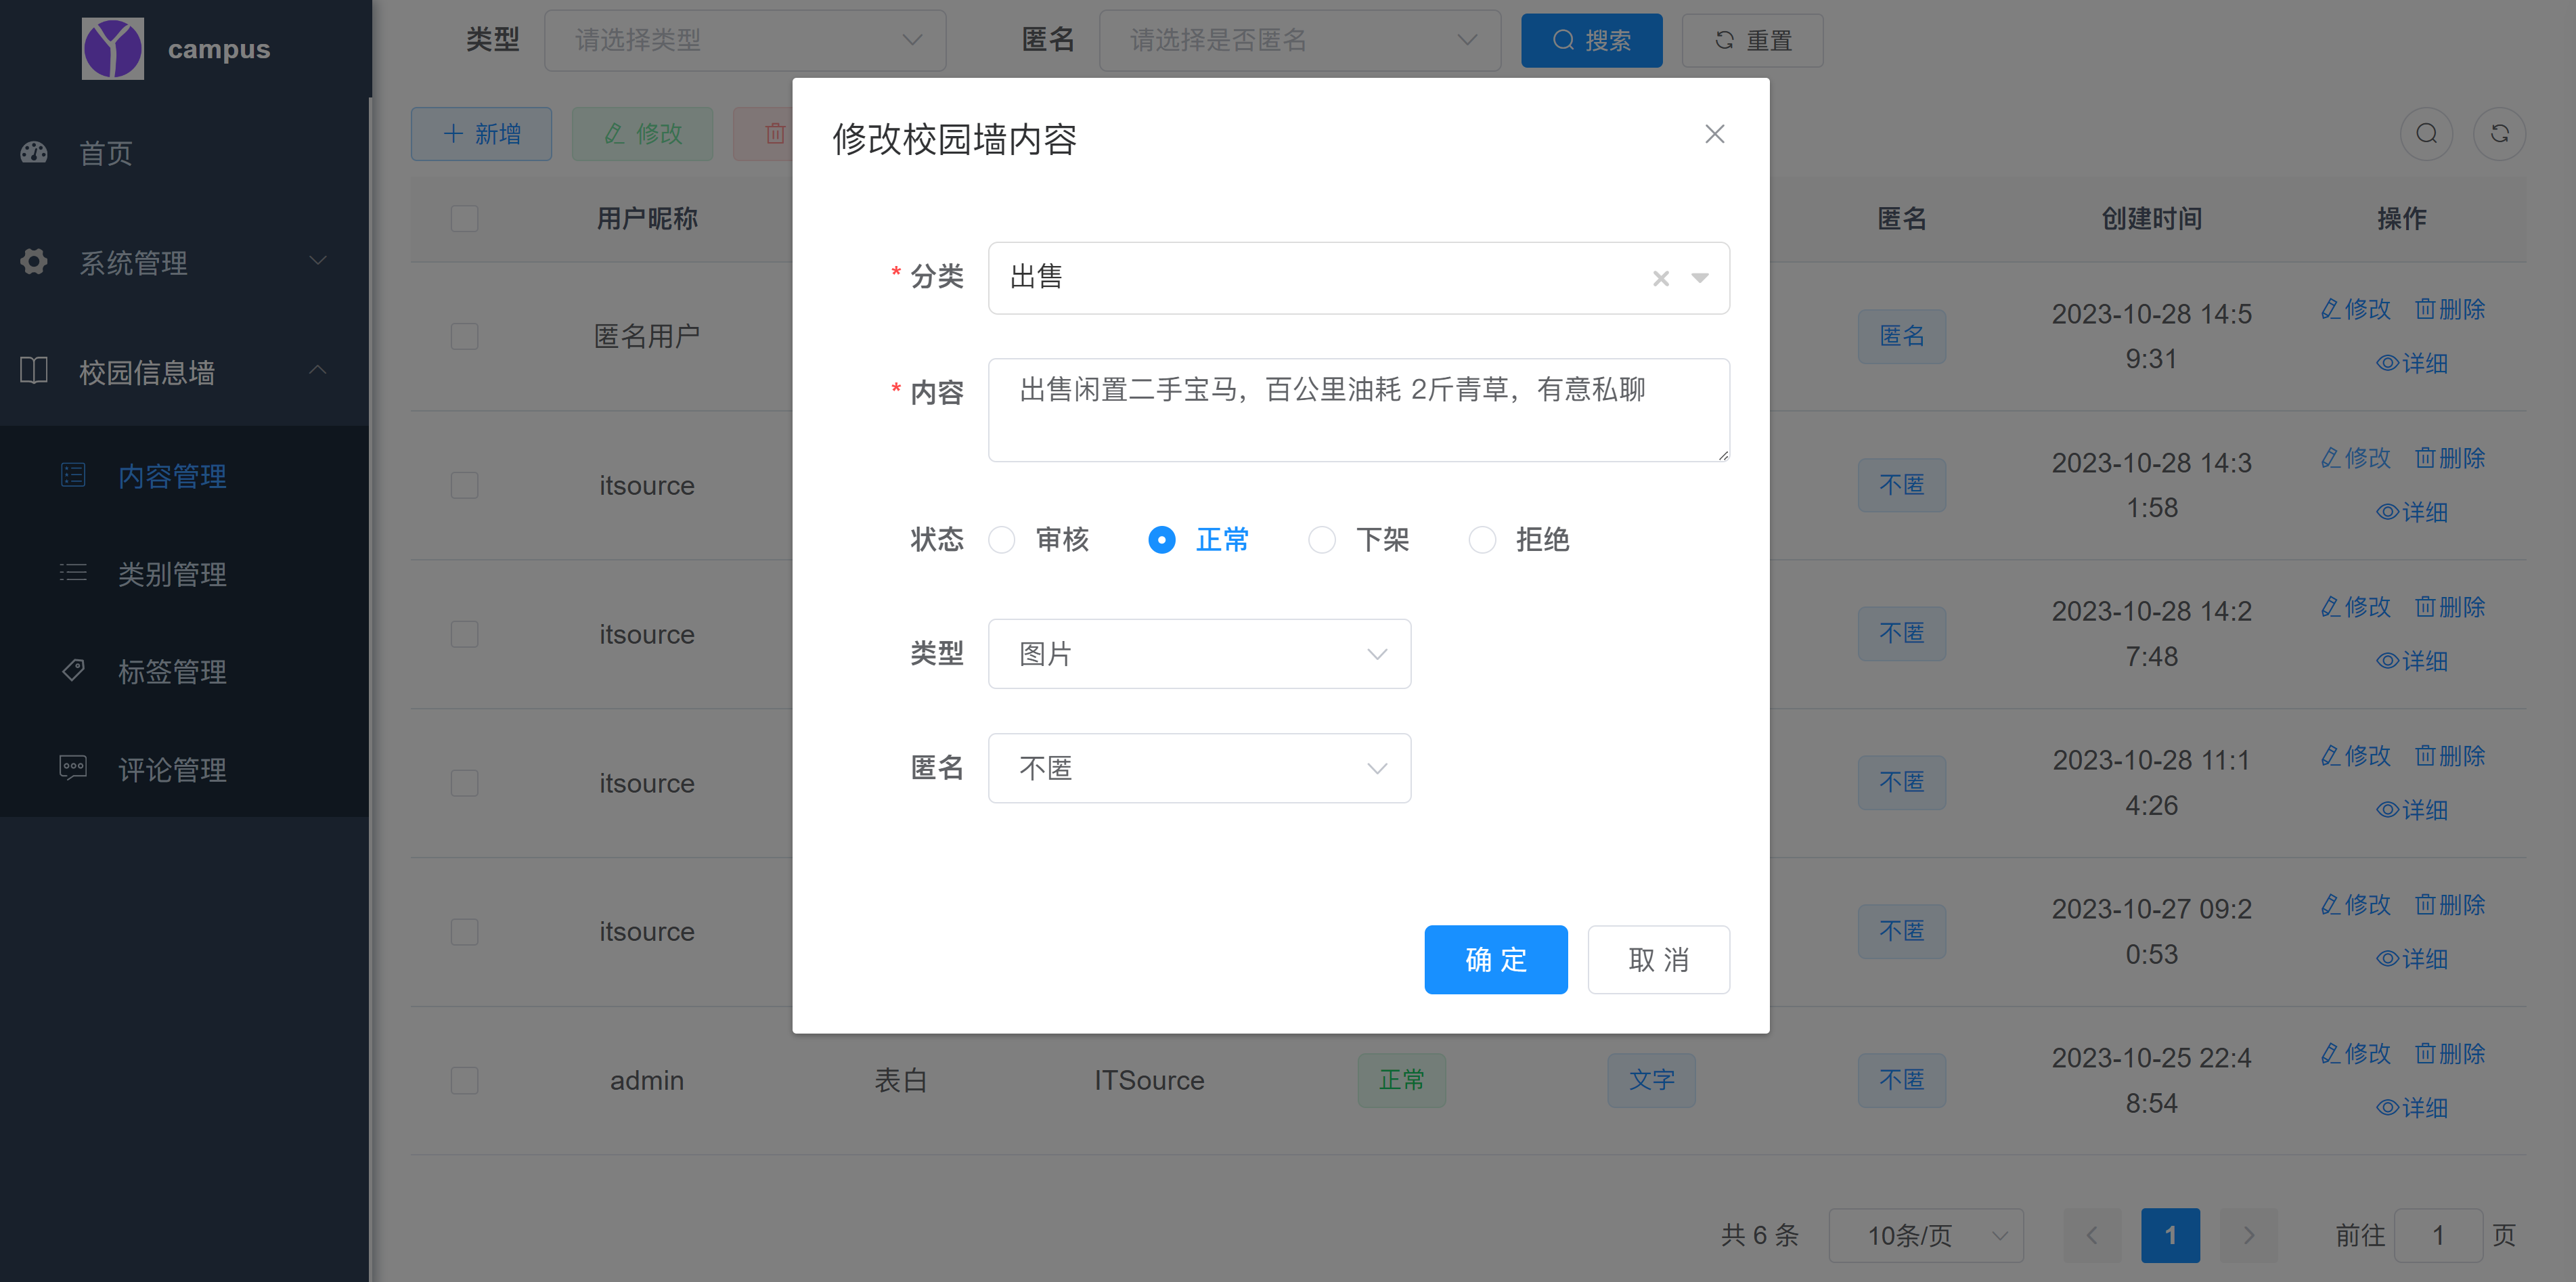
The management background can also review, remove, reject and other operations on the published information wall:
And manage wall menu: Manage comments:
2. Technical introduction
1. Technology stack
Backend: SpringBoot2.x +Mybatis+Redis
Database: MYSQL 8.x
前端: VUE + ElementUI
Management background: VUE + ElementUI
Mini program: uni-app
2. Code introduction
There are many systems designed in this project, which are divided into server side, management backend side, mini program side, web side, etc., so it is a little difficult to deploy. The project is deconstructed as follows:
image.png
Three Quick Start
1. Environment preparation
MYSQL 8
JDK1.8
Maven 3
IDEA
Node 16
Redis
HubuilderX
“
The above environment needs to be prepared and set up locally before proceeding with the following steps.
2. Download source code
Github:
“
Server + management background + Mini program built file https://github.com/panji-tech/campus-example Mini program source code: https://github.com/panji-tech/uni-app_campus_web web side: https: //github.com/panji-tech/nuxt_campus_example
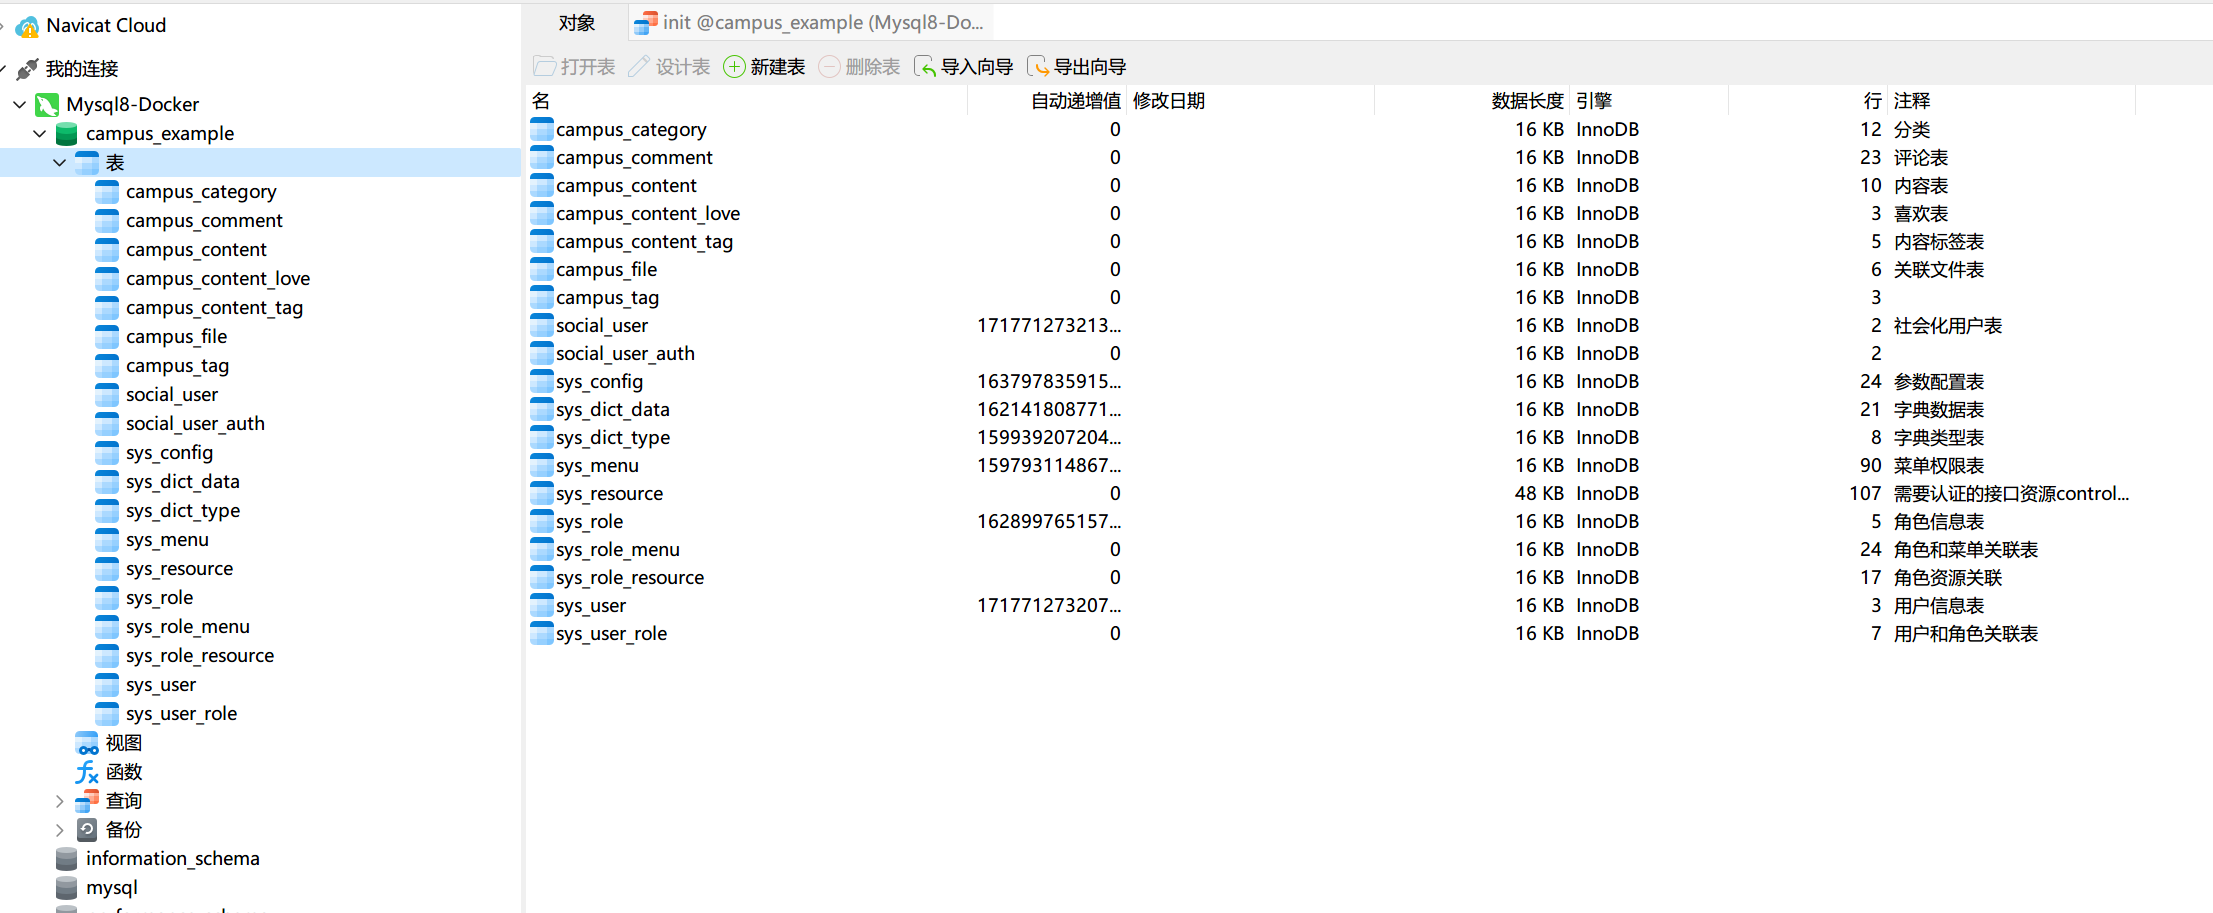
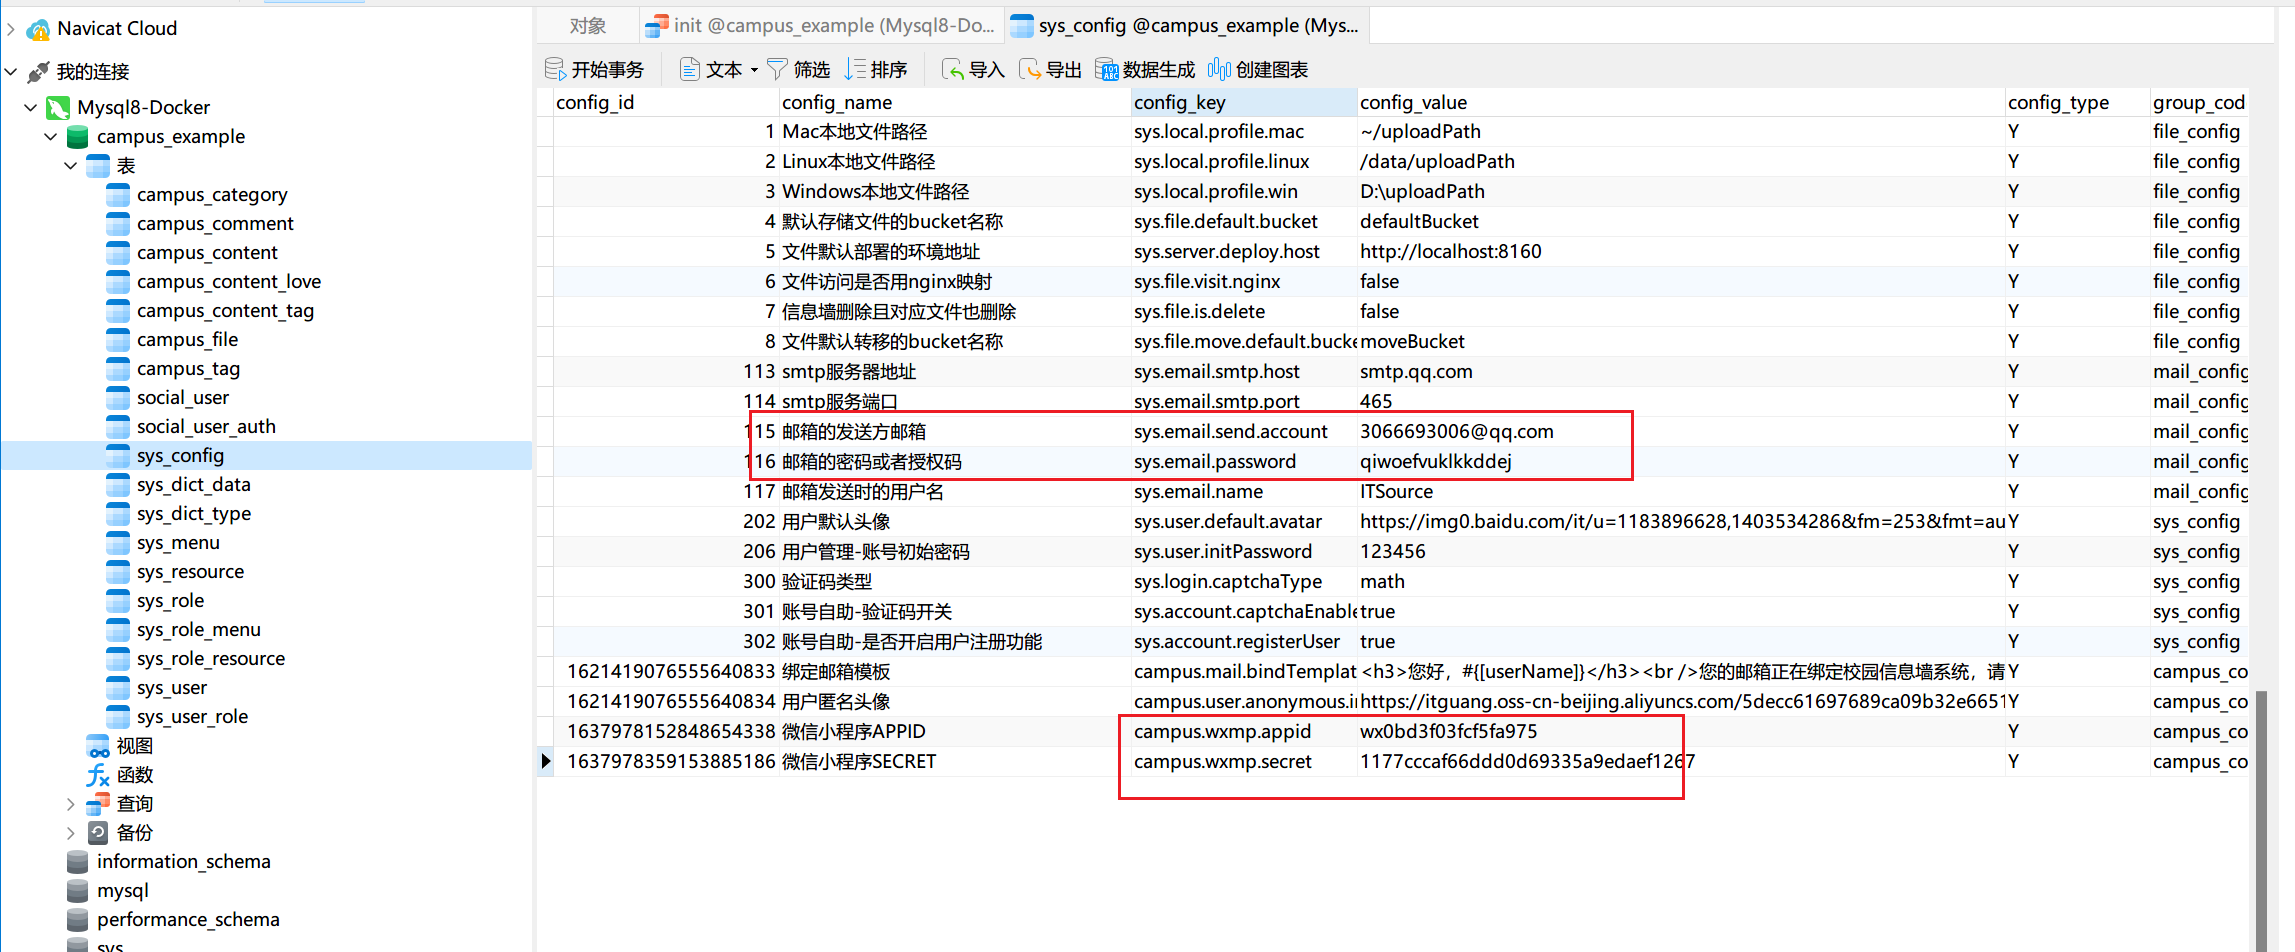
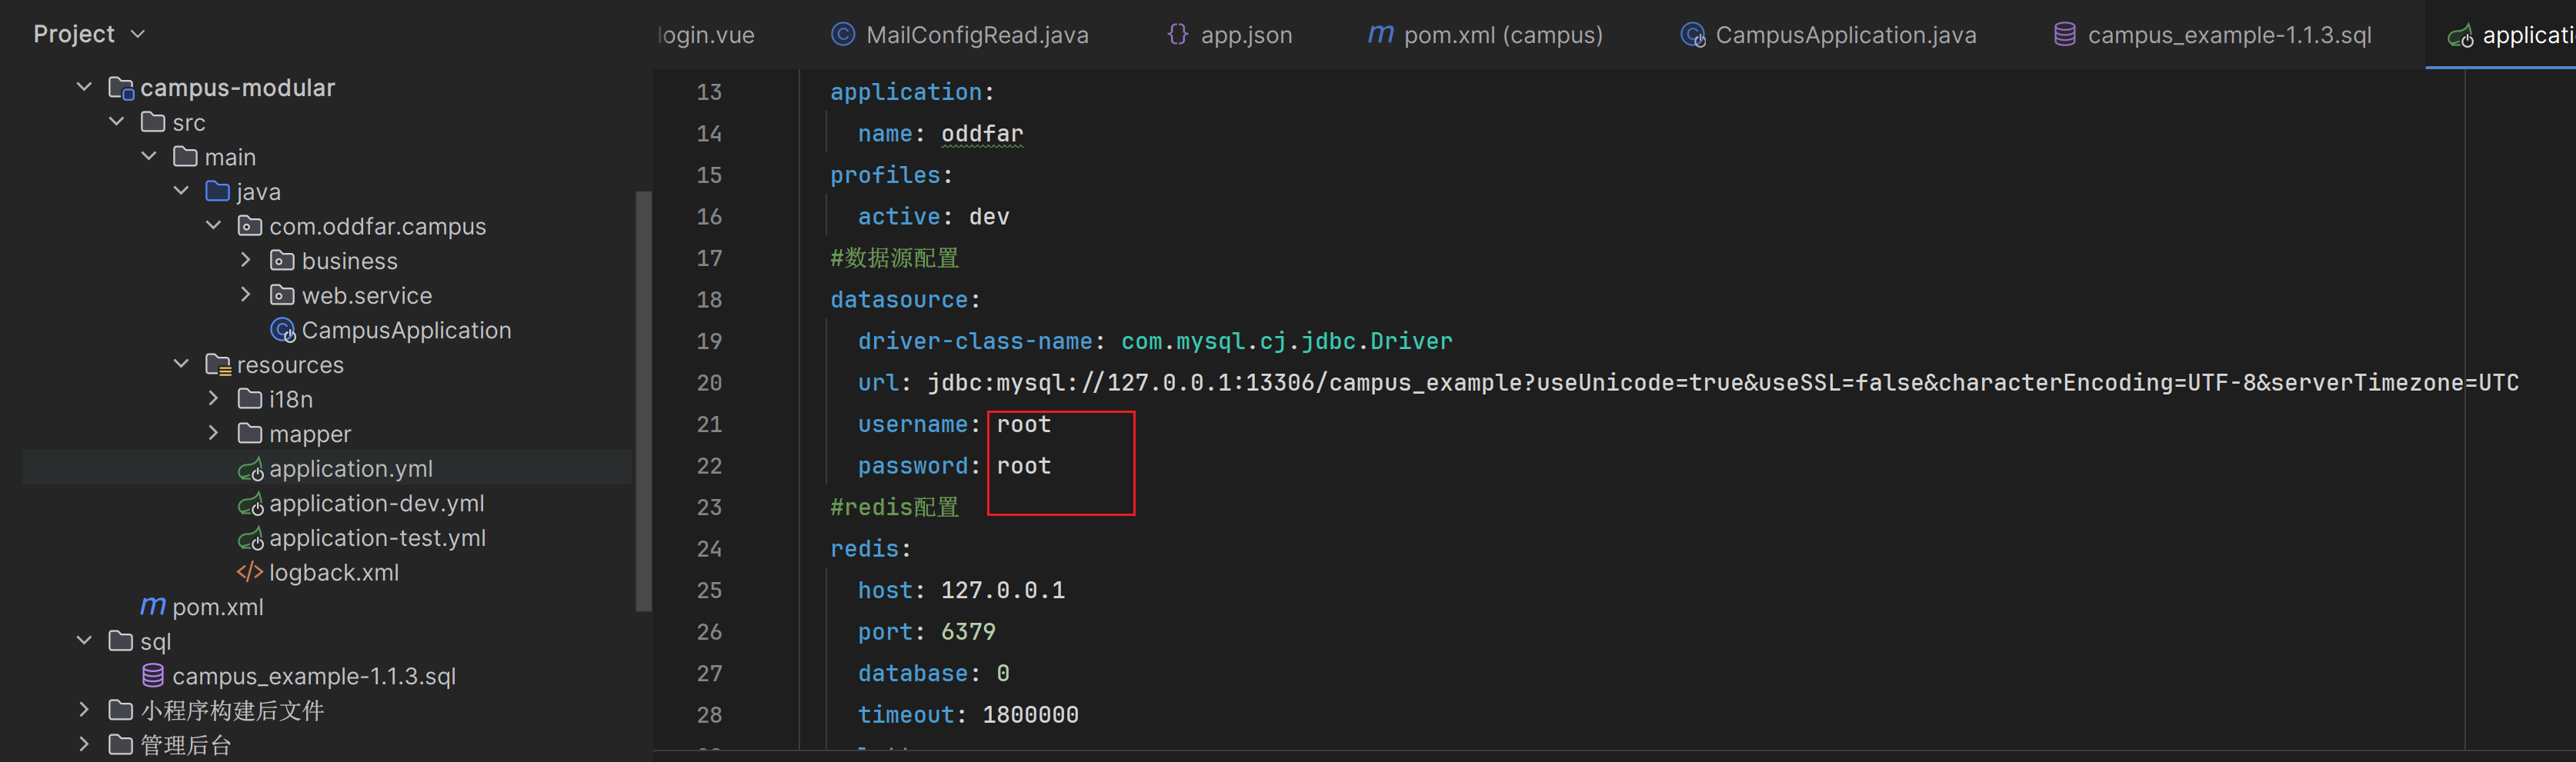
Database configuration: Confirm that the database configuration link and username and password are correct, then execute the database initialization statement: Open navicat to connect to the Mysql server, create a new database: campus_example, and open the sql file in the project:
Copy to navicat and execute:
You can see that the table structure is initialized and related data is also initialized:
Step4: Start the backend project
“
Idea runs the back-end project and sees the following information, which means the operation is successful.
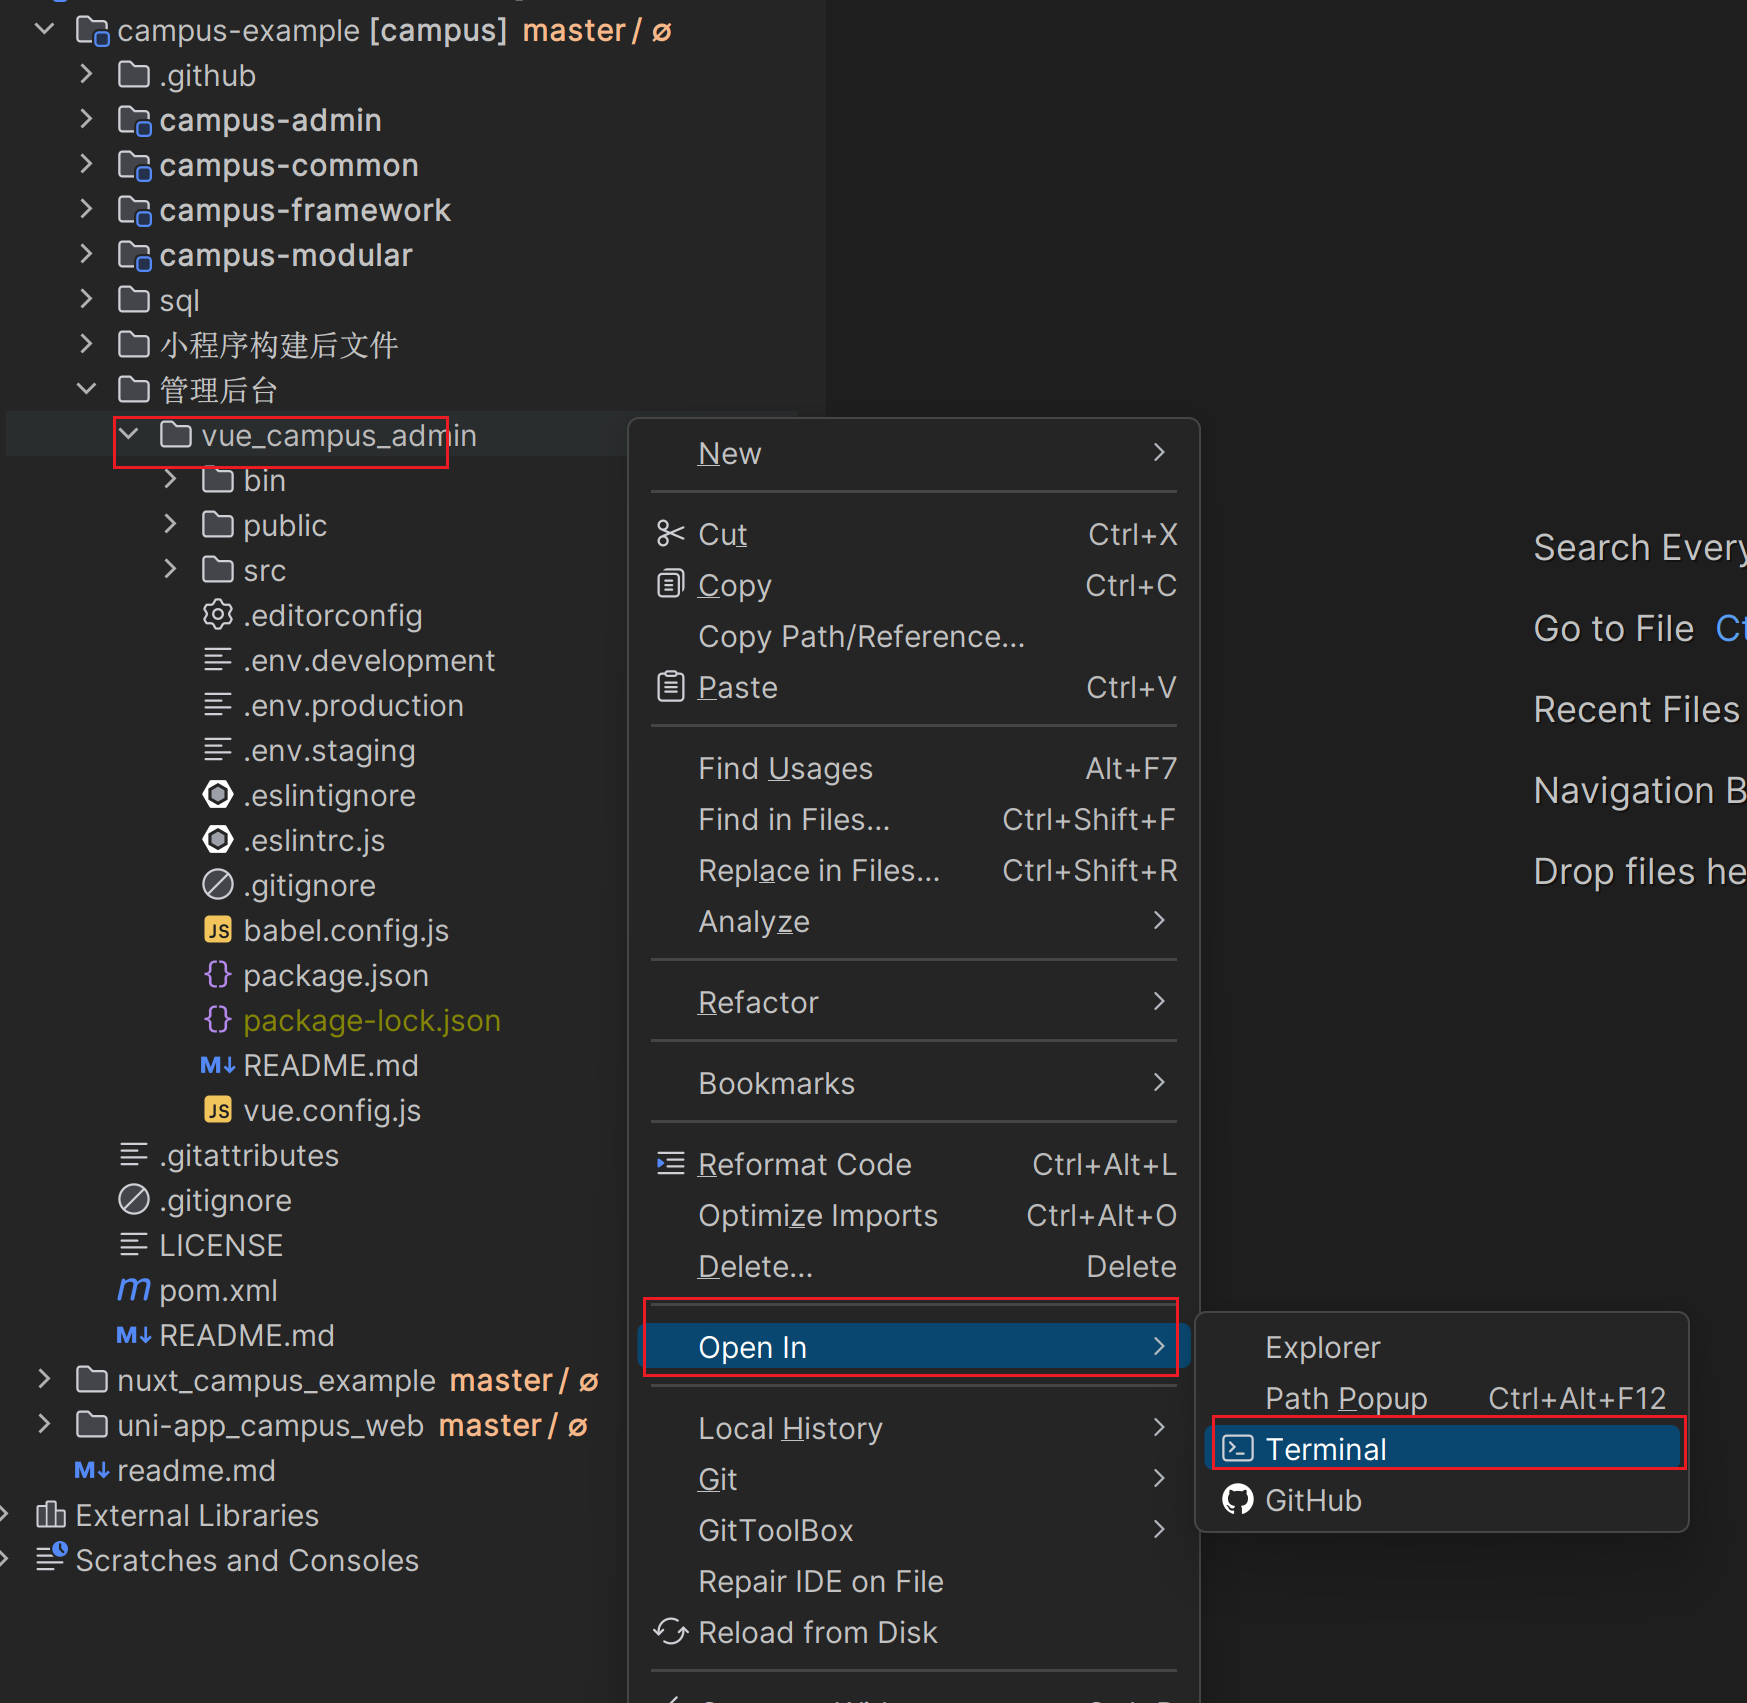
4. Manage background deployment
Open the terminal and enter the management background project directory:
“
image.png
Step1: Install npm dependencies
“
npm install
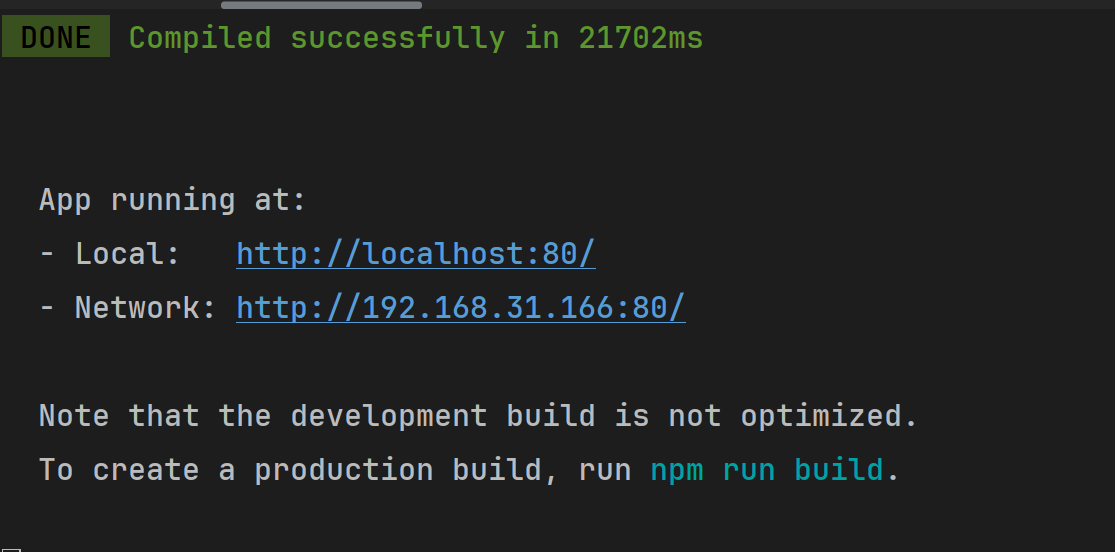
Step2: Start the front-end project
“
When npm run dev sees the following information, it means the deployment is successful.
Click on any link to jump to the browser and open it.
“
image.png
“
Login: Enter the account password: admin 123456 to log in successfully!
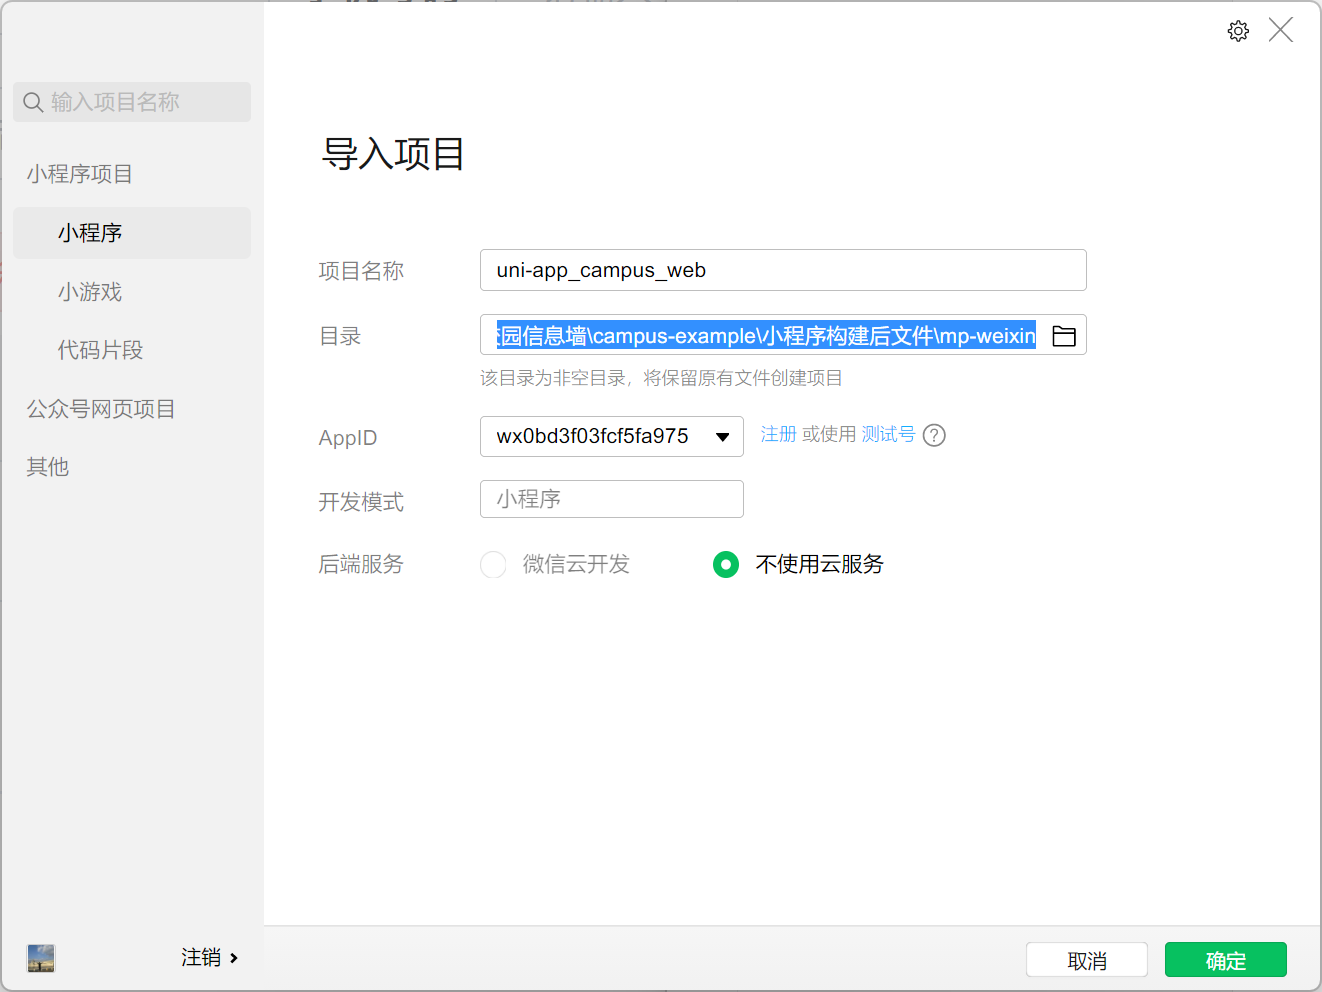
5. Mini program deployment
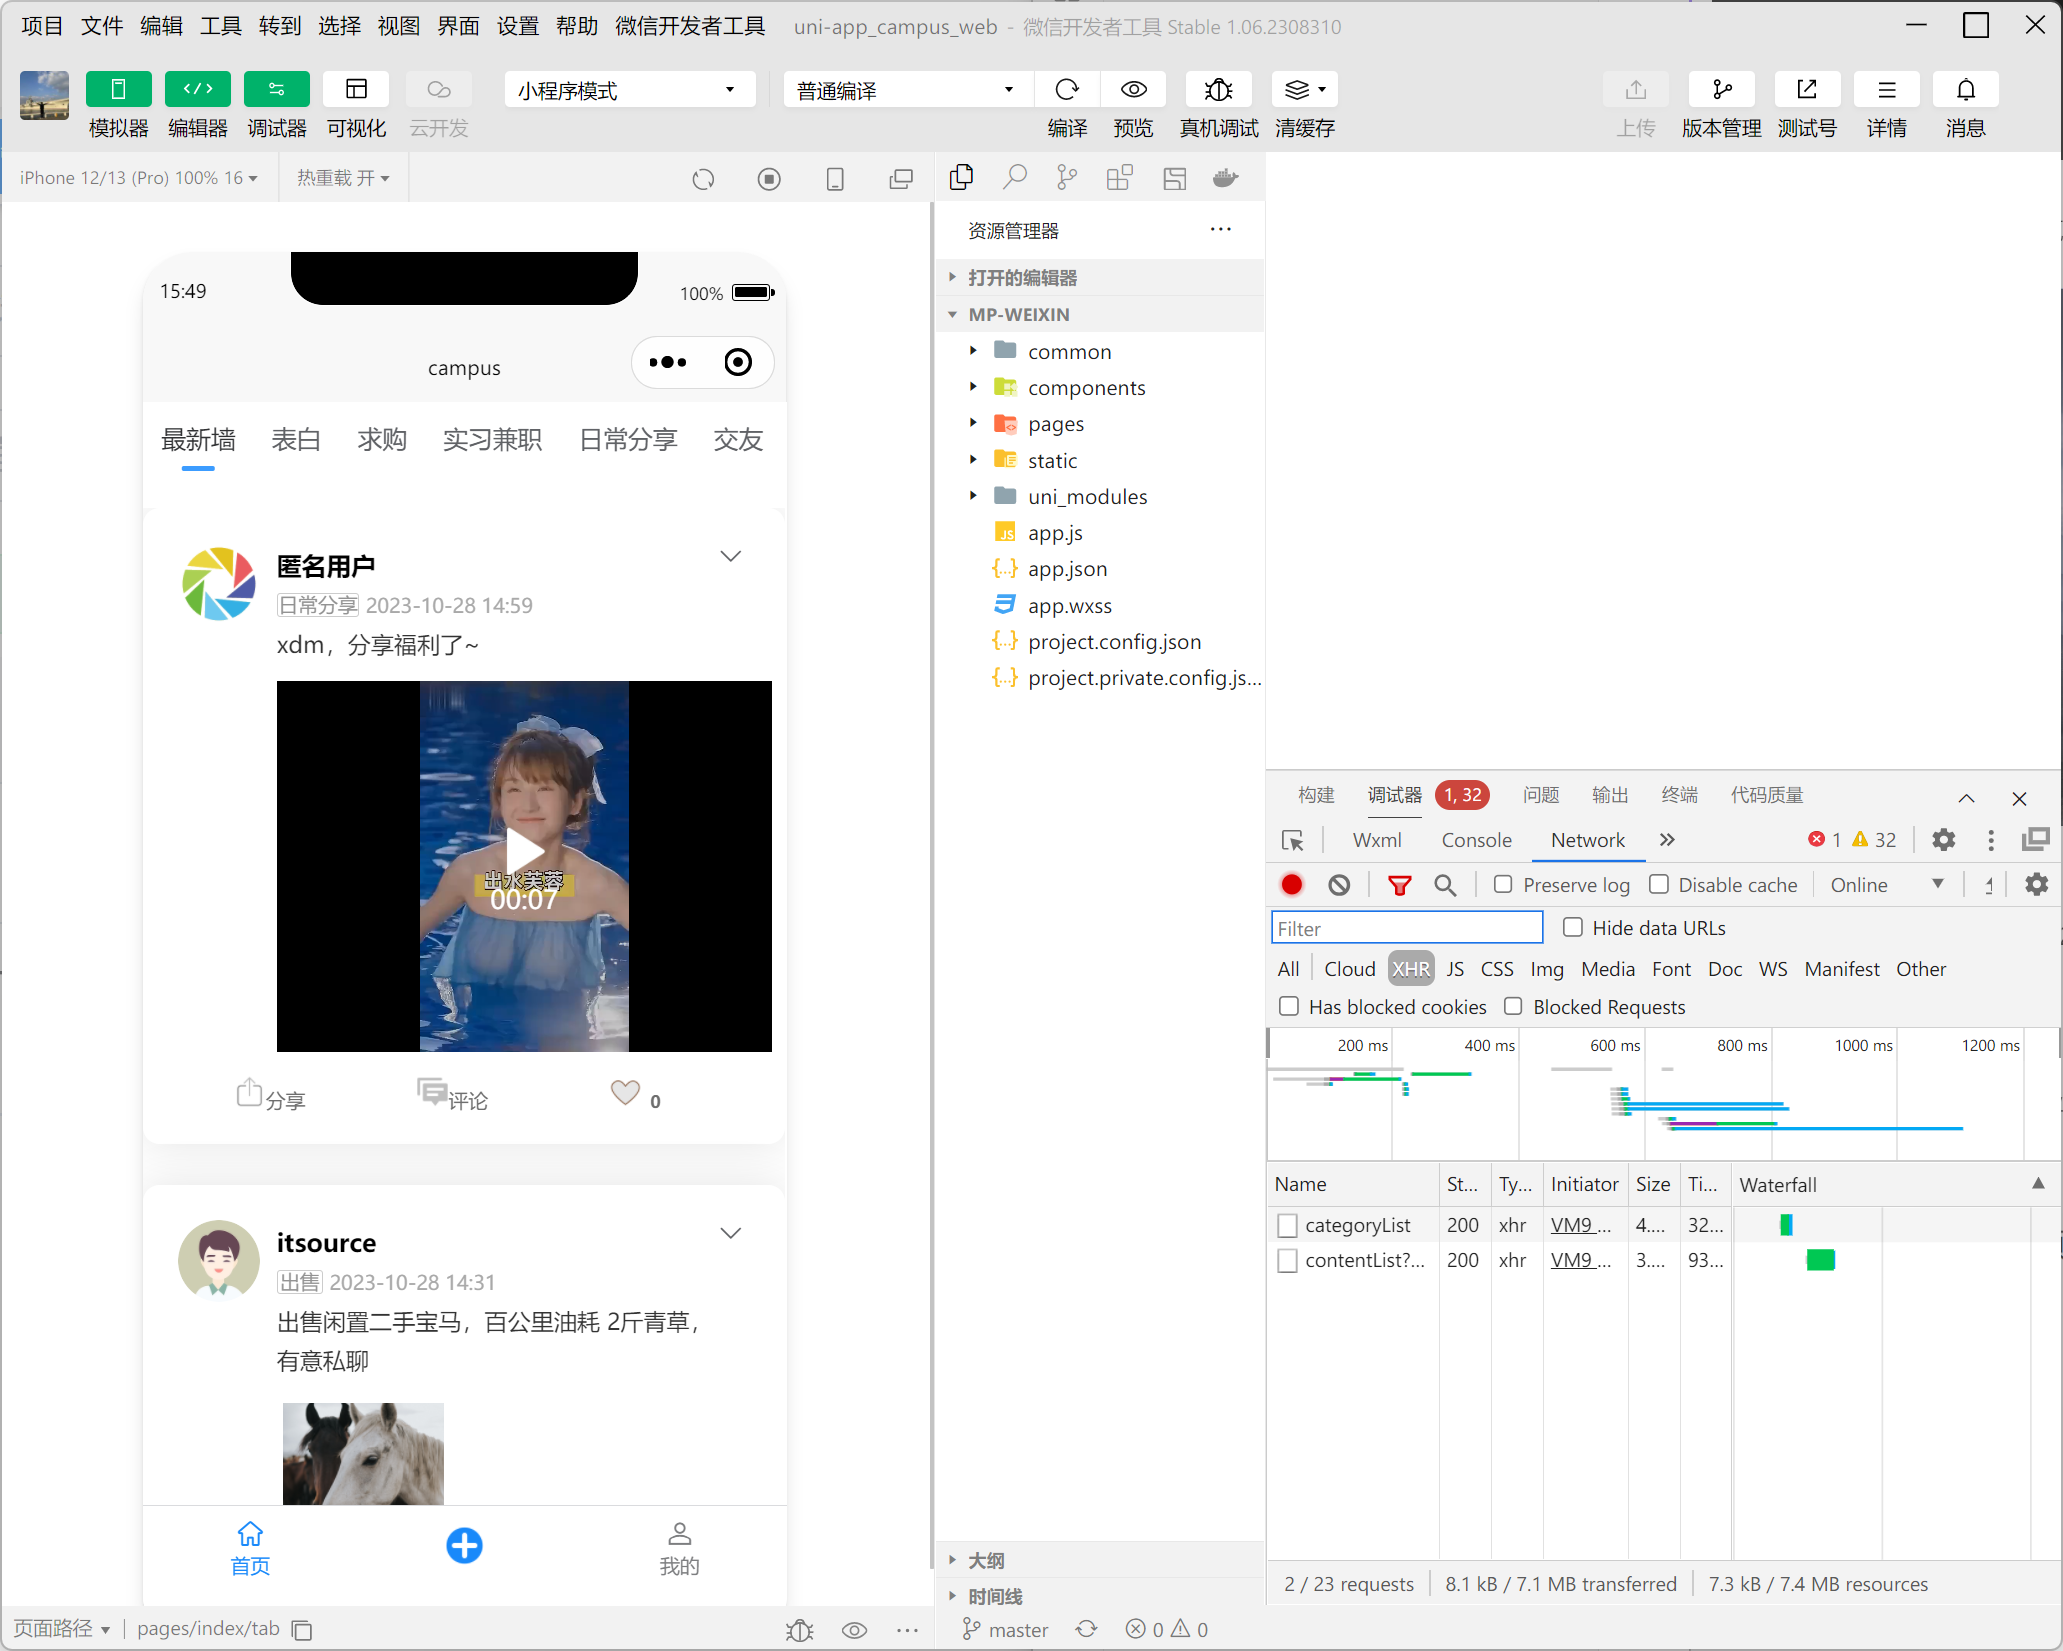
Download, install and open the WeChat developer tools,
Wait a moment and you will see that the mini program runs successfully:
If you want to make source code changes to the mini program, you can open the mini program source code project, use HbuilderX to modify, build, and run.
“
Note: The appid and secret used to log in to the WeChat applet are both the test number I applied for, and the email sent is also the test number. If modified, you can directly modify the database and then restart the back-end project:
Follow the ITSource official account! Get more learning resources!
“
Paid secondary development, customization, and one-on-one explanation are available. If interested, please contact WeChat: itguangit
This article is published by mdnice Multiple platforms


 You can also share videos:
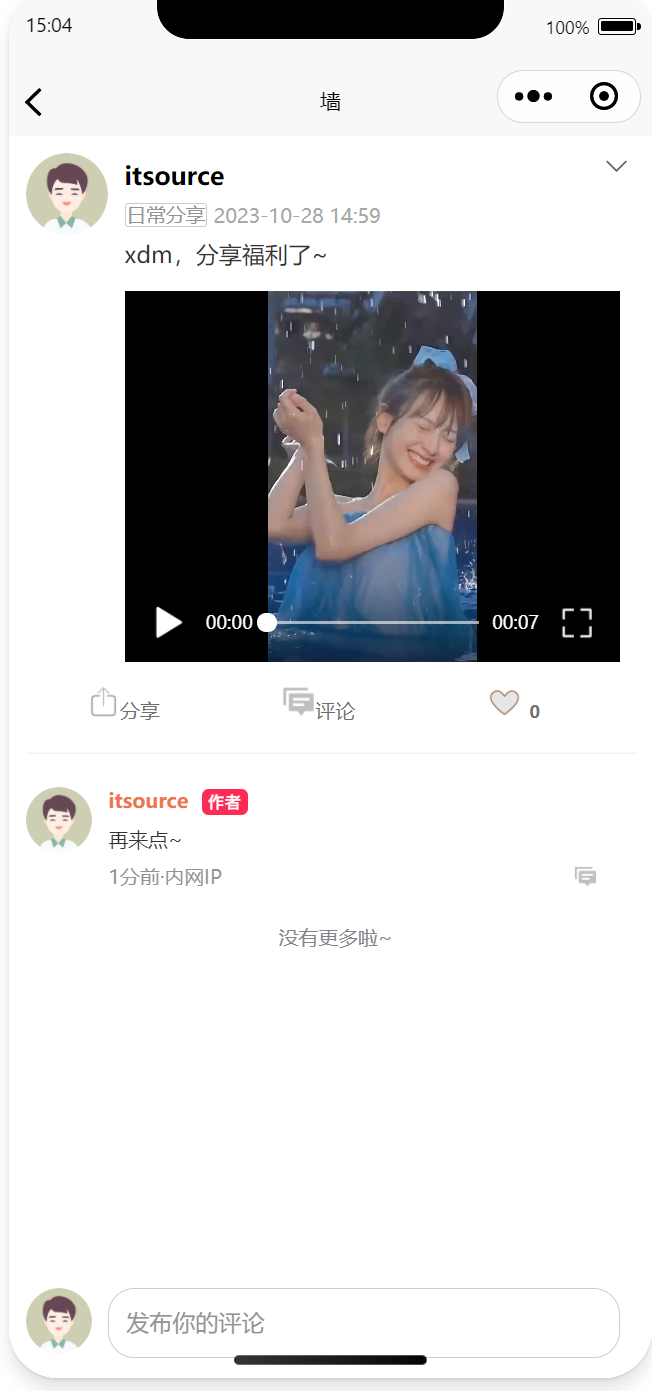
 Manage comments:
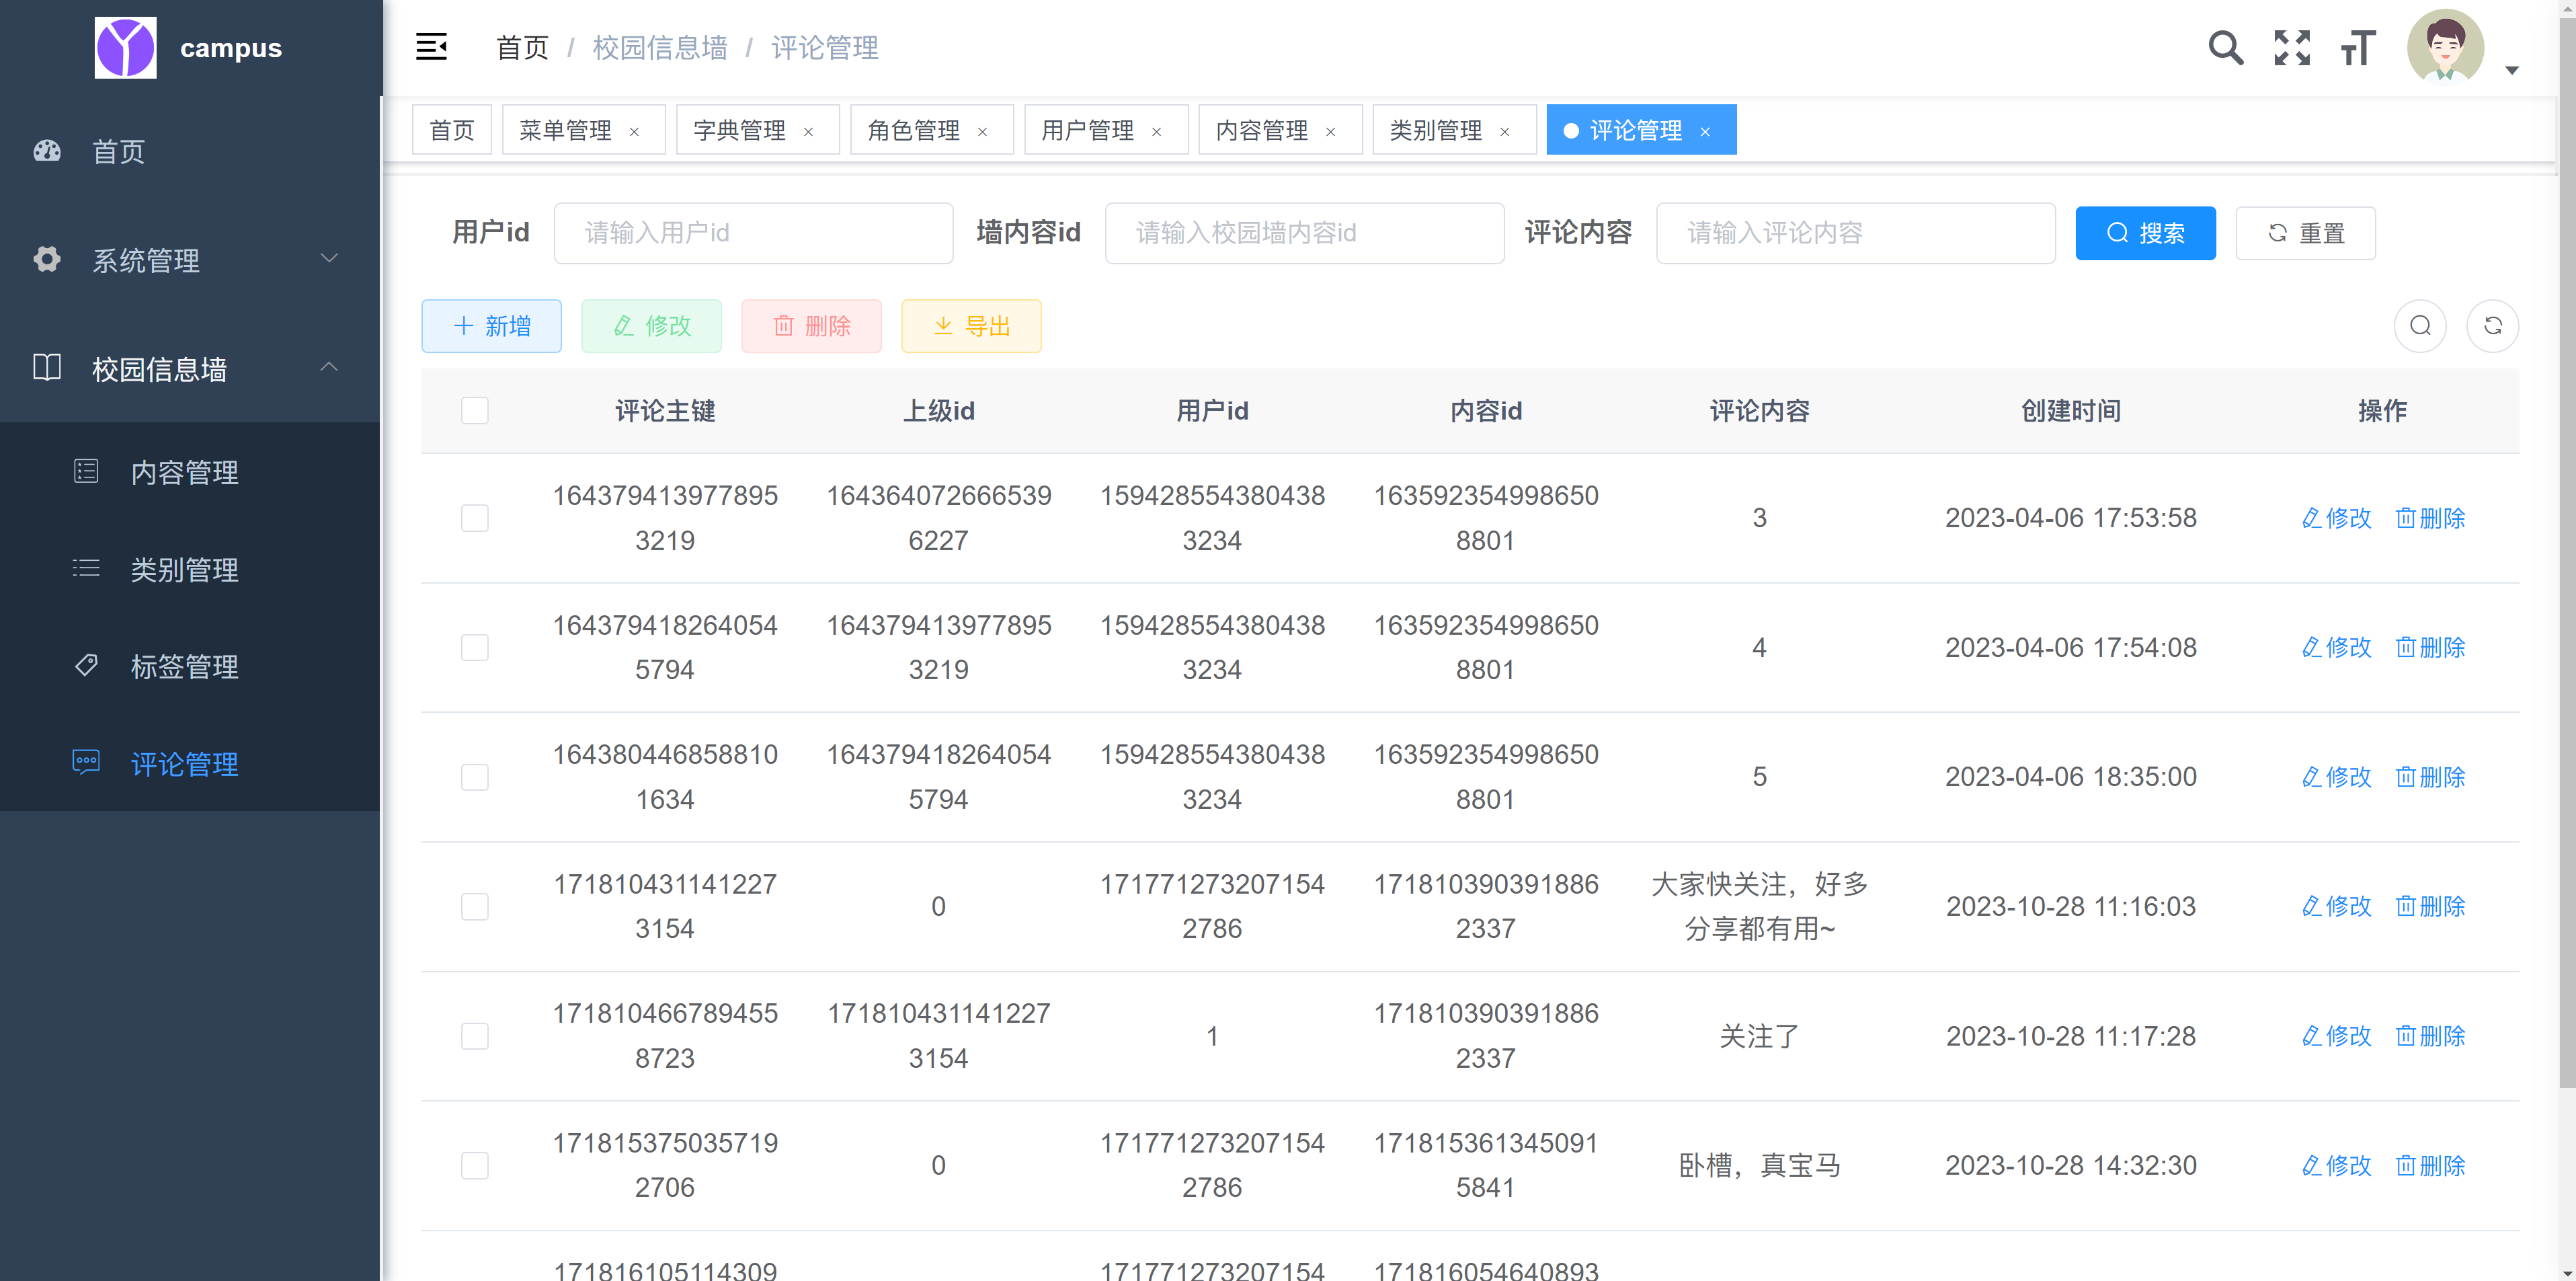

Copy to navicat and execute:
You can see that the table structure is initialized and related data is also initialized: