Article directory
Preface
MeterSphere is a one-stop open source continuous testing platform, covering functions such as test tracking, interface testing, UI testing and performance testing. It is fully compatible with mainstream open source standards such as JMeter and Selenium, effectively helping development and testing teams make full use of cloud elasticity to carry out highly scalable testing. Automated testing accelerates high-quality software delivery and promotes the improvement of the overall efficiency of China's testing industry.
The following describes how to deploy MeterSphere in Linux and combine it withcpolar intranet penetration to achieve remote access to the MeterSphere interface!
1. Install MeterSphere
Execute the following command as the root user to install MeterSphere with one click. If docker and docker compose are installed on the device, it will be installed in docker mode by default.
curl -sSL https://resource.fit2cloud.com/metersphere/metersphere/releases/latest/download/quick_start.sh | bash
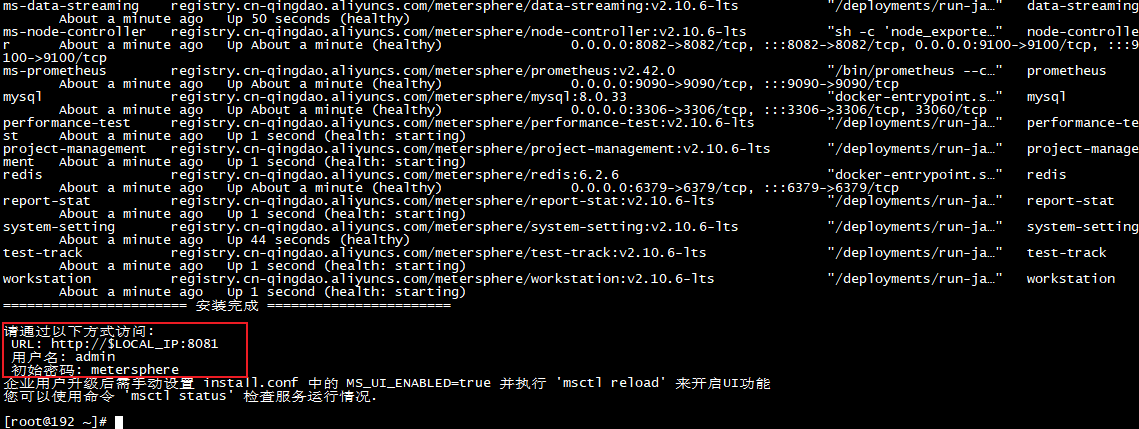
After successful installation, we can see the following information, access URL, port number: 8081, as well as user name and initialization password. We need to remember this information.
2. Access MeterSphere locally
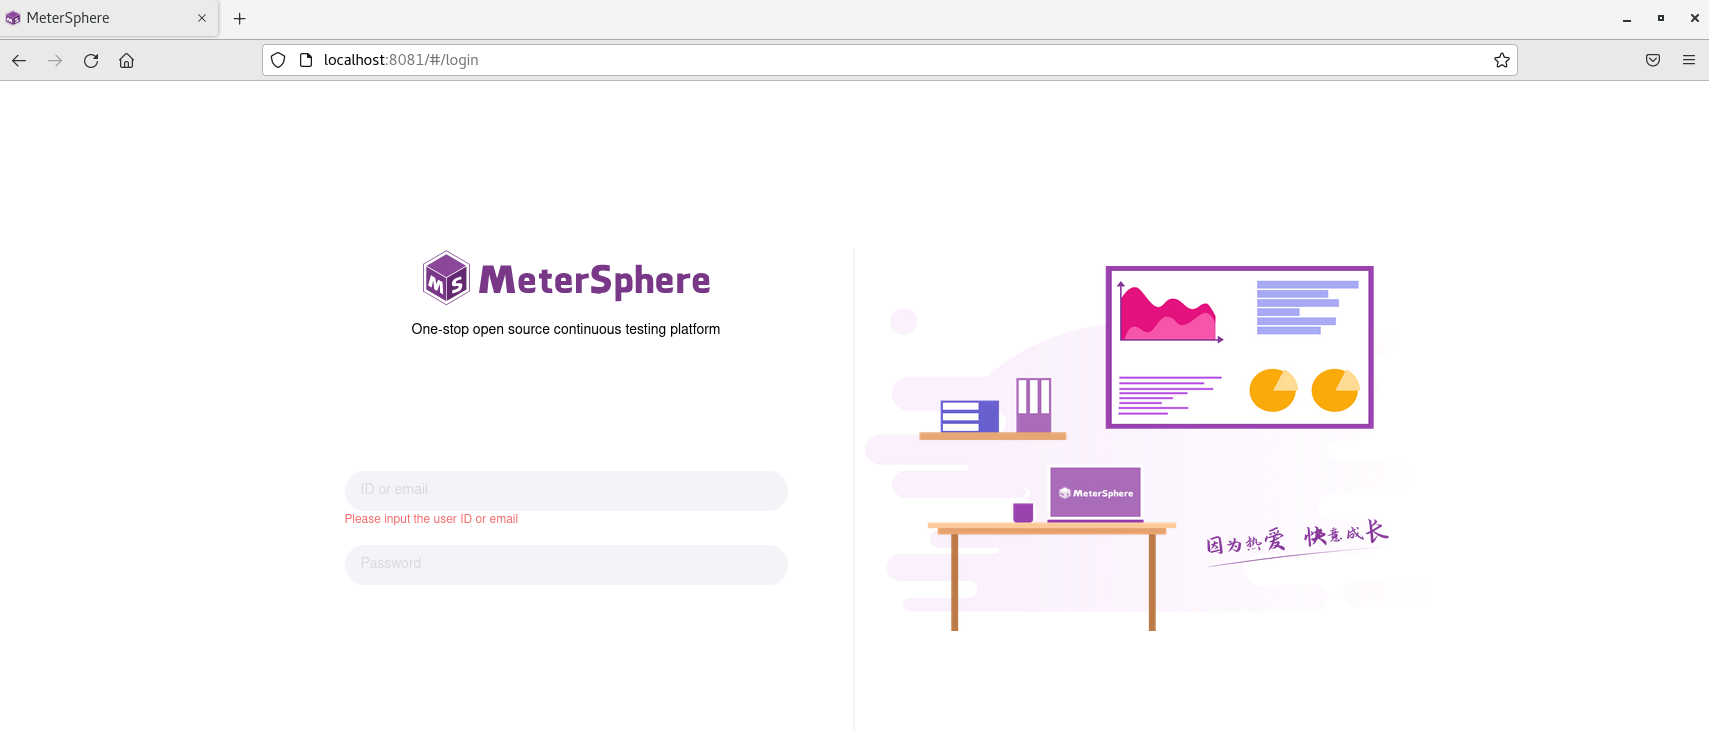
After installation, we access the web interface in the browser through the default web interface port 8081, or add port 8081 to the external device through the LAN. You can see that the local access is successful. Next we install cpolar to achieve remote access.
As mentioned above, if docker and docker compose are installed in the device, they will be installed in docker mode by default. Now we open docker images and docker pa -a and we can see that MeterSphere runs in docker mode, so we can stop or start it in Operation in docker

3. Install cpolar intranet penetration software
Above we installed and started the MeterSphere service in local Linux, and local access was ok. Next we installed the cpolar intranet penetration tool in Linux. Through cpolar's http public network address, we can easily access MeterSphere remotely without having to do it ourselves. Register a domain name and purchase a cloud server. The following are the steps to install cpolar
cpolar official website address: https://www.cpolar.com
- Use one-click script installation command
curl -L https://www.cpolar.com/static/downloads/install-release-cpolar.sh | sudo bash
- Add services to the system
sudo systemctl enable cpolar
- Start cpolar service
sudo systemctl start cpolar
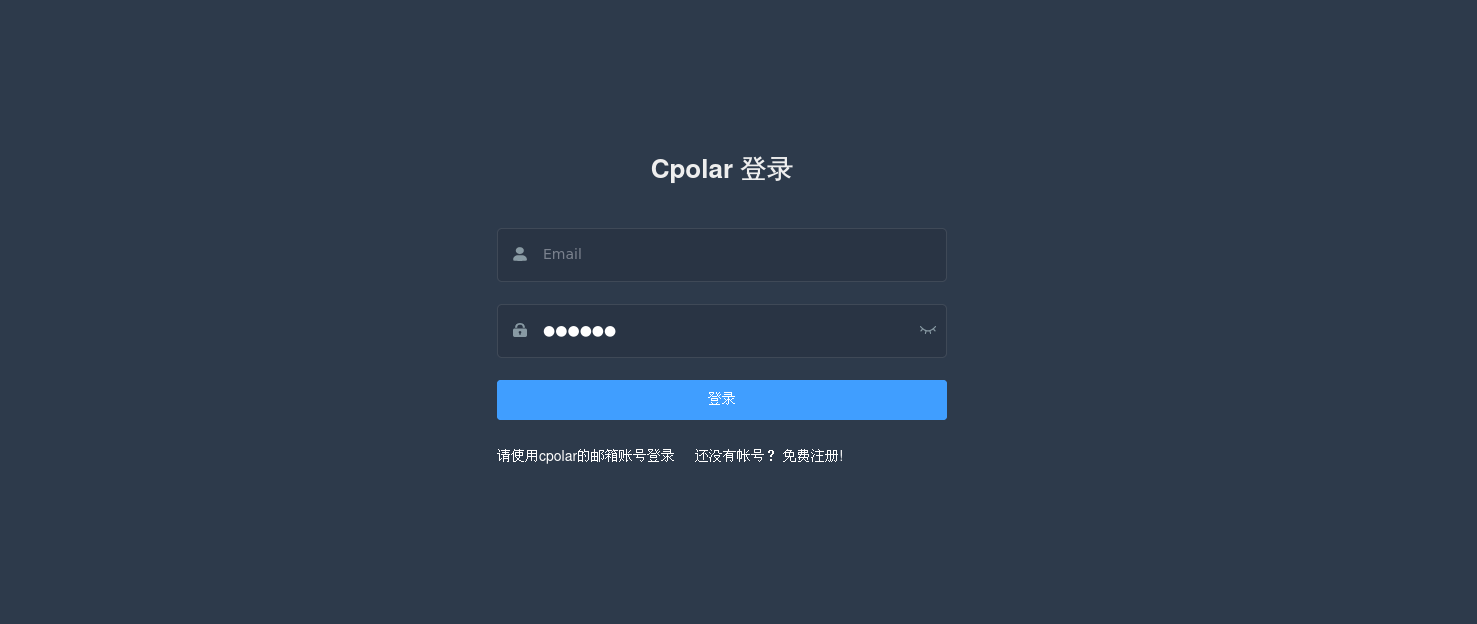
After cpolar is installed successfully, access the 9200 port of Linux on the external browser: [http://LAN ip:9200], log in using the cpolar account, and after logging in, you can see the cpolar web configuration interface, and configure it in the web interface That’s it
4. Configure MeterSphere public network access address
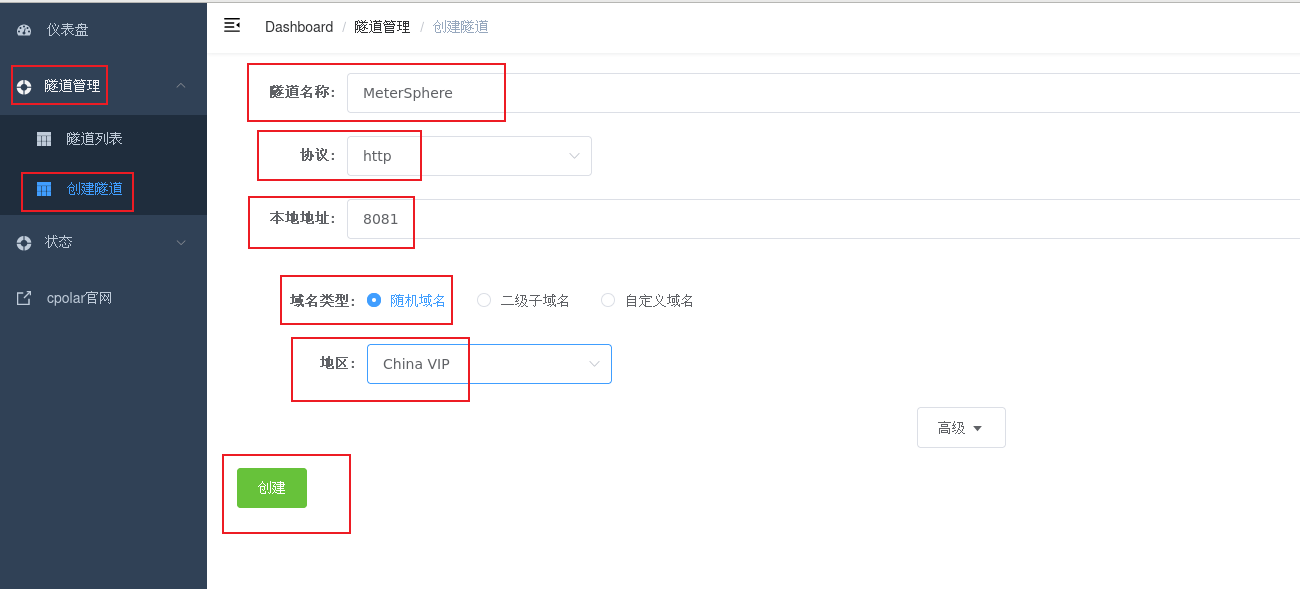
Click Tunnel Management - Create Tunnel on the left dashboard to create a cpolar tunnel for port 8081 of our http access method above!
- Tunnel name: The name can be customized. Be careful not to duplicate the existing tunnel name.
- Protocol: Select http
- Local address: 8081 (default port)
- Domain name type: Choose a random domain name for free
- Region: Select China vip
Click创建
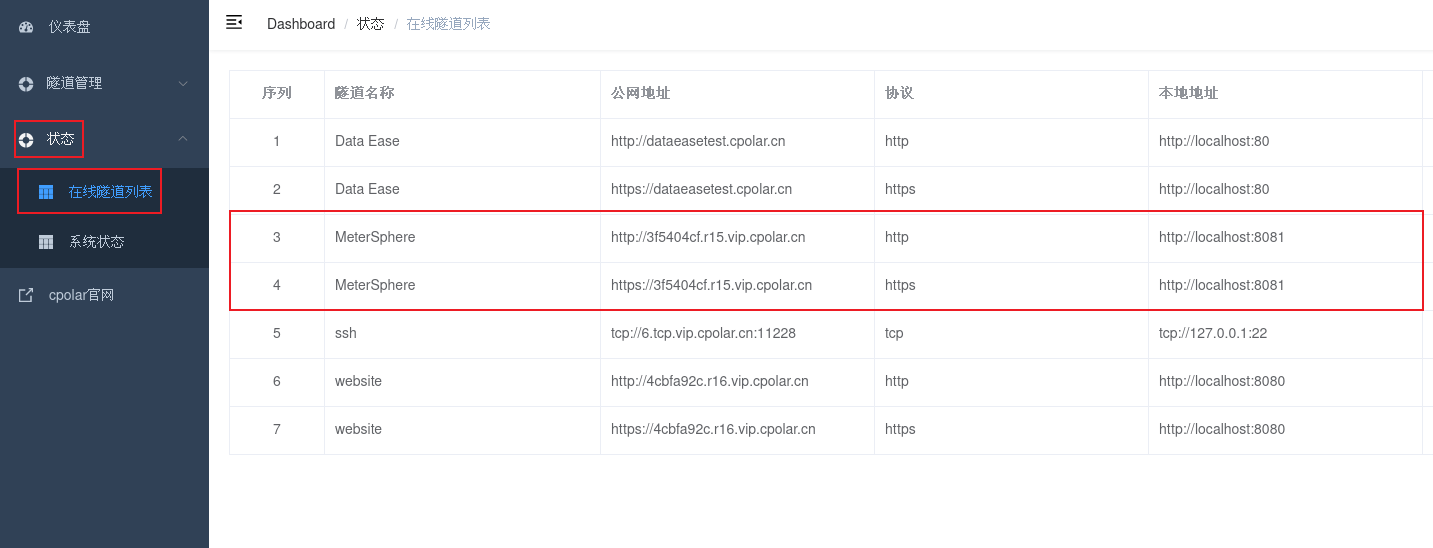
After the tunnel is successfully created, click the status on the left - online tunnel list to view the generated public network access address. There are two access methods, one is http and https
5. Remote access to MeterSphere via public network
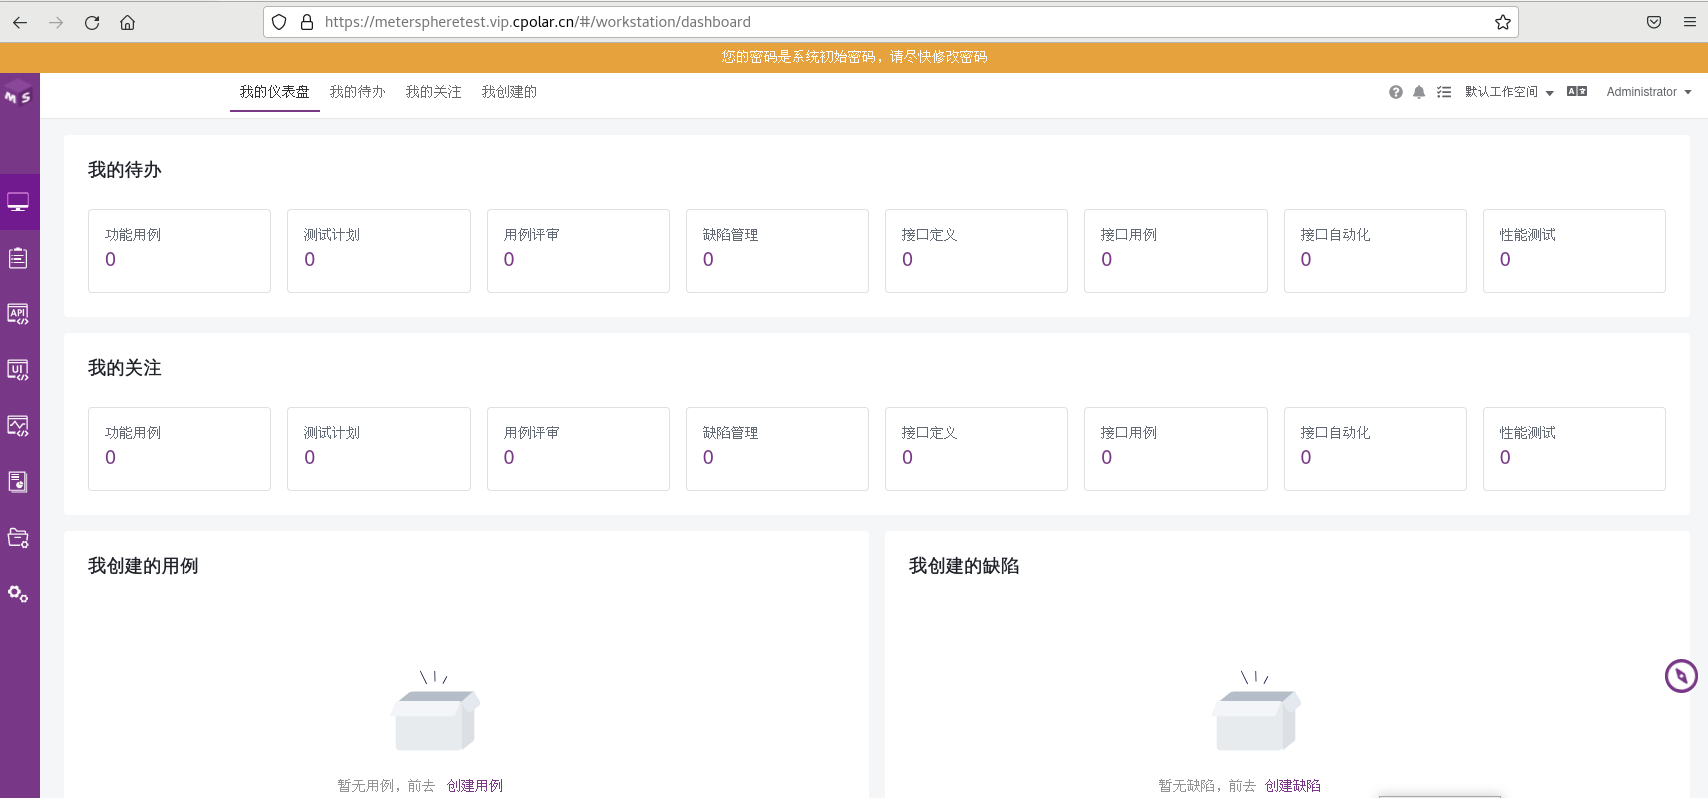
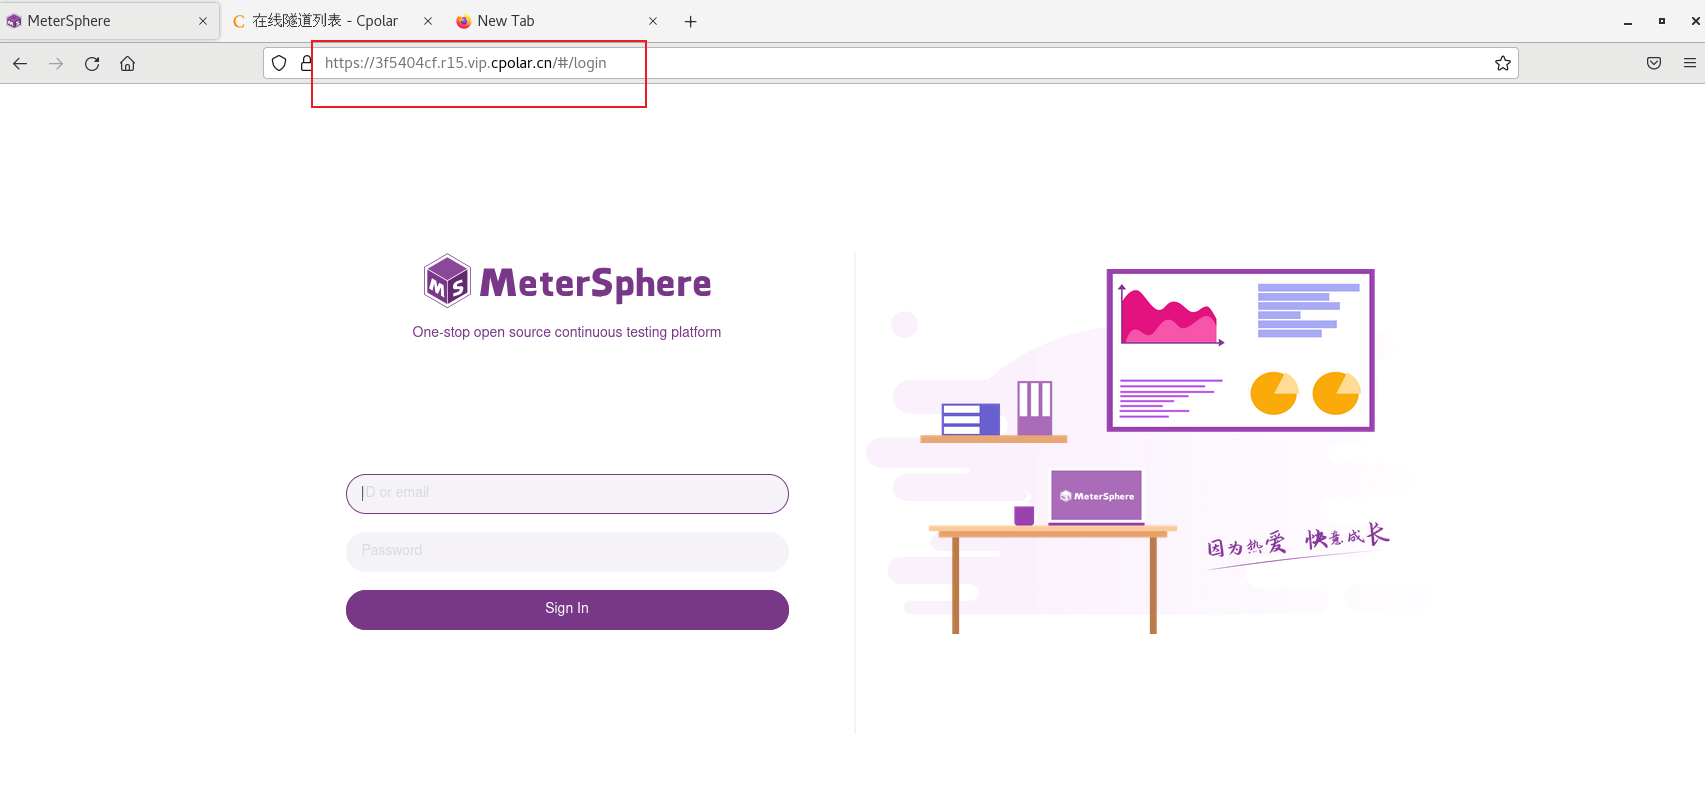
Use the above https public network address to access it in the browser of any device, and you can successfully see our MeterSphere service login management interface. Such a public network address that can be accessed remotely has been created. To access a new address, you may need to log in again.
6. Fixed MeterSphere public network address
Since the tunnel created using cpolar above uses a random public network address, it will change randomly within 24 hours, which is not conducive to long-term remote access. Therefore, we can configure a second-level subdomain name for it. This address is a fixed address and will not change randomly [ps: cpolar.cn has been filed]
Note that you need to upgrade the cpolar package to a basic package or above, and the bandwidth corresponding to each package is different. [cpolar.cn has been registered]
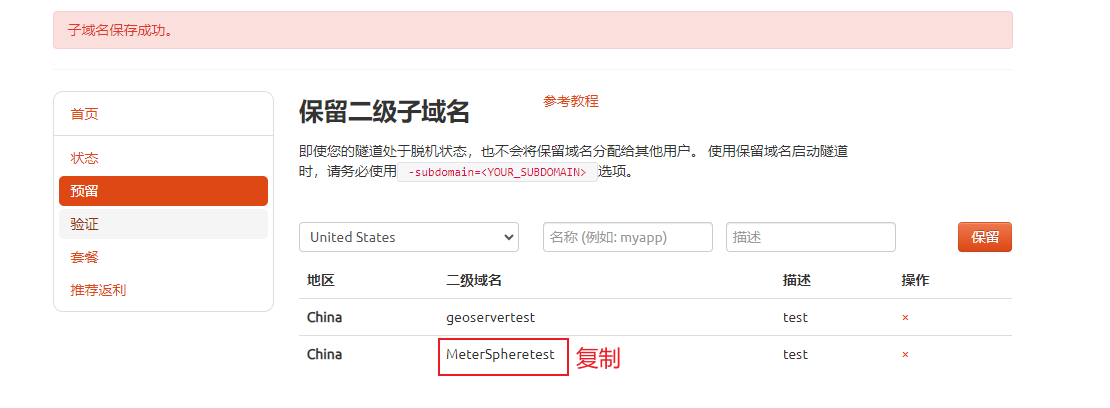
Log in to the cpolar official website, click Reserve on the left, select to reserve the second-level subdomain name, set a second-level subdomain name, click Reserve, and copy the reserved second-level subdomain name after the reservation is successful. Level subdomain name

After the reservation is successful, copy the name of the second-level subdomain name that was successfully reserved.
Return to the cpolar web UI management interface, click Tunnel Management - Tunnel List on the left dashboard, find the MeterSphere tunnel you want to configure, and click Edit on the right
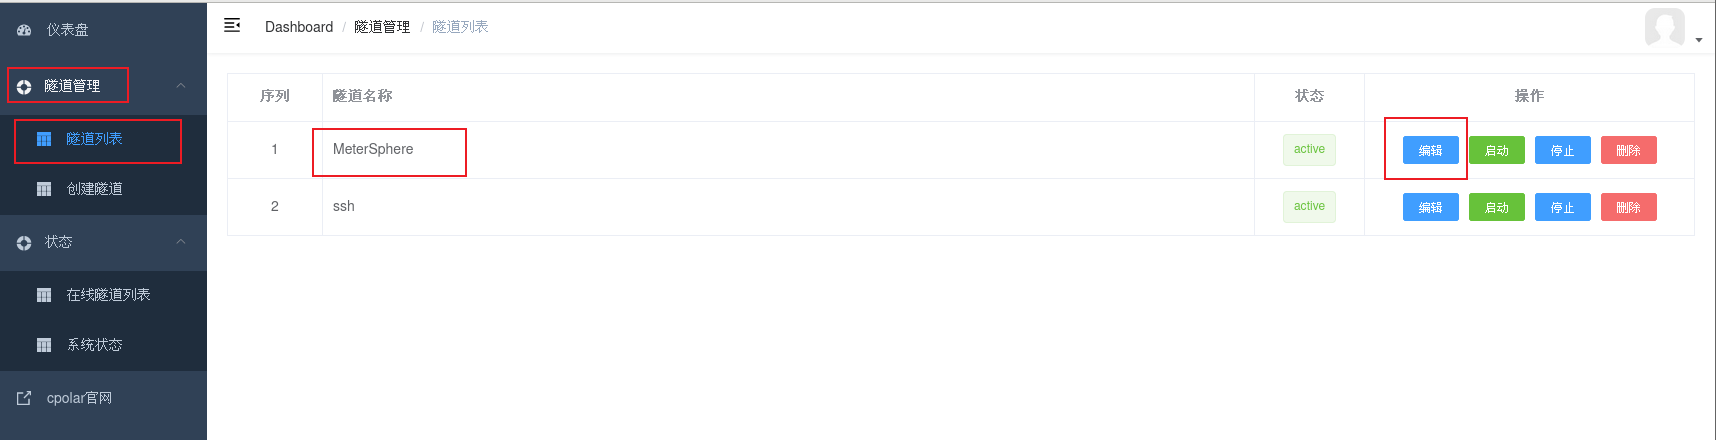
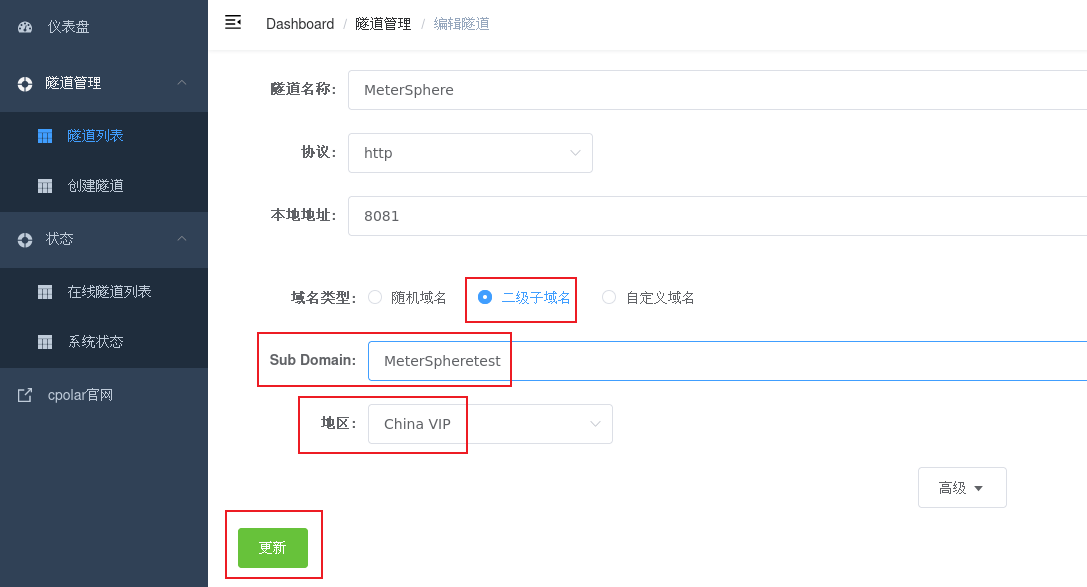
Modify the tunnel information and configure the successfully reserved second-level subdomain name into the tunnel.
- Domain name type: Select a second-level subdomain name
- Sub Domain: Fill in the successfully reserved second-level subdomain name
Click更新(Note, click once to update, no need to submit again)
After the update is completed, open the online tunnel list. At this time, you can see that the public network address has changed and the address name has become a fixed second-level subdomain name.

Finally, we use a fixed public network address to access the MeterSphere service. You can see that the login interface appears, indicating that the access is successful. In this way, a fixed and permanent public network address is set.
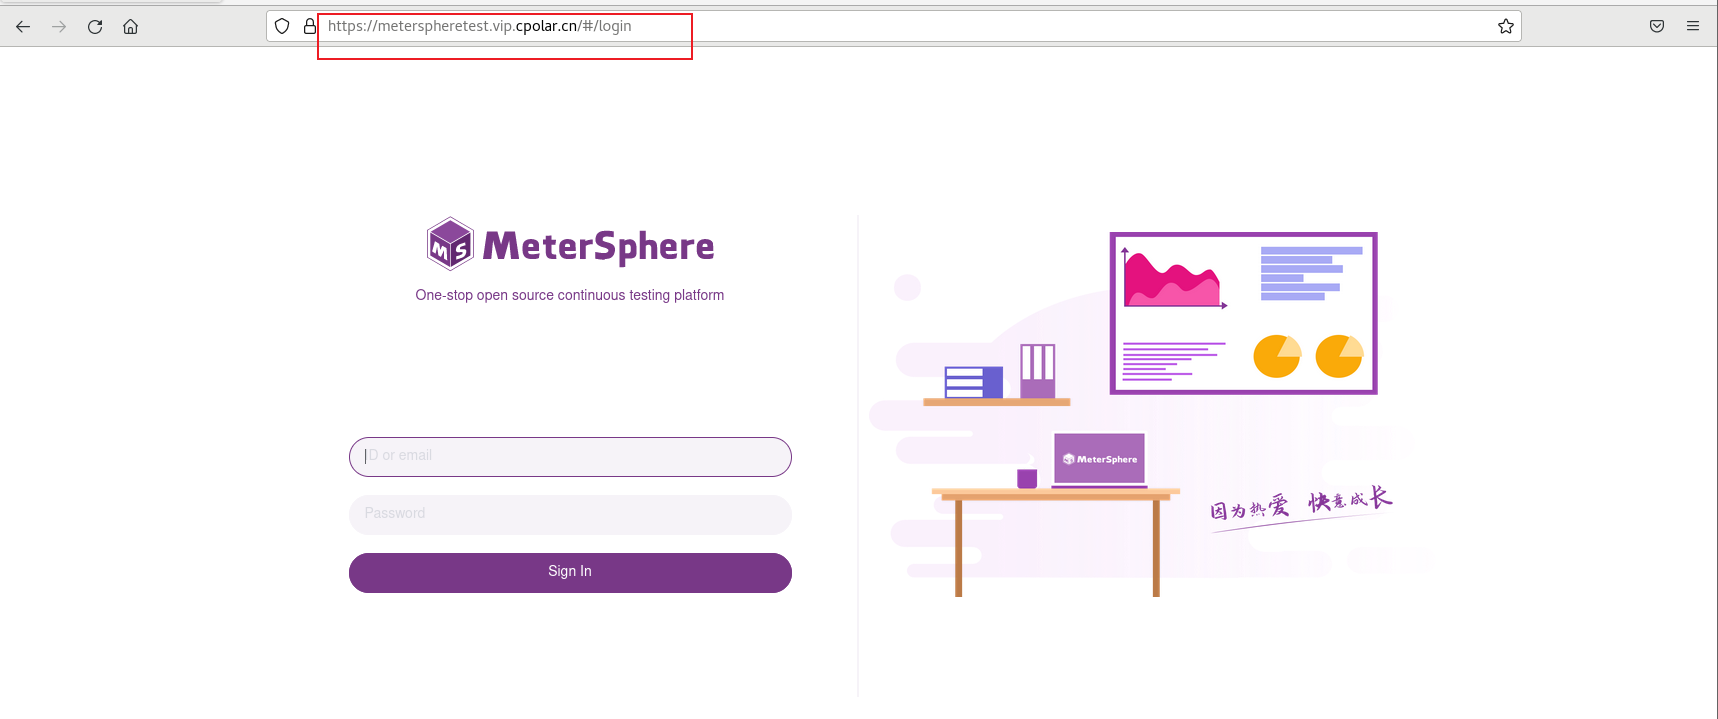
Enter your username and password to log in
We use a fixed public network address to access the MeterSphere service. You can see that the login interface appears, indicating that the access is successful. In this way, a fixed and permanent public network address is set.
Enter your username and password to log in