A Swift class is a general and flexible construct for building code.
We can define properties (constants, variables) and methods for classes.
Unlike other programming languages, Swift does not require you to create separate interface and implementation files for custom classes. All you have to do is define a class in a single file, and the system automatically generates external interfaces to other code.
Comparison between classes and structures
Classes and structs in Swift have a lot in common. What they have in common is:
- Define properties to store values
- Define methods to provide functionality
- Define ancillary scripts for accessing values
- Define a constructor to generate initialization values
- Extensions to increase the functionality of the default implementation
- Conform to a protocol to provide standard functionality for a class
Compared with structures, classes have the following additional functions:
- Inheritance allows one class to inherit characteristics of another class
- Type conversion allows the type of a class instance to be inspected and interpreted at runtime
- Destructor allows a class instance to release any allocated resources
- Reference counting allows multiple references to a class
grammar:
class classname {
   Definition 1
   Definition 2
   ……
   Definition N
}
class definition
class student{
   var studname: String
   each land: Int
   where mark2: Int
}
Instantiate class:
let studrecord = student()
Access class properties as reference types
Class properties can be accessed via . The format is: instantiation class name.property name :
identity operator
Because classes are reference types, it is possible for multiple constants and variables to reference a certain class instance in the background at the same time.
In order to determine whether two constants or variables refer to the same class instance, Swift has two built-in identity operators:
| identity operator | inequality operator |
|---|---|
| The operator is: === | The operator is: !== |
| Returns true if two constants or variables refer to the same class instance | Returns true if the two constants or variables refer to different class instances |
Example
import Cocoa

class SampleClass: Equatable {
    let myProperty: String
    init(s: String) {
        myProperty = s
    }
}
func ==(lhs: SampleClass, rhs: SampleClass) -> Bool {
    return lhs.myProperty == rhs.myProperty
}

let spClass1 = SampleClass(s: "Hello")
let spClass2 = SampleClass(s: "Hello")

if spClass1 === spClass2 {// false
    print("Referring to the same class instance\(spClass1)")
}

if spClass1 !== spClass2 {// true
    print("Referring to different class instances\(spClass2)")
}
The output result of the execution of the above program is:
Reference to different class instances SampleClass
Swift properties
Swift properties associate values with a specific class, structure, or enumeration.
Properties can be divided into stored properties and computed properties:
| Stored properties | Computed properties |
|---|---|
| Store constants or variables as part of an instance | Compute (rather than store) a value |
| for classes and structures | Used for classes, structures and enumerations |
Stored properties and computed properties are typically used on instances of specific types.
Attributes can also be applied directly to the type itself, which are called type attributes.
In addition, you can also define attribute observers to monitor changes in attribute values to trigger a custom operation. Property observers can be added to stored properties written by yourself, or to properties inherited from parent classes.
Stored properties
Simply put, a stored property is a constant or variable stored in an instance of a specific class or structure.
Stored properties can be variable stored properties (defined with the keyword var) or constant stored properties (defined with the keyword let).
-
Default values can be specified when defining stored properties.
-
You can also set or modify the value of a stored property during the construction process, or even modify the value of a constant stored property.
Lazy stored properties
Lazy stored properties are properties whose initial value is not calculated until the first time it is called.
Use lazy before the property declaration to indicate a lazy storage property.
Note:
Delayed storage properties must be declared as variables (usingvarthe keyword ) because the property's value may not be available until instance construction is complete. Constant properties must have an initial value before the construction process is completed, so they cannot be declared as delayed properties.
Lazy stored properties are generally used for:
-
Delay object creation.
-
When the value of an attribute depends on other unknown classes
import Cocoa

class sample {
    lazy var no = number() // `var` keyword is required
}

class number {
    var name = "Runoob Swift Tutorial"
}

var firstsample = sample()
print(firstsample.no.name)
The output result of the execution of the above program is:
Runoob Swift Tutorial
instantiation variable
If you have experience with Objective-C, you should know that Objective-C provides two methods for storing values and references for class instances. For properties, you can also use instance variables as backend storage for property values.
In the Swift programming language, these theories are unified and implemented using attributes. Properties in Swift do not have corresponding instance variables, and the backend storage of properties cannot be accessed directly. This avoids the trouble of access methods in different scenarios, and also simplifies the definition of attributes into one statement.
All information about the properties in a type—including naming, type, and memory management characteristics—is defined in a single place: the type definition.
Computed properties
In addition to stored properties, classes, structures, and enumerations can define computed properties . Computed properties do not store values directly, but provide a getter to obtain the value and an optional setter to indirectly set the value of other properties or variables.
import Cocoa

class sample {
    var no1 = 0.0, no2 = 0.0
    var length = 300.0, breadth = 150.0

    var middle: (Double, Double) {
        get{
            return (length / 2, breadth / 2)
        }
        set(axis){
            no1 = axis.0 - (length / 2)
            no2 = axis.1 - (breadth / 2)
        }
    }
}

var result = sample()
print(result.middle)
result.middle = (0.0, 10.0)

print(result.no1)
print(result.no2)
The output result of the execution of the above program is:
(150.0, 75.0)
-150.0
-65.0
If the computed property's setter does not define a parameter name that represents the new value, the default name newValue can be used.
Read-only computed property
A computed property with only getter and no setter is a read-only computed property.
Read-only computed properties always return a value and can be accessed via the dot (.) operator, but a new value cannot be set.
import Cocoa

class film {
    var head = ""
    var duration = 0.0
    var metaInfo: [String:String] {
        return [
            "head": self.head,
            "duration":"\(self.duration)"
        ]
    }
}

var movie = movie()
movie.head = "Swift Property"
movie.duration = 3.09

print(movie.metaInfo["head"]!)
print(movie.metaInfo["duration"]!)
The output result of the execution of the above program is:
Swift properties
3.09
Notice:
Computed properties, including read-only computed properties, must be
vardefined using keywords because their values are not fixed.letThe keyword is only used to declare constant properties, indicating values that cannot be modified after initialization.
property observer
Property observers monitor and respond to changes in property values. Property observers are called every time a property is set, even when the new value is the same as the current value.
Property observers can be added for stored properties other than lazy stored properties, and property observers can be added for inherited properties (including stored properties and computed properties) by overloading properties.
Note:
There is no need to add property observers for computed properties that cannot be overloaded because value changes can be monitored and responded to directly through the setter.
You can add one or all of the following observers to a property:
willSetCalled before setting a new valuedidSetCalled immediately after the new value is set- willSet and didSet observers are not called during property initialization
import Cocoa

class Samplepgm {
    var counter: Int = 0{
        willSet(newTotal){
            print("Counter: \(newTotal)")
        }
        didSet{
            if counter > oldValue {
                print("New number\(counter - oldValue)")
            }
        }
    }
}
let NewCounter = Samplepgm()
NewCounter.counter = 100
NewCounter.counter = 800
The output result of the execution of the above program is:
Counter: 100
Added 100
Counter: 800
Added 700
Global variables and local variables
The patterns described for computed properties and property observers can also be used for global and local variables.
| local variables | global variables |
|---|---|
| Variables defined inside a function, method, or closure. | A function, method, closure, or variable defined outside of any type. |
| Used to store and retrieve values. | Used to store and retrieve values. |
| Stored properties are used to get and set values. | Stored properties are used to get and set values. |
| Also used for computed properties. | Also used for computed properties. |
type attribute
Type attributes are written as part of the type definition within the outermost curly braces ({}) of the type.
Use the keyword static to define type attributes for value types, and the keyword class to define type attributes for classes.
Get and set the value of type properties
Similar to instance attributes, type attributes are accessed through the dot operator (.). However, type properties are obtained and set through the type itself, not through the instance. Examples are as follows:
Swift methods
Swift methods are functions associated with certain types
In Objective-C, classes are the only types that can define methods. But in Swift, you can not only choose whether to define a class/structure/enumeration, but also flexibly define methods on the types (classes/structures/enumerations) you create.
instance method
In the Swift language, an instance method is a method that belongs to an instance of a specific class, structure, or enumeration type.
Instance methods provide the following methods:
-
Can access and modify instance properties
-
Provide functionality relevant to the purpose of the instance
Instance methods should be written between the surrounding braces ({}) of the type to which they belong.
An instance method has implicit access to all other instance methods and properties of its type.
An instance method can only be called by a specific instance of the class to which it belongs.
Instance methods cannot be called independently of the existing instance.
grammar
func funcname(Parameters) -> returntype
{
    Statement1
    Statement2
    ……
    Statement N
    return parameters
}
Local parameter names and external parameter names of the method
Swift function parameters can have both a local name (used inside the function body) and an external name (used when calling the function
Methods in Swift are very similar to methods in Objective-C. Like in Objective-C, method names in Swift usually use a preposition to point to the first parameter of the method, such as: with, for, by, etc.
By default, Swift only gives a local parameter name to the first parameter name of a method; by default, it also gives global parameter names to the second and subsequent parameter names.
In the following example 'no1' is declared as a local parameter name in swift. 'no2' is used for global declarations and access via external programs.
Whether to provide external name settings
We force the external name to be added to the first parameter and use this local name as an external name (before Swift 2.0, the # sign was used).
Conversely, we can also use an underscore (_) to set the second and subsequent parameters without providing an external name.
self attribute
Every instance of a type has an implicit property called self, which is exactly the same as the instance itself.
You can use this implicit self attribute in an instance's instance method to refer to the current instance.
Modify value type in instance method
Structures and enumerations are value types in Swift language. In general, properties of a value type cannot be modified within its instance methods.
However, if you do need to modify the properties of a structure or enumeration in a specific method, you can choose to mutate the method, and then the method can change its properties from within the method; and any changes it makes The original structure is also retained at the end of the method.
A method can also assign a new instance to its implicit self property, which will replace the original instance after the method ends.
import Cocoa

struct area {
    var length = 1
    var breadth = 1

    func area() -> Int {
        return length * breadth
    }

    mutating func scaleBy(res: Int) {
        length *= res
        breadth *= res

        print(length)
        print(breadth)
    }
}

var val = area(length: 3, breadth: 5)
val.scaleBy(res: 3)
val.scaleBy(res: 30)
val.scaleBy(res: 300)
The output result of the execution of the above program is:
9
15
270
450
81000
135000
Assign a value to self in a variable method
Mutable methods can assign a new instance to the implicit property self.
 mutating func scaleBy(res: Int) {
        self.length *= res
        self.breadth *= res
        print(length)
        print(breadth)
    }
Type method
Instance methods are methods that are called by an instance of a type. You can also define methods that are called by the type itself. This method is called a type method.
To declare type methods of structures and enumerations, add the keyword static before the func keyword of the method. Classes may use the keyword class to allow subclasses to override the implementation methods of the parent class.
Type methods are called using the dot (.) syntax like instance methods.
import Cocoa

class Math
{
    class func abs(number: Int) -> Int
    {
        if number < 0
        {
            return (-number)
        }
        else
        {
            return number
        }
    }
}

struct absno
{
    static func abs(number: Int) -> Int
    {
        if number < 0
        {
            return (-number)
        }
        else
        {
            return number
        }
    }
}

let no = Math.abs(number: -35)
let num = absno.abs(number: -5)

print(no)
print(number)
The output result of the execution of the above program is:
35
5
Swift subscript script
Subscript scripts can be defined in targets such as classes, structures, and enumerations, and can be considered as shortcuts to access objects, collections, or sequences without the need to call specific assignments and accesses of instances. method.
For example, to use a subscript script to access an element in an array (Array) instance, you can write someArray[index], and to access an element in a dictionary (Dictionary) instance, you can write someDictionary[key].
Multiple subscript scripts can be defined for the same target, overloaded by different index value types, and the number of index values can be multiple.
Subscript script syntax and application
grammar
Subscript scripts allow you to access and assign values to an instance by passing one or more index values in square brackets after the instance.
The syntax is similar to a mix of instance methods and computed properties.
Similar to defining instance methods, defining subscript scripts uses the subscript keyword to explicitly declare the input parameter(s) and return type.
Unlike instance methods, subscript scripts can be set to read-write or read-only. This approach is a bit like the getters and setters of computed properties:
subscript(index: Int) -> Int {
    get {
        //Declaration for subscripting script values
    }
    set(newValue) {
        //Perform assignment operation
    }
}
Example 1
import Cocoa

struct subexample {
    let decrementer: Int
    subscript(index: Int) -> Int {
        return decrementer / index
    }
}
let division = subexample(decrementer: 100)

print("100 divided by 9 is equal to \(division[9])")
print("100 divided by 2 equals\(division[2])")
print("100 divided by 3 equals\(division[3])")
print("100 除以 5 等于 \(division[5])")
print("100 除以 7 等于 \(division[7])")
以上程序执行输出结果为:
100 除以 9 等于 11
100 除以 2 等于 50
100 除以 3 等于 33
100 除以 5 等于 20
100 除以 7 等于 14
在上例中,通过 subexample 结构体创建了一个除法运算的实例。数值 100 作为结构体构造函数传入参数初始化实例成员 decrementer。
你可以通过下标脚本来得到结果,比如 division[2] 即为 100 除以 2。
下标脚本选项
下标脚本允许任意数量的入参索引,并且每个入参类型也没有限制。
下标脚本的返回值也可以是任何类型。
下标脚本可以使用变量参数和可变参数。
一个类或结构体可以根据自身需要提供多个下标脚本实现,在定义下标脚本时通过传入参数的类型进行区分,使用下标脚本时会自动匹配合适的下标脚本实现运行,这就是下标脚本的重载。
Swift 继承
继承我们可以理解为一个类获取了另外一个类的方法和属性。
当一个类继承其它类时,继承类叫子类,被继承类叫超类(或父类)
在 Swift 中,类可以调用和访问超类的方法,属性和下标脚本,并且可以重写它们。
我们也可以为类中继承来的属性添加属性观察器。
基类
没有继承其它类的类,称之为基类(Base Class)。
子类
子类指的是在一个已有类的基础上创建一个新的类。
为了指明某个类的超类,将超类名写在子类名的后面,用冒号(:)分隔,语法格式如下
class SomeClass: SomeSuperclass {
    // 类的定义
}
实例
以下实例中我们定义了超类 StudDetails,然后使用子类 Tom 继承它:
class StudDetails
{
    var mark1: Int;
    var mark2: Int;

    init(stm1:Int, results stm2:Int)
    {
        mark1 = stm1;
        mark2 = stm2;
    }

    func show()
    {
        print("Mark1:\(self.mark1), Mark2:\(self.mark2)")
    }
}

class Tom : StudDetails
{
    init()
    {
        super.init(stm1: 93, results: 89)
    }
}

let tom = Tom()
tom.show()
The output result of the execution of the above program is:
Mark1:93, Mark2:89
Overriding
Subclasses can implement their own customized functions through inherited instance methods, class methods, instance attributes, or subscript scripts. We call this behavior overriding.
We can use the override keyword to achieve rewriting.
Access superclass methods, properties and subscripts
You can access super class methods, properties or subscripts by using the super prefix.
| rewrite | Access methods, properties, subscript scripts |
|---|---|
| method | super.somemethod() |
| Attributes | super.someProperty() |
| subscript script | super[someIndex] |
Overriding methods and properties
overridden method
In our subclass we can override super class methods using override keyword.
In the following example we override the show() method:
class SuperClass {
    func show() {
        print("This is the superclass SuperClass")
    }
}

class SubClass: SuperClass  {
    override func show() {
        print("This is a subclass SubClass")
    }
}

let superClass = SuperClass()
superClass.show()

let subClass = SubClass()
subClass.show()
以上程序执行输出结果为:
这是超类 SuperClass
这是子类 SubClass
重写属性
你可以提供定制的 getter(或 setter)来重写任意继承来的属性,无论继承来的属性是存储型的还是计算型的属性。
子类并不知道继承来的属性是存储型的还是计算型的,它只知道继承来的属性会有一个名字和类型。所以你在重写一个属性时,必需将它的名字和类型都写出来。
注意点:
-
如果你在重写属性中提供了 setter,那么你也一定要提供 getter。
-
如果你不想在重写版本中的 getter 里修改继承来的属性值,你可以直接通过super.someProperty来返回继承来的值,其中someProperty是你要重写的属性的名字。
以下实例我们定义了超类 Circle 及子类 Rectangle, 在 Rectangle 类中我们重写属性 area:
lass Circle {
    var radius = 12.5
    var area: String {
        return "矩形半径 \(radius) "
    }
}

// 继承超类 Circle
class Rectangle: Circle {
    var print = 7
    override var area: String {


        return super.area + " ,但现在被重写为 \(print)"
    }
}

let rect = Rectangle()
rect.radius = 25.0
rect.print = 3
print("Radius \(rect.area)")
以上程序执行输出结果为:
Radius 矩形半径 25.0 ,但现在被重写为 3
重写属性观察器
你可以在属性重写中为一个继承来的属性添加属性观察器。这样一来,当继承来的属性值发生改变时,你就会监测到。
Note: You cannot add property observers for inherited constant stored properties or inherited read-only computed properties.
class Square: Rectangle {
    override var radius: Double {
        didSet {
            print = Int(radius/5.0)+1
        }
    }
}
Prevent rewriting
We can prevent them from being overridden using the final keyword.
If you override final methods, properties or subscript scripts, an error will be reported at compile time.
You can mark the entire class as final by adding the final attribute (final class) before the keyword class. Such a class cannot be inherited, otherwise a compilation error will be reported.
final class Circle {
    final was radius = 12.5
    var area: String {
        return "The radius of the rectangle is\(radius)"
    }
}
class Rectangle: Circle {
    var print = 7
    override var area: String {
        return super.area + " , but now rewritten as \(print)"
    }
}
Since the above example uses the final keyword and does not allow rewriting, the execution will report an error:
error: var overrides a 'final' var
    override var area: String {
                 ^
note: overridden declaration is here
    var area: String {
        ^
error: var overrides a 'final' var
    override var radius: Double {
                 ^
note: overridden declaration is here
    final was radius = 12.5
              ^
error: inheritance from a final class 'Circle'
class Rectangle: Circle {
      ^
Swift construction process
Construction is the preparation process for using an instance of a class, structure, or enumeration type. This process includes setting initial values for each property in the instance and performing necessary preparation and initialization tasks.
Swift constructors use the init() method.
Unlike constructors in Objective-C, Swift's constructors do not need to return a value. Their main task is to ensure that new instances are properly initialized before they are used for the first time.
Class instances can also perform the work of cleaning up memory before the class instance is released by defining a deinitializer.
Initial assignment of stored properties
Classes and structures must set appropriate initial values for all stored properties when instances are created.
When stored properties are assigned in the constructor, their values are set directly and no property observers are triggered.
The storage property assignment process in the constructor:
-
Create initial value.
-
Default property values are specified in the property definition.
-
Initialize the instance and call the init() method.
Constructor
Constructors are called when creating a new instance of a specific type. Its simplest form is similar to an instance method without any parameters, named after the keyword init.
grammar
init()
{
    //Code executed after instantiation
}
Example
The following structure defines a constructor init without parameters, and initializes the values of the stored attributes length and breadth to 6 and 12:
struct rectangle {
var length: Double
var breadth: Double
init() {
length = 6
breadth = 12
}
}
var area = rectangle()
print("The area of the rectangle is \(area.length*area.breadth)")
The output result of the execution of the above program is:
The area of the rectangle is 72.0
Default attribute value
We can set initial values for stored properties in the constructor; similarly, we can set default values for properties when they are declared.
Using default values can make your constructors simpler and clearer, and the type of the property can be automatically deduced from the default value.
In the following example, we set a default value for the property when it is declared:
struct rectangle {
//Set default value
var length = 6
var breadth = 12
}
var area = rectangle()
print("The area of the rectangle is \(area.length*area.breadth)")
The output result of the execution of the above program is:
The area of the rectangle is 72
Construction parameters
You can provide construction parameters when defining the constructor init() as follows:
struct Rectangle {
    var length: Double
    var breadth: Double
    var area: Double

    init(fromLength length: Double, fromBreadth breadth: Double) {
        self.length = length
        self.breadth = breadth
        area = length * breadth
    }

    init(fromLeng leng: Double, fromBread bread: Double) {
        self.length = leng
        self.breadth = bread
        area = leng * bread
    }
}

let ar = Rectangle(fromLength: 6, fromBreadth: 12)
print("The area is: \(ar.area)")

let are = Rectangle(fromLeng: 36, fromBread: 12)
print("The area is: \(are.area)")
The output result of the execution of the above program is:
Area: 72.0
Area is: 432.0
Internal and external parameter names
Like function and method parameters, construction parameters also have a parameter name used inside the constructor and an external parameter name used when the constructor is called.
However, constructors do not have an identifiable name before the parentheses like functions and methods. Therefore, when calling a constructor, the constructor to be called is mainly determined by the parameter name and type in the constructor.
If you do not provide external names for parameters when defining a constructor, Swift will automatically generate an external name for each constructor parameter that is the same as the internal name.
struct Color {
    let red, green, blue: Double
    init(red: Double, green: Double, blue: Double) {
        self.red   = red
        self.green = green
        self.blue  = blue
    }
    init(white: Double) {
        red   = white
        green = white
        blue  = white
    }
}
no external name parameter
If you do not want to provide an external name for a constructor parameter, you can use an underscore _to display the external name describing it.
struct Rectangle {
    var length: Double

    init(frombreadth breadth: Double) {
        length = breadth * 10
    }

    init(frombre bre: Double) {
        length = bre * 30
    }
    //Do not provide external name
    init(_ area: Double) {
        length = area
    }
/ Called without providing an external name
let rectarea = Rectangle(180.0)
print("The area is: \(rectarea.length)")
Optional attribute types
If your customized type contains a stored attribute that logically allows a null value, you need to define it as an optional type (optional attribute type).
当存储属性声明为可选时,将自动初始化为空 nil。
struct Rectangle {
    var length: Double?

    init(frombreadth breadth: Double) {
        length = breadth * 10
    }

    init(frombre bre: Double) {
        length = bre * 30
    }

    init(_ area: Double) {
        length = area
    }
}
构造过程中修改常量属性
只要在构造过程结束前常量的值能确定,你可以在构造过程中的任意时间点修改常量属性的值。
对某个类实例来说,它的常量属性只能在定义它的类的构造过程中修改;不能在子类中修改。
尽管 length 属性现在是常量,我们仍然可以在其类的构造器中设置它的值:
struct Rectangle {
    let length: Double?

    init(frombreadth breadth: Double) {
        length = breadth * 10
    }

    init(frombre bre: Double) {
        length = bre * 30
    }

    init(_ area: Double) {
        length = area
    }
}

let rectarea = Rectangle(180.0)
print("面积为:\(rectarea.length)")
以上程序执行输出结果为:
面积为:Optional(180.0)
默认构造器
默认构造器将简单的创建一个所有属性值都设置为默认值的实例:
以下实例中,ShoppingListItem类中的所有属性都有默认值,且它是没有父类的基类,它将自动获得一个可以为所有属性设置默认值的默认构造器
class ShoppingListItem {
    var name: String?
    var quantity = 1
    var purchased = false
}
var item = ShoppingListItem()


print("名字为: \(item.name)")
print("数理为: \(item.quantity)")
print("Whether to pay: \(item.purchased)")
The output result of the execution of the above program is:
Name is: nil
Mathematically: 1
Whether to pay: false
Member-by-member initializer for structures
If structures provide default values for all stored properties and do not themselves provide custom initializers, they can automatically obtain a member-by-member initializer.
When we call the member-by-member constructor, we pass the parameter name that is the same as the member attribute name to complete the initial assignment of the member attributes.
The following example defines a structure Rectangle, which contains two properties length and breadth. Swift can automatically deduce the type Double of these two properties based on their initial assignments of 100.0 and 200.0.
struct Rectangle {
var length = 100.0, breadth = 200.0
}
let area = Rectangle(length: 24.0, breadth: 32.0)
print("Area of rectangle: \(area.length)")
print("Area of rectangle: \(area.breadth)")
Since both stored properties have default values, the structure Rectangle automatically gets a member-by-member initializer init(width:height:). You can use it to create new instances of Rectangle.
The output result of the execution of the above program is:
Area of rectangle: 24.0
Area of rectangle: 32.0
Constructor proxy for value types
The constructor can complete part of the construction process of the instance by calling other constructors. This process is called constructor delegation, and it reduces code duplication across multiple constructors.
In the following example, the Rect structure calls the construction process of Size and Point:
struct Size {
var width = 0.0, height = 0.0
}
struct Point {
var x = 0.0, y = 0.0
}
struct Rect {
var origin = Point()
var size = Size()
init() {}
init(origin: Point, size: Size) {
self.origin = origin
self.size = size
}
init(center: Point, size: Size) {
let originX = center.x - (size.width / 2)
let originY = center.y - (size.height / 2)
self.init(origin: Point(x: originX, y: originY), size: size)
}
}
// Both origin and size attributes use the default values Point(x: 0.0, y: 0.0) and Size(width: 0.0, height: 0.0) when defined:
let basicRect = Rect()
print("Size structure initial value: \(basicRect.size.width, basicRect.size.height) ")
print("Rect structure initial value: \(basicRect.origin.x, basicRect.origin.y) ")
//Assign the parameter values of origin and size to the corresponding stored attributes
let originRect = Rect(origin: Point(x: 2.0, y: 2.0),
size: Size(width: 5.0, height: 5.0))
print("Size structure initial value: \(originRect.size.width, originRect.size.height) ")
print("Initial value of Rect structure: \(originRect.origin.x, originRect.origin.y) ")
//First calculate the coordinates of origin through the values of center and size.
//Then call (or proxy to) the init(origin:size:) constructor to assign the new origin and size values to the corresponding attributes.
let centerRect = Rect(center: Point(x: 4.0, y: 4.0),
size: Size(width: 3.0, height: 3.0))
print("Size structure initial value: \(centerRect.size.width, centerRect.size.height) ")
print("Rect structure initial value: \(centerRect.origin.x, centerRect.origin.y) ")
The output result of the execution of the above program is:
Size structure initial value: (0.0, 0.0)
Rect structure initial value: (0.0, 0.0)
Size structure initial value: (5.0, 5.0)
Rect structure initial value: (2.0, 2.0)
Size structure initial value: (3.0, 3.0)
Rect structure initial value: (2.5, 2.5)
Class inheritance and construction process
Swift provides two types of class initializers to ensure that stored properties in all class instances can obtain initial values. They are designated initializers and convenience initializers.
| designated constructor | convenience constructor |
| The main constructor in a class | A secondary, auxiliary constructor in a class |
| Initialize all properties provided in the class, and call the constructor of the parent class up the parent class chain to implement the initialization of the parent class. | Convenience initializers can be defined to call a designated initializer in the same class and provide default values for its parameters. You can also define convenience initializers to create an instance for a special purpose or with specific inputs. |
| Every class must have at least one designated constructor | Provide convenience initializers for classes only when necessary |
Init(parameters) {
    statements
} |
convenience init(parameters) {
      statements
} |
Specify constructor instance
class mainClass {
     var no1: Int // Local storage variable
    init(no1 : Int) {
        self.no1 = no1 // initialization
    }
}
class subClass : mainClass {
    var no2: Int // New subclass storage variable
    init(no1 : Int, no2 : Int) {
        self.no2 = no2 // initialization
        super.init(no1:no1) //Initialize super class
    }
}

let res = mainClass(no1: 10)
let res2 = subClass(no1: 10, no2: 20)

print("res is: \(res.no1)")
print("res2 is: \(res2.no1)")
print("res2 is: \(res2.no2)")
The output result of the execution of the above program is:
res is: 10
res is: 10
res is: 20
Convenience constructor instance
class mainClass {
    var no1: Int // local storage variable
    init(no1 : Int) {
        self.no1 = no1 // initialization
    }
}

class subClass : mainClass {
    var no2 : Int
    init(no1 : Int, no2 : Int) {
        self.no2 = no2
        super.init(no1:no1)
    }
    // Convenience method requires only one parameter
    override convenience init(no1: Int)  {
        self.init(no1:no1, no2:0)
    }
}
let res = mainClass(no1: 20)
let res2 = subClass(no1: 30, no2: 50)

print("res is: \(res.no1)")
print("res2 is: \(res2.no1)")
print("res2 is: \(res2.no2)")
The output result of the execution of the above program is:
res is: 20
res2 is: 30
res2 is: 50
Constructor inheritance and overloading
Subclasses in Swift do not inherit the parent class’s constructor by default.
The parent class's constructor is only inherited when it is deterministic and safe.
When you override a parent class designated initializer, you need to write the override modifier.
class SuperClass {
    var corners = 4
    var description: String {
        return "\(corners) edges"
    }
}
let rectangle = SuperClass()
print("矩形: \(rectangle.description)")

class SubClass: SuperClass {
    override init() { //Overloaded constructor
        super.init()
        corners = 5
    }
}

let subClass = SubClass()
print("Pentagon: \(subClass.description)")
The output result of the execution of the above program is:
Rectangle: 4 sides
Pentagon: 5 sides
Designated initializer and convenience initializer instances
The following examples show inheritance of designated initializers, convenience initializers, and automatic initializers in action.
It defines a class hierarchy containing two classes, MainClass and SubClass, and demonstrates how their constructors interact.
class MainClass {
    var name: String

    init(name: String) {
        self.name = name
    }

    convenience init() {
        self.init(name: "[Anonymous]")
    }
}
let main = MainClass(name: "Runoob")
print("MainClass name is: \(main.name)")

let main2 = MainClass()
print("No corresponding name: \(main2.name)")

class SubClass: MainClass {
    var count: Int
    init(name: String, count: Int) {
        self.count = count
        super.init(name: name)
    }

    override convenience init(name: String) {
        self.init(name: name, count: 1)
    }
}

let sub = SubClass(name: "Runoob")
print("MainClass name is: \(sub.name)")

let sub2 = SubClass(name: "Runoob", count: 3)
print("count variable: \(sub2.count)")
The output result of the execution of the above program is:
MainClass name is: Runoob
No corresponding name: [anonymous]
MainClass name is: Runoob
count variable: 3
Failable initializer for a class
If a class, structure or enumeration type object may fail during the construction of itself, define a failable initializer for it.
Possible reasons for variable initialization failure include:
-
An invalid parameter value was passed in.
-
A required external resource is missing.
-
Specific conditions are not met.
In order to properly handle situations where this construction process may fail.
You can add one or more failable initializers to the definition of a class, structure, or enumeration type . The syntax is to add a question mark (init?) after the init keyword.
Failable initializer for enumeration types
You can obtain specific enumeration members of an enumeration type by constructing a failable initializer that takes one or more parameters.
Example
In the following example, an enumeration type named TemperatureUnit is defined. It contains three possible enumeration members (Kelvin, Celsius, and Fahrenheit) and a failable initializer that is used to find the enumeration member corresponding to the Character value:
enum TemperatureUnit {
    // Kelvin, Celsius, Fahrenheit
    case Kelvin, Celsius, Fahrenheit
    init?(symbol: Character) {


        switch symbol {
        case "K":
            self = .Kelvin
        case "C":
            self = .Celsius
        case "F":
            self = .Fahrenheit
        default:
            return nil
        }
    }
}


let fahrenheitUnit = TemperatureUnit(symbol: "F")
if fahrenheitUnit != nil {
    print("This is a defined temperature unit, so initialization is successful.")
}

let unknownUnit = TemperatureUnit(symbol: "X")
if unknownUnit == nil {
    print("This is not a defined temperature unit, so initialization failed.")
}
The output result of the execution of the above program is:
This is a defined temperature unit, so the initialization was successful.
This is not a defined temperature unit, so initialization failed.
Failable initializer for a class
Failable initializers for value types (such as structures or enumeration types) have no restrictions on when and where the failure of construction is triggered.
However, a class's failable initializer can only trigger failure behavior after all class properties have been initialized and after all proxy calls between constructors in the class have occurred.
Example
In the following example, a class named StudRecord is defined. Because the studname attribute is a constant, once the StudRecord class is constructed successfully, the studname attribute must have a non-nil value.
class StudRecord {
    let studname: String!
    init?(studname: String) {
        self.studname = studname
        if studname.isEmpty { return nil }
    }
}
if let stname = StudRecord(studname: "Failed Constructor") {
    print("Module is\(stname.studname)")
}
The output result of the execution of the above program is:
Module is a failure constructor
Override a failable initializer
Just like other initializers, you can override a base class's failable initializer with a subclass's failable initializer.
Alternatively, you can override a base class's failable initializer with a subclass's non-failable initializer.
You can override a failable initializer with a non-failable initializer, but the reverse doesn't work.
A non-failable initializer can never delegate a call to a failable initializer.
Example
The following examples describe failable and non-failable initializers:
class Planet {
    var name: String

    init(name: String) {
        self.name = name
    }

    convenience init() {
        self.init(name: "[No Planets]")
    }
}
let plName = Planet(name: "Mercury")
print("The name of the planet is: \(plName.name)")

let noplName = Planet()
print("There is no planet with this name: \(noplName.name)")

class planets: Planet {
    var count: Int

    init(name: String, count: Int) {
        self.count = count
        super.init(name: name)
    }

    override convenience init(name: String) {
        self.init(name: name, count: 1)
    }
}
The output result of the execution of the above program is:
The name of the planet is: Mercury
There are no planets with this name: [No Planets]
Failable constructor init!
Generally speaking, we define a failable initializer by adding a question mark after the init keyword (init?), but you can also define a failable initializer by adding an exclamation point after init (init!) . Examples are as follows:
struct StudRecord {
    let stname: String

    init!(stname: String) {
        if stname.isEmpty {return nil }
        self.stname = stname
    }
}

let stmark = StudRecord(stname: "Runoob")
if let name = stmark {
    print("Student name specified")
}

let blankname = StudRecord(stname: "")
if blankname == nil {
    print("Student name is empty")
}
The output result of the execution of the above program is:
Student name specified
Student name is empty
Swift destruction process
The destructor is called immediately before an instance of a class is released. Use keywords deinitto mark destructors, similar to how initialization functions initare marked. Destructors only work on class types.
Destruction process principle
Swift automatically releases instances that are no longer needed to free up resources.
Swift handles memory management of instances through automatic reference counting (ARC).
Normally you don't need to manually clean up when your instance is deallocated. However, when using your own resources, you may need to do some additional cleanup.
For example, if you create a custom class to open a file and write some data, you may need to close the file before the class instance is released.
grammar
In a class definition, there can be at most one destructor per class. The destructor does not take any parameters and is written without parentheses:
deinit {
    //Execute the destruction process
}
Example
var counter = 0; // reference counter
class BaseClass {
    init() {
        counter += 1;
    }
    deinit {
        counter -= 1;
    }
}

var show: BaseClass? = BaseClass()
print(counter)
show = nil
print(counter)
The output result of the execution of the above program is:
1
0
When the show = nil statement is executed, the calculator is subtracted by 1, and the memory occupied by show will be released.
var counter = 0; // reference counter

class BaseClass {
    init() {
        counter += 1;
    }

    deinit {
        counter -= 1;
    }
}

var show: BaseClass? = BaseClass()

print(counter)
print(counter)
The output result of the execution of the above program is:
1
1
Swift optional chaining
Optional Chaining is a process that can request and call properties, methods, and subscripts. The target of the request or call may be nil.
Optional chaining returns two values:
-
If the target has a value, the call will succeed and return the value
-
If the target is nil, the call will return nil
Multiple requests or calls can be linked into a chain. If any node is nil, the entire chain will fail.
Optional chaining as an alternative to forced resolution
You define an optional chain by placing a question mark (?) after the optional value of a property, method, or subscript script.
| Optional chain '?' | The exclamation mark (!) forces expansion of methods, properties, and subscript script optional chains. |
| ? Place in optional value and later call method, property, subscript script | ! Placed in an optional value and later called methods, properties, subscript scripts to force expansion of the value |
| When optional is nil, a friendly error message is output. | Force unwind execution error when optional is nil |
Optional chain instance using exclamation point (!)
class Person {
    var residence: Residence?
}

class Residence {
    var numberOfRooms = 1
}

let john = Person()

//Will cause a runtime error
let roomCount = john.residence!.numberOfRooms
The output result of the execution of the above program is:
fatal error: unexpectedly found nil while unwrapping an Optional value
If you want to use an exclamation mark (!) to force parsing to obtain the numberOfRooms attribute value of this person's residence attribute, a runtime error will occur because there is no residence value that can be parsed at this time.
Optional chain instance using question mark (?)
class Person {
    var residence: Residence?
}

class Residence {
    var numberOfRooms = 1
}

let john = Person()

// Link optional residence? attribute, if residence exists, retrieve the value of numberOfRooms
if let roomCount = john.residence?.numberOfRooms {


    print("John's room number is \(roomCount).")
} else {
    print("Cannot view room number")
}
The output result of the execution of the above program is:
Can't view room number
Because this attempt to obtain numberOfRooms may fail, the optional chain returns a value of type Int?, or "optional Int". When residence is empty (the above example), the selected Int will be empty, so numberOfRooms will not be accessible.
要注意的是,即使numberOfRooms是非可选Int(Int?)时这一点也成立。只要是通过可选链的请求就意味着最后numberOfRooms总是返回一个Int?而不是Int。
为可选链定义模型类
你可以使用可选链来多层调用属性,方法,和下标脚本。这让你可以利用它们之间的复杂模型来获取更底层的属性,并检查是否可以成功获取此类底层属性。
实例
定义了四个模型类,其中包括多层可选链:
class Person {
    var residence: Residence?
}

// 定义了一个变量 rooms,它被初始化为一个Room[]类型的空数组
class Residence {
    var rooms = [Room]()
    var numberOfRooms: Int {
        return rooms.count
    }
    subscript(i: Int) -> Room {
        return rooms[i]
    }
    func printNumberOfRooms() {
        print("房间号为 \(numberOfRooms)")
    }
    var address: Address?
}

// Room 定义一个name属性和一个设定room名的初始化器
class Room {
    let name: String
    init(name: String) { self.name = name }
}

// 模型中的最终类叫做Address
class Address {
    var buildingName: String?
    var buildingNumber: String?
    var street: String?
    func buildingIdentifier() -> String? {
        if (buildingName != nil) {
            return buildingName
        } else if (buildingNumber != nil) {
            return buildingNumber
        } else {
            return nil
        }
    }
}
通过可选链调用方法
你可以使用可选链的来调用可选值的方法并检查方法调用是否成功。即使这个方法没有返回值,你依然可以使用可选链来达成这一目的。
class Person {
    var residence: Residence?
}

// 定义了一个变量 rooms,它被初始化为一个Room[]类型的空数组
class Residence {
    var rooms = [Room]()
    var numberOfRooms: Int {
        return rooms.count
    }
    subscript(i: Int) -> Room {
        return rooms[i]
    }
    func printNumberOfRooms() {
        print("房间号为 \(numberOfRooms)")
    }
    var address: Address?
}

// Room 定义一个name属性和一个设定room名的初始化器
class Room {
    let name: String
    init(name: String) { self.name = name }
}

// 模型中的最终类叫做Address
class Address {
    var buildingName: String?
    var buildingNumber: String?
    var street: String?
    func buildingIdentifier() -> String? {
        if (buildingName != nil) {
            return buildingName
        } else if (buildingNumber != nil) {
            return buildingNumber
        } else {
            return nil
        }
    }
}

let john = Person()


if ((john.residence?.printNumberOfRooms()) != nil) {
    print("Output room number")
} else {
    print("Unable to output room number")
}
The output result of the execution of the above program is:
Unable to output room number
Use an if statement to check whether the printNumberOfRooms method can be called successfully: if the method is successfully called through the optional chain, the implicit return value of printNumberOfRooms will be Void, if not, nil will be returned.
Call subscript script using optional chaining
You can use optional chaining to try to get a value from a subscript script and check whether the call to the subscript script was successful, however, you cannot set a subscript script via optional chaining.
Example 1
class Person {
    var residence: Residence?
}

// A variable rooms is defined, which is initialized to an empty array of type Room[]
class Residence {
    var rooms = [Room]()
    var numberOfRooms: Int {
        return rooms.count
    }
    subscript(i: Int) -> Room {
        return rooms[i]
    }
    func printNumberOfRooms() {
        print("The room number is\(numberOfRooms)")
    }
    var address: Address?
}

// Room defines a name attribute and an initializer that sets the room name
class Room {
    let name: String
    init(name: String) { self.name = name }
}

//The final class in the model is called Address
class Address {
    var buildingName: String?
    var buildingNumber: String?
    was street: String?
    func buildingIdentifier() -> String? {
        if (buildingName != nil) {
            return buildingName
        } else if (buildingNumber != nil) {
            return buildingNumber
        } else {
            return nil
        }
    }
}

let john = Person()
if let firstRoomName = john.residence?[0].name {
    print("First room name\(firstRoomName).")
} else {
    print("Unable to retrieve room")
}
The output result of the execution of the above program is:
Unable to retrieve room
The optional chaining question mark in the subscript script call follows directly after john.residence and before the subscript script bracket, because john.residence is the optional value that the optional chain is trying to obtain.
Example 2
Create a Residence instance to john.residence in the instance, and there are one or more Room instances in his rooms array, then you can use the optional chain to obtain the instances in the rooms array through the Residence subscript script:
class Person {
    var residence: Residence?
}

// A variable rooms is defined, which is initialized to an empty array of type Room[]
class Residence {
    var rooms = [Room]()
    var numberOfRooms: Int {
        return rooms.count
    }
    subscript(i: Int) -> Room {
        return rooms[i]
    }
    func printNumberOfRooms() {
        print("The room number is\(numberOfRooms)")
    }
    var address: Address?
}

// Room defines a name attribute and an initializer that sets the room name
class Room {
    let name: String
    init(name: String) { self.name = name }
}

//The final class in the model is called Address
class Address {
    var buildingName: String?
    var buildingNumber: String?
    was street: String?
    func buildingIdentifier() -> String? {
        if (buildingName != nil) {
            return buildingName
        } else if (buildingNumber != nil) {
            return buildingNumber
        } else {
            return nil
        }
    }
}

let john = Person()
let johnsHouse = Residence()
johnsHouse.rooms.append(Room(name: "客厅"))
johnsHouse.rooms.append(Room(name: "厨房"))
john.residence = johnsHouse

let johnsAddress = Address()
johnsAddress.buildingName = "The Larches"
johnsAddress.street = "Laurel Street"
john.residence!.address = johnsAddress

if let johnsStreet = john.residence?.address?.street {
    print("John 所在的街道是 \(johnsStreet)。")
} else {
    print("无法检索到地址。 ")
}
以上程序执行输出结果为:
John 所在的街道是 Laurel Street。
通过可选链接调用来访问下标
通过可选链接调用,我们可以用下标来对可选值进行读取或写入,并且判断下标调用是否成功。
实例
class Person {
    var residence: Residence?
}

// 定义了一个变量 rooms,它被初始化为一个Room[]类型的空数组
class Residence {
    var rooms = [Room]()
    var numberOfRooms: Int {
        return rooms.count
    }
    subscript(i: Int) -> Room {
        return rooms[i]
    }
    func printNumberOfRooms() {
        print("房间号为 \(numberOfRooms)")
    }
    var address: Address?
}

// Room 定义一个name属性和一个设定room名的初始化器
class Room {
    let name: String
    init(name: String) { self.name = name }
}

// 模型中的最终类叫做Address
class Address {
    var buildingName: String?
    var buildingNumber: String?
    var street: String?
    func buildingIdentifier() -> String? {
        if (buildingName != nil) {
            return buildingName
        } else if (buildingNumber != nil) {
            return buildingNumber
        } else {
            return nil
        }
    }
}

let john = Person()

let johnsHouse = Residence()
johnsHouse.rooms.append(Room(name: "客厅"))
johnsHouse.rooms.append(Room(name: "厨房"))
john.residence = johnsHouse

if let firstRoomName = john.residence?[0].name {
    print("The first room is named \(firstRoomName)")
} else {
    print("Unable to retrieve room")
}
The output result of the execution of the above program is:
The first room is called the living room
Access subscripts of optional types
If the subscript returns a nullable type value, such as the key subscript of Dictionary in Swift. You can chain a subscript's nullable return value by placing a question mark after the subscript's closing parenthesis:
var testScores = ["Dave": [86, 82, 84], "Bev": [79, 94, 81]]
testScores["Dave"]?[0] = 91
testScores["Bev"]?[0]++
testScores["Brian"]?[0] = 72
// the "Dave" array is now [91, 82, 84] and the "Bev" array is now [80, 94, 81]
In the above example, a testScores array is defined, which contains two key-value pairs and maps the String type key to an integer array.
This example uses optional chaining calls to set the first element in the "Dave" array to 91, +1 the first element in the "Bev" array, and then attempts to set the first element in the "Brian" array to 72 .
The first two calls are successful because these two keys exist. But key "Brian" does not exist in the dictionary, so the third call fails.
Connect multiple layers of links
You can connect multiple levels of optional chains together, and you can mine lower-level property methods and subscripts within the model. However, a multi-level optional chain cannot add more levels than the optional values already returned.
如果你试图通过可选链获得Int值,不论使用了多少层链接返回的总是Int?。 相似的,如果你试图通过可选链获得Int?值,不论使用了多少层链接返回的总是Int?。
实例1
下面的例子试图获取john的residence属性里的address的street属性。这里使用了两层可选链来联系residence和address属性,它们两者都是可选类型:
class Person {
    var residence: Residence?
}

// 定义了一个变量 rooms,它被初始化为一个Room[]类型的空数组
class Residence {
    var rooms = [Room]()
    var numberOfRooms: Int {
        return rooms.count
    }
    subscript(i: Int) -> Room {
        return rooms[i]
    }
    func printNumberOfRooms() {
        print("房间号为 \(numberOfRooms)")
    }
    var address: Address?
}

// Room 定义一个name属性和一个设定room名的初始化器
class Room {
    let name: String
    init(name: String) { self.name = name }
}

// 模型中的最终类叫做Address
class Address {
    var buildingName: String?
    var buildingNumber: String?
    var street: String?
    func buildingIdentifier() -> String? {
        if (buildingName != nil) {
            return buildingName
        } else if (buildingNumber != nil) {
            return buildingNumber
        } else {
            return nil
        }
    }
}

let john = Person()

if let johnsStreet = john.residence?.address?.street {
    print("John's address is \(johnsStreet).")
} else {
    print("Unable to retrieve address")
}
The output result of the execution of the above program is:
Unable to retrieve address
Example 2
If you set an instance of Address as the value of john.residence.address, and set an actual value for the street property of address, you can get that property value through multiple levels of optional chaining.
class Person {
   var residence: Residence?
}

class Residence {

    var rooms = [Room]()
    var numberOfRooms: Int {
        return rooms.count
    }
    subscript(i: Int) -> Room {
        get{
            return rooms[i]
        }
        set {
            rooms[i] = newValue
        }
    }
    func printNumberOfRooms() {
        print("The room number is\(numberOfRooms)")
    }
    var address: Address?
}

class Room {
    let name: String
    init(name: String) { self.name = name }
}

class Address {
    var buildingName: String?
    var buildingNumber: String?
    was street: String?
    func buildingIdentifier() -> String? {
        if (buildingName != nil) {
            return buildingName
        } else if (buildingNumber != nil) {
            return buildingNumber
        } else {
            return nil
        }
    }
}
let john = Person()
john.residence?[0] = Room(name: "Bathroom")

let johnsHouse = Residence()
johnsHouse.rooms.append(Room(name: "客厅"))
johnsHouse.rooms.append(Room(name: "厨房"))
john.residence = johnsHouse

if let firstRoomName = john.residence?[0].name {
    print("The first room is\(firstRoomName)")
} else {
    print("Unable to retrieve room")
}
The output result of the above example is:
The first room is the living room
Chain functions that return optional values
We can also call methods that return nullable values through optional chaining, and we can continue to chain optional values.
Example
class Person {
    var residence: Residence?
}

// A variable rooms is defined, which is initialized to an empty array of type Room[]
class Residence {
    var rooms = [Room]()
    var numberOfRooms: Int {
        return rooms.count
    }
    subscript(i: Int) -> Room {
        return rooms[i]
    }
    func printNumberOfRooms() {
        print("The room number is\(numberOfRooms)")
    }
    var address: Address?
}

// Room defines a name attribute and an initializer that sets the room name
class Room {
    let name: String
    init(name: String) { self.name = name }
}

//The final class in the model is called Address
class Address {
    var buildingName: String?
    var buildingNumber: String?
    was street: String?
    func buildingIdentifier() -> String? {
        if (buildingName != nil) {
            return buildingName
        } else if (buildingNumber != nil) {
            return buildingNumber
        } else {
            return nil
        }
    }
}

let john = Person()

if john.residence?.printNumberOfRooms() != nil {
    print("指定了房间号)")
}  else {
    print("未指定房间号")
}
以上程序执行输出结果为:
未指定房间号
Swift 自动引用计数(ARC)
Swift 使用自动引用计数(ARC)这一机制来跟踪和管理应用程序的内存
通常情况下我们不需要去手动释放内存,因为 ARC 会在类的实例不再被使用时,自动释放其占用的内存。
但在有些时候我们还是需要在代码中实现内存管理。
ARC 功能
-
当每次使用 init() 方法创建一个类的新的实例的时候,ARC 会分配一大块内存用来储存实例的信息。
-
内存中会包含实例的类型信息,以及这个实例所有相关属性的值。
-
当实例不再被使用时,ARC 释放实例所占用的内存,并让释放的内存能挪作他用。
-
为了确保使用中的实例不会被销毁,ARC 会跟踪和计算每一个实例正在被多少属性,常量和变量所引用。
-
实例赋值给属性、常量或变量,它们都会创建此实例的强引用,只要强引用还在,实例是不允许被销毁的。
类实例之间的循环强引用
在上面的例子中,ARC 会跟踪你所新创建的 Person 实例的引用数量,并且会在 Person 实例不再被需要时销毁它。
然而,我们可能会写出这样的代码,一个类永远不会有0个强引用。这种情况发生在两个类实例互相保持对方的强引用,并让对方不被销毁。这就是所谓的循环强引用。
解决实例之间的循环强引用
Swift 提供了两种办法用来解决你在使用类的属性时所遇到的循环强引用问题:
- 弱引用
- 无主引用
弱引用和无主引用允许循环引用中的一个实例引用另外一个实例而不保持强引用。这样实例能够互相引用而不产生循环强引用。
对于生命周期中会变为nil的实例使用弱引用。相反的,对于初始化赋值后再也不会被赋值为nil的实例,使用无主引用。
弱引用实例
class Module {
    let name: String
    init(name: String) { self.name = name }
    var sub: SubModule?
    deinit { print("\(name) 主模块") }
}

class SubModule {
    let number: Int

    init(number: Int) { self.number = number }

    weak var topic: Module?

    deinit { print("子模块 topic 数为 \(number)") }
}

var toc: Module?
var list: SubModule?
toc = Module(name: "ARC")
list = SubModule(number: 4)
toc!.sub = list
list!.topic = toc

toc = nil
list = nil
以上程序执行输出结果为:
ARC 主模块
子模块 topic 数为 4
无主引用实例
class Student {
    let name: String
    var section: Marks?

    init(name: String) {
        self.name = name
    }

    deinit { print("\(name)") }
}
class Marks {
    let marks: Int
    unowned let stname: Student

    init(marks: Int, stname: Student) {
        self.marks = marks
        self.stname = stname
    }

    deinit { print("学生的分数为 \(marks)") }
}

was module: Student?
module = Student(name: "ARC")
module!.section = Marks(marks: 98, stname: module!)
module = nil
The output result of the execution of the above program is:
ARC
The student's score is 98
Strong reference cycle caused by closure
Strong reference cycles can also occur when you assign a closure to a property of a class instance, and the instance is used in the closure body. This closure body may access a property of the instance, such as self.someProperty, or call a method of the instance, such as self.someMethod, in the closure. Both cases result in the closure "capturing" self, creating a strong reference cycle.
Example
The following example shows you how a strong reference cycle is generated when a closure refers to self. The example defines a class called HTMLElement, which uses a simple model to represent a single element in HTML:
class HTMLElement {

    let name: String
    let text: String?

    lazy var asHTML: () -> String = {
        if let text = self.text {
            return "<\(self.name)>\(text)</\(self.name)>"
        } else {
            return "<\(self.name) />"
        }
    }

    init(name: String, text: String? = nil) {
        self.name = name
        self.text = text
    }

    deinit {
        print("\(name) is being deinitialized")
    }

}

//Create an instance and print information
var paragraph: HTMLElement? = HTMLElement(name: "p", text: "hello, world")
print(paragraph!.asHTML())
The HTMLElement class creates a strong reference cycle between the class instance and the closure of the asHTML default value.
The instance's asHTML attribute holds a strong reference to the closure. However, the closure uses self in its closure body (referencing self.name and self.text), so the closure captures self, which means that the closure in turn holds a strong reference to the HTMLElement instance. In this way, the two objects have a strong circular reference.
Resolve the strong reference cycle caused by the closure: When defining the closure, define the capture list as part of the closure. In this way, the strong reference cycle between the closure and the class instance can be resolved.
Weak references and unowned references
Define a capture within a closure as an unowned reference when the closure and captured instance always refer to each other and are always destroyed at the same time.
On the contrary, when the capturing reference may sometimes be nil, define the capture within the closure as a weak reference.
If the captured reference will never be set to nil, an unowned reference should be used instead of a weak reference .
Example
In the previous HTMLElement example, unowned reference is the correct way to solve the strong reference cycle. Write the HTMLElement class like this to avoid strong reference cycles:
class HTMLElement {

    let name: String
    let text: String?

    lazy var asHTML: () -> String = {
        [unowned self] in
        if let text = self.text {
            return "<\(self.name)>\(text)</\(self.name)>"
        } else {
            return "<\(self.name) />"
        }
    }

    init(name: String, text: String? = nil) {
        self.name = name
        self.text = text
    }

    deinit {
        print("\(name) is destroyed")
    }

}

//Create and print HTMLElement instance
var paragraph: HTMLElement? = HTMLElement(name: "p", text: "hello, world")
print(paragraph!.asHTML())

// The HTMLElement instance will be destroyed and you can see the message printed by its destructor
paragraph = nil
The output result of the execution of the above program is:
<p>hello, world</p>
p is destructed
Swift type conversion
Swift language type conversion can determine the type of an instance. It can also be used to detect whether an instance type belongs to an instance of its parent class or subclass.
Type conversion in Swift is implemented using the is and as operators. is is used to detect the type of a value, and as is used to convert types.
Type conversion can also be used to check whether a class implements a certain protocol.
Check type
Type conversion is used to detect whether an instance type belongs to a specific instance type.
You can use it on class and subclass hierarchies to check the type of a specific class instance and convert the type of this class instance to other types in the hierarchy.
Type checking uses the is keyword.
Operator is is used to check whether an instance belongs to a specific subtype. The type checking operator returns true if the instance belongs to that subtype, false otherwise.
class Subjects {
    var physics: String
    init(physics: String) {
        self.physics = physics
    }
}

class Chemistry: Subjects {
    var equations: String
    init(physics: String, equations: String) {
        self.equations = equations
        super.init(physics: physics)
    }
}

class Maths: Subjects {
    var formulae: String
    init(physics: String, formulae: String) {
        self.formulae = formulae
        super.init(physics: physics)
    }
}

let in = [
    Chemistry(physics: "Solid Physics", equations: "Hertz"),
    Maths(physics: "Fluid Dynamics", formula: "Gigahertz"),
    Chemistry(physics: "Thermal Physics", equations: "Decibel"),
    Maths(physics: "Astrophysics", formula: "MHz"),
    Maths(physics: "differential equation", formulae: "cosine series")]


let samplechem = Chemistry(physics: "Solid State Physics", equations: "Hertz")
print("The sample physics is: \(samplechem.physics)")
print("Sample equations: \(samplechem.equations)")


let samplemaths = Maths(physics: "Fluid Dynamics", formulae: "Gigahertz")
print("The example physics is: \(samplemaths.physics)")
print("The example formula is: \(samplemaths.formulae)")

var chemCount = 0
var mathsCount = 0
for item in sa {
    // If it is an instance of the Chemistry type, return true, otherwise return false.
    if item is Chemistry {
        ++chemCount
    } else if item is Maths {
        ++mathsCount
    }
}

print("Chemistry contains \(chemCount) subjects, mathematics contains \(mathsCount) subjects")
The output result of the execution of the above program is:
Example physics is: solid state physics
Example Equation: Hertz
Example physics are: Fluid Dynamics
Example formula is: Gigahertz
Chemistry consists of 2 topics and Mathematics consists of 3 topics
downward transformation
For downward conversion, use the type conversion operator (as? or as!)
Use the conditional form of type conversion (as?) when you are not sure that the downcast will succeed. Conditional form casts always return an optional value, and if downcasting is not possible, the optional value will be nil.
Only use the coercive form (as!) if you are sure that the downward transformation will succeed. A cast can trigger a runtime error when you attempt to downcast to an incorrect type.
class Subjects {
    var physics: String
    init(physics: String) {
        self.physics = physics
    }
}

class Chemistry: Subjects {
    var equations: String
    init(physics: String, equations: String) {
        self.equations = equations
        super.init(physics: physics)
    }
}

class Maths: Subjects {
    var formulae: String
    init(physics: String, formulae: String) {
        self.formulae = formulae
        super.init(physics: physics)
    }
}

let in = [
    Chemistry(physics: "Solid Physics", equations: "Hertz"),
    Maths(physics: "Fluid Dynamics", formula: "Gigahertz"),
    Chemistry(physics: "Thermal Physics", equations: "Decibel"),
    Maths(physics: "Astrophysics", formula: "MHz"),
    Maths(physics: "differential equation", formulae: "cosine series")]


let samplechem = Chemistry(physics: "Solid State Physics", equations: "Hertz")
print("The sample physics is: \(samplechem.physics)")
print("Sample equations: \(samplechem.equations)")


let samplemaths = Maths(physics: "Fluid Dynamics", formulae: "Gigahertz")
print("The example physics is: \(samplemaths.physics)")
print("The example formula is: \(samplemaths.formulae)")

var chemCount = 0
var mathsCount = 0

for item in sa {
    //Conditional form of type conversion
    if let show = item as? Chemistry {
        print("The chemistry topic is: '\(show.physics)', \(show.equations)")
        // mandatory form
    } else if let example = item as? Maths {
        print("The mathematics topic is: '\(example.physics)', \(example.formulae)")
    }
}
The output result of the execution of the above program is:
Example physics is: solid state physics
Example Equation: Hertz
Example physics are: Fluid Dynamics
Example formula is: Gigahertz
The chemistry topics are: 'Solid State Physics', Hertz
The mathematics topic is: 'Fluid Dynamics', Gigahertz
The chemistry topic is: 'Thermal Physics', decibels
The mathematics topic is: 'Astrophysics', MHz
Mathematics topics are: 'Differential equations', Cosine series
Type conversion between Any and AnyObject
Swift provides two special type aliases for indeterminate types:
AnyObjectCan represent an instance of any class type. (similar to id in Objective-C)AnyCan represent any type, including function types.
Note: Only use and
if you clearly need its behavior and functionality . It's always better to use explicit types that you expect in your code.AnyAnyObject
Any instance
class Subjects {
    var physics: String
    init(physics: String) {
        self.physics = physics
    }
}

class Chemistry: Subjects {
    var equations: String
    init(physics: String, equations: String) {
        self.equations = equations
        super.init(physics: physics)
    }
}

class Maths: Subjects {
    var formulae: String
    init(physics: String, formulae: String) {
        self.formulae = formulae
        super.init(physics: physics)
    }
}

let in = [
    Chemistry(physics: "Solid Physics", equations: "Hertz"),
    Maths(physics: "Fluid Dynamics", formula: "Gigahertz"),
    Chemistry(physics: "Thermal Physics", equations: "Decibel"),
    Maths(physics: "Astrophysics", formula: "MHz"),
    Maths(physics: "differential equation", formulae: "cosine series")]


let samplechem = Chemistry(physics: "Solid State Physics", equations: "Hertz")
print("The sample physics is: \(samplechem.physics)")
print("Sample equations: \(samplechem.equations)")


let samplemaths = Maths(physics: "Fluid Dynamics", formulae: "Gigahertz")
print("The example physics is: \(samplemaths.physics)")
print("The example formula is: \(samplemaths.formulae)")

var chemCount = 0
var mathsCount = 0

for item in sa {
    //Conditional form of type conversion
    if let show = item as? Chemistry {
        print("The chemistry topic is: '\(show.physics)', \(show.equations)")
        // mandatory form
    } else if let example = item as? Maths {
        print("The mathematics topic is: '\(example.physics)', \(example.formulae)")
    }
}

// Can store arrays of type Any example
var exampleany = [Any]()

exampleany.append(12)
exampleany.append(3.14159)
exampleany.append("Any instance")
exampleany.append(Chemistry(physics: "Solid State Physics", equations: "MHz"))

for item2 in exampleany {
    switch item2 {
    case let someInt as Int:
        print("The integer value is \(someInt)")
    case let someDouble as Double where someDouble > 0:
        print("Pi value is\(someDouble)")
    case let someString as String:
        print("\(someString)")
    case let phy as Chemistry:
        print("主题 '\(phy.physics)', \(phy.equations)")
    default:
        print("None")
    }
}
The output result of the execution of the above program is:
Example physics is: solid state physics
Example Equation: Hertz
Example physics are: Fluid Dynamics
Example formula is: Gigahertz
The chemistry topics are: 'Solid State Physics', Hertz
The mathematics topic is: 'Fluid Dynamics', Gigahertz
The chemistry topic is: 'Thermal Physics', decibels
The mathematics topic is: 'Astrophysics', MHz
Mathematics topics are: 'Differential equations', Cosine series
The integer value is 12
The value of Pi is 3.14159
Any instance
Topic 'Solid State Physics', MHz
AnyObject instance
class Subjects {
    var physics: String
    init(physics: String) {
        self.physics = physics
    }
}

class Chemistry: Subjects {
    var equations: String
    init(physics: String, equations: String) {
        self.equations = equations
        super.init(physics: physics)
    }
}

class Maths: Subjects {
    var formulae: String
    init(physics: String, formulae: String) {
        self.formulae = formulae
        super.init(physics: physics)
    }
}

// Array of type [AnyObject]
let saprint: [AnyObject] = [
    Chemistry(physics: "Solid Physics", equations: "Hertz"),
    Maths(physics: "Fluid Dynamics", formula: "Gigahertz"),
    Chemistry(physics: "Thermal Physics", equations: "Decibel"),
    Maths(physics: "Astrophysics", formula: "MHz"),
    Maths(physics: "differential equation", formulae: "cosine series")]


let samplechem = Chemistry(physics: "Solid State Physics", equations: "Hertz")
print("The sample physics is: \(samplechem.physics)")
print("Sample equations: \(samplechem.equations)")


let samplemaths = Maths(physics: "Fluid Dynamics", formulae: "Gigahertz")
print("The example physics is: \(samplemaths.physics)")
print("The example formula is: \(samplemaths.formulae)")

var chemCount = 0
var mathsCount = 0

for item in saprint {
    //Conditional form of type conversion
    if let show = item as? Chemistry {
        print("The chemistry topic is: '\(show.physics)', \(show.equations)")
        // mandatory form
    } else if let example = item as? Maths {
        print("The mathematics topic is: '\(example.physics)', \(example.formulae)")
    }
}

var exampleany = [Any]()
exampleany.append(12)
exampleany.append(3.14159)
exampleany.append("Any instance")
exampleany.append(Chemistry(physics: "Solid State Physics", equations: "MHz"))

for item2 in exampleany {
    switch item2 {
    case let someInt as Int:
        print("The integer value is \(someInt)")
    case let someDouble as Double where someDouble > 0:
        print("Pi value is\(someDouble)")
    case let someString as String:
        print("\(someString)")
    case let phy as Chemistry:
        print("主题 '\(phy.physics)', \(phy.equations)")
    default:
        print("None")
    }
}
The output result of the execution of the above program is:
Example physics is: solid state physics
Example Equation: Hertz
Example physics are: Fluid Dynamics
Example formula is: Gigahertz
The chemistry topics are: 'Solid State Physics', Hertz
The mathematics topic is: 'Fluid Dynamics', Gigahertz
The chemistry topic is: 'Thermal Physics', decibels
The mathematics topic is: 'Astrophysics', MHz
Mathematics topics are: 'Differential equations', Cosine series
The integer value is 12
The value of Pi is 3.14159
Any instance
Topic 'Solid State Physics', MHz
Use the cast operator (as, not as?) in the case of a switch statement to check and convert to an explicit type.
Swift extension
Extension is to add new functionality to an existing class, structure or enumeration type.
Extensions can add new functionality to a type, but cannot override existing functionality.
Extensions in Swift can:
- Add computed properties and computed static properties
- Define instance methods and type methods
- Provide a new constructor
- Define subscript
- Define and use new nested types
- Make an existing type conform to a protocol
grammar
Extension declarations use the keyword extension :
extension SomeType {
    //New functions added to SomeType are written here
}
An extension can extend an existing type to adapt to one or more protocols. The syntax is as follows:
extension SomeType: SomeProtocol, AnotherProctocol {
    //The protocol implementation is written here
}
Computed properties
Extensions can add computed instance properties and computed type properties to existing types.
Example
The following example adds five computed instance properties to the Int type and extends its functionality:
extension Int {
   var add: Int {return self + 100 }
   var sub: Int { return self - 10 }
   var mul: Int { return self * 10 }
   var div: Int { return self / 5 }
}

let addition = 3.add
print("Value after addition: \(addition)")

let subtraction = 120.sub
print("Value after subtraction: \(subtraction)")

let multiplication = 39.mul
print("Value after multiplication: \(multiplication)")

let division = 55.div
print("Value after division: \(division)")

let mix = 30.add + 34.sub
print("Mixed operation result: \(mix)")
The output result of the execution of the above program is:
Value after addition: 103
Value after subtraction: 110
Value after multiplication: 390
Value after division: 11
Mixed operation result: 154
Constructor
Extensions can add new constructors to existing types.
This allows you to extend other types, pass your own custom types as constructor parameters, or provide additional initialization options not included in the original implementation of the type.
Extensions can add a new convenience initializer init() to a class, but they cannot add a new designated constructor or destructor deinit() to a class.
struct sum {
    var num1 = 100, num2 = 200
}

struct diff {
    was no1 = 200, no2 = 100
}

struct mult {
    var a = sum()
    var b = diff()
}


extension mult {
    init(x: sum, y: diff) {
        _ = x.num1 + x.num2
        _ = y.no1 + y.no2
    }
}


let a = sum(num1: 100, num2: 200)
let b = diff(no1: 200, no2: 100)

let getMult = mult(x: a, y: b)
print("getMult sum\(getMult.a.num1, getMult.a.num2)")
print("getMult diff\(getMult.b.no1, getMult.b.no2)")
The output result of the execution of the above program is:
getMult sum(100, 200)
getMult diff(200, 100)
method
Extensions can add new instance methods and type methods to existing types.
The following example adds a new instance method named topics to the Int type:
extension Int {
   func topics(summation: () -> ()) {
      for _ in 0..<self {
         summation()
      }
   }
}

4.topics({
   print("Inside extension module")
})

3.topics({
   print("Internal type conversion module")
})
The output result of the execution of the above program is:
within the extension module
within the extension module
within the extension module
within the extension module
In the internal conversion module
In the internal conversion module
In the internal conversion module
This topicsmethod uses a () -> ()single parameter of type, indicating that the function has no parameters and no return value.
After defining this extension, you can call topics the method on any integer to perform a task multiple times:
mutable instance methods
Instance methods added by extension can also modify the instance itself.
Methods in structures and enumeration types that modify self or its properties must mark the instance method as mutating, just like the modifying method from the original implementation.
Example
The following example adds a new modification method called square to Swift's Double type to implement the square calculation of a primitive value:
extension Double { mutating func square() { let pi = 3.1415 self = pi * self * self } } was Trial1 = 3.3 Trial1.square() print("The area of the circle is: \(Trial1)") where Trial2 = 5.8 Trial2.square() print("The area of the circle is: \(Trial2)") was Trial3 = 120.3 Trial3.square() print("The area of the circle is: \(Trial3)")
The output result of the execution of the above program is:
The area of the circle is: 34.210935
The area of the circle is: 105.68006
The area of the circle is: 45464.070735
subscript
Extensions can add new subscripts to an existing type.
Example
The following example adds an integer subscript to the Swift built-in type Int. The subscript[n] returns a decimal number
extension Int {


   subscript(var multtable: Int) -> Int {


      was no1 = 1
      while multtable > 0 {
         no1 *= 10
         --multtable
      }
      return (self / no1) % 10
   }
}

print(12[0])
print(7869[1])
print(786543[2])
The output result of the execution of the above program is:
2
6
5
Nested types
Extensions can add new nested types to existing classes, structures, and enumerations:
extension Int {
   enum calc
   {
      case add
      case sub
      houses a lot
      case div
      case anything
   }

   var print: calc {
      switch self
      {
         case 0:
            return .add
         case 1:
            return .sub
         case 2:
            return .mult
         case 3:
            return .div
         default:
            return .anything
       }
   }
}

func result(numb: [Int]) {
   for i in numb {
      switch i.print {
         case .add:
            print(" 10 ")
          case .sub:
            print(" 20 ")
         case .mult:
         print(" 30 ")
         case .div:
         print(" 40 ")
         default:
         print(" 50 ")

      }
   }
}

result([0, 1, 2, 3, 4, 7])
以上程序执行输出结果为:
 10
 20
 30
 40
 50
 50
笔记:
扩展下标文中的代码对于较高版本的swift可能会报错:
'var' in this position is interpreted as an argument label
Left side of mutating operator isn't mutable: 'multtable' is immutable
验证了写法,这样写可以避免问题:
extension Int{
    subscript(digitIndex:Int)->Int{
        var decimalBase = 1
        var digit = digitIndex
        // 不能直接使用digitIndex,会报错
        while digit > 0 {
            decimalBase *= 10
            digit = digit - 1
        }
        return (self/decimalBase) % 10
    }
}

print(12[0])
print(7869[1])
print(786543[2])
参考了网上的写法,还可以这样写:
extension Int{
    subscript(digitIndex:Int)->Int{

        var decimalBase = 1
        for _ in 0 ..< digitIndex{
            decimalBase *= 10
        }
        return (self/decimalBase) % 10
    }
}
print(12[0])
print(7869[1])
print(786543[2])
Swift 协议
协议规定了用来实现某一特定功能所必需的方法和属性。
任意能够满足协议要求的类型被称为遵循(conform)这个协议。
类,结构体或枚举类型都可以遵循协议,并提供具体实现来完成协议定义的方法和功能。
语法
协议的语法格式如下:
protocol SomeProtocol {
    // 协议内容
}
要使类遵循某个协议,需要在类型名称后加上协议名称,中间以冒号:分隔,作为类型定义的一部分。遵循多个协议时,各协议之间用逗号,分隔。
struct SomeStructure: FirstProtocol, AnotherProtocol {
    // 结构体内容
}
如果类在遵循协议的同时拥有父类,应该将父类名放在协议名之前,以逗号分隔。
class SomeClass: SomeSuperClass, FirstProtocol, AnotherProtocol {
    // 类的内容
}
对属性的规定
协议用于指定特定的实例属性或类属性,而不用指定是存储型属性或计算型属性。此外还必须指明是只读的还是可读可写的。
协议中的通常用var来声明变量属性,在类型声明后加上{ set get }来表示属性是可读可写的,只读属性则用{ get }来表示。
protocol classa {

    var marks: Int { get set }
    var result: Bool { get }

    func attendance() -> String
    func markssecured() -> String

}

protocol classb: classa {

    var present: Bool { get set }
    var subject: String { get set }
    var stname: String { get set }

}

class classc: classb {
    var marks = 96
    let result = true
    var present = false
    var subject = "Swift 协议"
    var stname = "Protocols"

    func attendance() -> String {
        return "The \(stname) has secured 99% attendance"
    }

    func markssecured() -> String {
        return "\(stname) has scored \(marks)"
    }
}

let studdet = classc()
studdet.stname = "Swift"
studdet.marks = 98
studdet.markssecured()

print(studdet.marks)
print(studdet.result)
print(studdet.present)
print(studdet.subject)
print(studdet.stname)
以上程序执行输出结果为:
98
true
false
Swift 协议
Swift
对 Mutating 方法的规定
有时需要在方法中改变它的实例。
例如,值类型(结构体,枚举)的实例方法中,将mutating关键字作为函数的前缀,写在func之前,表示可以在该方法中修改它所属的实例及其实例属性的值。
protocol daysofaweek {
    mutating func show()
}

enum days: daysofaweek {
    case sun, mon, tue, wed, thurs, fri, sat
    mutating func show() {
        switch self {
        case .sun:
            self = .sun
            print("Sunday")
        case .mon:
            self = .mon
            print("Monday")
        case .tue:
            self = .tue
            print("Tuesday")
        case .wed:
            self = .wed
            print("Wednesday")
        case .thurs:
            self = .thurs
            print("Wednesday")
        case .fri:
            self = .fri
            print("Firday")
        case .sat:
            self = .sat
            print("Saturday")
        default:
            print("NO Such Day")
        }
    }
}

var res = days.wed
res.show()
以上程序执行输出结果为:
Wednesday
对构造器的规定
协议可以要求它的遵循者实现指定的构造器。
你可以像书写普通的构造器那样,在协议的定义里写下构造器的声明,但不需要写花括号和构造器的实体,语法如下:
protocol SomeProtocol {
   init(someParameter: Int)
}
实例
protocol tcpprotocol {
   init(aprot: Int)
}
协议构造器规定在类中的实现
你可以在遵循该协议的类中实现构造器,并指定其为类的指定构造器或者便利构造器。在这两种情况下,你都必须给构造器实现标上"required"修饰符:
class SomeClass: SomeProtocol {
   required init(someParameter: Int) {
      // 构造器实现
   }
}

protocol tcpprotocol {
   init(aprot: Int)
}

class tcpClass: tcpprotocol {
   required init(aprot: Int) {
   }
}
使用required修饰符可以保证:所有的遵循该协议的子类,同样能为构造器规定提供一个显式的实现或继承实现。
如果一个子类重写了父类的指定构造器,并且该构造器遵循了某个协议的规定,那么该构造器的实现需要被同时标示required和override修饰符:
protocol tcpprotocol {
    init(no1: Int)
}

class mainClass {
    var no1: Int // 局部变量
    init(no1: Int) {
        self.no1 = no1 // 初始化
    }
}

class subClass: mainClass, tcpprotocol {
    var no2: Int
    init(no1: Int, no2 : Int) {
        self.no2 = no2
        super.init(no1:no1)
    }
    // 因为遵循协议,需要加上"required"; 因为继承自父类,需要加上"override"
    required override convenience init(no1: Int)  {
        self.init(no1:no1, no2:0)
    }
}
let res = mainClass(no1: 20)
let show = subClass(no1: 30, no2: 50)

print("res is: \(res.no1)")
print("res is: \(show.no1)")
print("res is: \(show.no2)")
以上程序执行输出结果为:
res is: 20
res is: 30
res is: 50
协议类型
尽管协议本身并不实现任何功能,但是协议可以被当做类型来使用。
协议可以像其他普通类型一样使用,使用场景:
- 作为函数、方法或构造器中的参数类型或返回值类型
- 作为常量、变量或属性的类型
- 作为数组、字典或其他容器中的元素类型
实例
protocol Generator {
    associatedtype members
    func next() -> members?
}

var items = [10,20,30].makeIterator()
while let x = items.next() {
    print(x)
}

for lists in [1,2,3].map( {i in i*5}) {
    print(lists)
}

print([100,200,300])
print([1,2,3].map({i in i*10}))
以上程序执行输出结果为:
10
20
30
5
10
15
[100, 200, 300]
[10, 20, 30]
在扩展中添加协议成员
我们可以可以通过扩展来扩充已存在类型( 类,结构体,枚举等)。
扩展可以为已存在的类型添加属性,方法,下标脚本,协议等成员。
protocol AgeClasificationProtocol {
   var age: Int { get }
   func agetype() -> String
}

class Person {
   let firstname: String
   let lastname: String
   var age: Int
   init(firstname: String, lastname: String) {
      self.firstname = firstname
      self.lastname = lastname
      self.age = 10
   }
}

extension Person : AgeClasificationProtocol {
   func fullname() -> String {
      var c: String
      c = firstname + " " + lastname
      return c
   }

   func agetype() -> String {
      switch age {
      case 0...2:
         return "Baby"
      case 2...12:
         return "Child"
      case 13...19:
         return "Teenager"
      case let x where x > 65:
         return "Elderly"
      default:
         return "Normal"
      }
   }
}
协议的继承
协议能够继承一个或多个其他协议,可以在继承的协议基础上增加新的内容要求。
协议的继承语法与类的继承相似,多个被继承的协议间用逗号分隔:
protocol InheritingProtocol: SomeProtocol, AnotherProtocol {
    // 协议定义
}
实例
protocol Classa {
    var no1: Int { get set }
    func calc(sum: Int)
}

protocol Result {
    func print(target: Classa)
}

class Student2: Result {
    func print(target: Classa) {
        target.calc(1)
    }
}

class Classb: Result {
    func print(target: Classa) {
        target.calc(5)
    }
}

class Student: Classa {
    var no1: Int = 10

    func calc(sum: Int) {
        no1 -= sum
        print("学生尝试 \(sum) 次通过")

        if no1 <= 0 {
            print("学生缺席考试")
        }
    }
}

class Player {
    var stmark: Result!

    init(stmark: Result) {
        self.stmark = stmark
    }

    func print(target: Classa) {
        stmark.print(target)
    }
}

var marks = Player(stmark: Student2())
var marksec = Student()

marks.print(marksec)
marks.print(marksec)
marks.print(marksec)
marks.stmark = Classb()
marks.print(marksec)
marks.print(marksec)
marks.print(marksec)
以上程序执行输出结果为:
学生尝试 1 次通过
学生尝试 1 次通过
学生尝试 1 次通过
学生尝试 5 次通过
学生尝试 5 次通过
学生缺席考试
学生尝试 5 次通过
学生缺席考试
类专属协议
你可以在协议的继承列表中,通过添加class关键字,限制协议只能适配到类(class)类型。
该class关键字必须是第一个出现在协议的继承列表中,其后,才是其他继承协议。格式如下:
protocol SomeClassOnlyProtocol: class, SomeInheritedProtocol {
    // 协议定义
}
实例
protocol TcpProtocol {
    init(no1: Int)
}

class MainClass {
    var no1: Int // 局部变量
    init(no1: Int) {
        self.no1 = no1 // 初始化
    }
}

class SubClass: MainClass, TcpProtocol {
    var no2: Int
    init(no1: Int, no2 : Int) {
        self.no2 = no2
        super.init(no1:no1)
    }
    // 因为遵循协议,需要加上"required"; 因为继承自父类,需要加上"override"
    required override convenience init(no1: Int)  {
        self.init(no1:no1, no2:0)
    }
}

let res = MainClass(no1: 20)
let show = SubClass(no1: 30, no2: 50)

print("res is: \(res.no1)")
print("res is: \(show.no1)")
print("res is: \(show.no2)")
以上程序执行输出结果为:
res is: 20
res is: 30
res is: 50
协议合成
Swift 支持合成多个协议,这在我们需要同时遵循多个协议时非常有用。
语法格式如下:
protocol Stname {
    var name: String { get }
}

protocol Stage {
    var age: Int { get }
}

struct Person: Stname, Stage {
    var name: String
    var age: Int
}

func show(celebrator: Stname & Stage) {


    print("\(celebrator.name) is \(celebrator.age) years old")
}

let studname = Person(name: "Priya", age: 21)
show(studname)

let stud = Person(name: "Rehan", age: 29)
print(stud)

let student = Person(name: "Roshan", age: 19)
print(student)
以上程序执行输出结果为:
Priya is 21 years old
Person(name: "Rehan", age: 29)
Person(name: "Roshan", age: 19)
检验协议的一致性
你可以使用is和as操作符来检查是否遵循某一协议或强制转化为某一类型。
is操作符用来检查实例是否遵循了某个协议。as?返回一个可选值,当实例遵循协议时,返回该协议类型;否则返回nil。as用以强制向下转型,如果强转失败,会引起运行时错误。
实例
下面的例子定义了一个 HasArea 的协议,要求有一个Double类型可读的 area:
protocol HasArea {
    var area: Double { get }
}

// 定义了Circle类,都遵循了HasArea协议
class Circle: HasArea {
    let pi = 3.1415927
    var radius: Double
    var area: Double { return pi * radius * radius }
    init(radius: Double) { self.radius = radius }
}

// 定义了Country类,都遵循了HasArea协议
class Country: HasArea {
    var area: Double
    init(area: Double) { self.area = area }
}

// Animal是一个没有实现HasArea协议的类
class Animal {
    var legs: Int
    init(legs: Int) { self.legs = legs }
}

let objects: [AnyObject] = [
    Circle(radius: 2.0),
    Country(area: 243_610),
    Animal(legs: 4)
]

for object in objects {
    // 对迭代出的每一个元素进行检查,看它是否遵循了HasArea协议
    if let objectWithArea = object as? HasArea {
        print("面积为 \(objectWithArea.area)")
    } else {
        print("没有面积")
    }
}
以上程序执行输出结果为:
面积为 12.5663708
面积为 243610.0
没有面积
Swift 泛型
Swift 提供了泛型让你写出灵活且可重用的函数和类型。
Swift 标准库是通过泛型代码构建出来的。
Swift 的数组和字典类型都是泛型集。
你可以创建一个Int数组,也可创建一个String数组,或者甚至于可以是任何其他 Swift 的类型数据数组。
以下实例是一个非泛型函数 exchange 用来交换两个 Int 值:
实例
// 定义一个交换两个变量的函数
func swapTwoInts(_ a: inout Int, _ b: inout Int) {
let temporaryA = a
a = b
b = temporaryA
}
var numb1 = 100
var numb2 = 200
print("交换前数据: \(numb1) 和 \(numb2)")
swapTwoInts(&numb1, &numb2)
print("交换后数据: \(numb1) 和 \(numb2)")
以上程序执行输出结果为:
交换前数据: 100 和 200
交换后数据: 200 和 100
以上实例只试用与交换整数 Int 类型的变量。如果你想要交换两个 String 值或者 Double 值,就得重新写个对应的函数,例如 swapTwoStrings(_:_:) 和 swapTwoDoubles(_:_:),如下所示:
String 和 Double 值交换函数
func swapTwoStrings(_ a: inout String, _ b: inout String) {
let temporaryA = a
a = b
b = temporaryA
}
func swapTwoDoubles(_ a: inout Double, _ b: inout Double) {
let temporaryA = a
a = b
b = temporaryA
}
从以上代码来看,它们功能代码是相同的,只是类型上不一样,这时我们可以使用泛型,从而避免重复编写代码。
泛型使用了占位类型名(在这里用字母 T 来表示)来代替实际类型名(例如 Int、String 或 Double)。
func swapTwoValues<T>(_ a: inout T, _ b: inout T)
swapTwoValues 后面跟着占位类型名(T),并用尖括号括起来(<T>)。这个尖括号告诉 Swift 那个 T 是 swapTwoValues(_:_:) 函数定义内的一个占位类型名,因此 Swift 不会去查找名为 T 的实际类型。
以下实例是一个泛型函数 exchange 用来交换两个 Int 和 String 值:
实例
// 定义一个交换两个变量的函数
func swapTwoValues<T>(_ a: inout T, _ b: inout T) {
let temporaryA = a
a = b
b = temporaryA
}
var numb1 = 100
var numb2 = 200
print("交换前数据: \(numb1) 和 \(numb2)")
swapTwoValues(&numb1, &numb2)
print("交换后数据: \(numb1) 和 \(numb2)")
var str1 = "A"
var str2 = "B"
print("交换前数据: \(str1) 和 \(str2)")
swapTwoValues(&str1, &str2)
print("交换后数据: \(str1) 和 \(str2)")
以上程序执行输出结果为:
交换前数据:  100 和 200
交换后数据: 200 和 100
交换前数据:  A 和 B
交换后数据: B 和 A
泛型类型
Swift 允许你定义你自己的泛型类型。
自定义类、结构体和枚举作用于任何类型,如同 Array 和 Dictionary 的用法。
接下来我们来编写一个名为 Stack (栈)的泛型集合类型,栈只允许在集合的末端添加新的元素(称之为入栈),且也只能从末端移除元素(称之为出栈)。
接下来我们来编写一个名为 Stack (栈)的泛型集合类型,栈只允许在集合的末端添加新的元素(称之为入栈),且也只能从末端移除元素(称之为出栈)。
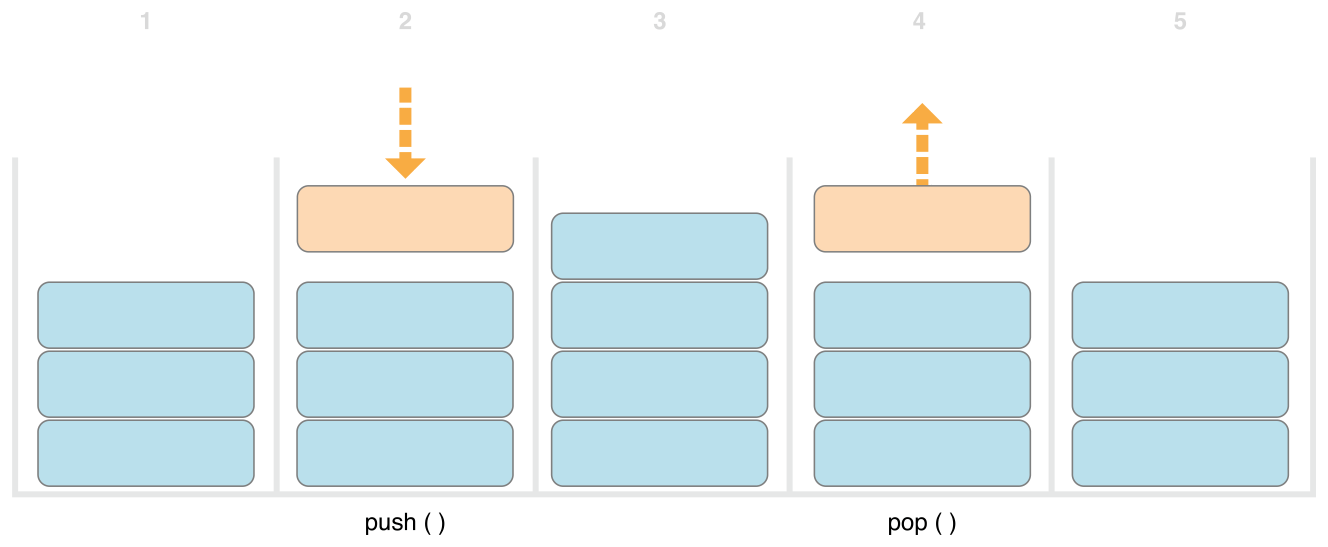
图片中从左到右解析如下:
- 三个值在栈中。
- 第四个值被压入到栈的顶部。
- 现在有四个值在栈中,最近入栈的那个值在顶部。
- 栈中最顶部的那个值被移除,或称之为出栈。
- 移除掉一个值后,现在栈又只有三个值了。
以下实例是一个非泛型版本的栈,以 Int 型的栈为例:
Int 型的栈
struct IntStack {
var items = [Int]()
mutating func push(_ item: Int) {
items.append(item)
}
mutating func pop() -> Int {
return items.removeLast()
}
}
这个结构体在栈中使用一个名为 items 的 Array 属性来存储值。Stack 提供了两个方法:push(_:) 和 pop(),用来向栈中压入值以及从栈中移除值。这些方法被标记为 mutating,因为它们需要修改结构体的 items 数组。
上面的 IntStack 结构体只能用于 Int 类型。不过,可以定义一个泛型 Stack 结构体,从而能够处理任意类型的值。
下面是相同代码的泛型版本:
泛型的栈
struct Stack<Element> {
var items = [Element]()
mutating func push(_ item: Element) {
items.append(item)
}
mutating func pop() -> Element {
return items.removeLast()
}
}
var stackOfStrings = Stack<String>()
print("字符串元素入栈: ")
stackOfStrings.push("google")
stackOfStrings.push("runoob")
print(stackOfStrings.items);
let deletetos = stackOfStrings.pop()
print("出栈元素: " + deletetos)
var stackOfInts = Stack<Int>()
print("整数元素入栈: ")
stackOfInts.push(1)
stackOfInts.push(2)
print(stackOfInts.items);
实例执行结果为:
字符串元素入栈:
["google", "runoob"]
出栈元素: runoob
整数元素入栈:
[1, 2]
Stack 基本上和 IntStack 相同,占位类型参数 Element 代替了实际的 Int 类型。
以上实例中 Element 在如下三个地方被用作占位符:
- 创建 items 属性,使用 Element 类型的空数组对其进行初始化。
- 指定 push(_:) 方法的唯一参数 item 的类型必须是 Element 类型。
- 指定 pop() 方法的返回值类型必须是 Element 类型。
扩展泛型类型
当你扩展一个泛型类型的时候(使用 extension 关键字),你并不需要在扩展的定义中提供类型参数列表。更加方便的是,原始类型定义中声明的类型参数列表在扩展里是可以使用的,并且这些来自原始类型中的参数名称会被用作原始定义中类型参数的引用。
下面的例子扩展了泛型类型 Stack,为其添加了一个名为 topItem 的只读计算型属性,它将会返回当前栈顶端的元素而不会将其从栈中移除:
泛型
struct Stack<Element> {
var items = [Element]()
mutating func push(_ item: Element) {
items.append(item)
}
mutating func pop() -> Element {
return items.removeLast()
}
}
extension Stack {
var topItem: Element? {
return items.isEmpty ? nil : items[items.count - 1]
}
}
var stackOfStrings = Stack<String>()
print("字符串元素入栈: ")
stackOfStrings.push("google")
stackOfStrings.push("runoob")
if let topItem = stackOfStrings.topItem {
print("栈中的顶部元素是:\(topItem).")
}
print(stackOfStrings.items)
实例中 topItem 属性会返回一个 Element 类型的可选值。当栈为空的时候,topItem 会返回 nil;当栈不为空的时候,topItem 会返回 items 数组中的最后一个元素。
以上程序执行输出结果为:
字符串元素入栈:
栈中的顶部元素是:runoob.
["google", "runoob"]
我们也可以通过扩展一个存在的类型来指定关联类型。
例如 Swift 的 Array 类型已经提供 append(_:) 方法,一个 count 属性,以及一个接受 Int 类型索引值的下标用以检索其元素。这三个功能都符合 Container 协议的要求,所以你只需简单地声明 Array 采纳该协议就可以扩展 Array。
以下实例创建一个空扩展即可:
extension Array: Container {}
类型约束
类型约束指定了一个必须继承自指定类的类型参数,或者遵循一个特定的协议或协议构成。
类型约束语法
你可以写一个在一个类型参数名后面的类型约束,通过冒号分割,来作为类型参数链的一部分。这种作用于泛型函数的类型约束的基础语法如下所示(和泛型类型的语法相同):
func someFunction<T: SomeClass, U: SomeProtocol>(someT: T, someU: U) {
    // 这里是泛型函数的函数体部分
}
上面这个函数有两个类型参数。第一个类型参数 T,有一个要求 T 必须是 SomeClass 子类的类型约束;第二个类型参数 U,有一个要求 U 必须符合 SomeProtocol 协议的类型约束。
实例
泛型
// 非泛型函数,查找指定字符串在数组中的索引
func findIndex(ofString valueToFind: String, in array: [String]) -> Int? {
for (index, value) in array.enumerated() {
if value == valueToFind {
// 找到返回索引值
return index
}
}
return nil
}
let strings = ["google", "weibo", "taobao", "runoob", "facebook"]
if let foundIndex = findIndex(ofString: "runoob", in: strings) {
print("runoob 的索引为 \(foundIndex)")
}
索引下标从 0 开始。
以上程序执行输出结果为:
runoob 的索引为 3
关联类
Swift 中使用 associatedtype 关键字来设置关联类型实例。
下面例子定义了一个 Container 协议,该协议定义了一个关联类型 ItemType。
Container 协议只指定了三个任何遵从 Container 协议的类型必须提供的功能。遵从协议的类型在满足这三个条件的情况下也可以提供其他额外的功能。
// Container 协议
protocol Container {
    associatedtype ItemType
    // 添加一个新元素到容器里
    mutating func append(_ item: ItemType)
    // 获取容器中元素的数
    var count: Int { get }
    // 通过索引值类型为 Int 的下标检索到容器中的每一个元素
    subscript(i: Int) -> ItemType { get }
}

// Stack 结构体遵从 Container 协议
struct Stack<Element>: Container {
    // Stack<Element> 的原始实现部分
    var items = [Element]()
    mutating func push(_ item: Element) {
        items.append(item)
    }
    mutating func pop() -> Element {
        return items.removeLast()
    }
    // Container 协议的实现部分
    mutating func append(_ item: Element) {
        self.push(item)
    }
    var count: Int {
        return items.count
    }
    subscript(i: Int) -> Element {
        return items[i]
    }
}

var tos = Stack<String>()
tos.push("google")
tos.push("runoob")
tos.push("taobao")
// 元素列表
print(tos.items)
// 元素个数
print( tos.count)
以上程序执行输出结果为:
["google", "runoob", "taobao"]
3
Where 语句
类型约束能够确保类型符合泛型函数或类的定义约束。
你可以在参数列表中通过where语句定义参数的约束。
你可以写一个where语句,紧跟在在类型参数列表后面,where语句后跟一个或者多个针对关联类型的约束,以及(或)一个或多个类型和关联类型间的等价(equality)关系。
实例
下面的例子定义了一个名为allItemsMatch的泛型函数,用来检查两个Container实例是否包含相同顺序的相同元素。
如果所有的元素能够匹配,那么返回 true,反之则返回 false。
泛型
// Container 协议
protocol Container {
associatedtype ItemType
// 添加一个新元素到容器里
mutating func append(_ item: ItemType)
// 获取容器中元素的数
var count: Int { get }
// 通过索引值类型为 Int 的下标检索到容器中的每一个元素
subscript(i: Int) -> ItemType { get }
}
// // 遵循Container协议的泛型TOS类型
struct Stack<Element>: Container {
// Stack<Element> 的原始实现部分
var items = [Element]()
mutating func push(_ item: Element) {
items.append(item)
}
mutating func pop() -> Element {
return items.removeLast()
}
// Container 协议的实现部分
mutating func append(_ item: Element) {
self.push(item)
}
var count: Int {
return items.count
}
subscript(i: Int) -> Element {
return items[i]
}
}
// 扩展,将 Array 当作 Container 来使用
extension Array: Container {}
func allItemsMatch<C1: Container, C2: Container>
(_ someContainer: C1, _ anotherContainer: C2) -> Bool
where C1.ItemType == C2.ItemType, C1.ItemType: Equatable {
// 检查两个容器含有相同数量的元素
if someContainer.count != anotherContainer.count {
return false
}
// 检查每一对元素是否相等
for i in 0..<someContainer.count {
if someContainer[i] != anotherContainer[i] {
return false
}
}
// 所有元素都匹配,返回 true
return true
}
var tos = Stack<String>()
tos.push("google")
tos.push("runoob")
tos.push("taobao")
var aos = ["google", "runoob", "taobao"]
if allItemsMatch(tos, aos) {
print("匹配所有元素")
} else {
print("元素不匹配")
}
以上程序执行输出结果为:
匹配所有元素
Swift 访问控制
访问控制可以限定其他源文件或模块中代码对你代码的访问级别。
你可以明确地给单个类型(类、结构体、枚举)设置访问级别,也可以给这些类型的属性、函数、初始化方法、基本类型、下标索引等设置访问级别。
协议也可以被限定在一定的范围内使用,包括协议里的全局常量、变量和函数。
访问控制基于模块与源文件。
模块指的是以独立单元构建和发布的 Framework 或 Application。在 Swift 中的一个模块可以使用 import 关键字引入另外一个模块。
源文件是单个源码文件,它通常属于一个模块, 源文件可以包含多个类和函数 的定义。
Swift 为代码中的实体提供了四种不同的访问级别:public、internal、fileprivate、private。
| 访问级别 | 定义 |
|---|---|
| public | 可以访问自己模块中源文件里的任何实体,别人也可以通过引入该模块来访问源文件里的所有实体。 |
| internal | 可以访问自己模块中源文件里的任何实体,但是别人不能访问该模块中源文件里的实体。 |
| fileprivate | 文件内私有,只能在当前源文件中使用。 |
| private | 只能在类中访问,离开了这个类或者结构体的作用域外面就无法访问。 |
public 为最高级访问级别,private 为最低级访问级别。
实例
public class SomePublicClass {}
internal class SomeInternalClass {}
fileprivate class SomeFilePrivateClass {}
private class SomePrivateClass {}
public var somePublicVariable = 0
internal let someInternalConstant = 0
fileprivate func someFilePrivateFunction() {}
private func somePrivateFunction() {}
除非有特殊的说明,否则实体都使用默认的访问级别 internal。
未指定访问级别默认为 internal
class SomeInternalClass {} // 访问级别为 internal
let someInternalConstant = 0 // 访问级别为 internal
函数类型访问权限
函数的访问级别需要根据该函数的参数类型和返回类型的访问级别得出。
下面的例子定义了一个名为someFunction全局函数,并且没有明确地申明其访问级别。
func someFunction() -> (SomeInternalClass, SomePrivateClass) {
    // 函数实现
}
函数中其中一个类 SomeInternalClass 的访问级别是 internal,另一个 SomePrivateClass 的访问级别是 private。所以根据元组访问级别的原则,该元组的访问级别是 private(元组的访问级别与元组中访问级别最低的类型一致)。
因为该函数返回类型的访问级别是 private,所以你必须使用 private 修饰符,明确的声明该函数:
private func someFunction() -> (SomeInternalClass, SomePrivateClass) {
    // 函数实现
}
将该函数申明为 public 或 internal,或者使用默认的访问级别 internal 都是错误的,因为如果这样你就无法访问 private 级别的返回值。
枚举类型访问权限
枚举中成员的访问级别继承自该枚举,你不能为枚举中的成员单独申明不同的访问级别。
实例
比如下面的例子,枚举 Student 被明确的申明为 public 级别,那么它的成员 Name,Mark 的访问级别同样也是 public:
实例
public enum Student {
case Name(String)
case Mark(Int,Int,Int)
}
var studDetails = Student.Name("Swift")
var studMarks = Student.Mark(98,97,95)
switch studMarks {
case .Name(let studName):
print("学生名: \(studName).")
case .Mark(let Mark1, let Mark2, let Mark3):
print("学生成绩: \(Mark1),\(Mark2),\(Mark3)")
}
以上程序执行输出结果为:
学生成绩: 98,97,95
子类访问权限
子类的访问级别不得高于父类的访问级别。比如说,父类的访问级别是 internal,子类的访问级别就不能申明为 public。
实例
public class SuperClass {
fileprivate func show() {
print("超类")
}
}
// 访问级别不能高于超类 public > internal
internal class SubClass: SuperClass {
override internal func show() {
print("子类")
}
}
let sup = SuperClass()
sup.show()
let sub = SubClass()
sub.show()
以上程序执行输出结果为:
超类
子类
常量、变量、属性、下标访问权限
常量、变量、属性不能拥有比它们的类型更高的访问级别。
比如说,你定义一个public级别的属性,但是它的类型是private级别的,这是编译器所不允许的。
同样,下标也不能拥有比索引类型或返回类型更高的访问级别。
如果常量、变量、属性、下标索引的定义类型是private级别的,那么它们必须要明确的申明访问级别为private:
private var privateInstance = SomePrivateClass()
Getter 和 Setter访问权限
常量、变量、属性、下标索引的Getters和Setters的访问级别继承自它们所属成员的访问级别。
Setter的访问级别可以低于对应的Getter的访问级别,这样就可以控制变量、属性或下标索引的读写权限。
实例
class Samplepgm {
fileprivate var counter: Int = 0{
willSet(newTotal){
print("计数器: \(newTotal)")
}
didSet{
if counter > oldValue {
print("新增加数量 \(counter - oldValue)")
}
}
}
}
let NewCounter = Samplepgm()
NewCounter.counter = 100
NewCounter.counter = 800
counter 的访问级别为 fileprivate,在文件内可以访问。
以上程序执行输出结果为:
计数器: 100
新增加数量 100
计数器: 800
新增加数量 700
构造器和默认构造器访问权限
初始化
我们可以给自定义的初始化方法申明访问级别,但是要不高于它所属类的访问级别。但必要构造器例外,它的访问级别必须和所属类的访问级别相同。
如同函数或方法参数,初始化方法参数的访问级别也不能低于初始化方法的访问级别。
默认初始化方法
Swift为结构体、类都提供了一个默认的无参初始化方法,用于给它们的所有属性提供赋值操作,但不会给出具体值。
默认初始化方法的访问级别与所属类型的访问级别相同。
实例
在每个子类的 init() 方法前使用 required 关键字声明访问权限。
实例
class classA {
required init() {
var a = 10
print(a)
}
}
class classB: classA {
required init() {
var b = 30
print(b)
}
}
let res = classA()
let show = classB()
以上程序执行输出结果为:
10
30
10
协议访问权限
如果想为一个协议明确的申明访问级别,那么需要注意一点,就是你要确保该协议只在你申明的访问级别作用域中使用。
如果你定义了一个public访问级别的协议,那么实现该协议提供的必要函数也会是public的访问级别。这一点不同于其他类型,比如,public访问级别的其他类型,他们成员的访问级别为internal。
实例
public protocol TcpProtocol {
init(no1: Int)
}
public class MainClass {
var no1: Int // local storage
init(no1: Int) {
self.no1 = no1 // initialization
}
}
class SubClass: MainClass, TcpProtocol {
var no2: Int
init(no1: Int, no2 : Int) {
self.no2 = no2
super.init(no1:no1)
}
// Requires only one parameter for convenient method
required override convenience init(no1: Int) {
self.init(no1:no1, no2:0)
}
}
let res = MainClass(no1: 20)
let show = SubClass(no1: 30, no2: 50)
print("res is: \(res.no1)")
print("res is: \(show.no1)")
print("res is: \(show.no2)")
以上程序执行输出结果为:
res is: 20
res is: 30
res is: 50
扩展访问权限
你可以在条件允许的情况下对类、结构体、枚举进行扩展。扩展成员应该具有和原始类成员一致的访问级别。比如你扩展了一个公共类型,那么你新加的成员应该具有和原始成员一样的默认的internal访问级别。
或者,你可以明确申明扩展的访问级别(比如使用private extension)给该扩展内所有成员申明一个新的默认访问级别。这个新的默认访问级别仍然可以被单独成员所申明的访问级别所覆盖。
泛型访问权限
泛型类型或泛型函数的访问级别取泛型类型、函数本身、泛型类型参数三者中的最低访问级别。
实例
public struct TOS<T> {
var items = [T]()
private mutating func push(item: T) {
items.append(item)
}
mutating func pop() -> T {
return items.removeLast()
}
}
var tos = TOS<String>()
tos.push("Swift")
print(tos.items)
tos.push("泛型")
print(tos.items)
tos.push("类型参数")
print(tos.items)
tos.push("类型参数名")
print(tos.items)
let deletetos = tos.pop()
以上程序执行输出结果为:
["Swift"]
["Swift", "泛型"]
["Swift", "泛型", "类型参数"]
["Swift", "泛型", "类型参数", "类型参数名"]
类型别名
任何你定义的类型别名都会被当作不同的类型,以便于进行访问控制。一个类型别名的访问级别不可高于原类型的访问级别。
比如说,一个private级别的类型别名可以设定给一个public、internal、private的类型,但是一个public级别的类型别名只能设定给一个public级别的类型,不能设定给internal或private 级别的类型。
注意:这条规则也适用于为满足协议一致性而给相关类型命名别名的情况。
实例
public protocol Container {
typealias ItemType
mutating func append(item: ItemType)
var count: Int { get }
subscript(i: Int) -> ItemType { get }
}
struct Stack<T>: Container {
// original Stack<T> implementation
var items = [T]()
mutating func push(item: T) {
items.append(item)
}
mutating func pop() -> T {
return items.removeLast()
}
// conformance to the Container protocol
mutating func append(item: T) {
self.push(item)
}
var count: Int {
return items.count
}
subscript(i: Int) -> T {
return items[i]
}
}
func allItemsMatch<
C1: Container, C2: Container
where C1.ItemType == C2.ItemType, C1.ItemType: Equatable>
(someContainer: C1, anotherContainer: C2) -> Bool {
// check that both containers contain the same number of items
if someContainer.count != anotherContainer.count {
return false
}
// check each pair of items to see if they are equivalent
for i in 0..<someContainer.count {
if someContainer[i] != anotherContainer[i] {
return false
}
}
// all items match, so return true
return true
}
var tos = Stack<String>()
tos.push("Swift")
print(tos.items)
tos.push("泛型")
print(tos.items)
tos.push("Where 语句")
print(tos.items)
var eos = ["Swift", "泛型", "Where 语句"]
print(eos)
The output result of the execution of the above program is:
["Swift"]
["Swift", "Generics"]
["Swift", "Generics", "Where statement"]
["Swift", "Generics", "Where statement"]