1. Effect
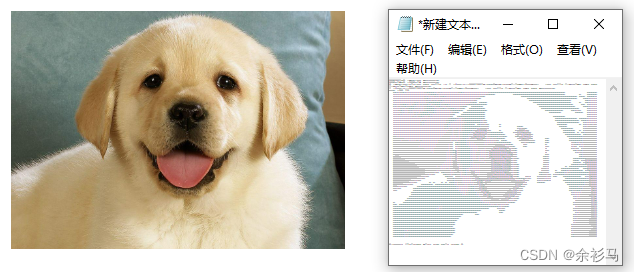
Note: The dog pictures are from Baidu pictures, and the download format is png.
2. Principle
Get the RGB value of the picture, calculate the gray value through the grayscale algorithm, then divide the grayscale value into intervals with characters, and output the characters according to the interval where the grayscale value is located. The core code:
    for j := 0; j < y; j++ {
		for i := 0; i < x; i++ {
            // 1、获取图片的 RGB 数值
			r, g, b, _ := img.At(i, j).RGBA()
			//fmt.Println(uint8(r), uint8(g), uint8(b))
            // 2、计算图片的灰度值
			gray := Gray(uint8(r), uint8(g), uint8(b))
            // 3、根据灰度值所在的字符区间输出字符
			printPic(gray)
		}
		fmt.Println("")
	}
Grayscale value algorithm formula
1. Floating point arithmetic: Gray = R * 0.3 + G * 0.59 + B * 0.11
2. Integer method: Gray = (R*30 + G*59 + B*11) / 100
3. Shifting method: Gray =( R*76 + G*151 + B*28) >> 8
4. Average method: Gray = (R + G + B) / 3
5. Only take green: Gray = G
Divide character intervals based on grayscale values
The gray value ranges from 0 ~ 255. When there are 18 characters, 256 / 18 is rounded down to 14, then the difference between each character interval is 14. For example, when 0 <= gray <14, 'A is output ', when 14 <= gray <25, output 'B', and so on. Two output methods are provided below:
func printPic(gray uint8) {
	charArray := []string{"K", "S", "P", "k", "s", "p", ";", "."}
	index := math.Round(float64(int(gray) * (len(charArray) + 1) / 255))
	if int(index) >= len(charArray) {
		fmt.Print(" ")
	} else {
		fmt.Printf("%s", charArray[int(index)])
	}
}
func printPic(gray uint8) {
charArray := []string{"M","N","H","Q","$","O","C","?","7",">","!",":","–",";","."}
index := math.Floor(float64(int(gray) / len(charArray)))
if int(index) >= len(charArray) {
fmt.Print(" ")
} else {
fmt.Printf("%s", charArray[int(index)])
}
}3. Complete code
package utils

/**
 * 图片工具
 *
 * @author Yushanma
 * @since 2022/10/13 18:54
 */

import (
	"bufio"
	"fmt"
	"image"
	"image/color"
	"image/png"
	"log"
	"math"
	"os"
)

func ReadPic(imgFile string) image.Image {
	// 打开图片文件
	f, err := os.Open(imgFile)
	if err != nil {
		log.Fatalln(err)
	}
	defer f.Close()

	// 解析图片
	img, fmtName, err := image.Decode(f)
	if err != nil {
		log.Fatalln(err)
	}

	//fmt.Printf("Name: %v, Bounds: %+v, Color: %+v", fmtName, img.Bounds(), img.ColorModel())
	x := img.Bounds().Size().X
	y := img.Bounds().Size().Y

	fmt.Println(fmtName, x, y)

	out := image.NewRGBA(img.Bounds())

	for j := 0; j < y; j++ {
		for i := 0; i < x; i++ {
			r, g, b, _ := img.At(i, j).RGBA()
			//fmt.Println(uint8(r), uint8(g), uint8(b))
			gray := Gray(uint8(r), uint8(g), uint8(b))
			printPic(gray)
			out.Set(i, j, color.RGBA{R: gray, G: gray, B: gray, A: 255})
		}
		fmt.Println("")
	}

	SavePic(out)

	return img
}

/*
反转,把每个像素点的每个rgb值都与255作差(alpha的值不改变)
r, g, b = 255-r , 255-g , 255-b
*/

func Invert(r, g, b uint8) (uint8, uint8, uint8) {
	return 255 - r, 255 - g, 255 - b
}

func Gray(r, g, b uint8) uint8 {
	//fmt.Println("\ngray", (r+g+b)/3)
	//return (r + g + b) / 3
	return g
}

func SavePic(img *image.RGBA) {
	f, err := os.Create("D:\\GWorkSpace\\CrazyImg\\data\\out2.png")
	if err != nil {
		log.Fatalln(err)
	}
	defer f.Close()
	b := bufio.NewWriter(f)
	err = png.Encode(b, img)
	if err != nil {
		log.Fatalln(err)
	}
	b.Flush()
}

// 输出 V2
func printPic(gray uint8) {
	charArray := []string{"K", "S", "P", "k", "s", "p", ";", "."}
	index := math.Round(float64(int(gray) * (len(charArray) + 1) / 255))
	if int(index) >= len(charArray) {
		fmt.Print(" ")
	} else {
		fmt.Printf("%s", charArray[int(index)])
	}
}
package main

import "CrazyImg/utils"

/**
 * 主入口
 *
 * @author Yushanma
 * @since 2022/10/13 18:57
 */
func main() {
	imgFile := "D:\\GWorkSpace\\CrazyImg\\data\\img0.png"
	utils.ReadPic(imgFile)
}
4. TXT view effect
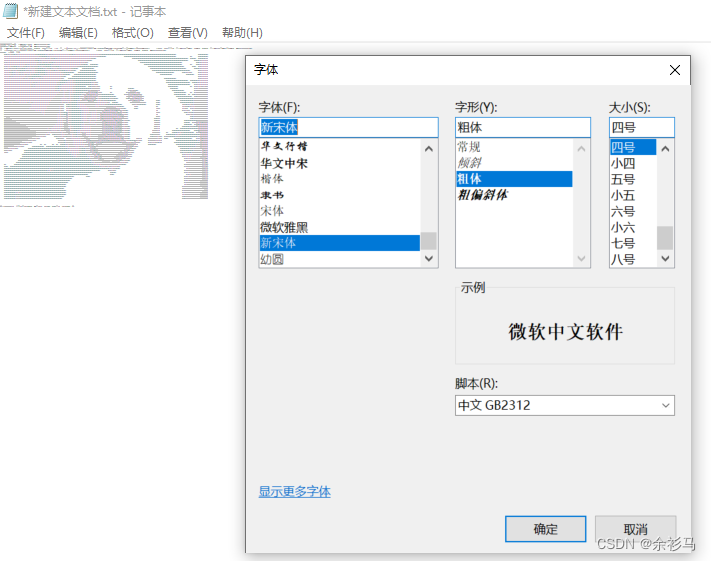
The effect is related to the font. The one used here is New Song Dynasty-bold-size 4.