Mac pycharm creates and imports python projects & virtual environment configuration & downloads class libraries
I hope you can save my time on the phone. If it can help you, I will be very happy;)
There are many methods, here are only the tried methods.
Prerequisite: Set the python environment variables
1. General settings
The advantage is that there will be a default designated virtual environment and workspace after the new creation. If it does not meet your needs, you can create it or import it and reset it (see 2 and 3 below)
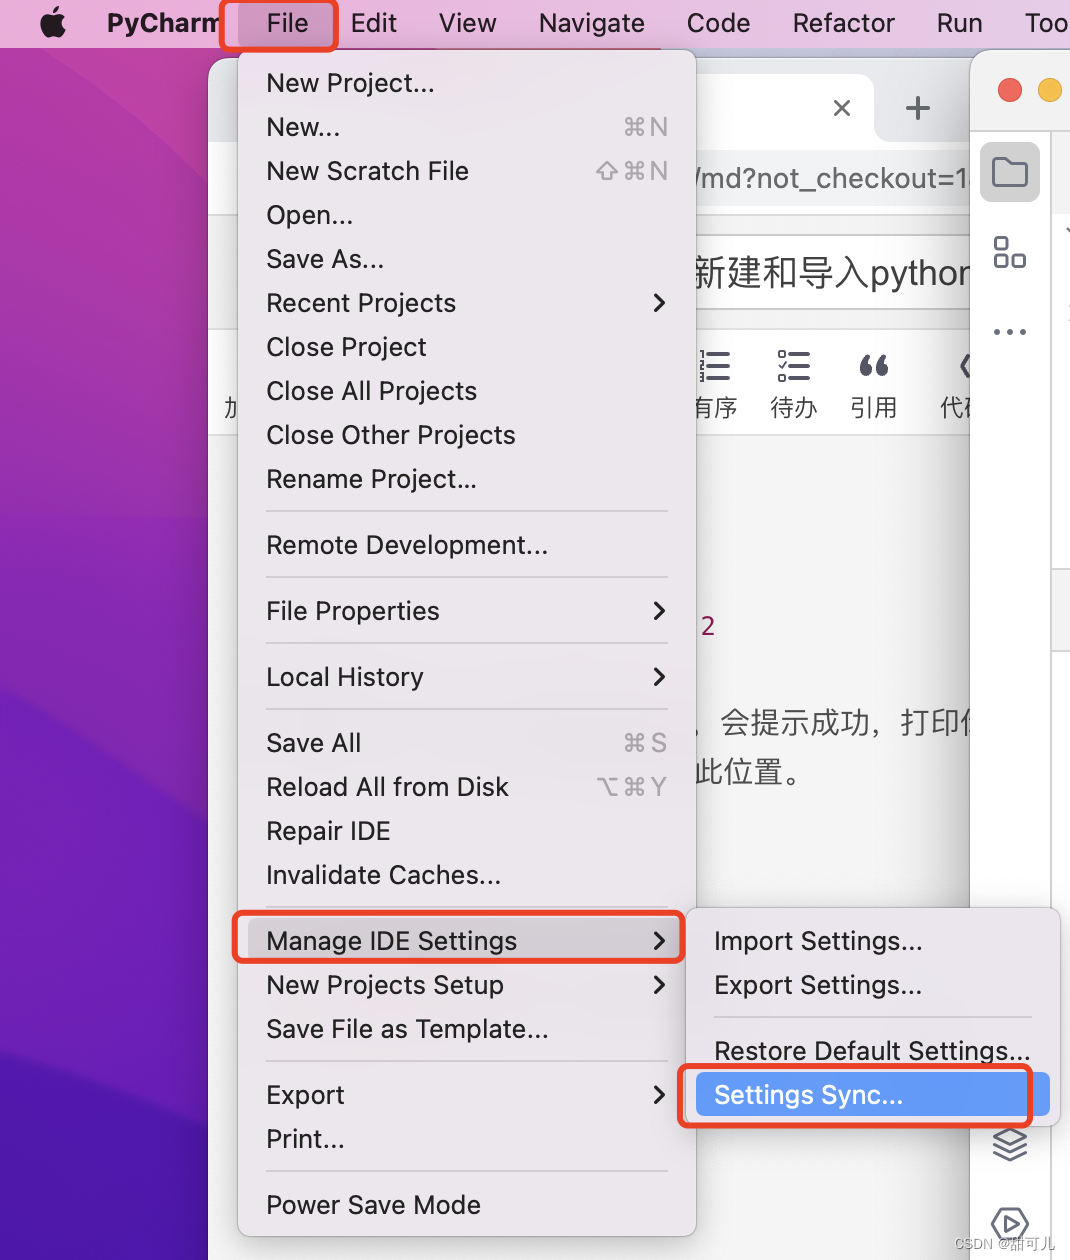
step1, specify the default virtual environment variable through custom configuration
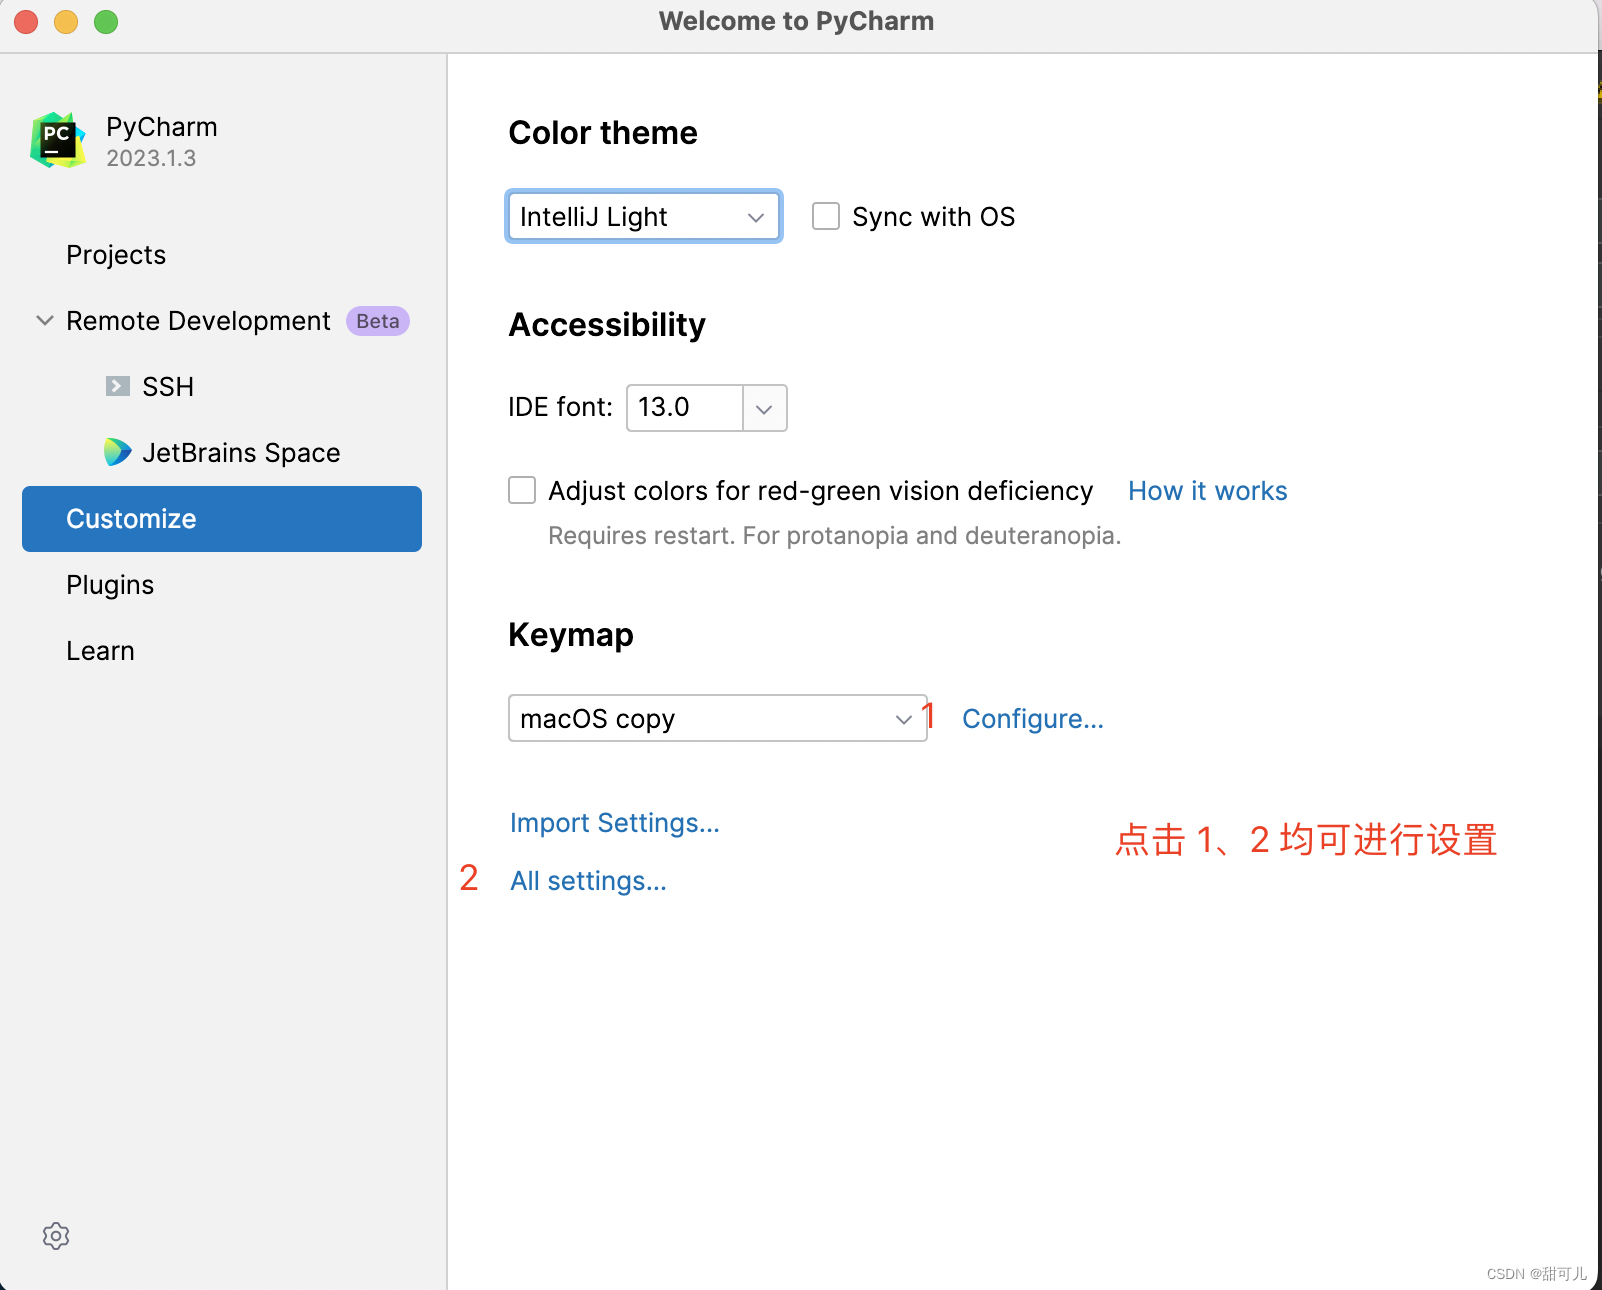
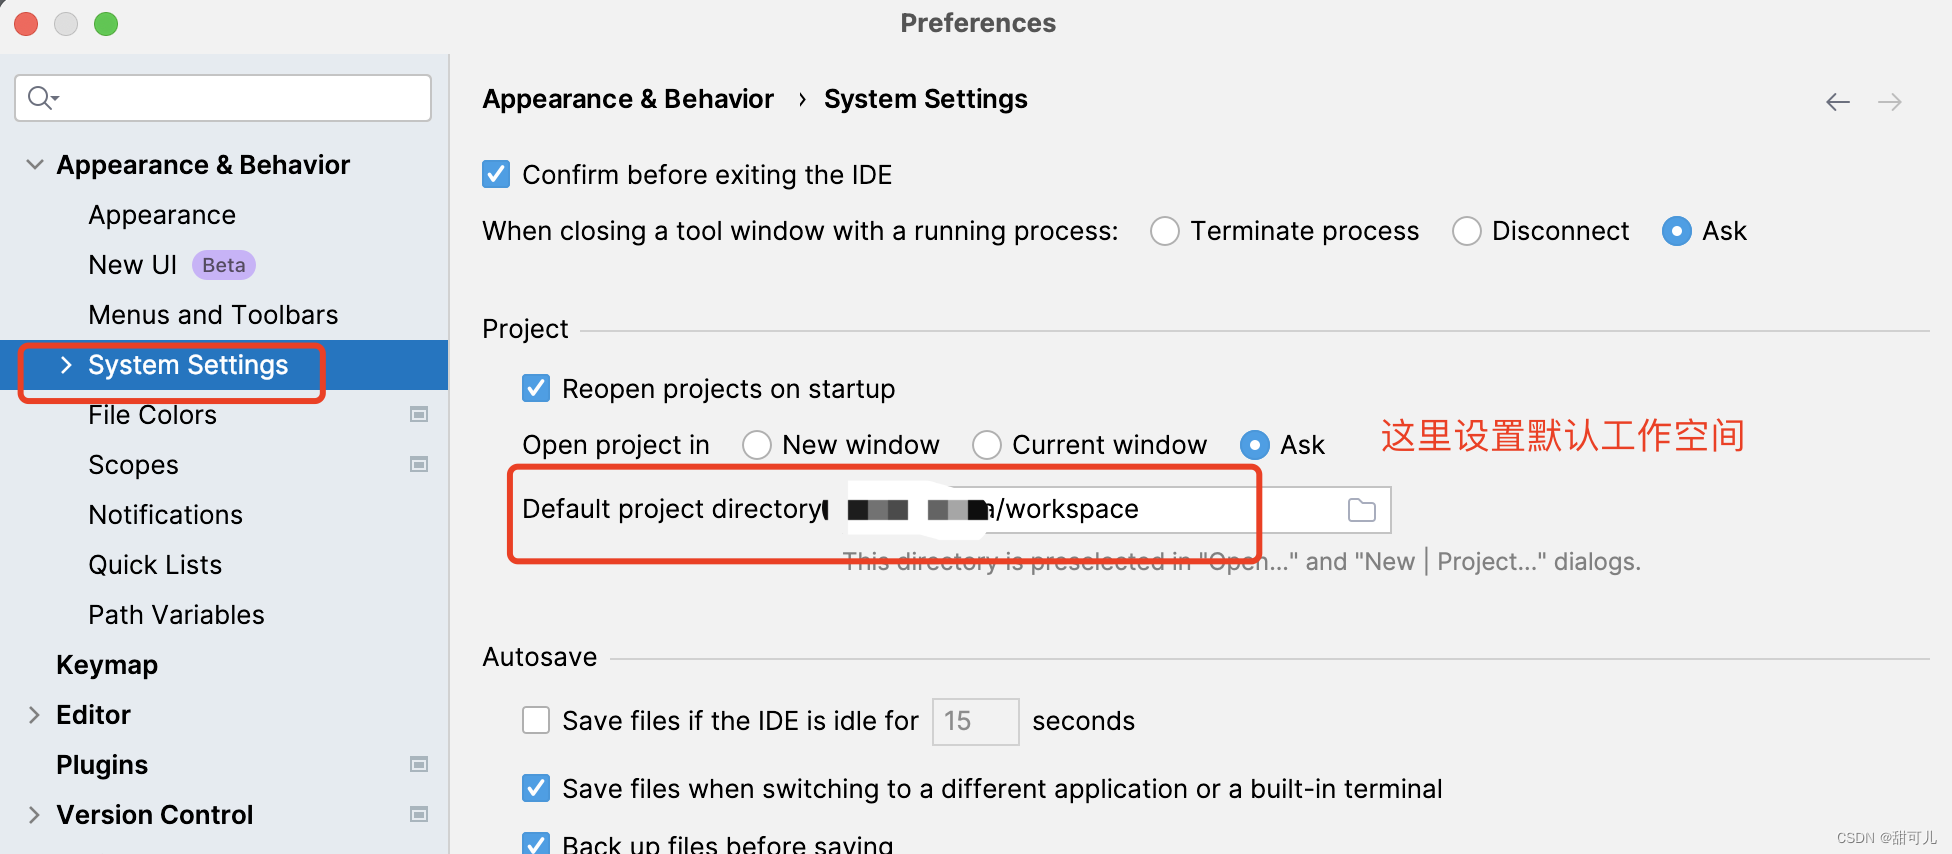
step2, set up the virtual environment and specify the default workspace
-
Set up a virtual environment.
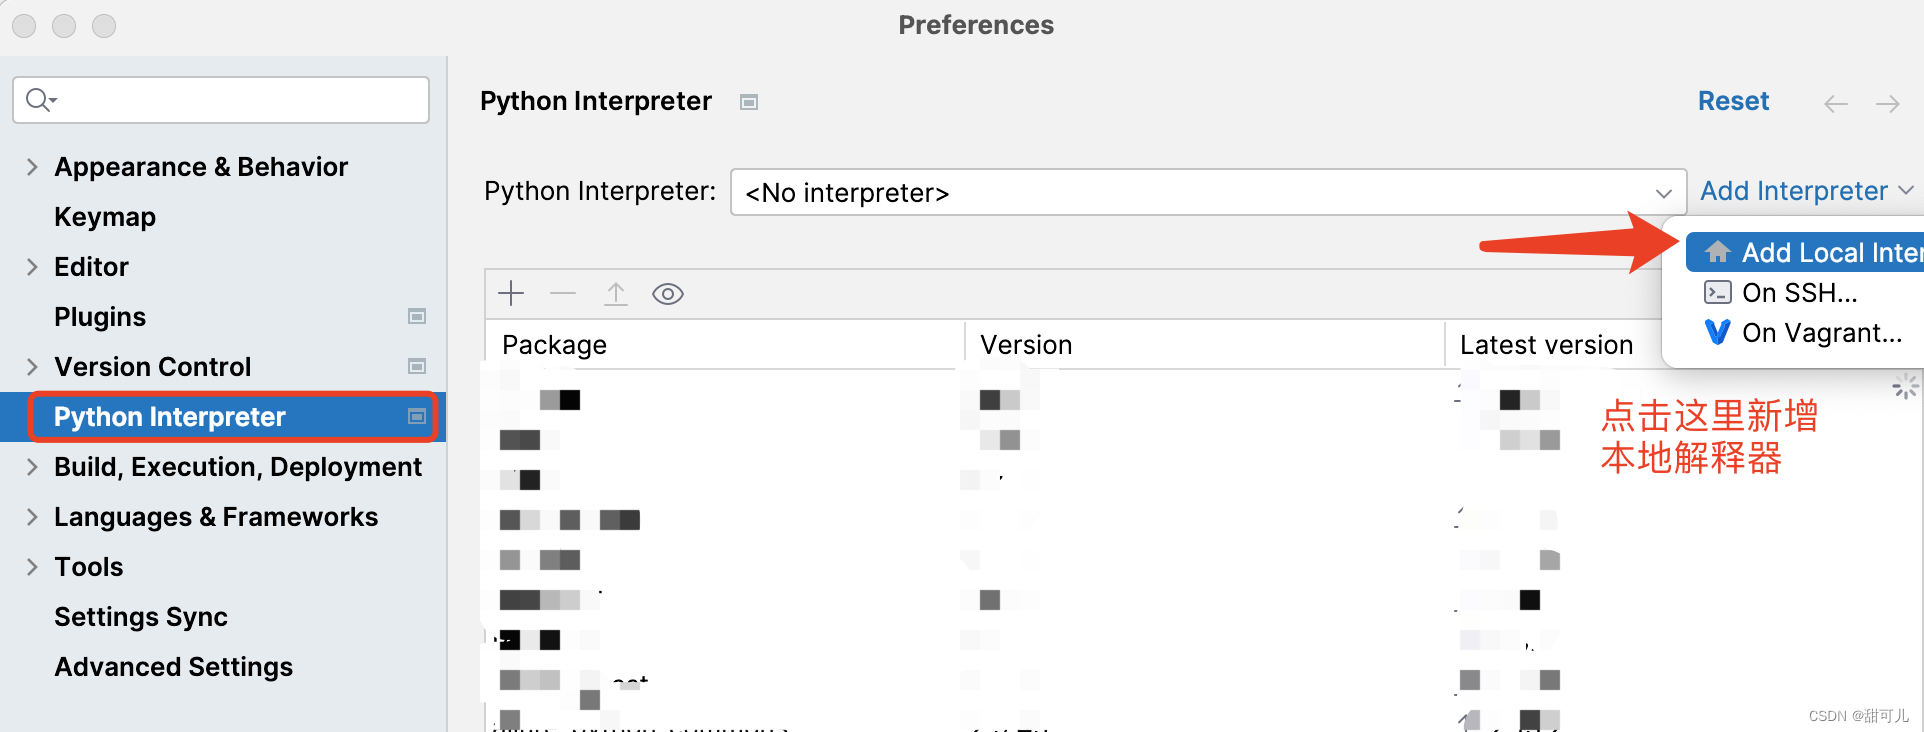
Here you can specify a folder in the workspace for the class library to be stored.
-
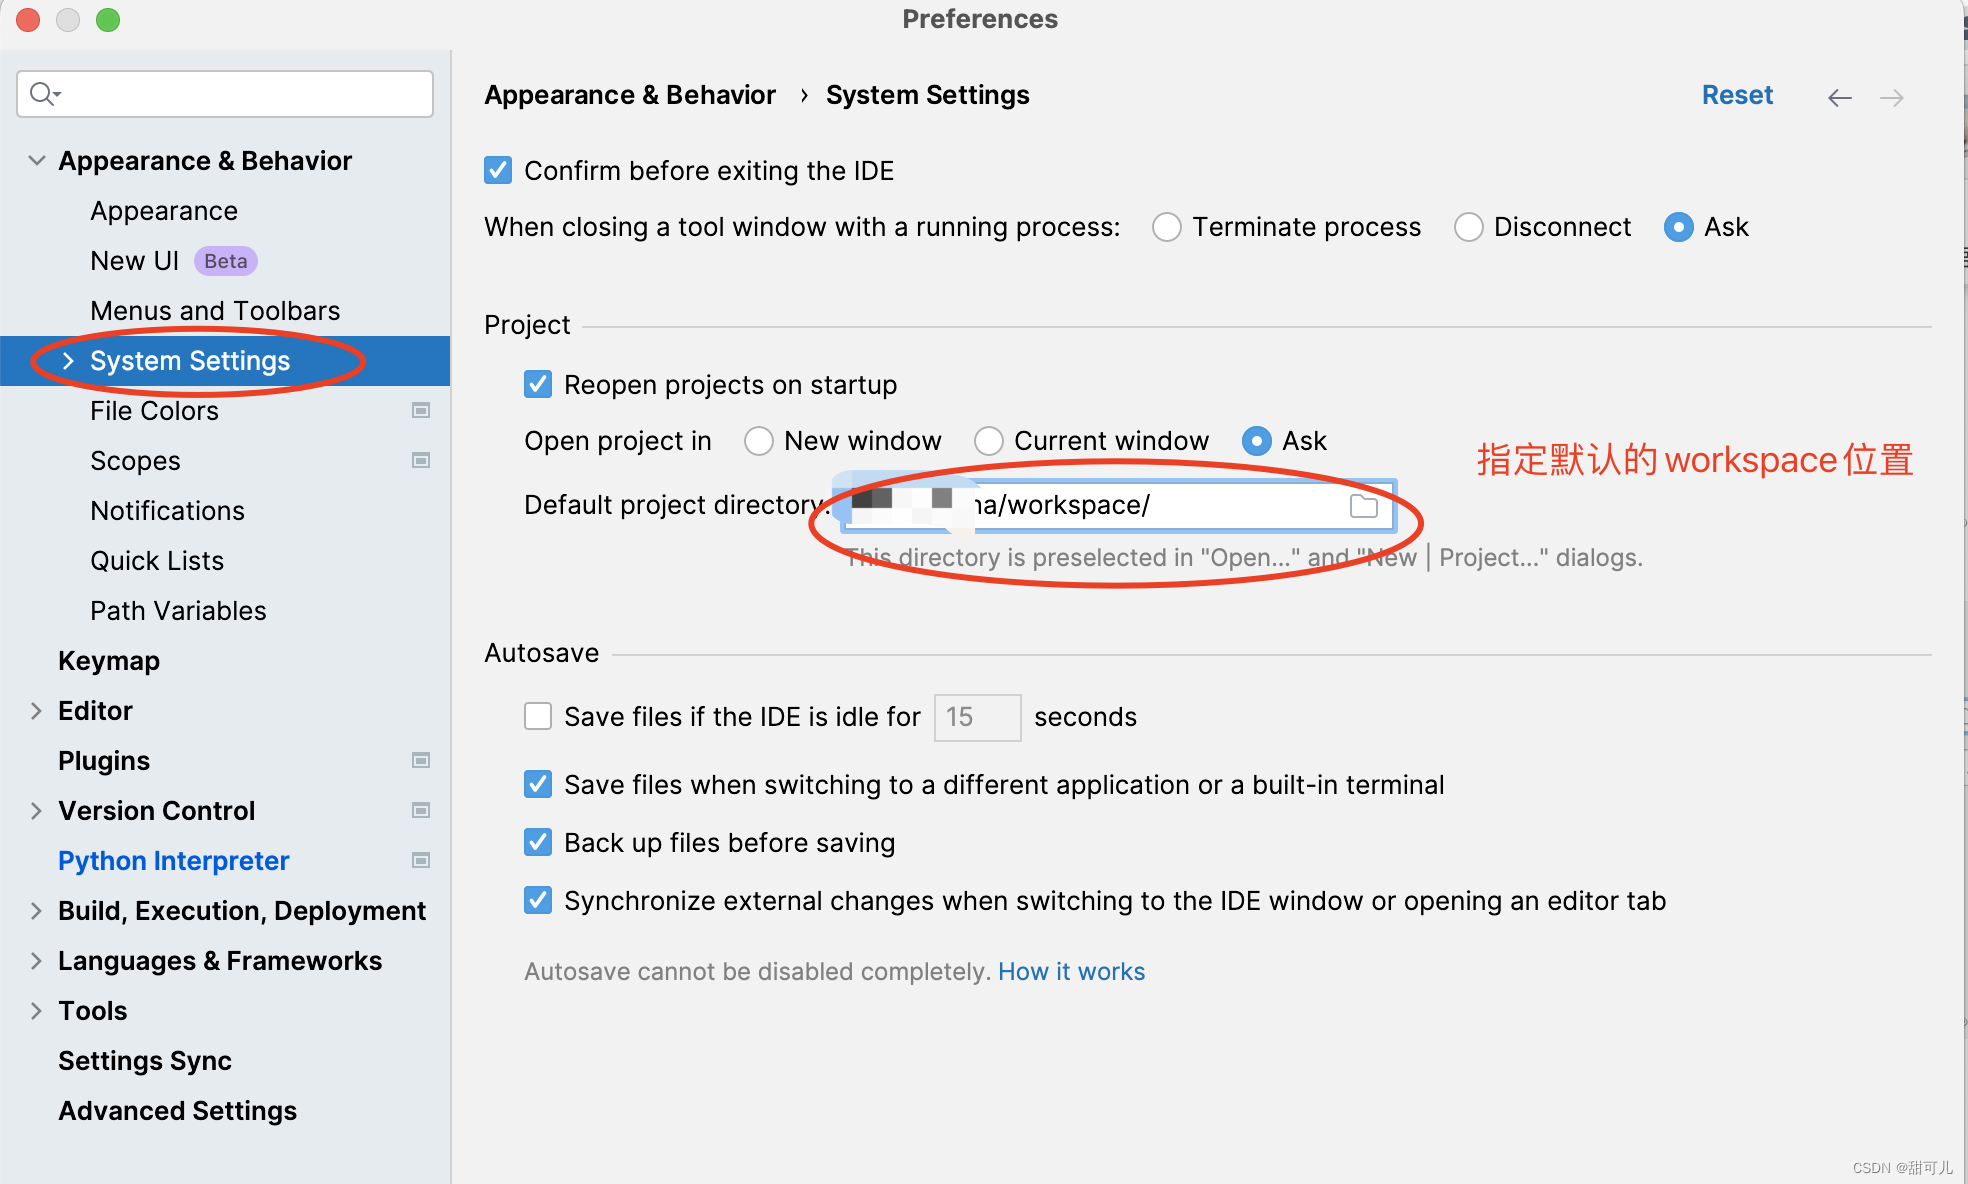
Set the default designated workSpace
step3, import or create a new python project
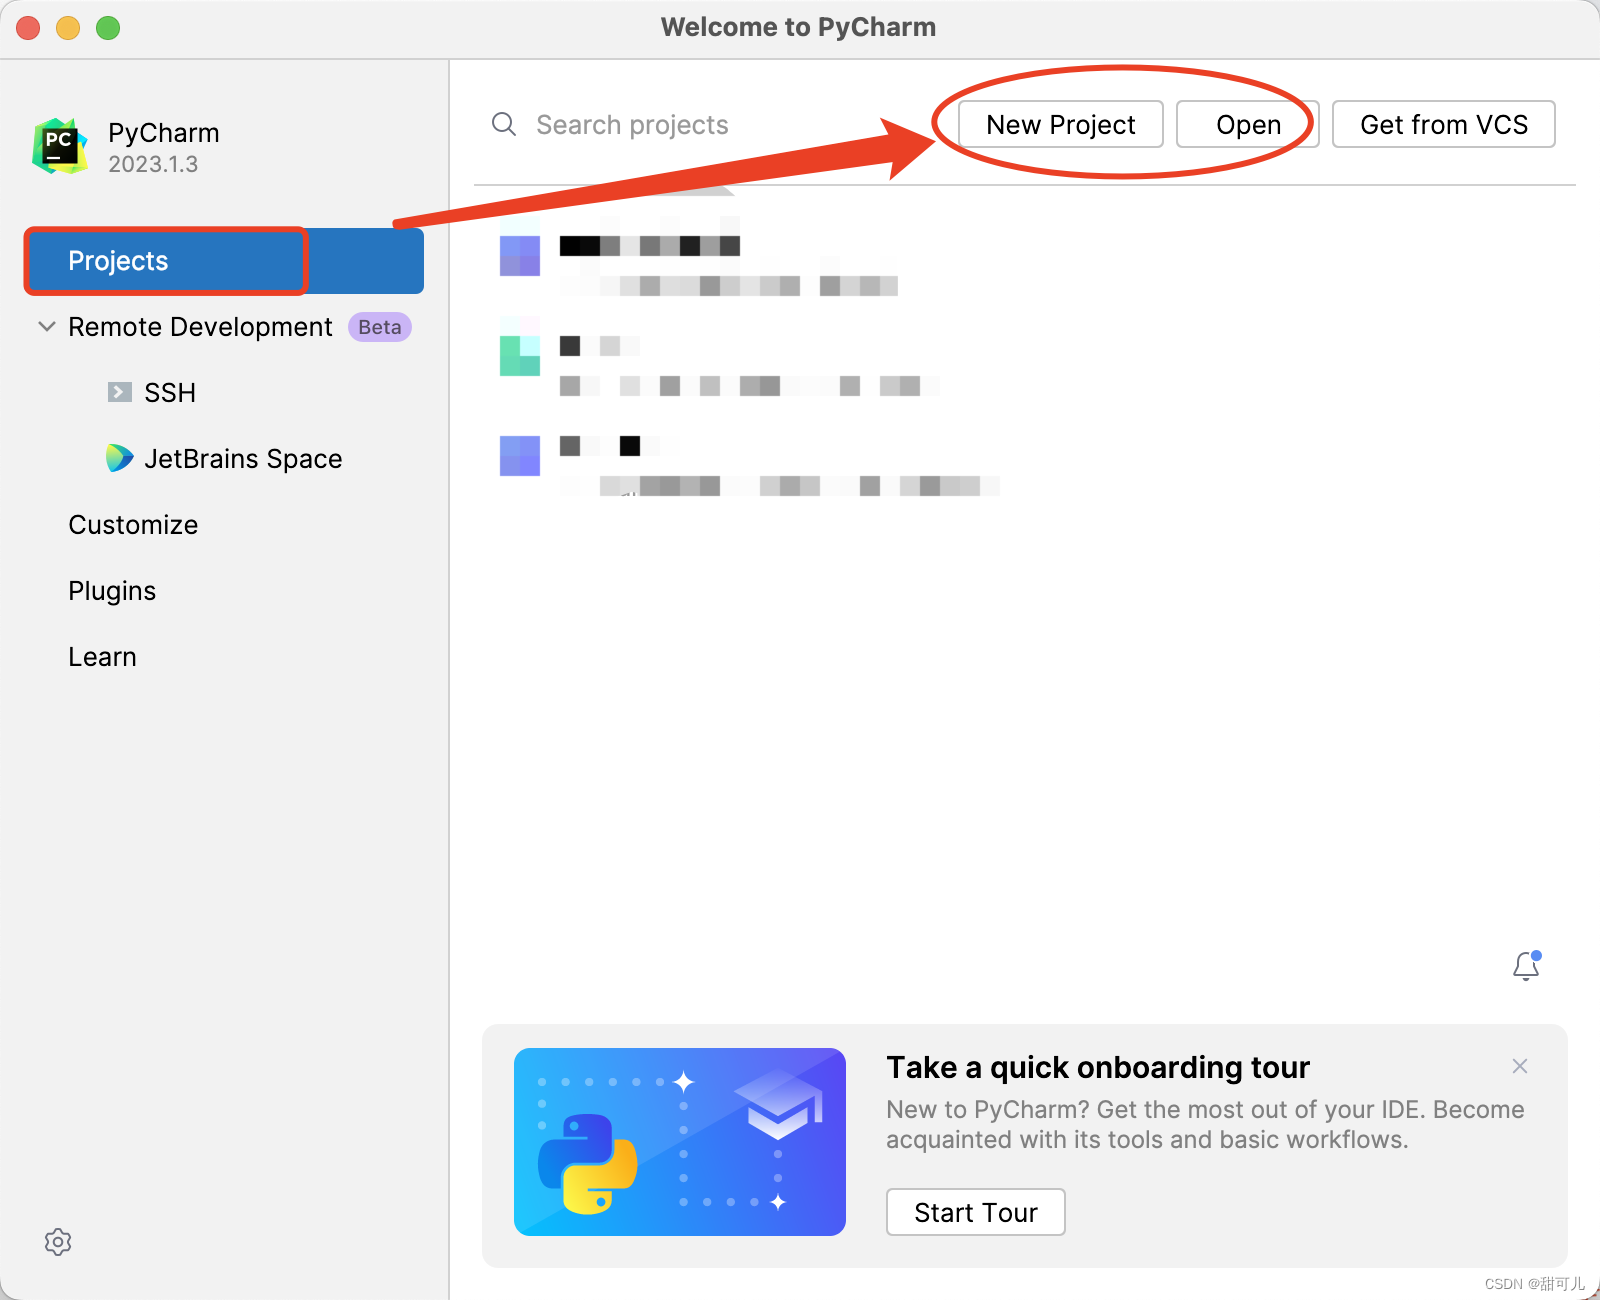
2. Create a new python project in pycharm
step1. Click New [file->newProject]:
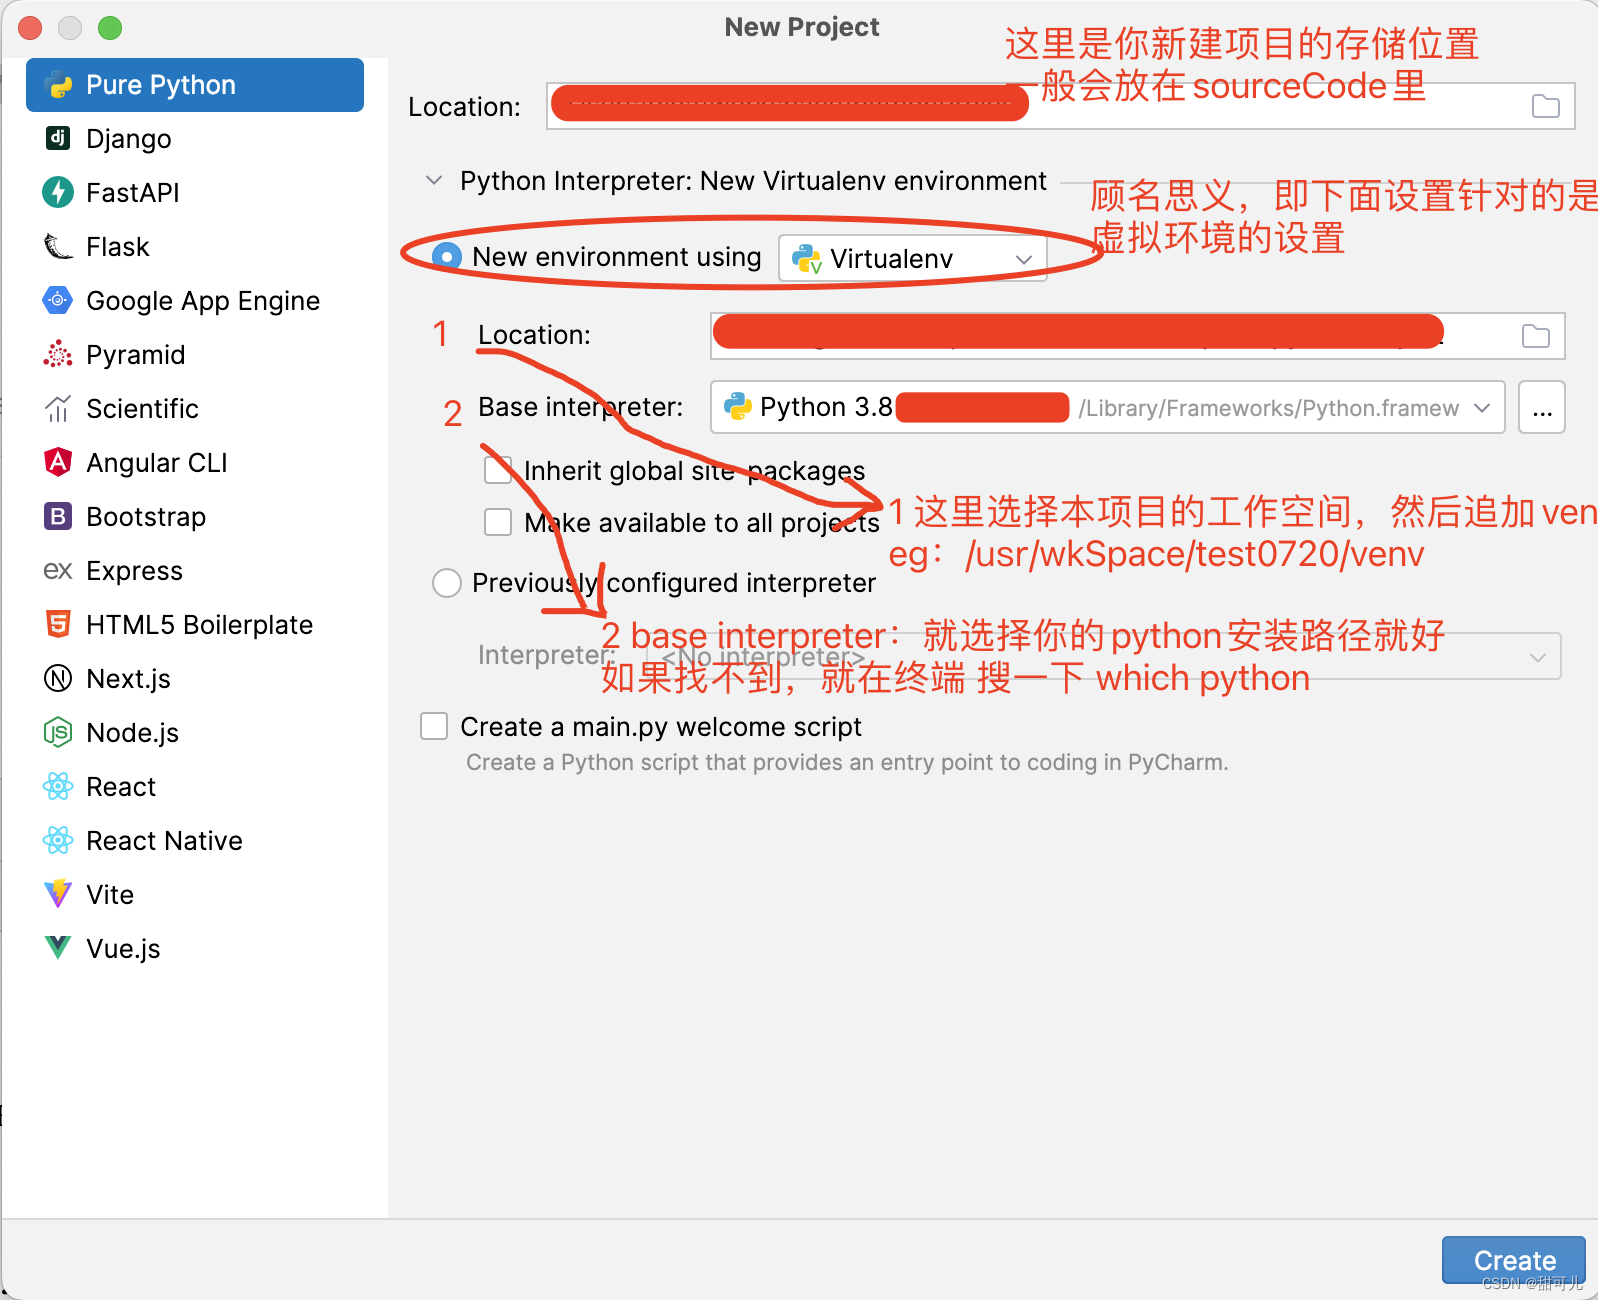
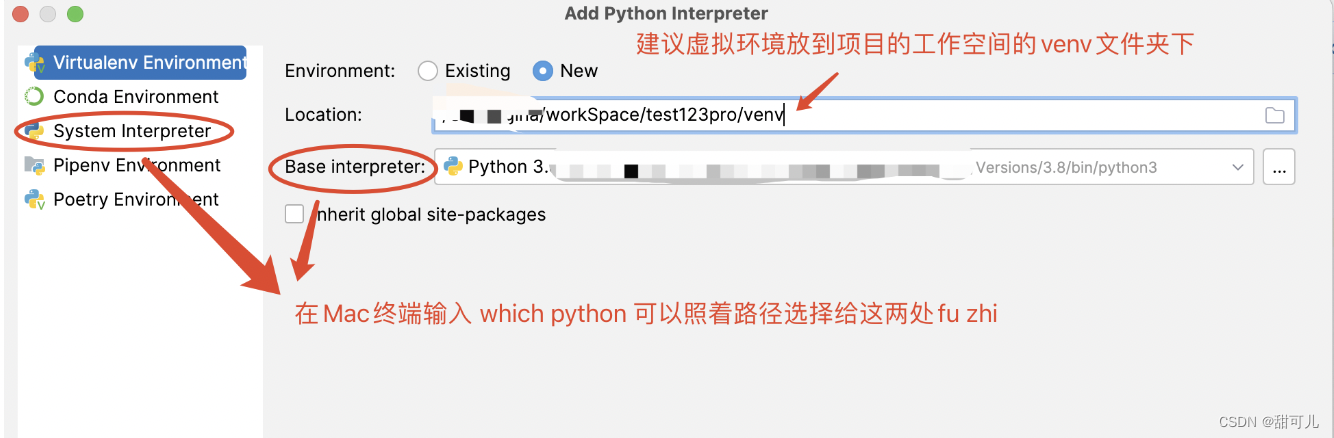
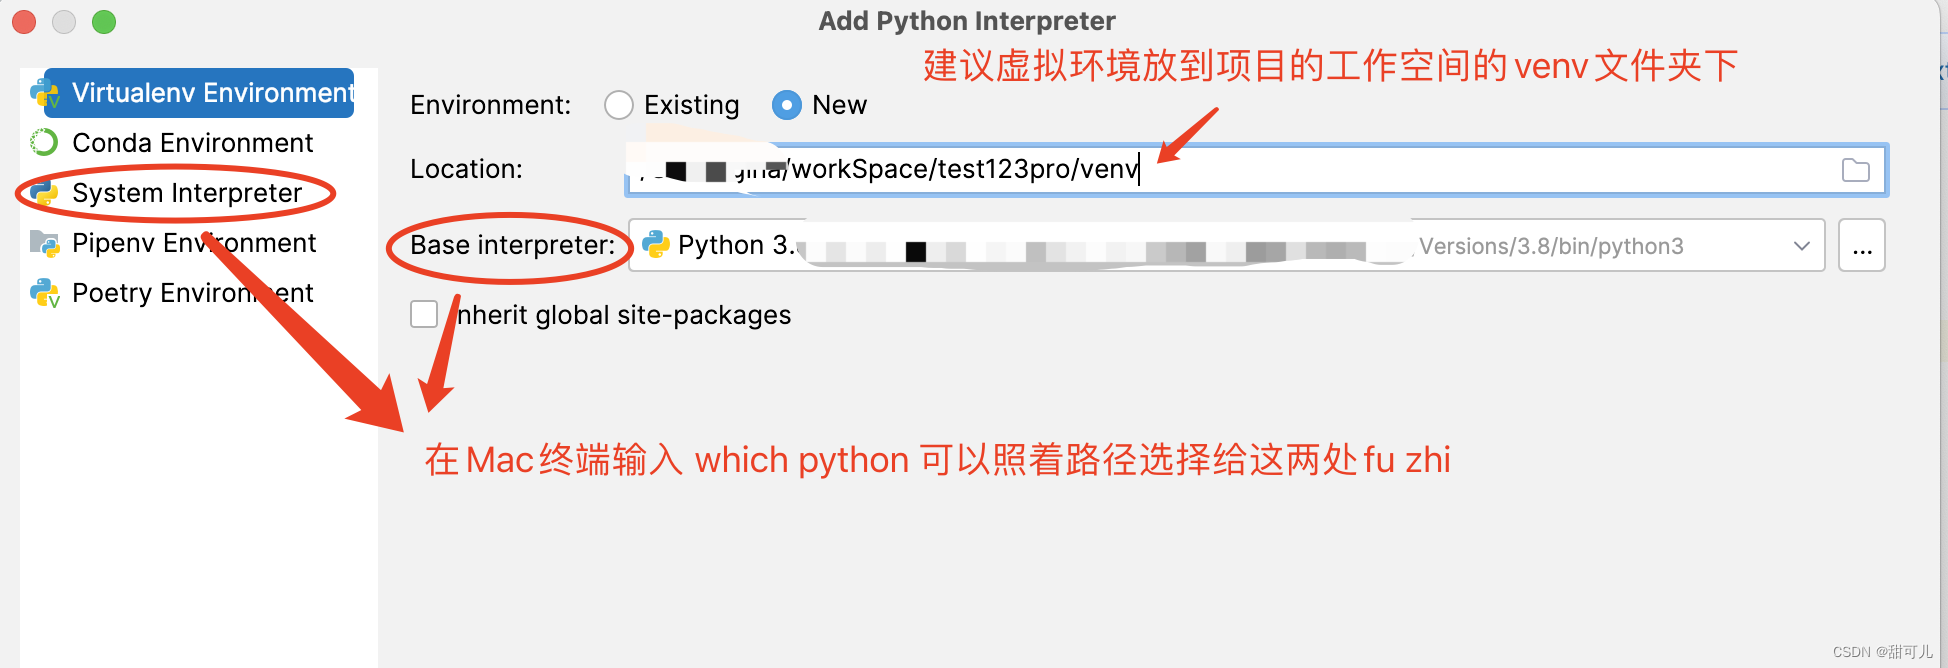
The top Location : used to store your project source code, usually placed under sourceCode.
Location of the virtual environment: user storage class library, so it can be placed in wkspace and stored in venv.
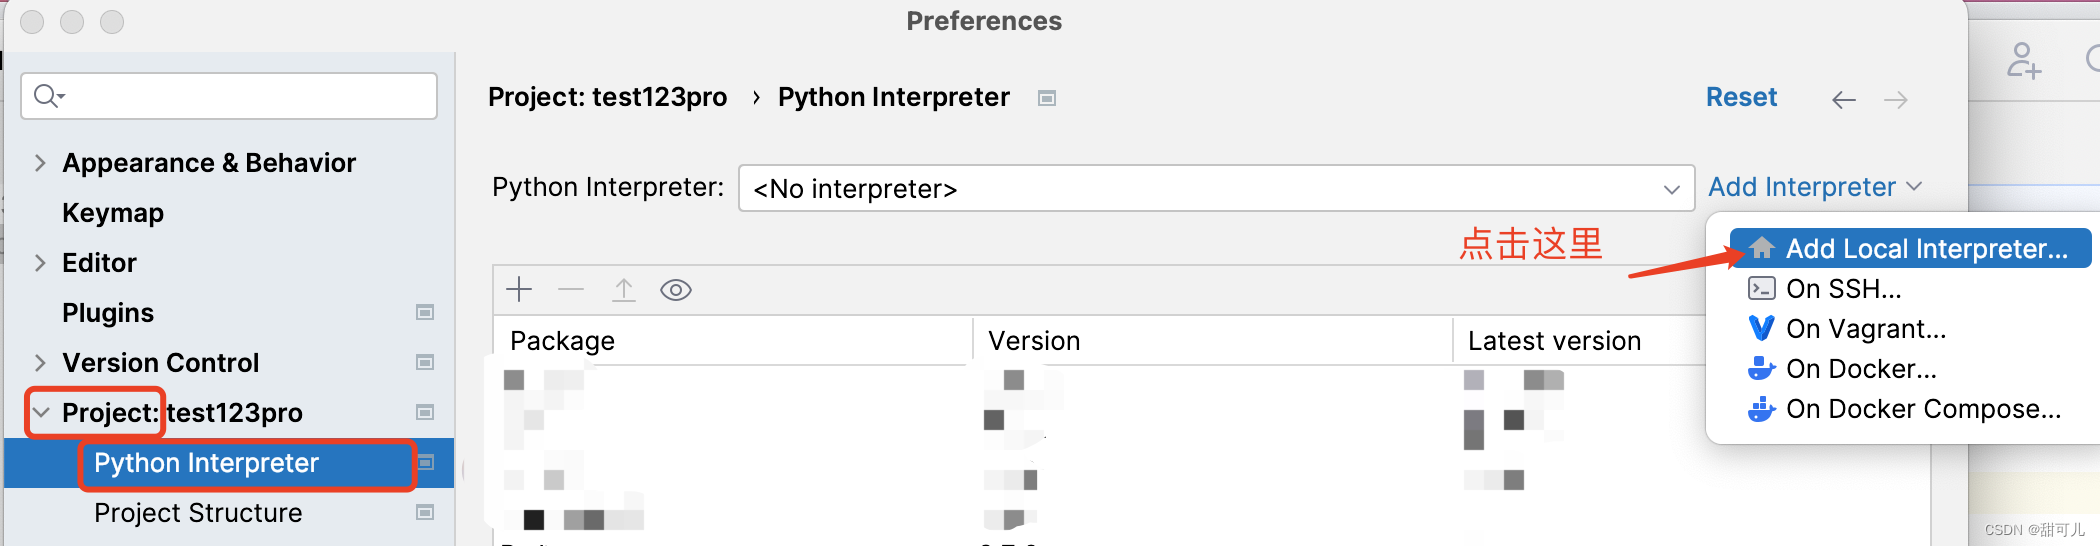
Base interpreter:
just select the environment variables you configured. Just use an alias. If you don't remember it, open the terminal and input it which python, and then configure it to the base interpreter according to this path value.
'It is equivalent to pom.xml in Java. What is written here are the class libraries that need to be downloaded.'
Click create.
step2. Set up the virtual environment for the created empty project
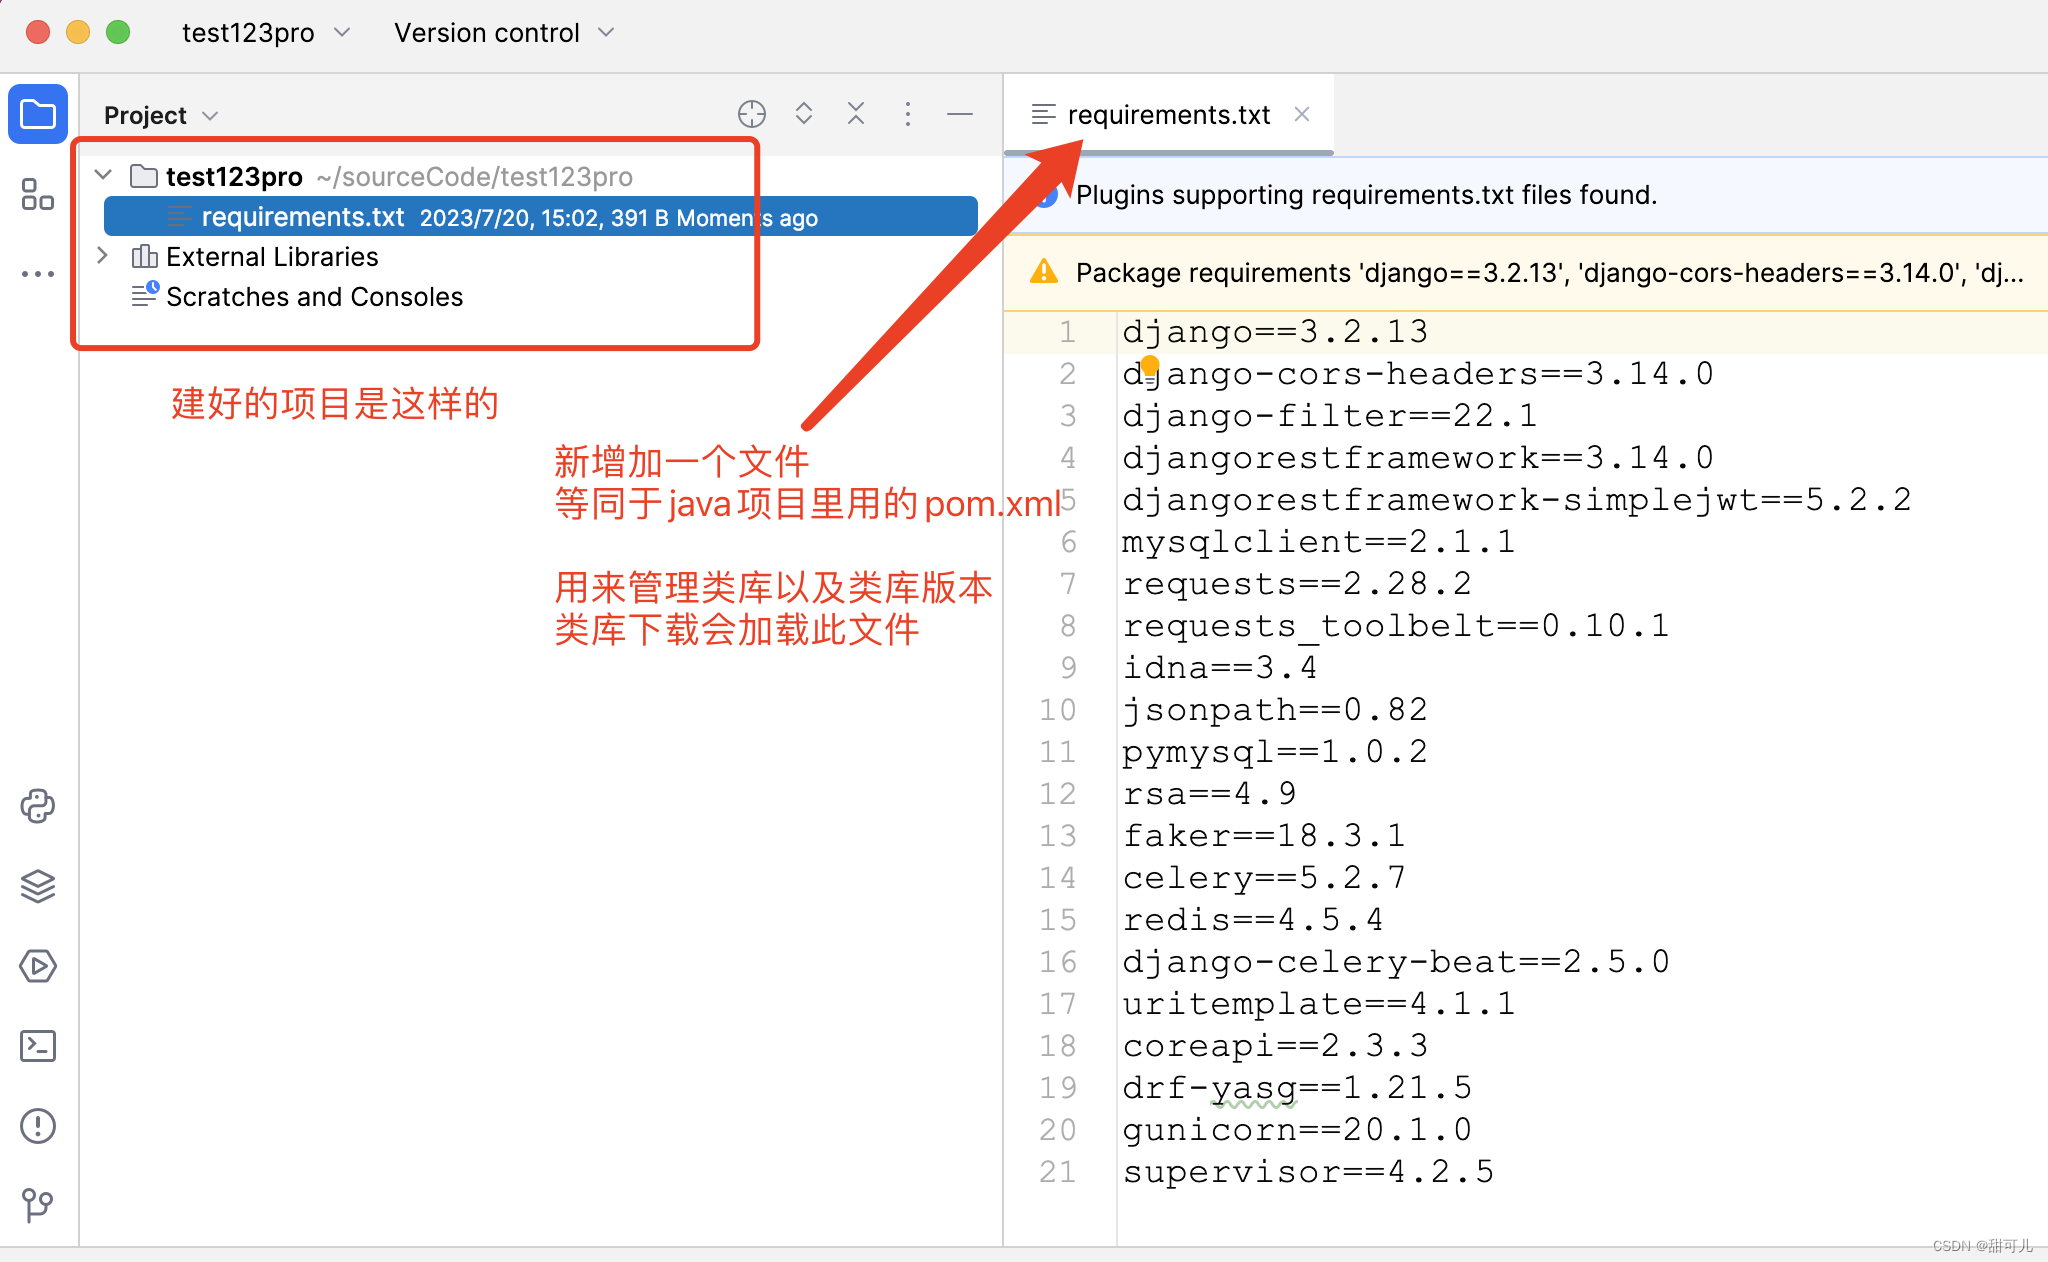
You need to create a new file in the project: requirements.txt
The content of the file is as follows: Here are some class libraries needed for development. Friends can extract or supplement them according to their actual needs.
django==3.2.13
django-cors-headers==3.14.0
django-filter==22.1
djangorestframework==3.14.0
djangorestframework-simplejwt==5.2.2
mysqlclient==2.1.1
requests==2.28.2
requests_toolbelt==0.10.1
idna==3.4
jsonpath==0.82
pymysql==1.0.2
rsa==4.9
faker==18.3.1
celery==5.2.7
redis==4.5.4
django-celery-beat==2.5.0
uritemplate==4.1.1
coreapi==2.3.3
drf-yasg==1.21.5
gunicorn==20.1.0
supervisor==4.2.5
Execute the command and download the class library, which will be automatically stored in the virtual environment location you just set, which is under the venv folder:
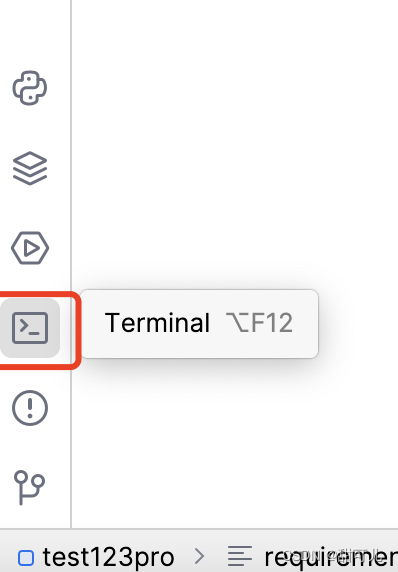
Open the terminal of your IDE and execute: pip3 install -r requirements.txt -i https://pypi.douban.com/simple
The terminal is in the lower left corner:
After execution, you may be prompted: pip install --upgrade pip
Just execute. :
Successfully installed pip-23.2
Then re-execute the download class library command just now. It will prompt success and print the venv path you just set, indicating that the downloaded class library is stored in this location.
3. Import python project into pycharm
There is nothing to say about importing the project. Just click file ->open and select your python project.
step1. Set virtual environment parameters [can be done before and after importing the project]
step2:Set the default workspace
step3, import the project and set up the virtual environment
Import project:file->open
Execute the command in the pycharm terminal (lower left corner of the IDE):pip3 install -r requirements.txt -i https://pypi.douban.com/simple
At this point, importing and creating a new python project in pycharm is over. I wish you all the best.