Article directory
- iFlytek platform use
- Python implements speech recognition of iFlytek interface
-
- Step 1: Import the required dependent libraries
- Step 2: Declare global variables
- Step 3: Initialize the iFlytek interface object
- Step 4: Receive the processing function after websocket establishes connection
- Step 5: Processing function for receiving websocket message
- Step 6: Integrate and run each function
- Complete code
iFlytek platform use
1. Register an iFlytek platform account and the iFlytek official website .
2. Open the iFlytek console.
3. Click "Create New App".
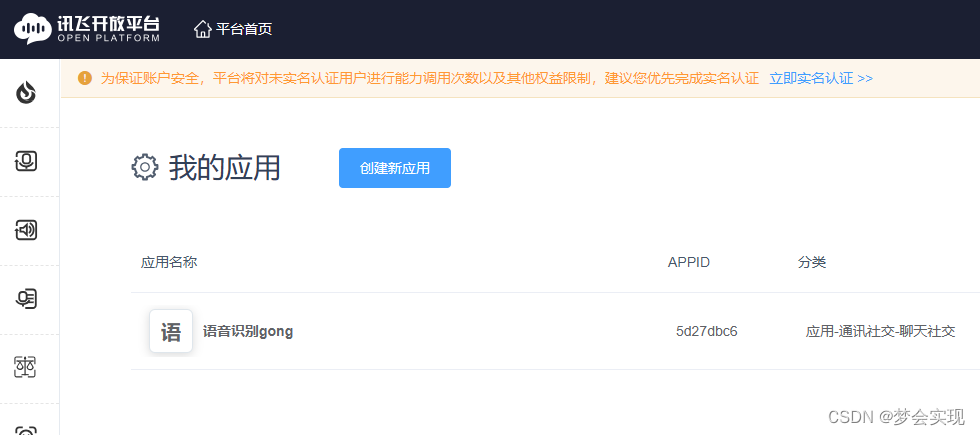
4. Enter "Application Name", "Application Category", "Application Function Description" (these are all customized).
5. After the creation is successful, remember the three keys "APPID", "APISecret" and "APIKey".

Python implements speech recognition of iFlytek interface
Step 1: Import the required dependent libraries
import websocket
import hashlib
import base64
import hmac
import json
from urllib.parse import urlencode
import time
import ssl
from wsgiref.handlers import format_date_time
from datetime import datetime
from time import mktime
import _thread as thread
import pyaudio
If there are dependent libraries that are not available, use pip to configure the virtual environment in Anaconda to download the dependent libraries.
For example:
pip install pyaudio
Step 2: Declare global variables
在Python中,全局变量是在程序的任何地方都可以访问的变量。
作用和意义:
	1.共享数据:全局变量能够在整个程序中共享数据,不受作用域的限制。
	2.存储常量或配置:全局变量可以用来存储常量或配置项,这些值在整个程序中都需要使用,并且不会变化。
	3.减少参数传递:全局变量可以减少函数或方法之间的参数传递。
存在的问题:
	1.命名空间污染:全局变量可能导致命名空间的污染,特别是在大型程序或模块化开发中。如果多个模块或函数定义了相同名称的全局变量,会导致冲突和意外的行为。
	2.难以追踪和维护:使用全局变量会使代码更难理解和维护。
因此,在使用全局变量时应谨慎,仅在必要的情况下使用。
The statement is audio
STATUS_FIRST_FRAME = 0  # 第一帧的标识
STATUS_CONTINUE_FRAME = 1  # 中间帧标识
STATUS_LAST_FRAME = 2  # 最后一帧的标识
Step 3: Initialize the iFlytek interface object
class Ws_Param(object):
    # 初始化接口对象
    def __init__(self,APPID,APIKey,APISecret):
        # 初始化讯飞接口的ID,Key,Secret
        self.APPID=APPID
        self.APIKey=APIKey
        self.APISecret=APISecret
        # 公共参数(common)
        self.CommonArgs={

    "app_id":self.APPID}
        # 业务参数(business)
        self.BusinessArgs={

    "domain":"iat","language":"zh_cn",
                           "accent":"mandarin","vinfo":1,"vad_eos":1000}

    def create_url(self):
        # 生成url
        url='wss://ws-api.xfyun.cn/v2/iat'
        now=datetime.now()
        date=format_date_time(mktime(now.timetuple()))
        # 生成RFC1123格式的时间戳
        signature_origin = "host: " + "ws-api.xfyun.cn" + "\n"
        signature_origin += "date: " + date + "\n"
        signature_origin += "GET " + "/v2/iat " + "HTTP/1.1"
        # 拼接字符串
        signature_sha = hmac.new(self.APISecret.encode('utf-8'),
                                 signature_origin.encode('utf-8'),
                                 digestmod=hashlib.sha256).digest()
        signature_sha = base64.b64encode(signature_sha).decode(encoding='utf-8')
        # 进行hmac_sha256进行加密
        authorization_origin = "api_key=\"%s\", algorithm=\"%s\", headers=\"%s\", " \
                               "signature=\"%s\"" % (self.APIKey, "hmac-sha256",
                                                     "host date request-line", signature_sha)
        authorization = base64.b64encode(authorization_origin.encode('utf-8')).decode(encoding='utf-8')
        v={


            "authorization": authorization,
            "date": date,
            "host": "ws-api.xfyun.cn"
        }
        # 将请求的鉴权参数组合为字典
        url=url+'?'+urlencode(v)
        # 拼接鉴权参数,生成url
        return url
Step 4: Receive the processing function after websocket establishes connection
def on_open(ws):
    # 收到websocket连接建立的处理
    def run(*args):
        # 在线音频处理并发送到讯飞
        status=STATUS_FIRST_FRAME
        # 音频的状态信息,标识音频是第一帧,还是中间帧、最后一帧
        CHUNK = 520  # 定义数据流块
        FORMAT = pyaudio.paInt16  # 16bit编码格式
        CHANNELS = 1  # 单声道
        RATE = 16000  # 16000采样频率
        p=pyaudio.PyAudio()  # 录音
        # 实例化pyaudio对象
        stream = p.open(format=FORMAT,  # 音频流wav格式
                        channels=CHANNELS,  # 单声道
                        rate=RATE,  # 采样率16000
                        input=True,
                        frames_per_buffer=CHUNK)
        # 创建音频流,使用这个对象去打开声卡,设置采样深度、通道数、采样率、输入和采样点缓存数量
        print("---------------开始录音-----------------")
        # 开始录音
        global text
        for i in range(0,int(RATE/CHUNK*60)):
            # 录制特定时间的音频
            buf=stream.read(CHUNK)
            # 读出声卡缓冲区的音频数据
            if not buf:
                status=STATUS_LAST_FRAME
            if status==STATUS_FIRST_FRAME:
                # 首帧处理
                d = {

    "common": wsParam.CommonArgs,
                     "business": wsParam.BusinessArgs,
                     "data": {

    "status": 0, "format": "audio/L16;rate=16000",
                              "audio": str(base64.b64encode(buf), 'utf-8'),
                              "encoding": "raw"}}
                d = json.dumps(d)
                # 将拼接的字符串d数据结构转换为json
                ws.send(d)
                status=STATUS_CONTINUE_FRAME
            elif status==STATUS_CONTINUE_FRAME:
                # 中间帧处理
                d = {

    "data": {

    "status": 1, "format": "audio/L16;rate=16000",
                              "audio": str(base64.b64encode(buf), 'utf-8'),
                              "encoding": "raw"}}
                ws.send(json.dumps(d))
            elif status==STATUS_LAST_FRAME:
                # 最后一帧处理
                d = {

    "data": {

    "status": 2, "format": "audio/L16;rate=16000",
                              "audio": str(base64.b64encode(buf), 'utf-8'),
                              "encoding": "raw"}}
                ws.send(json.dumps(d))
                time.sleep(1)
                break
    thread.start_new_thread(run,())
Step 5: Processing function for receiving websocket message
def on_message(ws,message):
    # 收到websocket消息的正常处理
    try:
        # print(json.loads(message))
        code = json.loads(message)["code"]
        # 解码返回的message的json数据中的code
        sid = json.loads(message)["sid"]
        if code != 0:
            errMsg = json.loads(message)["message"]
            # 解码message中错误信息
            print("sid:%s call error:%s code is:%s" % (sid, errMsg, code))
        else:
            data = json.loads(message)["data"]["result"]["ws"]
            # 解码message中ws数据
            result = ""
            for i in data:
                for w in i["cw"]:
                    result += w["w"]

            if result == '。' or result == '.。' or result == ' .。' or result == ' 。':
                pass
            else:
                # t.insert(END, result)  # 把上边的标点插入到result的最后
                print("翻译结果: %s。" % (result))
                global recording_results
                recording_results=result
    except Exception as e:
        # 异常处理,参数异常
        print("receive msg,but parse exception:", e)

def on_error(ws,error):
    # 收到websocket后错误的处理
    print("### error ### : ",error)
    run()
    # 重新启动监听

def on_close(ws):
    # 收到websocket关闭的处理
    pass
Step 6: Integrate and run each function
There are three key places in it: "APPID", "APIKey", and "APISecret".
Paste the "APPID", "APIKey", and "APISecret" in the iFlytek console application project above into the code.
def run():
    global wsParam
    wsParam=Ws_Param(APPID='5d27db6',
                    APIKey='d61163a9bdb5d0508f98dee66e0383',
                    APISecret='ZTQ5NTAwZTk05MDdhNWViZjcyYjVh')
    # 初始化讯飞接口编码

    websocket.enableTrace(False)
    # True表示默认在控制台打印连接和信息发送接收情况

    wsUrl=wsParam.create_url()
    # 生成讯飞的url进行连接

    ws=websocket.WebSocketApp(wsUrl, on_message=on_message, on_error=on_error, on_close=on_close)
    ws.on_open=on_open  # 进行websocket连接

    ws.run_forever(sslopt={

    "cert_reqs": ssl.CERT_NONE}, ping_timeout=2)
    # 无限循环,只要这个websocket连接未断开,这个循环就会一直进行下去
start operation.
if __name__ == '__main__':
	run()
Complete code
''' 在线语音识别 '''
import websocket
import hashlib
import base64
import hmac
import json
from urllib.parse import urlencode
import time
import ssl
from wsgiref.handlers import format_date_time
from datetime import datetime
from time import mktime
import _thread as thread
import pyaudio


recording_results=""   # 识别结果
STATUS_FIRST_FRAME = 0  # 第一帧的标识
STATUS_CONTINUE_FRAME = 1  # 中间帧标识
STATUS_LAST_FRAME = 2  # 最后一帧的标识

class Ws_Param(object):
    # 初始化接口对象
    def __init__(self,APPID,APIKey,APISecret):
        # 初始化讯飞接口的ID,Key,Secret
        self.APPID=APPID
        self.APIKey=APIKey
        self.APISecret=APISecret
        # 公共参数(common)
        self.CommonArgs={

    "app_id":self.APPID}
        # 业务参数(business)
        self.BusinessArgs={

    "domain":"iat","language":"zh_cn",
                           "accent":"mandarin","vinfo":1,"vad_eos":1000}

    def create_url(self):
        # 生成url
        url='wss://ws-api.xfyun.cn/v2/iat'
        now=datetime.now()
        date=format_date_time(mktime(now.timetuple()))
        # 生成RFC1123格式的时间戳
        signature_origin = "host: " + "ws-api.xfyun.cn" + "\n"
        signature_origin += "date: " + date + "\n"
        signature_origin += "GET " + "/v2/iat " + "HTTP/1.1"
        # 拼接字符串
        signature_sha = hmac.new(self.APISecret.encode('utf-8'),
                                 signature_origin.encode('utf-8'),
                                 digestmod=hashlib.sha256).digest()
        signature_sha = base64.b64encode(signature_sha).decode(encoding='utf-8')
        # 进行hmac_sha256进行加密
        authorization_origin = "api_key=\"%s\", algorithm=\"%s\", headers=\"%s\", " \
                               "signature=\"%s\"" % (self.APIKey, "hmac-sha256",
                                                     "host date request-line", signature_sha)
        authorization = base64.b64encode(authorization_origin.encode('utf-8')).decode(encoding='utf-8')
        v={


            "authorization": authorization,
            "date": date,
            "host": "ws-api.xfyun.cn"
        }
        # 将请求的鉴权参数组合为字典
        url=url+'?'+urlencode(v)
        # 拼接鉴权参数,生成url
        return url


def on_open(ws):
    # 收到websocket连接建立的处理
    def run(*args):
        # 在线音频处理并发送到讯飞
        status=STATUS_FIRST_FRAME
        # 音频的状态信息,标识音频是第一帧,还是中间帧、最后一帧
        CHUNK = 520  # 定义数据流块
        FORMAT = pyaudio.paInt16  # 16bit编码格式
        CHANNELS = 1  # 单声道
        RATE = 16000  # 16000采样频率
        p=pyaudio.PyAudio()  # 录音
        # 实例化pyaudio对象
        stream = p.open(format=FORMAT,  # 音频流wav格式
                        channels=CHANNELS,  # 单声道
                        rate=RATE,  # 采样率16000
                        input=True,
                        frames_per_buffer=CHUNK)
        # 创建音频流,使用这个对象去打开声卡,设置采样深度、通道数、采样率、输入和采样点缓存数量
        print("---------------开始录音-----------------")
        # 开始录音
        global text
        for i in range(0,int(RATE/CHUNK*60)):
            # 录制特定时间的音频
            buf=stream.read(CHUNK)
            # 读出声卡缓冲区的音频数据
            if not buf:
                status=STATUS_LAST_FRAME
            if status==STATUS_FIRST_FRAME:
                # 首帧处理
                d = {

    "common": wsParam.CommonArgs,
                     "business": wsParam.BusinessArgs,
                     "data": {

    "status": 0, "format": "audio/L16;rate=16000",
                              "audio": str(base64.b64encode(buf), 'utf-8'),
                              "encoding": "raw"}}
                d = json.dumps(d)
                # 将拼接的字符串d数据结构转换为json
                ws.send(d)
                status=STATUS_CONTINUE_FRAME
            elif status==STATUS_CONTINUE_FRAME:
                # 中间帧处理
                d = {

    "data": {

    "status": 1, "format": "audio/L16;rate=16000",
                              "audio": str(base64.b64encode(buf), 'utf-8'),
                              "encoding": "raw"}}
                ws.send(json.dumps(d))
            elif status==STATUS_LAST_FRAME:
                # 最后一帧处理
                d = {

    "data": {

    "status": 2, "format": "audio/L16;rate=16000",
                              "audio": str(base64.b64encode(buf), 'utf-8'),
                              "encoding": "raw"}}
                ws.send(json.dumps(d))
                time.sleep(1)
                break
    thread.start_new_thread(run,())


def on_message(ws,message):
    # 收到websocket消息的正常处理
    try:
        # print(json.loads(message))
        code = json.loads(message)["code"]
        # 解码返回的message的json数据中的code
        sid = json.loads(message)["sid"]
        if code != 0:
            errMsg = json.loads(message)["message"]
            # 解码message中错误信息
            print("sid:%s call error:%s code is:%s" % (sid, errMsg, code))
        else:
            data = json.loads(message)["data"]["result"]["ws"]
            # 解码message中ws数据
            result = ""
            for i in data:
                for w in i["cw"]:
                    result += w["w"]

            if result == '。' or result == '.。' or result == ' .。' or result == ' 。':
                pass
            else:
                # t.insert(END, result)  # 把上边的标点插入到result的最后
                print("翻译结果: %s。" % (result))
                global recording_results
                recording_results=result
    except Exception as e:
        # 异常处理,参数异常
        print("receive msg,but parse exception:", e)

def on_error(ws,error):
    # 收到websocket后错误的处理
    print("### error ### : ",error)
    run()
    # 重新启动监听

def on_close(ws):
    # 收到websocket关闭的处理
    pass

def run():
    global wsParam
    wsParam=Ws_Param(APPID='5d27dbc6',
                    APIKey='d61163a9bdb5d0a0508f98dee66e0383',
                    APISecret='ZTQ5NTAwZTk0YzQ5MDdhNWViZjcyYjVh')
    # 初始化讯飞接口编码
    websocket.enableTrace(False)
    # True表示默认在控制台打印连接和信息发送接收情况
    wsUrl=wsParam.create_url()
    # 生成讯飞的url进行连接
    ws=websocket.WebSocketApp(wsUrl, on_message=on_message, on_error=on_error, on_close=on_close)
    ws.on_open=on_open  # 进行websocket连接
    ws.run_forever(sslopt={

    "cert_reqs": ssl.CERT_NONE}, ping_timeout=2)
    # 无限循环,只要这个websocket连接未断开,这个循环就会一直进行下去

if __name__ == '__main__':
	run()