Tip: After the article is written, the table of contents can be automatically generated. For how to generate it, please refer to the help document on the right.
Article directory
Preface
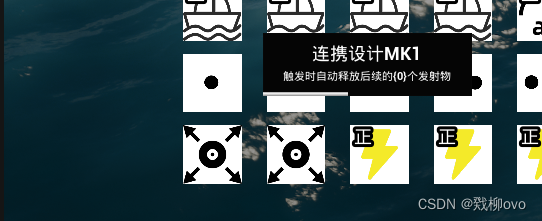
I've been doing my graduate work recently, and I've been worrying about how to accurately place the floating details window on the side of the icon, like the effect in the picture below.
I originally thought about directly obtaining the position of the control on the screen to calculate the generation position of the floating window, but the magic is that the blueprint does not seem to have this node. . . After searching around, I discovered the menu anchor. I will record its usage here to avoid forgetting it.
1. Menu anchor
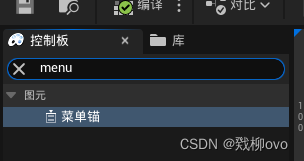
First of all, you can find the menu anchor directly in the control panel. The menu anchor is mainly used to pop up the specified menu at a fixed location.
2. Specify menu controls
There are two ways to specify menu controls, one is to directly specify the type, and the other is to customize the generated control.
1. Directly specify the control class
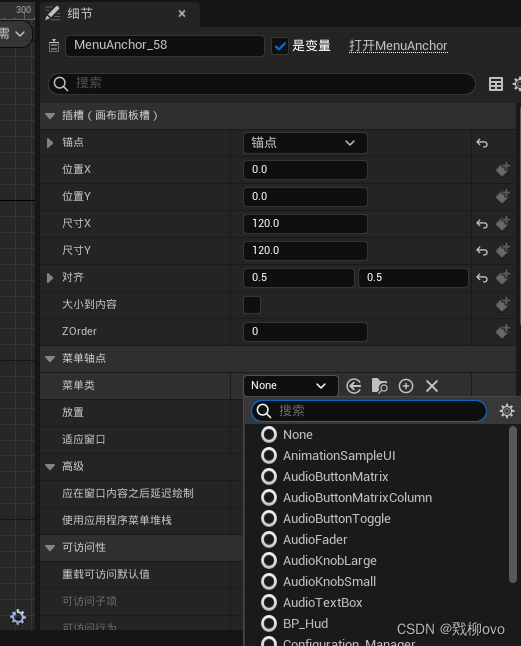
In the details panel, you can specify the control class you want to pop up through the menu anchor through the menu class. However, there is a small disadvantage of directly specifying it, that is, there is no way to modify the generated control. If you want to create your own UI and place it on the menu anchor, You need to use the second method
2. Customize generated controls
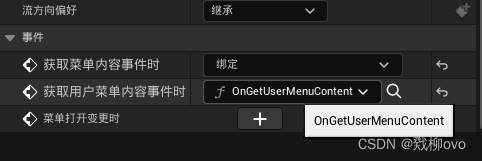
If you want to customize the generated control, you need to override the OnGetMenuContent event in the details panel
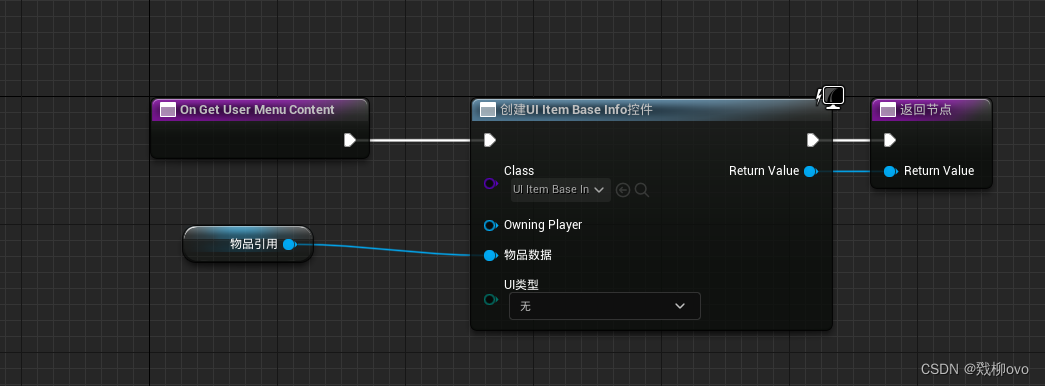
In this way, you can customize the controls you want to place, specify the generation parameters, or control the menu UI.
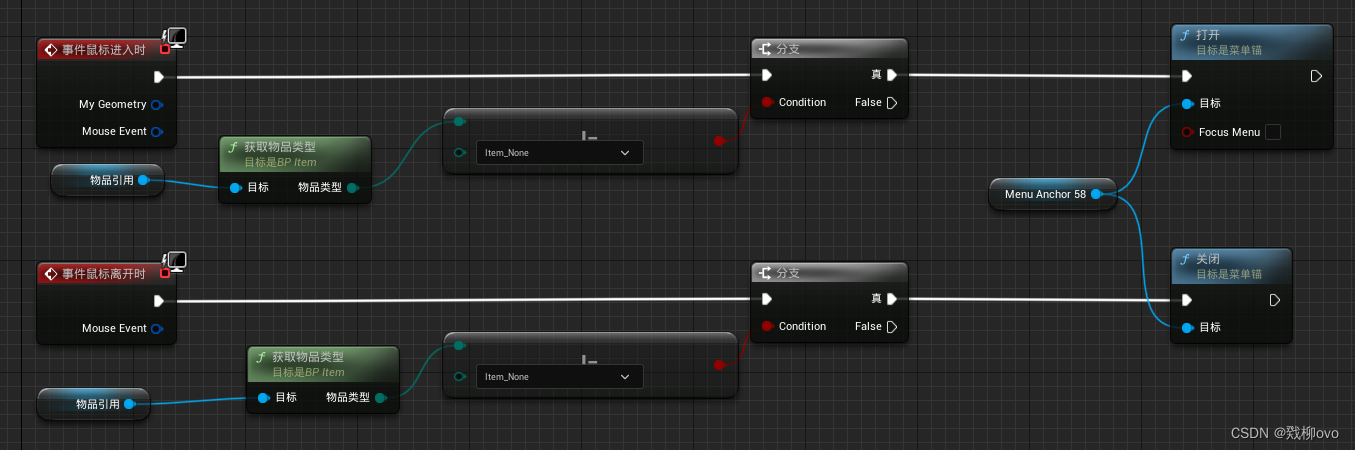
3. Open/close menu

You can call the corresponding function to open or close the menu. The author here binds it to the event of the mouse entering the control. Of course, it can also be bound to a button click.
4. Menu placement location
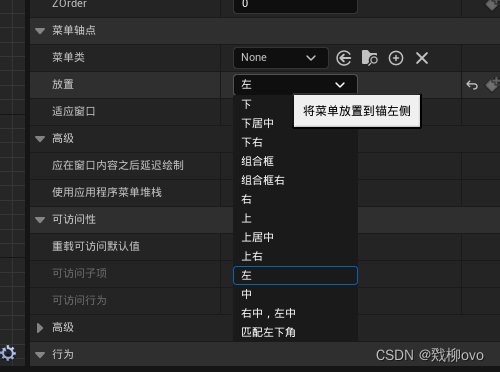
Here you can modify the position of the menu relative to the menu anchor. At the same time, some are adaptive, which means that if the screen space is not enough to place the menu, the menu can be automatically modified to the other side, as shown in the two situations below.

If you don’t want to block the icon, you can change the placement mode to left like the author did . Then wrap the entire control with a menu anchor, as shown in the figure below, so that the location where the menu is generated avoids the menu anchor.
Summarize
As for more detailed information, you can refer to the official document official document link - menu anchor . The author will complete some basic things when I have time.