Table of contents
1. Turn on remote login on macOS
3. Remotely connect to macOS via public network ssh
3.1 macOS installation and configuration cpolar
3.2 Obtain the public network address of the ssh tunnel
3.3 Test public network ssh remote connection to macOS
4. Configure a fixed TCP address for the public network
4.1 Reserve a fixed TCP port address
4.2 Configure fixed TCP port address
5. Use fixed TCP port address to ssh remotely
Preface
macOS comes with the Secure Shell client, which allows you to log into remote servers and desktops that listen for incoming SSH connections. We can ssh username@ipuse it to ssh to the server, but it is usually limited to remote within the LAN.
In this tutorial, we will use the cpolar intranet penetration tool to map the ssh service default port: port 22, obtain the public network address, and implement ssh remote login in the public network environment without the need for a public network IP or setting up a router.
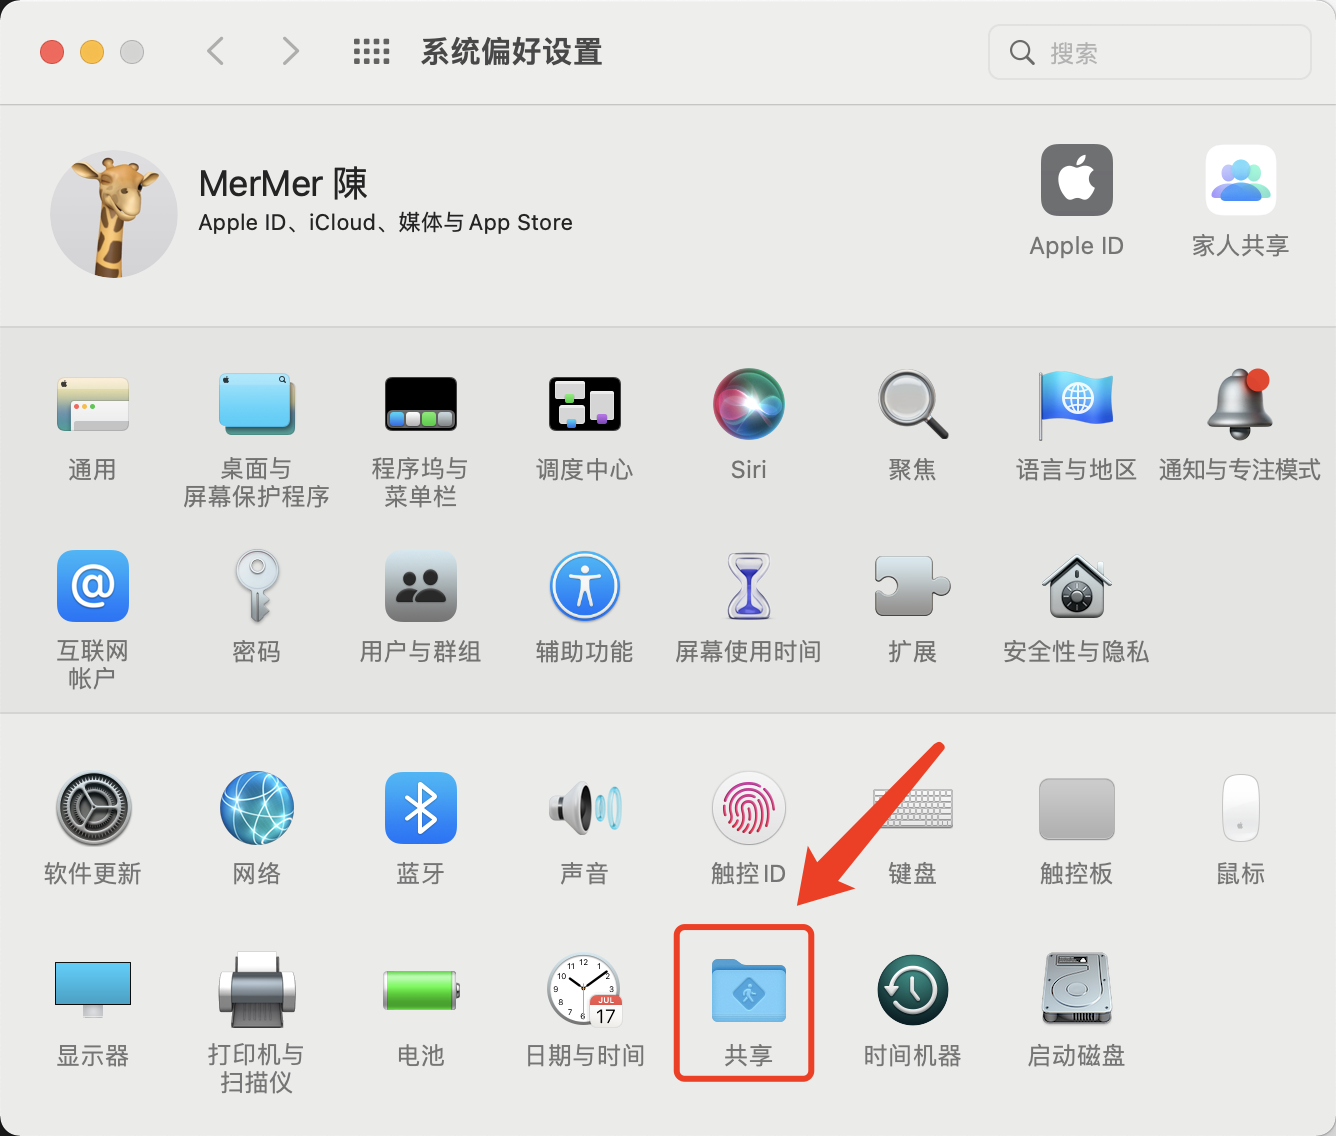
1. Turn on remote login on macOS
- Open System Preferences and click
共享
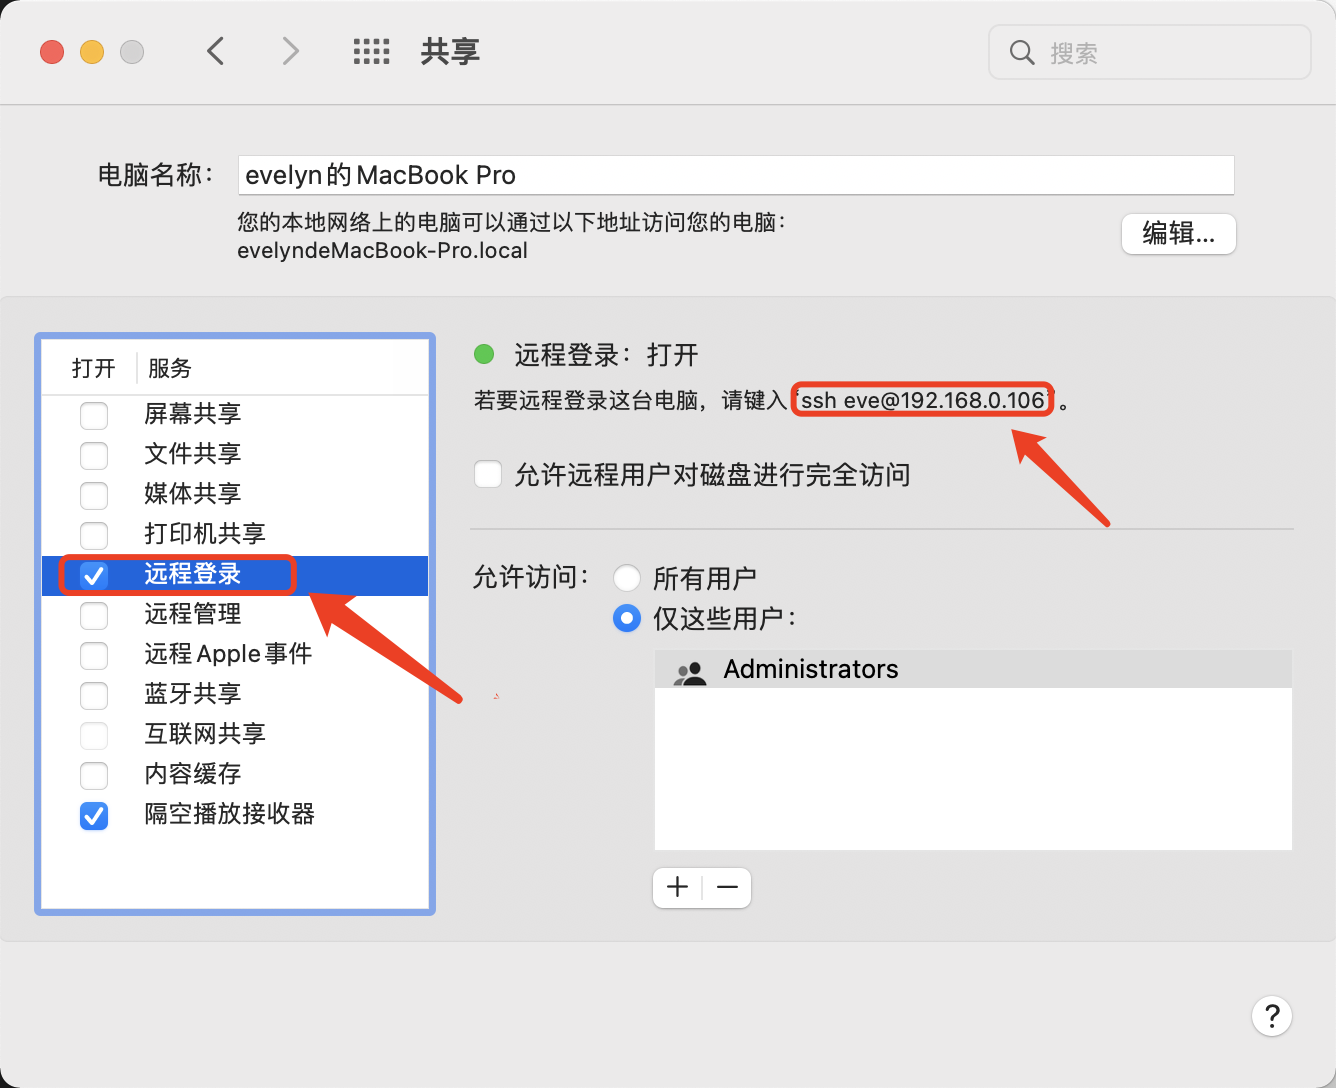
- Check to open
远程登录and copy the ssh remote login command on the right
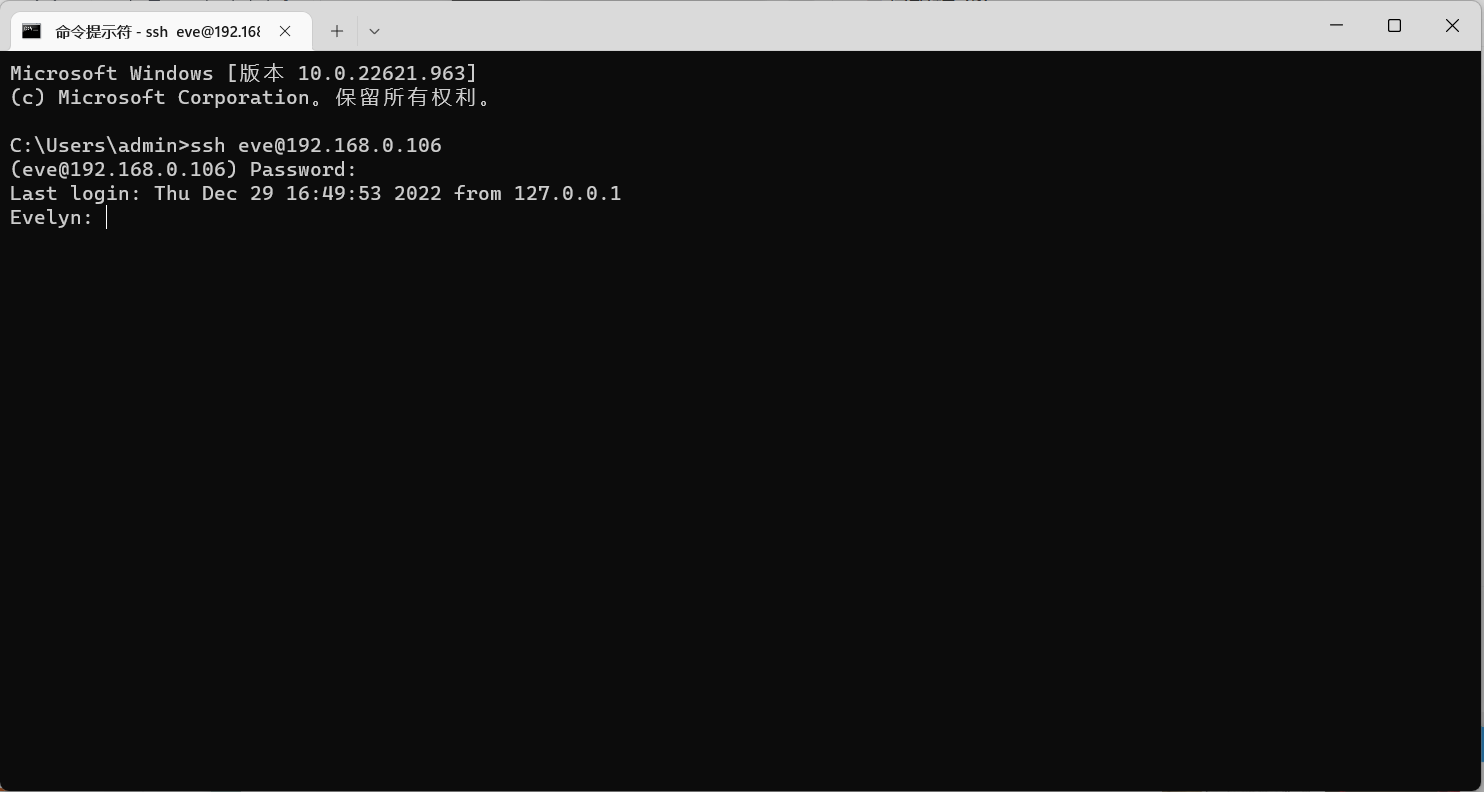
2. Test ssh remote in LAN
This example uses the Windows system to test ssh remote. Click the Start menu bar to search cmd, open the command prompt, enter the ssh command, and it will prompt for confirmation. Enter yesand press Enter, and it will prompt you to enter the macOS login password.
ssh [email protected]
Remote login to macOS via ssh within the LAN was successful.
3. Remotely connect to macOS via public network ssh
After successfully logging in to macOS via ssh remotely in the LAN, we will then map port 22 through the cpolar intranet to remotely connect to macOS via ssh in a public network environment.
3.1 macOS installation and configuration cpolar
Installing cpolar on macos can be installed through the homebrew package manager without manually downloading the installation package.
- Install homebrew
Homebrew is a package management tool under Mac OS. It has many practical functions such as installation, uninstallation, update, viewing, and search.
/bin/bash -c "$(curl -fsSL https://raw.githubusercontent.com/Homebrew/install/HEAD/install.sh)"
- Install cpolar via Homebrew package manager
brew tap probezy/core && brew install cpolar
- token authentication
Log in to the cpolar official website backend , click Verify on the left, check your authentication token, and then paste the token in the command line
cpolar authtoken xxxxxxx

- install service
sudo cpolar service install
- Start service
sudo cpolar service start
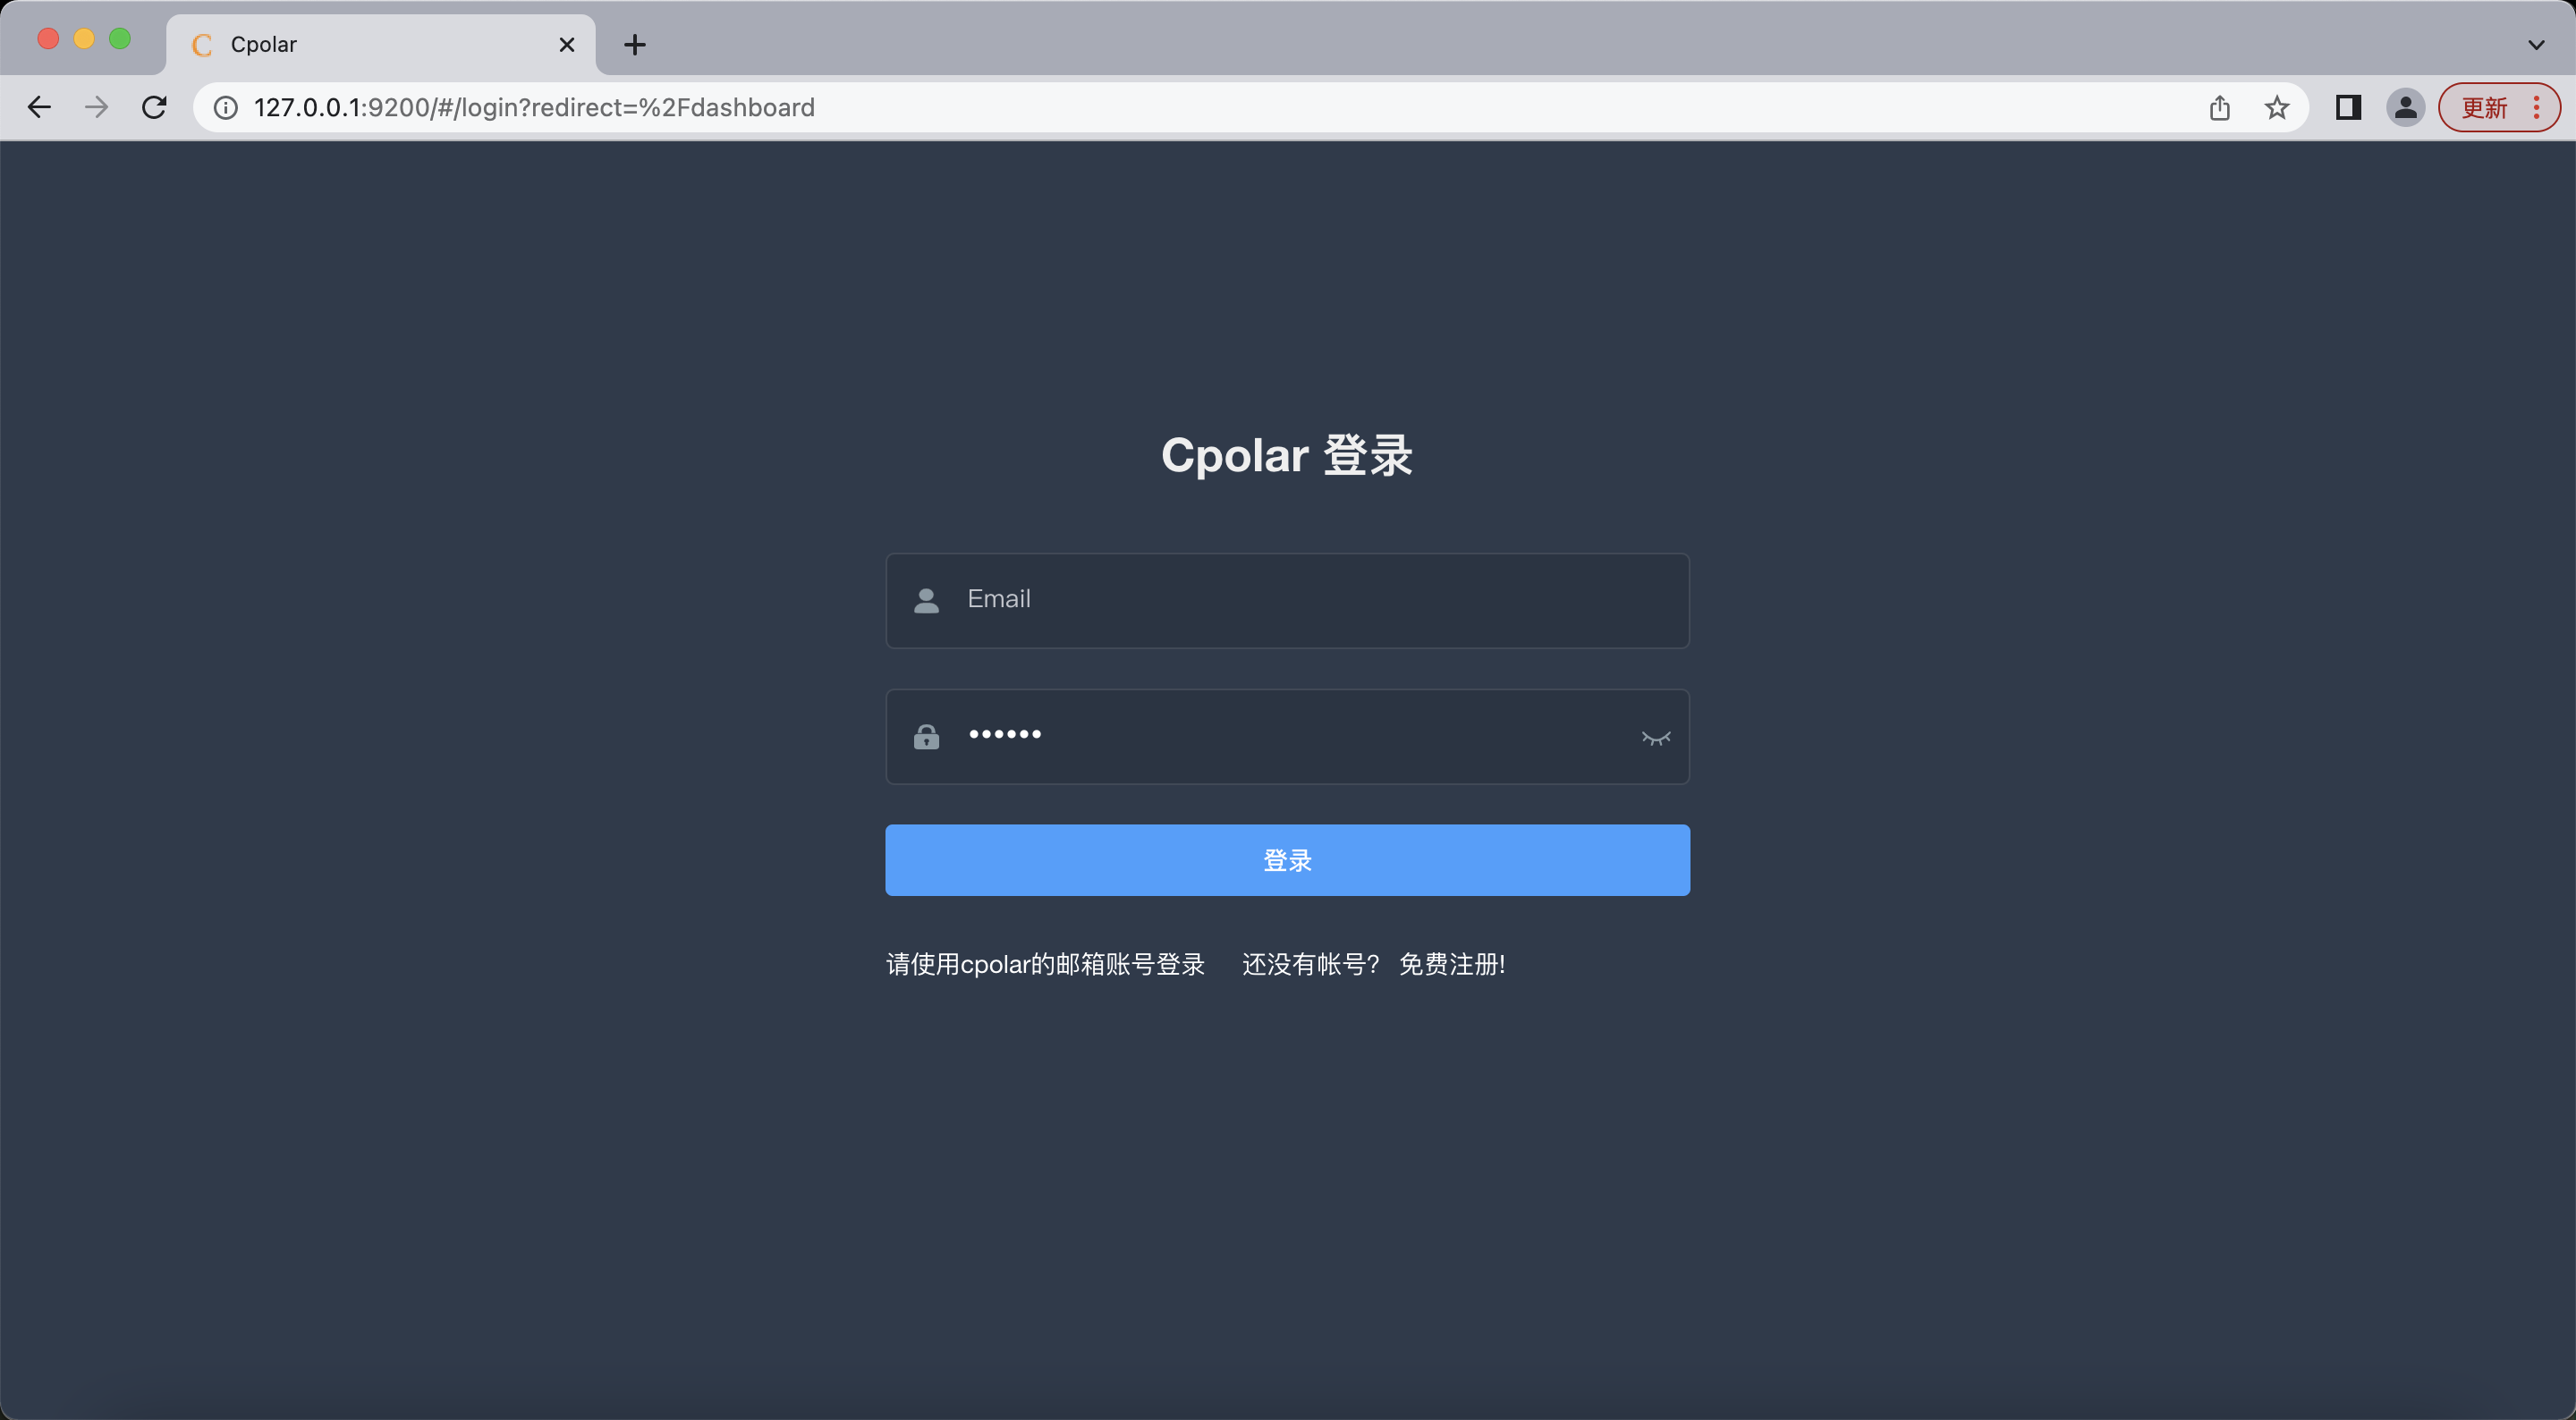
- Log in to the cpolar web UI management interface
Access the local port 9200 [ http://127.0.0.1:9200/ ] on the browser and log in using the cpolar account.
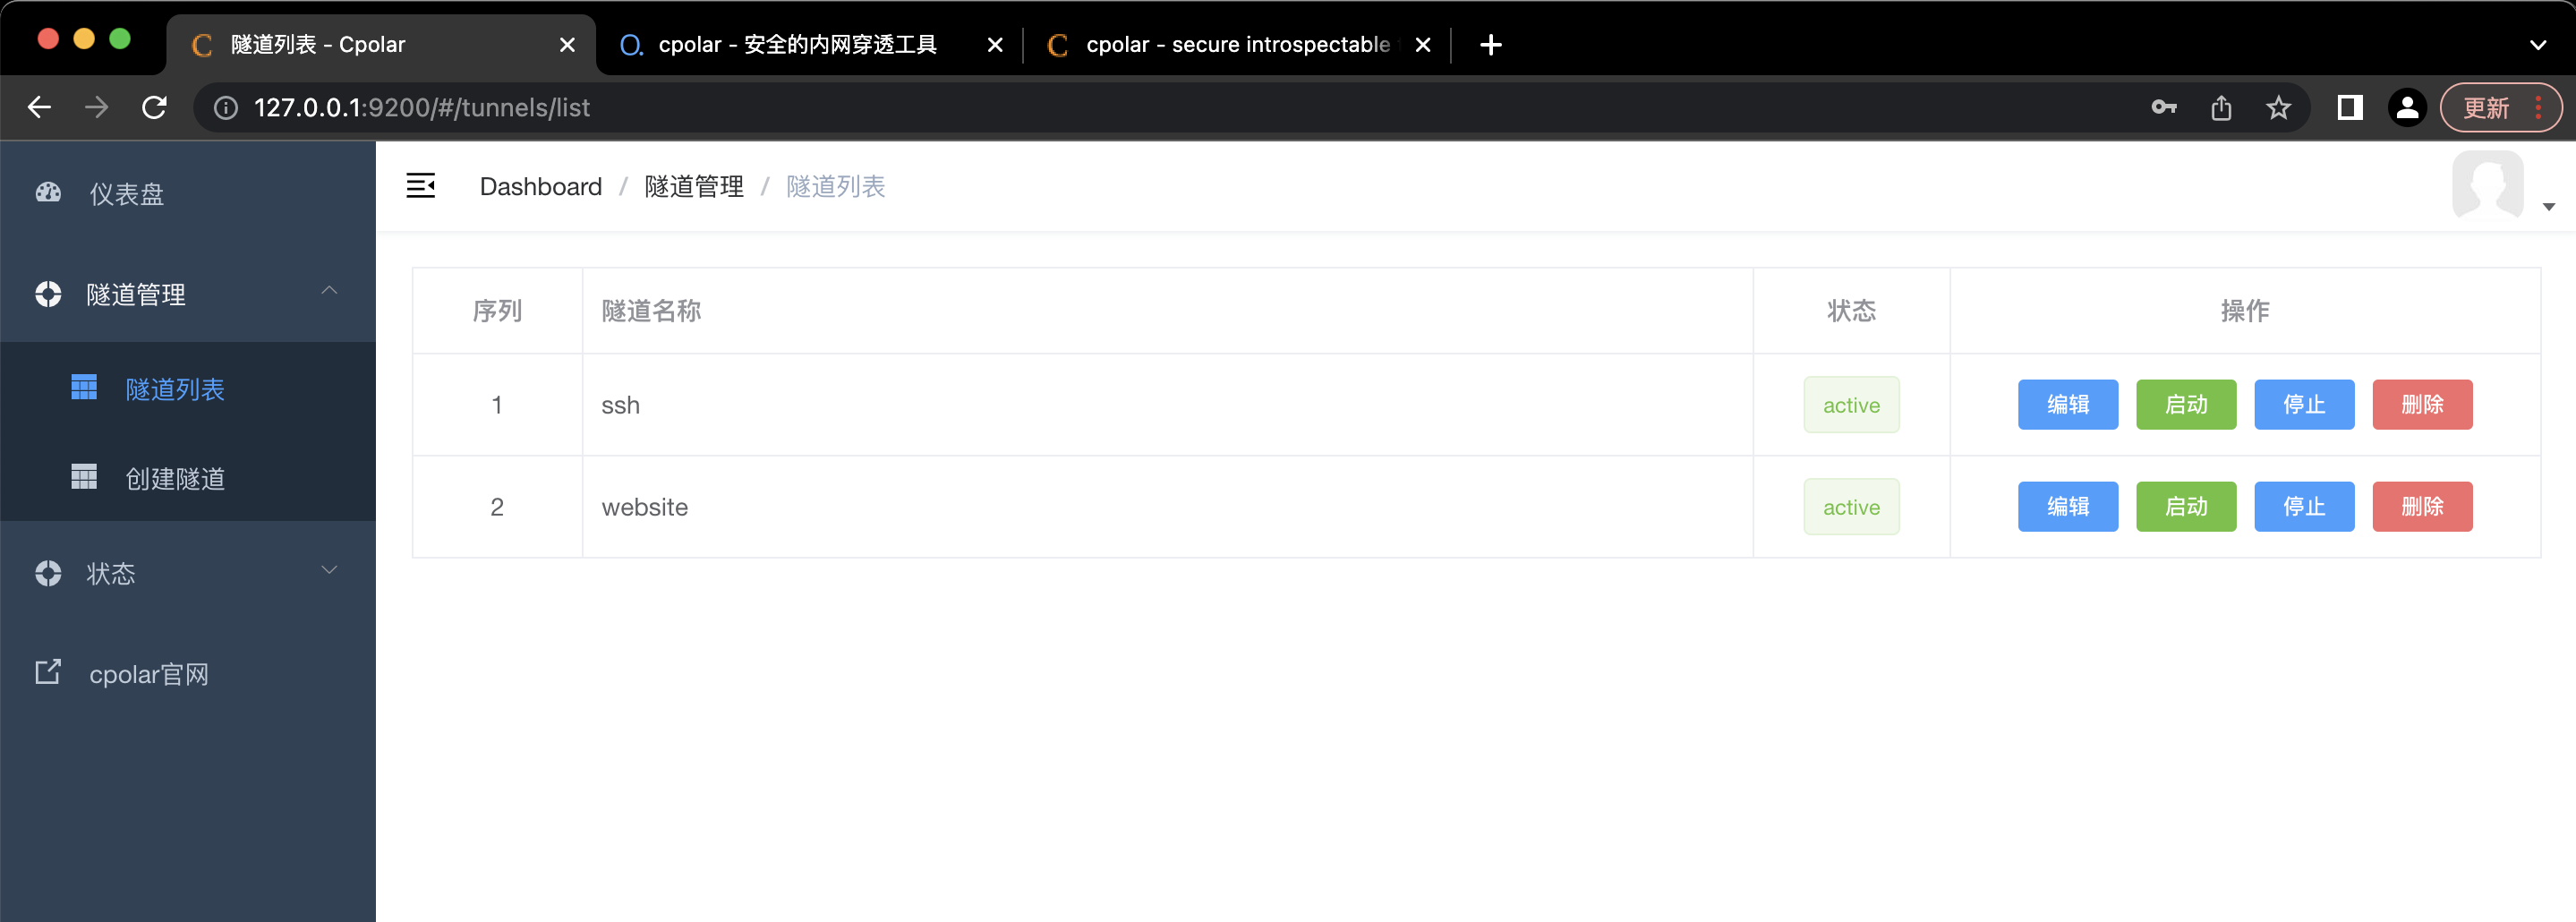
After successfully logging in, click Tunnel Management - Tunnel List on the left dashboard. You can see two sample tunnels (you can edit or delete them yourself)
- ssh tunnel: pointing to local port 22, tcp protocol
- website tunnel: pointing to local port 8080, tcp protocol
This time we can use the ssh sample tunnel directly.
3.2 Obtain the public network address of the ssh tunnel
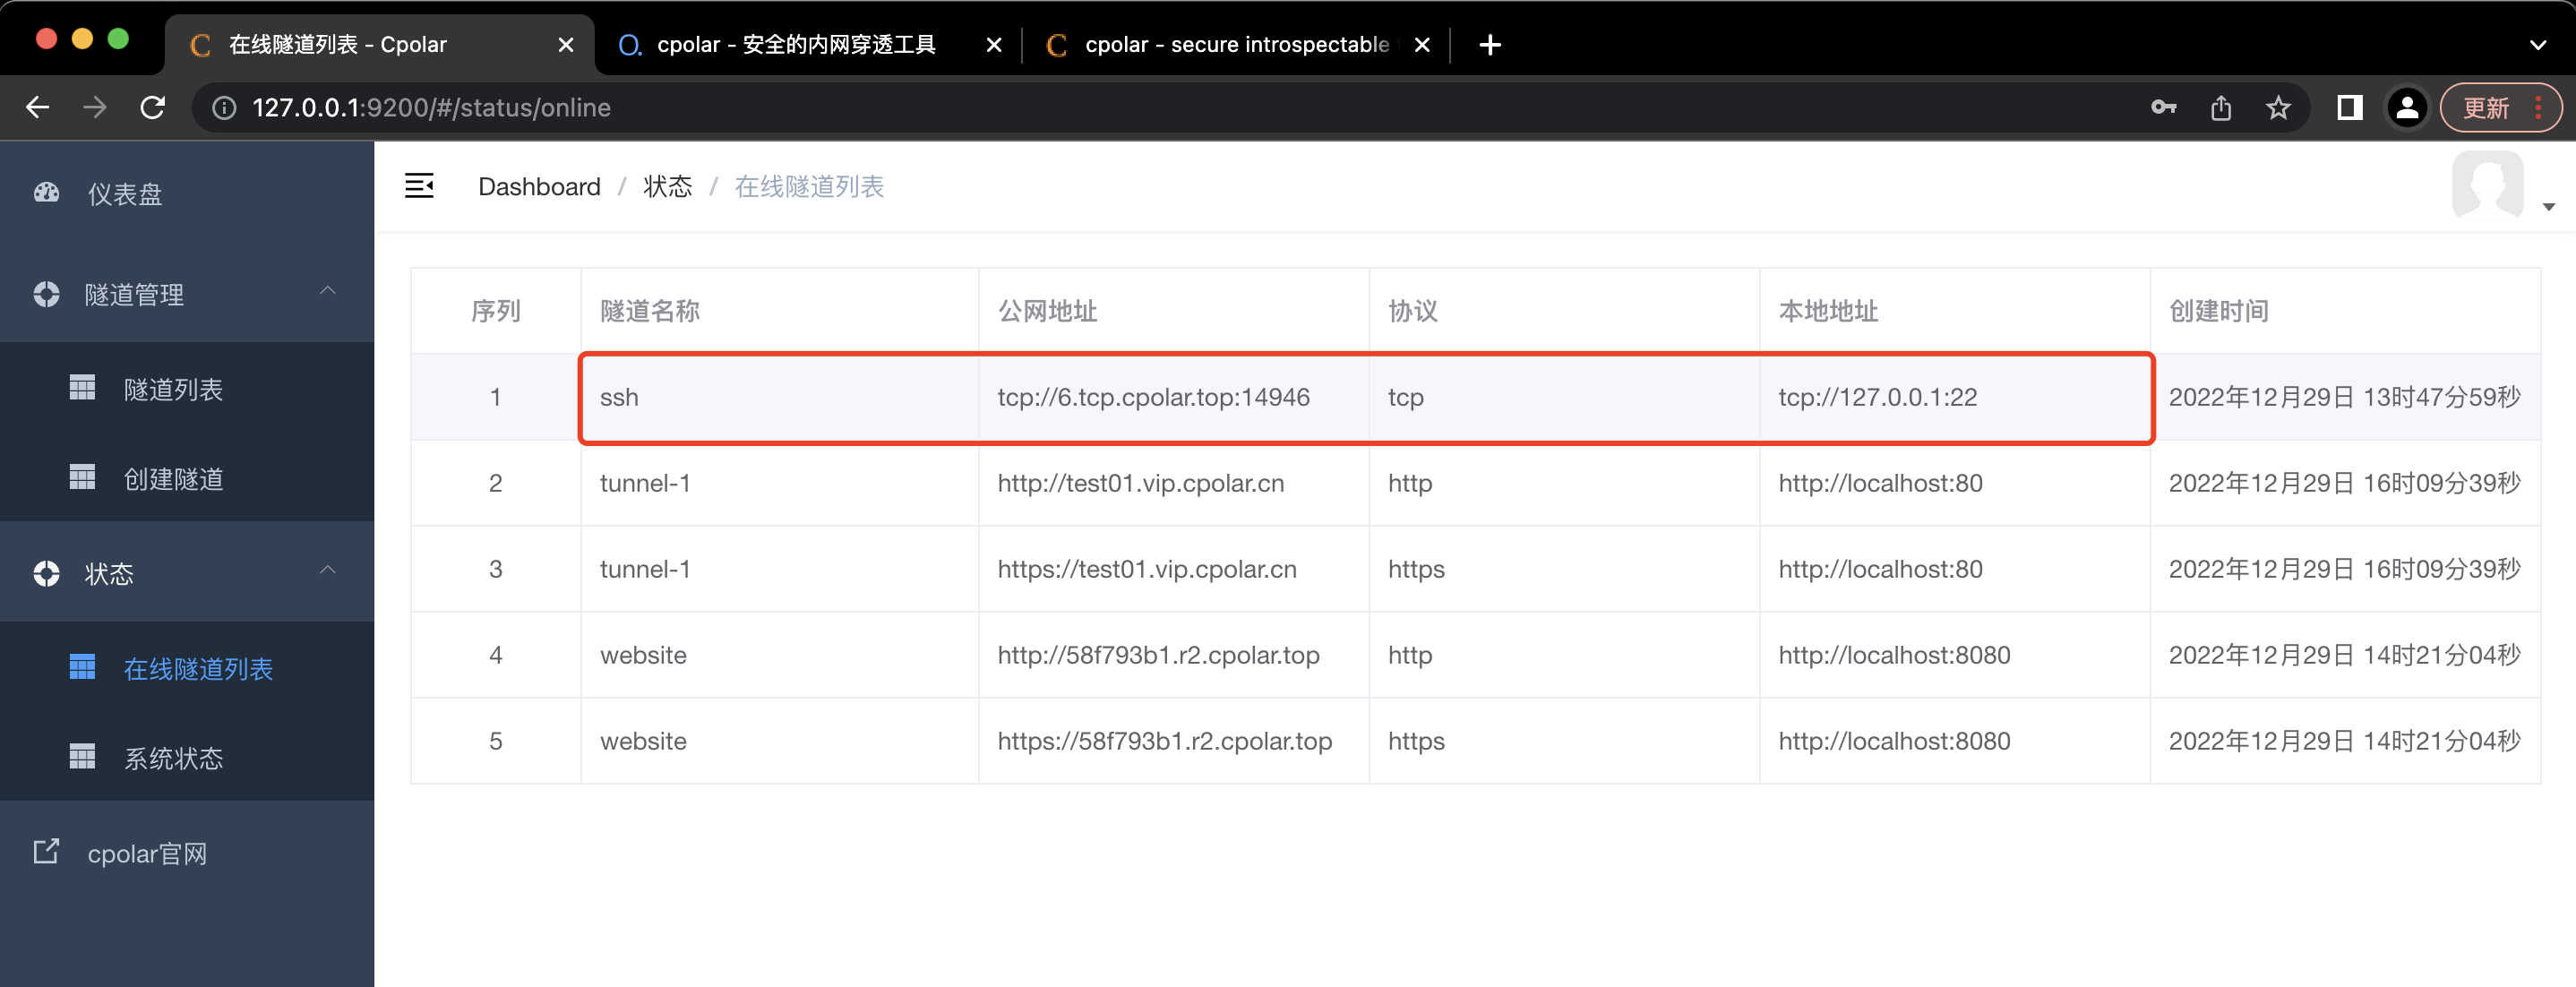
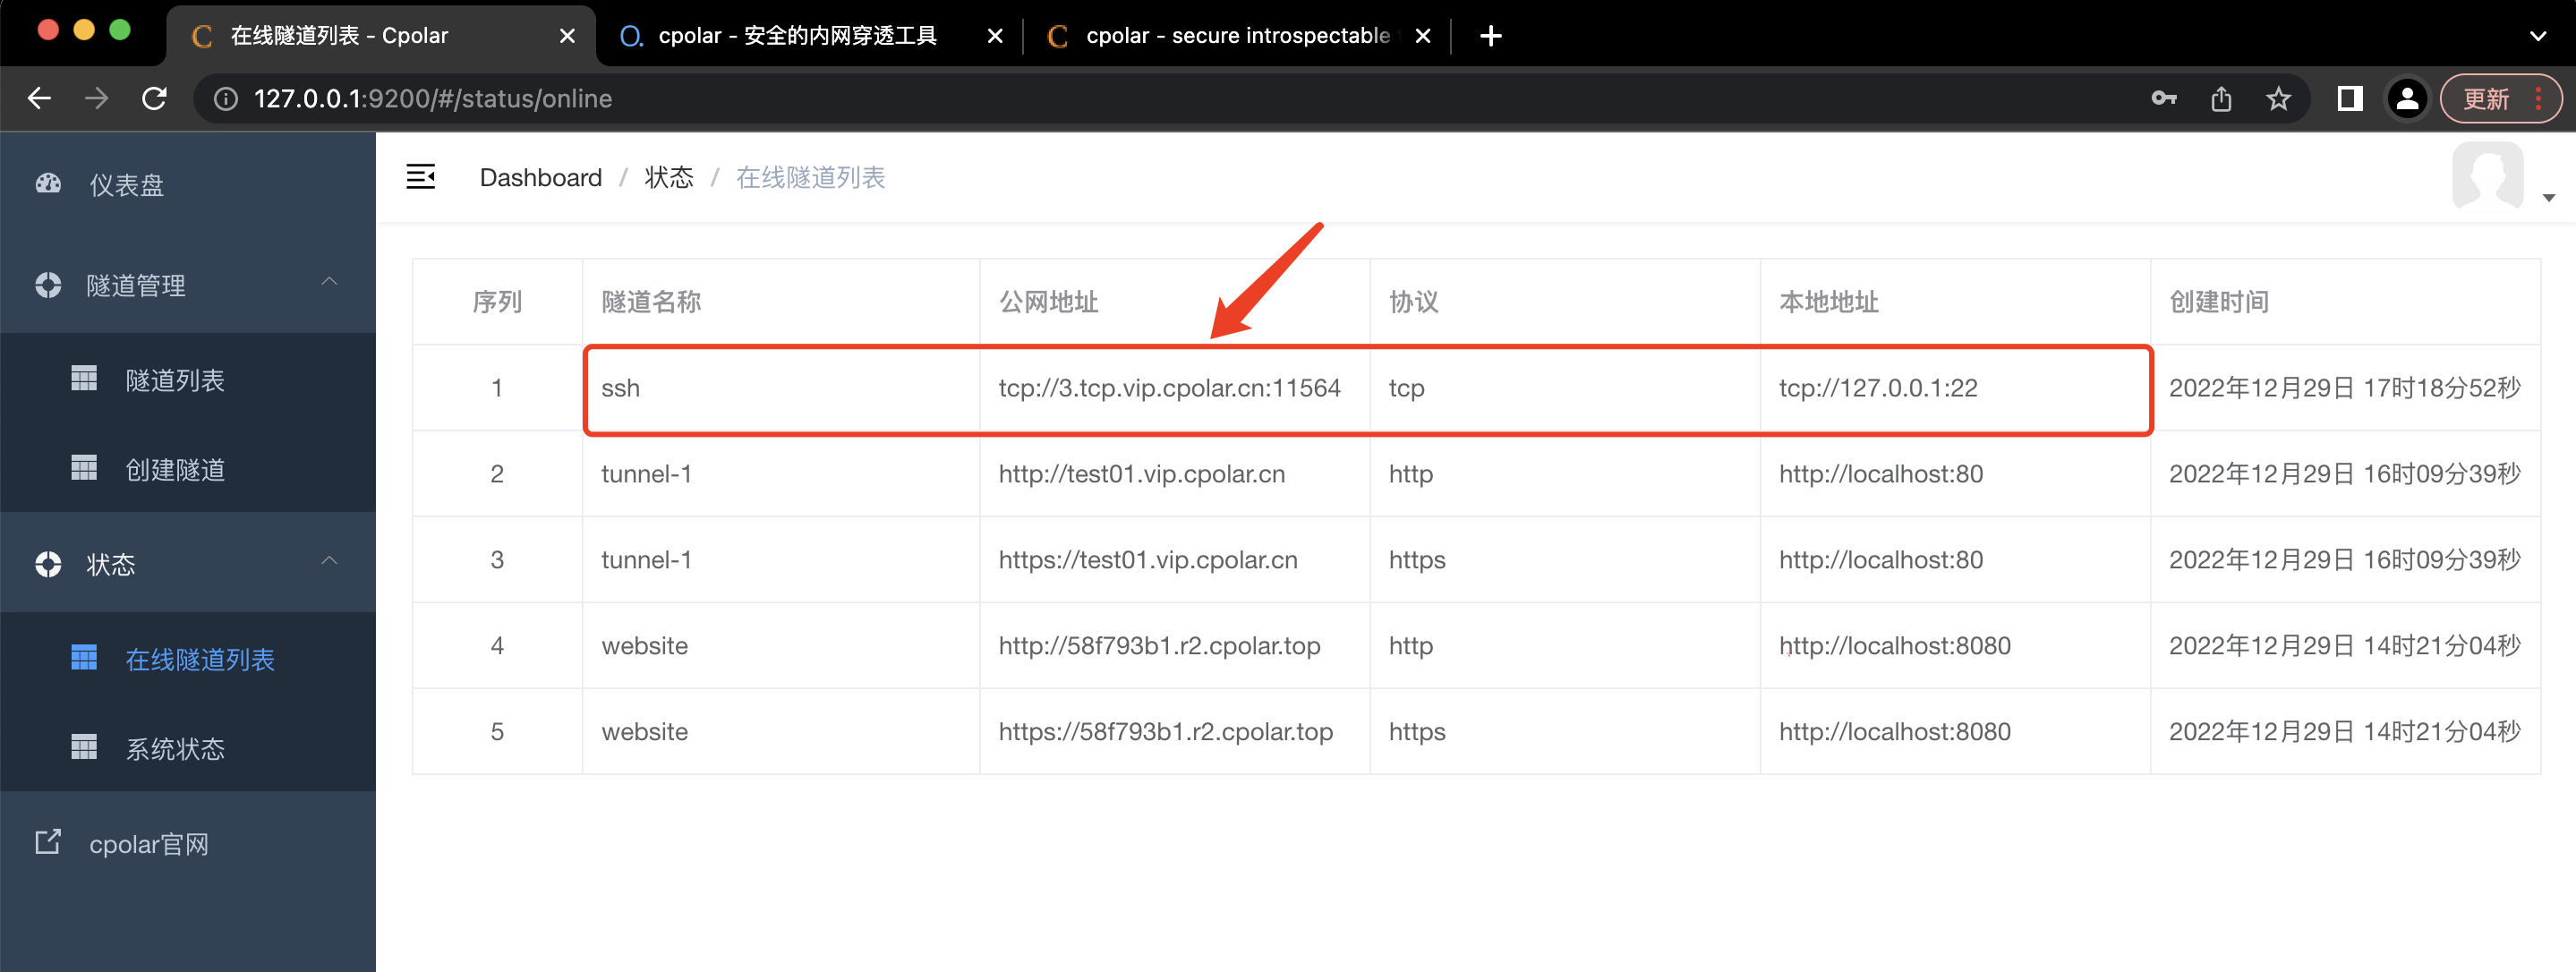
Click on the status of the dashboard on the left - online tunnel list, find the ssh tunnel, you can see that the system automatically generates the corresponding public network address, copy it down, note that tcp://no copying is required, in this example 6.tcp.cpolar.top:14946.
3.3 Test public network ssh remote connection to macOS
Open the command prompt and enter the ssh command:
ssh macOS用户名@公网地址 -p 公网端口号
Note: Since our local port 22 is mapped to port 14946 when it reaches the public network, the ssh command needs to add the -p parameter, followed by the public network tunnel port number.
like:
ssh [email protected] -p 14946
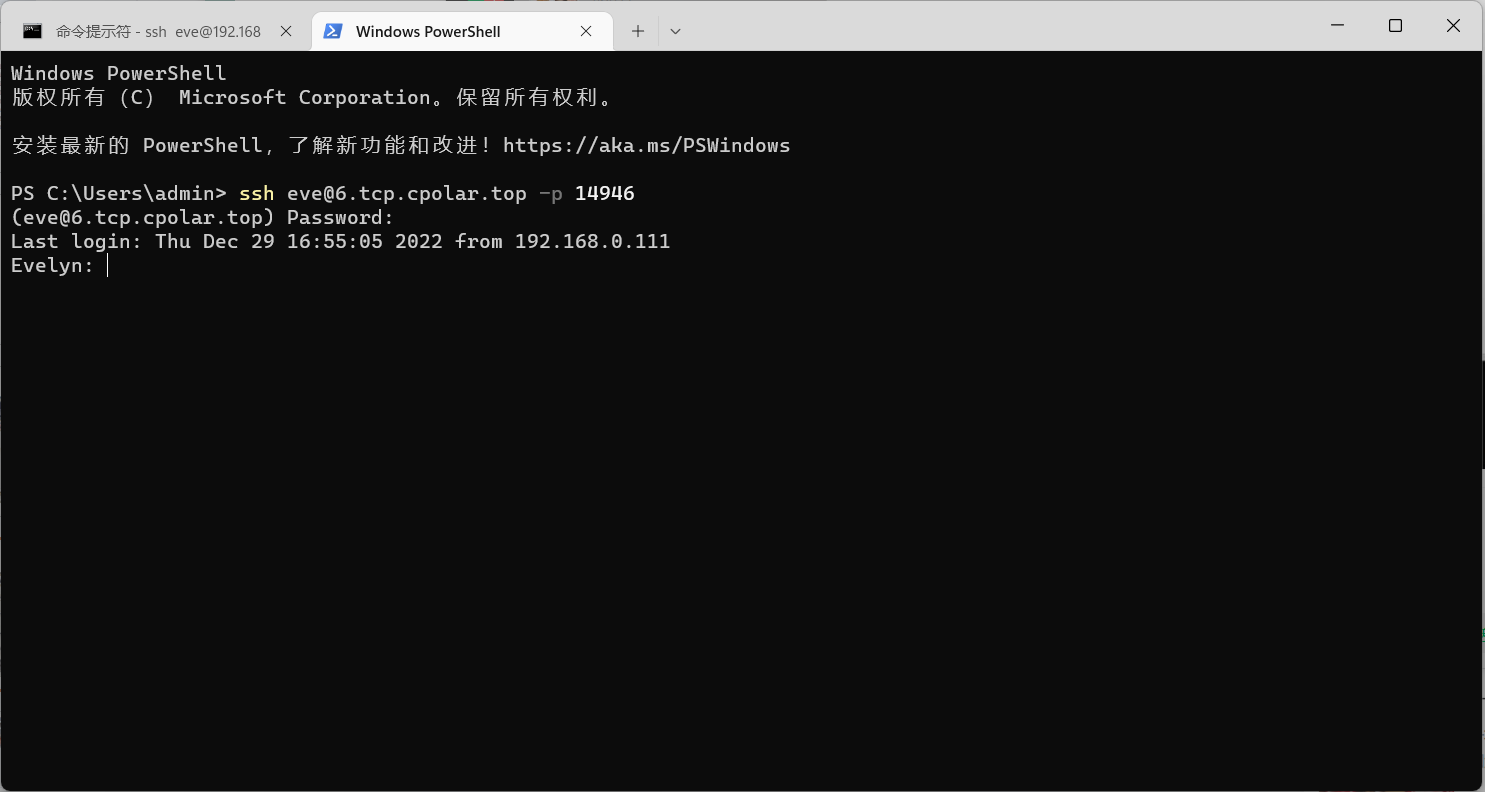
SSH remote login successful!
4. Configure a fixed TCP address for the public network
The ssh sample tunnel installed by cpolar by default uses a random port address, which will change randomly within 24 hours, which is very inconvenient for users who visit frequently or services in production environments. For this purpose, we can configure a permanently fixed public network TCP address for remote control.
Note that you need to upgrade the cpolar package to the professional package or above.
4.1 Reserve a fixed TCP port address
Log in to the cpolar official website backend , click Reserve on the left, and find the reserved TCP address:
- Region: Select China VIP
- Description: Notes, which can be customized
Click保留
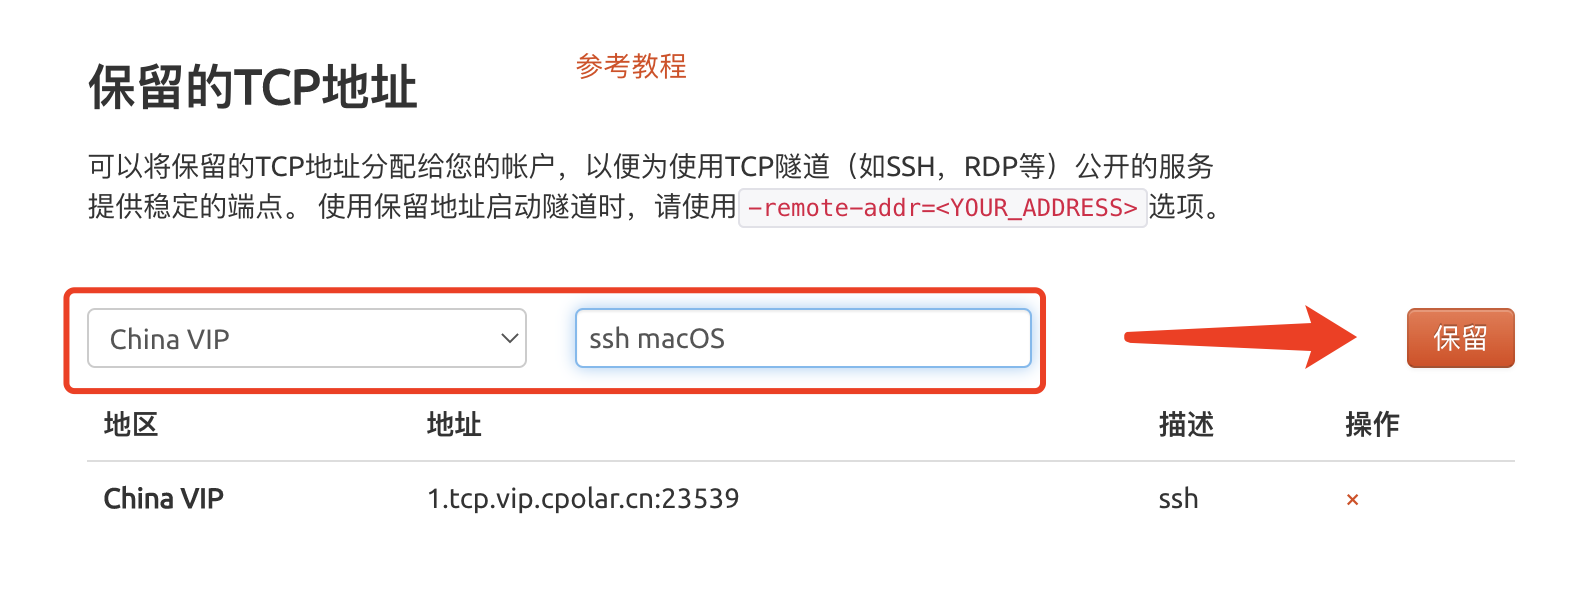
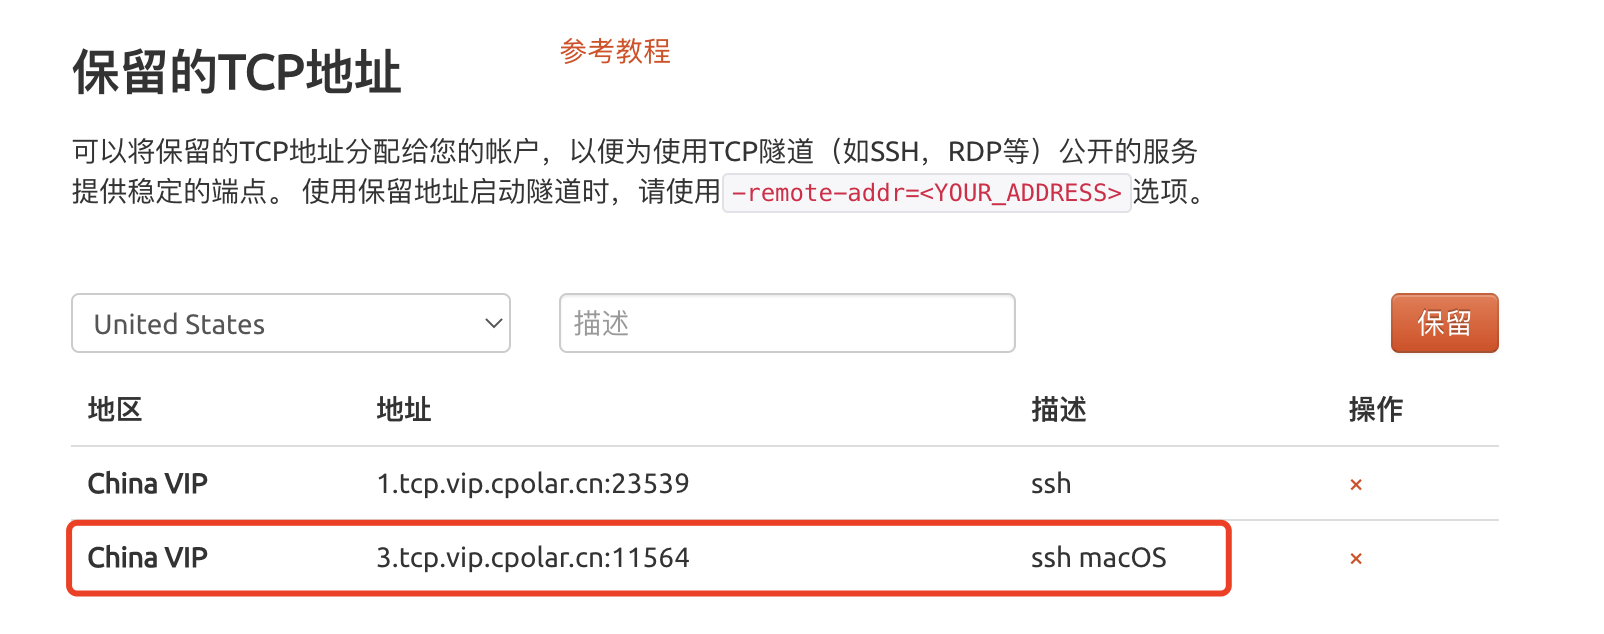
The fixed TCP address is retained successfully. The system generates the corresponding public network address + fixed port number and copies them.
4.2 Configure fixed TCP port address
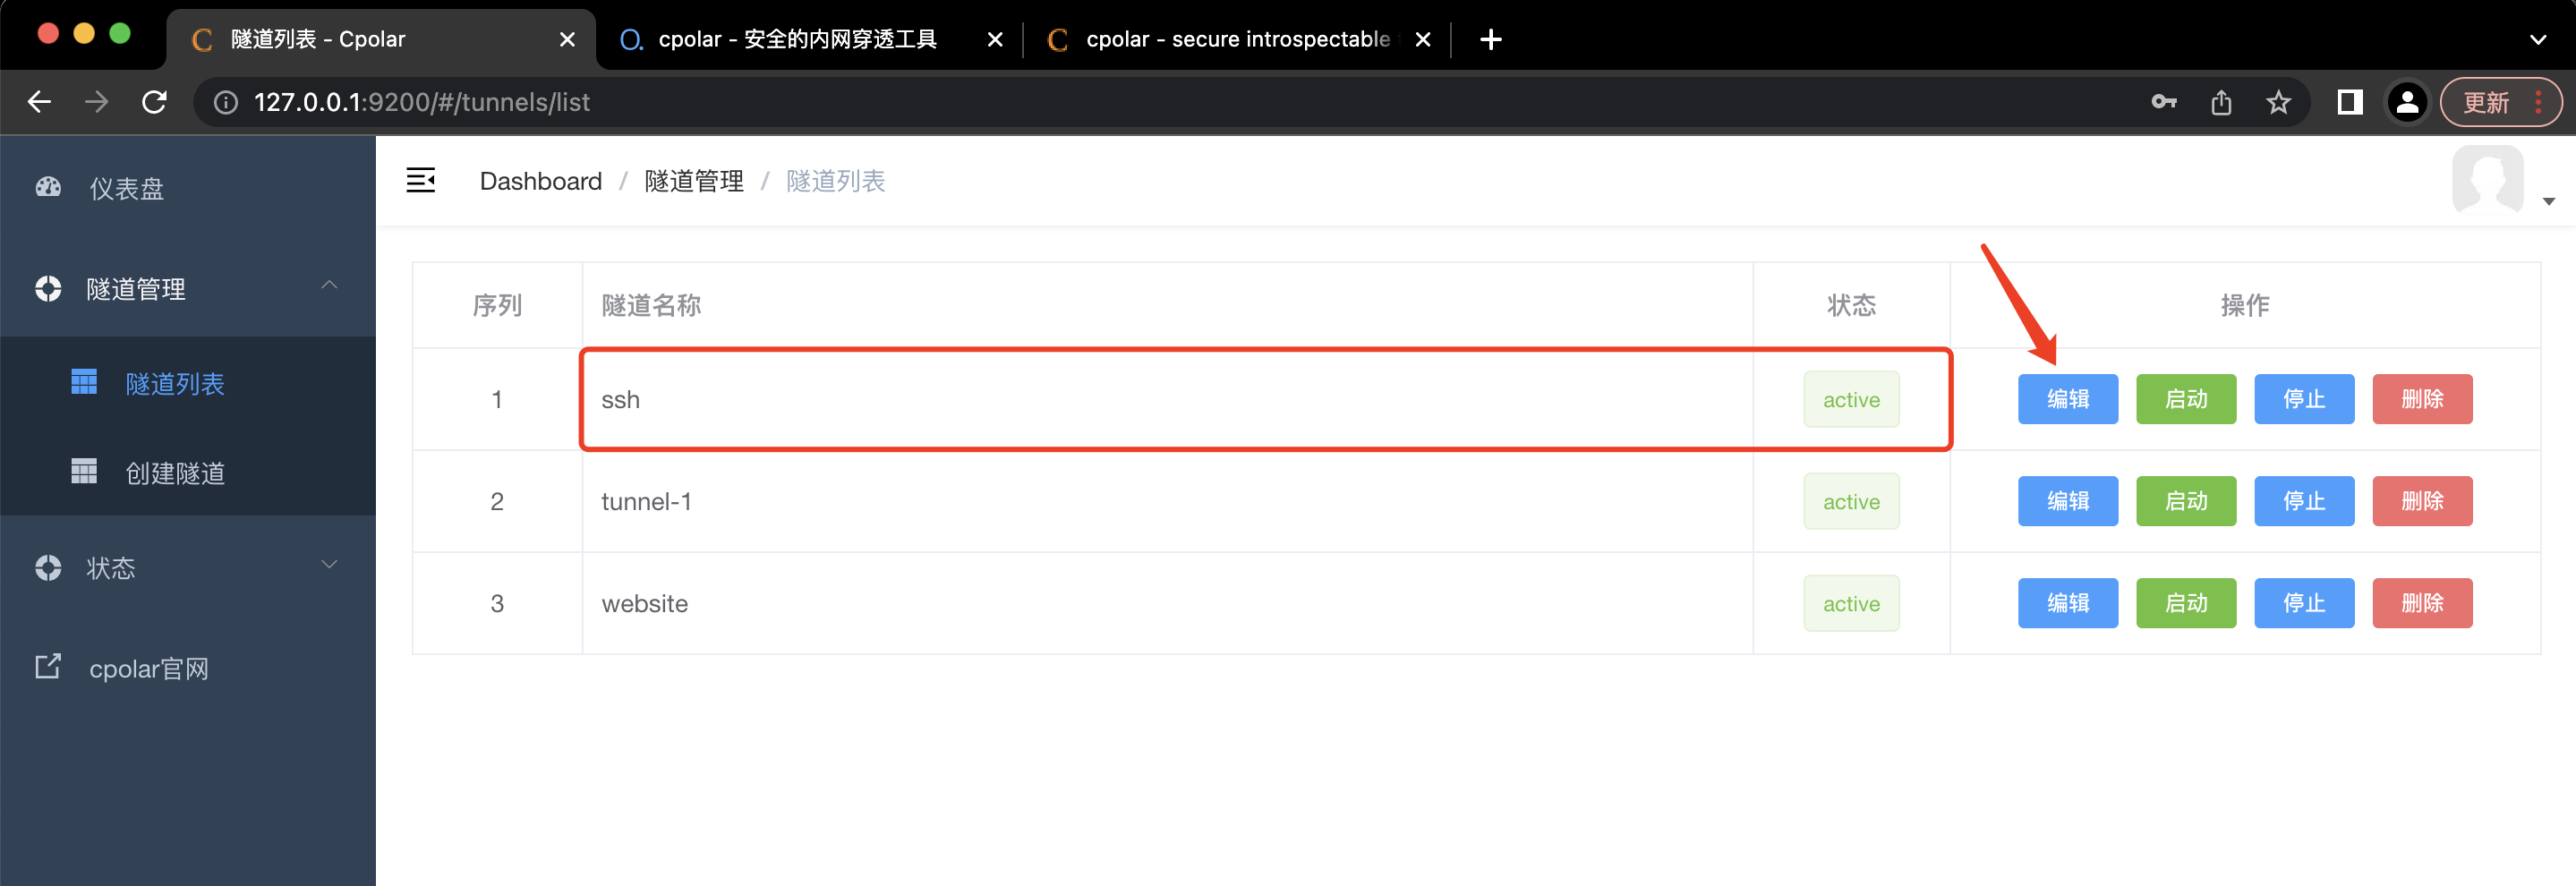
Visit http://127.0.0.1:9200/ to log in to the cpolar web UI management interface, click Tunnel Management - Tunnel List on the left dashboard, find the ssh tunnel, and click on the right编辑
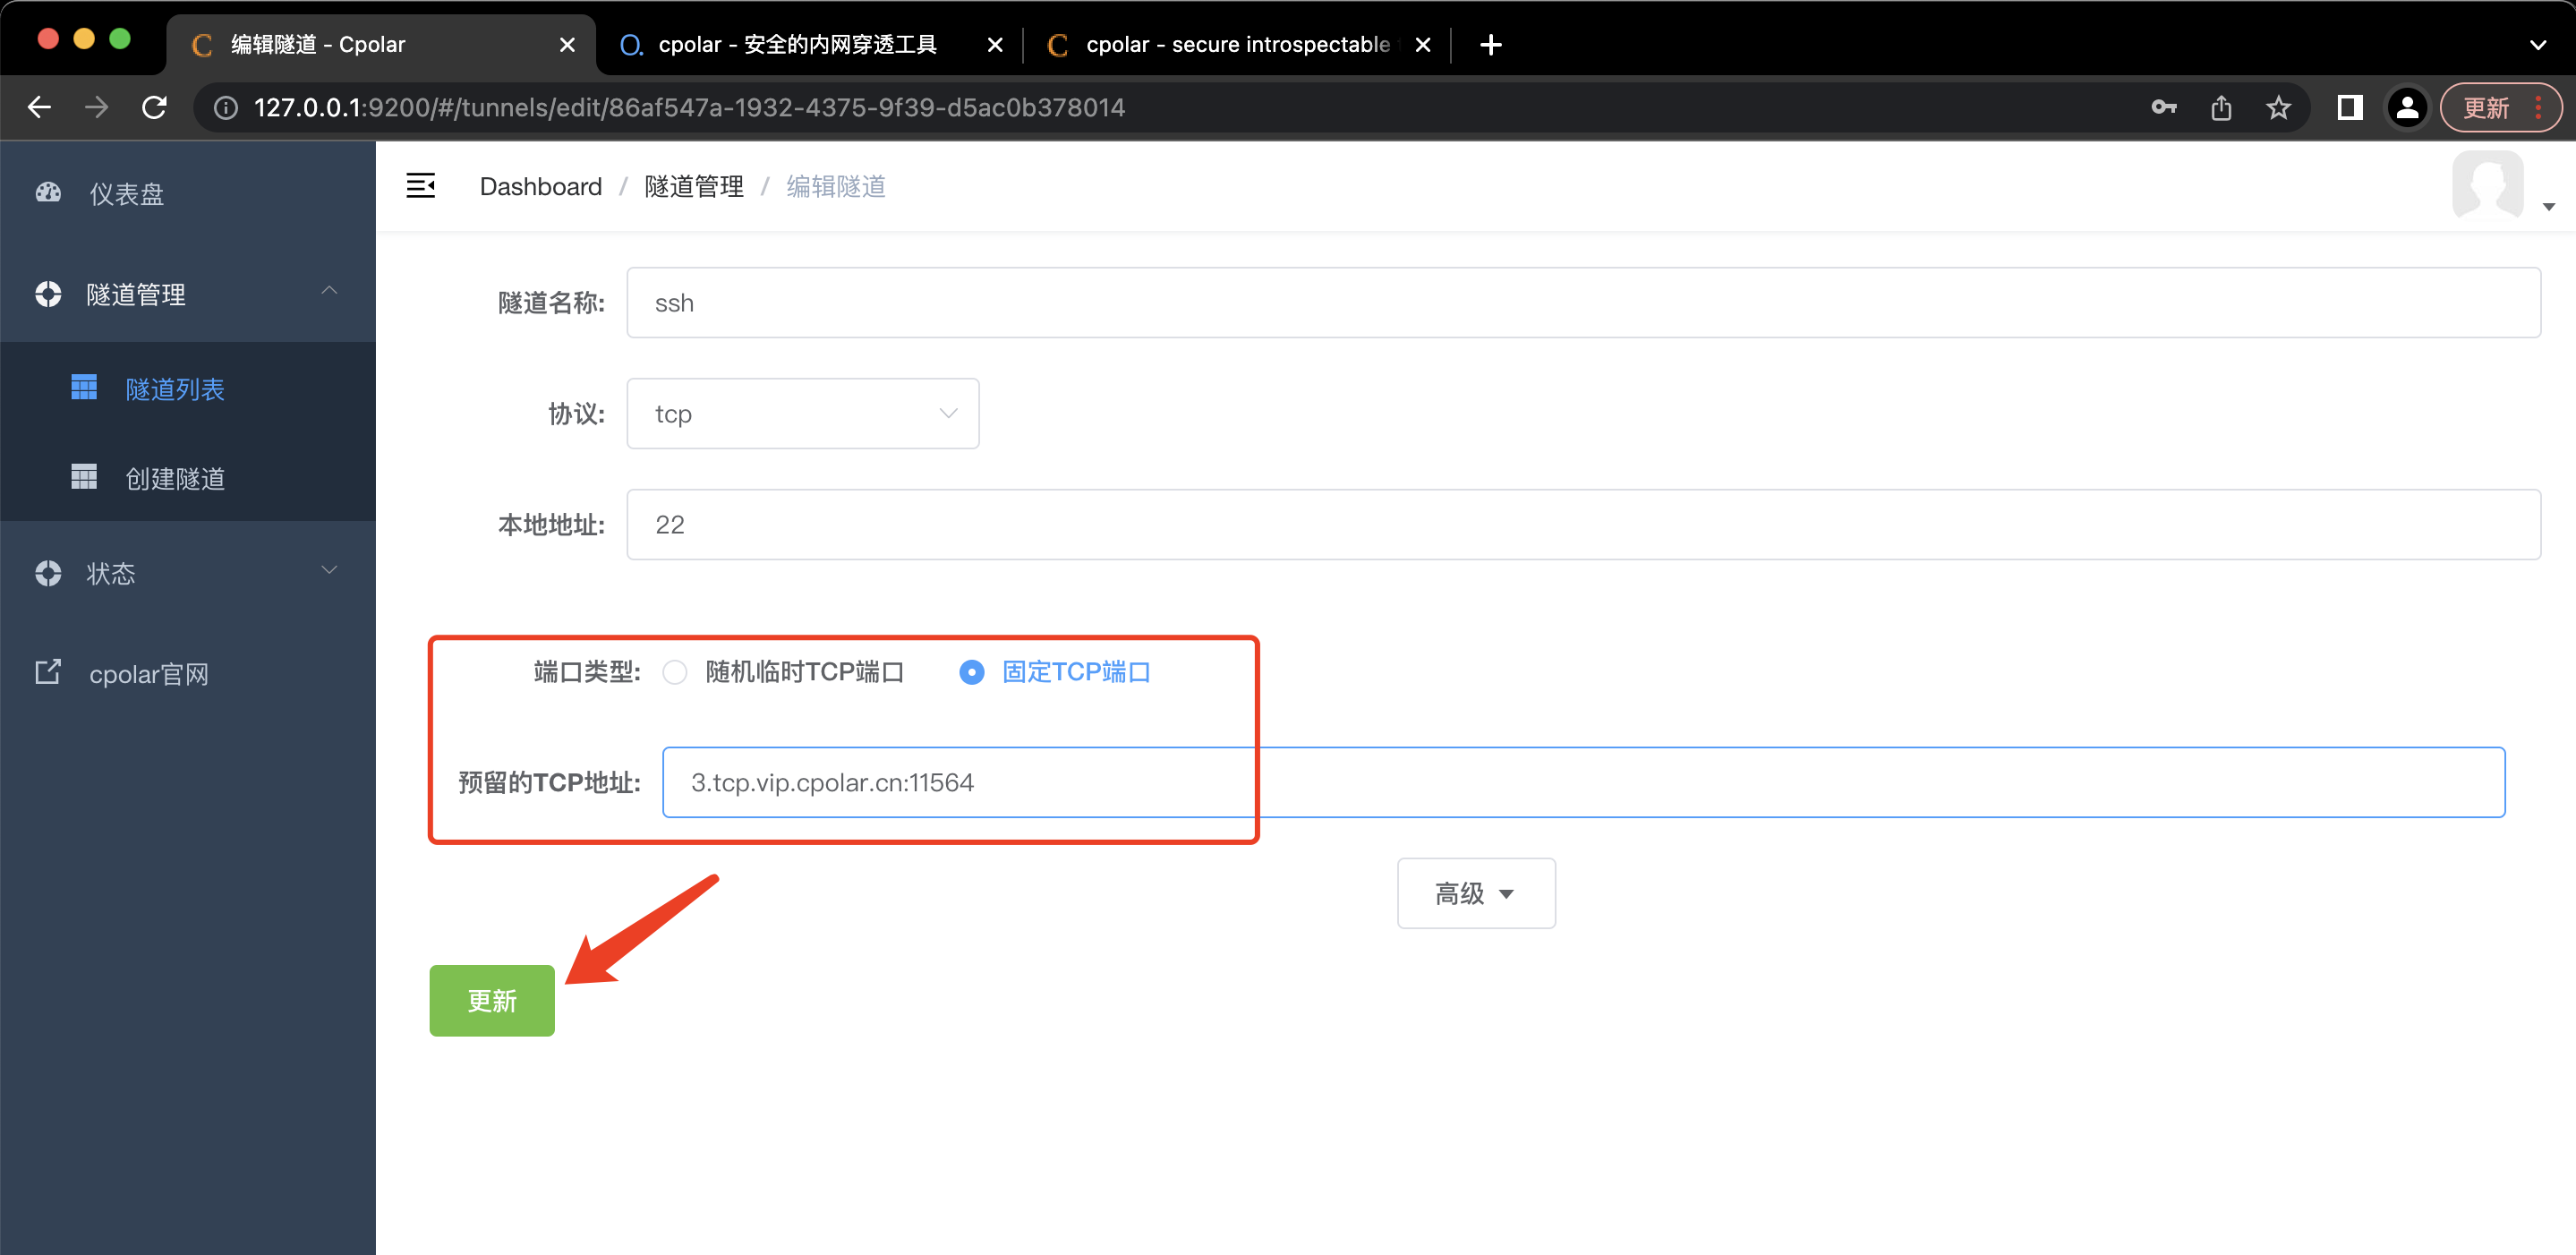
Modify the tunnel information and configure a fixed TCP port address:
- Port Type: Select instead
固定TCP端口 - Reserved TCP address: Fill in the fixed TCP port address that was successfully reserved just now
Click更新
It prompts that the tunnel update is successful. Click the status on the left dashboard - Online tunnel list. You can see that the public network address of the ssh tunnel has been updated to the fixed TCP port address. Copy it.
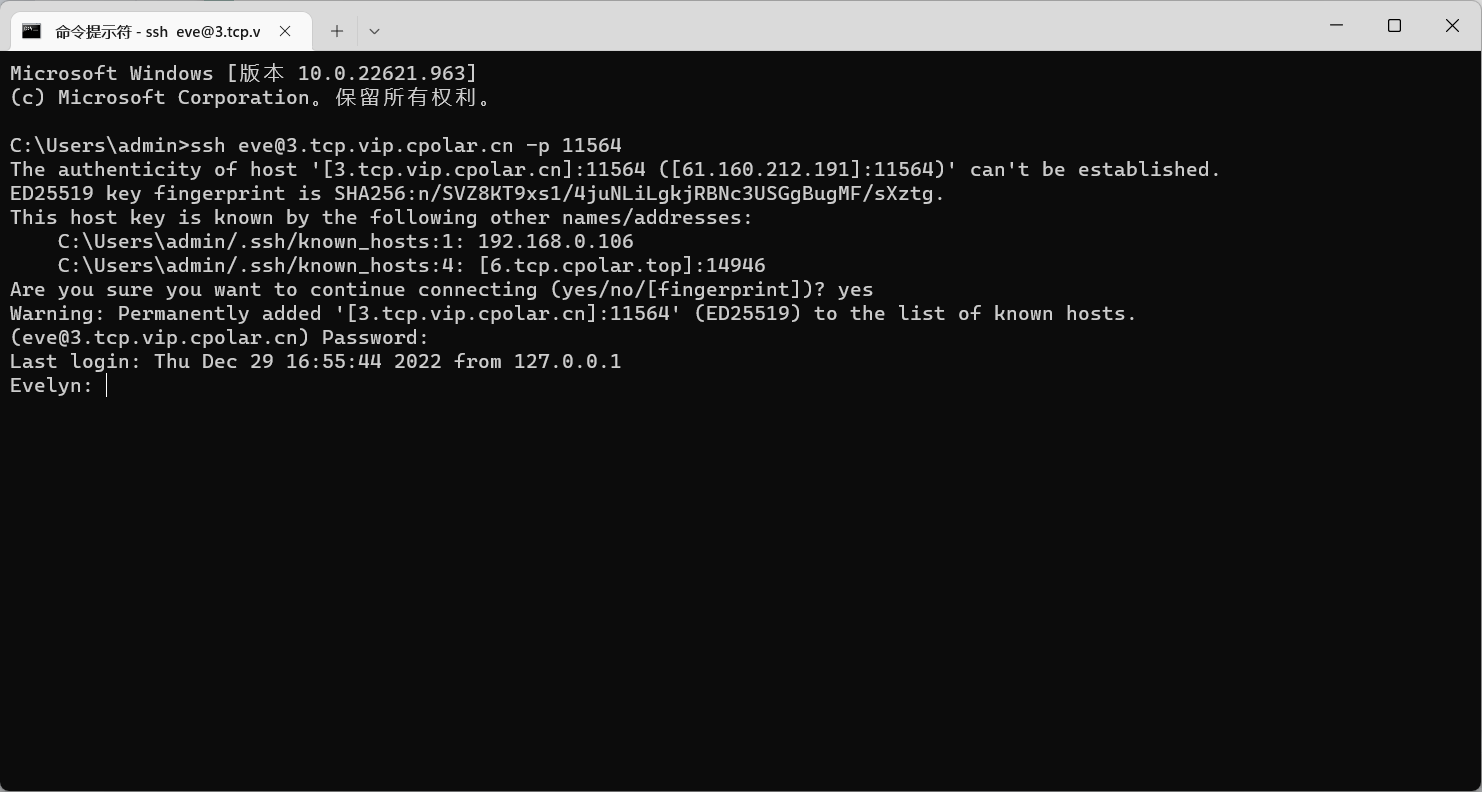
5. Use fixed TCP port address to ssh remotely
ssh [email protected] -p 11564
The ssh remote login is successful, and now the public network address will no longer change randomly.