1. First download and install ndk
Menu Tools -》SDK Manager:

If it is not selected, it means it is not installed. Select it and click the button "Apply"
to download and install it automatically.
2. Create a new project JniDemoByNDK and select Empty Activity.
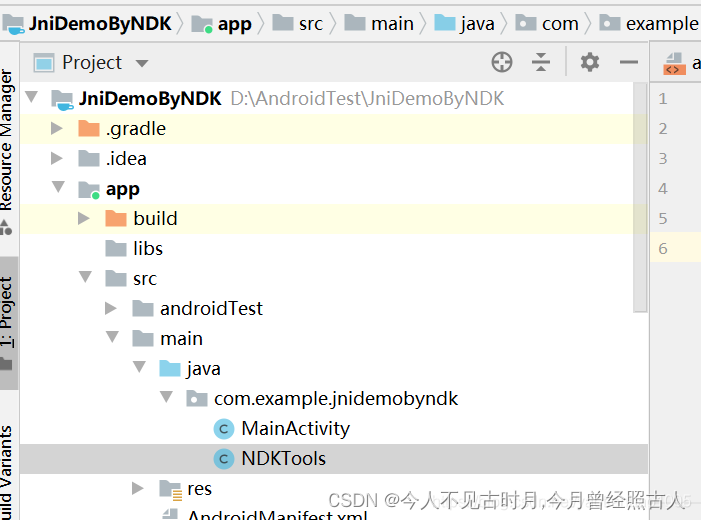
3. Create a new Java class: NDKTools under com.example.jnidemobyndk:
The code for its class is:
package com.example.jnidemobyndk;
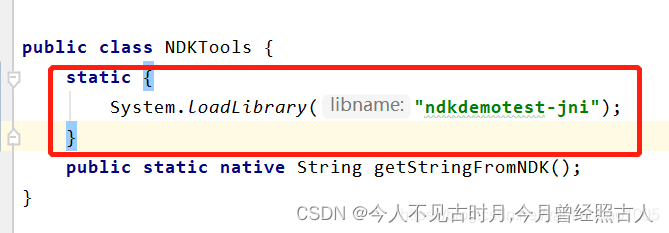
public class NDKTools {
public static native String getStringFromNDK();
}4. Click the menu: Build -> Make Project to compile the NDKTools.java file.
5. Find the NDKTools.class file:
The directory where it is located is:
D:\AndroidTest\JniDemoByNDK\app\build\intermediates\javac\debug\classes\com\example\jnidemobyndk
6. Enter the terminal interface (Terminal) of Android Studio and enter the specified directory:
D:\AndroidTest\JniDemoByNDK\app\build\intermediates\javac\debug\classes>
Note: You can only go to the classes layer.
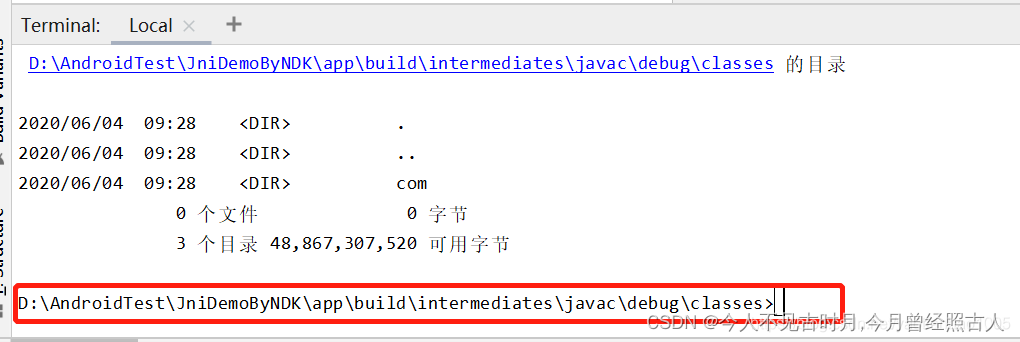
Then type the command:
javah -jni com.example.jnidemobyndk.NDKToolsEnter key:
If there are no errors, a header file will be generated at the classes level: com_example_jnidemobyndk_NDKTools.h
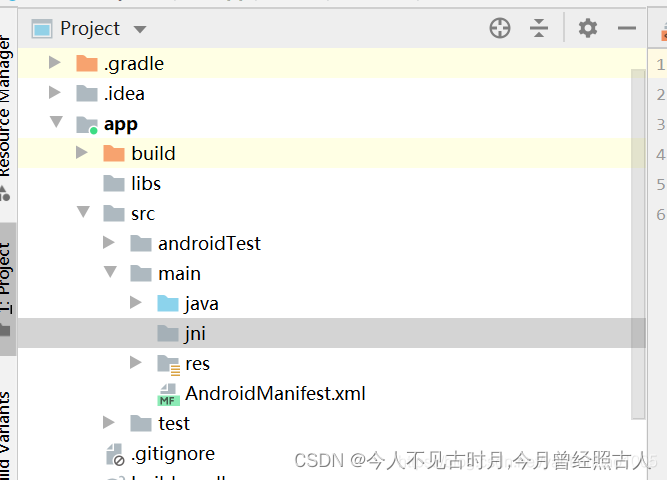
7. Create a subdirectory jni in the main directory:
8. Cut the com_example_jnidemobyndk_NDKTools.h file to the jni directory
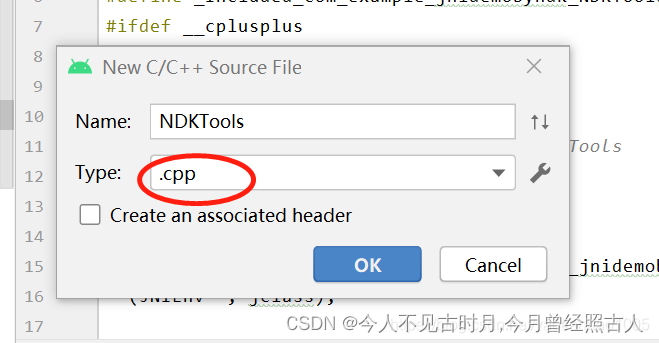
9. Create a new cpp file under jni: NDKTools.cpp (I don’t know why it always fails to compile when creating a c file. It prompts that it is not in utf-8 format, but it is obviously a utf-8 format file, so you must create a cpp file here. )
10. Add the following code to NDKTools.cpp
#include <string>
#include "com_example_jnidemobyndk_NDKTools.h"

JNIEXPORT jstring JNICALL
Java_com_example_jnidemobyndk_NDKTools_getStringFromNDK
  (JNIEnv *env, jclass){

    //std::string hello = "Hello from C++";
    //return env->NewStringUTF(hello.c_str());
     return env->NewStringUTF("Hellow World,这是隔壁老李头的NDK的第一行代码");
  }
11. Add a line of code to the TextView control in activity_main.xml
android:id="@+id/tv"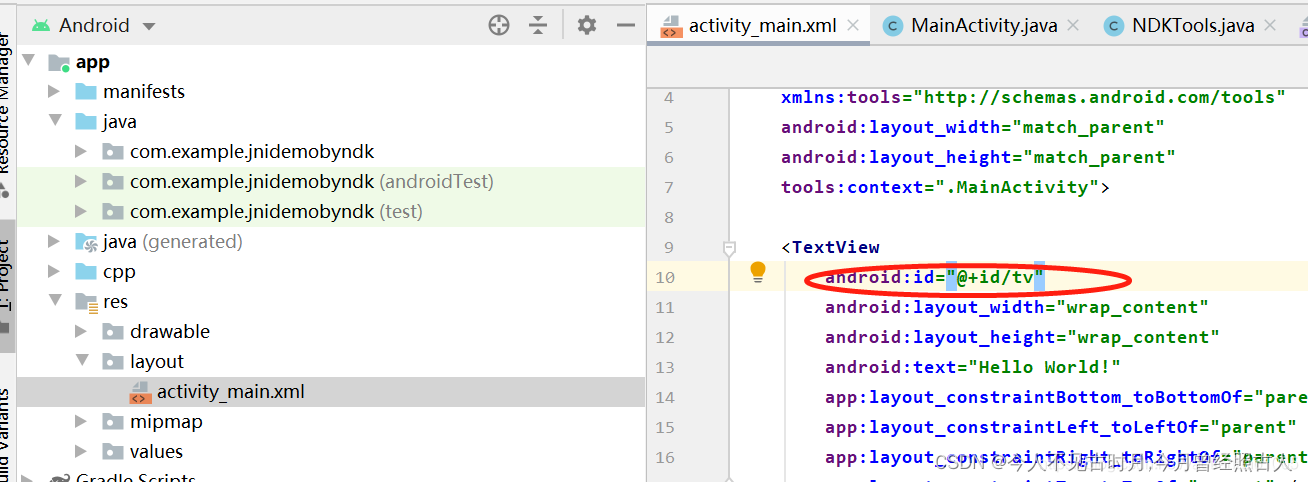
12. Add the following code to the MainActivity.java code:
String text = NDKTools.getStringFromNDK();
        Log.i("gebilaolitou","text="+text);
        ((TextView)findViewById(R.id.tv)).setText(text);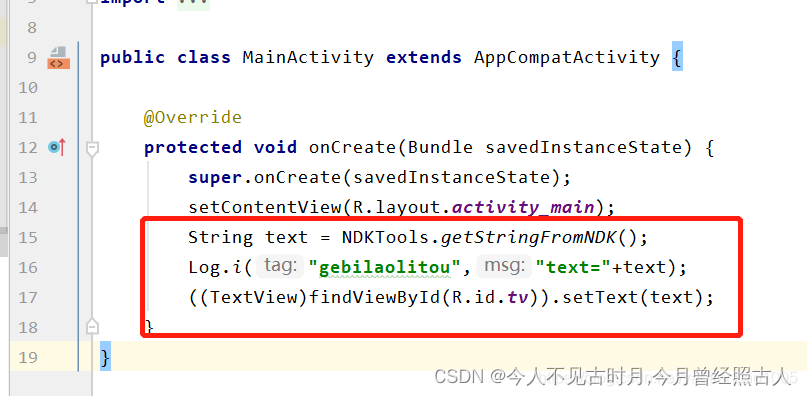
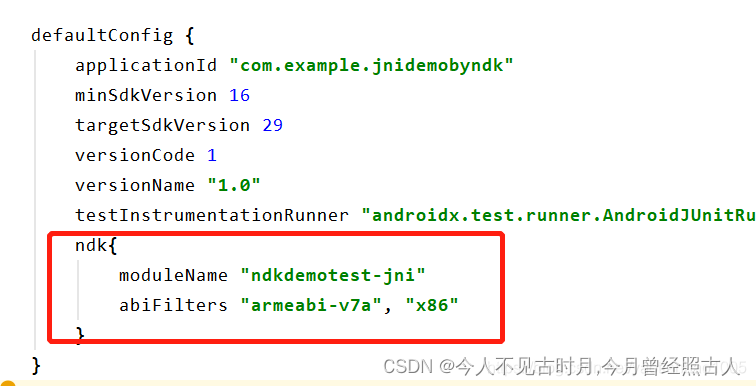
13. Add in build.gradle:
Under defaultConfig:
ndk{
      moduleName "ndkdemotest-jni"
      abiFilters "armeabi-v7a", "x86"
}
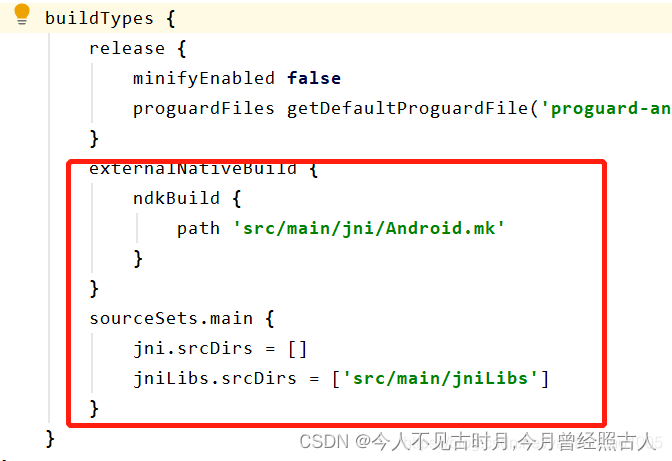
Under buildTypes:
externalNativeBuild {
            ndkBuild {
                path 'src/main/jni/Android.mk'
            }
        }
        sourceSets.main {
            jni.srcDirs = []
            jniLibs.srcDirs = ['src/main/jniLibs']
        }
14. Add the Android.mk file in the src/main/jni/ directory
LOCAL_PATH := $(call my-dir)

include $(CLEAR_VARS)

LOCAL_MODULE    := ndkdemotest-jni

LOCAL_SRC_FILES := NDKTools.cpp

include $(BUILD_SHARED_LIBRARY)
15. Add the following code to NDKTools.java
static {
        System.loadLibrary("ndkdemotest-jni");
    }
16. Start compiling and complete it in one go. so storage location
D:\AndroidTest\JniDemoByNDK\app\build\intermediates\merged_native_libs\debug\out\lib\armeabi-v7a
generally has several places.
————————————————
Reprinted at: https://blog.csdn.net/yaotianhao1005/article/details/106523049/