Preparation
- Raspberry Pi 4B
- Memory card formatting software, used to format memory cards. I don’t know why I don’t use the system’s built-in [right-click>Format] to format the memory card. Someone who knows will hopefully explain it. Commonly used formatting software SDFormatter . (Click here to download SDFormatter)
- Burning software, burn the system to the memory card. Commonly used software is Win32DiskImager . (Click here to download Win32DiskImager)
- Download the UbuntuServer system image Raspberry Pi 64-bit version. ( UbuntuServer download address )
- LAN scanning, because there is no screen and SSH connection must know the address, so when the Raspberry Pi is connected to wifi, it can scan the entire LAN to get the Raspberry Pi IP address. The software I use is LanSee.
- The SSH connection tool I use is the MobaXterm connection tool.
- Video reference
overall process
1. Download the UbuntuServer system image
2. Format the memory card
3. Burn the system
4. Modify the configuration file
5. Power on the Raspberry Pi and start the system
6. Scan the LAN to obtain the Raspberry Pi IP
7. Use ssh to connect to the system
1. Download UbuntuServer Raspberry Pi 64-bit version
- The Raspberry Pi has its own official image as well as third-party images. The one downloaded here is UbuntuServer (Ubuntu server version). This version does not have a desktop, and there is a black window after startup. If you want a desktop, you can download the desktop version. Newbies are recommended to download the Raspberry Pi official system image desktop version. I tried the ubuntu desktop version and required settings to start the desktop after burning. The official image does not require any settings. After the burning is completed, it is directly inserted into the Raspberry Pi and directly connected to the display screen to display the desktop.
The picture below shows the download page

- Clicking green will jump to a new page and the download box will pop up. If the download box does not pop up, check whether the browser blocks it. Sometimes the download box pops up slowly.
2. Format the memory card
- You can check the choice of memory card yourself. I also forgot the parameters of the memory card I bought. The memory card is 64G.
The picture below is the formatting software directory
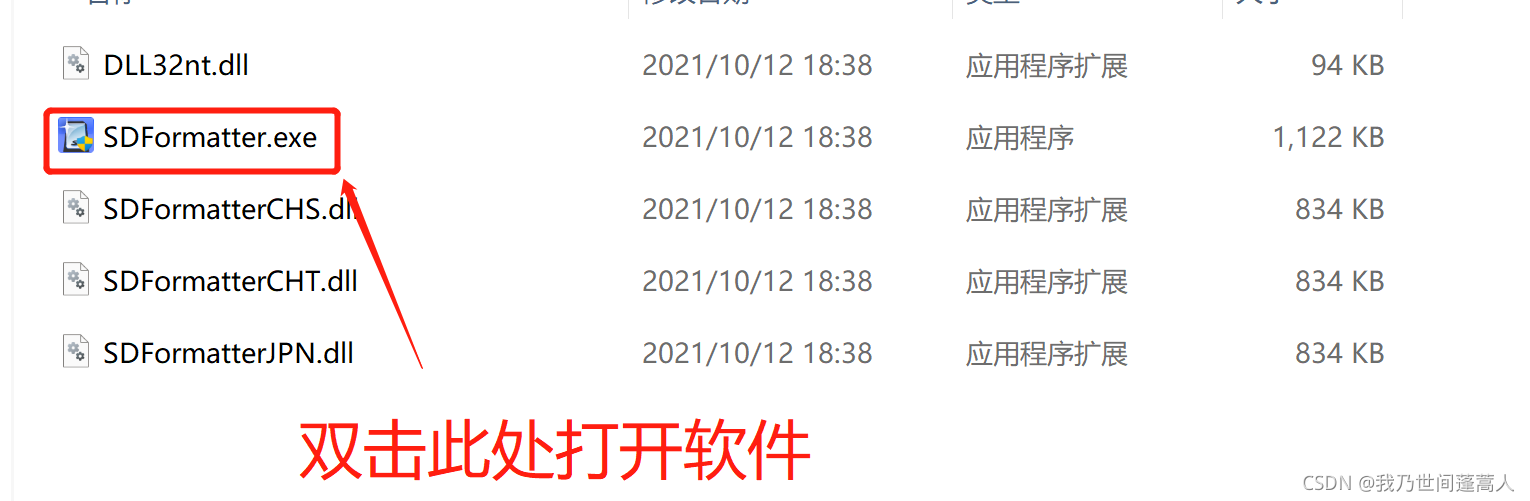
The software interface is as shown below
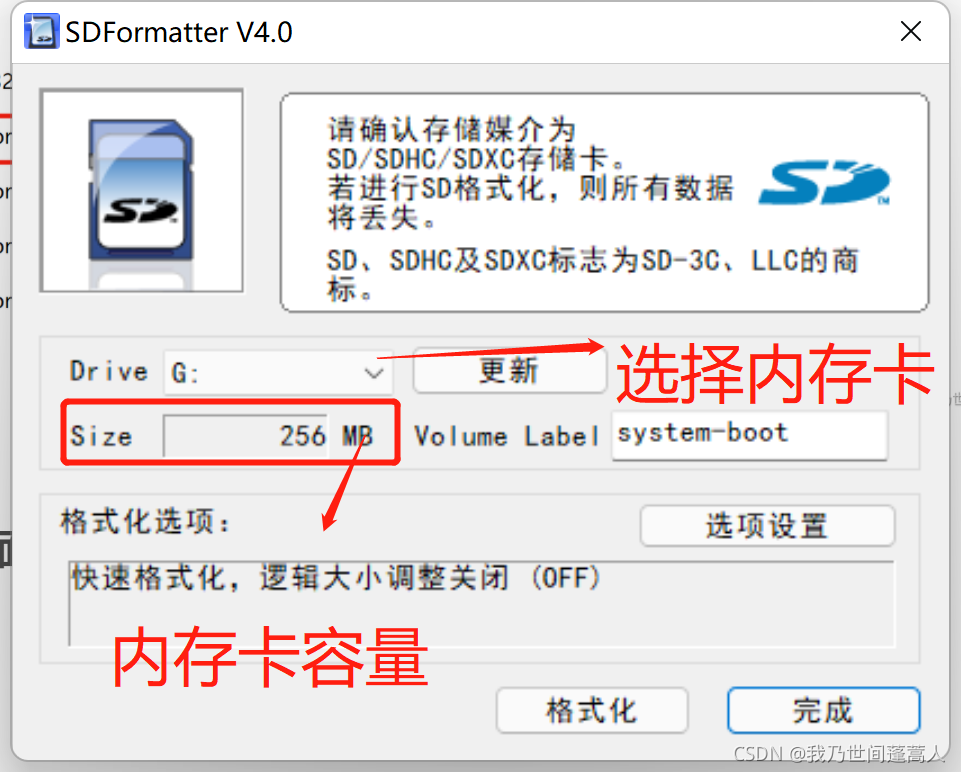
There is no need to change any parameters, just click format.
- Select the disk ID corresponding to the memory card behind Drive. This software will not recognize the disk ID of the computer hard disk! ! ! If there is no option, you can click "Update" to refresh it. If it is not there yet, the memory card has not been read.
- My memory card is 64G and 256MB is shown here because I have burned the system into the memory card. If the system has not been burned into the memory card, it should be more than 57,000 MB. Not all 64G memory cards are more than 5,700, and the real capacity must be less than 64G. , but it’s not certain how much less.
- After the system is burned, the memory card capacity becomes 256.
Formatting
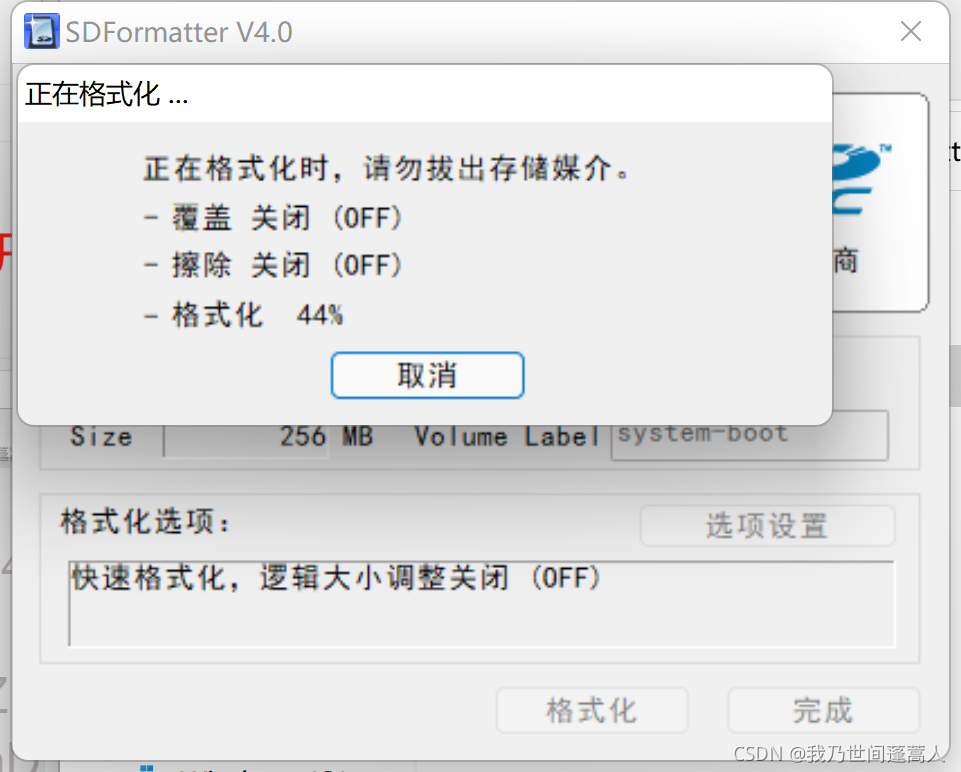
Formatting completed
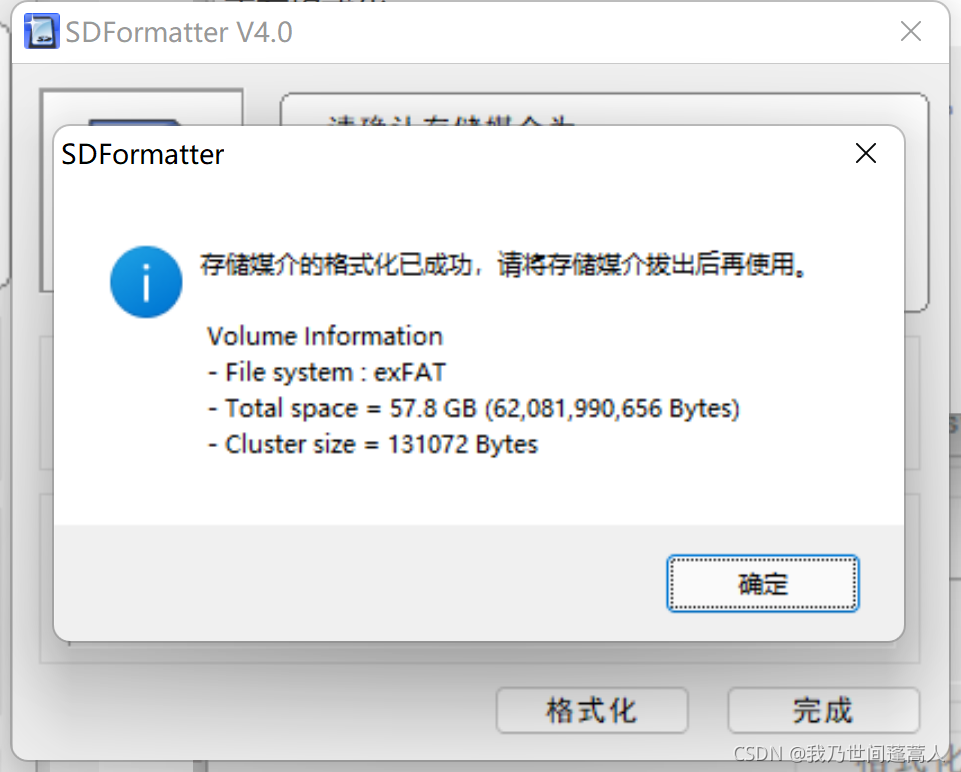
- After formatting, the memory card is empty.
3. Burning system
Software display after downloading

- Double click to open
Downloaded ubuntuServer system image display

- It needs to be decompressed after downloading, and undecompressed files cannot be used.
Win32DiskImager uses
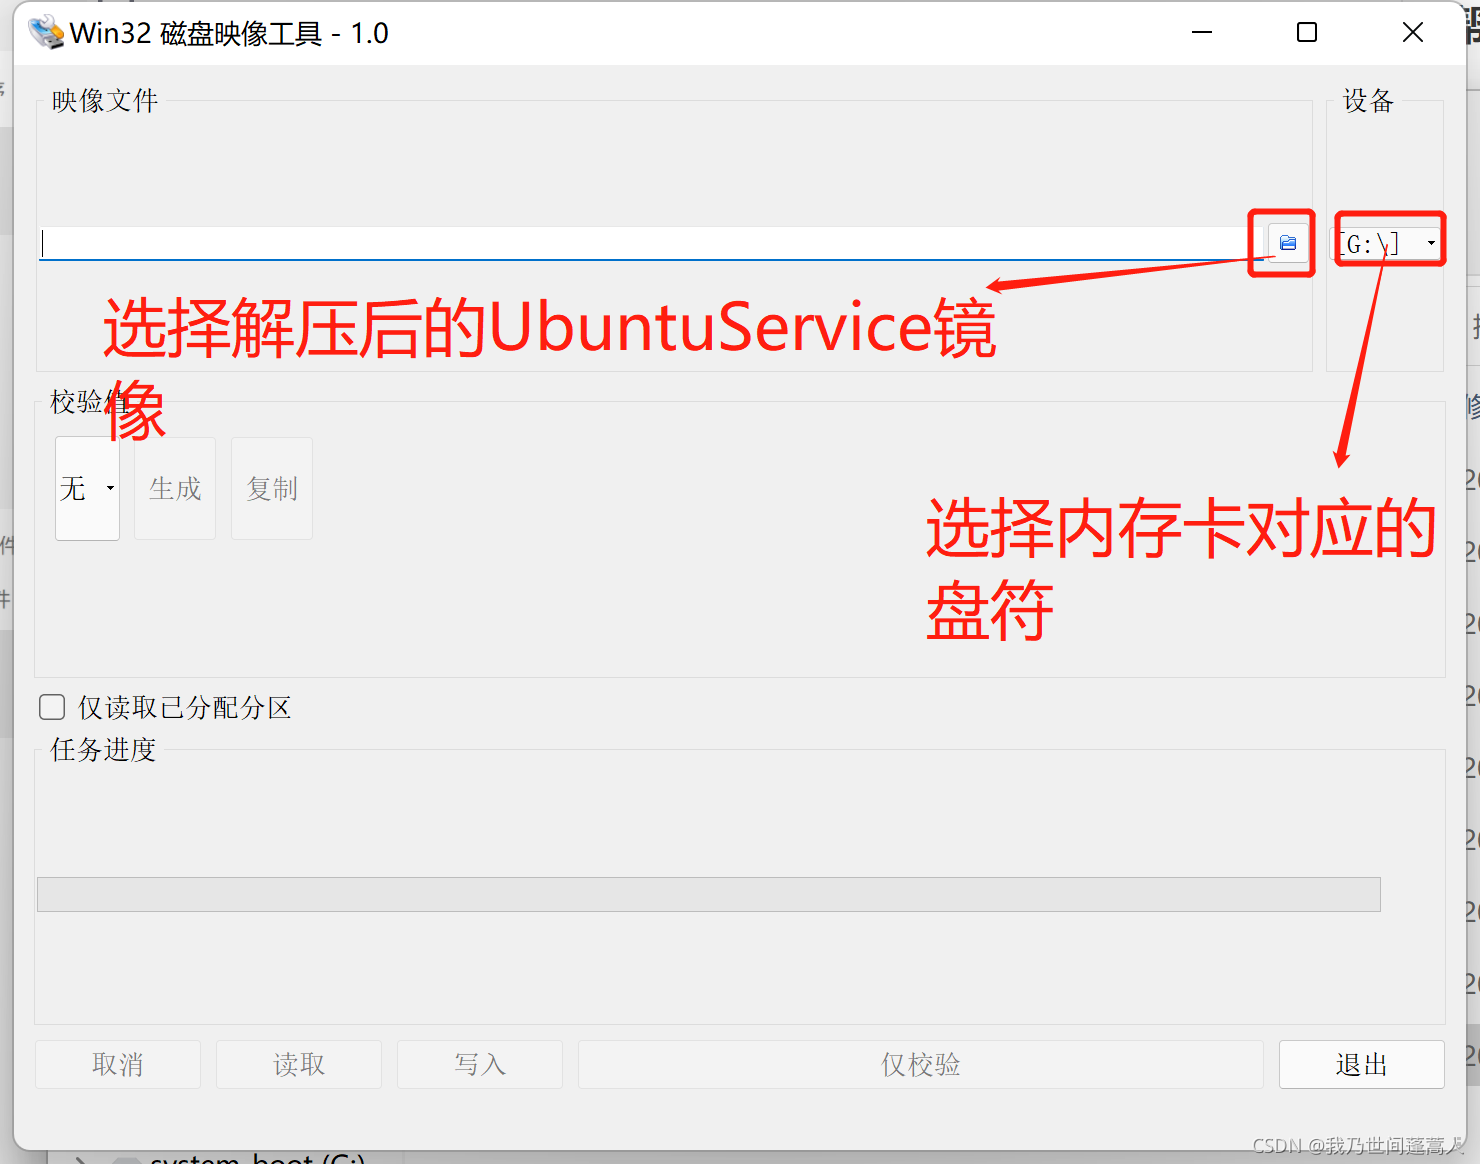
After selecting the image, "Write" below the software will light up.

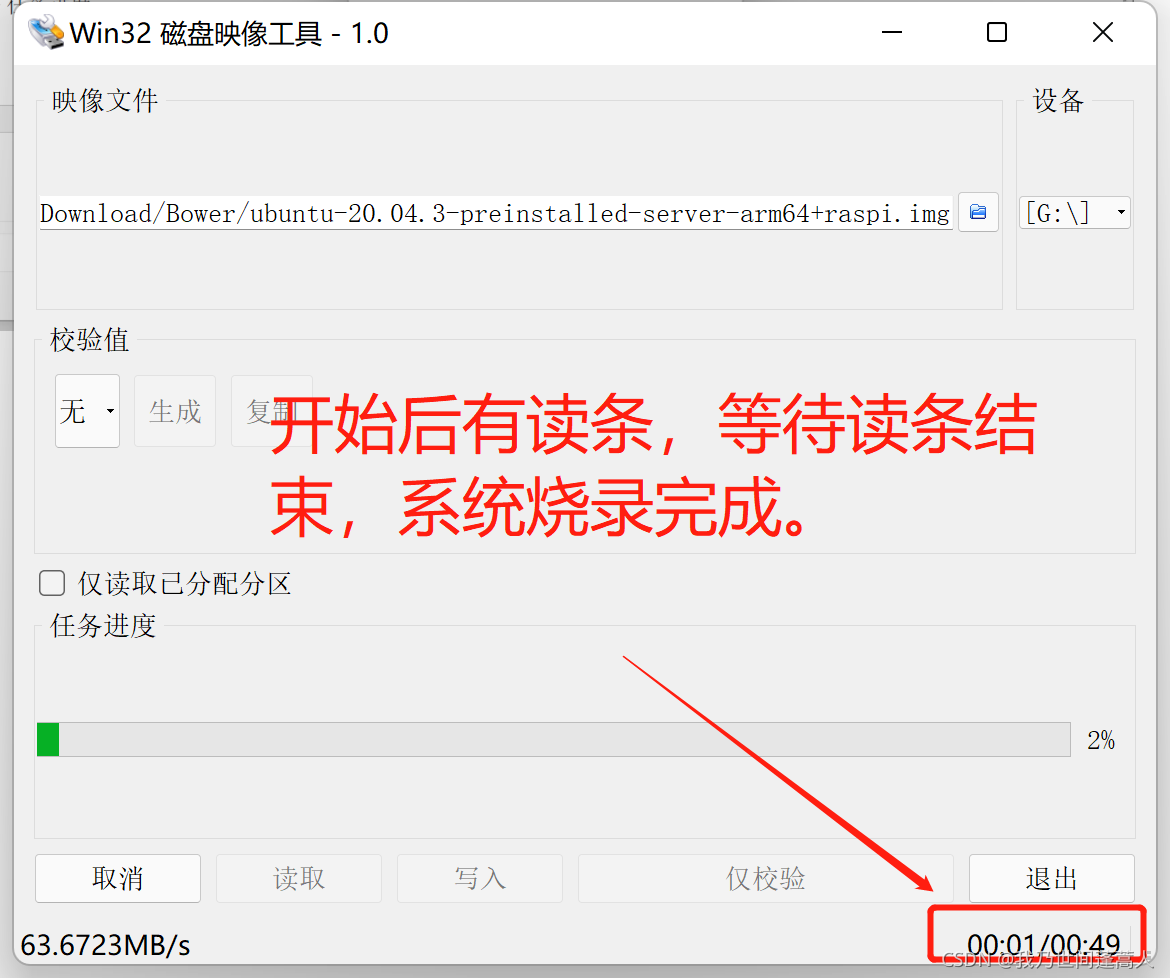
What it looks like during burning
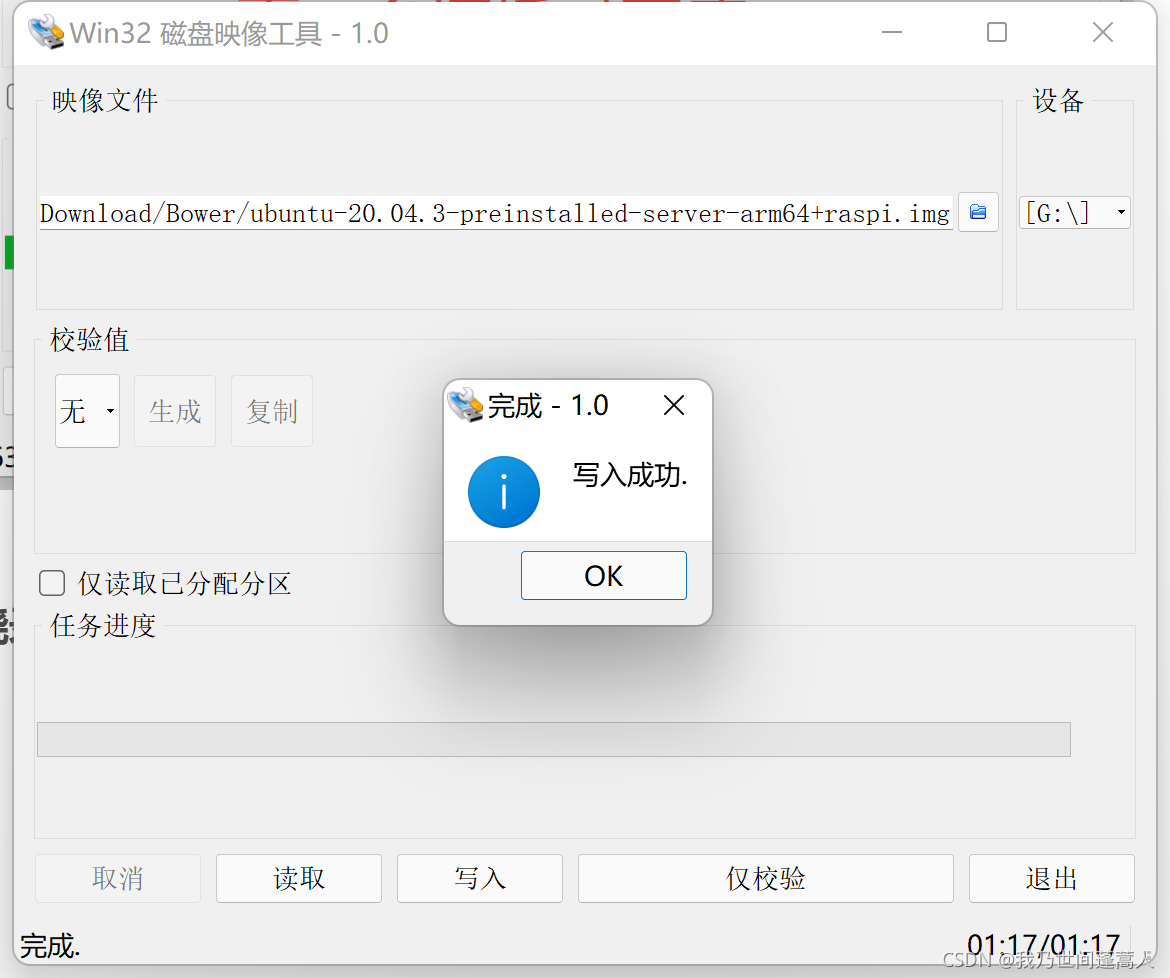
Burning completed
Memory card status after burning is completed
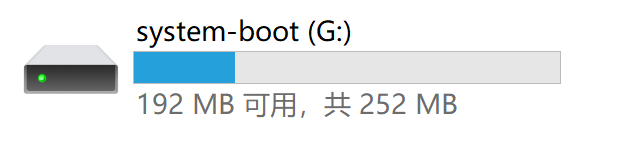
- It is normal for the memory card capacity to change.
- Problems may occur during burning. For any problems that arise, you can seek help from Baidu. I had no problems.
4. Modify configuration
- There is no screen, so you need to configure something so that you can connect to the Raspberry Pi through ssh after starting the system.
configure wifi
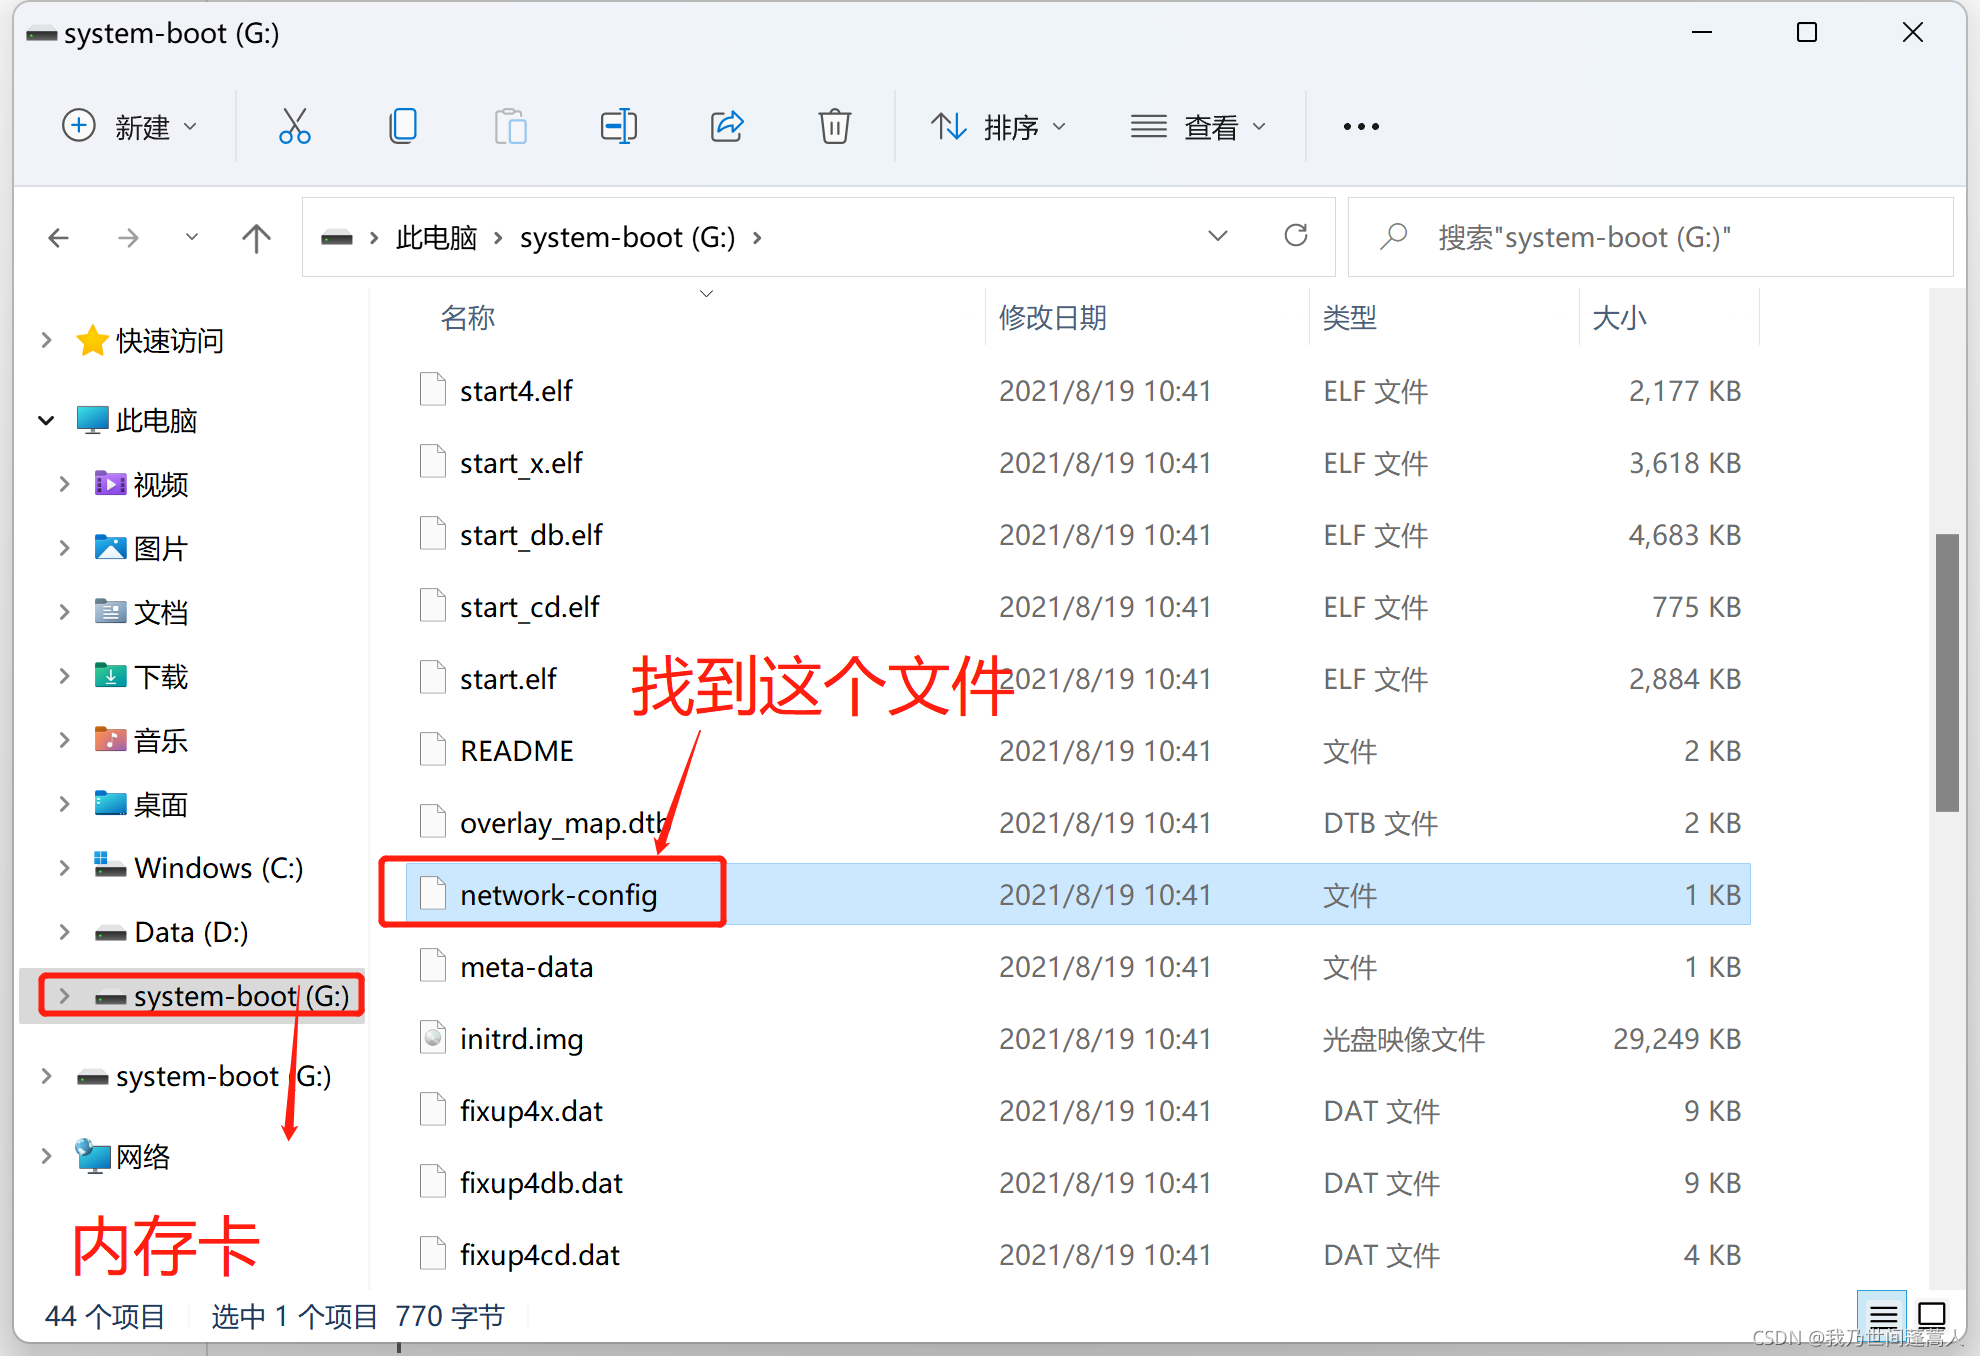
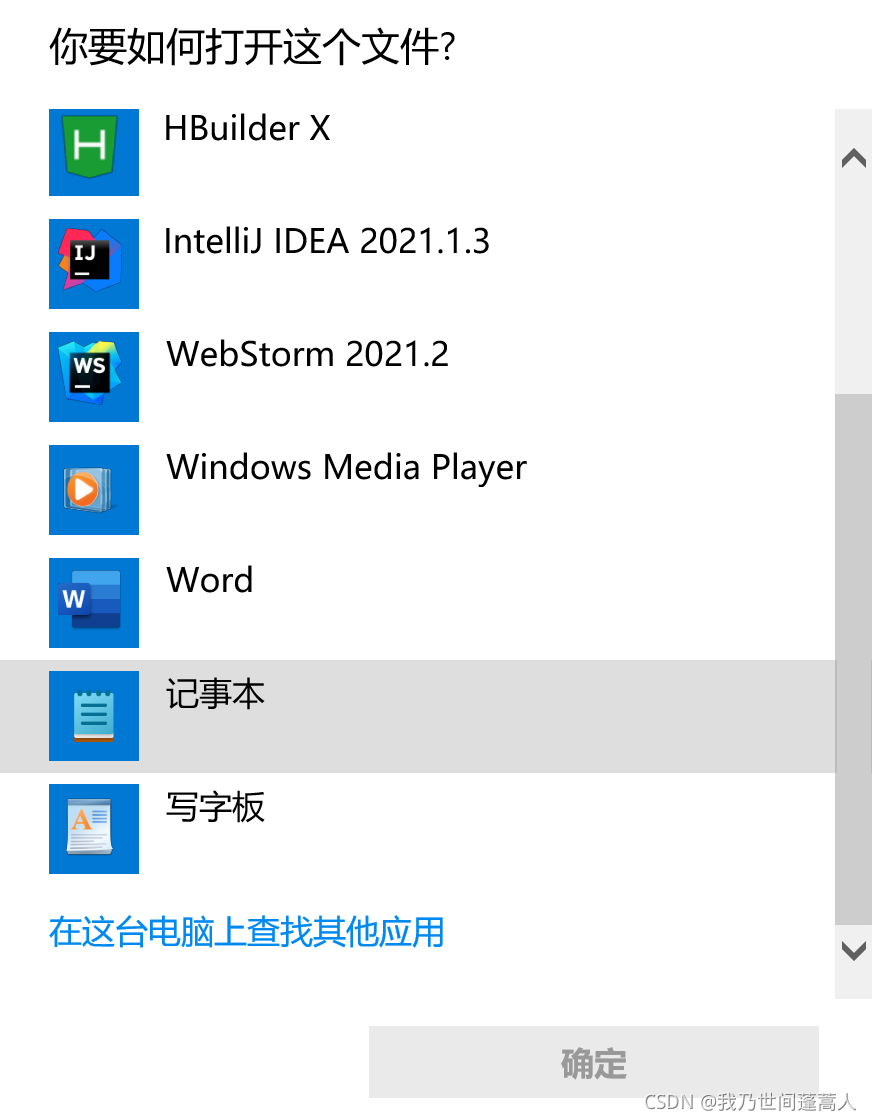
- Find network-config, right-click and find "Open with", select Notepad in Open with, Notepad should be available. As shown below
- After opening it, modify the wifi as shown in the picture below
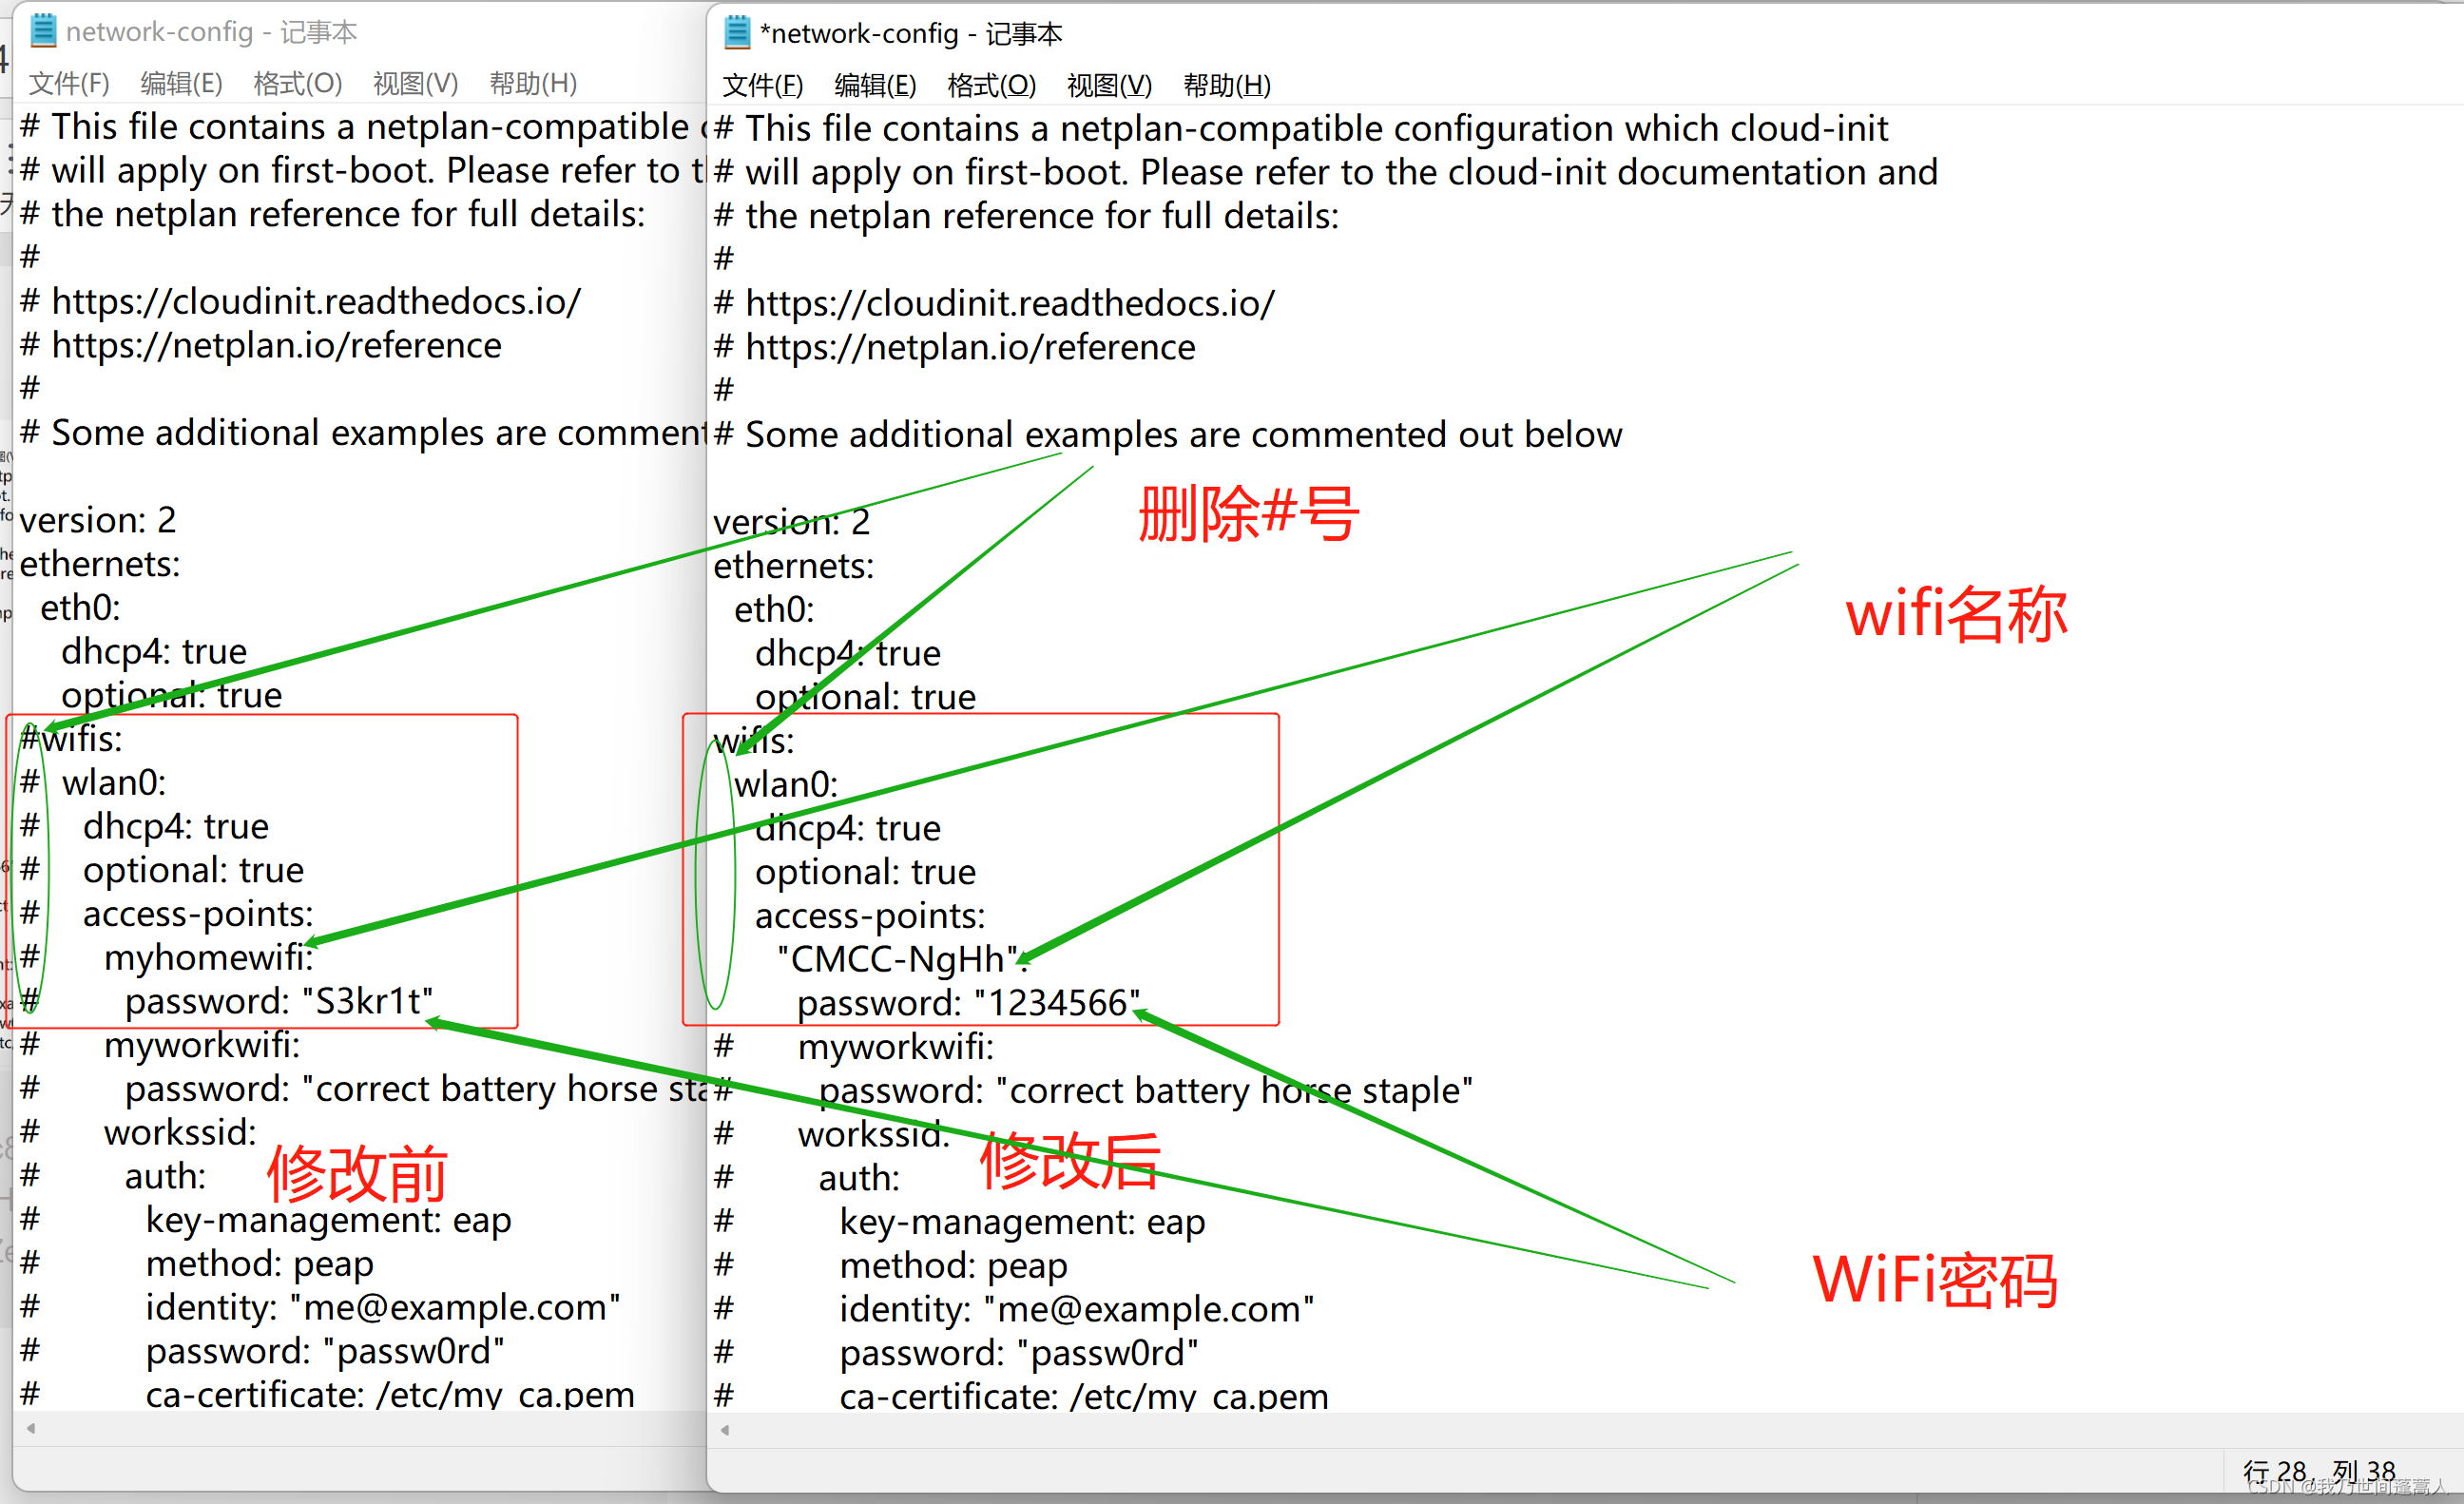
- Note that compared to the picture above, if the wifi name is in Chinese, I don’t know if the connection can be successful.
- The wifi name needs to be wrapped with " ". Note that the double quotes are in English. Chinese and English double quotation marks are different, Chinese " ", English " "
- The password should also be wrapped with " ". The original document is "S3kr1t" and change S3kr1t to your own wifi password.
5. Power on the Raspberry Pi
- It is recommended to scan the LAN IP before powering on, so that you can easily determine which IP the Raspberry Pi has.
- Use the "eject" method on your computer to eject the memory card. Directly removing the memory card may damage the files on the memory card. It is recommended to remove it gracefully.
- Plug in the Raspberry Pi and power it up.
6. Scan the LAN to obtain the Raspberry Pi IP
- Note here that LanSee can only scan one IP segment, that is, the WiFi connected to the Raspberry Pi and the WiFi connected to the laptop must be the same.
Before the Raspberry Pi was powered on, I scanned the LAN IP and found 4.
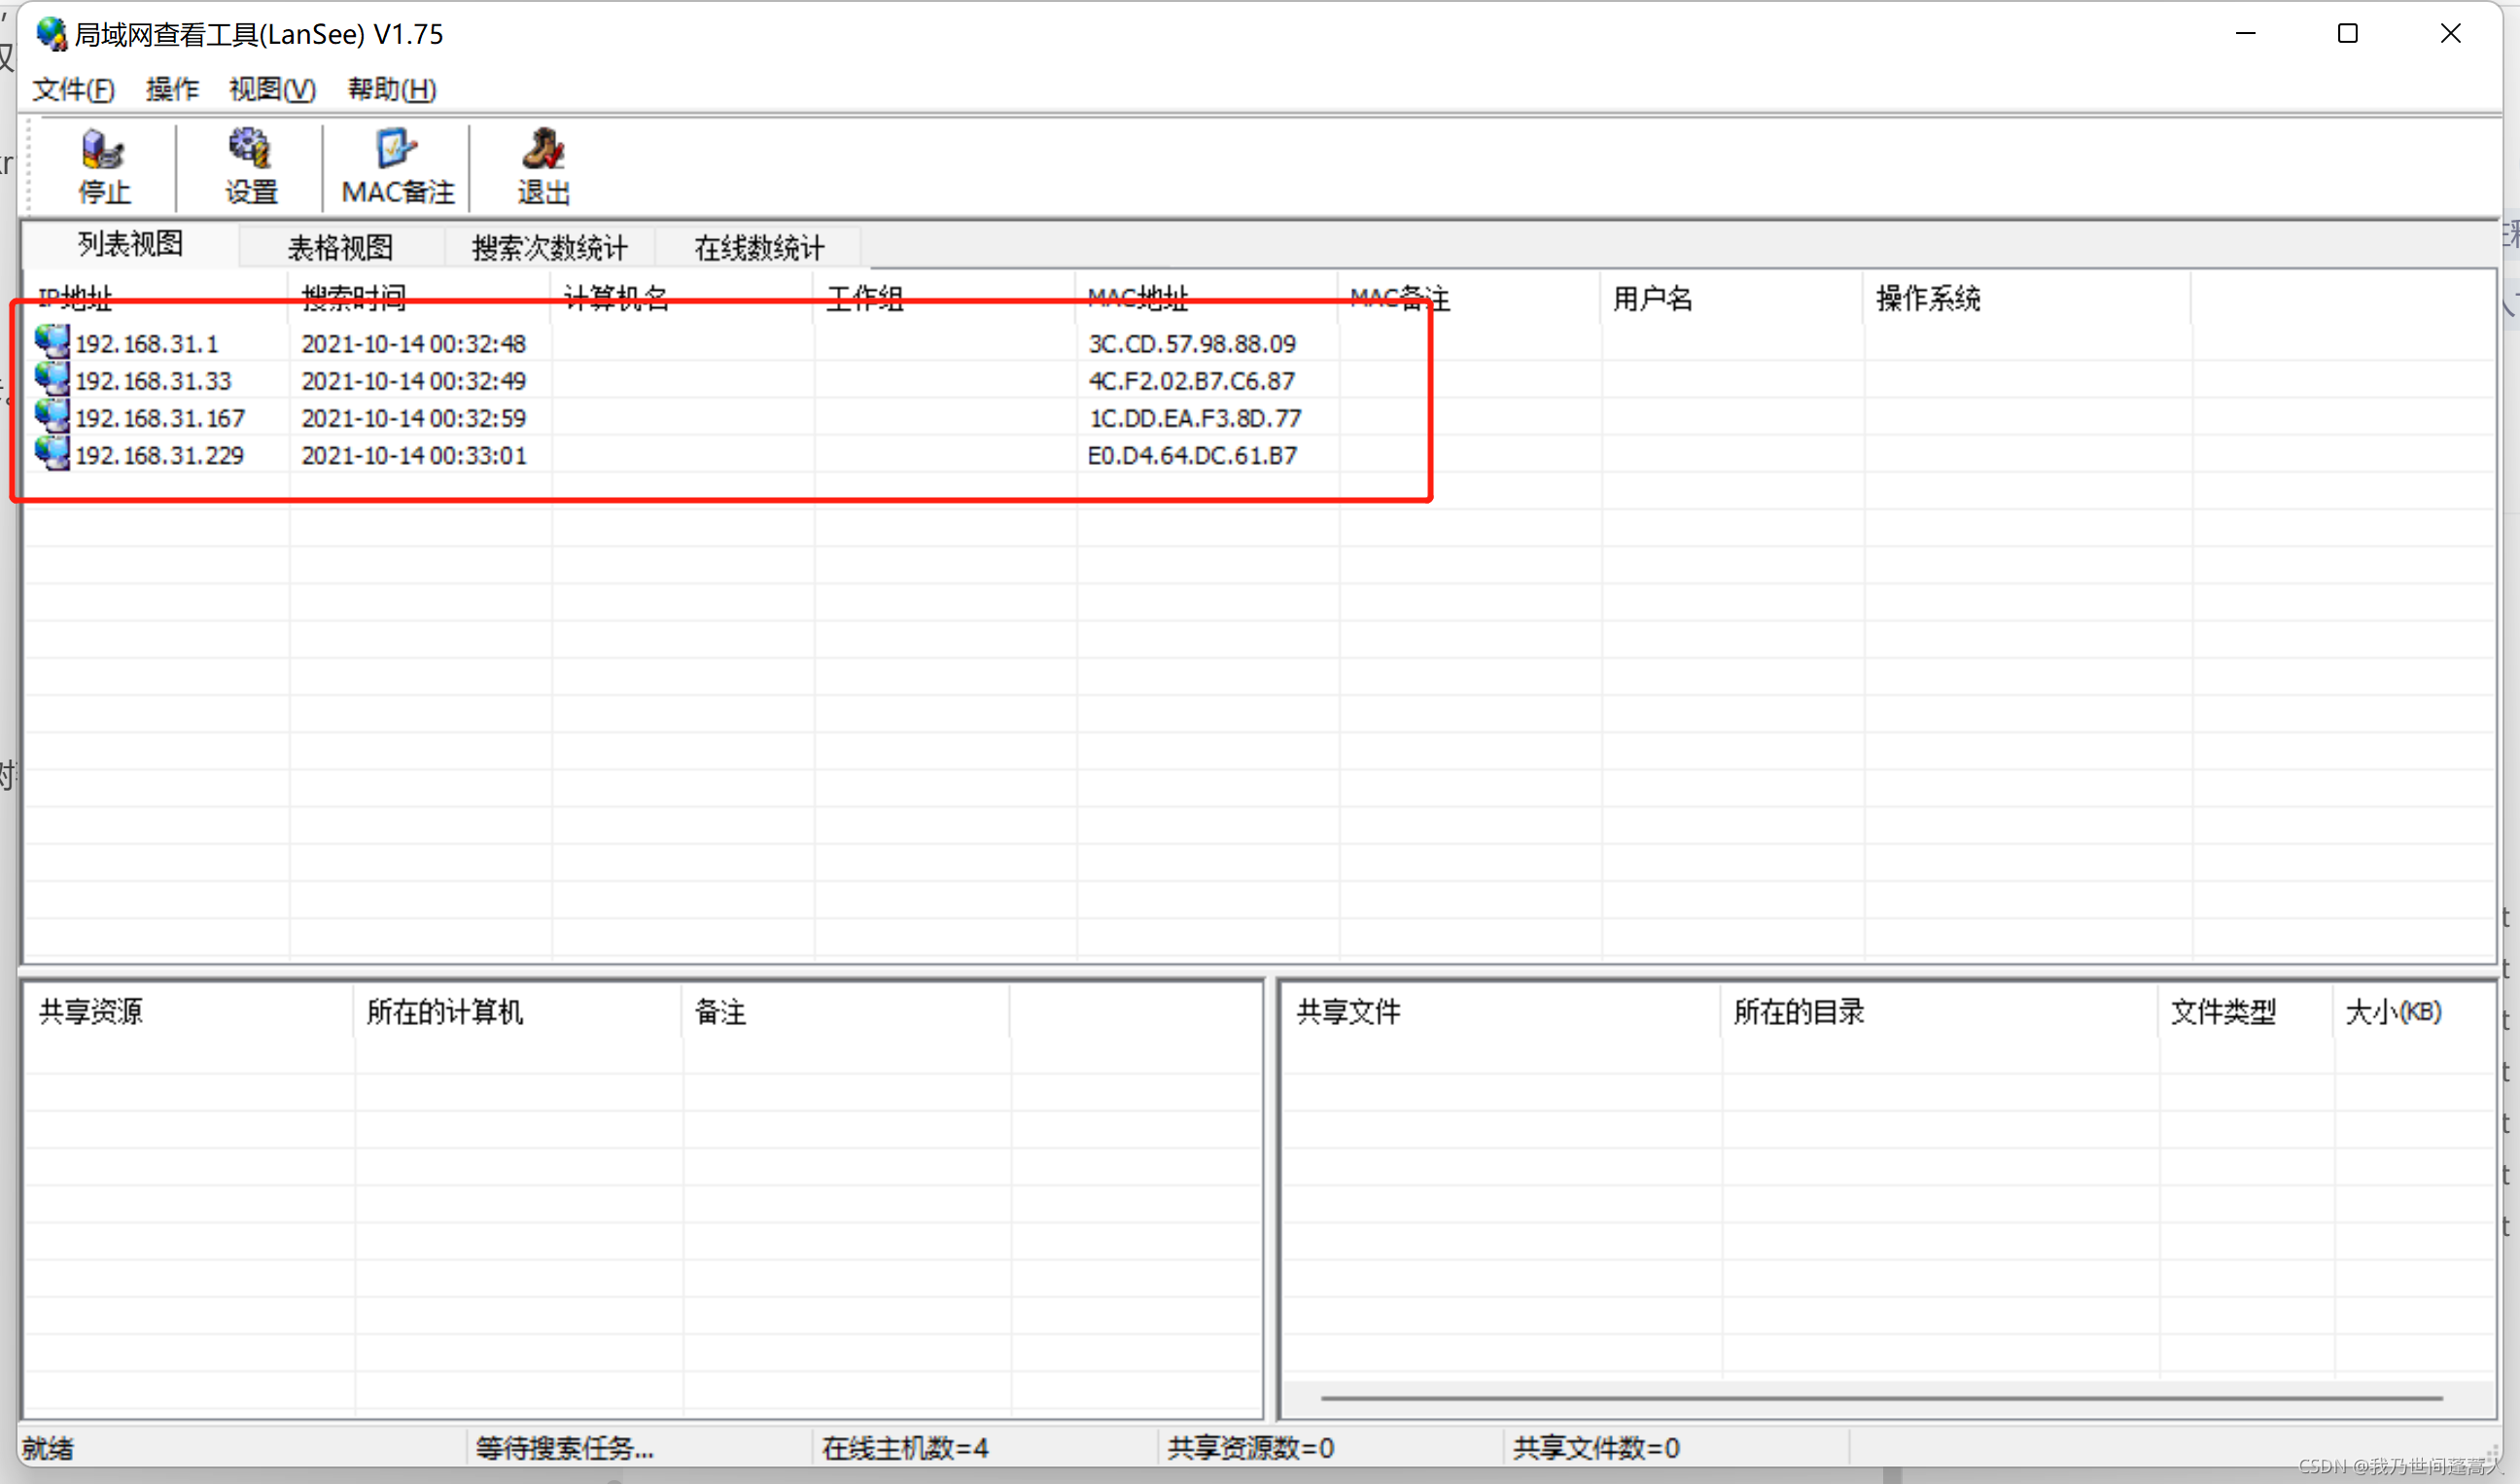
After the Raspberry Pi is powered on, the scan results are as shown below
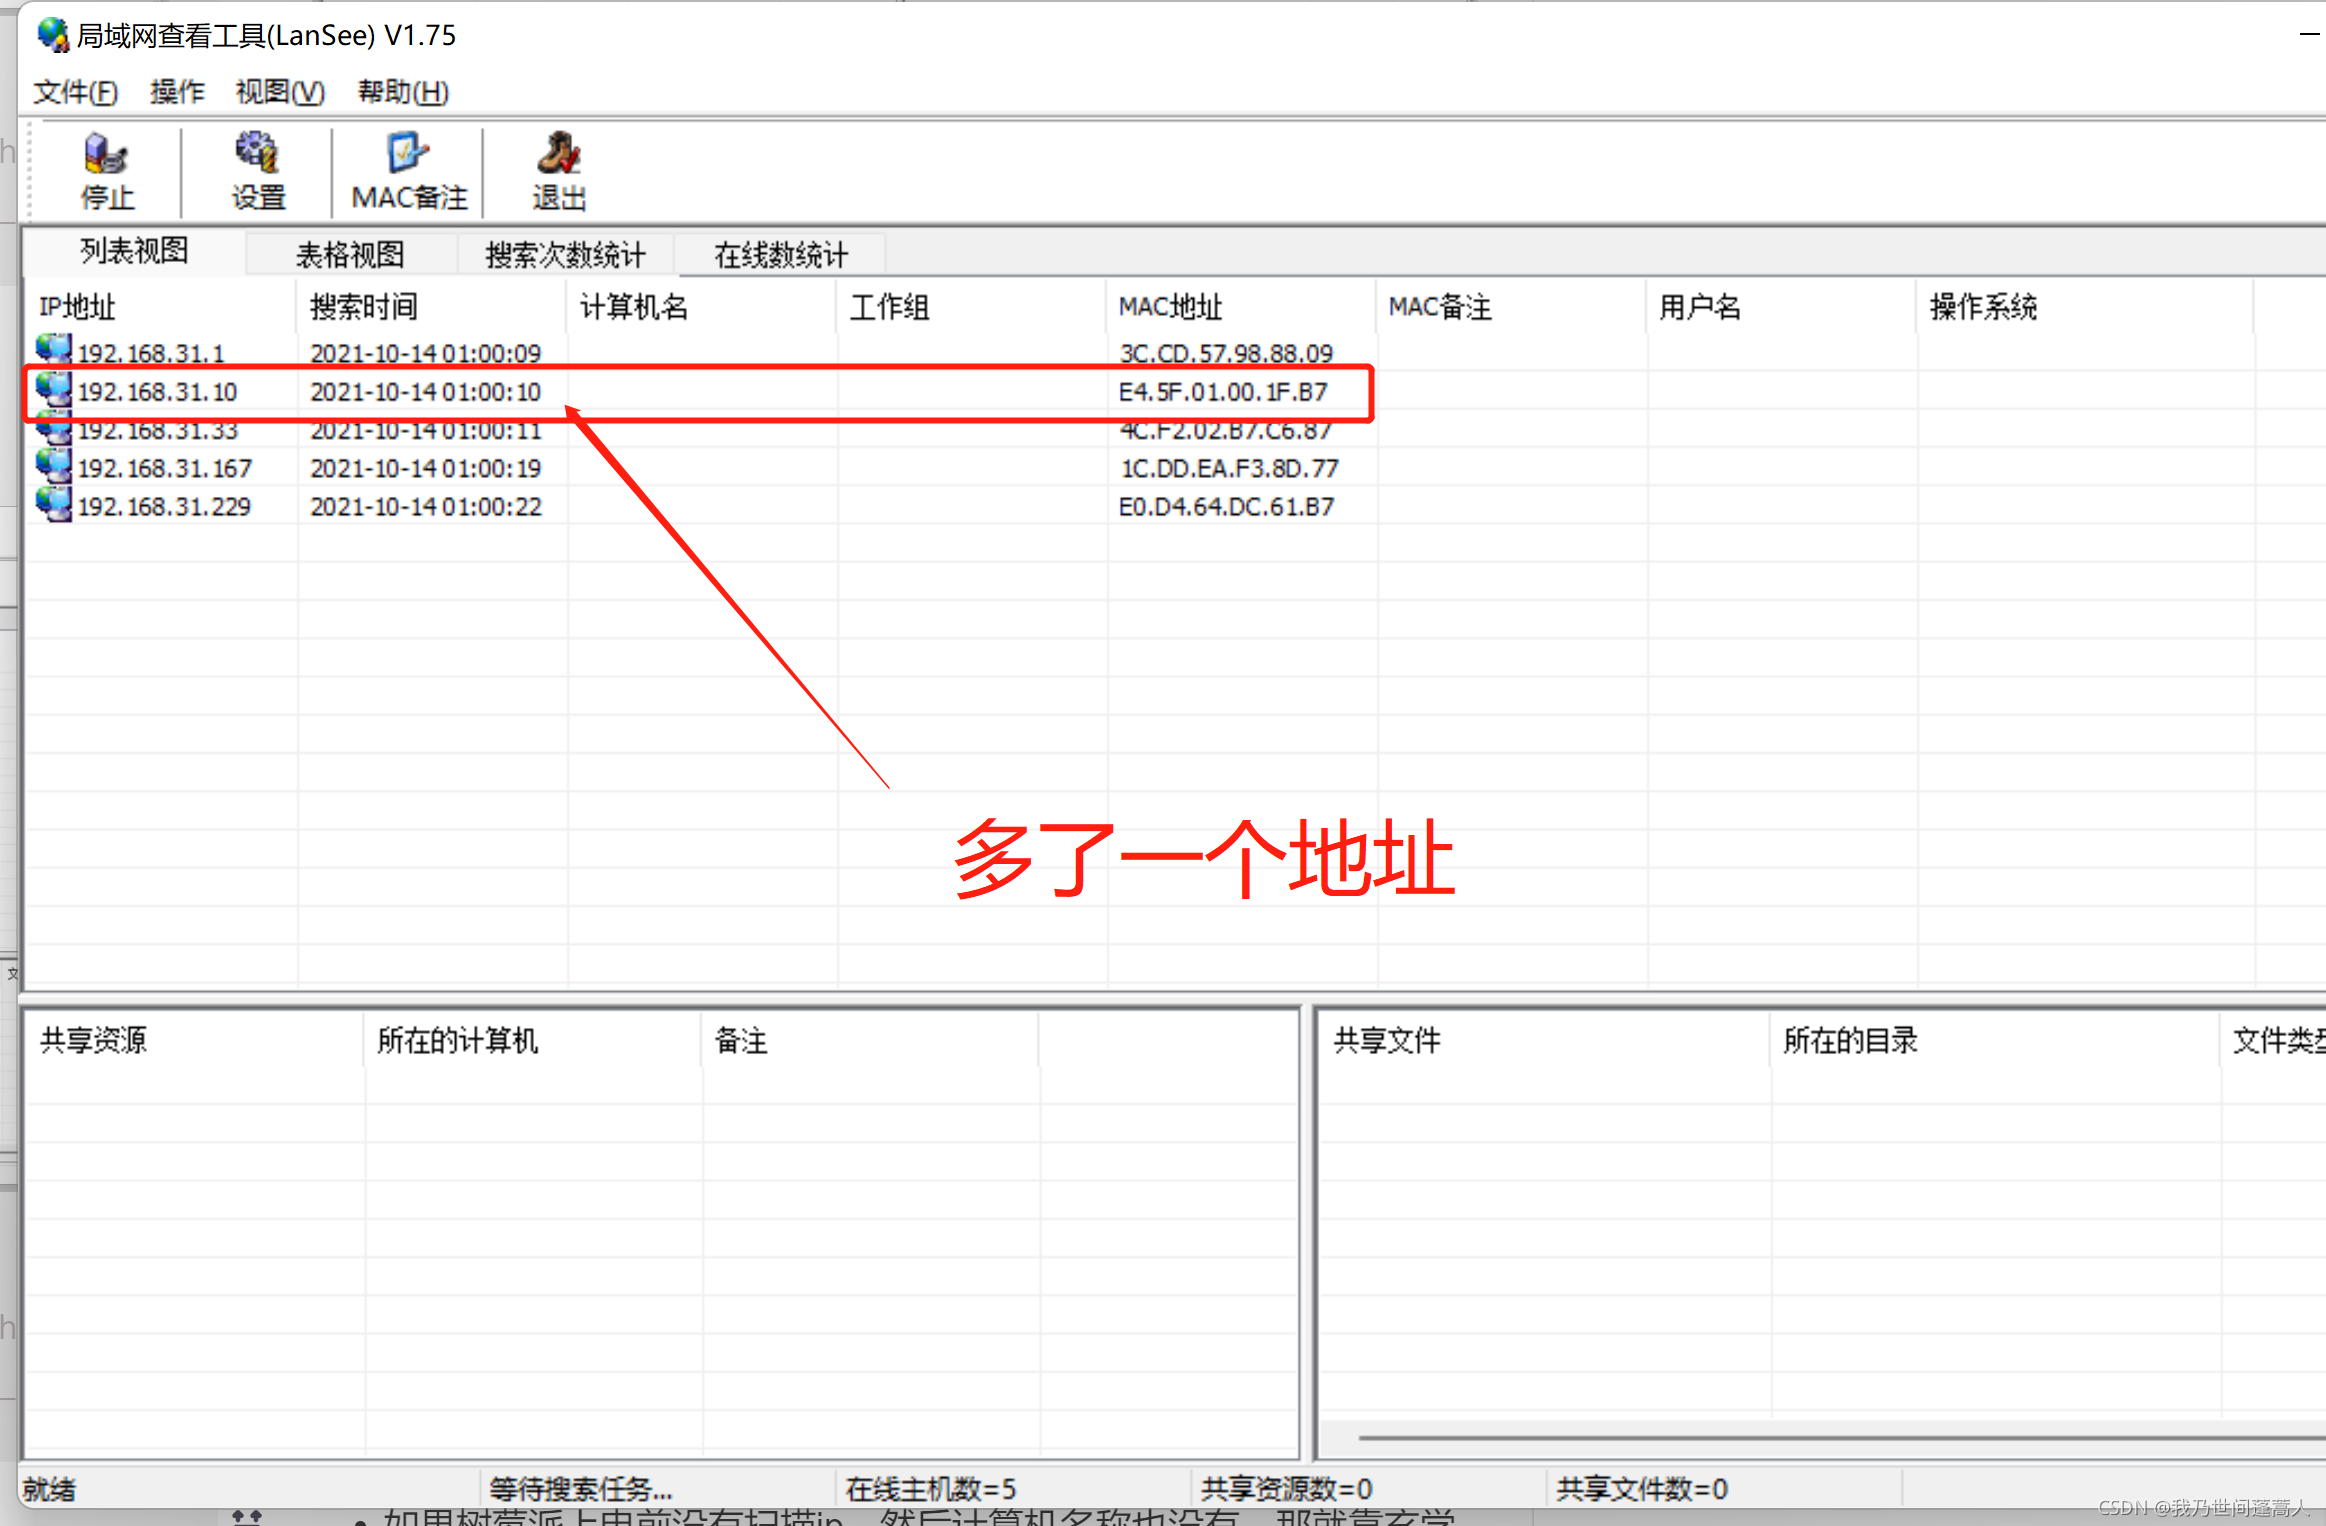
- After powering on, wait 7 to 10 minutes before scanning. I kept scanning and it took 7 minutes after powering on to scan a new IP. The waiting time is quite long.
- I don’t know why the computer name is not there. If there was, the Raspberry Pi would be something like “Raspberry Pi”.
- If the Raspberry Pi did not scan the IP address before powering on, and the computer name is not available, then rely on metaphysics to connect, and try to connect to the IP address you like.
- There is also a way that does not require scanning. You can log in to the router's background to check the connected devices on your own WiFi. In this way, you can also find the Raspberry Pi IP address.
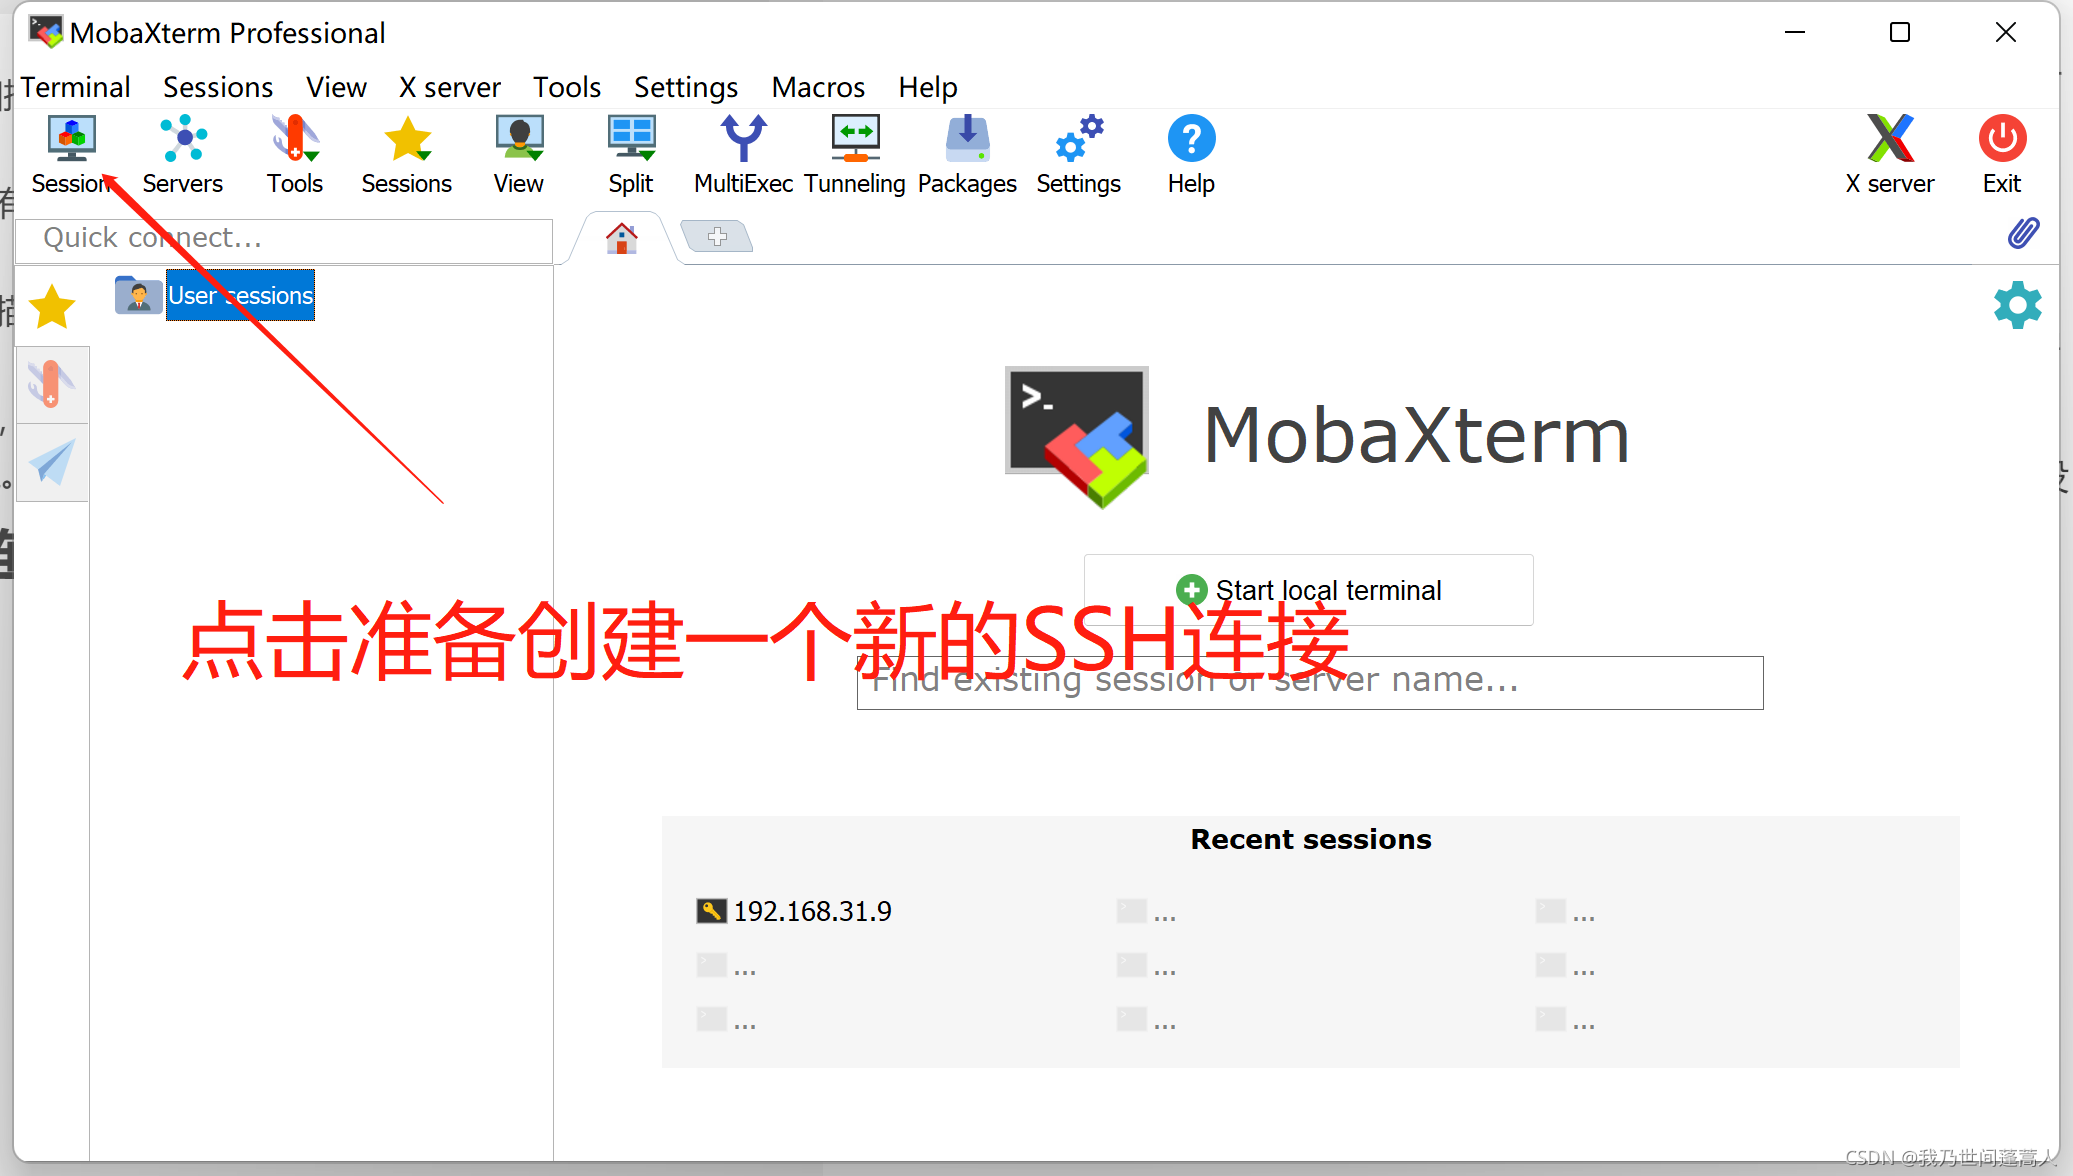
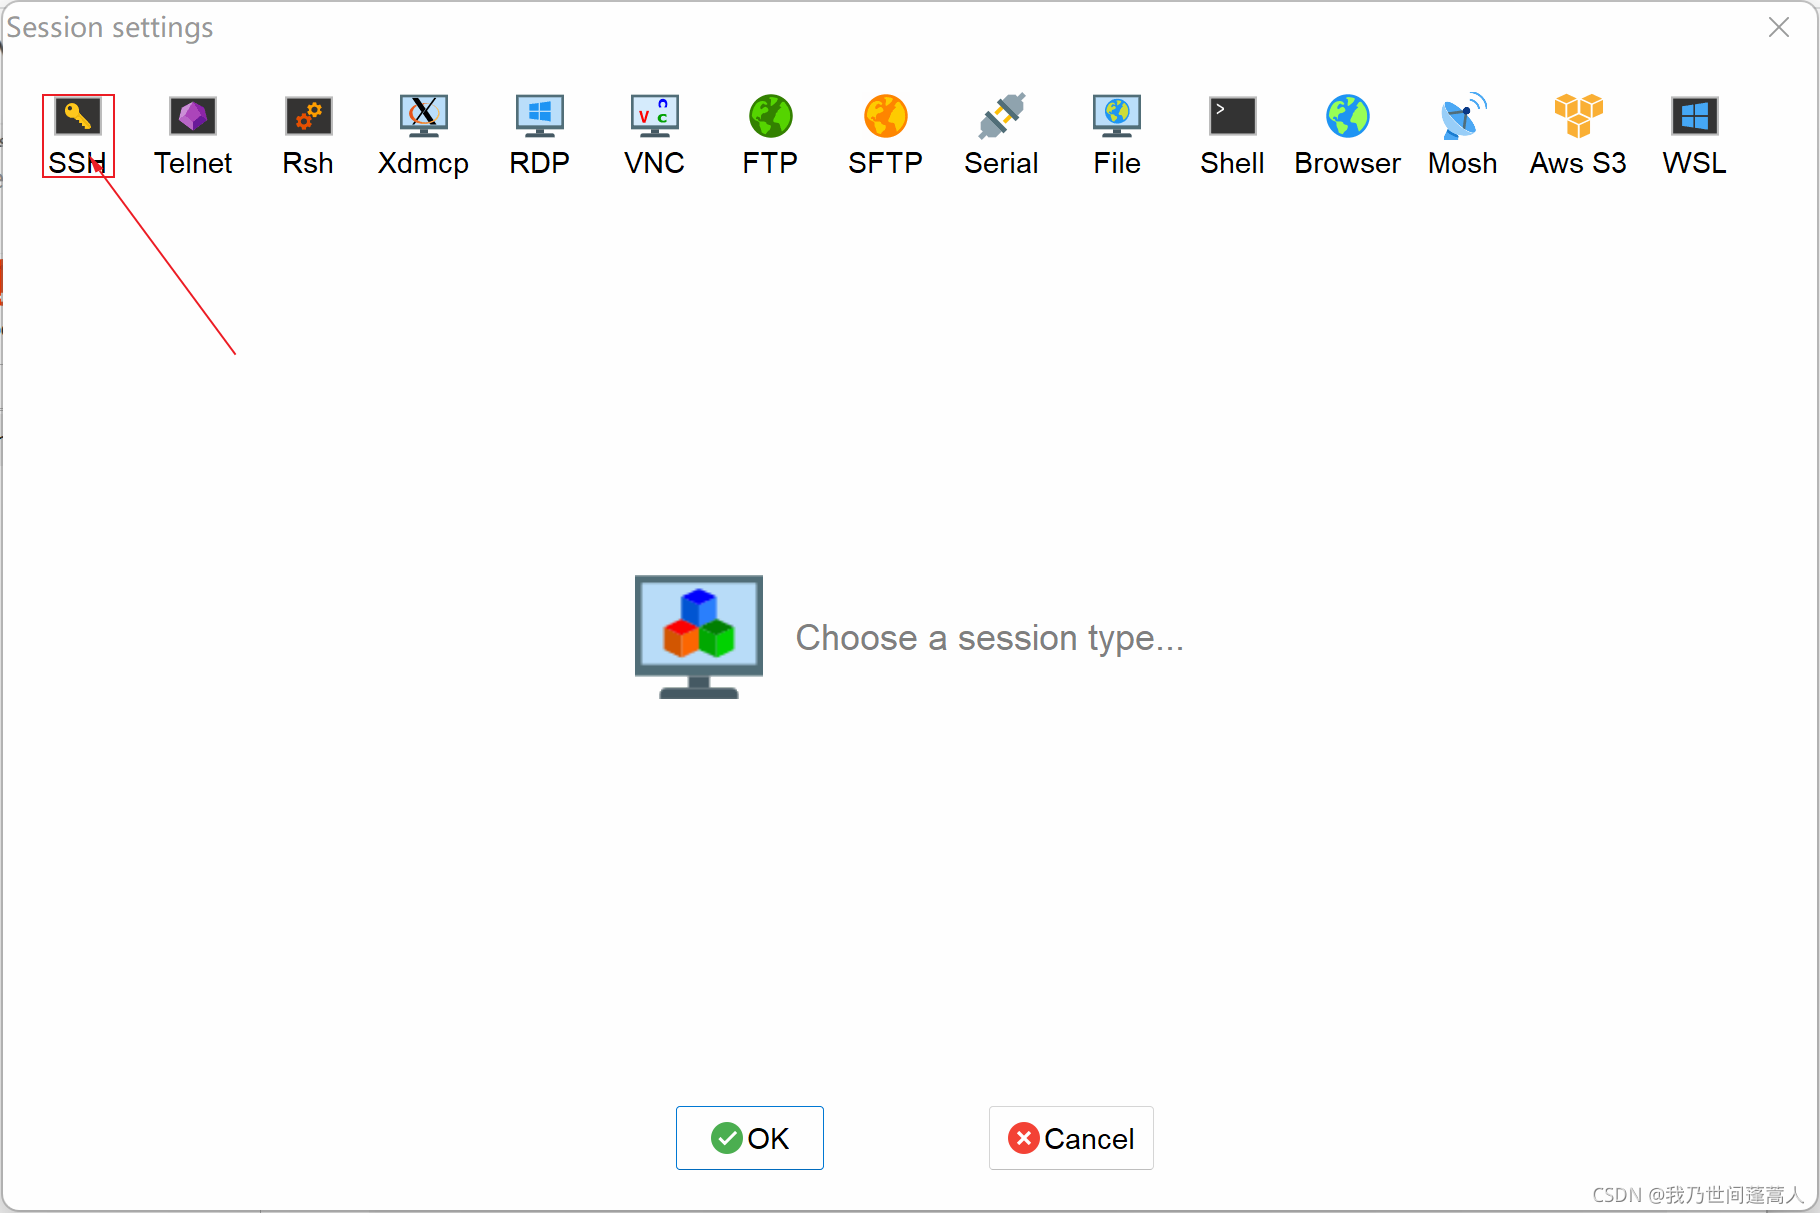
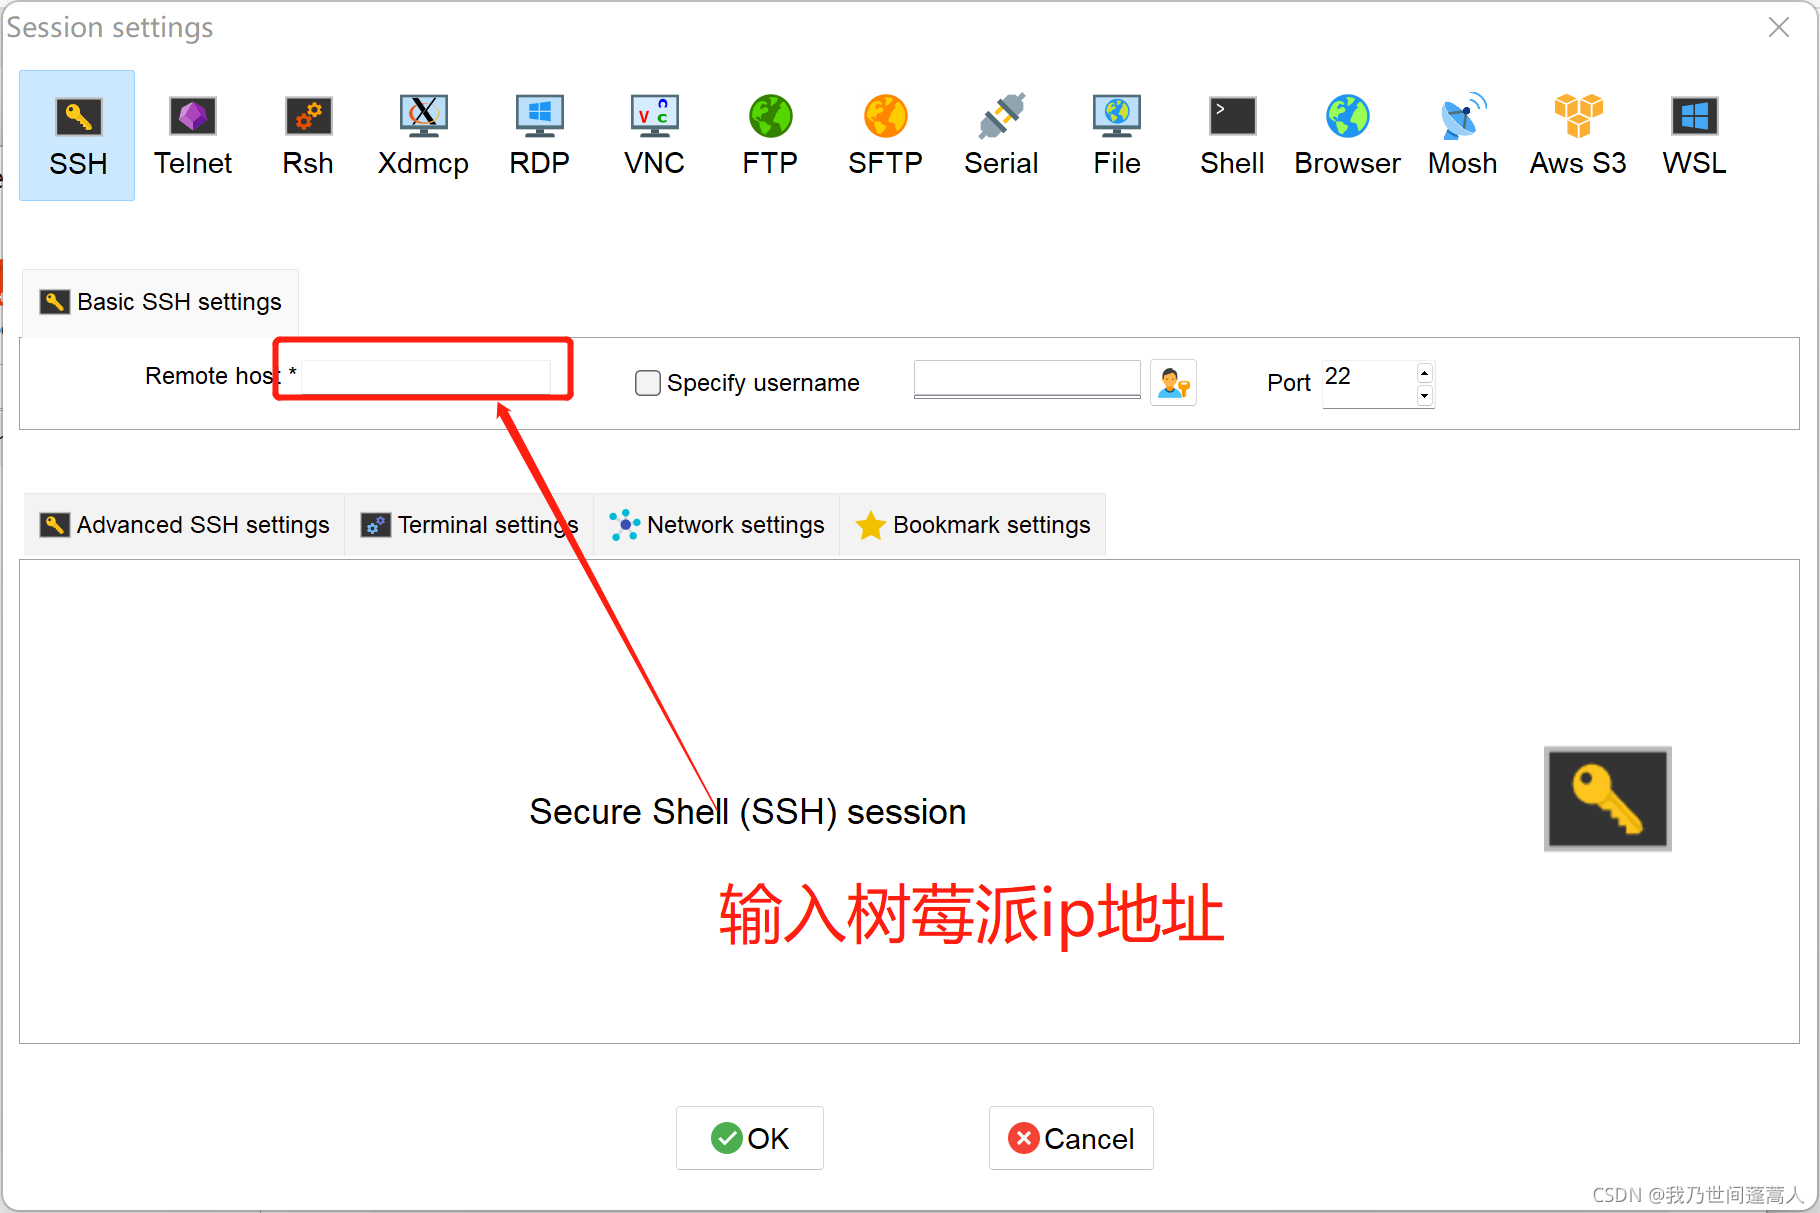
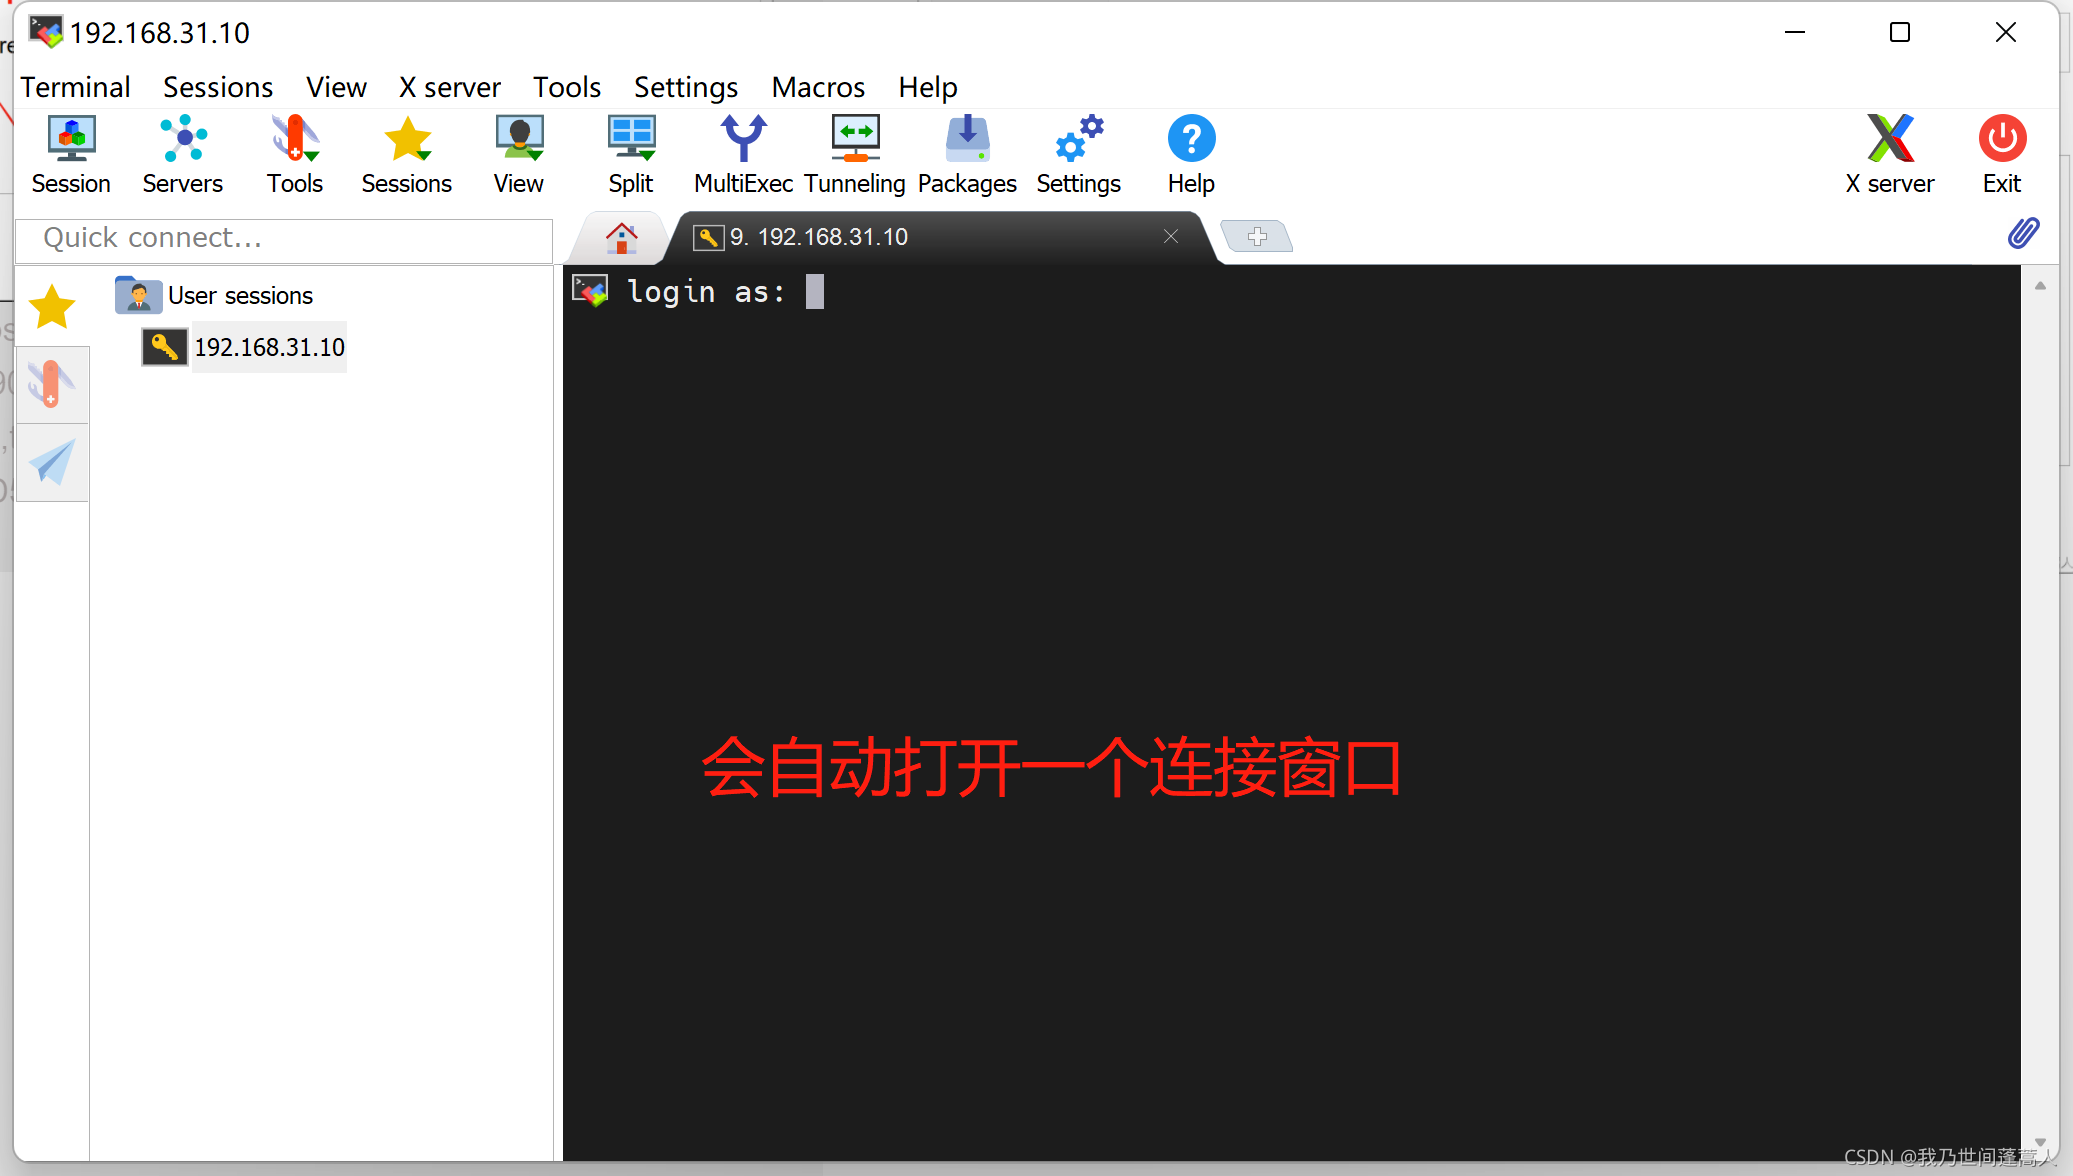
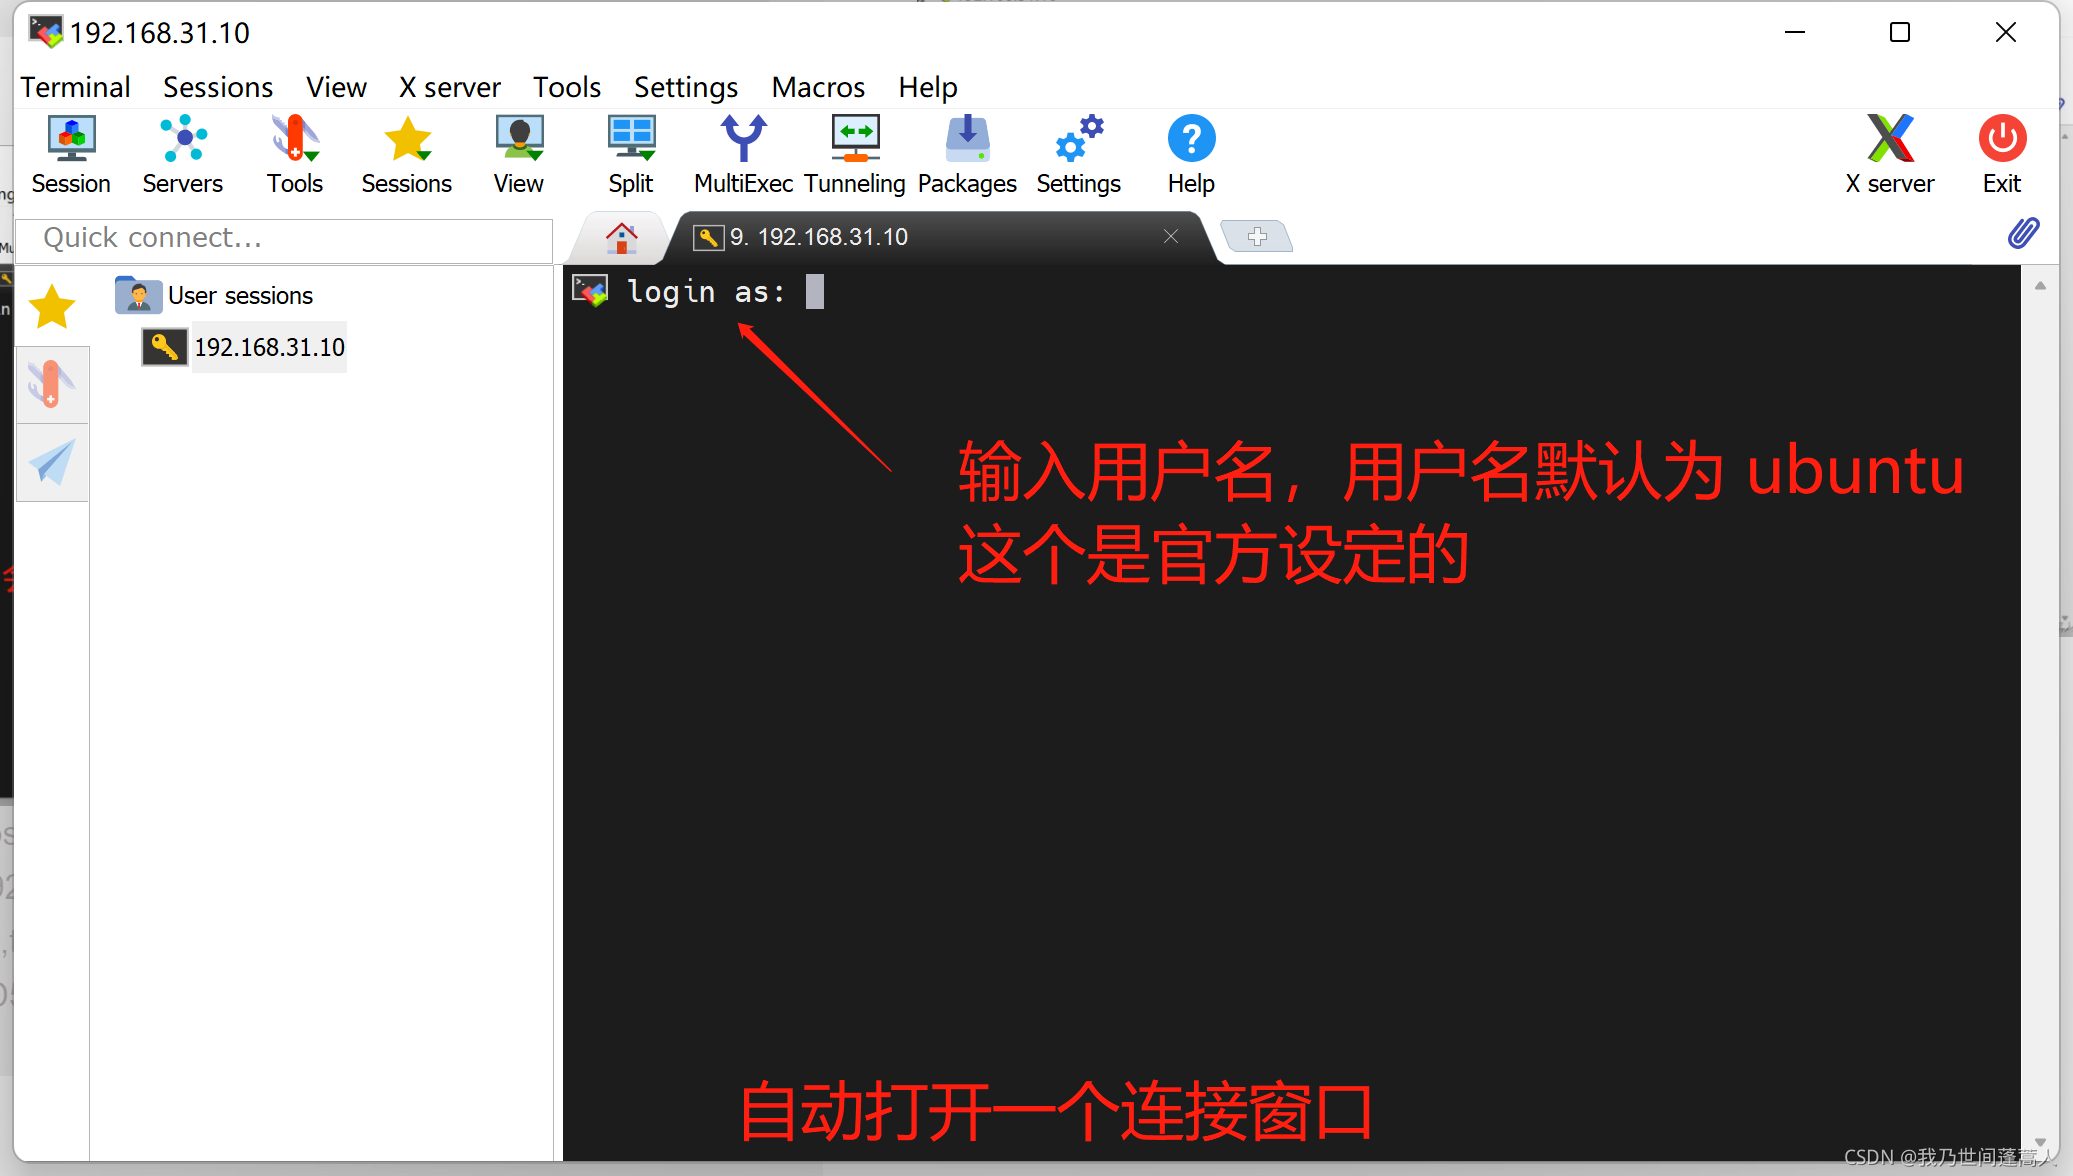
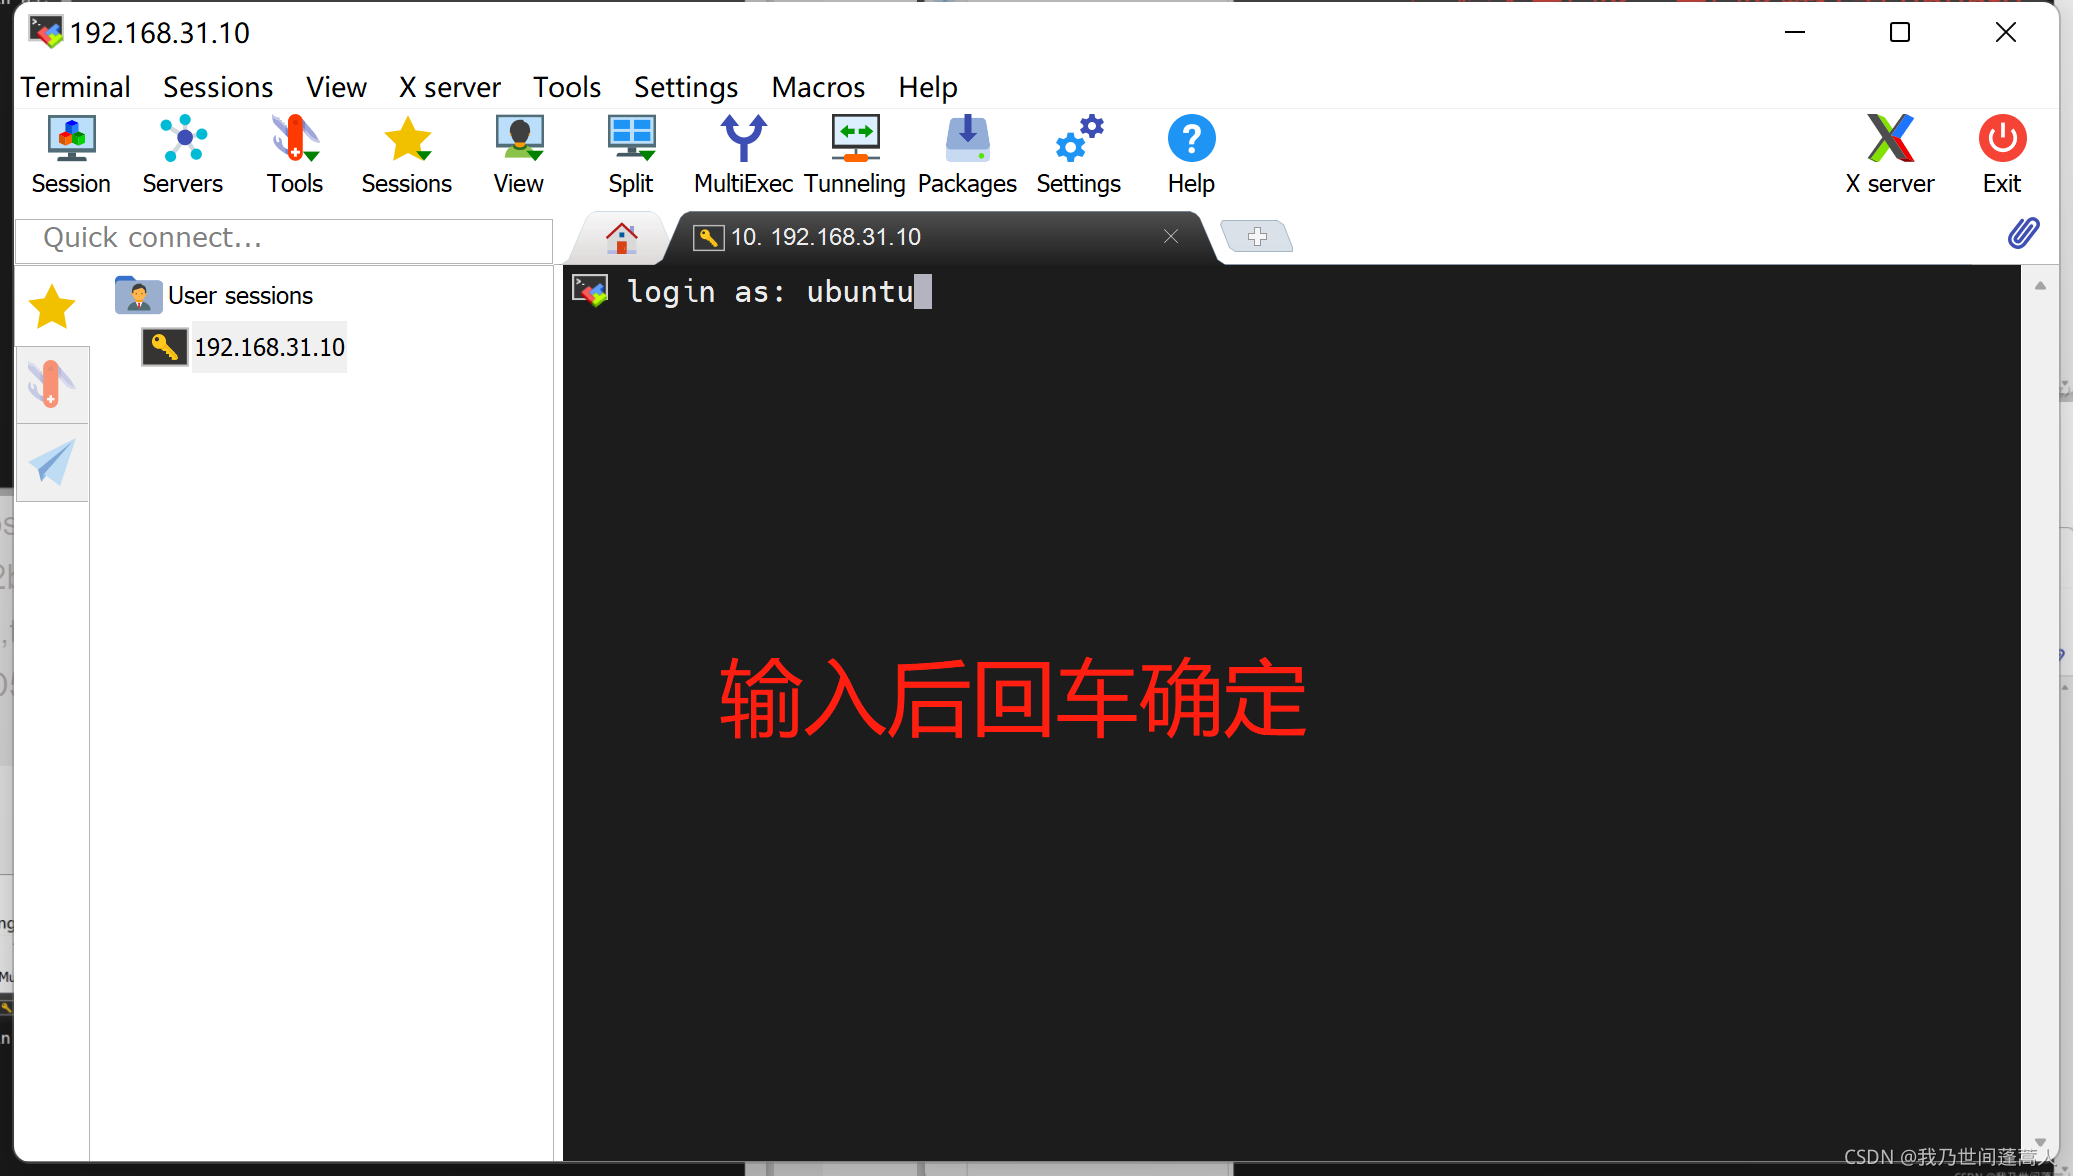
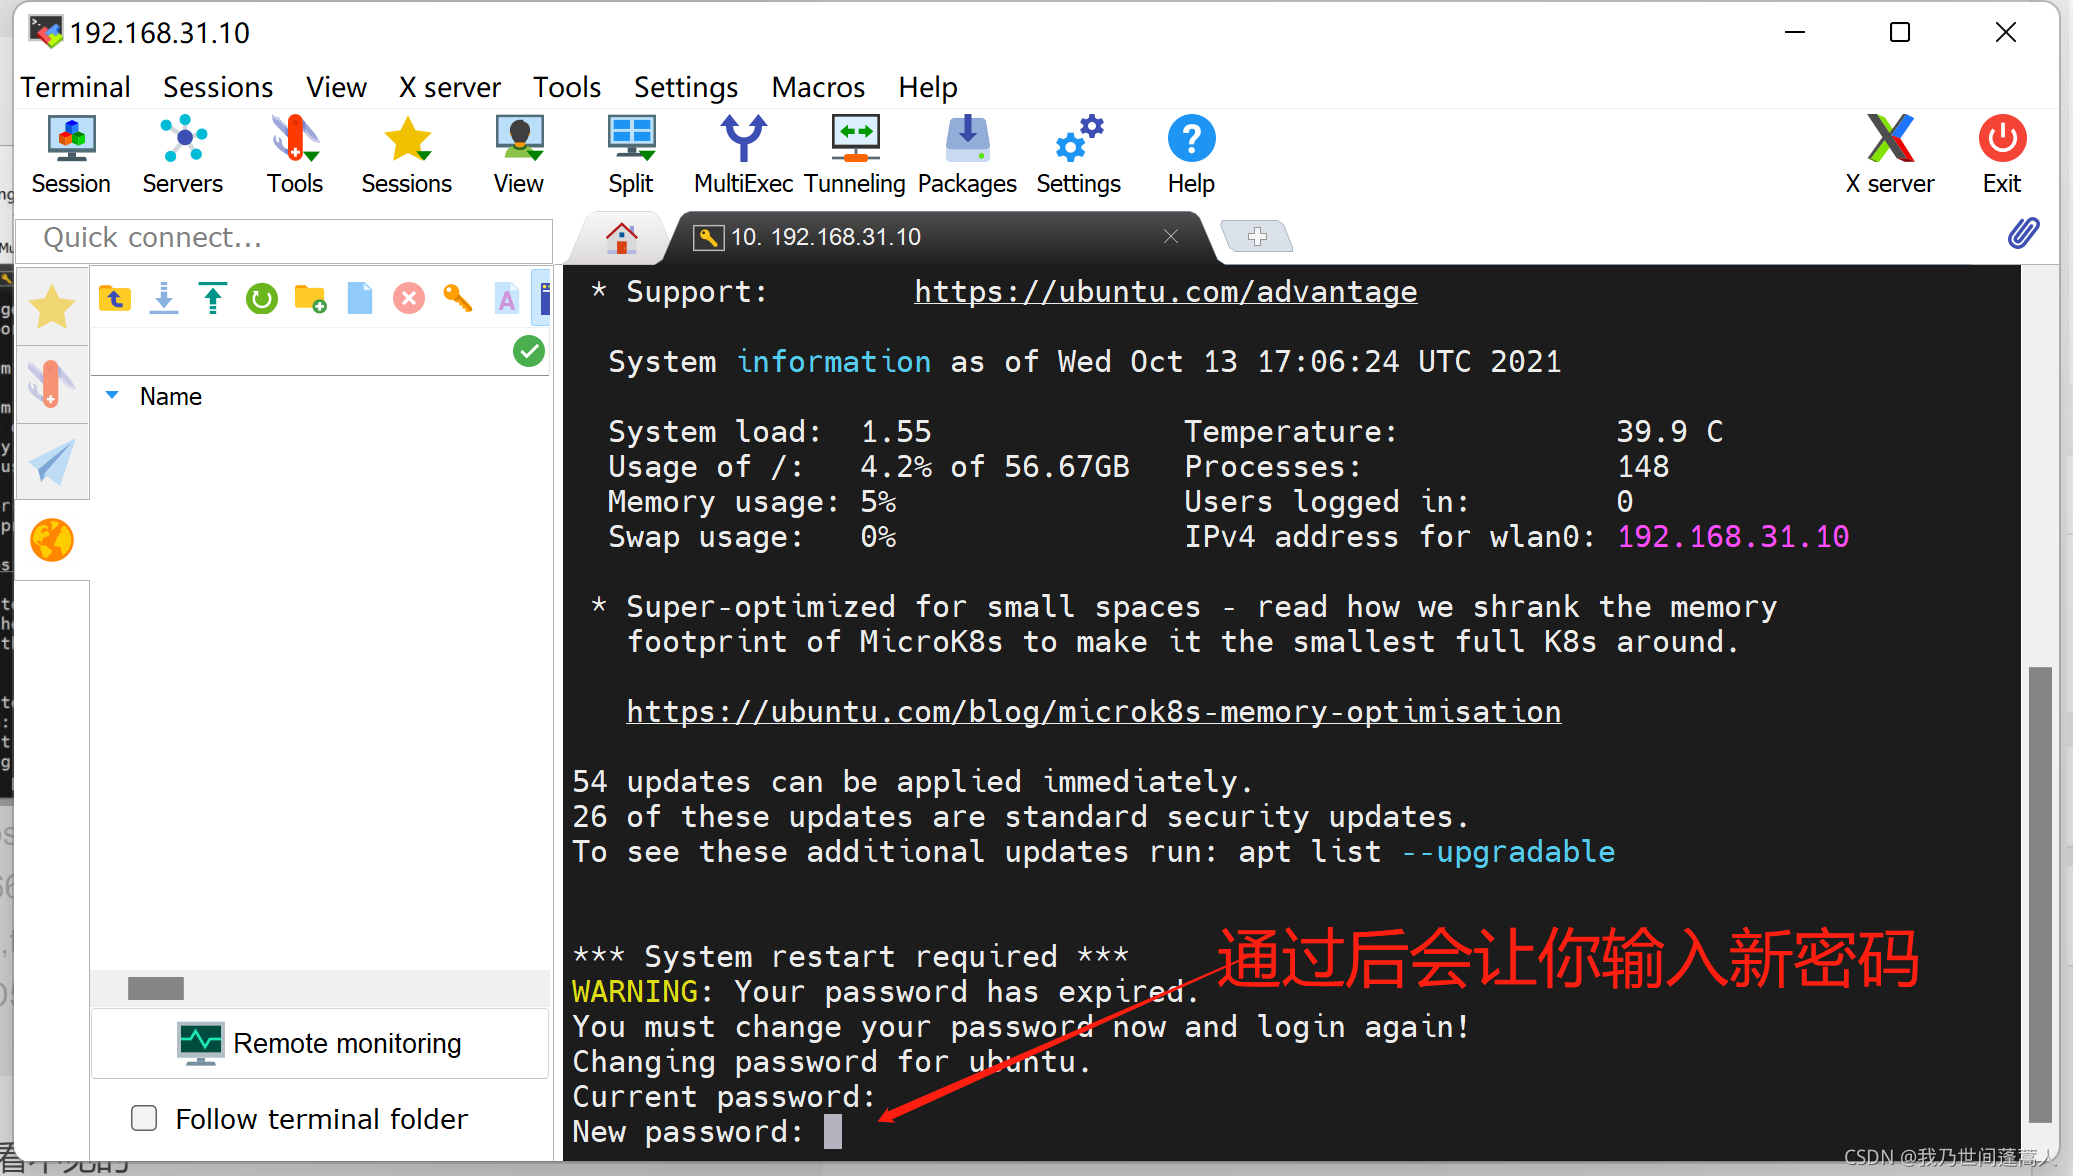
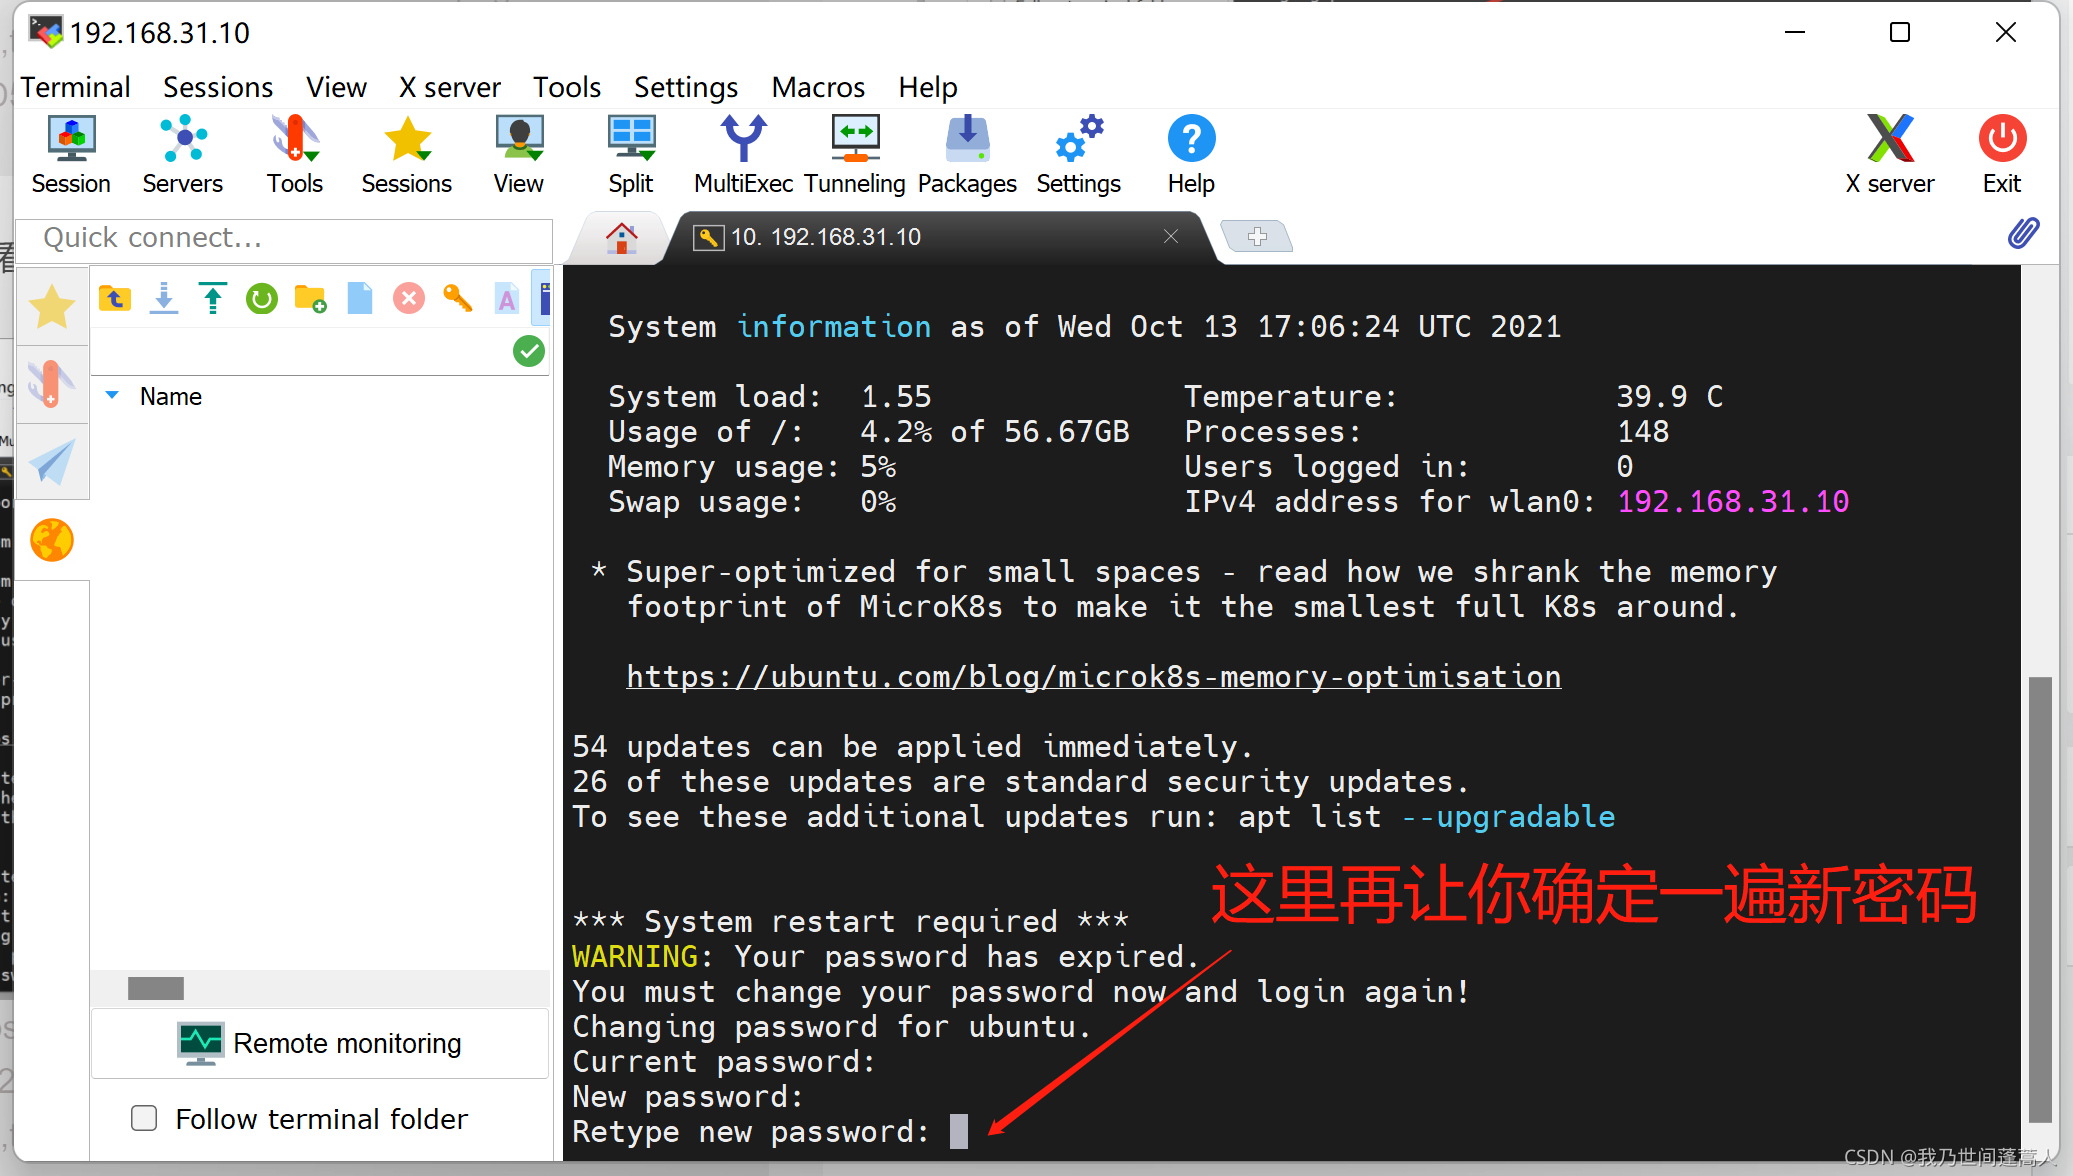
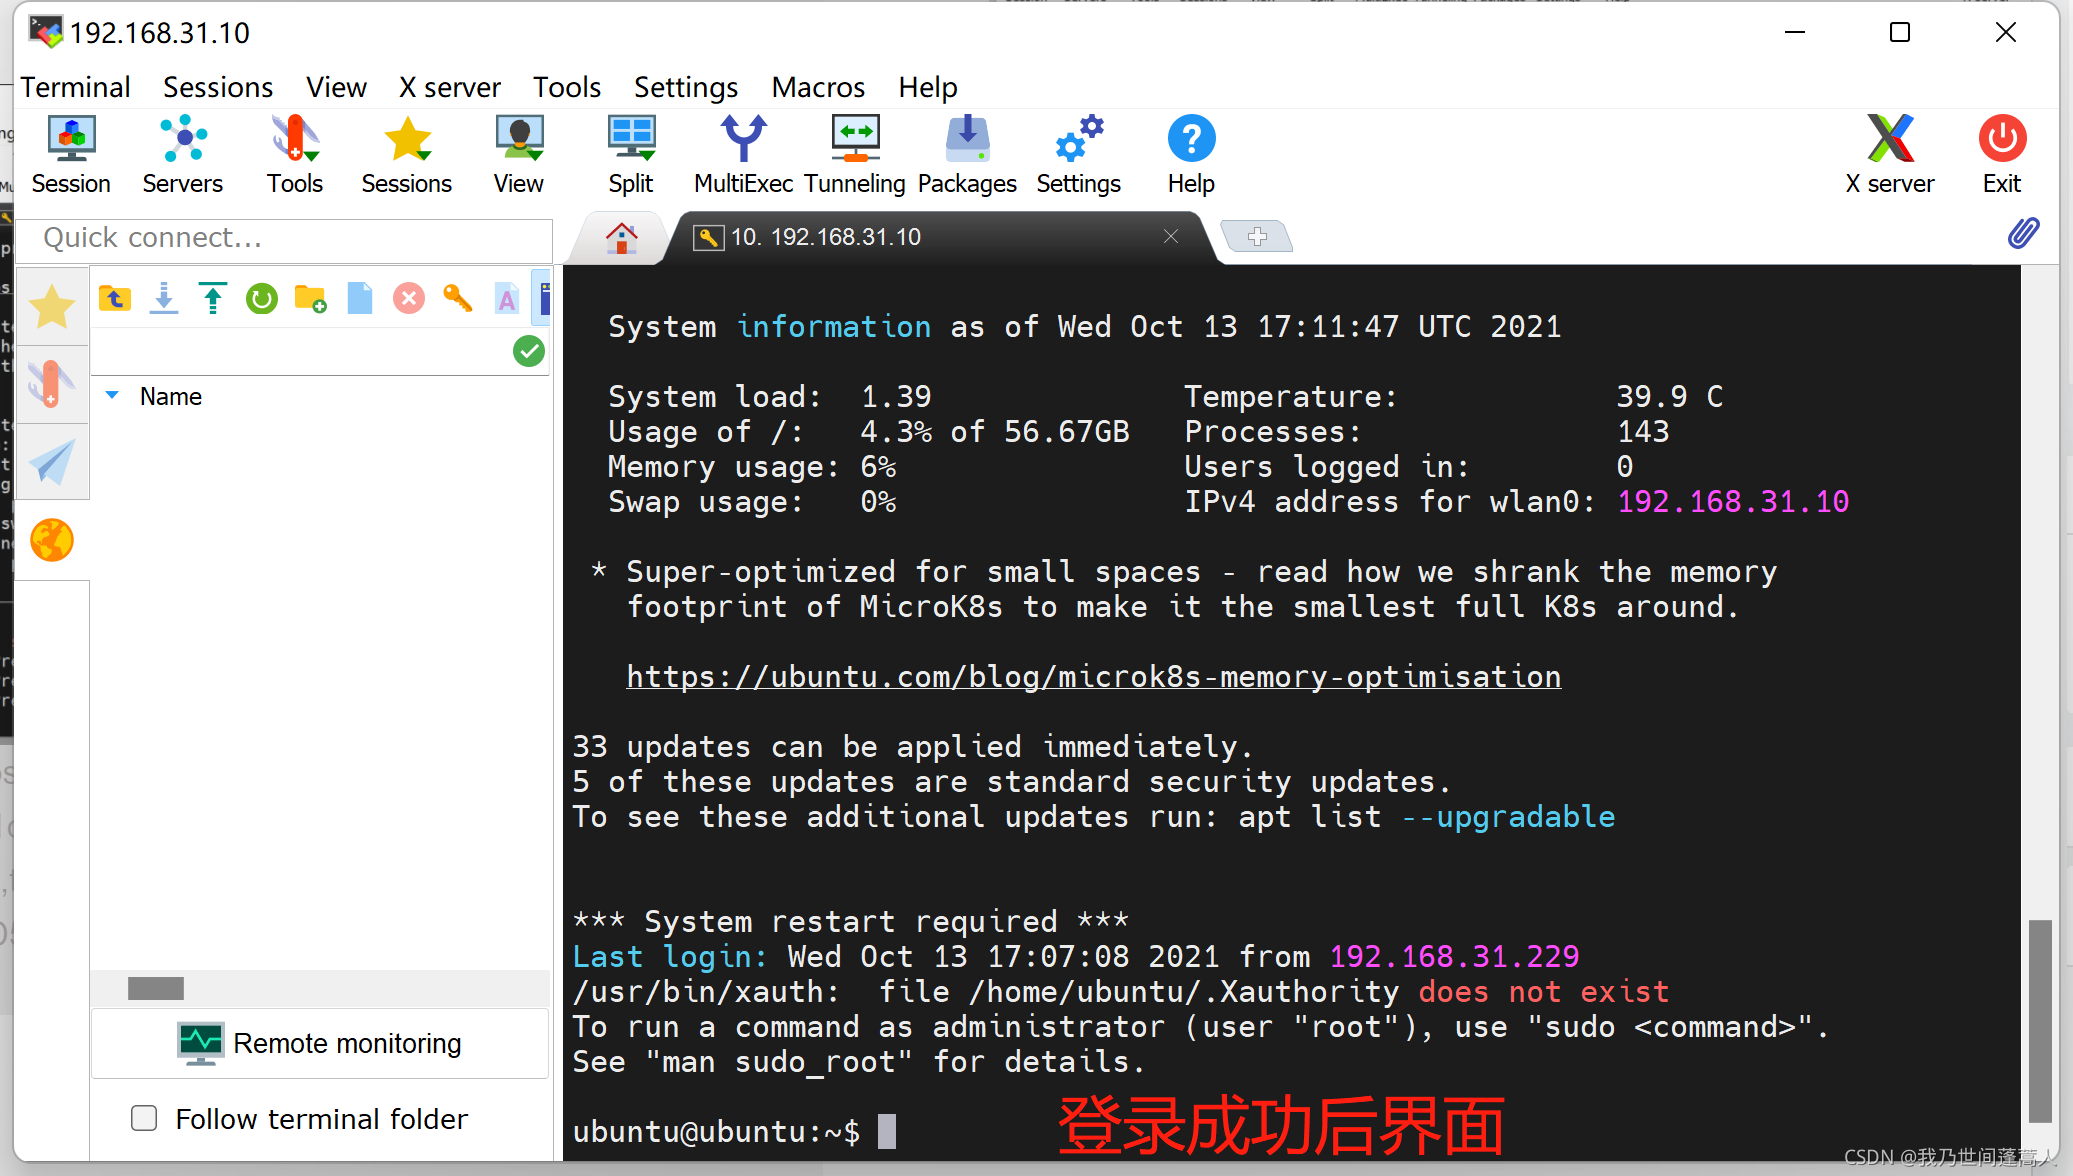
7. Connect to Raspberry Pi via SSH
establish connection

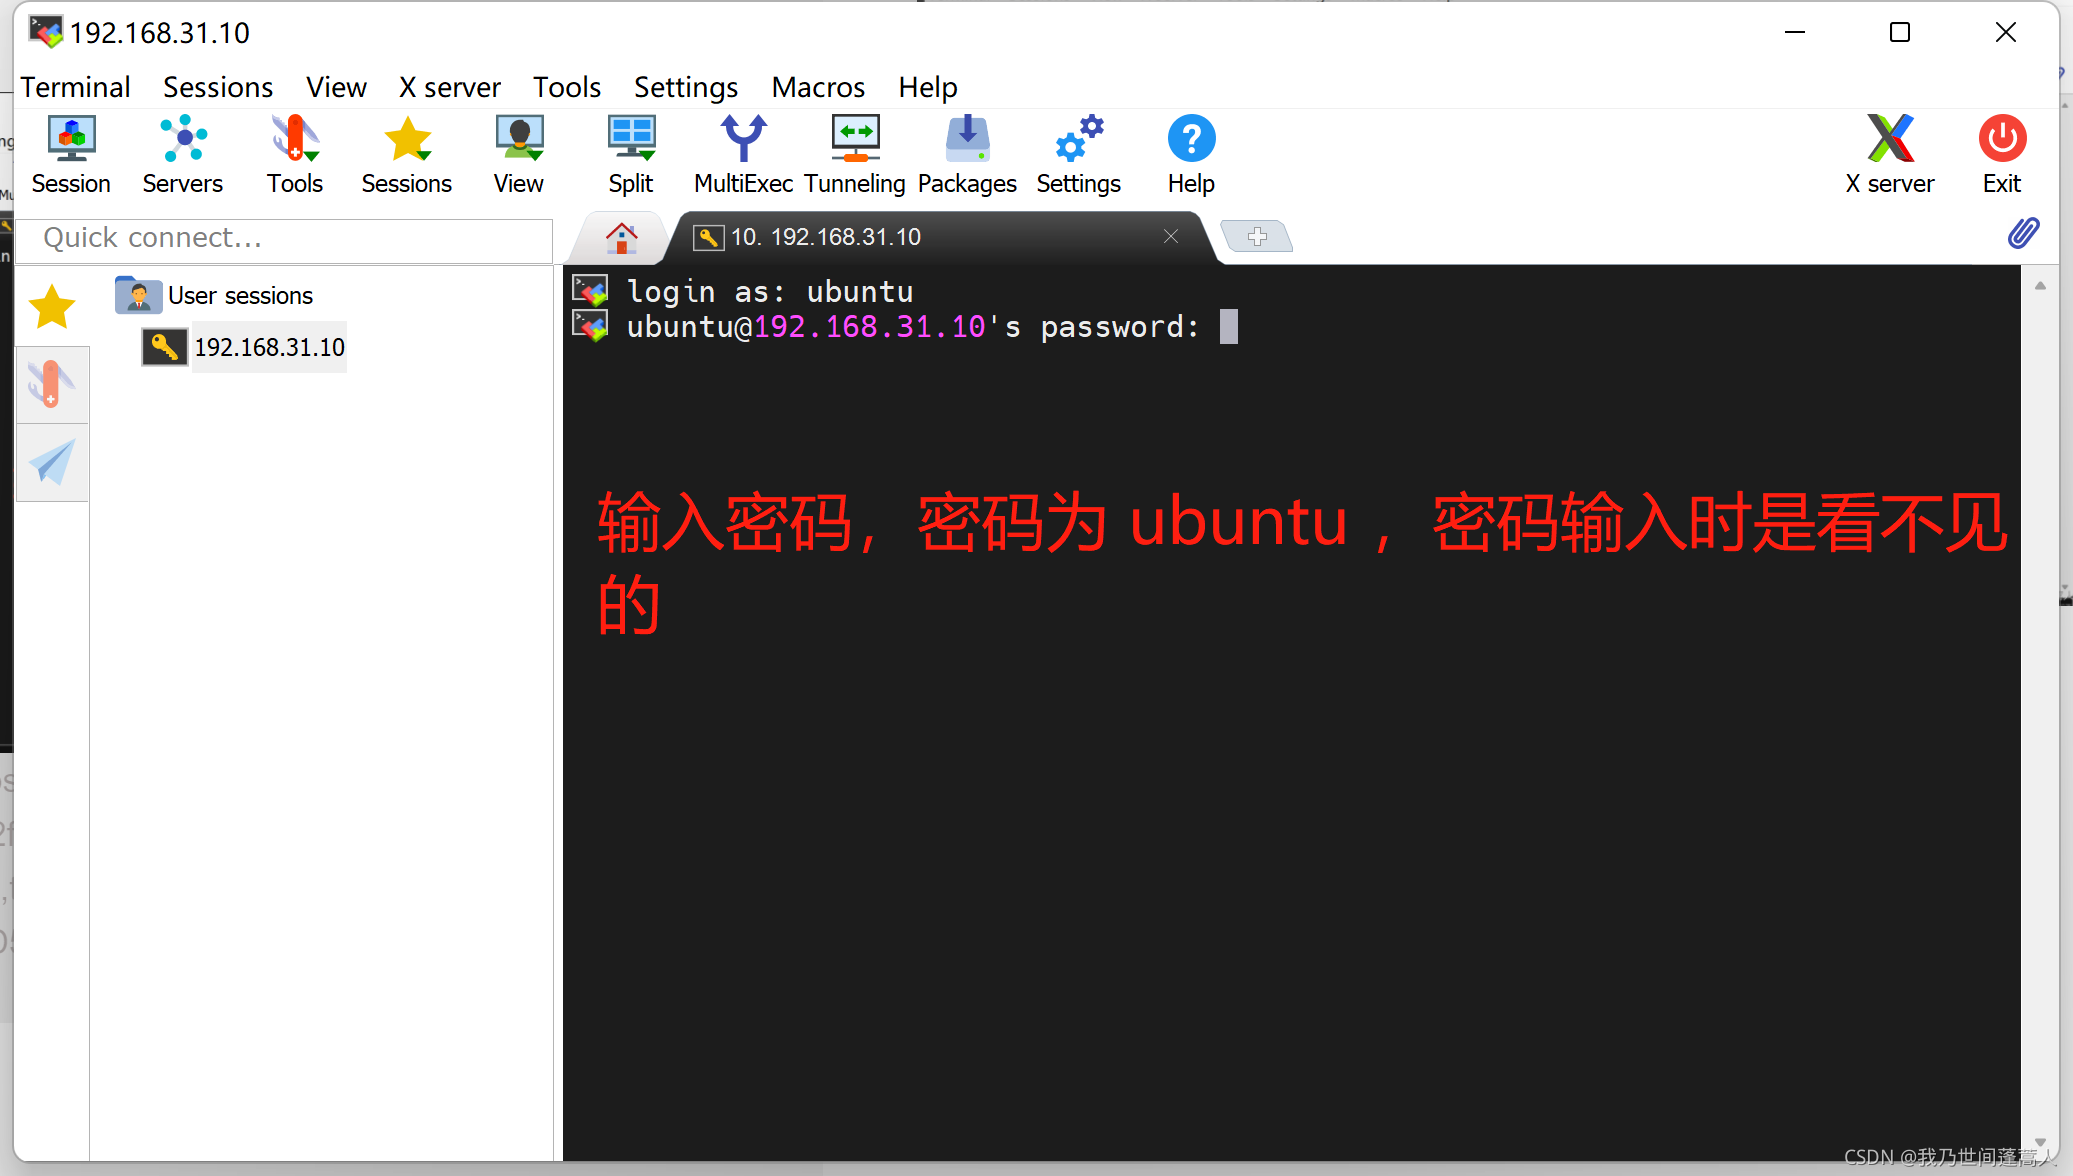
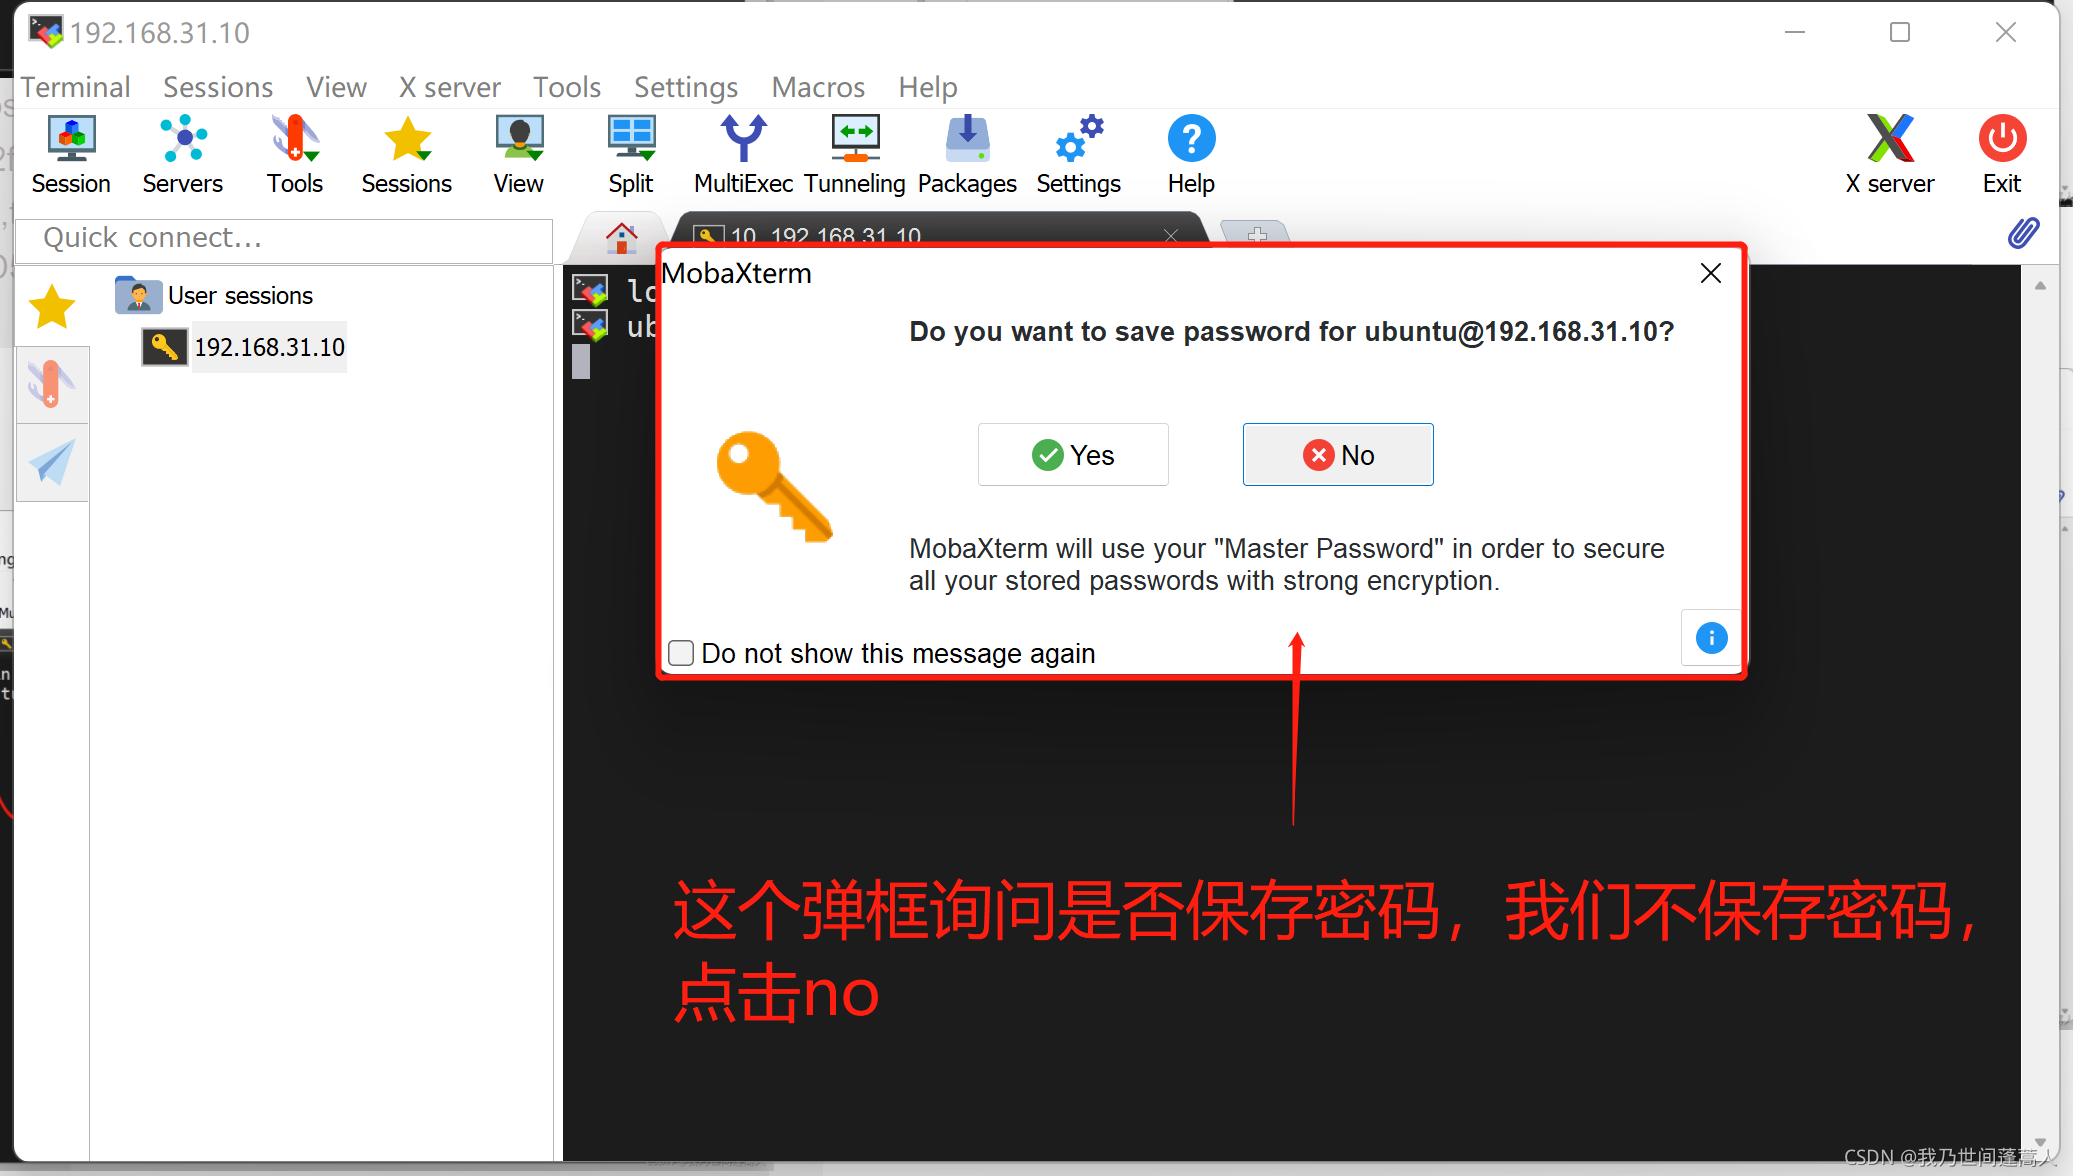
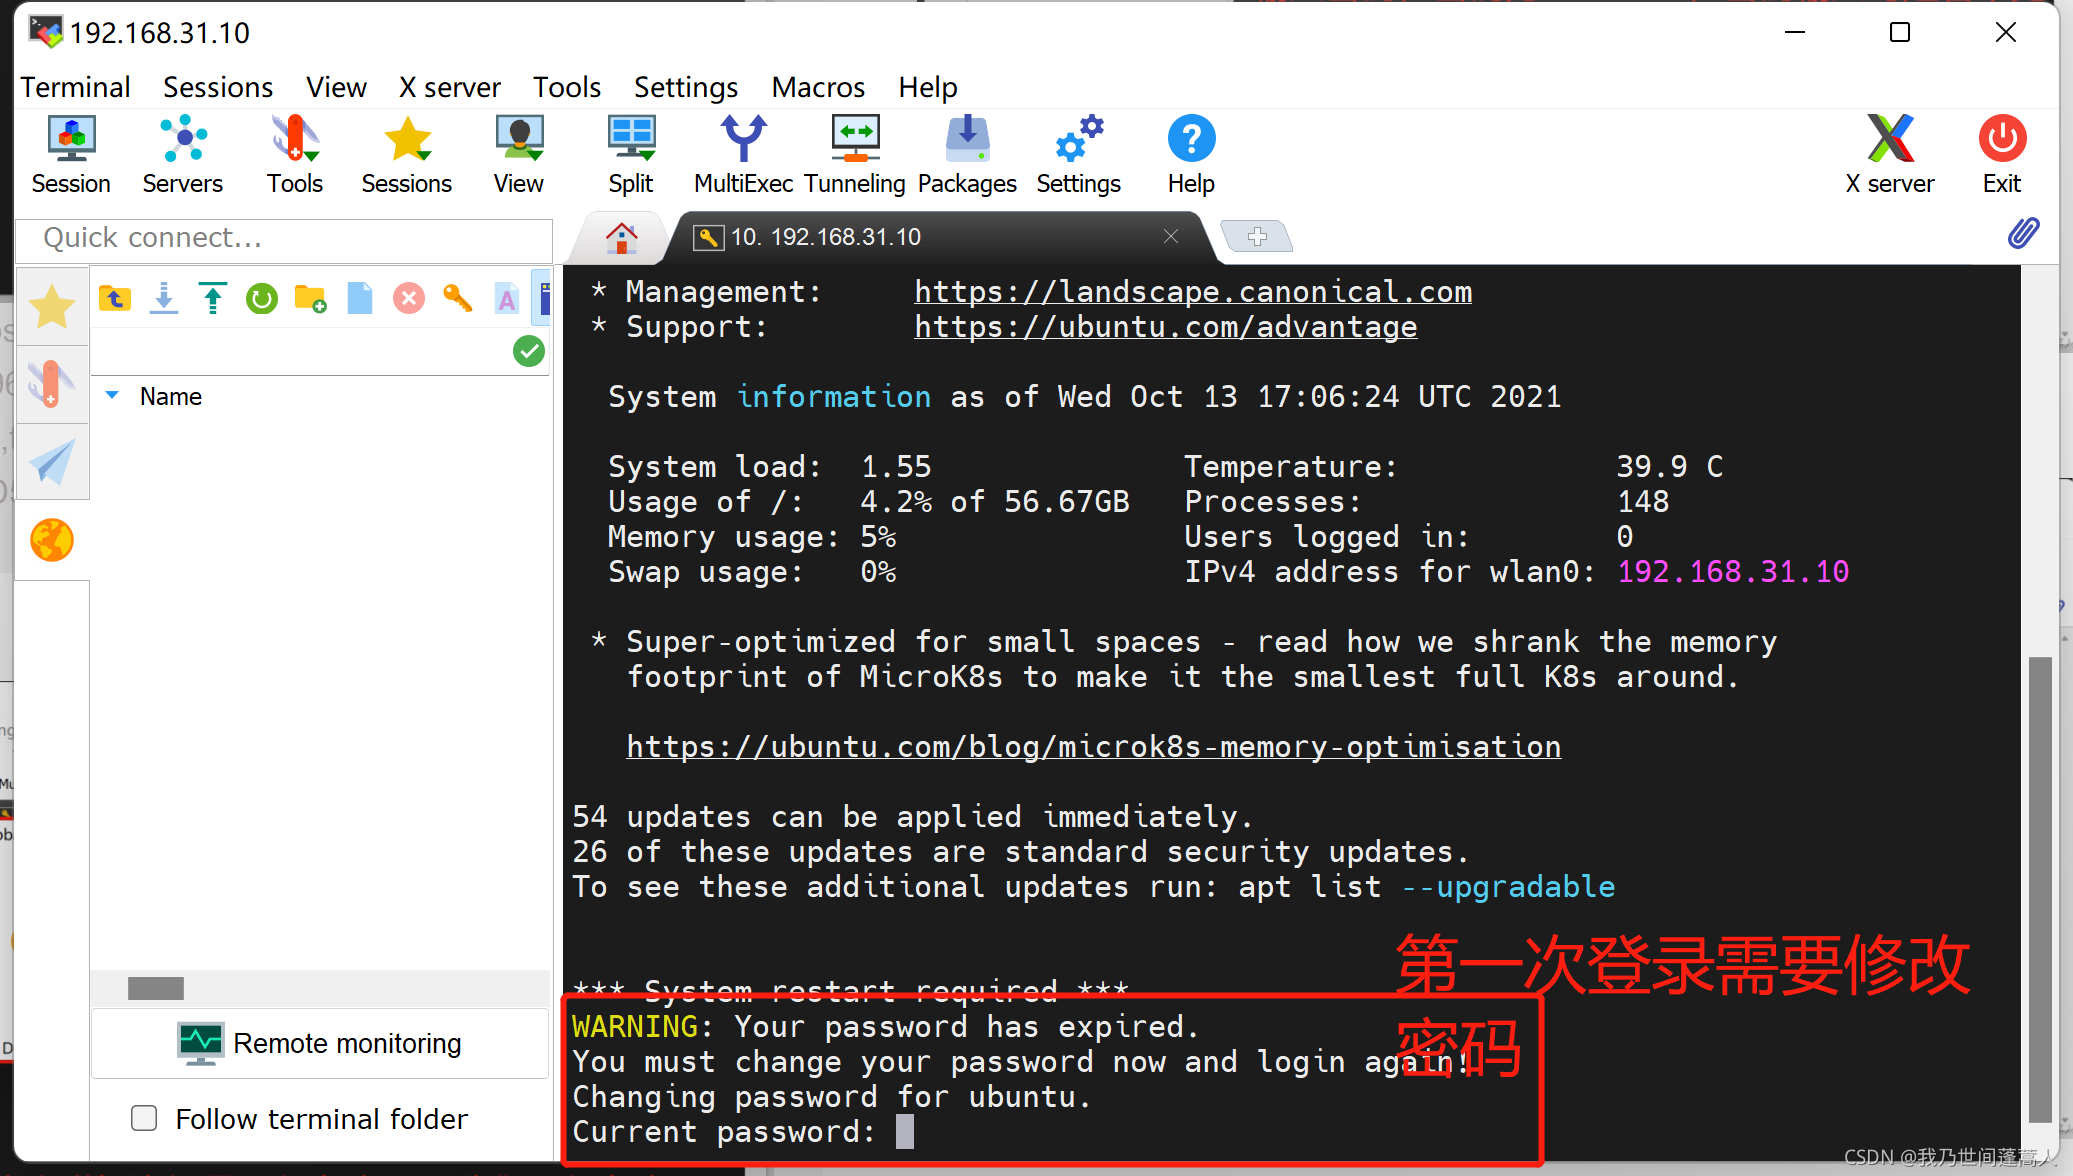
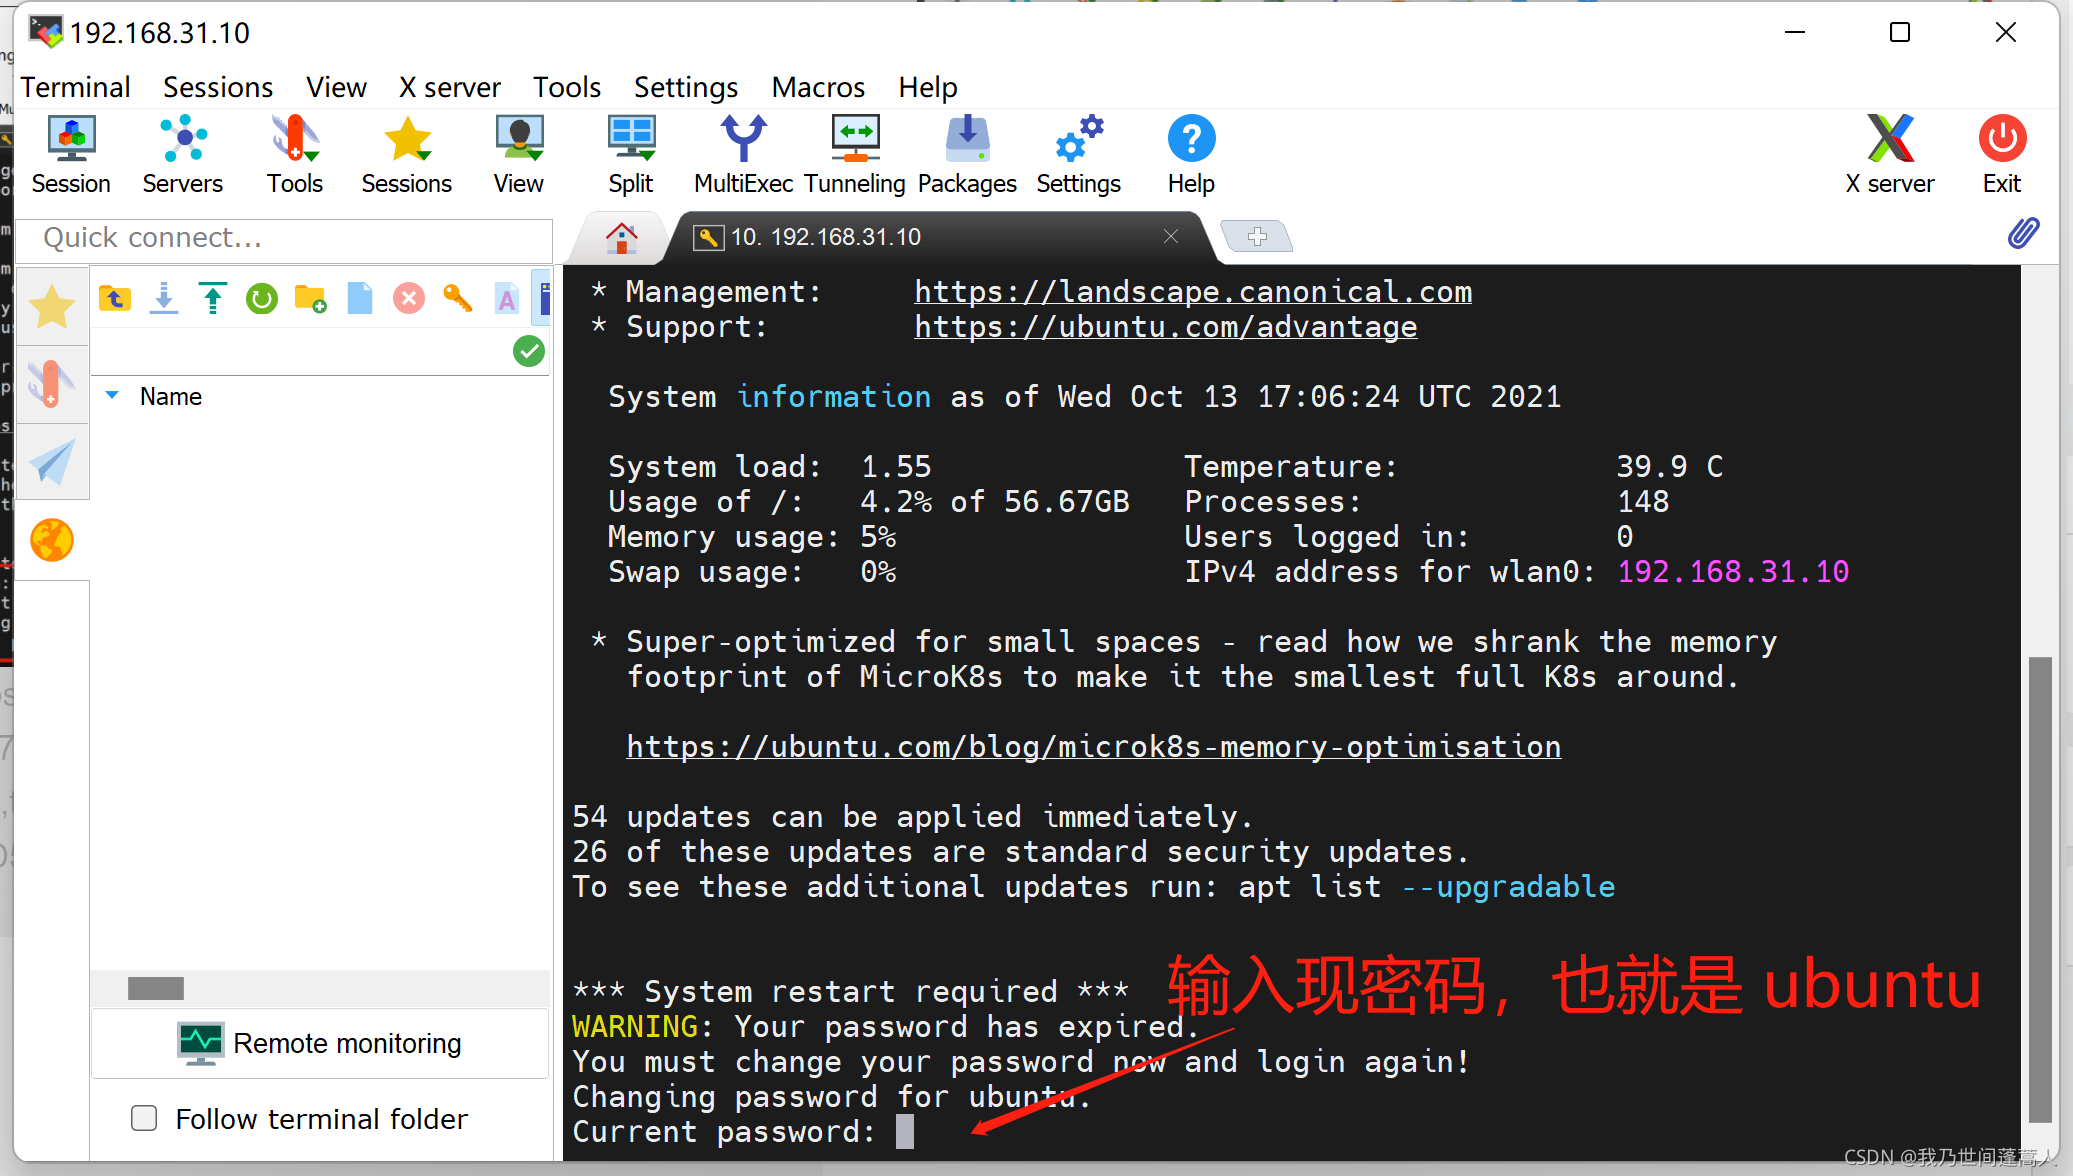
- Enter the current password. The password input is invisible.
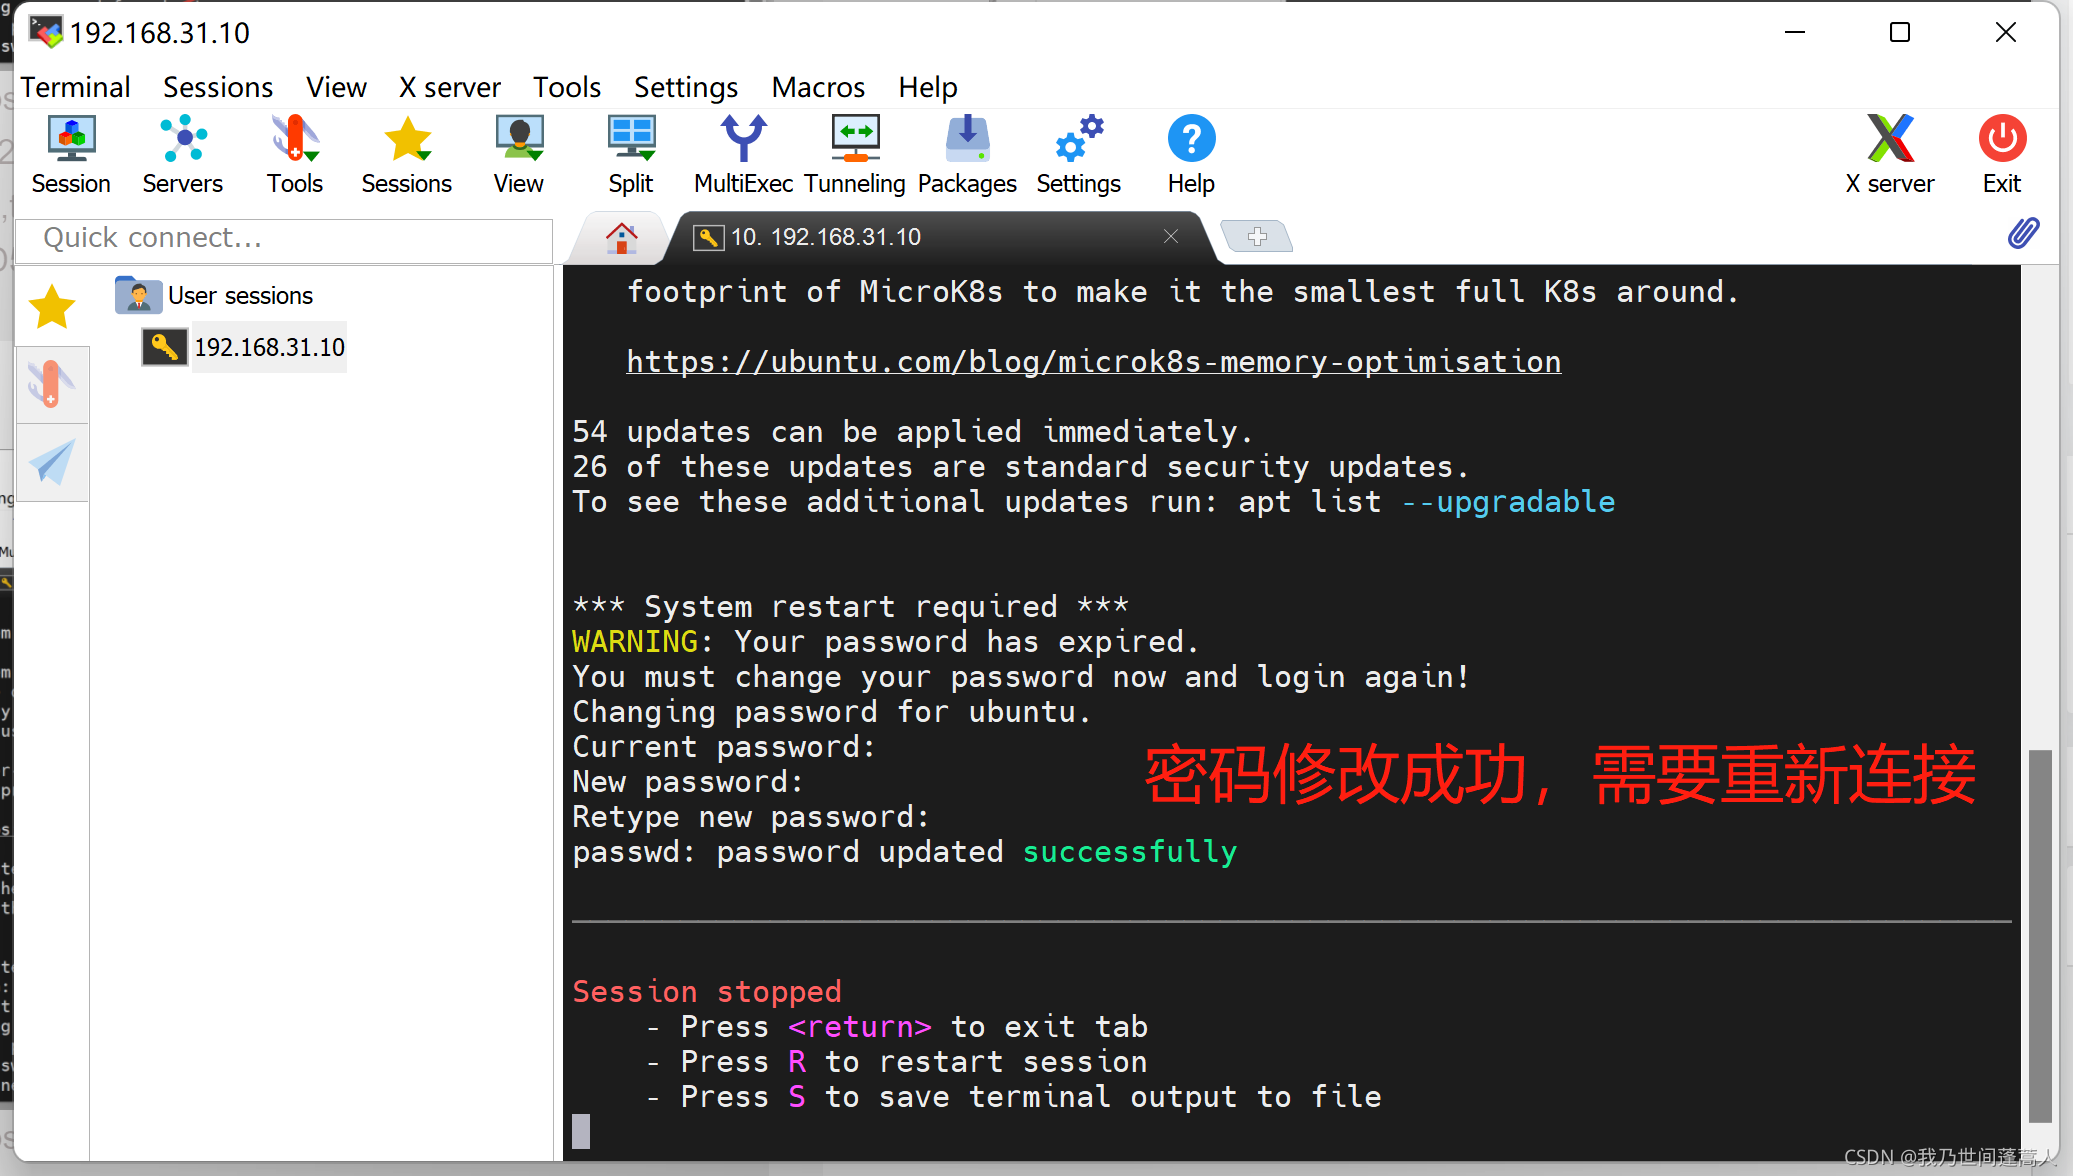
- Press the letter r to reconnect
at last
- The entire installation process is complete here.
- I think it is already at the nanny level. Players who can burn other systems for Raspberry Pi are probably novices. What I have written is already very wordy.
- When it comes to connecting to ssh, it's basically over. After all, everyone uses different connection tools.
- I try my best to upload all the software I use.