JavaWeb (11. Conversational Technology)
11-Conversational Technology
Today's goal
Understand what session tracking technology is
Understand the use of cookies
Master the use of Session
Improve the function of user login registration case
one,Overview of session tracking technology
For 会话跟踪these four words, we need to break them down to explain them. We must first understand what they are 会话, and then understand what they are 会话跟踪:
-
Session :The user opens the browser, accesses the resources of the web server, and the session is established until one party disconnects and the session ends. A session can contain multiple requests and responses。
- After the browser makes a request and the server responds with data to the front end, a session (between the browser and the server) is established.
- After the session is established, if neither the browser nor the server is closed, the session will continue to be established.
- The browser and server can continue to use the session to send requests and respond. The entire process above is calledsession。
Use actual scenarios to understand the conversation. For example, when we visit JD.com, after opening the browser and entering the JD.com homepage, a session is established between the browser and JD.com’s server. Later, we search for products, view product details, and join The shopping cart, etc. are all completed in this session.
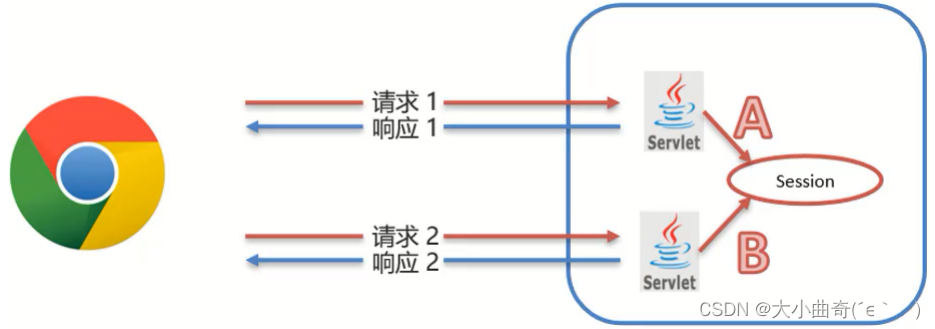
Thinking: How many sessions are established in total in the picture below?
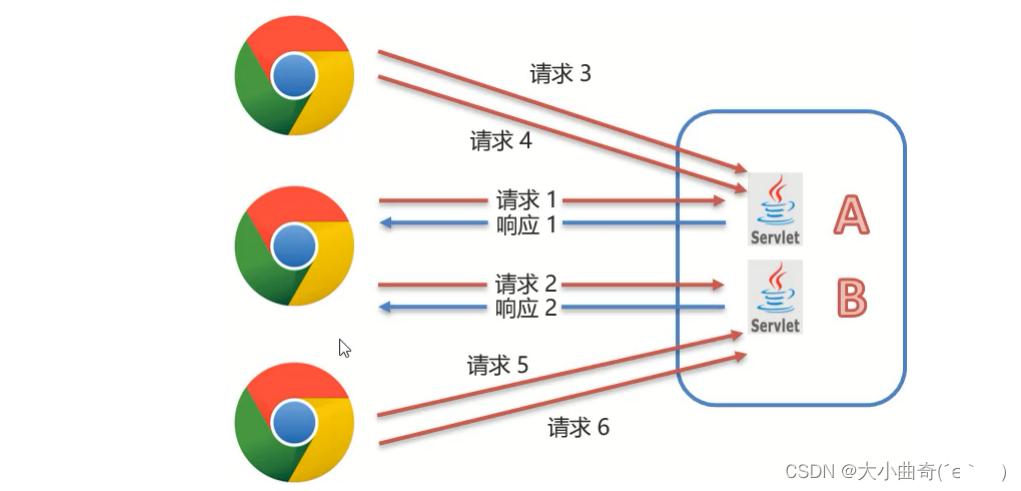
Each browser will establish a session with the server, and the total is3sessions. -
Session tracking :A method of maintaining browser state. The server needs to identify whether multiple requests come from the same browser in order to share data between multiple requests in the same session.。
-
The server will receive multiple requests, which may come from multiple browsers. For example, the 6 requests in the picture above come from 3 browsers.
-
The server needs to identify whether the request is coming from the same browser
-
The process used by the server to identify the browser, this process is session tracking
-
After the server recognizes the browser, it can share data between multiple requests in the same session.
Then we have another question to think about. Why do multiple requests in a session need to share data? With this data sharing function, we can What functions are implemented? -
Shopping cart:
加入购物车and去购物车结算are two requests, but if you want to display the products added in the previous request in this subsequent request, you need to use data sharing. -
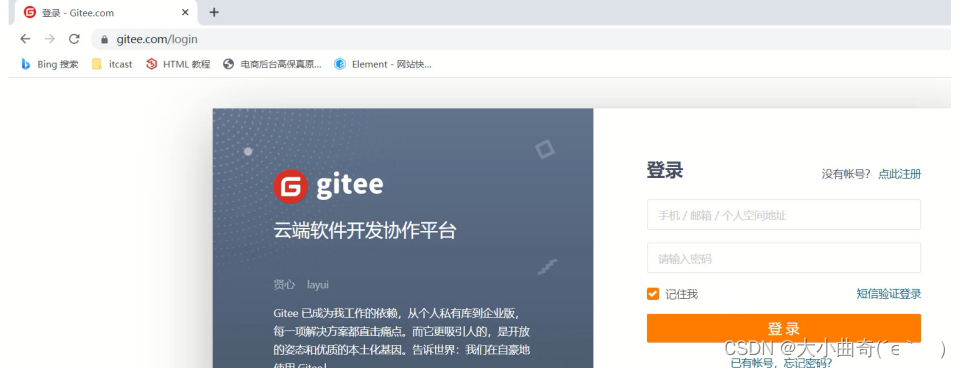
The page displays user login information: many websites access multiple functions after logging in. After sending multiple requests, the browserThere will be information about the currently logged in user [user name], such as Baidu, JD.com, Code Cloud, etc.
-
Functions of the website login page
记住我: After the user successfully logs in,记住我the website will automatically fill in the user name and password the next time he logs in after checking the button, simplifying the user's login operation. Multiple logins will result in multiple requests. It also involves sharing data between -
The verification code function of the login page: Generate the verification code and enter the verification code and click to register. These are also two requests. The data of the two requests must be compared. If they are the same, registration is allowed, if they are different, registration is denied. The implementation of this function also requires Share data within the same session.
-
Through the explanation of these examples, I believe that everyone 会话追踪has a certain understanding of the technology, and this technology is also very important in actual development. Then we need to learn 会话跟踪the technologies next. Before learning these technologies, we need to think: Why do browsers and servers not support data sharing now?
- HTTP requests are used for data transmission between the browser and the server.
- The HTTP protocol isno status, every time the browser requests the server, the server will treat the request asnewask
- The HTTP protocol is designed to be stateless so that each request is independent of each other and does not affect each other.
- Once requests are independent, data sharing between multiple requests cannot be achieved.
After analyzing the specific reasons, how to implement session tracking technology? The specific implementation methods are:
(1) Client session tracking technology:Cookie
(2) Server-side session tracking technology:Session
Both technologies can achieve session tracking, and the biggest difference between them is:Cookies are stored on the browser side and Sessions are stored on the server side.
The specific learning ideas are:
CooKieBasic usage, principles, usage detailsSessionBasic usage, principles, usage detailsCookieSessionComprehensive cases of and
1. Summary
In this section, we mainly introduce what issessionandsession tracking technology,have to be aware of is:
- The HTTP protocol is stateless, and session tracking cannot be achieved by relying on the HTTP protocol.
- If you want to implement session tracking, you need to use Cookie and Session
How to use this Cookie and Session specifically, let's start with Cookie.
two,Cookie
To learn Cookie, we mainly solve the following problems:
- What are cookies?
- How are cookies used?
- How are cookies implemented?
- What are the precautions for using cookies?
1、Basic use of cookies
①. Concept
Cookie: Client session technology saves data to the client, and each subsequent request carries cookie data for access.
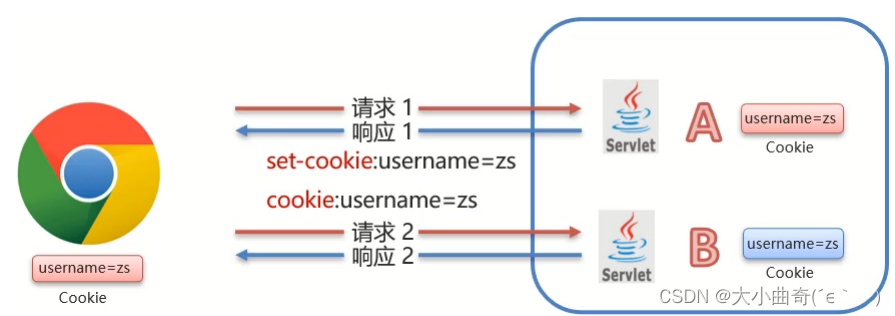
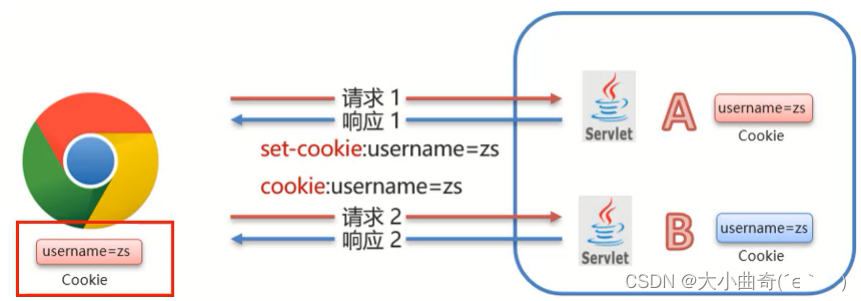
②.Cookie workflow
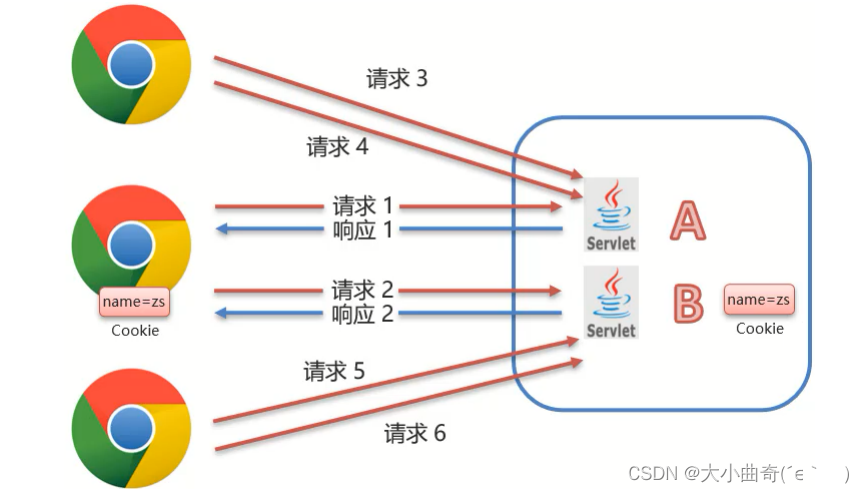
- The server provides two Servlets, namely ServletA and ServletB.
- The browser sends HTTP request 1 to the server, and the server ServletA receives the request and performs business processing.
- Server-side ServletA can create a Cookie object during processing and
name=zsstore the data in the Cookie. - When server-side ServletA responds to data, it will respond to the browser with the Cookie object.
- When the browser receives the response data, it will store the data in the Cookie object in the browser memory. At this time, the browser and the server willA session was established
- in the same sessionThe browser sends HTTP request 2 to the server ServletB again, and the browser will carry all the data in the Cookie object.
- After ServletB receives the request and data, it can obtain the data stored in the Cookie object, so that data can be shared between multiple requests in the same session.
③.Basic use of
cookies. For the use of cookies, we should pay more attention to how the background code operates cookies. The operations of cookies are mainly divided into two categories. This isSend CookieandGet Cookie,How to implement the above two pieces of content respectively?
1.1. Send Cookie
- Create Cookie object and set data
Cookie cookie = new Cookie("key","value");
- Send cookie to client: useresponseobject
response.addCookie(cookie);
After introducing the steps corresponding to sending Cookie, let's use a case to complete the sending of Cookie. The specific implementation steps are:
Requirements: Generate Cookie objects and store data in Servlet, and then send the data to the browser
(1). Create a Maven project, the project name is cookie-demo, and add dependencies in pom.xml
(2). Write a Servlet class, The name is AServlet
(3). Create a Cookie object in the AServlet, store the data, and send it to the front end
(4). Start the test and view the value in the Cookie object in the browser
(1) Create Maven project cookie-demo and add dependencies in pom.xml
<properties>
    <maven.compiler.source>8</maven.compiler.source>
    <maven.compiler.target>8</maven.compiler.target>
</properties>

<dependencies>
    <!--servlet-->
    <dependency>
        <groupId>javax.servlet</groupId>
        <artifactId>javax.servlet-api</artifactId>
        <version>3.1.0</version>
        <scope>provided</scope>
    </dependency>
    <!--jsp-->
    <dependency>
        <groupId>javax.servlet.jsp</groupId>
        <artifactId>jsp-api</artifactId>
        <version>2.2</version>
        <scope>provided</scope>
    </dependency>
    <!--jstl-->
    <dependency>
        <groupId>jstl</groupId>
        <artifactId>jstl</artifactId>
        <version>1.2</version>
    </dependency>
    <dependency>
        <groupId>taglibs</groupId>
        <artifactId>standard</artifactId>
        <version>1.1.2</version>
    </dependency>
</dependencies>
(2) Write a Servlet class namedAServlet
(3) Create a Cookie object in the Servlet, store the data, and send it to the front end
package com.itheima.web.cookie;
@WebServlet("/aServlet")
public class AServlet extends HttpServlet {
@Override
protected void doGet(HttpServletRequest request, HttpServletResponse response) throws ServletException, IOException {
//发送Cookie
//1. 创建Cookie对象
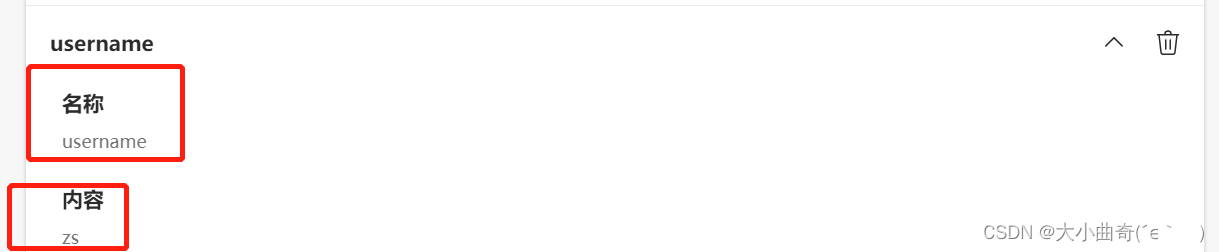
Cookie cookie = new Cookie("username","zs");
//2. 发送Cookie,response
response.addCookie(cookie);
}
@Override
protected void doPost(HttpServletRequest request, HttpServletResponse response) throws ServletException, IOException {
this.doGet(request, response);
}
}
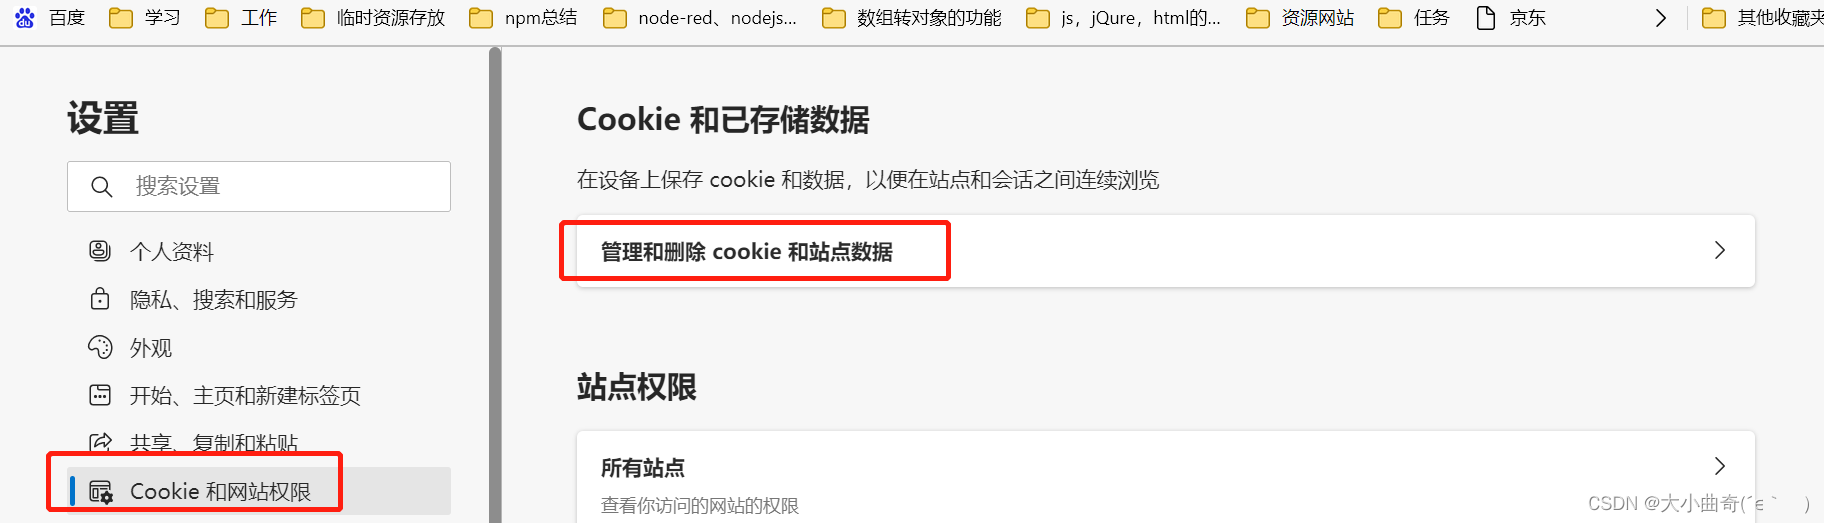
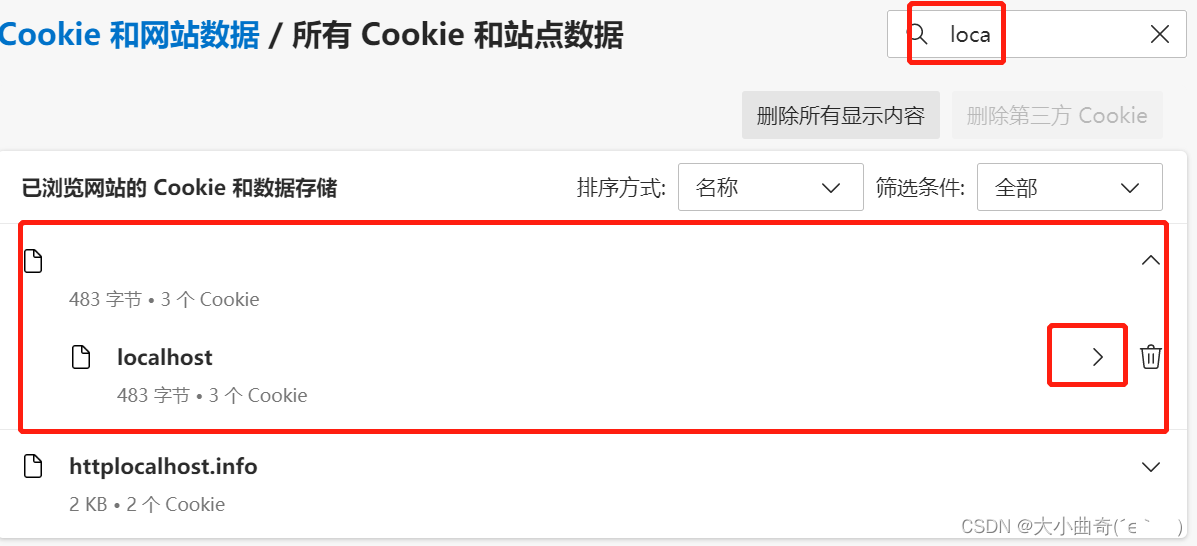
(4) Start the test and view the value in the Cookie object in the browser
There are two ways to access http://localhost:8080/cookie-demo/aServlet
the chrome browser to view the cookie value:
Method 1:
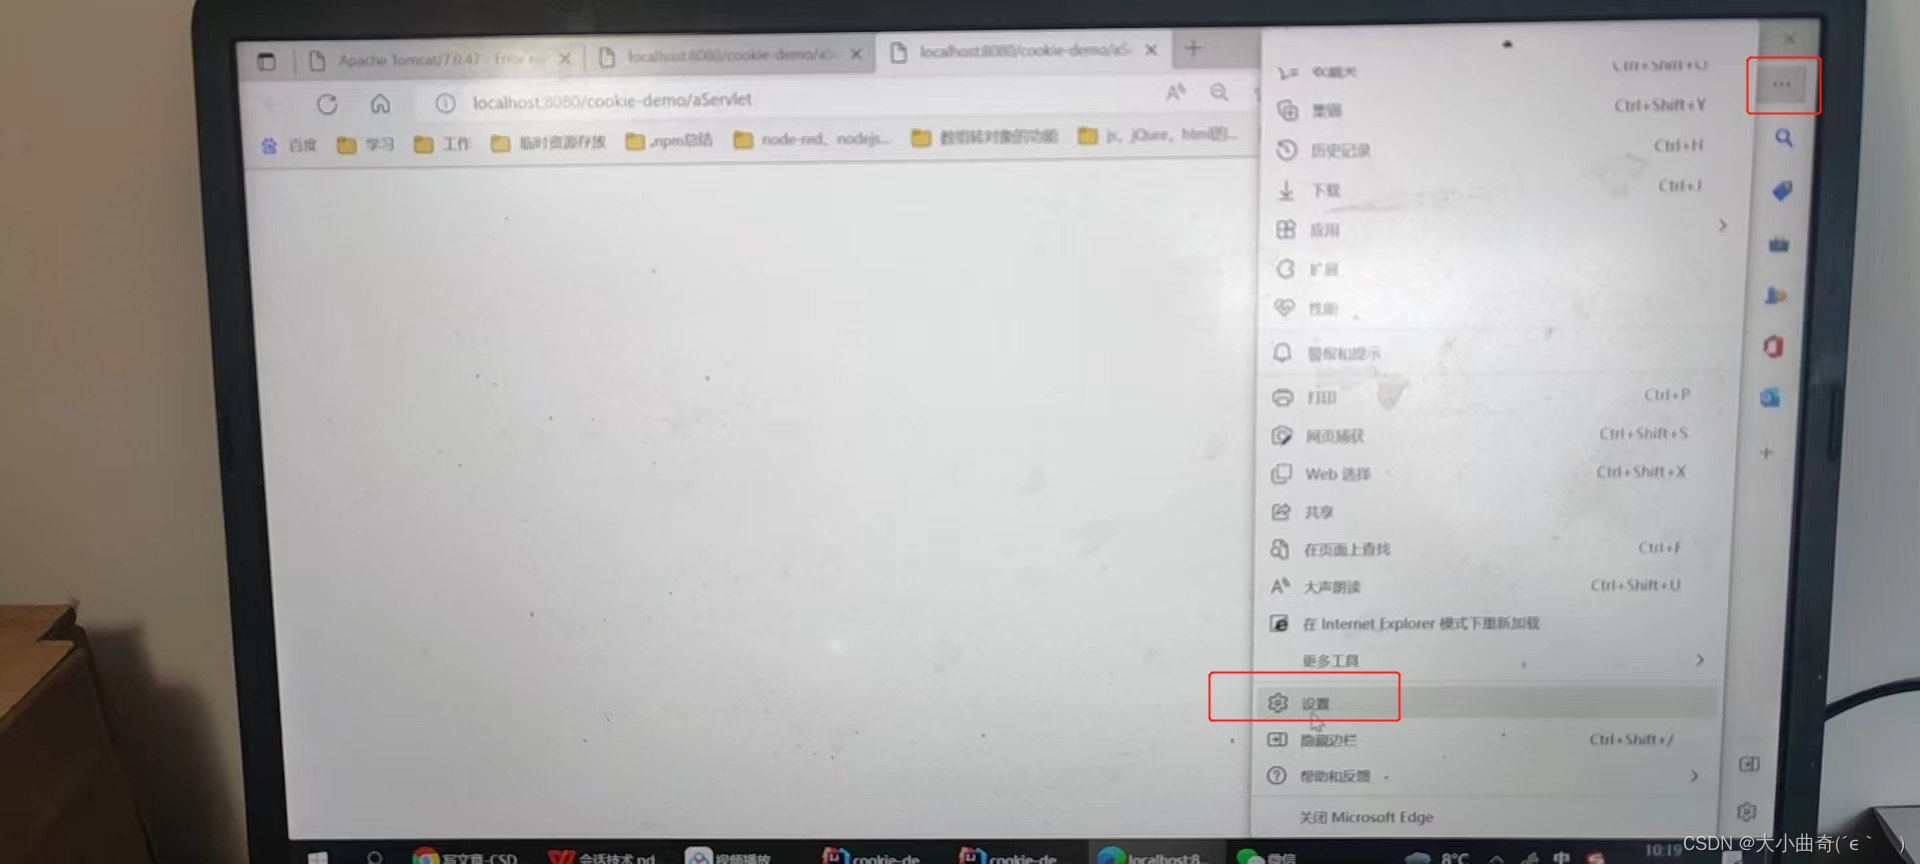

Method 2 : Select to open the developer tools or use the shortcut key F12 or Ctrl+Shift+I
1.2. Obtain Cookies
- To get all cookies carried by the client, userequestobject
Cookie[] cookies = request.getCookies();
- Traverse the array and obtain each Cookie object:
for - Get data using Cookie object methods
cookie.getName();
cookie.getValue();
After introducing the steps corresponding to obtaining cookies, let's use a case to complete the acquisition of cookies. The specific implementation steps are:
Requirements: Obtain the data stored in the Cookie object in the previous case in the Servlet
1. Write a new Servlet class named BServlet;
2. Use the request object in the BServlet to obtain the Cookie array, traverse the array, and obtain the specified name from the data The corresponding value;
3. Start the test and print out the obtained value on the console;
(1) Write a new Servlet class named BServlet
(2) Use the request object in BServlet to obtain the Cookie array, traverse the array, and obtain the value corresponding to the specified name from the data.=
package com.itheima.web.cookie;

@WebServlet("/bServlet")
public class BServlet extends HttpServlet {


    @Override
    protected void doGet(HttpServletRequest request, HttpServletResponse response) throws ServletException, IOException {


        //获取Cookie
        //1. 获取Cookie数组
        Cookie[] cookies = request.getCookies();
        //2. 遍历数组
        for (Cookie cookie : cookies) {


            //3. 获取数据
            String name = cookie.getName();
            if("username".equals(name)){


                String value = cookie.getValue();
                System.out.println(name+":"+value);
                break;
            }
        }
    }
    @Override
    protected void doPost(HttpServletRequest request, HttpServletResponse response) throws ServletException, IOException {


        this.doGet(request, response);
    }
}
(3) Start the test and print out the obtained value on the console
Visit http://localhost:8080/cookie-demo/bServlet

the IDEA console to see the output results:

think:when testing
- Can I get the data in the cookie by closing the browser between accessing AServlet and BServlet, restarting the browser and then accessing BServlet? [Personal test, it is possible! 】
We will discuss this issue in the details of the use of cookies, so you can try it first.
1.3. Summary
In this section, we mainly explain the basic use of Cookies, including two parts
- Send Cookie:
- Create a Cookie object and set the value:
Cookie cookie = new Cookie("key","value"); - Sending cookies to the client usesResponse object:
response.addCookie(cookie);
- Create a Cookie object and set the value:
- Get cookies:
- useRequest objectGet the Cookie array:
Cookie[] cookies = request.getCookies(); - Traverse array
- Get the value of each Cookie object in the array:
cookie.getName()和cookie.getValue()
- useRequest objectGet the Cookie array:
After introducing the basic use of cookies, how does the bottom layer of cookies realize data sharing between two requests in a session?
2. Analysis of the principle of Cookie (just know it)
The implementation principle of Cookie is based on the HTTP protocol, in which the two request header information in the HTTP protocol are designed: (the response and the request are relative to the server)
- Response header:set-cookie
- Request header: cookie
- In the previous case, it has been possible to implement the function of AServlet sending Cookie to the front end, and BServlet obtaining the Cookie from the request.
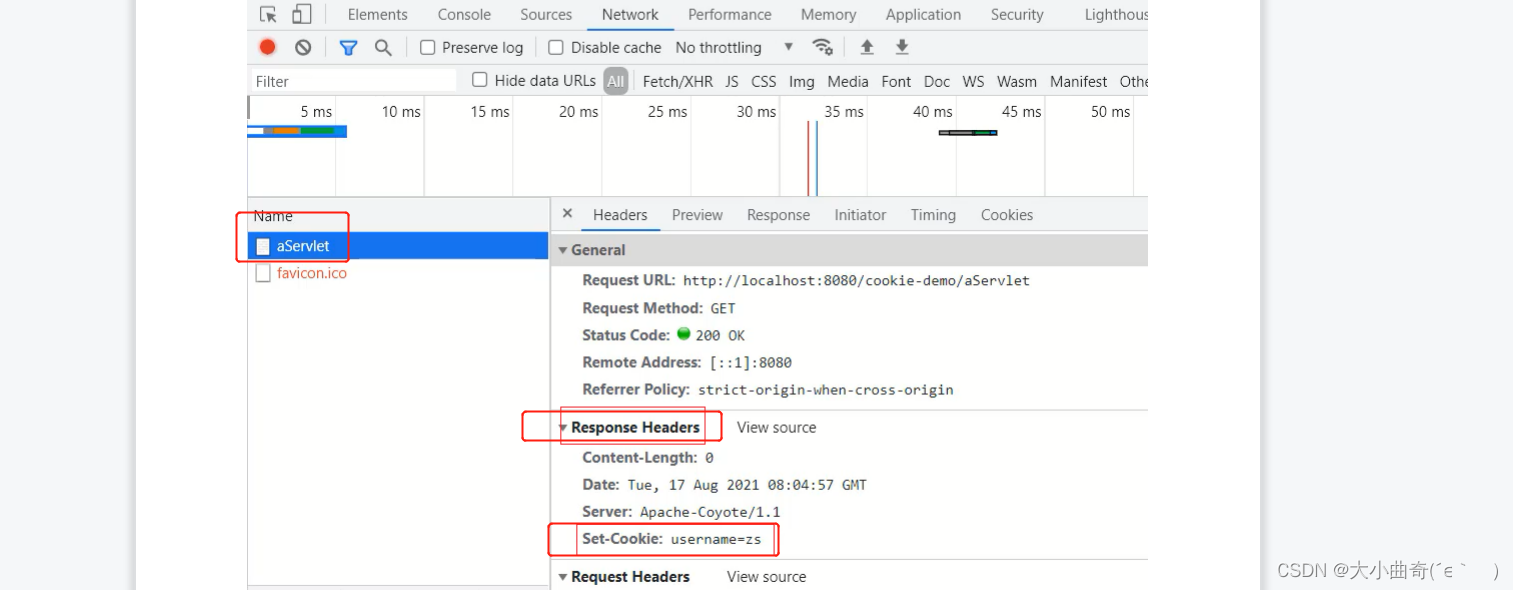
- When AServlet responds to data, the Tomcat server responds to data based on the HTTP protocol.
- When Tomcat finds that the backend is returning a Cookie object, Tomcat will add a line of data to the response header.
Set-Cookie:username=zs - After the browser obtains the response result, it can obtain
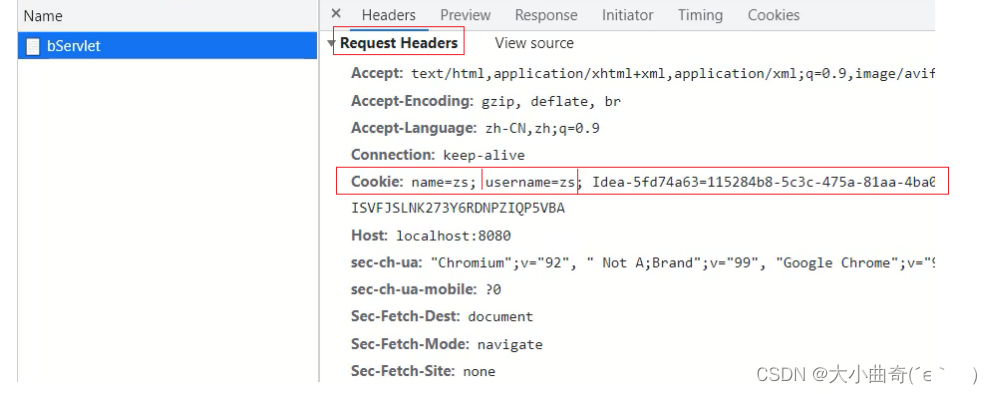
Set-Cookiethe corresponding value from the response headerusername=zsand store the data in the browser's memory. - When the browser sends a request to BServlet again, the browser will automatically add it to the request header.
Cookie: username=zsSent to server BServlet - The Request object will encapsulate the values corresponding to the cookies in the request header into Cookie objects, eventually forming an array.
- After BServlet obtains Cookie[] through the Request object, it can obtain the data it needs from it.
Next, use the case just now to verify the above conclusion:
(1) Access the address corresponding to the AServlet http://localhost:8080/cookie-demo/aServlet
and use the Chrom browser to open the developer tools (F12 or Crtl+Shift+I) to viewresponse headerThe data in
(2) Access the address corresponding to BServlet `http://localhost:8080/cookie-demo/bServlet
Use the Chrom browser to open the developer tools (F12 or Crtl+Shift+I) to viewRequest headerData in:
3、Cookie usage details (heavy)
In this section, we mainly explain two pieces of knowledge. The first is the survival time of Cookie, and the second is how Cookie stores Chinese characters. First, let’s learn about the survival time of Cookie.
3.1. Cookie survival time (Heavy)
I asked you to think about a question before:
(1) The browser sends a request to AServlet, and AServlet will respond to an existing
usernanme=zsCookie object to the browser
(2) The browser receives the response data and stores the cookie in the browser memory
(3) When the browser sends a request to BServlet, BServlet can use the Request object to obtain Cookie data
(4) Before sending a request to BServlet, if the browser is closed and reopened for access, can BServlet obtain Cookie data?
Note: Closing and opening the browser does not mean opening a new selected graphics card, and it must be closed and then opened, and the order cannot be changed.
In response to the above problem, through the demonstration, you will find that Cookie data can no longer be obtained in BServlet. Why is this?
- By default, cookies are stored in browser memory. When the browser is closed and the memory is released, the cookie is destroyed.
This conclusion confirms the above demonstration effect, but if you use this default cookie, some requirements cannot be achieved. For example:
there is a function on the login page of the website above记住我, which everyone is familiar with. - Enter your username and password for the first time and check the box
记住我to log in. - The next time you log in, your username and password will be filled in automatically, and you don’t need to re-enter them to log in.
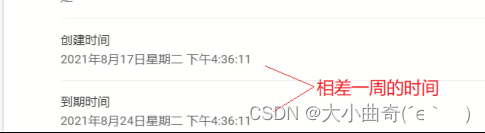
- For example,
记住我this function requires remembering the username and password for a week, so there will be problems using the default cookies. - Because by default, cookies will be deleted from the browser memory as soon as the browser is closed, and
记住我the functions cannot be implemented.
So we now encounter a problem:How to store cookies persistently?
Cookie has actually provided us with the corresponding API to accomplish this. This API issetMaxAge,
- Set cookie survival time
setMaxAge(int seconds)
Parameter values are:
1.Positive number: Write the cookie to the hard drive of the computer where the browser is located for persistent storage. Automatically delete when time expires
2.Negative number: Default value, the cookie is in the current browser memory. When the browser is closed, the cookie is destroyed.
3. Zero: Delete the corresponding cookie.
Next, we set the cookie survival time in AServlet.
package com.itheima.web.cookie;

@WebServlet("/aServlet")
public class AServlet extends HttpServlet {


    @Override
    protected void doGet(HttpServletRequest request, HttpServletResponse response) throws ServletException, IOException {


        //发送Cookie
        //1. 创建Cookie对象
        Cookie cookie = new Cookie("username","zs");
        //设置存活时间   ,1周 7天
        cookie.setMaxAge(60*60*24*7); //易阅读,需程序计算
        //cookie.setMaxAge(604800); //不易阅读(可以使用注解弥补),程序少进行一次计算
        //2. 发送Cookie,response
        response.addCookie(cookie);
    }

    @Override
    protected void doPost(HttpServletRequest request, HttpServletResponse response) throws ServletException, IOException {


        this.doGet(request, response);
    }
}
After modifying the code, start the test and visithttp://localhost:8080/cookie-demo/aServlet
- After accessing an AServlet, close the browser and restart it, and then access it again. If
http://localhost:8080/cookie-demo/bServetit can be printed on the consoleusername:zs, it means that the cookie is not destroyed when the browser is closed. - View the contents of the cookie through your browser and you will find cookie-related information.
3.2. Cookie stores Chinese (Heavy)
First, let’s demonstrate an effect. username=zsChange the previous value username=张三to 张三save Chinese characters in the cookie and see what the effect is:
package com.itheima.web.cookie;

@WebServlet("/aServlet")
public class AServlet extends HttpServlet {


    @Override
    protected void doGet(HttpServletRequest request, HttpServletResponse response) throws ServletException, IOException {


        //发送Cookie
        //1. 创建Cookie对象
        String value = "张三";
        Cookie cookie = new Cookie("username", value);
        //设置存活时间   ,1周 7天
        cookie.setMaxAge(60 * 60 * 24 * 7); //易阅读,需程序计算
        //cookie.setMaxAge(604800); //不易阅读(可以使用注解弥补),程序少进行一次计算
        //2. 发送Cookie,response
        response.addCookie(cookie);
    }
    @Override
    protected void doPost(HttpServletRequest request, HttpServletResponse response) throws ServletException, IOException {


        this.doGet(request, response);
    }
}
Start the access test. When accessing, you http://localhost:8080/cookie-demo/aServletwill find that the browser will prompt an error message:
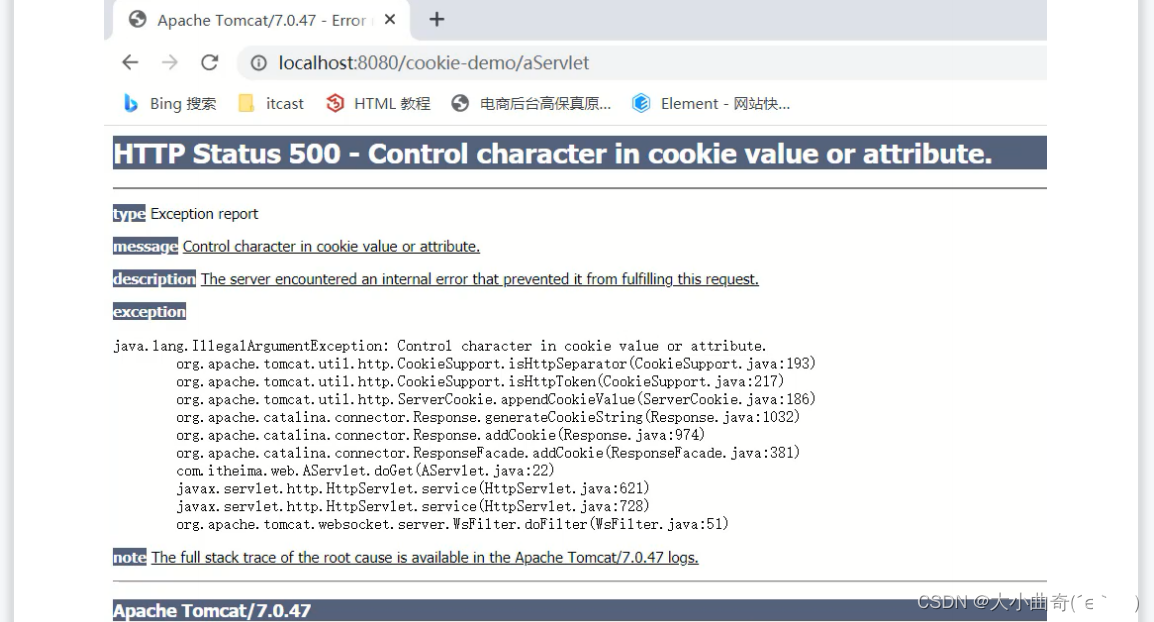
Through the above case demonstration, we come to a conclusion:
- Cookies cannot directly store Chinese characters
Cookies cannot store Chinese, but if there is a need for this, how should we solve it at this time? At this time
, we can use a knowledge point we have learned before URL编码, so if we need to store Chinese, justNeed to transcode, the specific implementation ideas are:
1. Encode Chinese URL in AServlet, use it
URLEncoder.encode(), and store the encoded value in Cookie
2. Obtain the value in Cookie in BServlet, and the obtained value is the URL encoded value
3. Store the obtained value in URL decoding, using itURLDecoder.decode(), you can get the corresponding Chinese value
(1) URL encoding Chinese in AServlet
package com.itheima.web.cookie;

@WebServlet("/aServlet")
public class AServlet extends HttpServlet {


    @Override
    protected void doGet(HttpServletRequest request, HttpServletResponse response) throws ServletException, IOException {


        //发送Cookie
        //1. 创建Cookie对象
        String value = "张三";
        //对中文进行URL编码
        value = URLEncoder.encode(value, "UTF-8");
        System.out.println("存储数据:" + value);
        //将编码后的值存入Cookie中
        Cookie cookie = new Cookie("username", value);
        //设置存活时间   ,1周 7天
        cookie.setMaxAge(60 * 60 * 24 * 7); //易阅读,需程序计算
        //cookie.setMaxAge(604800); //不易阅读(可以使用注解弥补),程序少进行一次计算
        //2. 发送Cookie,response
        response.addCookie(cookie);
    }
    @Override
    protected void doPost(HttpServletRequest request, HttpServletResponse response) throws ServletException, IOException {


        this.doGet(request, response);
    }
}
(2) Get the value in BServlet and decode the value
package com.itheima.web.cookie;

@WebServlet("/bServlet")
public class BServlet extends HttpServlet {


    @Override
    protected void doGet(HttpServletRequest request, HttpServletResponse response) throws ServletException, IOException {


        //获取Cookie
        //1. 获取Cookie数组
        Cookie[] cookies = request.getCookies();
        //2. 遍历数组
        for (Cookie cookie : cookies) {


            //3. 获取数据
            String name = cookie.getName();
            if ("username".equals(name)) {


                String value = cookie.getValue(); //获取的是URL编码后的值 %E5%BC%A0%E4%B8%89
                //URL解码
                value = URLDecoder.decode(value, "UTF-8");
                System.out.println(name + ":" + value);//value解码后为 张三
                break;
            }
        }
    }

    @Override
    protected void doPost(HttpServletRequest request, HttpServletResponse response) throws ServletException, IOException {


        this.doGet(request, response);
    }
}
Run the program and run the addresses of the above two files in the browser respectively. You can output two sentences on the console:
存储数据:%E5%BC%A0%E4%B8%89
username:张三
At this point, we can store Chinese in Cookie for use.
3.3、summary
In the details of the use of cookies, we talked about 存活时间the sum of cookies 存储中文:
- Survival time requires mastering
setMaxAage()the use of API - To store Chinese, you need to master the use of URL encoding and decoding.
three,Session
Cookies can already complete data sharing between multiple requests in a session. We also mentioned that Sessions can also be implemented, then:
- What is Session?
- How to use Session?
- How is Session implemented?
- What are the precautions for using Session?
1、Basic use of Session
1. Concept
Session:Server-side session tracking technology: save data to the server.
- Session is stored on the server side and Cookie is stored on the client side.
- Data stored on the client is easily stolen and intercepted, and there are many unsafe factors.
- The data stored on the server side is smaller than that on the client side.safer
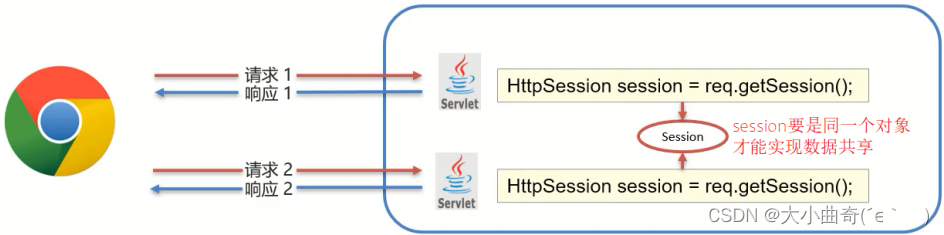
2.Session workflow

- The AServlet on the server side obtains a Session object and stores the data in it.
- The BServlet on the server side obtains the same Session object and retrieves data from it
- This enables data sharing between multiple requests in a session.
- The biggest question now is how to ensure that AServlet and BServlet use the same Session object (explained in the principle analysis session)?
3. Basic use of Session
The HttpSession interface is provided in JavaEE to realize the data sharing function between multiple requests in a session.
The specific usage steps are:
- Get Session object, using
requestthe object
HttpSession session = request.getSession();
- Functions provided by the Session object:
- Store data in the session field
void setAttribute(String name, Object o) - Get the value based on key
Object getAttribute(String name) - Delete the key-value pair based on key
void removeAttribute(String name)
- Store data in the session field
After introducing the Session-related API, let’s use a case to complete the use of Session. The specific implementation steps are:
Requirements: Store data in the Session in one Servlet, and obtain the data stored in the Session in another Servlet
1. Create a Servlet class named SessionDemo1
2. Create a Servlet class named SessionDemo2
3. In the method of SessionDemo1 : Get the Session object and store data
4. In the method of SessionDemo2: Get the Session object and get the data
5. Start the test
(1) Create a Servlet class named SessionDemo1
(3) SessionDemo1: Get the Session object and store data
package com.itheima.web.session;

@WebServlet("/demo1")
public class SessionDemo1 extends HttpServlet {


    @Override
    protected void doGet(HttpServletRequest request, HttpServletResponse response) throws ServletException, IOException {


        //存储到Session中
        //1. 获取Session对象
        HttpSession session = request.getSession();
        //2. 存储数据
        session.setAttribute("username", "zs");
    }
    @Override
    protected void doPost(HttpServletRequest request, HttpServletResponse response) throws ServletException, IOException {


        this.doGet(request, response);
    }
}
(2) Create a Servlet class named SessionDemo2
(4) SessionDemo2: Get the Session object and get data
package com.itheima.web.session;

@WebServlet("/demo2")
public class SessionDemo2 extends HttpServlet {


    @Override
    protected void doGet(HttpServletRequest request, HttpServletResponse response) throws ServletException, IOException {


        //获取数据,从session中
        //1. 获取Session对象
        HttpSession session = request.getSession();
        //2. 获取数据
        Object username = session.getAttribute("username");
        System.out.println(username);
    }
    @Override
    protected void doPost(HttpServletRequest request, HttpServletResponse response) throws ServletException, IOException {


        this.doGet(request, response);
    }
}
(5) Start testing,
- Access first
http://localhost:8080/cookie-demo/demo1and store data in Session - During access
http://localhost:8080/cookie-demo/demo2, get data from Session - View the console.

Through the effect of the case, you can see that Session can share data between two requests in one session.
1.1、summary
At this point, the basic use of Session has been completed. The key points to master are:
- Session acquisition
HttpSession session = request.getSession(); - Use of Common Session Methods
Note: What can be stored in Session is an Object type of data, which means that any data type can be stored in Session.void setAttribute(String name, Object o) Object getAttribute(String name)
After introducing the basic use of Session, how does the underlying layer of Session realize data sharing between two requests in a session?
2. Analysis of the principle of Session
- Session is implemented based on Cookie
In fact, this sentence cannot explain the underlying implementation of Session in detail. Next, let’s analyze the specific implementation principle of Session step by step:
(1)Prerequisites
If Session wants to realize data sharing between multiple requests in a session, it must ensure that the object obtained by multiple requests is the same Session..
So are they an object? It is very simple to verify this conclusion. You only need to print the Session objects in the two Servlets in the above case.
SessionDemo1
        //1. 获取Session对象
        HttpSession session = request.getSession();
        System.out.println(session);
SessionDemo2
        //获取数据,从session中
        //1. 获取Session对象
        HttpSession session = request.getSession();
        System.out.println(session);
Start the test and visit respectively.
http://localhost:8080/cookie-demo/demo1
http://localhost:8080/cookie-demo/demo2

By printing, you can get the following conclusions:
- The Session object obtained in the two Servlet classes is the same
- Refresh the demo1 and demo2 requests multiple times, and the final results printed on the console are the same.
Then the question comes again. If you open a new browser and access demo1 or demo2, will the Session printed on the console still be the same object?
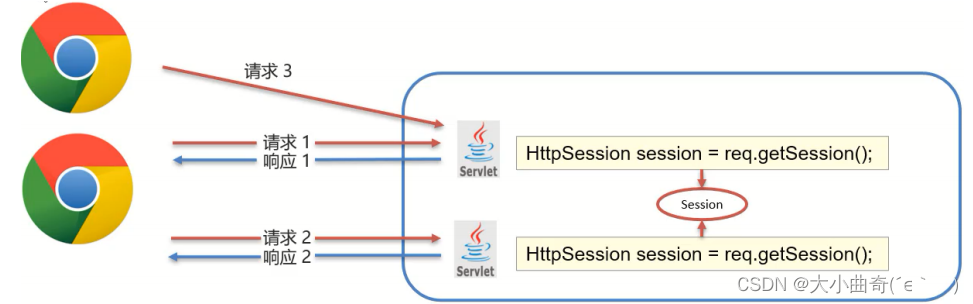
Note: When demonstrating on a computer, if it is the same browser, you must close all browsers and reopen them to open a new browser.
Of course, you can also use different browsers for testing, so there is no need to close all previous browsers.
Test results: If it is a different browser or after reopening the browser, the printed Session will be different.
Therefore, Session also implements data sharing between multiple requests in a session.
Then the main question comes,How does Session ensure that the Session object obtained in a session is the same?

(1) When demo1 obtains the session object for the first time, the session object will have a unique identifier. If it is
id:10
(2) after demo1 stores other data in the session and processes all business, it needs to respond to the result through the Tomcat server. Browser
(3) When the Tomcat server discovers that the session object is used in business processing, it will treat the session's unique identifierid:10as a cookie, add itSet-Cookie:JESSIONID=10to the response header, and respond to the browser
(4) After the browser receives the response result, it will Store the cookie data in the response header into the browser's memory
(5) When the browser accesses demo2 in the same session, it willcookie: JESSIONID=10add the data in the cookie to the request header in the format and send it to the server Tomcat
(6) After demo2 gets the request, it reads the JSESSIONID value in the cookie as 10 from the request header, and then searches forid:10the session object in the server memory. If it is found, it returns the object directly. If not, it creates a new session. After object
(7) closes and opens the browser, because the browser's cookie has been destroyed, there is no JESSIONID data, and the session obtained by the server is a brand new session object.
At this Session是基于Cookie来实现的point, we have finished the explanation. Next, we will demonstrate it through examples:
(1) Use the chrome browser to access http://localhost:8080/cookie-demo/demo1, open the developer mode (F12 or Ctrl+Shift+I), and viewResponse HeadersData:

(2) Use Chrome browser to visit again http://localhost:8080/cookie-demo/demo2and viewRequest Headersdata:

2.1、summary
After introducing the principle of Session, we only need to remember
- Session is implemented based on Cookie
3、Session usage details
In this section we will mainly explain two pieces of knowledge. The first one isSession passivation and activation, the second one isSession destruction, first let’s learn what is Session passivation and activation?
3.1、Session passivation and activation
The first question that everyone needs to think about is:
-
After the server is restarted, is the data in the Session still there?
To answer this question, we can first look at the picture below.
(1) The session object shared by the server-side AServlet and BServlet should be stored in the server's memory
(2) ) After the server is restarted, the data in the memory should have been released and the objects should have been destroyed,
so the session data should no longer exist. But what problems will occur if the session does not exist?For example,
(1) the user adds the items to be purchased to the shopping cart. Because the same session needs to be requested multiple times for data sharing, it is assumed that the data is stored in the Session object. (
2) The user is about to pay. When the user received a call, the payment action was stranded.
(3) While the user was making a call, the shopping website needed to be restarted for some reasons.
(4) After the restart, the session data was destroyed, and the product information in the shopping cart was also lost. Then it disappears
(5) If the user wants to initiate payment again, there will be a problem.So for session data, we should be able to save the data even if the server is restarted.
After analyzing so much, when the Tomcat server is restarted, whether the session data will be saved and how it is saved, we can demonstrate it through actual cases:
Note: The shutdown and startup mentioned here should ensure normal shutdown and startup.
So how to shut down the Tomcat server normally?
You need to use the command line to start and stop the Tomcat server:
start up: Enter the directory where the project pom.xml is located and executetomcat7:run

stop:In the command line interface that starts, enterctrl+cWith the above two normal startup and shutdown methods, the next test process is:
(1) Start the Tomcat server first
(2) Accesshttp://localhost:8080/cookie-demo/demo1and store the data in the session
(3) Stop the Tomcat server correctly
(4) Restart the Tomcat server again
(5) Accesshttp://localhost:8080/cookie-demo/demo2to see if the data in the session can be obtained

After testing, you will find that as long as the server is shut down and started normally, the data in the session can be saved.
So how does the Tomcat server do it?
The specific reasons are:Session passivation and activation:- passivation: After the server is shut down normally, Tomcat will automatically write the Session data to the file on the hard disk.
- The passivated data path is:
项目目录\target\tomcat\work\Tomcat\localhost\项目名称\SESSIONS.ser

- The passivated data path is:
- activation: After starting the server again, load data from the file into the Session
- After the data is loaded into the Session, the files in the path
SESSIONS.serwill be deleted.
- After the data is loaded into the Session, the files in the path
- passivation: After the server is shut down normally, Tomcat will automatically write the Session data to the file on the hard disk.
You just need to understand the entire process mentioned above. Because all the processes are completed by Tomcat itself, we do not need to participate.
Summary
After introducing the passivation and activation of Session, we need to pay attention to the following:
- Session data is stored on the server side. After the server is restarted, the session data will be saved.
- After the browser is closed and started, the re-established connection is already a new session, and the session data obtained is also a new object.
- If you want to share the session data, the browser cannot be closed, so the session data cannot be saved for a long time.
- Cookies are stored on the client side and can be stored for a long time.
3.2. Session destruction
There are two ways to destroy a session:
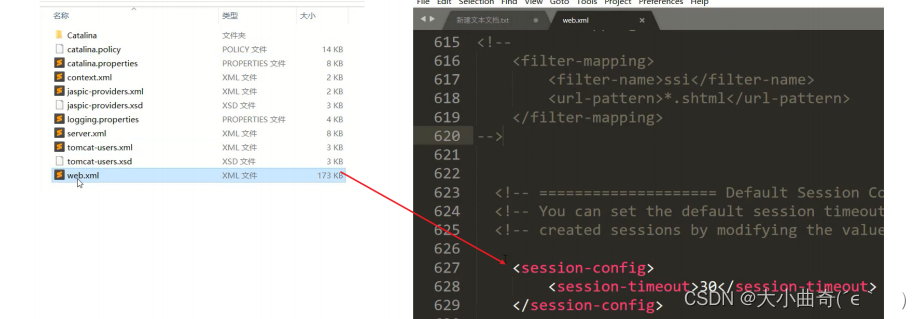
- By default, no operation is performed and it is automatically destroyed in 30 minutes.
- This expiration time can be modified through configuration.
- Configure in the project's web.xml
<?xml version="1.0" encoding="UTF-8"?> <web-app xmlns="http://xmlns.jcp.org/xml/ns/javaee" xmlns:xsi="http://www.w3.org/2001/XMLSchema-instance" xsi:schemaLocation="http://xmlns.jcp.org/xml/ns/javaee http://xmlns.jcp.org/xml/ns/javaee/web-app_3_1.xsd" version="3.1"> <session-config> <session-timeout>100</session-timeout> </session-config> </web-app> - If not configured, the default is 30 minutes. The default value is hard-coded in Tomcat's web.xml configuration file.
- Configure in the project's web.xml
- This expiration time can be modified through configuration.
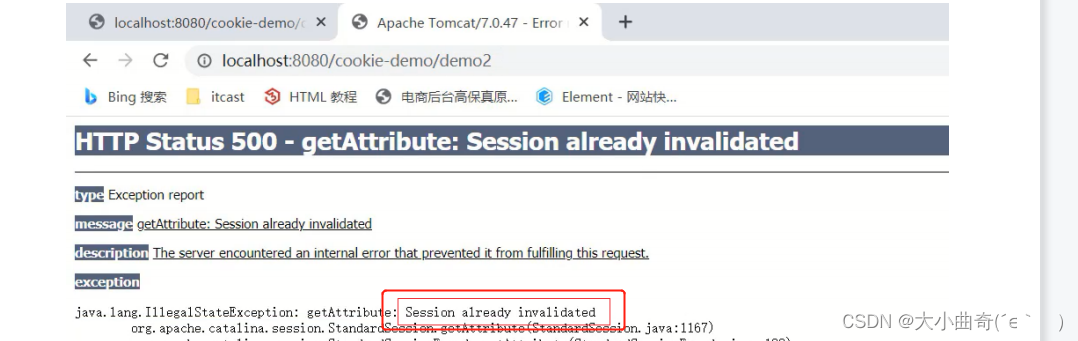
- Call invalidate() of the Session object to destroy it
- Add a session destruction method to the SessionDemo2 class
package com.itheima.web.session;

@WebServlet("/demo2")
public class SessionDemo2 extends HttpServlet {


    @Override
    protected void doGet(HttpServletRequest request, HttpServletResponse response) throws ServletException, IOException {


        //获取数据,从session中
        //1. 获取Session对象
        HttpSession session = request.getSession();
        // 销毁
        session.invalidate();
        //2. 获取数据
        Object username = session.getAttribute("username");
        System.out.println(username);
    }

    @Override
    protected void doPost(HttpServletRequest request, HttpServletResponse response) throws ServletException, IOException {


        this.doGet(request, response);
    }
}
- Start the access test, first visit demo1 to store data into the session, and then visit demo2 again to get data from the session.
- This destruction method generally requires the session to be destroyed when the user exits.
4、Summary of Cookies and Sessions
-
Both Cookie and Session are used to complete multiple requests within a session.data sharingof.
Putting the two required objects together, you need to think about:
What is the difference between Cookie and Session?
What are the application scenarios of Cookie and Session? -
the difference:
- Storage location: Cookie stores data on the client side, and Session stores data on the server side.
- Security: Cookie is not safe, Session is safe
- Data size: Cookie maximum 3KB, Session has no size limit
- Storage time: Cookies can be stored for a long time through setMaxAge(), and the Session defaults to 30 minutes.
- Server performance: Cookies do not occupy server resources, and Sessions occupy server resources.
-
Application scenarios:
- Shopping cart: uses cookies to store
- Displayed in the name of the logged in user: Use Session to store
- Remember me function: uses cookies to store
- Verification code: use session to store
-
in conclusion
- Cookies are used to ensure user identification when not logged in.
- Session is used to save data after user login
After introducing Cookie and Session,Which one to use still needs to be analyzed in detail based on the specific business.。
Four,User login registration case
1. Demand analysis
Statement of needs:
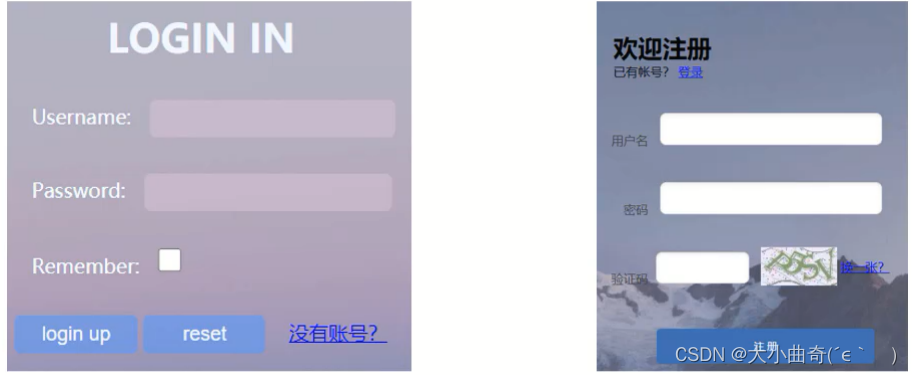
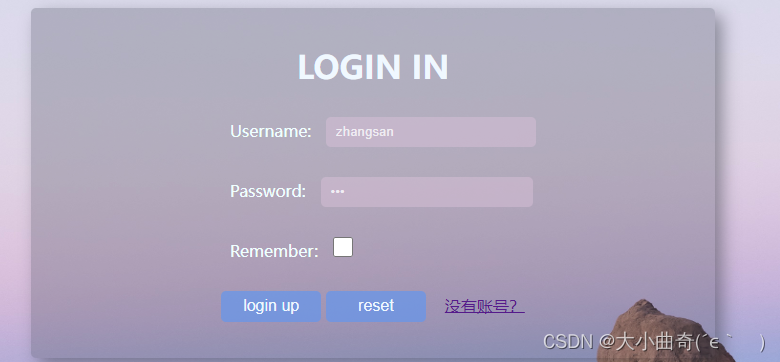
- Complete the user login function . If the user checks "Remember User" , the login page will be visited next time.autofillUsername Password
- Complete the registration function and implementVerification codeFunction
2、User login function
1. Requirements:
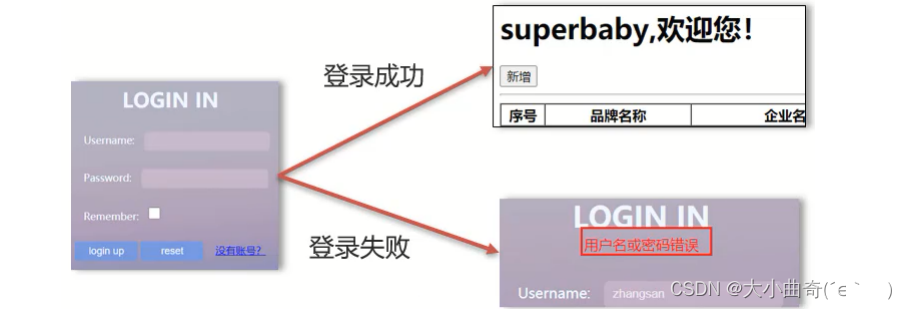
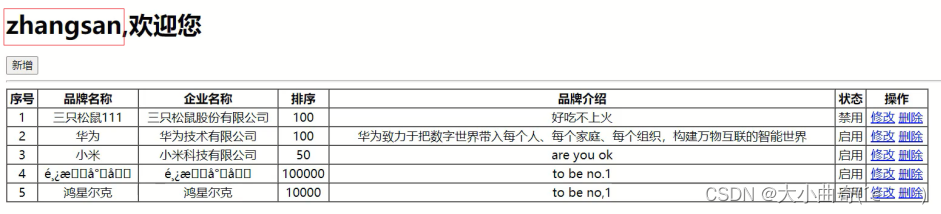
- After the user logs in successfully, jump to the list page and display the name of the currently logged in user on the page.
- After the user fails to log in, jump back to the login page and display the corresponding error message on the page.
2. Implement process analysis
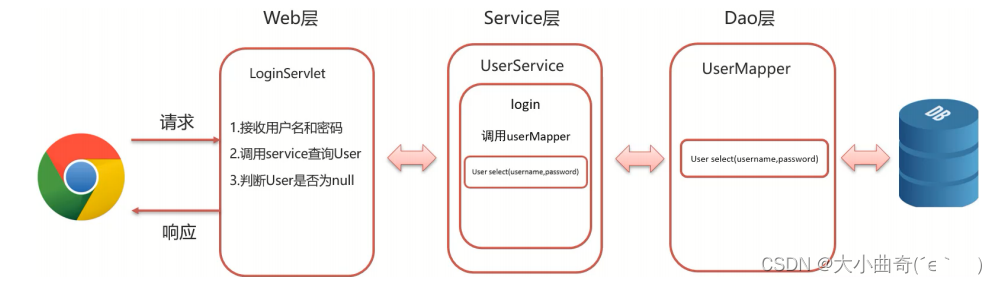
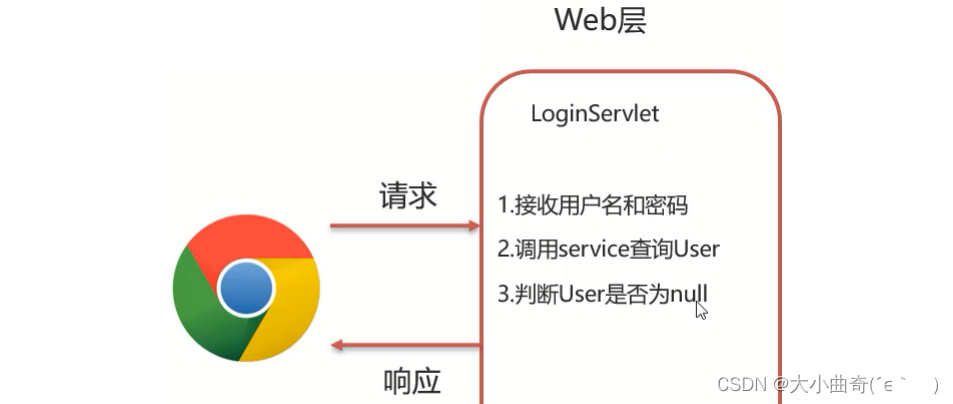
(1) The front end sends requests and data to the LoginServlet of the Web layer through the form
(2) Receives the request and data [user name and password] in the LoginServlet
(3) After the LoginServlet receives the request and data, it calls the Service layer to complete the query based on the user name and password. User object
(4) In the Service layer, you need to write the UserService class, implement the login method in the class, and call the UserMapper of the Dao layer in the method
(5) In the UserMapper interface, declare a method to query user information based on the user name and password
(6) Dao After the layer queries the data, it encapsulates the returned data into the User object and hands the object to the Service layer
(7) The Service layer returns the data to the Web layer
(8) After the Web layer obtains the User object, it determines the User object and if it is Null , then respond the error message to the login page. If it is not Null, jump to the list page, and save the currently logged in user's information into the Session and carry it to the list page.
3. Specific implementation
(1) Complete the Dao layer code writing
(1.1) and 04-资料\1. 登录注册案例\2. MyBatis环境\UserMapper.javaplace it under the com.itheima.mapper` package:
package com.itheima.mapper;

public interface UserMapper {


    /**
     * 根据用户名和密码查询用户对象
     * @param username
     * @param password
     * @return
     */
    @Select("select * from tb_user where username = #{username} and password = #{password}")
    User select(@Param("username") String username,@Param("password")  String password);

    /**
     * 根据用户名查询用户对象
     * @param username
     * @return
     */
    @Select("select * from tb_user where username = #{username}")
    User selectByUsername(String username);

    /**
     * 添加用户
     * @param user
     */
    @Insert("insert into tb_user values(null,#{username},#{password})")
    void add(User user);
}
(1.2)、(Create entity class object) will 04-资料\1. 登录注册案例\2. MyBatis环境\User.javabe placed com.itheima.pojounder the package:
package com.itheima.pojo;
public class User {


    private Integer id;
    private String username;
    private String password;

    public Integer getId() {


        return id;
    }
    public void setId(Integer id) {


        this.id = id;
    }
    public String getUsername() {


        return username;
    }
    public void setUsername(String username) {


        this.username = username;
    }
    public String getPassword() {


        return password;
    }
    public void setPassword(String password) {


        this.password = password;
    }
    @Override
    public String toString() {


        return "User{" +
                "id=" + id +
                ", username='" + username + '\'' +
                ", password='" + password + '\'' +
                '}';
    }
}
(1.3) will 04-资料\1. 登录注册案例\2. MyBatis环境\UserMapper.xmlbe placed in resources/com/itheima/mapperthe directory:
<?xml version="1.0" encoding="UTF-8" ?>
<!DOCTYPE mapper
        PUBLIC "-//mybatis.org//DTD Mapper 3.0//EN"
        "http://mybatis.org/dtd/mybatis-3-mapper.dtd">
<mapper namespace="com.itheima.mapper.UserMapper">

</mapper>
(2) Complete the code writing of the Service layer
(2.1) com.itheima.serviceCreate the UserService class under the package
public class UserService {


    //1.使用工具类获取SqlSessionFactory
    SqlSessionFactory factory = SqlSessionFactoryUtils.getSqlSessionFactory();
    /**
     * 登录方法
     * @param username
     * @param password
     * @return
     */
    public User login(String username,String password){


        //2. 获取SqlSession
        SqlSession sqlSession = factory.openSession();
        //3. 获取UserMapper
        UserMapper mapper = sqlSession.getMapper(UserMapper.class);
        //4. 调用方法
        User user = mapper.select(username, password);
        //释放资源
        sqlSession.close();

        return  user;
    }
}
(3) Complete the code writing of the page and Web layer
(3.1) 04-资料\1. 登录注册案例\1. 静态页面Copy to the project webappdirectory:
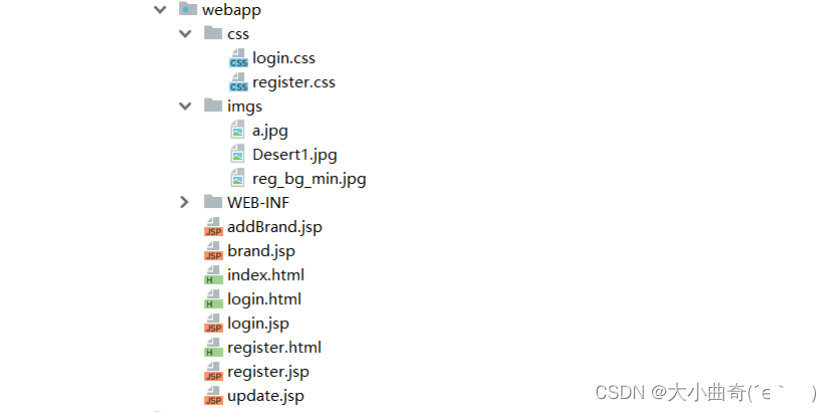
(3.2) login.htmlModify the content tologin.jsp
<%@ page contentType="text/html;charset=UTF-8" isELIgnored="false" language="java" %>
<!DOCTYPE html>
<html lang="en">
<head>
<meta charset="UTF-8">
<title>login</title>
<link href="css/login.css" rel="stylesheet">
</head>
<body>
<div id="loginDiv" style="height: 350px">
<form action="/brand-demo/loginServlet" method="post" id="form">
<h1 id="loginMsg">LOGIN IN</h1>
<!-- <div id="errorMsg">用户名或密码不正确</div>-->
<div id="errorMsg">${login_msg}</div>
<p>Username:<input id="username" name="username" type="text"></p>
<p>Password:<input id="password" name="password" type="password"></p>
<p>Remember:<input id="remember" name="remember" type="checkbox"></p>
<div id="subDiv">
<input type="submit" class="button" value="login up">
<input type="reset" class="button" value="reset">
<a href="register.html">没有账号?</a>
</div>
</form>
</div>
</body>
</html>
(3.3) Create LoginServlet class
package com.itheima.web;

@WebServlet("/loginServlet")
public class LoginServlet extends HttpServlet {


    private UserService service = new UserService();
    @Override
    protected void doGet(HttpServletRequest request, HttpServletResponse response) throws ServletException, IOException {


        //1. 获取用户名和密码
        String username = request.getParameter("username");
        String password = request.getParameter("password");

        //2. 调用service查询
        User user = service.login(username, password);

        //3. 判断
        if (user != null) {


            //登录成功,跳转到查询所有的BrandServlet

            //将登陆成功后的user对象,存储到session
            HttpSession session = request.getSession();
            //将user信息存储到session;
            session.setAttribute("user", user);

            String contextPath = request.getContextPath();//获取项目访问路径
            response.sendRedirect(contextPath + "/selectAllServlet");//Respones请求重定向
        } else {


            // 登录失败,
            // 将错误信息存储到request,setAttribute传递数据给转发的对象
            request.setAttribute("login_msg", "用户名或密码错误");
            // 跳转到login.jsp,请求转发
            request.getRequestDispatcher("/login.jsp").forward(request, response);
        }
    }
    @Override
    protected void doPost(HttpServletRequest request, HttpServletResponse response) throws ServletException, IOException {


        this.doGet(request, response);
    }
}
(3.4) Add a prompt message to welcome the current user under the label in brand.jsp:
<h1>${user.username},欢迎您</h1>
(3.5) Modify login.jsp and use EL expression to obtain error information
修改前内容:<div id="errorMsg">用户名或密码不正确</div>
修改后内容: <div id="errorMsg">${login_msg}</div>
(4) Start, access test
(4.1) Enter the login page and enter the wrong user name or password
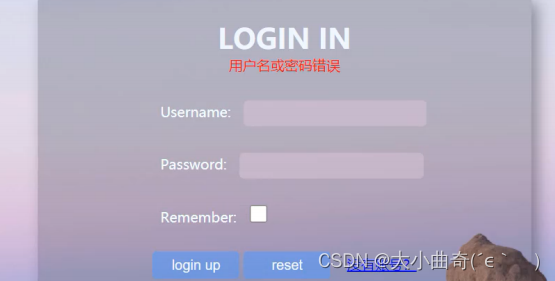
(4.2) Enter the correct user and password information
2.1. Summary
- In LoginServlet, the user data of successful login is stored in the session, and the method obtains the currently logged in user information in the list page for display.
- In LoginServlet, the error message of login failure is stored in the request. If it is stored in the session, all requests in this session will have the error message of login failure. This is not needed, so there is no need to store it in in session
3、Remember Me-Set Cookie
-
need:
If the user checks "Remember User", the username and password will be automatically filled in the next time they visit the login page. This can improve the user experience.

In response to the above demand, the biggest question is: How to automatically fill in username and password? -
Implementation process analysis
Because记住我the function is to achieve the effect that even if the user closes the browser and visits again after a few days, it can be filled in automatically. Therefore, the login information needs to be stored in a file that can be saved for a long time and can still be valid after the browser is closed and restarted. The place is what we talked about earlierCookie,so:
- Write username and passwordCookie, and the cookie is stored persistently. The browser will automatically carry the cookie next time you visit.
- After obtaining the cookie data on the page, set it to the username and password boxes.
- When are cookies written?
- The user must log in successfully before writing
记住我Checkboxes that users must check on the login page
(1) When sending requests and data, the front end needs to carry one more
Rememberdata about whether the user has checked or not
(2) After the LoginServlet obtains the data, it calls Service to complete the determination of the user name and password
(3) The login is successful, and the user checks the check box on the front end If selected记住我, you need to write the user name and password data into the cookie, and set the cookie survival time
(4) After the setting is successful, the data will be responded to the front end.
- Implementation
(1) Set the value for the check box in login.jsp
<%@ page contentType="text/html;charset=UTF-8" isELIgnored="false" language="java" %>
<!DOCTYPE html>
<html lang="en">
<head>
<meta charset="UTF-8">
<title>login</title>
<link href="css/login.css" rel="stylesheet">
</head>
<body>
<div id="loginDiv" style="height: 350px">
<form action="/brand-demo/loginServlet" method="post" id="form">
<h1 id="loginMsg">LOGIN IN</h1>
<!-- <div id="errorMsg">用户名或密码不正确</div>-->
<div id="errorMsg">${login_msg}</div>
<p>Username:<input id="username" name="username" type="text"></p>
<p>Password:<input id="password" name="password" type="password"></p>
<p>Remember:<input id="remember" name="remember" value="1" type="checkbox"></p>
<div id="subDiv">
<input type="submit" class="button" value="login up">
<input type="reset" class="button" value="reset">
<a href="register.html">没有账号?</a>
</div>
</form>
</div>
</body>
</html>
(2) Get the value of the check box in LoginServlet and set the cookie after successful login
package com.itheima.web;

@WebServlet("/loginServlet")
public class LoginServlet extends HttpServlet {


    private UserService service = new UserService();

    @Override
    protected void doGet(HttpServletRequest request, HttpServletResponse response) throws ServletException, IOException {


        //1. 获取用户名和密码
        String username = request.getParameter("username");
        String password = request.getParameter("password");
        //获取复选框数据
        String remember = request.getParameter("remember");

        //2. 调用service查询
        User user = service.login(username, password);

        //3. 判断
        if (user != null) {


            //登录成功,跳转到查询所有的BrandServlet
            //判断用户是否勾选记住我,字符串写前面是为了避免出现空指针异常
            if ("1".equals(remember)) {


                //勾选了,发送Cookie
                //1. 创建Cookie对象
                Cookie c_username = new Cookie("username", username);
                Cookie c_password = new Cookie("password", password);
                // 设置Cookie的存活时间
                c_username.setMaxAge(60 * 60 * 24 * 7);
                c_password.setMaxAge(60 * 60 * 24 * 7);
                //2. 发送
                response.addCookie(c_username);
                response.addCookie(c_password);
            }
            //将登陆成功后的user对象,存储到session
            HttpSession session = request.getSession();
            session.setAttribute("user", user);

            String contextPath = request.getContextPath();//获取项目访问路径
            response.sendRedirect(contextPath + "/selectAllServlet");//Respones请求重定向
        } else {


            // 登录失败,
            // 存储错误信息到request
            request.setAttribute("login_msg", "用户名或密码错误");
            // 跳转到login.jsp,转发;
            request.getRequestDispatcher("/login.jsp").forward(request, response);
        }
    }
    @Override
    protected void doPost(HttpServletRequest request, HttpServletResponse response) throws ServletException, IOException {


        this.doGet(request, response);
    }
}
(3) Start the access test.
Only when the current user name and password are entered correctly and the Remeber checkbox is checked can the cookie-related data be seen in the response header.

4、Remember Me - Get Cookie
-
After the required
login is successful and Remeber is checked, the cookie data returned by the backend to the frontend has been stored. Next, you need to obtain the data in the cookie on the page and set the data to the username and password boxes on the login page.

How to get the value in the cookie directly on the page? -
To implement process analysis
, you can use EL expressions on the page.${cookie.key.value}
key: refers to the key name stored in the cookie.
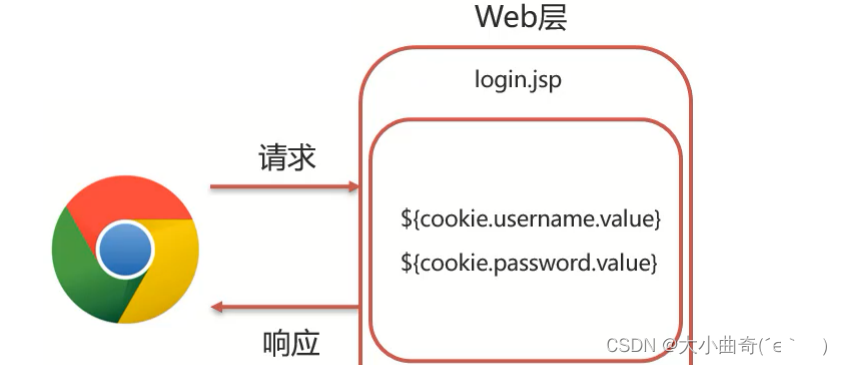
(1) Use the value value in the form input box of the login.jsp user name to add a default value to the form element. Value can be used${cookie.username.value}
(2) Use the value value in the login.jsp password form input box to add a default value to the form element. Value can be used${cookie.password.value}
- Specific implementation
(1) Modify the login.jsp page
<p>Username:<input id="username" name="username" value="${cookie.username.value}" type="text"></p>

<p>Password:<input id="password" name="password" value="${cookie.password.value}" type="password"></p>
- After accessing the test and revisiting the login page, you can see that the user and password have been filled in.
5、User registration function
- need
- Registration function: save user information to the database
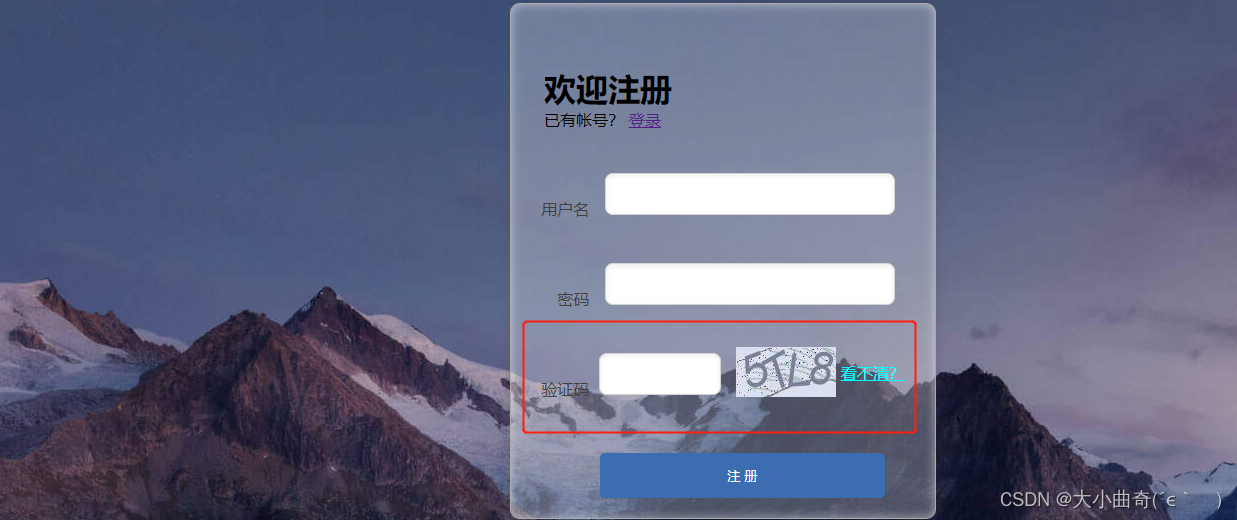
- Verification code function
- Show verification code: Show the verification code image and click to switch
- Verification verification code: If the verification code is not filled in correctly, registration will fail.
2. Implement process analysis

(1) The front end sends requests and data to the RegisterServlet of the Web layer through a form
(2) Receive requests and data in RegisterServlet [user name and password]
(3) After RegisterServlet receives the request and data, it calls the Service layer to complete the saving of user information.
(4) In the Service layer, you need to write the UserService class and implement the register method in the class. You need to determine whether the user already exists. If not, complete the saving of the user data.
(5) In the UserMapper interface, declare two methods, one is to query user information based on user name, and the other is to save user information.
(6) If the save in the UserService class is successful, it will return true, if it fails, it will return false, and the data will be returned to the Web layer.
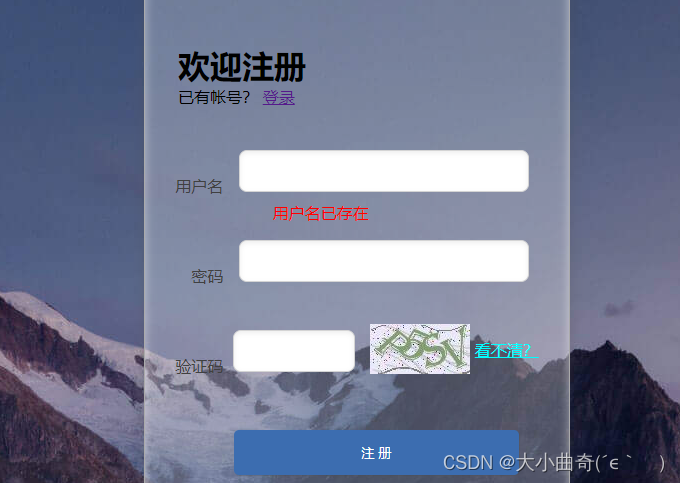
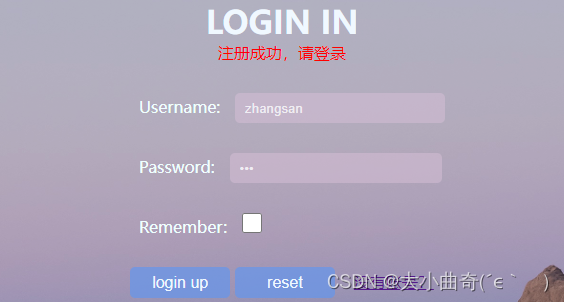
(7) After the Web layer obtains the result, if it returns true, it will prompt 注册成功and forward it to the login page. If it returns false, it will prompt 用户名已存在and forward it to the registration page.
- Implementation
(1) Complete the content in the Dao layer code reference material
(2) Write the Service layer code
public class UserService {


    //1.使用工具类获取SqlSessionFactory
    SqlSessionFactory factory = SqlSessionFactoryUtils.getSqlSessionFactory();
    /**
     * 注册方法
     * @return
     */
    public boolean register(User user){


        //2. 获取SqlSession
        SqlSession sqlSession = factory.openSession();
        //3. 获取UserMapper
        UserMapper mapper = sqlSession.getMapper(UserMapper.class);
        //4. 判断用户名是否存在
        User u = mapper.selectByUsername(user.getUsername());

        if(u == null){


            // 用户名不存在,注册
            mapper.add(user);
            sqlSession.commit();//提交事务;
        }
        sqlSession.close();//关闭

        return u ;

    }
}
(3) Complete the code writing of the page and Web layer
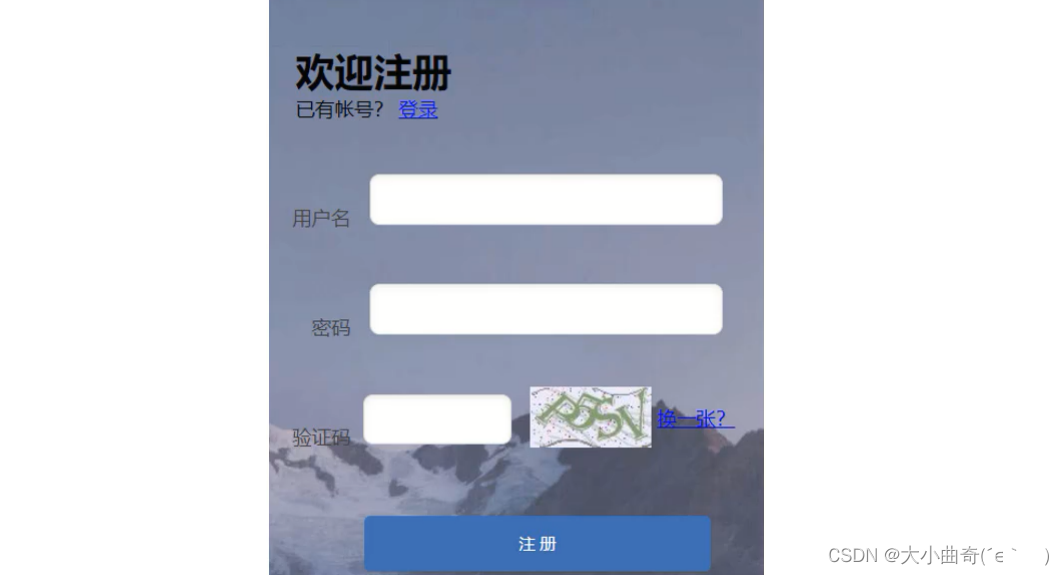
(3.1) Modify the content of register.html to register.jsp
<%@ page contentType="text/html;charset=UTF-8" isELIgnored="false" language="java" %>
<!DOCTYPE html>
<html lang="en">
<head>
    <meta charset="UTF-8">
    <title>欢迎注册</title>
    <link href="css/register.css" rel="stylesheet">
</head>
<body>
<div class="form-div">
    <div class="reg-content">
        <h1>欢迎注册</h1>
        <span>已有帐号?</span> <a href="login.jsp">登录</a>
    </div>
    <form id="reg-form" action="/brand-demo/registerServlet" method="post">

        <table>
            <tr>
                <td>用户名</td>
                <td class="inputs">
                    <input name="username" type="text" id="username">
                    <br>
                    <span id="username_err" class="err_msg" style="display: none">用户名不太受欢迎</span>
                </td>
            </tr>
            <tr>
                <td>密码</td>
                <td class="inputs">
                    <input name="password" type="password" id="password">
                    <br>
                    <span id="password_err" class="err_msg" style="display: none">密码格式有误</span>
                </td>
            </tr>

            <tr>
                <td>验证码</td>
                <td class="inputs">
                    <input name="checkCode" type="text" id="checkCode">
                    <img src="imgs/a.jpg">
                    <a href="#" id="changeImg">看不清?</a>
                </td>
            </tr>
        </table>
        <div class="buttons">
            <input value="注 册" type="submit" id="reg_btn">
        </div>
        <br class="clear">
    </form>
</div>
</body>
</html>
(3.2)Write RegisterServlet
package com.itheima.web;
@WebServlet("/registerServlet")
public class RegisterServlet extends HttpServlet {
private UserService service = new UserService();
@Override
protected void doGet(HttpServletRequest request, HttpServletResponse response) throws ServletException, IOException {
//1. 获取用户名和密码数据
String username = request.getParameter("username");
String password = request.getParameter("password");
User user = new User();
user.setUsername(username);
user.setPassword(password);
//2. 调用service 注册
boolean flag = service.register(user);
//3. 判断注册成功与否
if(!flag){
//注册功能,跳转登陆页面
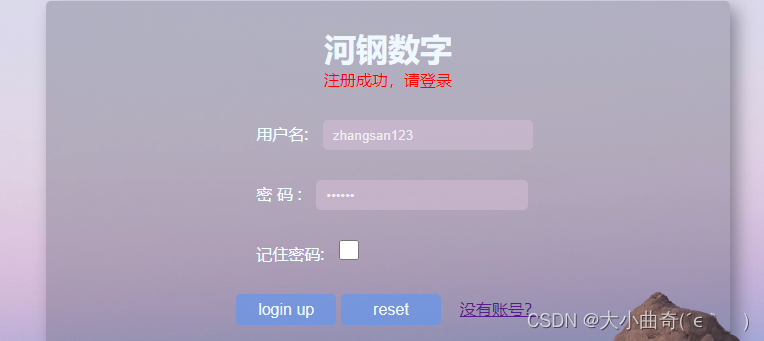
request.setAttribute("register_msg","注册成功,请登录");
request.getRequestDispatcher("/login.jsp").forward(request,response);
}else {
//注册失败,跳转到注册页面
request.setAttribute("register_msg","用户名已存在");
request.getRequestDispatcher("/register.jsp").forward(request,response);
}
}
@Override
protected void doPost(HttpServletRequest request, HttpServletResponse response) throws ServletException, IOException {
this.doGet(request, response);
}
}
(3.3) The error information returned by the background needs to be displayed on the page, and register.jsp needs to be modified.
修改前:<span id="username_err" class="err_msg" style="display:none">用户名不太受欢迎</span>
修改后:<span id="username_err" class="err_msg">${register_msg}</span>
(3.4) If the registration is successful, the success information needs to be displayed on the login page, so login.jsp also needs to be modified.
修改前:<div id="errorMsg">${login_msg}</div>
修改后:<div id="errorMsg">${login_msg} ${register_msg}</div>
(3.5) Modify login.jsp and change the registration jump address to register.jsp
修改前:<a href="register.html">没有账号?</a>
修改后: <a href="register.jsp">没有账号?</a>
(3.6) Start the test and access the browser. http://localhost:8080/brand-demo/login.jsp
If the registered user information already exists:
If the registered user information does not exist, the registration is successful:
6、Verification code-display
- demand analysis
Display verification code: display the verification code image, and click to switch.
The generation of verification code is implemented through tool classes. For specific tool classes, refer to
04-资料\1. 登录注册案例\CheckCodeUtil.java
Write the main method in this tool class for testing:
public static void main(String[] args) throws IOException {


    //生成验证码的图片位置
    OutputStream fos = new FileOutputStream("d://a.jpg");
    //checkCode为最终验证码的数据
    String checkCode = CheckCodeUtil.outputVerifyImage(100, 50, fos, 4);
    System.out.println(checkCode);
}
After generating the verification code, we can know:
- The verification code is an image generated using Java code
- The function of the verification code: prevent the machine from automatically registering and attacking the server
- Implement process analysis
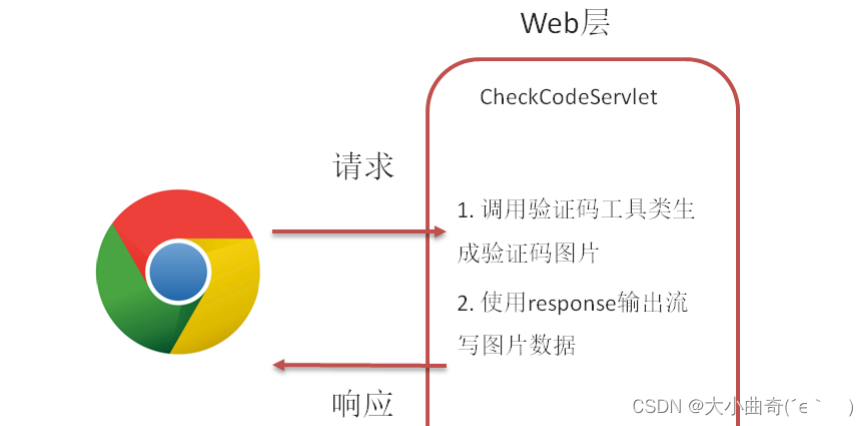
(1) The front end sends a request to CheckCodeServlet
(2) After CheckCodeServlet receives the request, it generates a verification code image and writes the image back to the front end using the output stream of the Response object.
Thinking: How to write pictures back to the front-end browser?
(1) There is already a tool class in Java to generate verification code images. In the test class, the image is only generated to the disk. (
2) The process of generating the disk is usedOutputStream流. How to generate this image on the page?
(3) Previously in When writingReponsean object, it has a method to obtain its byte output stream.getOutputStream()
(4) In summary, we can change the stream object written to the disk into aResponsebyte stream to complete the image response to the front end.
- Implementation
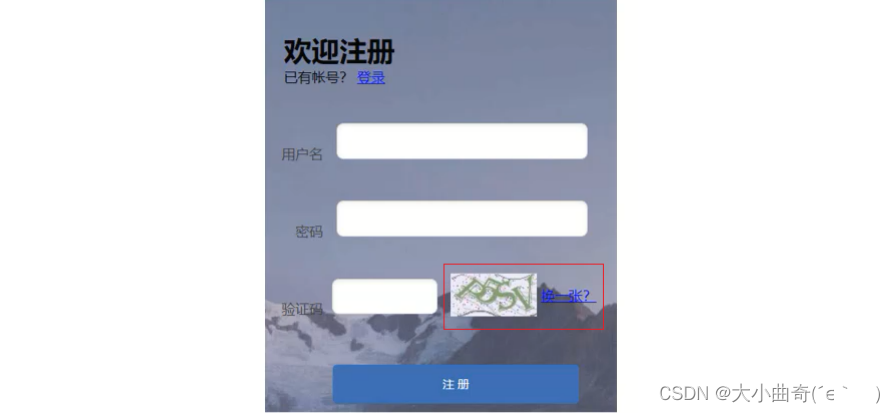
(1) Modify Register.jspthe page and obtain the verification code image from the background
           <tr>
                <td>验证码</td>
                <td class="inputs">
                    <input name="checkCode" type="text" id="checkCode">
                    <img id="checkCodeImg" src="/brand-demo/checkCodeServlet">
                    <a href="#" id="changeImg">看不清?</a>
                </td>
            </tr>

            <script>
                document.getElementById("changeImg").onclick = function () {
                    //路径后面添加时间戳的目的是避免浏览器进行缓存静态资源
                    document.getElementById("checkCodeImg").src = "/brand-demo/checkCodeServlet?"+new Date().getMilliseconds();
                }
            </script>
(2) Write the CheckCodeServlet class to receive requests and generate verification codes
package com.itheima.web;

@WebServlet("/checkCodeServlet")
public class CheckCodeServlet extends HttpServlet {


    @Override
    protected void doGet(HttpServletRequest request, HttpServletResponse response) throws ServletException, IOException {


        // 生成验证码
        ServletOutputStream os = response.getOutputStream();
        String checkCode = CheckCodeUtil.outputVerifyImage(100, 50, os, 4);
         // 存入Session
        HttpSession session = request.getSession();
        session.setAttribute("checkCodeGen",checkCode);
    }

    @Override
    protected void doPost(HttpServletRequest request, HttpServletResponse response) throws ServletException, IOException {


        this.doGet(request, response);
    }
}
Run the code: You can see that 看不清the picture will be changed when we click
7. Verification code-verification
- need
-
Determine whether the verification code generated by the program is the same as the verification code entered by the user. If not, registration will be blocked.
-
Verification code image to access and submit registration form istwicerequest, so the verification code generated by the program must be stored in the Session.
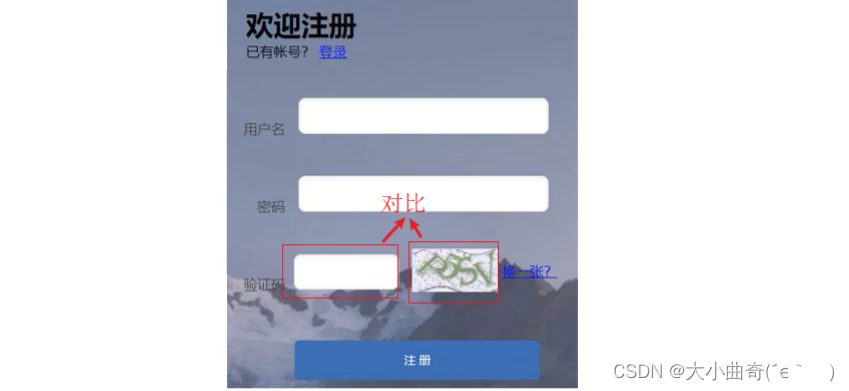
Thinking: Why should the verification code data be stored in the Session? -
Generating the verification code and verifying the verification code are two requests. Here, data needs to be shared between the two requests in a session.
-
The verification code belongs to the security data category, so we select Session to store the verification code data.
- Implement process analysis

(1) When generating the verification code in CheckCodeServlet, store the verification code data in the Session object
(2) The front end submits the verification code and registration data to the background and hands it to the RegisterServlet class
(3) After the RegisterServlet class receives the request and data, there is a verification code in it, which is compared with the verification code in the Session.
(4) If they are consistent, the registration will be completed. If they are inconsistent, an error message will be prompted.
- Implementation
(1) Modify CheckCodeServletthe class and store the verification code in Sessionthe object
package com.itheima.web;

@WebServlet("/checkCodeServlet")
public class CheckCodeServlet extends HttpServlet {


    @Override
    protected void doGet(HttpServletRequest request, HttpServletResponse response) throws ServletException, IOException {


        // 生成验证码
        ServletOutputStream os = response.getOutputStream();
        String checkCode = CheckCodeUtil.outputVerifyImage(100, 50, os, 4);

        // 存入Session
        HttpSession session = request.getSession();
        session.setAttribute("checkCodeGen",checkCode);
    }

    @Override
    protected void doPost(HttpServletRequest request, HttpServletResponse response) throws ServletException, IOException {


        this.doGet(request, response);
    }
}
(2) In RegisterServlet, get sessionthe verification code of the page and the object, and compare it.
package com.itheima.web;
@WebServlet("/registerServlet")
public class RegisterServlet extends HttpServlet {
private UserService service = new UserService();
@Override
protected void doGet(HttpServletRequest request, HttpServletResponse response) throws ServletException, IOException {
//1. 获取用户名和密码数据
String username = request.getParameter("username");
String password = request.getParameter("password");
User user = new User();
user.setUsername(username);
user.setPassword(password);
// 获取用户输入的验证码
String checkCode = request.getParameter("checkCode");
// 程序生成的验证码,从Session获取
HttpSession session = request.getSession();
String checkCodeGen = (String) session.getAttribute("checkCodeGen");
// 比对,忽略大小写
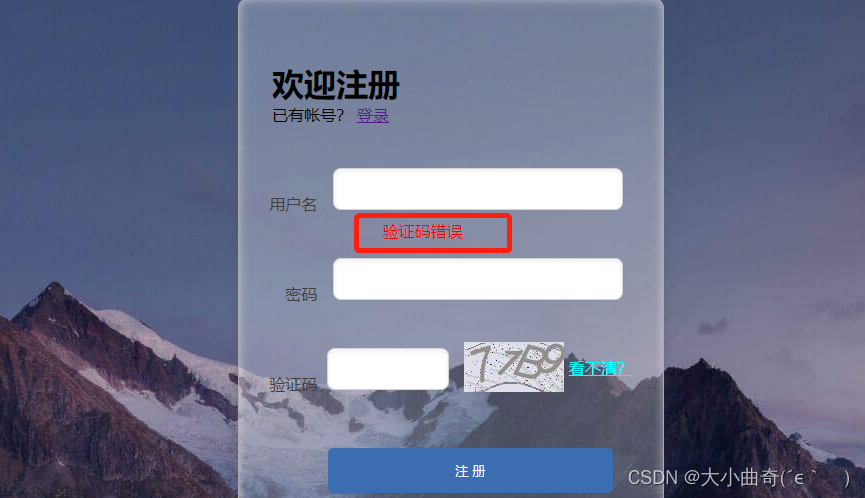
if(!checkCodeGen.equalsIgnoreCase(checkCode)){
request.setAttribute("register_msg","验证码错误");
//跳转
request.getRequestDispatcher("/register.jsp").forward(request,response);
// 不允许注册
return;
}
//2. 调用service 注册
boolean flag = service.register(user);
//3. 判断注册成功与否
if(!flag){
//注册功能,跳转登陆页面
request.setAttribute("register_msg","注册成功,请登录");
request.getRequestDispatcher("/login.jsp").forward(request,response);
}else {
//注册失败,跳转到注册页面
request.setAttribute("register_msg","用户名已存在");
request.getRequestDispatcher("/register.jsp").forward(request,response);
}
}
@Override
protected void doPost(HttpServletRequest request, HttpServletResponse response) throws ServletException, IOException {
this.doGet(request, response);
}
}
Run the program: http://localhost:8080/brand-demo/login.jsp
When filling in the verification code incorrectly:
When filling in the verification code correctly: