1. Local docker registration certificate docker login connects to harbor warehouse:
We use docker login/push/pull to deal with Harbor, upload and download images, etc. However, errors such as x509: certificate signed by unknown authority may occur.
[root@test01 harbor.dev]# docker login harbor.dev
Authenticating with existing credentials…
Login did not succeed, error: Error response from daemon: Get https://harbor.dev/v2/: x509: certificate signed by unknown authority
Username (admin): admin
Password:
Error response from daemon: Get https://harbor.dev/v2/: x509: certificate signed by unknown authority
At this time, according to the official docker https://docs.docker.com/engine/security/certificates/ , the client needs to use tls to communicate with Harbor and uses a self-signed certificate, so a directory must be created: /etc/docker/certs .d, create a directory of signed domain names in this directory, then the entire directory is: /etc/docker/certs.d/xxxx(harbor域名), and then copy harbor's certificate ca.crt to this directory.
2. Use shell scripts to pull, tag, and push a large number of images to the private harbor warehouse
#!/bin/bash

while IFS= read -r line; do
  image_name=$(echo "$line" | awk '{print $1}')

  new_name=$(echo "$line" | awk '{print $2}' | tr -d '\r')

  docker pull "$image_name"
  docker tag "$image_name" "$new_name"
  docker push "$new_name"

  echo "Pulled, tagged, and pushed $image_name as $new_name"
done < images.txt
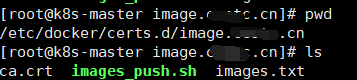
As shown above, we first need to prepare an images.txt which includes all download image names and upload names, as shown below. Each line includes image_name and new_name, separated by spaces.
istio/proxyv2:1.14.1 harbor.dev/cube_studio/istio_proxyv2:1.14.1
istio/pilot:1.14.1 harbor.dev/cube_studio/pilot:1.14.1
mysql:5.7 harbor.dev/cube_studio/
Of course, the key to the above script is to obtain image_name and new_name. If new_name can be modified based on image_name, you can also change the script to get a new_name that suits you. The following is for reference.
  #images.txt每行只有image_name,tr -d '\r'去掉换行符
  image_name=$(echo "$line" | awk '{print $1}' | tr -d '\r')

  #在image_name前加上harbor.dev/hub/
  new_name="harbor.dev/hub/$image_name"

  #image_name中的ccr.ccs.tencentyun.com/hub替换为harbor.dev/hub
  new_name=$(echo "$image_name" | sed 's/ccr.ccs.tencentyun.com\/hub/harbor.dev\/hub/g')
Paste the data in the Excel table into Notepad, and leave a space between each column
You can combine all the data you need into one column in EXECL and then export it.
- Assume that your original data has two columns AB, enter the formula in cell C1:
=A1&" "&B1, use the fill handle to copy the formula downward, and then paste column C into the txt document, that is, the distance between each column is one space.