1 Introduction to Raspberry Pi PICO
1.1 Introduction
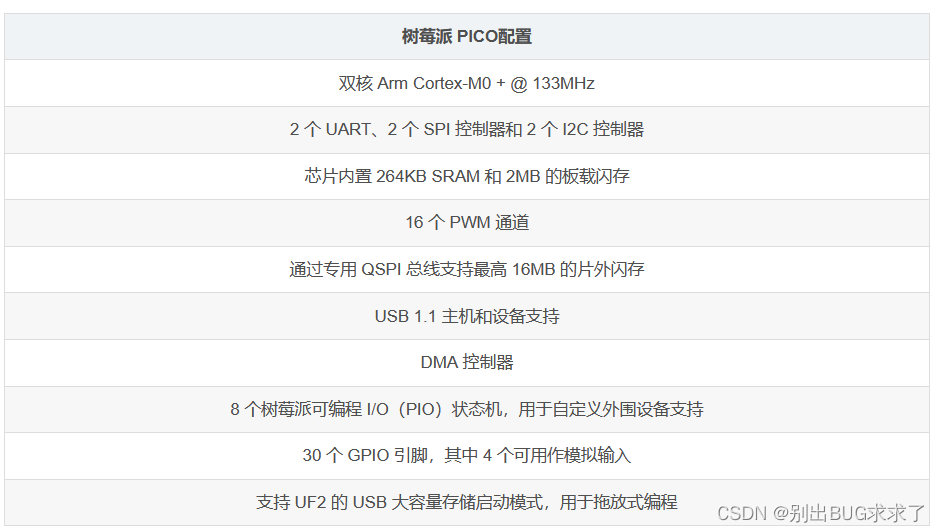
The Raspberry Pi Pico is a low-cost, high-performance microcontroller board with a flexible digital interface. It integrates Raspberry Pi's own RP2040 microcontroller chip, a dual-core Arm Cortex M0+ processor running at up to 133 MHz, embedded 264KB SRAM and 2MB of onboard flash memory, and 26 multi-function GPIO pins. For software development, you can use the Raspberry Pi's C/C++ SDK or MicroPython.
1.2 Configuration
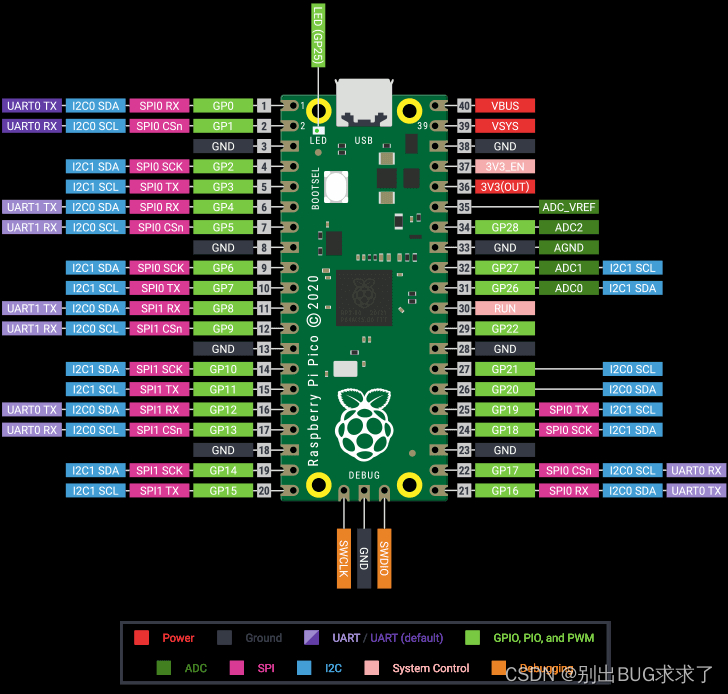
1.3 Pin diagram
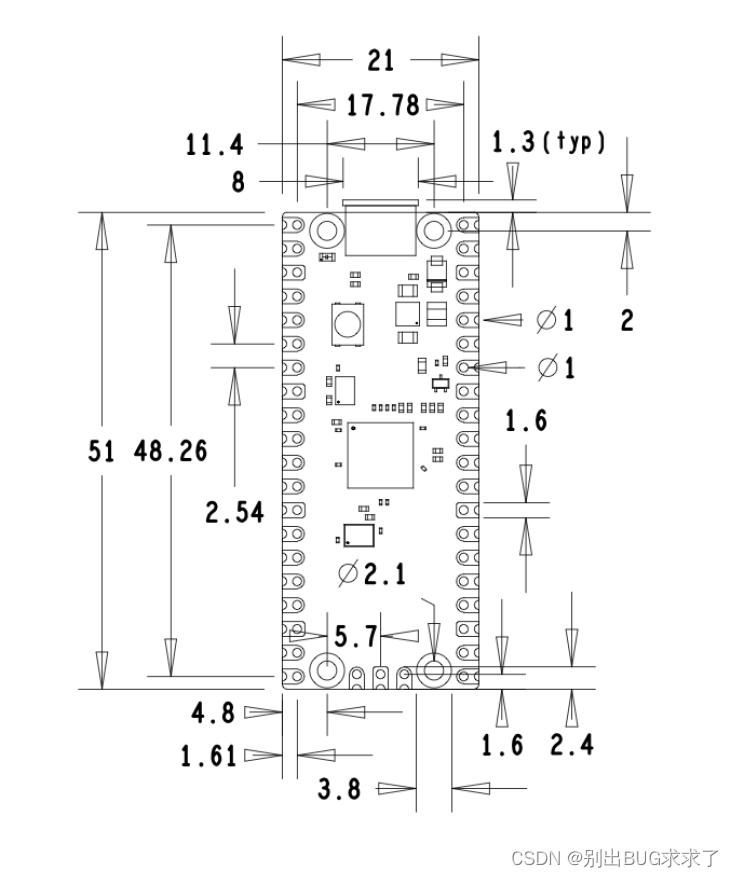
1.4 Dimensions
2 installation
2.1 Burn firmware
-
Click the https://micropython.org/download/rp2-pico/rp2-pico-latest.uf2 link to download the UF2 file;
-
If the connection fails, you can download it from the official website https://www.raspberrypi.org/documentation/rp2040/getting-started/#getting-started-with-micropython
-
Press and hold the BOOTSEL button and insert the Pico into the USB serial port of the computer. A new U disk folder will pop up on the computer. Drag the UF2 file just downloaded into the folder. The Raspberry Pi PICO will automatically restart. When, the firmware burning is completed.
2.2 Install IDE (Thonny IDE) - Install on the host side
- Go to the official software website https://thonny.org/ to download the software. It is best to download the latest version, otherwise it may not support Raspberry Pi PICO;
- Install Thonny. After the installation is complete, open the Thonny software, open it
工具->设置-> 解释器, selectMicroPython(Raspberry Pi Pico)the interpreter, and select the serial port number of the Raspberry Pi PICO at the serial port (if the board is connected to the computer, the software will generally automatically detect the serial port number) - Restart the software and you can see that the files in the Raspberry Pi PICO are displayed in the lower left corner of the software;
if the file tree on the left is not displayed, you can check View->File
2.3 Running the program offline

Create a new file. After writing the code, hold down ctrl+s to save the file on the Raspberry Pi PICO and name it main.py (be sure to add the suffix .py). The next time the Raspberry Pi PICO is powered on, it will automatically Run the program in main.py.
3 hello-world lights up
3.01 Light up the onboard LED light
from machine import Pin

if __name__ == '__main__':
    # 构建led对象
    # 板载LED灯连接与引脚25相连
    # LED = Pin(id, mode, pull)
    # id:PICO引脚编号
    # mode:输入输出方式,有Pin.IN(输入)和Pin.OUT(输出)两种
    # pull:上下拉电阻配置,有None(无上下拉电阻)、Pin.PULL_UP(上拉电阻)和Pin.PULL_DOWN(下拉电阻)三种
    LED = Pin(25, Pin.OUT)
    # 高电平点亮
    LED.value(1)
3.02 Onboard LED flashes
from machine import Pin
from utime import sleep
import utime

led = Pin(25, Pin.OUT)

if __name__ == '__main__':
    while True:
        # led点亮
        led.value(1)
        utime.sleep_ms(1000)
        # led熄灭
        led.value(0)
        utime.sleep_ms(1000)