1 Introduction to K8S account system
In k8s, there are two types of users, service account and user. We can create a role or clusterrole, and then bind the account to the role or clusterrole to grant permissions to the account and achieve permission control. The functions of the two types of accounts are as follows.
-
Server account: The account used by k8s processes and pods to apply for authorization. Similar to the nginx service, there will be an nginx user.
-
user: The account used by k8s managers, which is the account we use.
2 service account
2.1 Introduction
All access in Kubernetes, whether external or internal, will be processed through the API Server. Authentication and authorization are required before accessing Kubernetes resources.
-
In k8s, service account (sa for short) is used by processes in the cluster. When a pod or process in the cluster needs to apply for resources with the apiserver, sa will be used.
2.2 Why do you need sa
Mainly for permission control, different sa accounts correspond to different permissions, such as adding, deleting, and checking.
2.3 How to create sa
-
create a sa
[root@k8s-master01 ~]# kubectl create serviceaccount sa-example ##创建一个sa名为sa-example
serviceaccount/sa-example created
[root@k8s-master01 ~]#
[root@k8s-master01 ~]# kubectl describe sa sa-example
Name:                sa-example
Namespace:           default
Labels:              <none>
Annotations:         <none>
Image pull secrets:  <none>
Mountable secrets:   <none>
Tokens:              <none>
Events: <none>-
Create a secret for sa. After version v1.25, the secret is no longer automatically created after creating sa, so it needs to be created manually. The secret will contain some authentication information, including ca certificates, etc.
[root@k8s-master01 ~]# cat sa-example-secret.yaml
apiVersion: v1
kind: Secret
metadata:
  name: secret-sa-example
  annotations:
    kubernetes.io/service-account.name: "sa-example"   # 这里填写serviceAccountName
type: kubernetes.io/service-account-token
[root@k8s-master01 ~]# kubectl create -f sa-example-secret.yaml
secret/secret-sa-example created
[root@k8s-master01 ~]# kubectl describe sa sa-example ##检查可以发现sa的token处已经关联上了刚创建的secret
Name:                sa-example
Namespace:           default
Labels:              <none>
Annotations:         <none>
Image pull secrets:  <none>
Mountable secrets:   <none>
Tokens:              secret-sa-example
Events:              <none>
[root@k8s-master01 ~]# kubectl describe secret secret-sa-example  ##查看secret的详情
Name:         secret-sa-example
Namespace:    default
Labels:       <none>
Annotations:  kubernetes.io/service-account.name: sa-example
              kubernetes.io/service-account.uid: a4b9c0ea-2362-4bb3-abc7-10dc0fb795fc

Type:  kubernetes.io/service-account-token

Data
====
ca.crt:     1099 bytes
namespace:  7 bytes
token:      eyJhbGciOiJSUzI1NiIsImtpZCI6IkhwYldkODNuZmNMczYzNlRiRmpQQndMTFJYSWZZODZQSFIxUFI0WW1fYWMifQ.eyJpc3MiOiJrdWJlcm5ldGVzL3NlcnZpY2VhY2NvdW50Iiwia3ViZXJuZXRlcy5pby9zZXJ2aWNlYWNjb3VudC9uYW1lc3BhY2UiOiJkZWZhdWx0Iiwia3ViZXJuZXRlcy5pby9zZXJ2aWNlYWNjb3VudC9zZWNyZXQubmFtZSI6InNlY3JldC1zYS1leGFtcGxlIiwia3ViZXJuZXRlcy5pby9zZXJ2aWNlYWNjb3VudC9zZXJ2aWNlLWFjY291bnQubmFtZSI6InNhLWV4YW1wbGUiLCJrdWJlcm5ldGVzLmlvL3NlcnZpY2VhY2NvdW50L3NlcnZpY2UtYWNjb3VudC51aWQiOiJhNGI5YzBlYS0yMzYyLTRiYjMtYWJjNy0xMGRjMGZiNzk1ZmMiLCJzdWIiOiJzeXN0ZW06c2VydmljZWFjY291bnQ6ZGVmYXVsdDpzYS1leGFtcGxlIn0.OjGSORdrRchb-dOk56bIx9s2KfedIrcBHhWi4N7g1v2zDgbumF8DoIVUbDdSB3IXtSnrWu6ccF-NEXDkxTtsU3rRZCn4qLpYqxtmK-We0-JDqfPd6brSqv8SMOFpUhbTxOcCjsICLvGY0dE8iTNjRLjmlTlNENGJui3pYweLCV1Qe0Ry4hZs0BFaMVZn6dSjjNnPTTfaSNRk-4jcqqoOxC0qxVrpQb-LjLvBy9fi2omBZQnb4e98aGo8SN4U5tWNOr_QEfYO9h8B9w-Ub5eI2uZ9jan07ezjD9wathT4BP471m-8NFsFDO8PcRpvxDtNjl4XzMoQmjZA1wM0rseDrg
24.4 How to use sa
It is very convenient to use ServiceAccount in Pod. You only need to specify the name of ServiceAccount.
[root@k8s-master01 ~]# cat nginx-alpine.yaml
apiVersion: v1
kind: Pod
metadata:
  name: nginx-test-pod  ##pod名
spec:
  serviceAccountName: sa-example  ##sa名
  containers:
  - image: nginx:alpine
    name: container-0
    resources:
      limits:
        cpu: 100m
        memory: 200Mi
      requests:
        cpu: 100m
        memory: 200Mi
  imagePullSecrets:
  - name: default-secret  ##下载镜像使用到的secret名
[root@k8s-master01 ~]# kubectl create -f nginx-alpine.yaml
pod/nginx-test-pod created
[root@k8s-master01 ~]# kubectl get pod
NAME             READY   STATUS    RESTARTS   AGE
nginx-test-pod   1/1     Running   0          2m13s
[root@k8s-master01 ~]# kubectl describe pod nginx-test-pod|grep -i account
Service Account:  sa-example
      /var/run/secrets/kubernetes.io/serviceaccount from kube-api-access-mb8cd (ro)
[root@k8s-master01 ~]# kubectl exec -it nginx-test-pod -- /bin/sh  ##进入pod,可以看到对应的secret文件,ca证书和token
/ # ls /var/run/secrets/kubernetes.io/serviceaccount
ca.crt     namespace  token
After creating sa, we can bind role or clusterrole to grant more refined permissions.
3 user account
3.1 Introduction
The service account mentioned above is used for pods in the k8s cluster. The User Account introduced here is for us, that is, for others.
3.2 Why user account is needed
The k8s cluster is the same as the Linux operating system. Our default account is: kubernetes-admin@kubernetes. The administrator account also has the greatest permissions and can be used unimpeded in the k8s cluster.
But in the enterprise, we are not the only ones using k8s clusters. There are also many R&D personnel who need to use the cluster. At this time, we need to create some accounts for them, but the permissions of these accounts cannot be too large to prevent mistakes. Delete the resource. At this time we can use the user account.
3.3 How to create a user account
Proceed as follows
-
Create the certificate files and keys required by the user
-
Create user
-
Creating a Role
-
Bind roles to users
3.3.1 Generate certificates for users
For the sa account introduced earlier, the certificate will be created when the secret is created. For users, we need to create the certificate ourselves.
[root@k8s-master01 ~]# openssl genrsa -out singless.key 2048  ##给用户创建一个私钥
[root@k8s-master01 ~]# openssl req -new -key singless.key -out singless.csr -subj "/CN=singless/O=devops" ##用此私钥创建一个csr(证书签名请求)文件,其中我们需要在subject里带上用户信息(CN为用户名,O为用户组),其中/O参数可以出现多次,即可以有多个用户组:
[root@k8s-master01 ~]# openssl x509 -req -in singless.csr -CA /etc/kubernetes/pki/ca.crt -CAkey /etc/kubernetes/pki/ca.key -CAcreateserial -out singless.crt -days 365 ##找到K8S集群(API Server)的CA证书文件,其位置取决于安装集群的方式,通常会在/etc/kubernetes/pki/路径下,会有两个文件,一个是CA证书(ca.crt),一个是CA私钥(ca.key)。通过集群的CA证书和之前创建的csr文件,来为用户颁发证书。-CA和-CAkey参数需要指定集群CA证书所在位置,-days参数指定此证书的过期时间,这里为365天。最后将证书(tom.crt)和私钥(tom.key)保存起来,这两个文件将被用来验证API请求。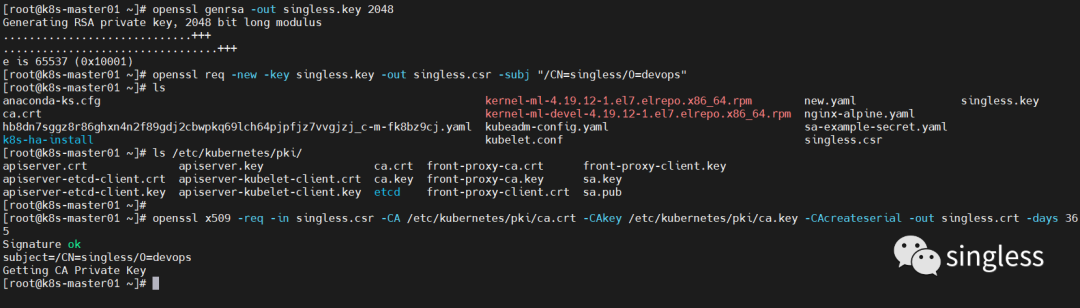
3.3.2 Create user
Now we want to operate the cluster as singleless through kubectl. We need to add singleless's authentication information to kubectl's configuration, that is, ~/.kube/config. Use the following command to add user singleless's authentication information to kubectl's configuration:
[root@k8s-master01 ~]# kubectl config set-credentials singless --client-certificate=singless.crt --client-key=singless.key
User "singless" set.
[root@k8s-master01 ~]# cat ~/.kube/config |tail -4  ##添加完成后在~/.kube/config可以看到新增了
- name: singless
  user:
    client-certificate: /root/singless.crt
    client-key: /root/singless.key
[root@k8s-master01 ~]# kubectl config set-context singless --cluster=kubernetes --namespace=* --user=singless  ##创建context,通过context来绑定用户,来实现精细化的权限控制。context可以理解为登录用户时所需的环境变量。删除使用kubectl config delete-context命令
[root@k8s-master01 ~]# kubectl config get-contexts  ##查询当前环境的context
CURRENT   NAME                          CLUSTER      AUTHINFO           NAMESPACE
*         kubernetes-admin@kubernetes   kubernetes   kubernetes-admin
          singless                      kubernetes   singless           *
3.3.3 Create roles
There are two main types of roles: role and clusterrole. Roles are relatively restrictive and only take effect on specified resources. The cluster role (clusterrole) has relatively broad permissions. After a new cluster role is created, this role will affect the entire cluster.
There are two ways to create a character
-
Create via command line
[root@k8s-master01 ~]# kubectl create role myrole  --verb=get,list,watch --resource=pod,svc 创建了一个名叫myrole的角色,并且赋予它对pod、service有看的权限
role.rbac.authorization.k8s.io/myrole created-
Create via yaml file
[root@k8s-master01 ~]# cat myrole2.yaml
apiVersion: rbac.authorization.k8s.io/v1
#api版本,使用kubectl explain +【要查询的资源,比如pod】
kind: Role
metadata:
  name: myrole2
rules:          #规则
- apiGroups: [""]  # 空字符串""表明使用支持所有的api版本,一般都放空
  resources: ["pods"]           #resources:资源,现在这些权限对哪些资源生效,这里写的是pod,如果想要多写几个,就用逗号隔开,其实就是一个列表
  verbs: ["get", "watch", "list"]       #详细的权限:这三个都是查看的权限。如果需要所有权限,直接填写一个*号即可
[root@k8s-master01 ~]# kubectl create -f myrole2.yaml
role.rbac.authorization.k8s.io/myrole2 created
View created roles
[root@k8s-master01 ~]# kubectl get role
NAME      CREATED AT
myrole    2023-07-18T09:22:51Z
myrole2   2023-07-18T09:33:24Z
3.3.4 Role binding user
[root@k8s-master01 ~]# kubectl create rolebinding myrole-binding --role=myrole2 --user=singless  ##将用户和角色进行绑定
[root@k8s-master01 ~]# kubectl get rolebinding -owide  ##查看绑定关系
NAME             ROLE           AGE   USERS      GROUPS   SERVICEACCOUNTS
myrole-binding   Role/myrole2   57s   singless
3.4 Use of Account
The following example shows that the singleless user can see the pod, but cannot see the svc, which is in line with the permission settings we made when creating the role myrole2 earlier.
[root@k8s-master01 ~]# kubectl config use-context singless
Switched to context "singless".
[root@k8s-master01 ~]# kubectl get pod
NAME             READY   STATUS    RESTARTS   AGE
nginx-test-pod   1/1     Running   0          124m
[root@k8s-master01 ~]# kubectl get svc
Error from server (Forbidden): services is forbidden: User "singless" cannot list resource "services" in API group "" in the namespace "default"
Use the following command to switch the context back to the administrator user
[root@k8s-master01 ~]# kubectl config use-context kubernetes-admin@kubernetes