SonarQube is a code quality detection tool developed based on Java. Generally, developers will check their own code problems on it, but our operation and maintenance needs to build it to ensure their normal use, and needs to integrate with Jenkins to push the content of gitlab to SonarQube for detection. .
Table of contents
Install software (jdk+mysql+sonarqube)
Configure Sonar to connect to the local database
1. Jenkins pushes code to Sonar on the command line
2. Jenkins configures SonarQube server
3. Jenkins adds Sonar build items
Installation preparations
1. SonarQube基础java开发,需安装open JDK8版本
2. SonarQube需要依赖MySQL数据库,至少5.6版本以上
3. SonarQube的小型实例至少4G内存,如果大型实例需要16G内存
Install software (jdk+mysql+sonarqube)
[root@Sonar ~]# rpm -ivh jdk-8u181-linux-x64.rpm

https://dev.mysql.com/downloads/repo/yum/    #该网址找到mysql下载链接
[root@Sonar ~]# wget https://dev.mysql.com/get/mysql80-community-release-el7-3.noarch.rpm
[root@Sonar ~]# rpm -ivh mysql80-community-release-el7-3.noarch.rpm
[root@Sonar ~]# cat /etc/yum.repos.d/mysql-community.repo
......
[mysql56-community]
name=MySQL 5.6 Community Server
baseurl=http://repo.mysql.com/yum/mysql-5.6-community/e
l/7/$basearch/
enabled=1                        #更改5.6的enabled为0
gpgcheck=1
gpgkey=file:///etc/pki/rpm-gpg/RPM-GPG-KEY-mysql
......
[mysql80-community]
name=MySQL 8.0 Community Server
baseurl=http://repo.mysql.com/yum/mysql-8.0-community/el/7/$basearch/
enabled=0                        #更改8.0的enabled为1
gpgcheck=1
gpgkey=file:///etc/pki/rpm-gpg/RPM-GPG-KEY-mysql
......
[root@Sonar ~]# yum -y install mysql-community-server    #安装mysql
[root@Sonar ~]# service mysql start                      #启动mysql
Redirecting to /bin/systemctl start mysql.service
In some cases, the problem may occur that MySQL listens to the TCP6 port and cannot access the database normally.
#如果端口监听到tcp6,增加一条配置重启即可
[root@sonar ~]# grep bind /etc/my.cnf
bind-address=0.0.0.0        #在my.cnf文件中配置bind-address参数来指定MySQL进程的绑定IP地址;

#或者关闭系统的tcp6
vim /etc/sysctl.conf     #加入以下三条配置,在sysctl.conf文件中设置这三个内核参数,以禁用所有的IPv6连接,这样即时MySQL配置错误地监听了TCP6端口,也不会阻塞TCP4端口。
net.ipv6.conf.all.disable_ipv6 = 1
net.ipv6.conf.default.disable_ipv6 = 1
net.ipv6.conf.lo.disable_ipv6 = 1
sysctl -p    #使用sysctl -p命令来重新加载sysctl.conf,使刚刚设置的内核参数生效。
Configure database password and create database
[root@Sonar ~]# mysqladmin -uroot password 123
Warning: Using a password on the command line interface can be insecure.
[root@Sonar ~]# mysqladmin -uroot password 123
Warning: Using a password on the command line interface can be insecure.
[root@Sonar ~]# mysql -uroot -p123 -e "CREATE DATABASE sonar DEFAULT CHARACTER SET utf8;"
Warning: Using a password on the command line interface can be insecure.
[root@Sonar ~]# mysql -u root -p123 -e "show databases"

Warning: Using a password on the command line interface can be insecure.
+--------------------+
| Database           |
+--------------------+
| information_schema |
| mysql              |
| performance_schema |
| sonar              |
+--------------------+
Download and install the SonarQube service, and start it with the sonar user
#官网链接,可以在里面找需要下载的版本,这里我选择7.0,下载链接放到文末了
https://www.sonarsource.com/products/sonarqube/downloads/

[root@Sonar ~]# unzip sonarqube-7.0.zip
[root@Sonar ~]# mv sonarqube-7.0 /usr/local/
[root@Sonar ~]# ln -s /usr/local/sonarqube-7.0/ /usr/local/sonarqube
[root@Sonar ~]# useradd sonar
[root@Sonar ~]# chown -R sonar.sonar /usr/local/sonarqube-7.0/
Configure Sonar to connect to the local database
[root@Sonar ~]# cat /usr/local/sonarqube/conf/sonar.properties
......
sonar.jdbc.username=root
sonar.jdbc.password=123
sonar.jdbc.url=jdbc:mysql://localhost:3306/sonar?useUnicode=true&characterEncoding=utf8&rewrieBatchedSta
tements=true&useConfigs=maxPerformance&useSSL=false
......
Start sonarqube as a normal user
[root@Sonar ~]# su - sonar -c "/usr/local/sonarqube/bin/linux-x86-64/sonar.sh start"
Starting SonarQube...
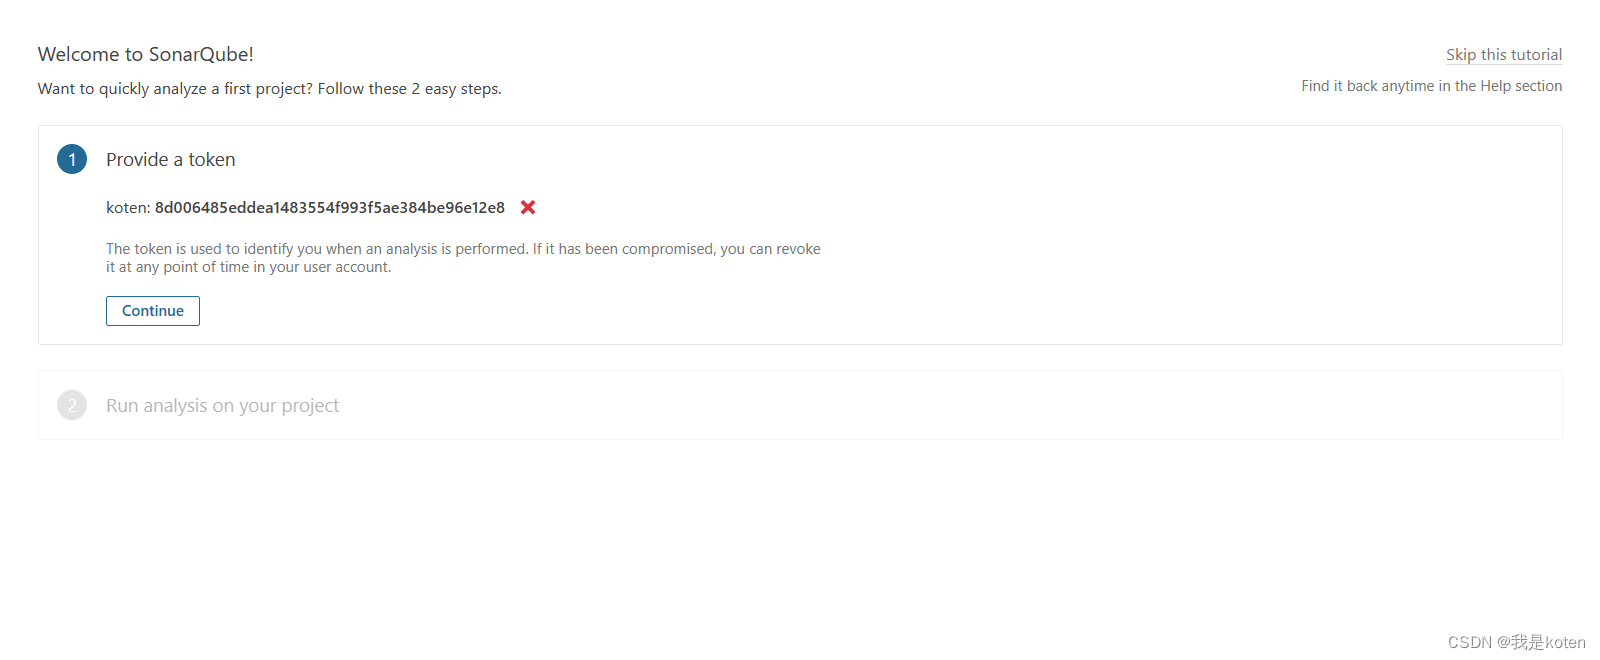
Started SonarQube.The port after startup is 9000. Use the browser to directly access http://10.0.0.203:9000/about . The username is admin and the password is admin. Generate a token. It will only be displayed once and recorded.
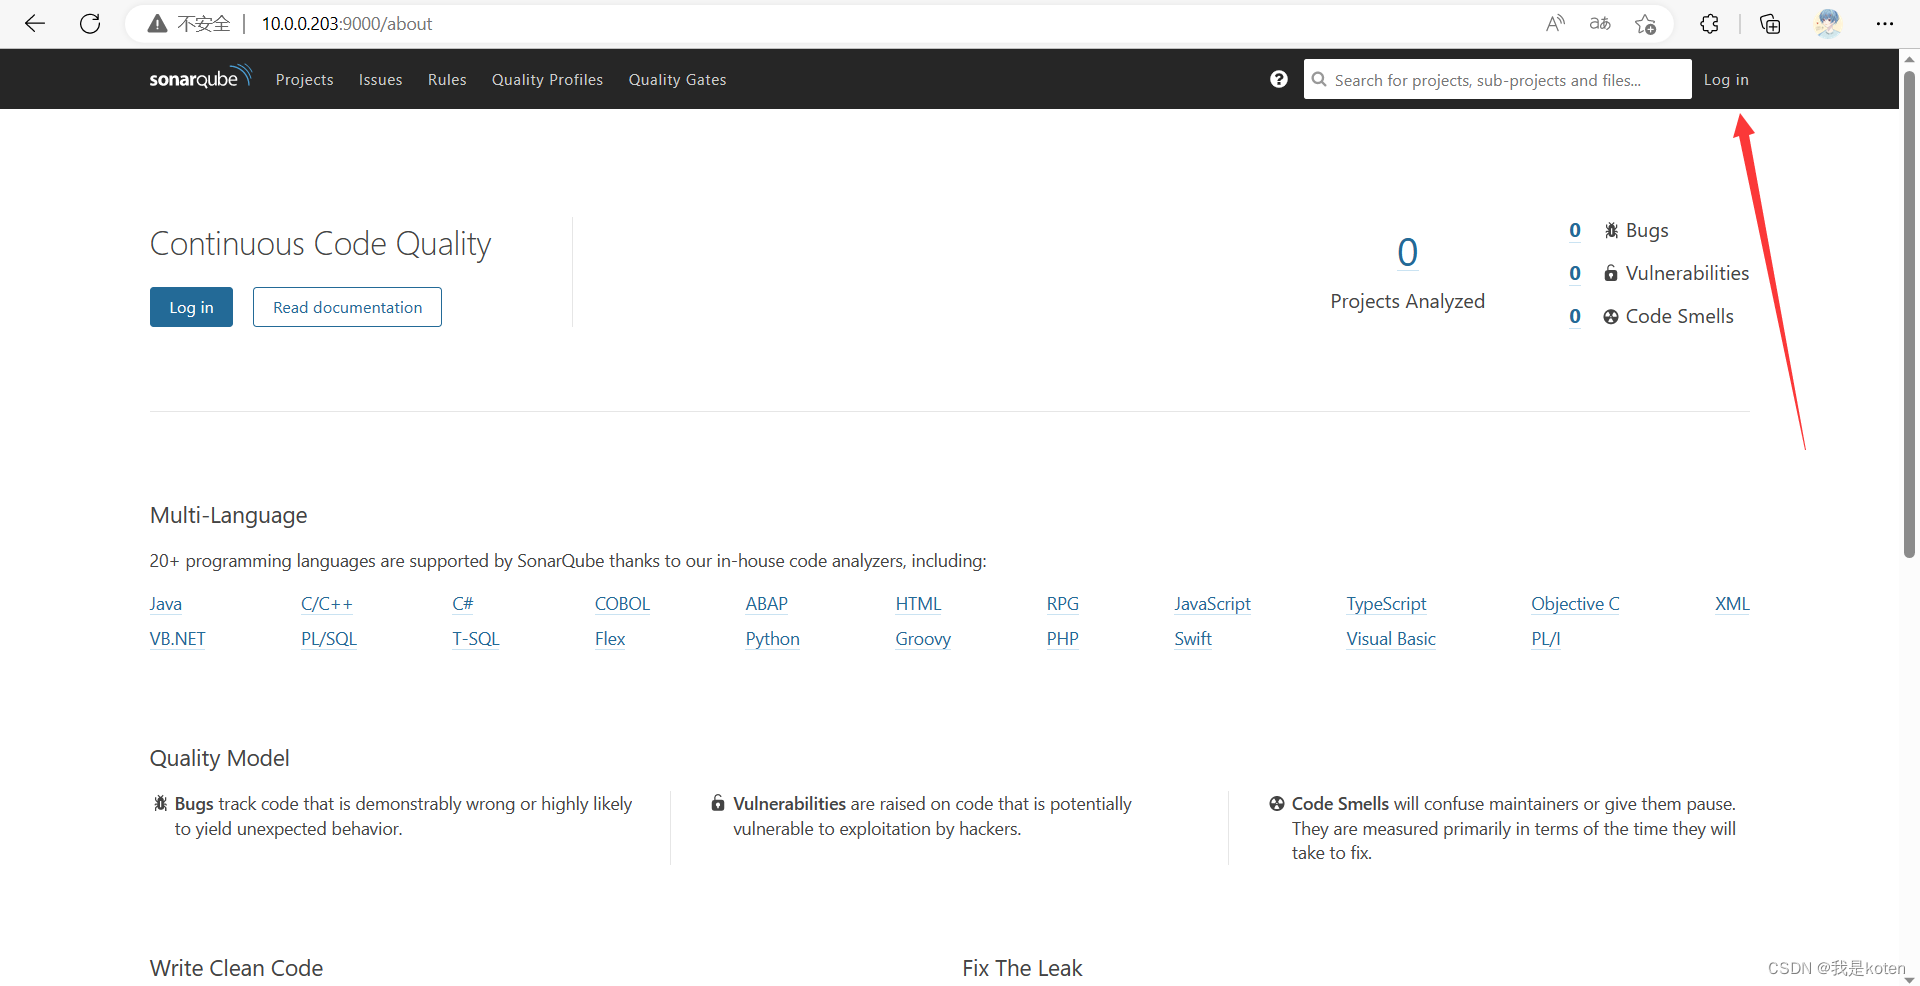
Sonarqube login configuration


Click the download link to enter the document, select the client version to download, and configure the server address
I choose to use 4.2.0 here, and the download link is at the end of the article
Save the generated content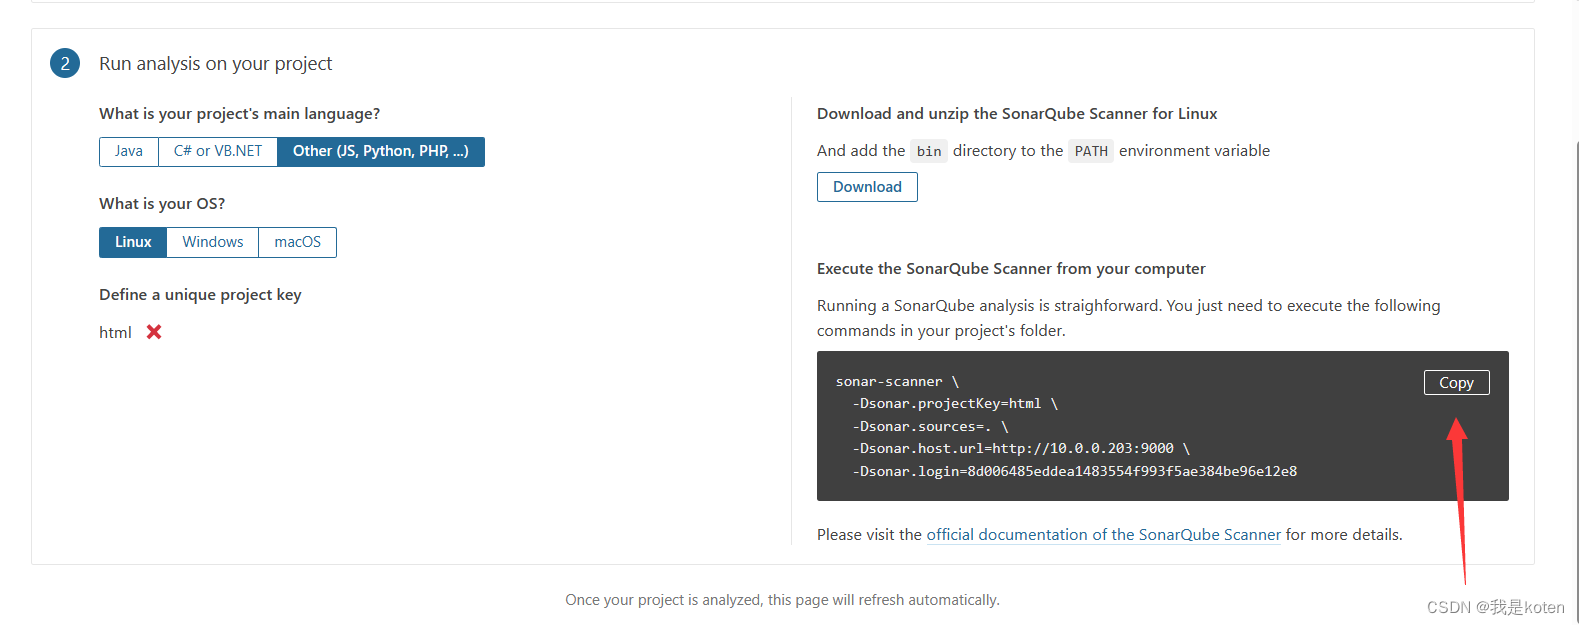
Configure client to jenkins
[root@Jenkins ~]# unzip sonar-scanner-cli-4.2.0.1873-linux.zip
[root@Jenkins ~]# mv sonar-scanner-4.2.0.1873-linux/ /usr/local/
[root@Jenkins ~]# cd /usr/local/
[root@Jenkins local]# ln -s sonar-scanner-4.2.0.1873-linux/ sonar-scanner
[root@Jenkins local]# cat sonar-scanner/conf/sonar-scanner.properties
......
sonar.host.url=http://10.0.0.203:9000
sonar.login=8d006485eddea1483554f993f5ae384be96e12e8    #提前保存的密钥
#----- Default source code encoding
sonar.sourceEncoding=UTF-8
After configuring, click Skip

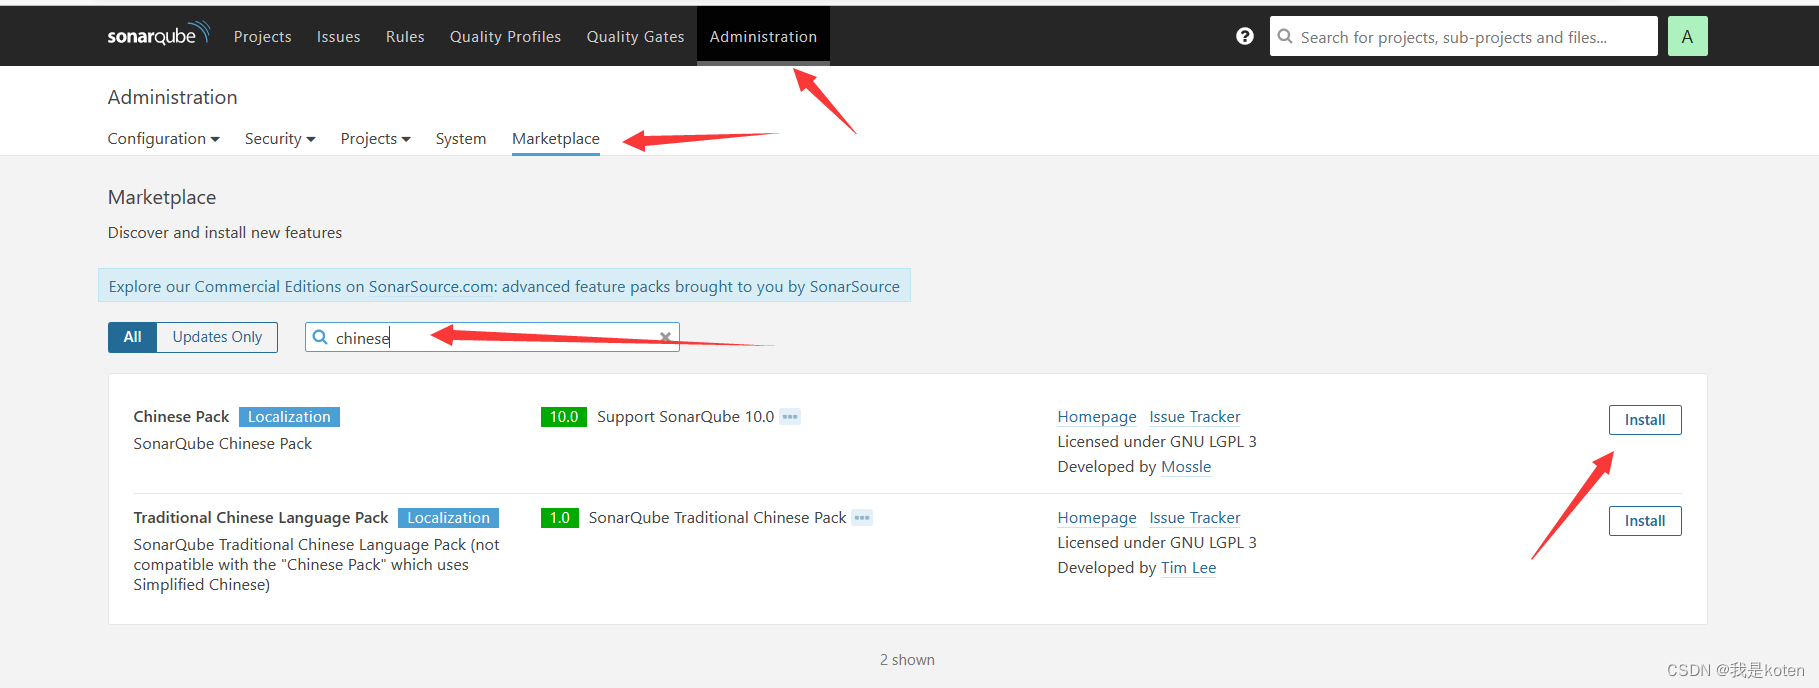
Sonar installation plugin
1. Automatic installation
1. Install the Chinese Sinicization plug-in, click to find it in turn, and click restart to take effect after installing
2. Code quality analysis tools such as C, Java, Python, PHP, JS, etc. have been installed by default. If a project uses JAVA, HTML, JS, HTML, by default only the loopholes and bugs of JAVA, JS and other codes will be checked. If If HTML, CSS and other plug-ins are installed, vulnerabilities and bugs in the JAVA, JS, HTML, CSS code in the project code will be detected.
2. Manual installation
I packaged the downloaded modules in advance, re-imported them and decompressed them. The download link is at the end of the article.
[root@Sonar ~]# mv /usr/local/sonarqube/extensions/plugins /usr/local/sonarqube/extensions/plugins_back
[root@Sonar ~]# tar xf sonar_plugins.tar.gz -C /usr/local/sonarqube/extensions/
[root@Sonar ~]# chown -R sonar.sonar /usr/local/sonarqube/extensions/plugins
[root@Sonar ~]# su - sonar -c "/usr/local/sonarqube/bin/linux-x86-64/sonar.sh restart"
Stopping SonarQube...
Waiting for SonarQube to exit...
Stopped SonarQube.
Starting SonarQube...
Started SonarQube.
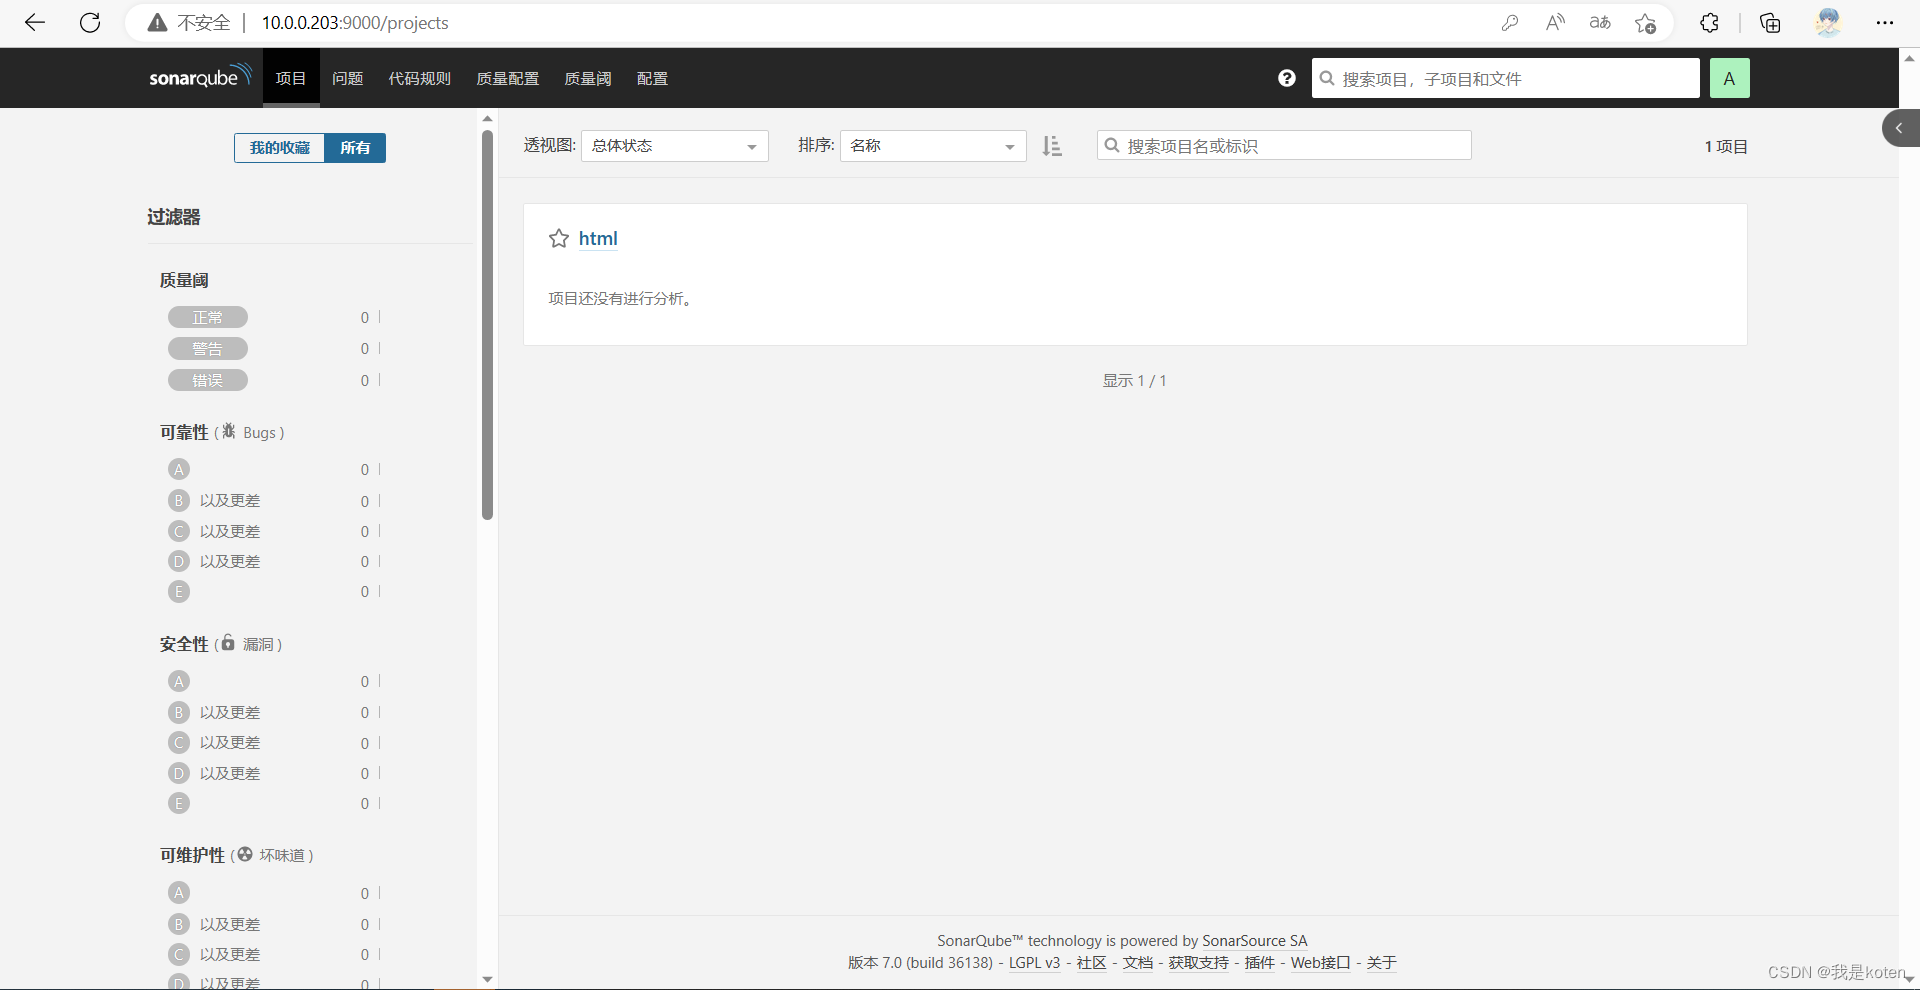
Refreshing the page shows Chinese
Jenkins integrates Sonar
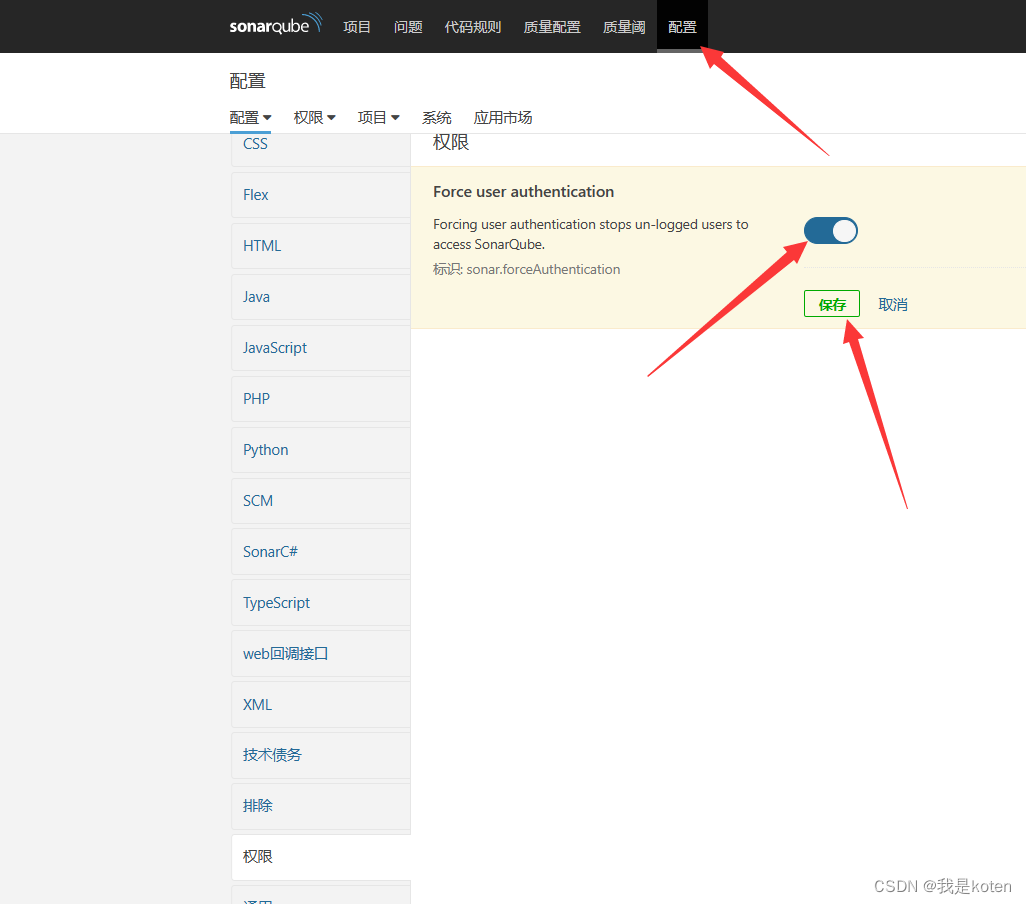
1. Jenkins pushes code to Sonar on the command line
Perform code push analysis in the project directory, first open the authentication
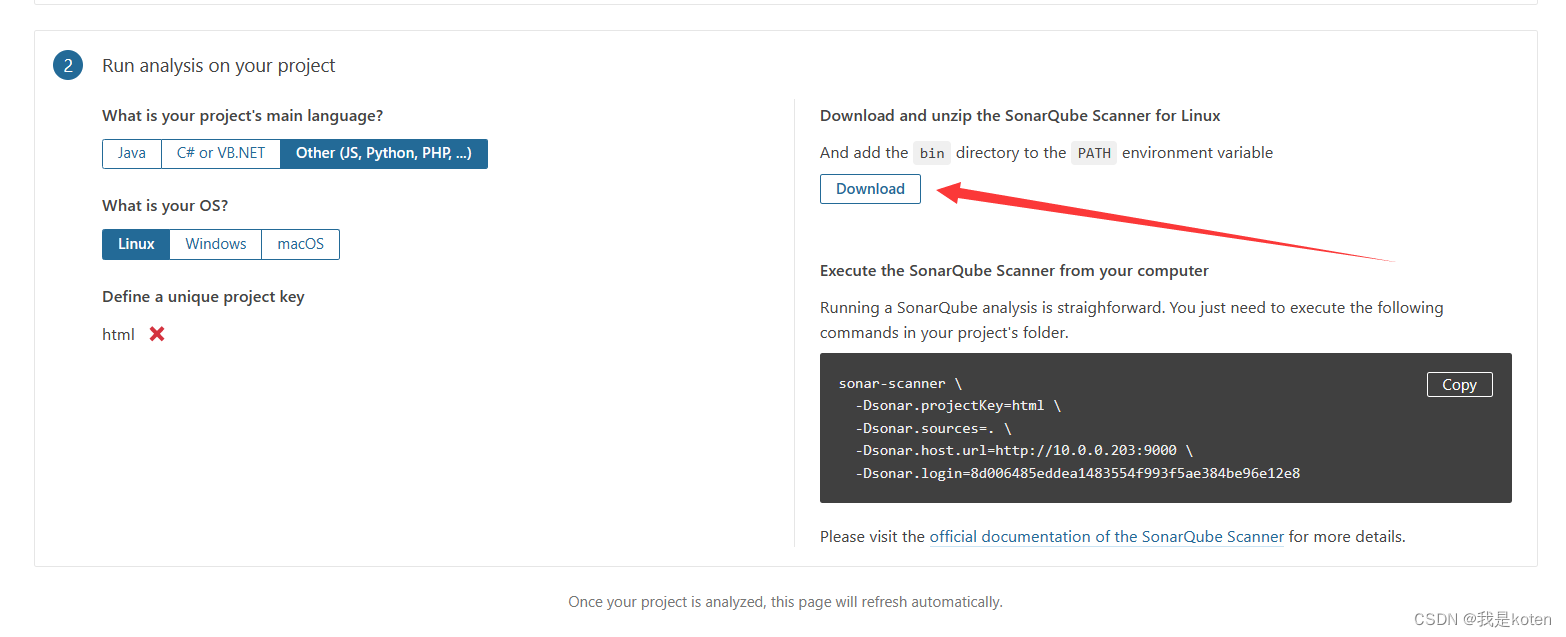
Execute the following code in Jenkins and push the html code
[root@Jenkins local]# cd /var/lib/jenkins/workspace/freestyle-job
[root@Jenkins freestyle-job]# /usr/local/sonar-scanner/bin/sonar-scanner  \
-Dsonar.projectKey=html \
-Dsonar.sources=. \
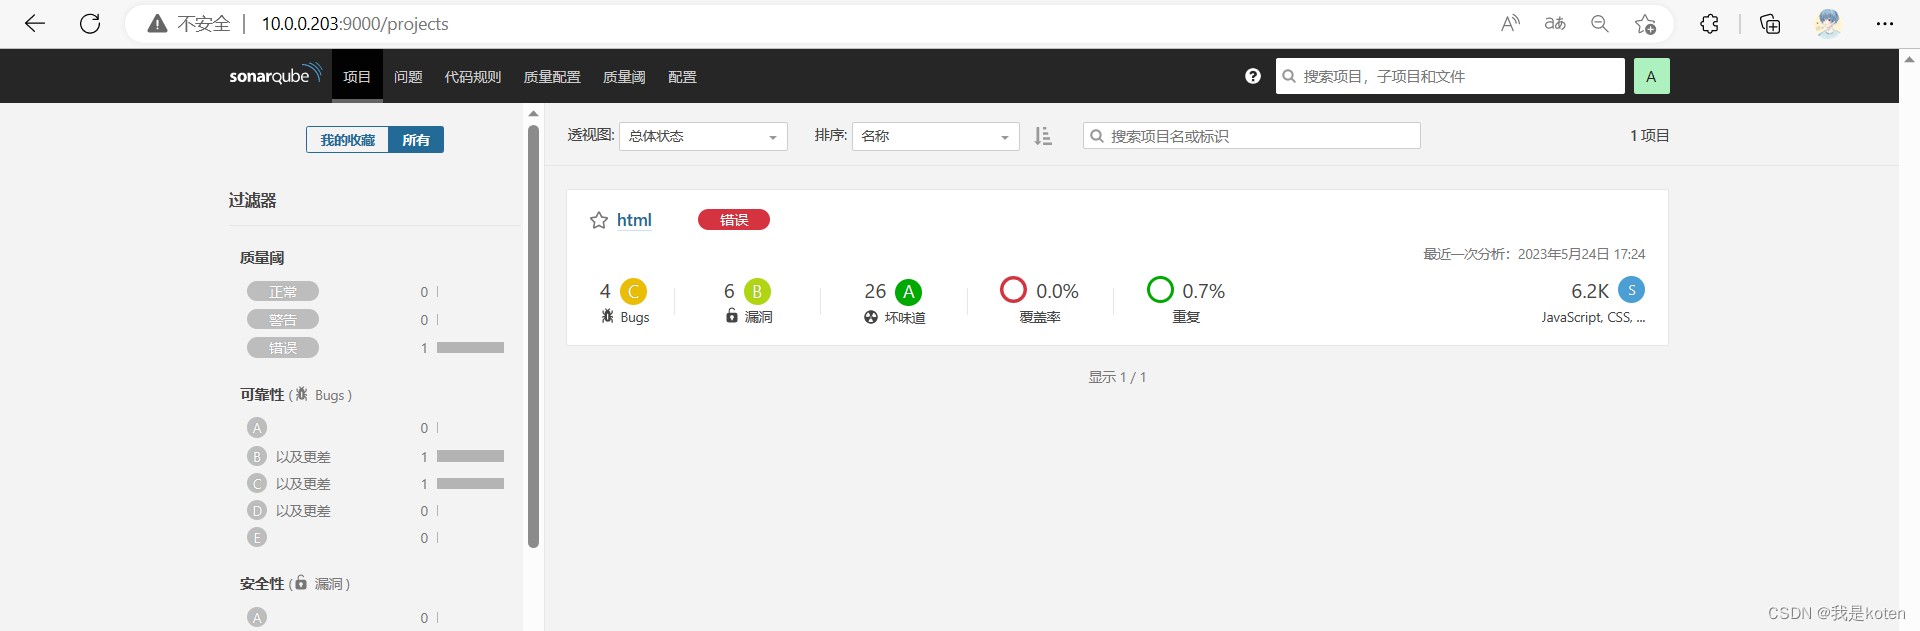
View on the page after execution
Push java code for analysis
# 方法1
cd /var/lib/jenkins/workspace/my-maven-job
/usr/local/sonar-scanner/bin/sonar-scanner \
-Dsonar.projectKey=java \
-Dsonar.sources=.
# 方法2
cd /var/lib/jenkins/workspace/my-maven-job
mvn sonar:sonar \
-Dsonar.host.url=http://10.0.0.203:9000 \
-Dsonar.login=8d006485eddea1483554f993f5ae384be96e12e8
2. Jenkins configures SonarQube server
1. First, you need to install the Sonar plug-in in Jenkins.

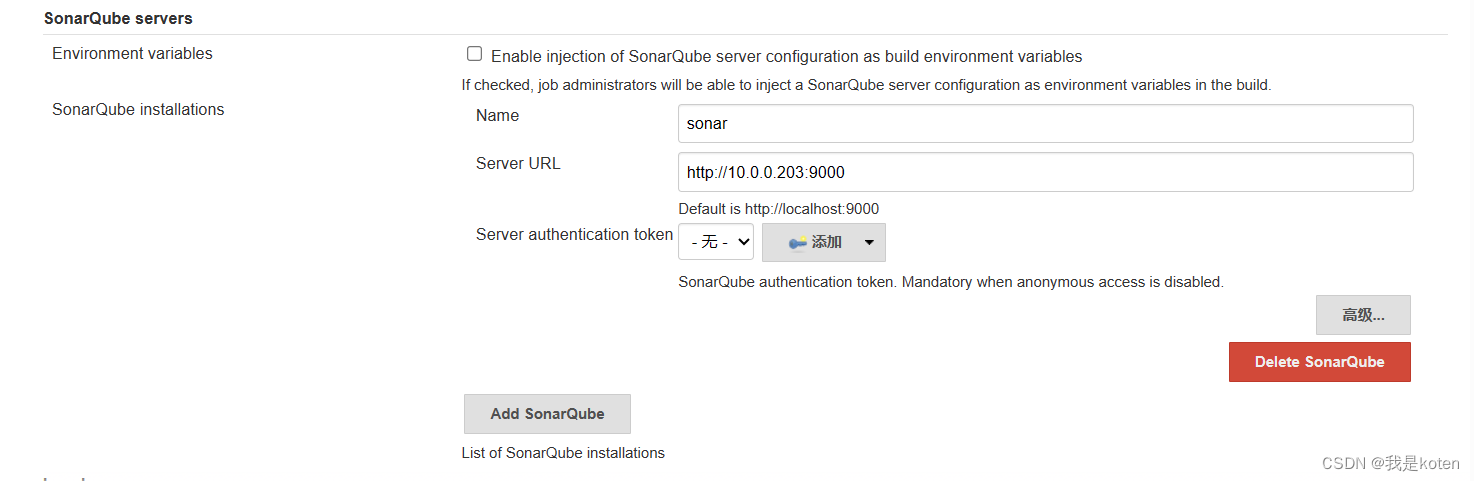
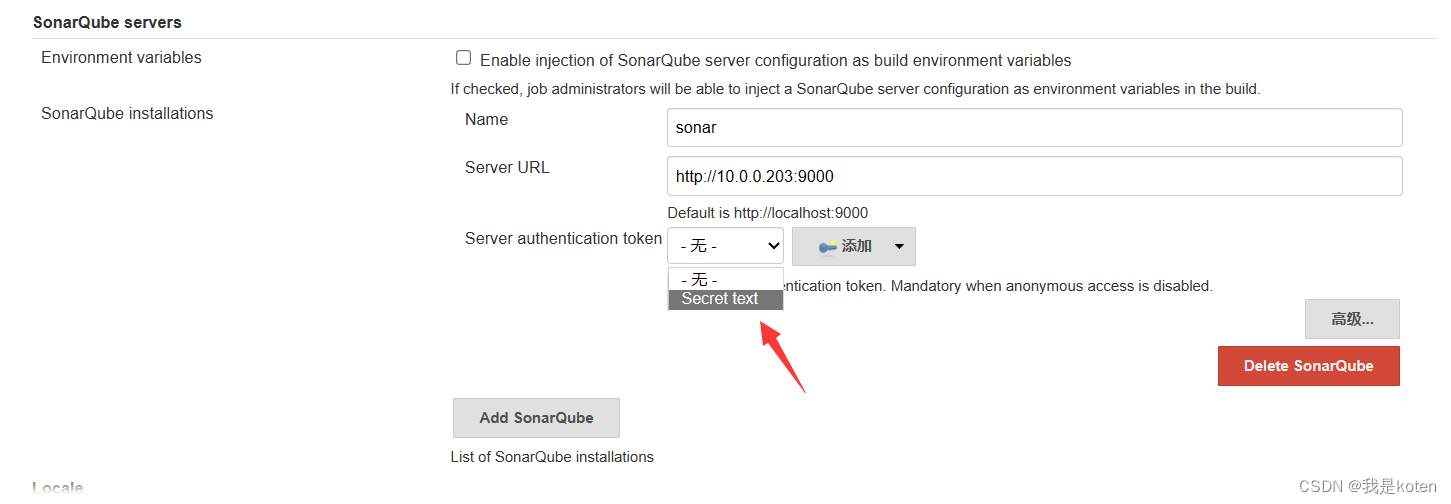
2. Configure sonar server information
In system management, system settings, find the word sonarqube

Click Add and fill in the sonar information and URL.
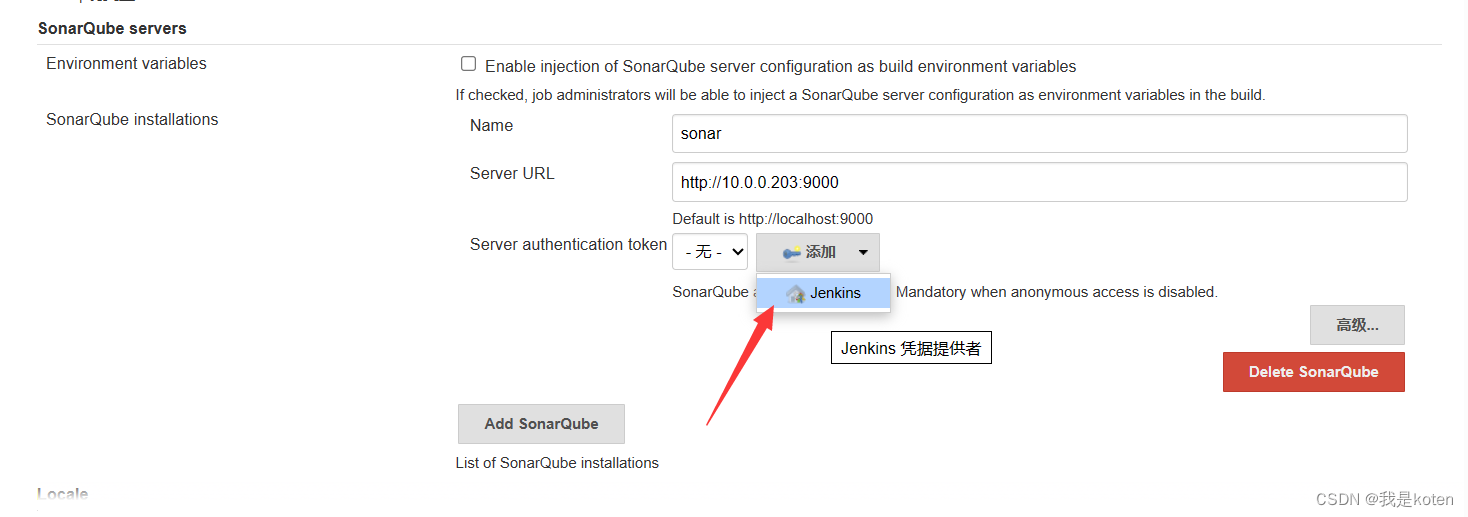
Add sonar's credentials
Select the type, fill in the sonar key, and click Submit
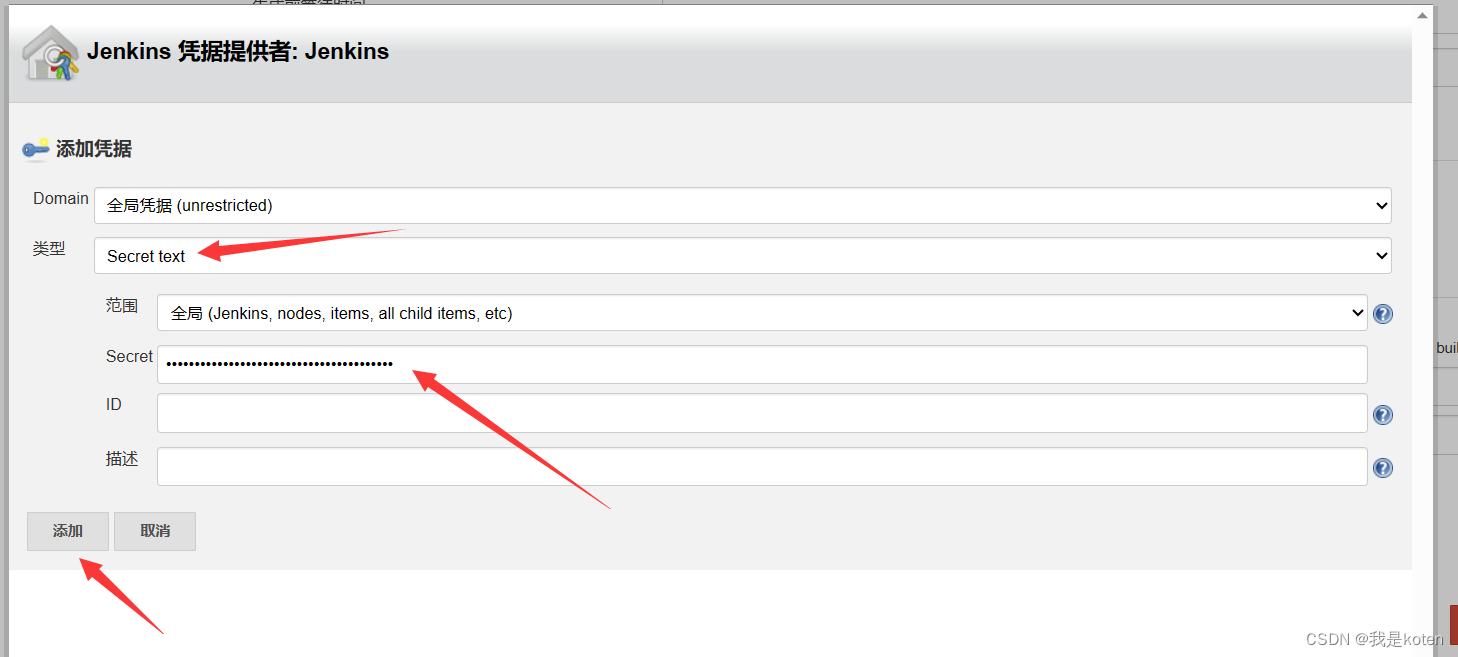
Then select the credentials you just submitted and click Save.
3. Configure the command path of sonar
To enable Jenkins to find the directory of the sonar-scanner command, set it in the system settings and global tool configuration.

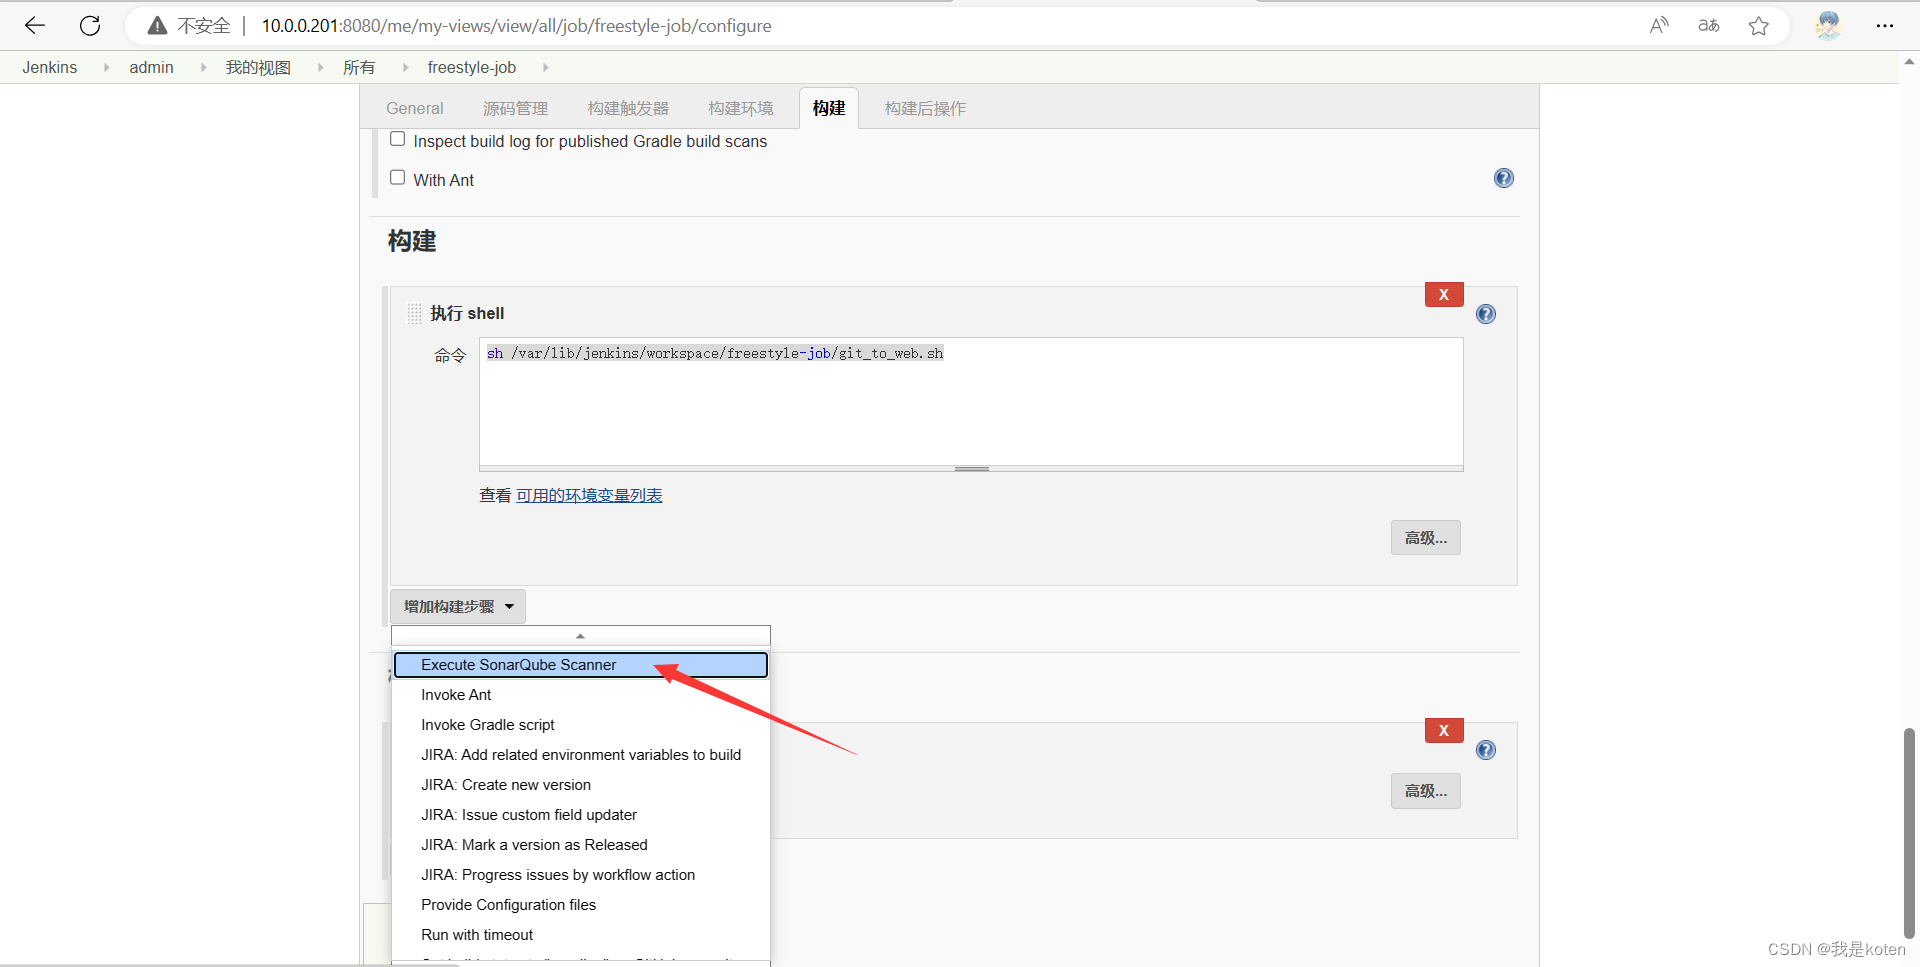
3. Jenkins adds Sonar build items
In the project configuration, add the sonar build item
After adding, adjust and publish the project's location to test first and then publish the project.
sonar.projectName=${JOB_NAME} # 项目在sonarqube上的显示名称
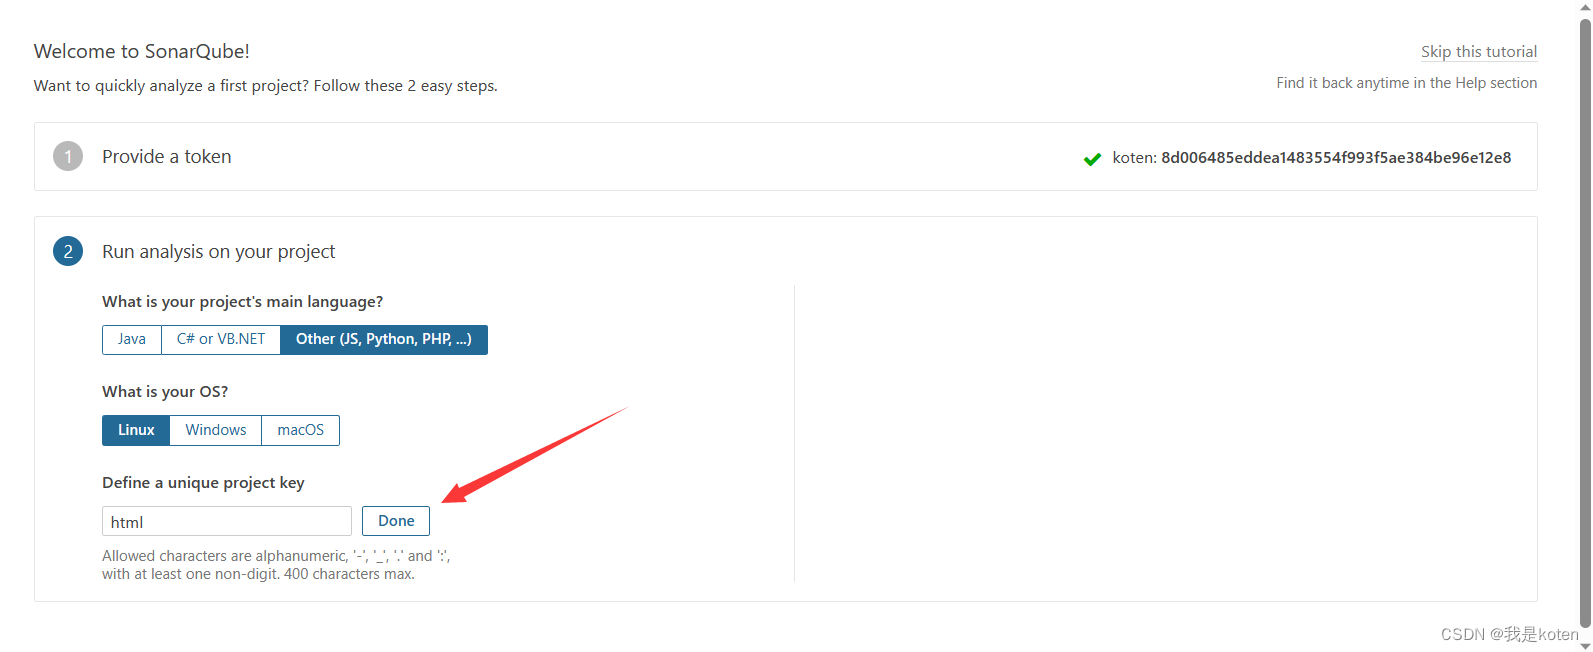
sonar.projectKey=html # 项目的唯一表示,不能重复
sonar.sources=. # 扫描那个项目的源码Add the above code content to the Analysis properties configuration item

When building the project at this time, you will first go to sonar to detect and then publish the code. Click Build Now and find that the build is successful.
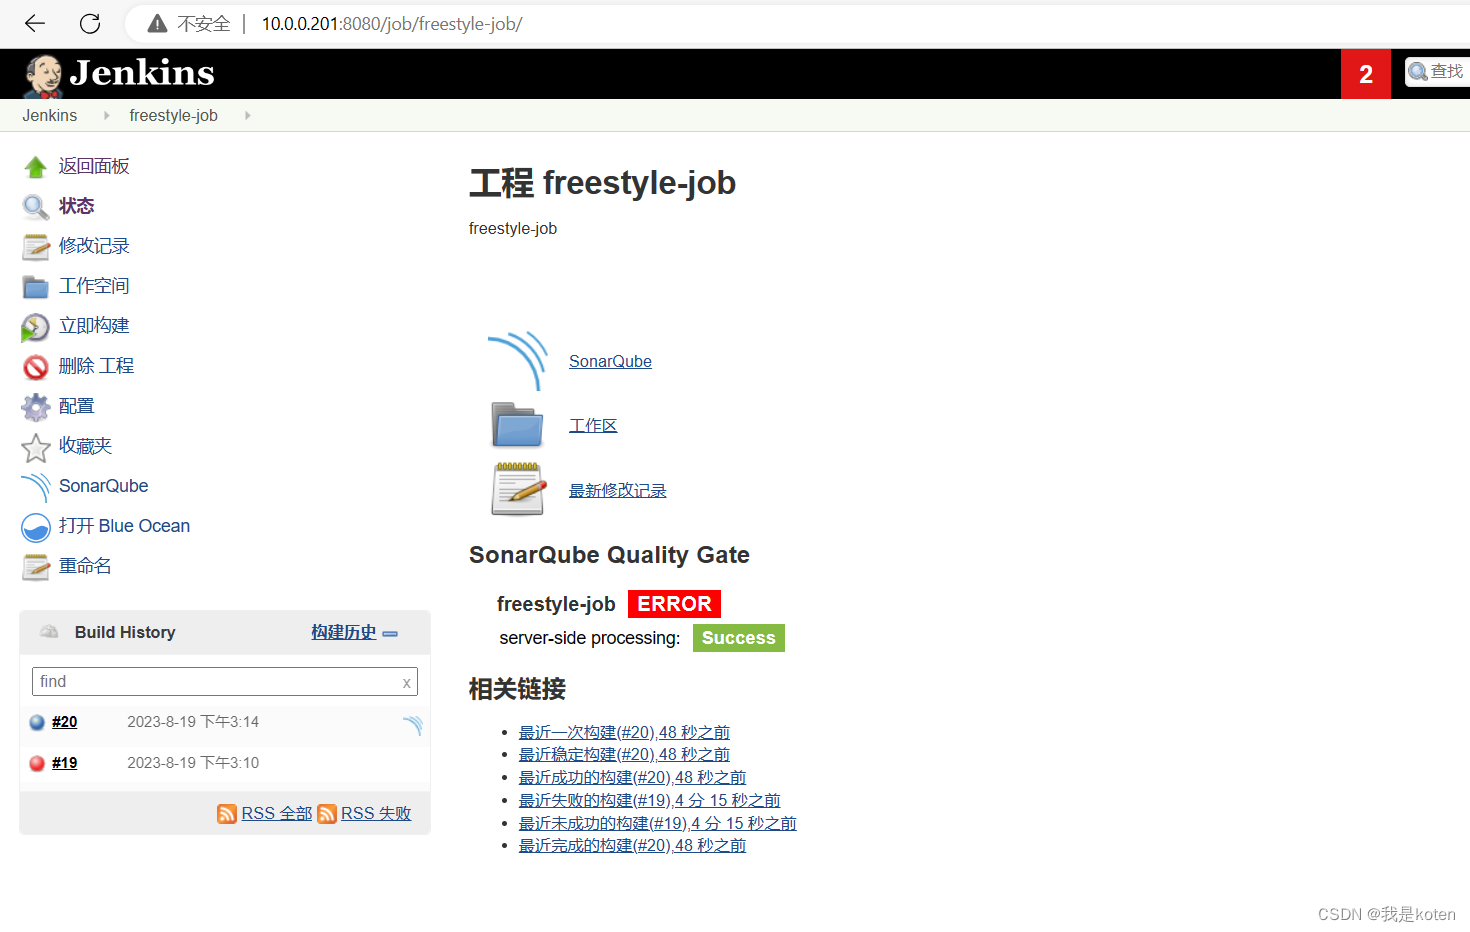
The build status is also displayed here. Clicking it will jump to the sonar interface.
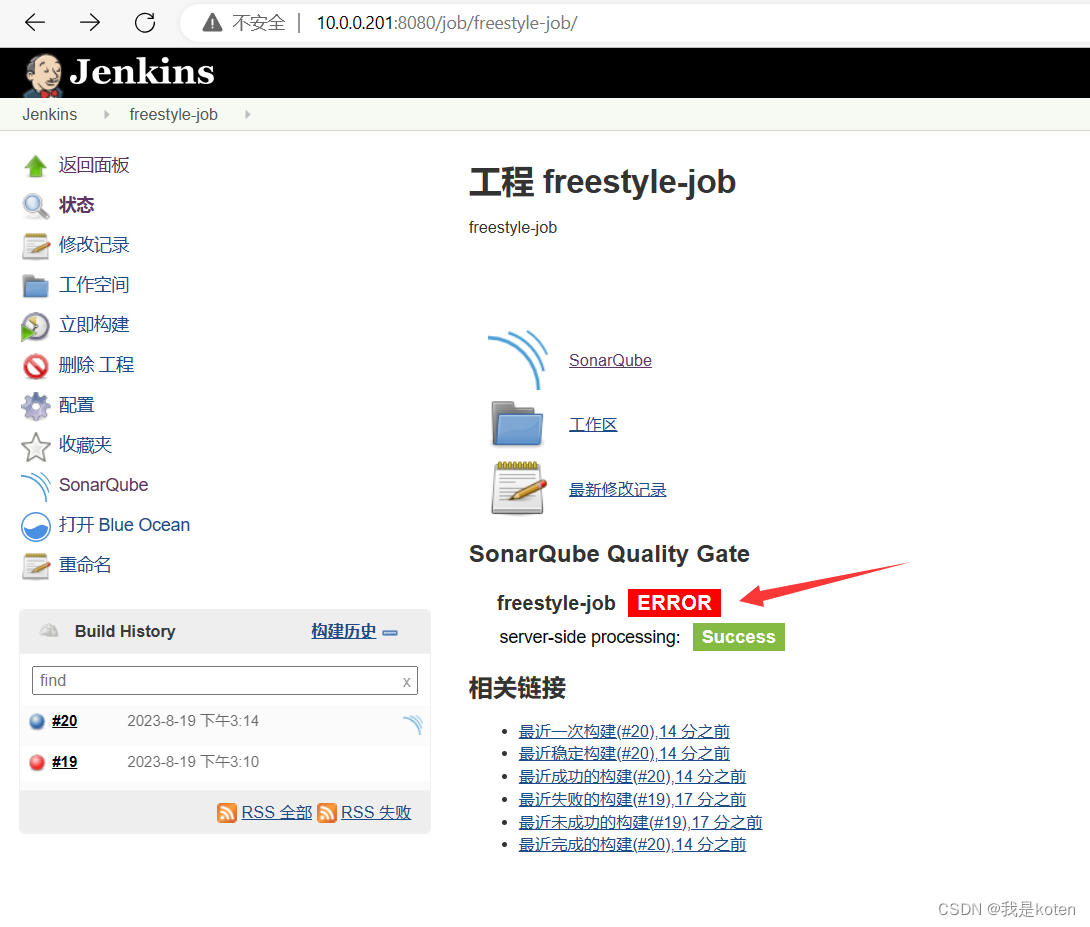
At this time, the project in sonar is updated

If you are configuring a Java project, fill in the Analysis properties parameters as follows. The former analyzes the code based on its location, while the latter constructs the code first and then analyzes it.
sonar.projectName=${JOB_NAME}
sonar.projectKey=java
sonar.sources=.
sonar.java.binaries=jeesns-service/target/sonar

或者

clean
verify
sonar:sonar
-Dsonar.host.url=http://10.0.0.203:9000
-Dsonar.login=0807eba6dcceabe5bce653a9c4efe95ce6a8ac99
Sonarqube7.0 server download link: https://pan.baidu.com/s/1e6Te3sg3PaKqY66iz_qkKA?pwd=d9jx
Sonarqube4.2 client download link: https://pan.baidu.com/s/1DGkAXDlLq_rueQZfIo9kxg?pwd=gerw
Sonarqube module download link: https://pan.baidu.com/s/1t4G3sNpJXqnFzYMPdYQZUQ?pwd=wbcl
I am koten, with 10 years of experience in operation and maintenance, and I continue to share dry goods in operation and maintenance. Thank you for your reading and attention!