C++ encapsulates qml custom graphic control
Introduction to QtWidget and qml
Qt provides 2 sets of UI modes, one is the representative Qt Widget based on C++, and the other is qt quick.
QtWidget is already relatively stable and has rich controls, so it can be used for some large-scale projects.
The interface made by qml is more beautiful, you can easily write some cool animations and special effects, and it is more friendly to touch screen support. It is more suitable for mobile terminal development, but for some large-scale Hua projects with complex interfaces, I personally think it is better to use QtWidget. Qt Quick uses OpenGL as the graphics rendering engine by default. In general qquick projects, qml writes the interface and C++ serves as the functional backend.
Today we are going to talk about how to use c++ to encapsulate custom graphic controls in qml.
Encapsulate controls by inheriting QQuickPaintedItem
describe
QQuickPaintedItem makes it possible to use the QPainter API with QML scene graphs. It sets up a textured rectangle in the scene graph and uses QPainter to draw on the texture. The render target can be a QImage, or when using OpenGL, a QOpenGLFramebufferObject. When the render target is a QImage, QPainter first renders into the image and then uploads the contents into the texture. When using QOpenGLFramebufferObject, QPainter draws directly on the texture. Calling update() triggers a redraw.
To enable QPanter for antialiased rendering, use setAntialiasing().
To write your own painted item, you first create a subclass of QQuickPaintedItem, and then start by implementing its only pure virtual public function, paint(), which implements the actual painting. The draw will be inside a rectangle from 0,0 to width(),height().
Public interface definition
| QQuickPaintedItem(QQuickItem *parent = Q_NULLPTR) | |
|---|---|
| virtual | ~QQuickPaintedItem() |
| bool | antialiasing() const |
| QColor | fillColor() const |
| bool | mipmap() const |
| bool | opaquePainting() const |
| virtual void | paint(QPainter *painter) = 0 |
| PerformanceHints | performanceHints() const |
| RenderTarget | renderTarget() const |
| void | setAntialiasing(bool enable) |
| void | setFillColor(const QColor &) |
| void | setMipmap(bool enable) |
| void | setOpaquePainting(bool opaque) |
| void | setPerformanceHint(PerformanceHint hint, bool enabled = true) |
| void | setPerformanceHints(PerformanceHints hints) |
| void | setRenderTarget(RenderTarget target) |
| void | setTextureSize(const QSize &size) |
| QSize | textureSize() const |
| void | update(const QRect &rect = QRect()) |
The function that plays a key role this time is the protagonistvirtual void paint(QPainter *painter)=0, by overriding the virtual function paint, the content to be painted is realized.
code example
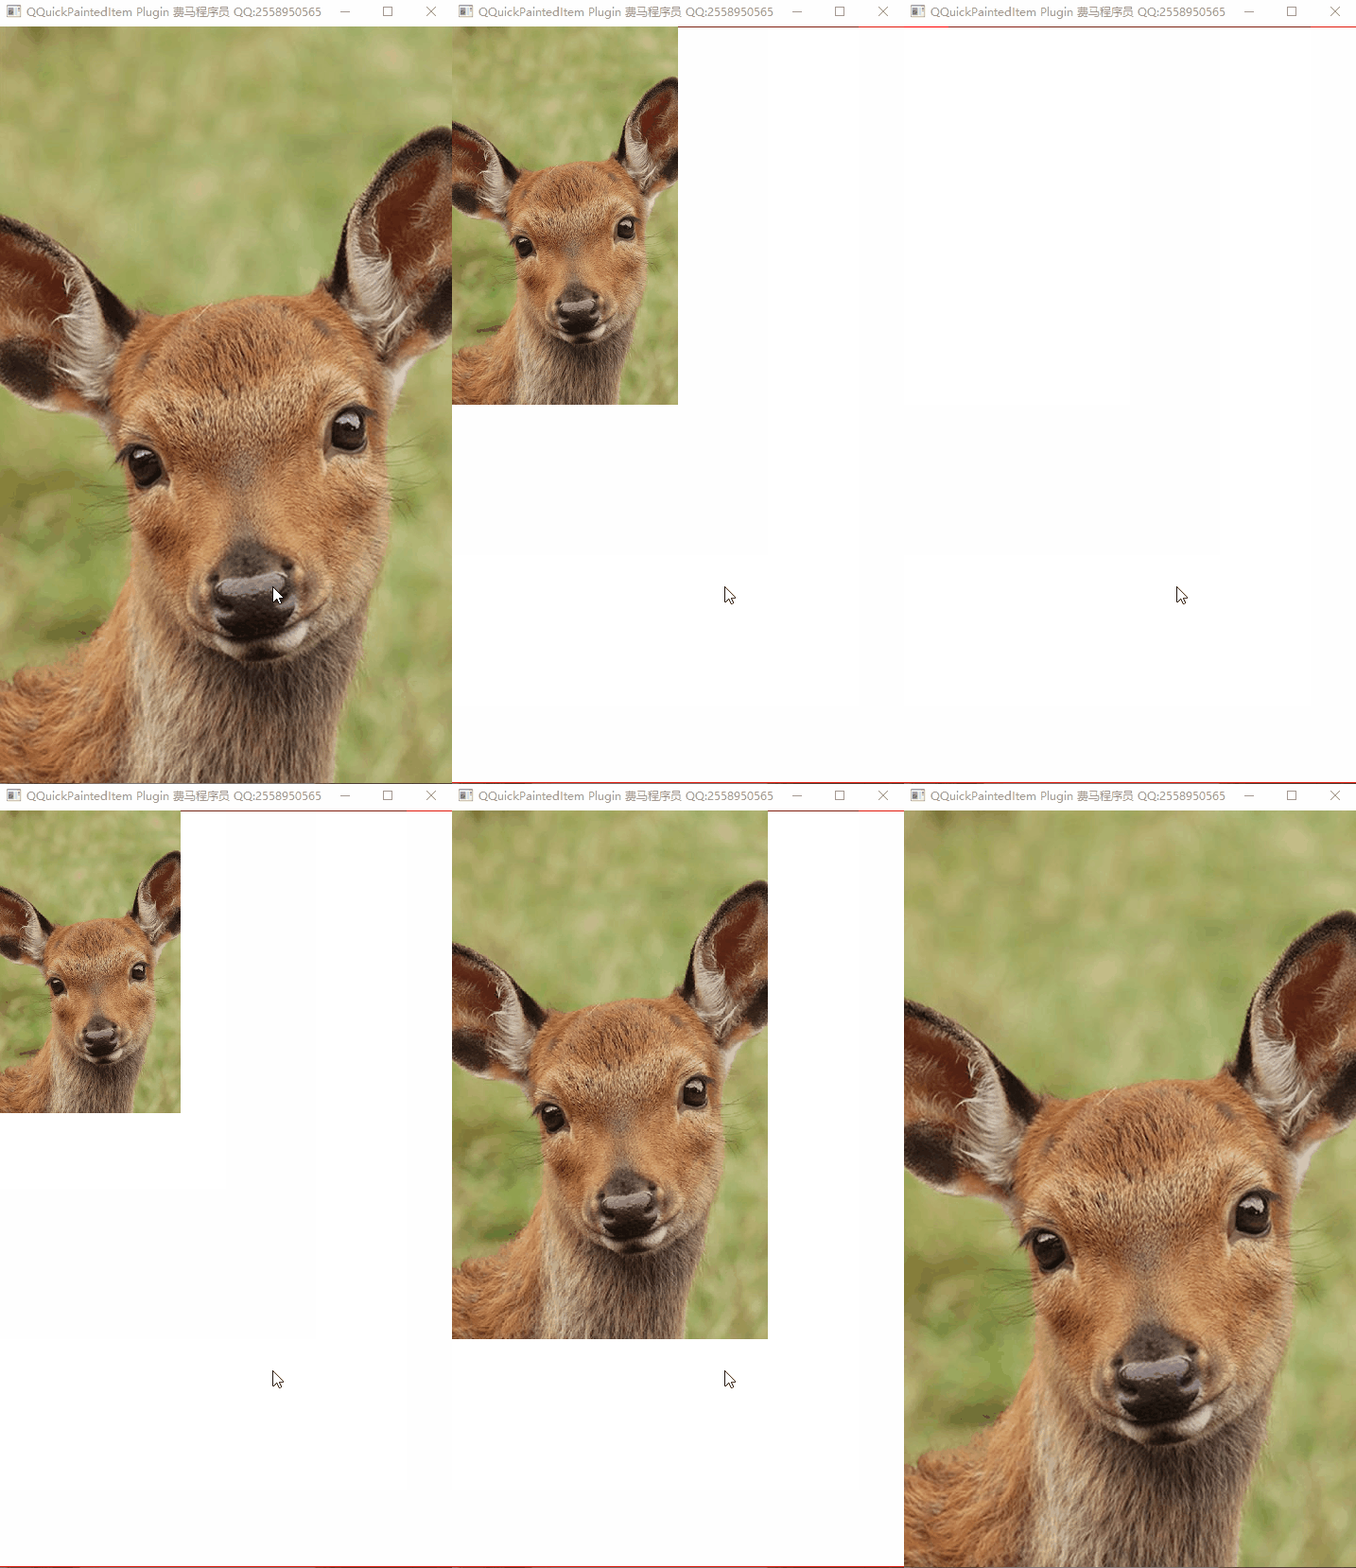
The following implements a control for image display. Sliding the mouse wheel can zoom in and out of the image.
Define class XImageView, inherit QQuickPaintedItem
#ifndef XIMAGEVIEW_H
#define XIMAGEVIEW_H

#include <QObject>
#include <QImage>
#include <QQuickPaintedItem>

class QPainter;
class XImageView : public QQuickPaintedItem
{


    Q_OBJECT

    Q_PROPERTY(QImage mImage READ getImage WRITE setImage)
    Q_PROPERTY(QString fileUrl READ getFileUrl WRITE setFileUrl)
    Q_PROPERTY(int mWidth READ getWidth WRITE setWidth)
    Q_PROPERTY(int mHeight READ getHeight WRITE setHeight)

public:
    XImageView(QQuickItem *parent = 0);
    virtual ~XImageView();

    virtual void paint(QPainter *painter);

    QImage getImage() const;
    void setImage(QImage img);

    QString getFileUrl() const;
    void setFileUrl(QString url);

    int getWidth() const;
    void setWidth(int w);

    int getHeight() const;
    void setHeight(int h);

    Q_INVOKABLE void zoomDraw(float z = 1.0f);

private:
   QImage mImage;
   QString fileUrl;
   int mWidth;
   int mHeight;
   float mZoom;
};

#endif // XIMAGEVIEW_H
Rewrite the paint function to implement self-painting
void XImageView::paint(QPainter *painter)
{


    if (painter == nullptr)
    {


        return;
    }
    if(mImage.isNull())
    {


        if(!fileUrl.isEmpty())
        {


            if(!mImage.load(fileUrl))
            {


                qDebug("load image file failed!");
                return;
            }
        }else
        {


            qDebug("file is not exsit!");
            return;
        }
    }

    QImage tempImage = mImage.scaled(mWidth*mZoom,mHeight*mZoom,Qt::KeepAspectRatio);

    painter->setRenderHint(QPainter::Antialiasing, true);
    painter->setRenderHint(QPainter::HighQualityAntialiasing, true);
    painter->setRenderHint(QPainter::SmoothPixmapTransform, true );
    painter->drawImage(0,0, tempImage);
}
Note: The qml type must be registered before calling.
    int verMajor = 1;
    int verMinor = 0;

    qmlRegisterType<XImageView>("custom.qimi.image",verMajor,verMinor,"XImageView");
qml call example
import QtQuick 2.9
import QtQuick.Window 2.2

import custom.qimi.image 1.0

Window {


    visible: true
    width: 480
    height: 800
    title: qsTr("QQuickPaintedItem Plugin 费马程序员 QQ:2558950565")

    property double zoomVlaue: 1.0
    signal drawImage()

    Rectangle
    {


        id: image
        color: "transparent"
        border.color: "red"
        anchors
        {


            margins: 0
            centerIn: parent
            fill: parent
        }
    }

    XImageView
    {


        id: ximageView
        width: parent.width
        height: parent.height
        mWidth: parent.width
        mHeight: parent.height
        fileUrl: ":/image/mmm.jpg"
    }

    MouseArea
    {


        anchors.fill: parent
        acceptedButtons: Qt.LeftButton
        onClicked: {


            if(mouse.button === Qt.LeftButton)
            {


                drawImage();
            }
        }
        onWheel: {


            var m_value = wheel.angleDelta.y/120;
            if(m_value>0)
            {


                if(zoomVlaue<1.0){


                zoomVlaue += 0.1;
                }
            }else
            {


                if(zoomVlaue>0.0){


                zoomVlaue -= 0.1;
                }
            }
            console.log("wheel event=,zoom=",m_value,zoomVlaue);
            ximageView.zoomDraw(zoomVlaue);
        }
    }

    onDrawImage: {


        console.log("mouse clicked!");
        ximageView.zoomDraw();
    }
}
renderings
Slide the middle mouse wheel to zoom in and out:

Conclusion: Through the above methods, we can customize various qml controls.
Full code example: Sample code download link
Author: Feima Programmer.
Welcome to technical exchange: QQ: 255895056.
Please indicate the source for reprinting. If there is any inappropriateness, please correct me.