1. Machine Vision
Machine Vision generally refers to Computer Vision. Simply put, it is the study of how to make machines understand things. It refers to using cameras and computers instead of human eyes to carry out machine vision such as target identification, tracking and measurement, and further performs graphics processing to make computer processing into images that are more suitable for human eyes to observe or transmit to instruments for detection.
1.1 Application of machine vision
Face recognition, vehicle detection, recognizing text in images (OCR), image stitching, restoration, background replacement
2. OpenCV
Developed by Gray Bradsky in 1999 and released in 2000 as
C++, Python, Java, JS
cross-platform (Windows, Linux, Mac...)
Learning opencv can:
- Understand how OpenCV works
- Some common image problems can be solved using OpenCV
- Learn how to deal with problems such as object recognition and text recognition.
2.1 Install OpenCV
Install using a server virtual environment:
pip install opencv-python==4.7.0.72
Install the opencv expansion package (optional):
pip install opencv-contrib-python==4.7.0.72If it cannot be installed: https://www.lfd.uci.edu/~gohlke/pythonlibs/ Download the corresponding package and install it manually.
3. OpenCV reading and display
3.1 Create window
namedWindow() creates a named window

# WINDOW_AUTOSIZE The window size is not allowed to be modified.
cv2.namedWindow('new', cv2.WINDOW_AUTOSIZE)

# WINDOW_NORMAL can make the window size adjustable
# cv2.namedWindow('new', cv2.WINDOW_NORMAL)

# Modify window size
# cv2.resizeWindow('new', 1920, 1080)

imshow('new', display content) display window
# Destroy the image window cv2.destroyAllWindows()


# The waitKey method represents waiting for a key press, 0 represents any key press, and other integers represent the time to wait for a key press, in milliseconds. If no key operation occurs after the time, the window will automatically close.
waitKey() waits for user input


# Will return the ascii value of the key
# key = cv2.waitKey(0)
if key == ord('q'):
cv2.destroyAllWindows()
ord() gets ascii value
3.2 Picture reading and writing
Use imread to read pictures, and the default is to read color pictures.
imread(path, flag)
imwrite(path, img): Use imwrite to save images
cv2.imread('01_Picture/01_cat.jpg')
cv2.imshow('cat',img)
cv2.waitKey(0)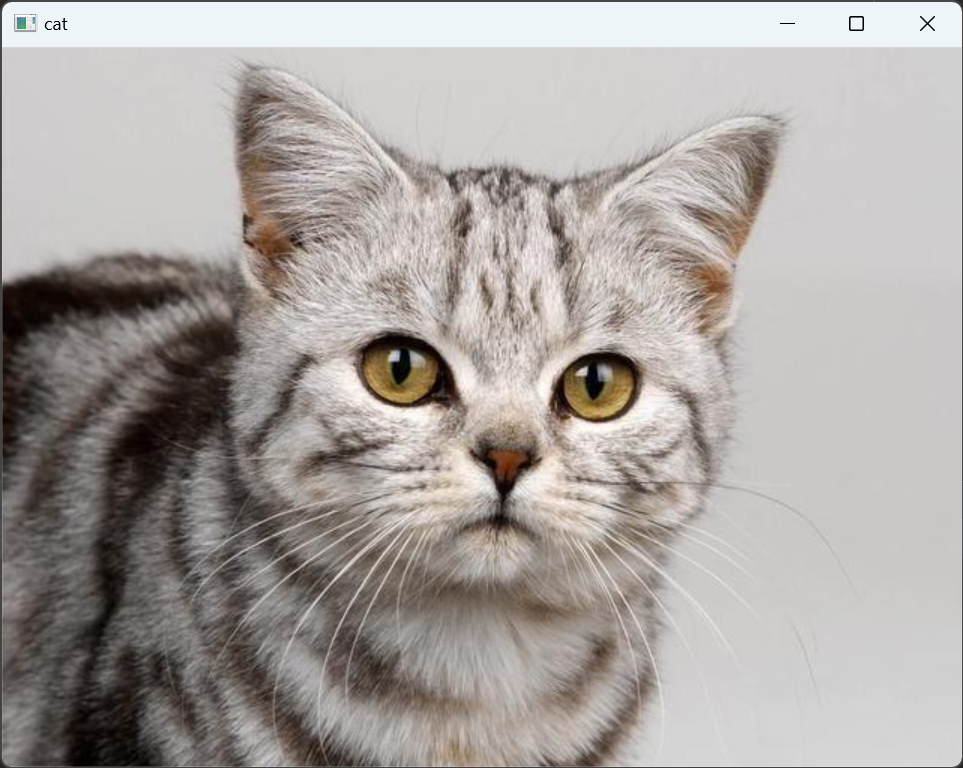
Display using matplotlib `plt.imshow(img)`
import matplotlib.pyplot as plt


img= cv2.imread('D:\\3-project\\zyj\\pythonCNN\\pic\\cat.jpeg')
plt.imshow(img)
plt.show()

Because the image color channels read by OpenCV are arranged according to BGR (blue, green, and red) , generally the image channels are arranged according to RGB. In order to display cat pictures normally, we need to use OpenCV's image display method:

3.3 Video playback and recording
Video is composed of pictures. Each frame of the video is a picture, usually 30 frames, which means 30 pictures are displayed in one second.
cv2.VideoCapture can capture the camera, using numbers to represent different devices, such as 0, 1
vc = cv2.VideoCapture('./1.mp4') # Open the video file
vc = cv2.VideoCapture(0) # Open the camera
import cv2
import matplotlib.pyplot as plt
import numpy as np

cv2.namedWindow('video', cv2.WINDOW_NORMAL)
cv2.resizeWindow('video', 640, 480)

vc = cv2.VideoCapture(0) #打开摄像头

while True:
    # vc.read() 返回两个值, 第一个为状态值, 读到帧为True, 第二个值为视频帧
    ret, frame = vc.read()
    if not ret:
        break

    cv2.imshow('video',frame)  # 将视频帧放在窗口中显示
    key= cv2.waitKey(10)
    if key & 0xFF == ord('q'):
        break
 # 释放
vc.release()
cv2.destroyAllWindows()
Record video
cap = cv2.VideoCapture(0)
# *mp4v就是解包操作 等同于  'm', 'p', '4', 'v'
fourcc = cv2.VideoWriter_fourcc(*'mp4v')
# (640, 480)表示摄像头拍视频, 这个大小搞错了也不行.
# 主要是这个分辨率.
vw = cv2.VideoWriter('output.mp4', fourcc, 20, (640, 480))

while cap.isOpened():
    ret, frame = cap.read()
    if not ret:
        print('can not recive frame, Exiting...')
        break

    vw.write(frame)
    cv2.imshow('frame', frame)

    if cv2.waitKey(1) == ord('q'):
        break

cap.release()

#释放VideoWriter
vw.release()

cv2.destroyAllWindows()
- VideoWriter: Parameter one is the output file, parameter two is the multimedia file format (VideoWriter_fourcc, parameter three is the frame rate, parameter four is the resolution. -
write encodes and writes to the cache
- release writes the cache content to the disk, and Release resources
3.4 Controlling the mouse
OpenCV allows us to respond to mouse actions on the window.
setMouseCallback(winname, callback, userdata) winname is the name of the window, callback is the callback function, and userdata is the parameter to the callback function.
The callback(event, x, y, flags, userdata) callback function must contain these 5 parameters. event is the event (mouse movement, left button, right button, etc.), x, y are the coordinates of the mouse point, and flags are mainly used for combination key, userdata is the userdata of setMouseCallback above
Mouse events:
- EVENT_MOUSEMOVE 0 Mouse movement
- EVENT_LBUTTONDOWN 1 Left mouse button pressed
- EVENT_RBUTTONDOWN 2 Right mouse button pressed
- EVENT_MBUTTONDOWN 3 Middle mouse button pressed - EVENT_LBUTTONUP
4 Left button released
- EVENT_RBUTTONUP 5 Right button released
- EVENT_MBUTTONUP 6 Middle button released
- EVENT_LBUTTONDBLCLK 7 Left button Double click
- EVENT_RBUTTONDBLCLK 8 Double right click
- EVENT_MBUTTONDBLCLK 9 Double click on the middle button
- EVENT_MOUSEWHEEL 10 Scroll the mouse wheel up and down
- EVENT_MOUSEHWHEEL 11 Scroll the mouse left and right
flags:
- EVENT_FLAG_LBUTTON 1 Press the left button
- EVENT_FLAG_RBUTTON 2 Press the right button
- EVENT_FLAG_MBUTTON 4 Press the middle button
- EVENT_FLAG_CRTLKEY 8 Press the ctrl key
- EVENT_FLAG_SHIFTKEY 16 Press the shift key
- EVENT_FLAG_ALTKEY 32 Press the alt key
import cv2
import numpy as np


def mouse_callback(event, x, y, flags, userdata):
    print(event, x, y, flags, userdata)

cv2.namedWindow('mouse', cv2.WINDOW_NORMAL)
cv2.resizeWindow('mouse', 640, 360)

# 设置鼠标回调函数
cv2.setMouseCallback('mouse', mouse_callback, '123')

# 显示窗口和背景
# 生成全黑的图片
img = np.zeros((360, 640, 3), np.uint8)
while True:
    cv2.imshow('mouse', img)
    key = cv2.waitKey(1)
    if key & 0xFF == ord('q'):
        break

cv2.destroyAllWindows()
3.5 TrackBar control
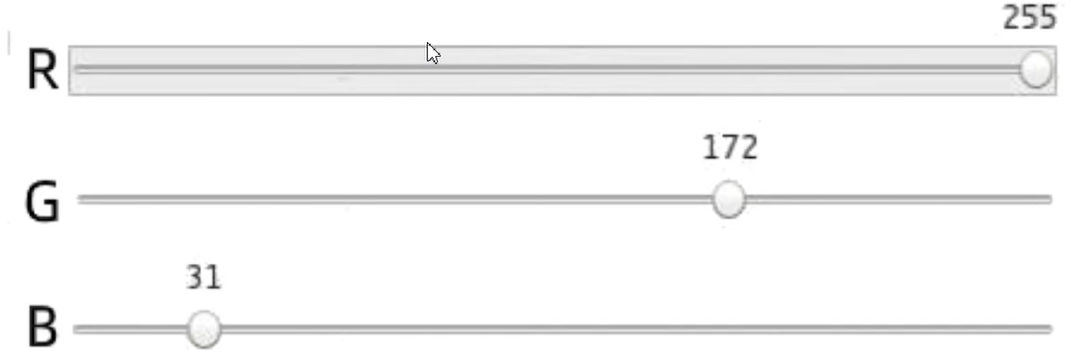
- createTrackbar(trackbarname, winname, value, count, onChange) creates a TrackBar control, value is the default value of trackbar, count is the maximum value of bar, and the minimum is 0 - getTrackbarPos(trackbarname, winname) gets the current value of
TrackBar
import cv2
import numpy as np

# 创建窗口
cv2.namedWindow('trackbar', cv2.WINDOW_NORMAL)
cv2.resizeWindow('mouse', 640, 480)
# 定义回调函数
def callback(value):
    print(value)

# 创建trackbar
cv2.createTrackbar('R', 'trackbar', 0, 255, callback)
cv2.createTrackbar('G', 'trackbar', 0, 255, callback)
cv2.createTrackbar('B', 'trackbar', 0, 255, callback)

# 创建一个背景图片
img = np.zeros((480,640,3), np.uint8)

while True:
    # 获取当前trackbar的值
    r = cv2.getTrackbarPos('R', 'trackbar')
    g = cv2.getTrackbarPos('G', 'trackbar')
    b = cv2.getTrackbarPos('B', 'trackbar')

    # 改变背景图颜色
    img[:] = [b, g, r]
    cv2.imshow('trackbar', img)

    key = cv2.waitKey(1)
    if key & 0xFF == ord('q'):
        break

cv2.destroyAllWindows()