1. Picture-in-picture effect overlay filter (overlay, overlay)
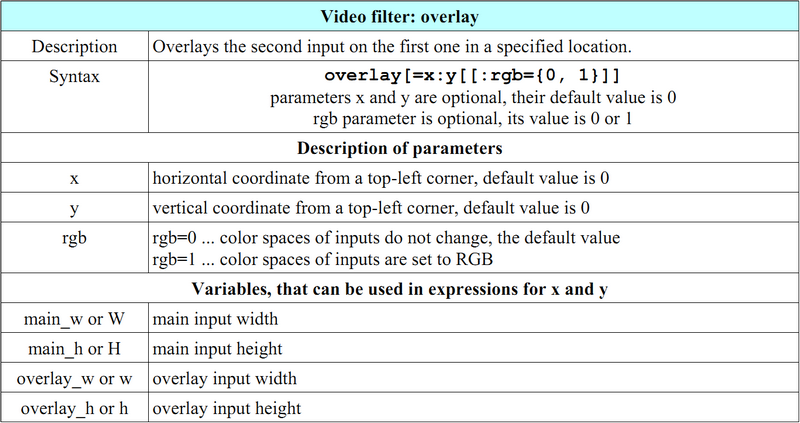
The usage syntax of overlay:
ffmpeg -i input1 -i input2 -filter_complex overlay=x:y output
The -vf simple filter is not used here, but the -filter_complex composite filter is used because there are multiple input sources.
But if you pass the link tag, you can use the -vf filter in conjunction with the movie video source, such as: ffmpeg -i input1 -vf movie=input2[logo];[in][logo]overlay=x:y output
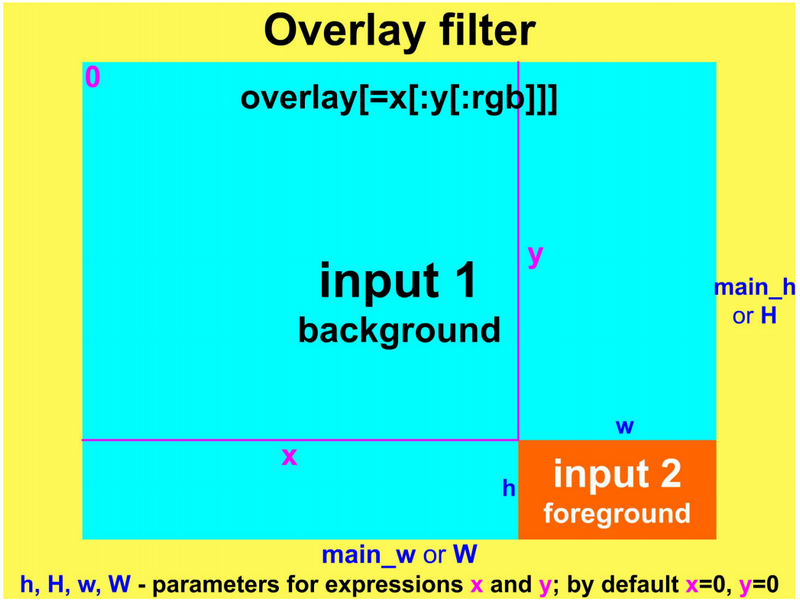
2. A logo is displayed in the corner of the screen
Top left corner: ffmpeg -i pair.mp4 -i logo.png -filter_complex overlay pair1.mp4
右上角:ffmpeg -i pair.mp4 -i logo.png -filter_complex overlay=W-w pair2.mp4
左下角:ffmpeg -i pair.mp4 -i logo.png -filter_complex overlay=H-h pair3.mp4
右下角:ffmpeg -i pair.mp4 -i logo.png -filter_complex overlay=W-w:H-h pair4.mp4
3. Display the logo at the specified time (use the -itsoffset option)

4. Add time
ffmpeg -f lavfi -i testsrc -vf crop=61:52:224:94 -t 30 timer.ogg //30秒
ffmpeg -i test.mp4 -i timer.ogg -filter_complex overlay=451 output.mp4 //451 is obtained by subtracting 61 from the width 512 of the test.mp4 video, and the effect is that the time is displayed in the upper right corner of the video
ffmpeg -i test.mp4 -vf movie=timer.ogg,scale=15:14[tm];[in][tm]overlay=248:371 output.pm4 //Scale the timer to 15:14, then add to The video test.mp4 has a width of 248 and a height of 371. [in] is the built-in input tag, and [tm] is the tag you typed
Reposted from: ffmpeg picture-in-picture effect - yongfengnice - 博客园