Node.js is an open source, cross-platform JavaScript runtime environment based on the Chrome V8 engine. It allows developers to use JavaScript to build high-performance, scalable network applications, enabling JavaScript to run on the server side, not just limited to the browser side. Node.js' package manager npm is the world's largest open source library ecosystem. Front-end development and back-end development can be realized by using Node.js, which has features such as event-driven and non-blocking IO model.

Node.js installation and environment configuration
Install Node.js
To start using Node.js , you first need to install the Node.js runtime on your computer. Here are a few common ways to install Node.js:
1. Download the installation package from the official website: visit the official website of Node.js, select the version suitable for your operating system, download and install (fool-style installation, just click Next), you can choose a custom installation directory, and then in the terminal Enter node -v and npm -v check if the installation was successful.
2. Install using a package manager (for Linux/macOS): If you are using Linux or macOS, you can use a package manager to install Node.js. For example, run the following command in a terminal:
For Linux (using apt):
sudo apt install nodejs sudo apt install npmFor macOS (using Homebrew):
brew install nodeConfigure the Node.js environment
After installing Node.js, you may also need to configure some environment settings to use it better:
1. Check the installation: Run the following command on the command line to check whether Node.js and npm (Node.js package manager) are installed correctly:
node -v npm -v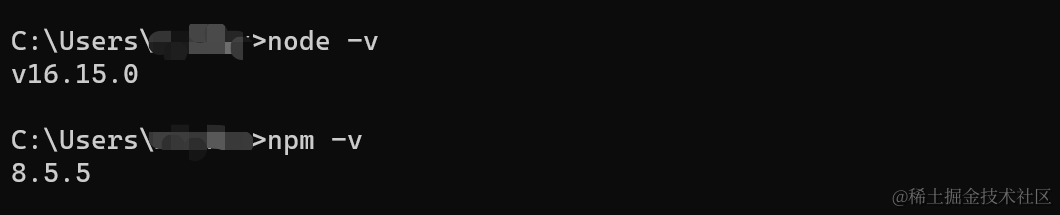
2. Update npm: npm often releases updates, you can update npm to the latest version by running the following command:
npm install -g npm3. Choose a version management tool: For different projects, you may need to use different versions of Node.js. You can use such as nvm(Node Version Manager) to manage multiple Node.js versions, how to install nvm will not go into details here.

Practice case: building a simple Node.js server
Here's a basic Node.js hands-on example that demonstrates how to create a simple server that handles basic routing and requests:
// 引入 http 模块 const http = require('http'); // 创建服务器 const server = http.createServer((req, res) => { if (req.url === '/') { res.writeHead(200, { 'Content-Type': 'text/plain' }); res.end('Hello, Node.js Server!'); } else if (req.url === '/about') { res.writeHead(200, { 'Content-Type': 'text/plain' }); res.end('About Page'); } else { res.writeHead(404, { 'Content-Type': 'text/plain' }); res.end('404 Not Found'); } }); // 监听端口 server.listen(3000, () => { console.log('Server is running on http://localhost:3000'); });In your IDE editor create a server.js file called , and paste the above code into it. Then navigate to the directory where the file is located in a terminal and run the following command to start the server:
node server.jshttp://localhost:3000 Now you can visit and http://localhost:3000/about view the server's response in your browser .

Tips, Tricks & Precautions
- Learning resources: Node.js has a wealth of learning resources, including official documentation, tutorials, blog posts, and online courses. A solid understanding of the core concepts and features of Node.js will have a huge impact on your development experience.
- Package management: Installing, managing, and sharing JavaScript packages is easy with npm.
npm initYou can use the command to create a file in your project folderpackage.jsonand thennpm installinstall the required packages using - Asynchronous programming: Node.js adopts a non-blocking asynchronous programming model, which means that most operations are non-blocking, which can improve the performance of the application. But you also need to take care to handle callbacks, Promises or async/await correctly to avoid callback hell and async errors.
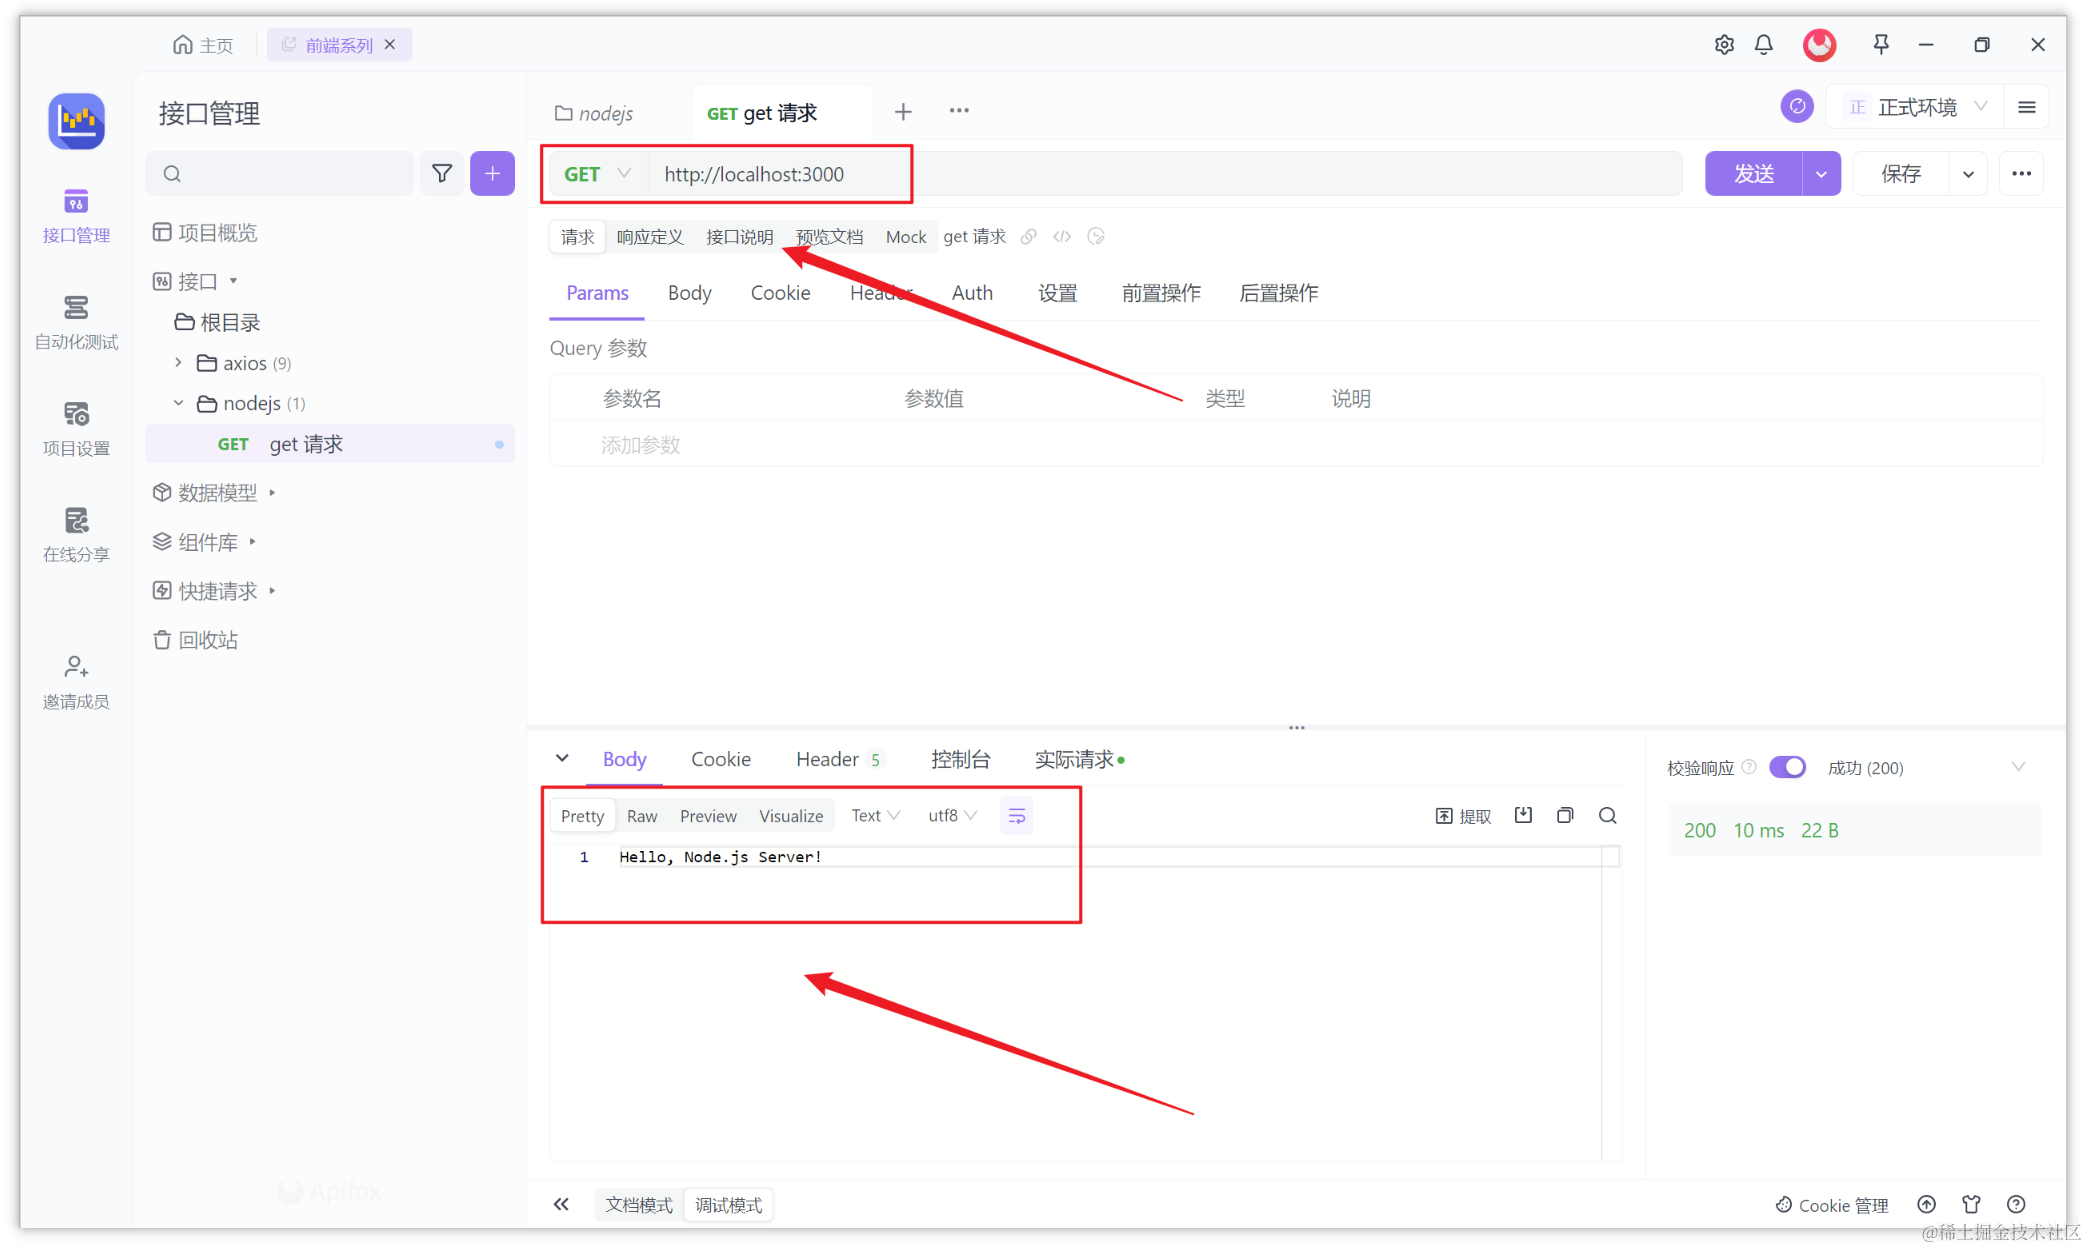
Debug the backend interface through Apifox
Apifox is a more powerful interface testing tool than Postman. Apifox = Postman + Swagger + Mock + JMeter. Apifox supports debugging interfaces of http(s) , WebSocket, Socket, gRPC , Dubbo and other protocols, and integrates IDEA plug-ins. When the back-end personnel finish writing the service interface, Apifox can be used to verify the correctness of the interface during the testing phase. The graphical interface greatly facilitates the online efficiency of the project.
In the example of this article, the interface can be tested through Apifox. After creating a new project, select "debug mode" in the project , fill in the request address, and then quickly send the request and get the response result. The above practice case is shown in the figure:
Summarize
Node.js is a powerful JavaScript runtime environment that enables developers to build high-performance web applications on the server side. Through this article, we understand the basic concepts, installation methods, and environment configuration of Node.js, and experience the usage of Node.js through a simple practical case. To learn Node.js in depth, it is recommended to consult the official documentation and related learning resources.
Knowledge expansion:
- How does Node.js read files line by line? This article explains how Node.js reads files line by line
- What is assert in Node.js? How to use the assert module of node.js?
Reference link: