[flask+gunicorn+docker] Create a simple flask project and deploy it to a docker container
Create a simple flask project and deploy it to a docker container
Requirements:
1. Repackage lark's notification method API into an API that is closer to the requirements
2. Provide request services for the interface API
The selected implementation method:
1. Write related functions, mainly based on the API requesting lark
2. Choose flask to write the API
3. Use gunicorn + gevent to start the flask service
4. Encapsulate the service into the docker image
The focus of this article:
1. How to quickly create a simple flask project
2. How to use gunicorn to start the flask service
3. Docker package and run related details
Basic introduction
- Flask : One of the two most popular frameworks for python (django, flask), lightweight is the biggest feature
- Gunicorn : Those who are only familiar with development with java or PHP may not understand the deployment of python at first. The Flask application is a Python application that conforms to the WSGI specification and cannot run independently (the method similar to app.run is only suitable for development mode). Need to rely on other components to provide server functions.
- gevent : gunicorn uses a synchronous blocking network model (-k sync) by default, which may not perform well enough for large concurrent access. We conveniently use a gevent to increase the concurrency
- Docker : The container can be understood as a "black box". After the project becomes huge, we often struggle to manage the deployment and maintenance of the entire project. If we pack the entire project into a "container", then we only need to maintain a configuration file to tell the computer what to put into the "container" for each deployment, and even borrow some tools to automate this process, and the deployment will become easier. Very convenient.
This paragraph is reproduced from: Flask + Docker Brainless Deployment Novice Tutorial , which is also the blog that helped me the most. It is concise and concise, and it is recommended to read.
1. Create a simple flask project
Since no database is involved, we can directly add an app.py file in the root directory:
# ./app.py
from gevent import monkey
monkey.patch_all()

from flask import Flask
from flask_cors import CORS
from lark_api import lark_api

# 创建Flask对象
app = Flask(__name__,
            template_folder="public",
            static_folder="public",
            static_url_path="/")
# 将在其他文件 lark_api.py 声明的蓝图 lark_api 在 app 上进行注册
app.register_blueprint(lark_api)
# 跨域请求
CORS(app, supports_credentials=True, origins="*")

# 这里是为了方便后续测试服务是否跑起来
@app.route('/')
def HelloDockerFlask():
    return 'Hello Docker Flask!'


if __name__ == "__main__":
    app.run(debug=True)
Here is a simple example of the registration method of the blueprint in lark_api.py and the declaration and implementation of the api:
from flask import Blueprint
# 创建蓝图对象
lark_api = Blueprint("lark_api", __name__)
# API声明:分别是自定的url和请求方式
@lark_api.route("/api/lark/card_message", methods=["POST"])
def card_message():
	## TODO
Cut to the root directory, run the following commands on the terminal, and then you can run the web service that comes with flask
python app.py
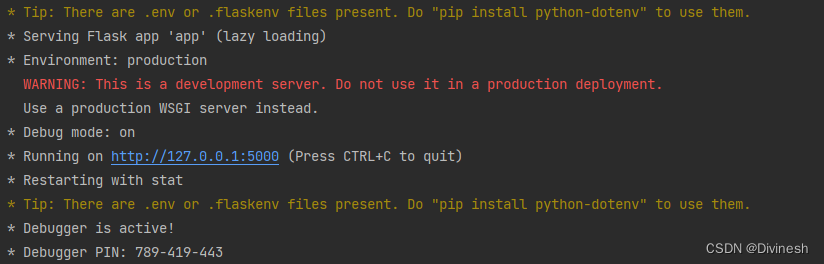
It can be seen that the service is successfully started, but the web service that comes with flask is relatively weak. If you close the terminal or exceed the delay, the service will be closed, so it is only suitable for development and testing, not suitable for production deployment, so we will use gunicorn to start the flask service later.
2. Use gunicorn+gevent to start the flask service
Quick installation via pip
pip install gunicorn gevent
PS: It should be noted that currently gunicorn can only run in the linux environment and does not support the windows platform.
We create a new gunicorn.conf.py file in the root directory
# ./gunicorn.conf.py
workers = 5    # 定义同时开启的处理请求的进程数量,根据网站流量适当调整
worker_class = "gevent"   # 采用gevent库,支持异步处理请求,提高吞吐量
bind = "0.0.0.0:3000" # 设置端口,这里注意要设置成0.0.0.0,如果设置为127.0.0.1的话就只能本地访问服务了
After creating gunicorn.conf.py, we can start the flask service through gunicorn
gunicorn app:app -c gunicorn.conf.py
The first app represents the app.py file; the second app represents the created flask object.
3. Use docker to encapsulate the flask service
(1) Writing of Dockerfile
Create a Dockerfile file in the root directory, content:
# 基于的基础镜像,这里使用python,开发版本是 3.x ,基础镜像也写 3.x 就可以,这样可以保持版本一致,避免 Python 版本差异带来的问题
FROM python:3.10
# /app 是要部署到服务器上的路径
WORKDIR /app
# Docker 避免每次更新代码后都重新安装依赖,先将依赖文件拷贝到项目中
COPY requirements.txt requirements.txt
# 执行指令,安装依赖
RUN pip install -r requirements.txt -i https://pypi.tuna.tsinghua.edu.cn/simple
# COPY指令和ADD指令功能和使用方式类似。只是COPY指令不会做自动解压工作。
# 拷贝项目文件和代码
COPY . .
# 执行指令,字符串间是以空格间隔
CMD ["gunicorn", "app:app", "-c", "./gunicorn.conf.py"]
PS: I stepped on a trap here. FROM python:3.10 began to capitalize 'python'. Note that it must be lowercase here, otherwise the subsequent build docker will fail. I speculate that other fields except FROM also need lowercase.
(2) Create a docker image
docker build -t 'noticedemo' .
noticedemo is the name of the created image, which can be modified by yourself.
It should be noted that this process takes a little time. The first creation needs to pull the base image, and it also takes time to install dependencies.
After the build is complete, view the mirror list through the following command, and you can find that noticedemo is displayed in it
docker images
(3) Start the container to run the docker image
Production environment running (running in daemon mode)
docker run -d -p 3000:3000 noticedemo
-d: Run as daemon
-p: Specify port mapping, the format is: host (host) port: container port
More parameters can be passed docker -help查看.
(4) Some other commonly used docker commands
# 列出所有镜像
docker images
# 列出容器(运行中的)
docker ps
# 列出所有的容器(包括未运行的)
docker ps -a
# 运行/停止容器
docker start/stop [CONTAINER ID]
# 删除容器
docker rm [CONTAINER ID]
# 删除镜像
docker rmi [IMAGE ID]
4. How to provide services to users
If it is a public and open source API service, you can push the image to the docker cloud for sharing. Users only need to pull your image to run the service on the server they want to deploy; but there is actually a simpler way for internal use
. The entire project file is uploaded to gitlab or other similar platforms. Those who need to use the service can flexibly deploy the service to the server they want to deploy by simply pulling the code -> creating a docker image -> starting the container to run the docker image;
Don't forget to write the README document, mainly including the command to start the container to run the docker image and the API application document.