Table of contents
1. Install yum source (solved the problem of where to find MySQL)
Before installation and uninstallation, it is recommended to switch the user to root
1. Install MySQL
0. Before installation, please perform a delete operation to delete the pre-installed or residual MySQL
1. Install yum source (solved the problem of where to find MySQL)
1.1 Obtain MySQL official yum source http://repo.mysql.com/
Note: It is best to install the mysql version that is consistent with your own server system , otherwise there may be software compatibility issues (check the current server system version: cat /etc/redhat-release)
Go to http://repo.mysql.com/, and find resources that match your own server system version
Right click on the web page -> view web page source code -> Centos 7 series in line 142 - 147.

1.2 Click the link to download the installation package to your local, and then use the rz command to upload to your Linux server

1.3 Run the installation package and install the yum source: rpm -ivh just downloaded an'z'b

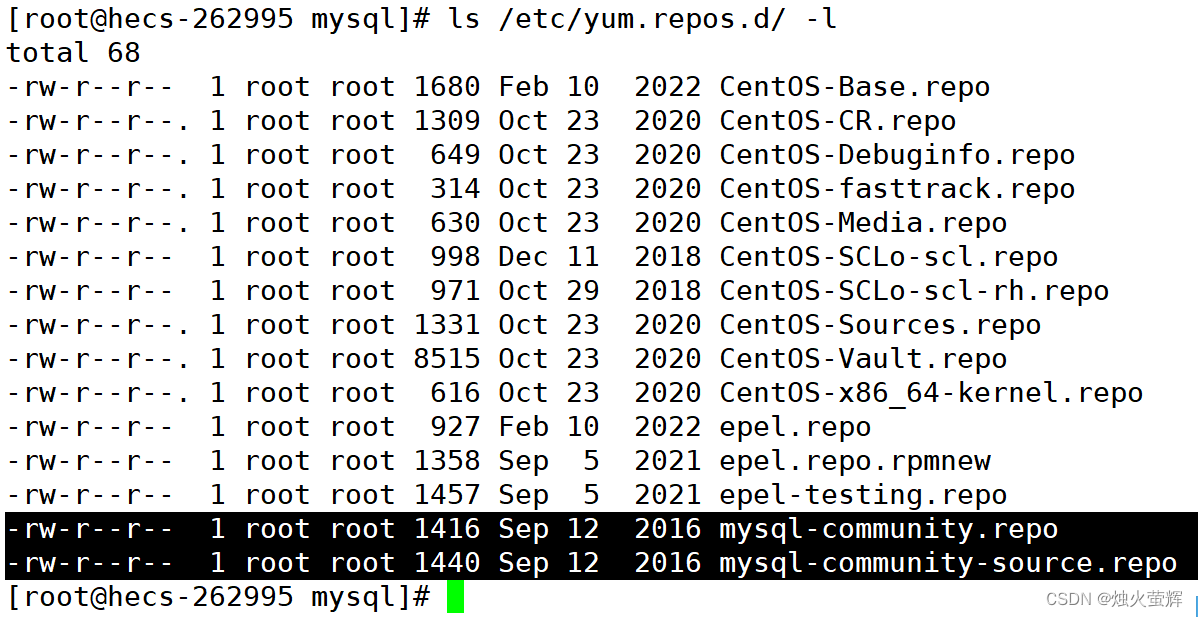
1.4 Check whether there is a yum source of mysql in the yum source: ls /etc/yum.repos.d/ -l
1.5 Check whether the yum source of MySQL can work normally: yum list | grep mysql
2. Which version of MySQL to install
2.1 Installed version
yum install -y mysql-community-server
2.2 Common problems during installation
Key expiration problem:
Solution:
Execute the command: rpm --import https://repo.mysql.com/RPM-GPG-KEY-mysql-2022
and reinstall: yum install -y mysql l-community-serverWhen the prompt Complete! appears, the installation is successful.
2.3 How to ensure that MySQL is installed?
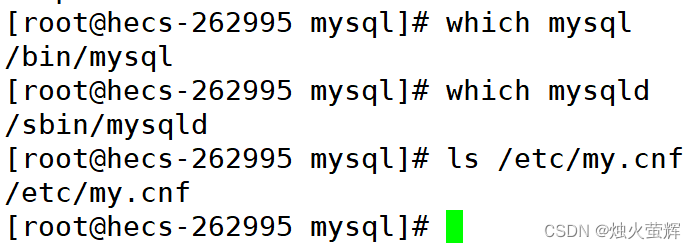
Execute the following three commands:
- which mysql : Check whether the MySQL client is installed
- which mysqld : Check whether the MySQL server is installed
- ls /etc/my.cnf : Check if there is a MySQL configuration file (note that the suffix is cnf)

2. Start and log in to MySQL
0. Figure out what we want to launch?
The MySQL we installed is a set of network services, including both client and server. What we need to start is the server, namely mysqld. After starting the database server, we can access the server through the database client to add, delete, modify and check the data.
1. Start the MySQL server: systemctl start mysqld
2. Get a password or set a password to log in
- Log in with a temporary password
Check the temporary password: grep 'temporary password' /var/log/mysqld.log
(If you installed a newer mysql, it is likely that there is no temporary password, then use another login method.)- Login by setting skip password
Use vim to open the MySQL configuration file: vim /etc/my.cnf
Then add in the last line: skip-grant-tables
Finally restart the MySQL client: systemctl restart mysqld
3. Log in to the MySQL server
Use the command mysql -uroot -p to log in, and then enter the password (you can skip the password and press Enter directly).
4. Exit the MySQL server: quit
5. Configure my.cnf to configure the encoding format of the database client and server
- Open the MySQL configuration file with vim : vim /etc/my.cnf
- Then add two lines before the last line skip-grant-tables:
character-set-server=utf8
default-storage-engine=innodb- Finally restart the MySQL client: systemctl restart mysqld
6. Enable MySQL to start automatically at boot (if you don’t want to use the command systemctl start mysqld to start the MySQL server every time you boot, execute the following two commands in sequence )
systemctl enable mysqld
systemctl daemon-reload
3. Delete MySQL/ MariaDB
1. Check whether MySQL is installed: ps ajx | grep mysqldCheck whether MariaDB is installed: ps ajx | grep mariadb//MariaDB is a branch of MySQL, just like the relationship between Centos and Linux
2. Stop running MySQL: systemctl stop mysqld
stop running MariaDB MariaDB : systemctl stop mariadb
3. Check whether there is a MySQL installation package: rpm -qa | grep mysql
Check whether there is a MariaDB installation package: rpm -qa | grep mariadb
4. Uninstall all related installation packages one by one : sudo yum remove The name of the installation package found aboveIt is too troublesome to uninstall one by one, use the following command to automatically uninstall:
- Automatically uninstall all MySQL installation packages: rpm -qa | grep mysql | xargs yum -y remove
- Automatically uninstall all MariaDB installation packages: rpm -qa | grep mariadb | xargs yum -y remove
"Tuo 1" Windows opens U mode to input special punctuation: switch to Chinese, input uubd.
"Tuo 2" to view the current system version: cat /etc/redhat-release
"Extension 3" mysql version: Check the MySQL version.
"Tuo 4" systemctl stop mysqld: close the MySQL server
systemctl start mysqld: start the MySQL serversystemctl restart mysqld : Restart the MySQL server