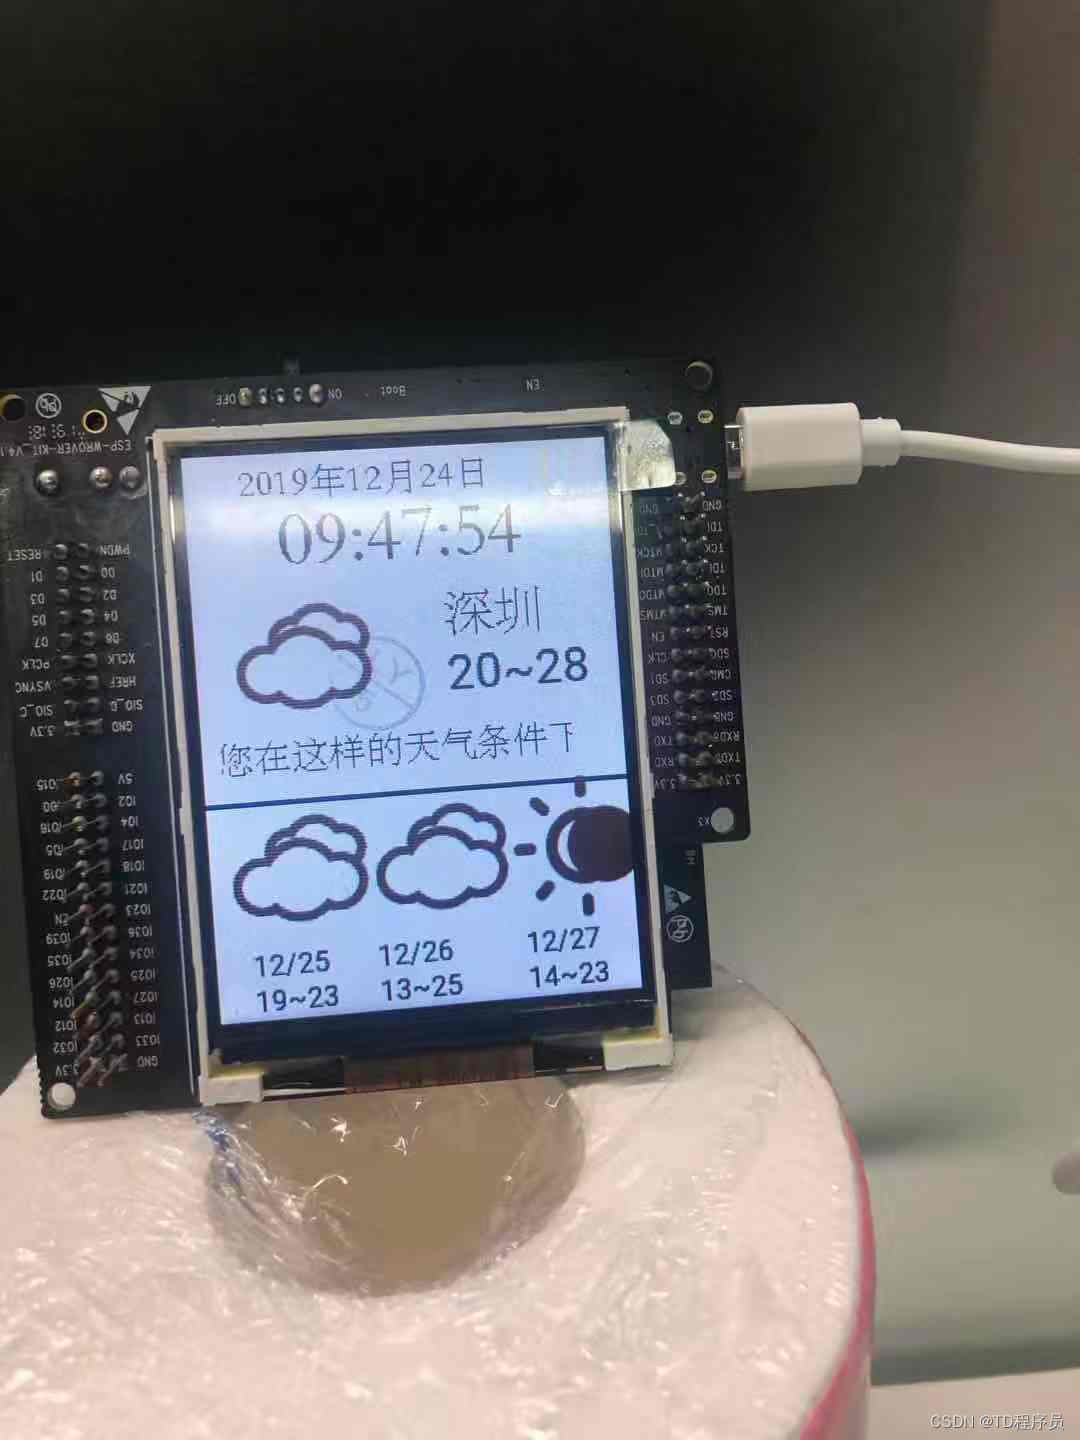

Features:
-
Driver ili9341
-
Get weather data from JD.com
start using
get the key
1. Register an account from JD.com
2. Obtain the key from the website 

Install the ESP32 SDK
ESP-IDF Programming Guide - ESP32 - — ESP-IDF Programming Guide latest documentation
notes:
This project is compatible with ESP-IDF 3.X branch and 4.0 branch. For the 4.0 branch, you can use make or CMake, but CMake is recommended. Instructions are given here for using the latest toolchain idf.py(invoking CMake), but it's easy to convert to make. For example, instead of running idf.py menuconfig, just run make menuconfig.
Build this repository independently and run the demos.
Try this first to make sure your hardware is supported, wired and configured correctly.
-
Get this item:
git clone --recurse-submodules https://github.com/donny681/ESP32_Weather_station.git -
run from its root
idf.py menuconfig -
Select your display kit or board and other options - see configuration options
-
Fill in the key into main/my_https.c, you can see define
KEY -
idf.py build -
idf.py -p (YOUR PORT) flash(with make this is justmake flash- configure PORT in 3.xmenuconfig)
Install this project as a library submodule in your own project
It is recommended to install this repository as a submodule in the git repository of the IDF project. The configuration system is designed so that you don't need to copy or edit any files in this repository. By keeping the submodule directory clean, you can ensure repeatable builds and easy updates from this upstream repository.
CMake
The following example is taken from the ESP-IDF Blink example, which you can copy and use as the basis for your own projects. The project root CMakeLists.txt file needs to add a line before the project to add the extra component directory to the path, like this:
#CMakeLists.txt
cmake_minimum_required(VERSION 3.5)

include($ENV{IDF_PATH}/tools/cmake/project.cmake)

set(EXTRA_COMPONENT_DIRS externals/lv_port_esp32_ili9341/components)

project(blink)
In your CMakeLists.txt file or the component that uses LVGL, /mainyou need to add the REQUIRES directive for this project's driver and lvgl itself to the function, idf_component_registere.g.
#main/CMakeLists.txt
idf_component_register(
    SRCS "blink.c"
    INCLUDE_DIRS "."
    REQUIRES lvgl_ili9341 lvgl
)
generate file
If you use make, just add EXTRA_COMPONENT_DIRS to your project's root Makefile:
PROJECT_NAME := blink
EXTRA_COMPONENT_DIRS := externals/lv_port_esp32_ili9341/components

include $(IDF_PATH)/make/project.mk
configuration options
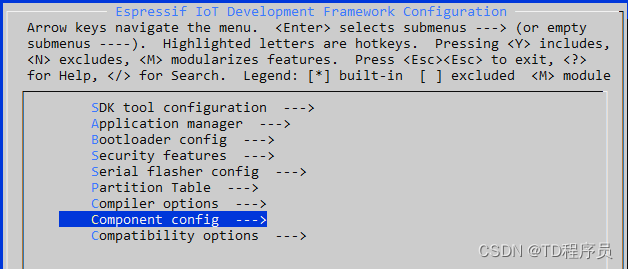
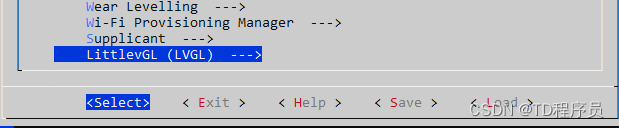
There are many configuration options available, all accessible via idf.py menuconfig-> Components -> LittlevGL (LVGL).


Options include:
- Display Resolution - set the height and width of the display
- presence of touch controllers
- Invert Display - If text and objects are backwards, you can enable this feature
- Enable backlight control via GPIO (vs hardwired on)
- Backlight active high or low - some monitors expect a high (1) signal to enable the backlight, others expect a high (1) signal (default) - try toggling this if your backlight is off
Assign the correct pin assignments according to your ESP32 board
There are various development boards based on the ESP32 chip, make sure to assign the correct pin numbers to the signals that interface with the TFT display board. The predefined configurations below are recommended, but you can also have separate pins for the display controller and touch controller.

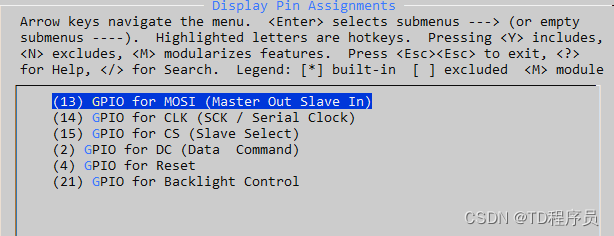

Predefined Display Configurations


For a development kit with a connected display, all correct settings are known and can menuconfigbe selected from the first option "Select a predefined display configuration". Once selected, all other options will be defaulted and will not appear in the menu.
Our current board defined this way is:
ESP32 Development Board with 38 GPIOs

ILI9341-HSPI
| Moxie | clock pulse | CS | DC | fast recovery time | BCKL |
|---|---|---|---|---|---|
| 13 | 14 | 5 | 19 | 18 | 23 |
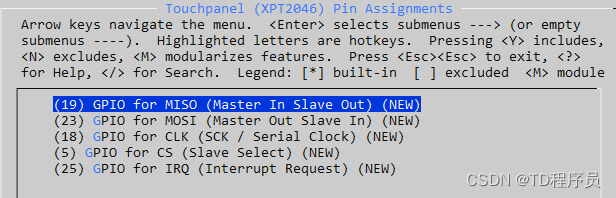
XPT2046-VSPI
| Moxie | miso | clock pulse | CS | interrupt request |
|---|---|---|---|---|
| 32 | 35 | 26 | 33 | 25 |
ESP32 DevKit v1 with 30 GPIOS
There is another development kit with only 30 GPIOs available:
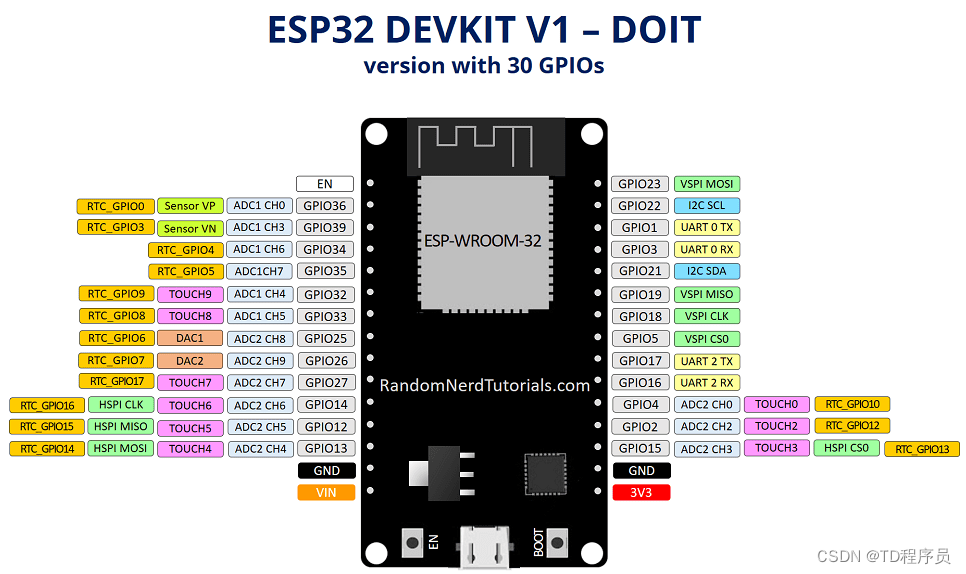

ILI9341
For using ILI9341 HSPI, modify the pin configuration components/drv/disp_spi.hto:
ILI9341-HSPI
| Moxie | clock pulse | CS | DC | fast recovery time | BCKL |
|---|---|---|---|---|---|
| 13 | 14 | 15 | 2 | 4 | 21 |
XPT2046-VSPI
| Moxie | miso | clock pulse | CS | interrupt request |
|---|---|---|---|---|
| 23 | 19 | 18 | 5 | 25 |
ESP32 DevKit v4 with 38 GPIOs
See this pdf for more info: https://www.espressif.com/sites/default/files/documentation/esp32-wroom-32d_esp32-wroom-32u_datasheet_en.pdf
ILI9341-HSPI
| Moxie | clock pulse | CS | DC | fast recovery time | BCKL |
|---|---|---|---|---|---|
| 13 | 14 | 15 | number 17 | 25 | 26 |
XPT2046-VSPI
| Moxie | miso | clock pulse | CS | interrupt request |
|---|---|---|---|---|
| 23 | 19 | 18 | 5 | 27 |
other boards
menuconfigOf course, all individual pins can be configured if the available predefined do not meet your board or project requirements. By default, the predefined options are disabled and the pins for the 30-pin development board are set to default values.
Generate spiffs bin
-
Download the spiffs tool
-
Compile and generate bin, please check spiffs instructions ( GitHub - igrr/mkspiffs: Tool to build and unpack SPIFFS images )
-
Download output bin to flash address 0x310000
Or you can refresh "spiffs1.img"
python esp-idf/components/esptool_py/esptool/esptool.py --chip esp32 --port /dev/ttyUSB1 --baud 2000000 write_flash 0x1000 spiffs1.img
Complete code download link
Link: https://pan.baidu.com/s/1XZOgO1bQYR82eWaA5cCe5Q
Extraction code: m4ml