What I wrote before is a bit outdated. I recently installed a new database and recorded it.
1. Download the Mysql 8.0 database CentOS 8.0 version
Mysql download address: MySQL :: Download MySQL Community Server https://dev.mysql.com/downloads/mysql/
CentOS belongs to redHat , so choose:

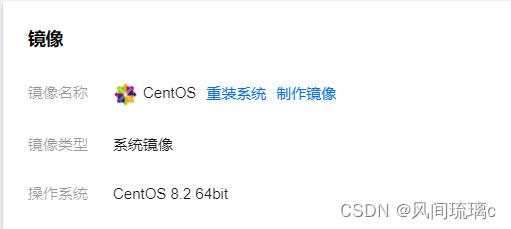
Since my lightweight server is CentOS 8.2 and is 64-bit (this time I use Tencent Cloud, new users are cheap)

2. After the download is complete, use xftp to upload to the server. I put it in the /opt/mysql directory.

Check whether mariadb is installed before installation, run the command rpm -qa | grep mariadb ,
If installed, you need to uninstall, uninstall command: rpm -e mariadb-libs-5.5.68-1.el7.x86_64 --nodeps
Note that the place marked in red is subject to the one you found out. If mariadb is not installed, skip the uninstallation step.
3. Unzip and install the following five packages:
#解压
tar -xvf mysql-8.0.28-1.el8.x86_64.rpm-bundle.tar
#安装以下这5个包就可以了
rpm -ivh mysql-community-common-8.0.27-1.el7.x86_64.rpm --nodeps --force
rpm -ivh mysql-community-common-8.0.27-1.el7.x86_64.rpm --nodeps --force
rpm -ivh mysql-community-common-8.0.28-1.el8.x86_64.rpm  --nodeps --force
rpm -ivh mysql-community-libs-8.0.28-1.el8.x86_64.rpm  --nodeps --force
rpm -ivh mysql-community-client-8.0.28-1.el8.x86_64.rpm --nodeps --force
rpm -ivh mysql-community-server-8.0.28-1.el8.x86_64.rpm --nodeps --force
4. Run the following command to initialize mysql and open it
mysqld --initialize;
chown mysql:mysql /var/lib/mysql -R;
systemctl start mysqld.service;
systemctl enable mysqld;
5. Run the command to find the initial password of mysql, as shown below
cat /var/log/mysqld.log | grep password
6. Log in to mysql with the initial password
mysql -uroot -p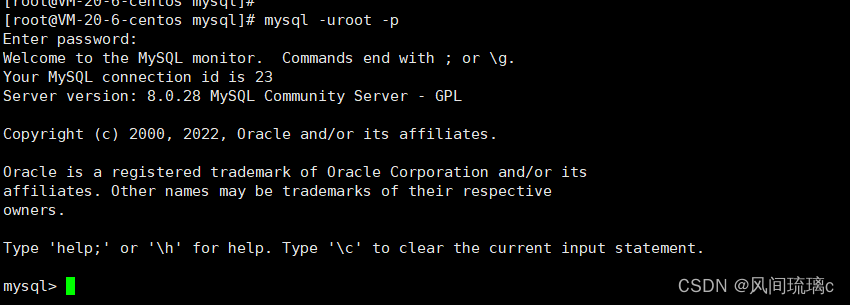
7. Although the mysql installation is complete, if you run a command, you will find that mysql forces us to change the password:

8. Run the command to change the password
ALTER USER 'root'@'localhost' IDENTIFIED WITH mysql_native_password BY 'root' In this way, the password when we log in as the root user on this machine is changed to root
9. Log in again to see if the password change takes effect
It has taken effect, and the login with the new password is successful.
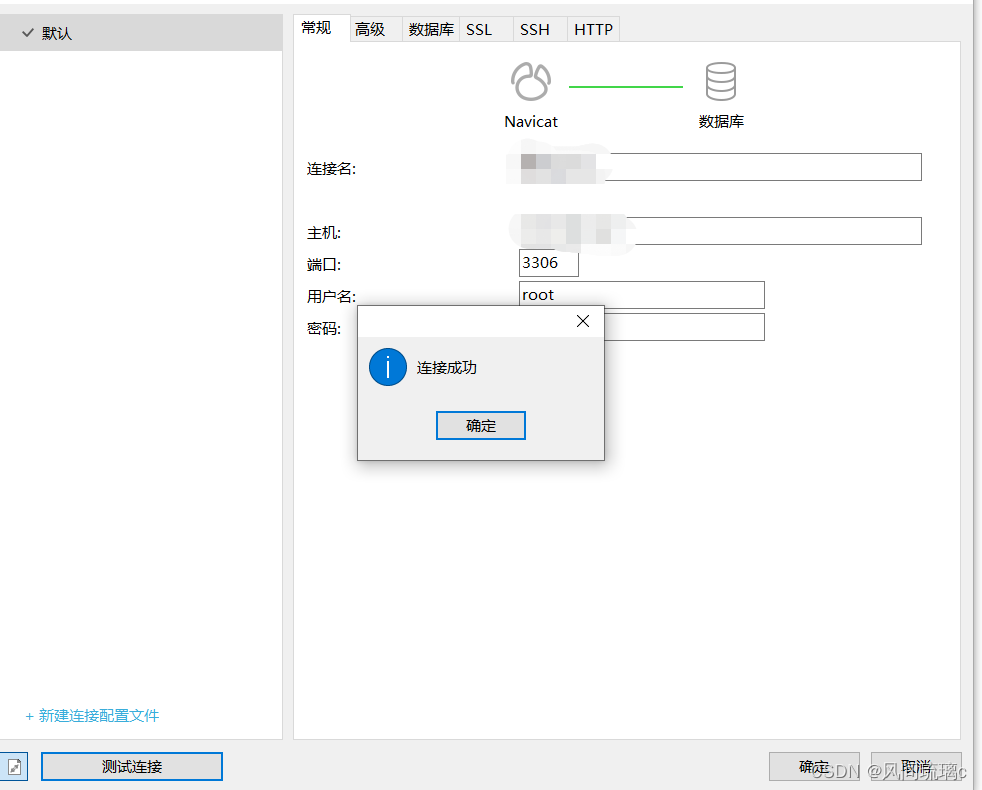
10. Try to use navicat to connect to the server, but the connection fails. It is found that the port is not open. Modify the server firewall settings:
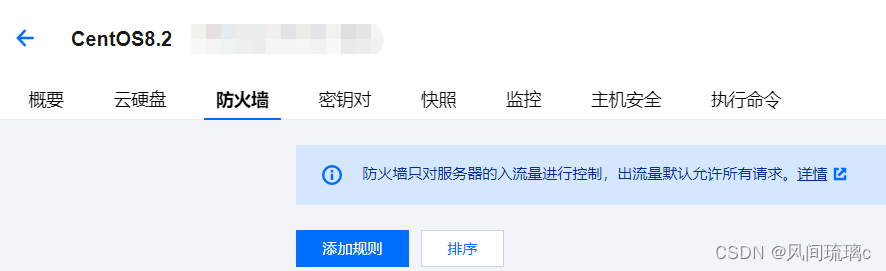 Add a rule to allow port 3306 to be open.
11. Try again and find that you still can’t connect. It turns out that the database does not allow remote connections. Modify:
# 使用的database名称为"mysql"
>use mysql;
# 修改之前查看;
>select host, user from user;
# 修改”root“账号的配置信息
>update user set host = '%' where user = 'root';
# 如果账号是“test”,使用该命令
# update user set host='%' where user='test';
# 验证修改成功;
>select host, user from user;
# 给root账号授权
>grant all privileges on *.* to root@'%' with grant option;
# 刷新使其生效
>flush privileges;
Ok, now connected: