I. Introduction
When learning the advanced chapter of MySQL, you need to install MySQL on CentOS, and then connect to it remotely, so I took two days to read 95% of the Linux chapter delivered by St. Regis
This article is an excerpt of the part about installing MySQL in the study notes, as a reference and as a share
2. Install MySQL
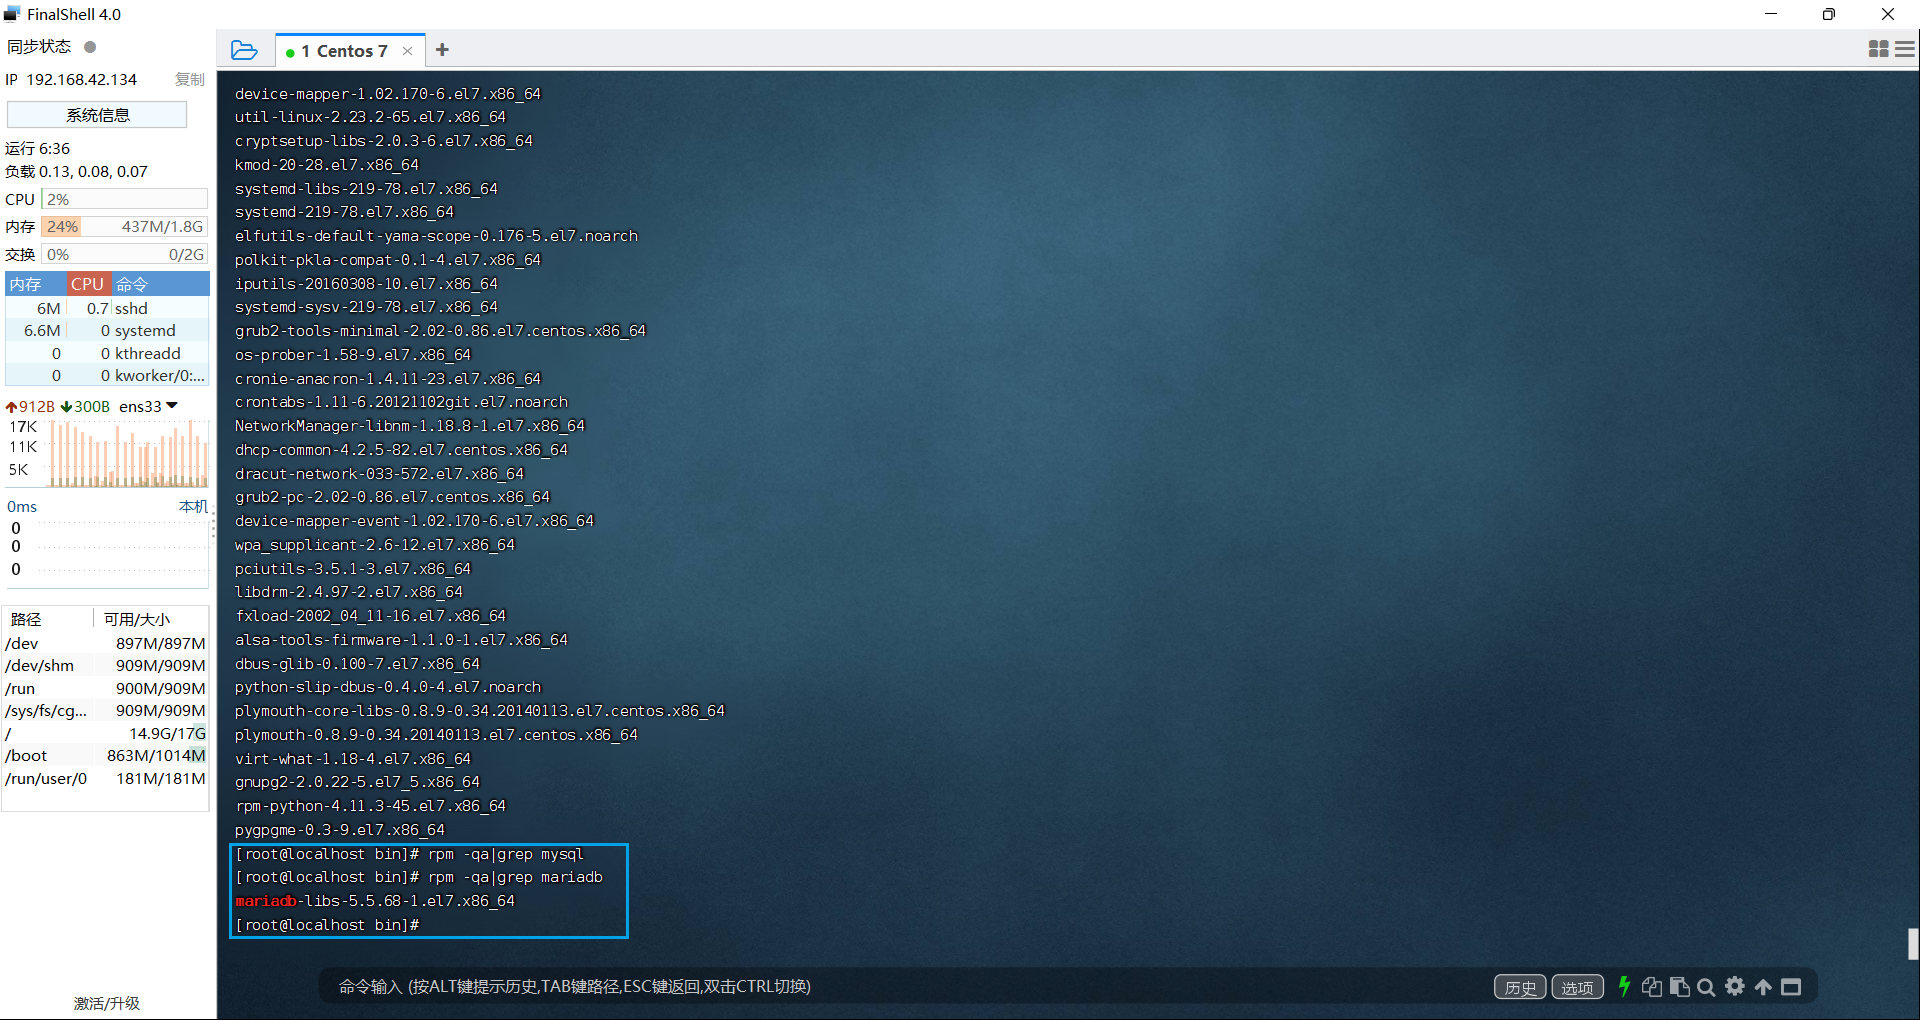
First check whether the MySQL database has been installed in the current system. If it has been installed, the installation will fail. At the same time, the mariadb that comes with CentOS7 will conflict with the MySQL database.
rpm -qa: Query all software installed in the current system
rpm -qa|grep mysql: Query whether there is mysql in the software name installed in the current system
rpm -qa|grep mariadb: Query whether there is mariadb in the software name installed in the current system
RPM (Red-Hat Package Manager) is a package manager, a tool used by Red Hat Linux to manage and install software
【Practice diagram】
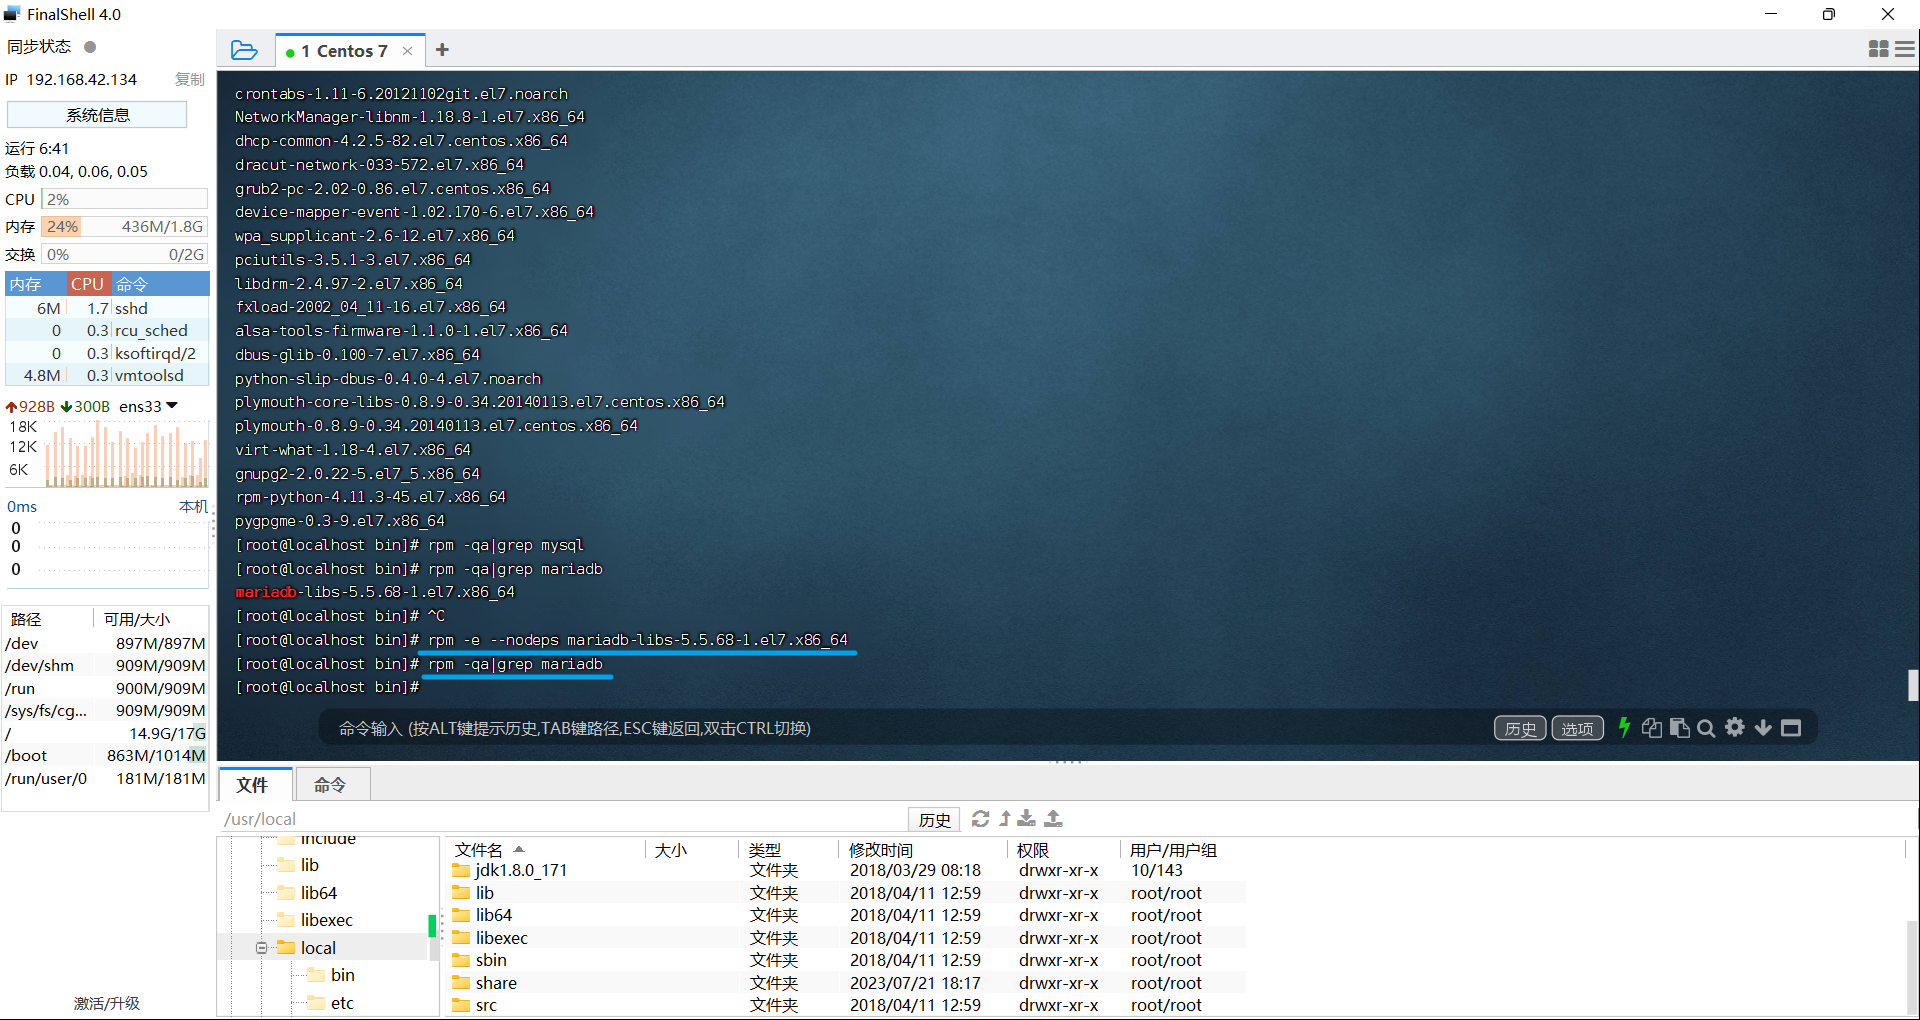
Uninstall conflicting software installed
rpm -e --nodeps 软件名称: Uninstall the software
rpm -e --nodeps mariadb-libs-5.5.68-1.el7.x86_64
【Practice diagram】
The preparatory work is completed here, and the next step is the formal installation
first step
Go to the official website to download the Linux version of MySQL, here select the same version of MySQL as the local machine
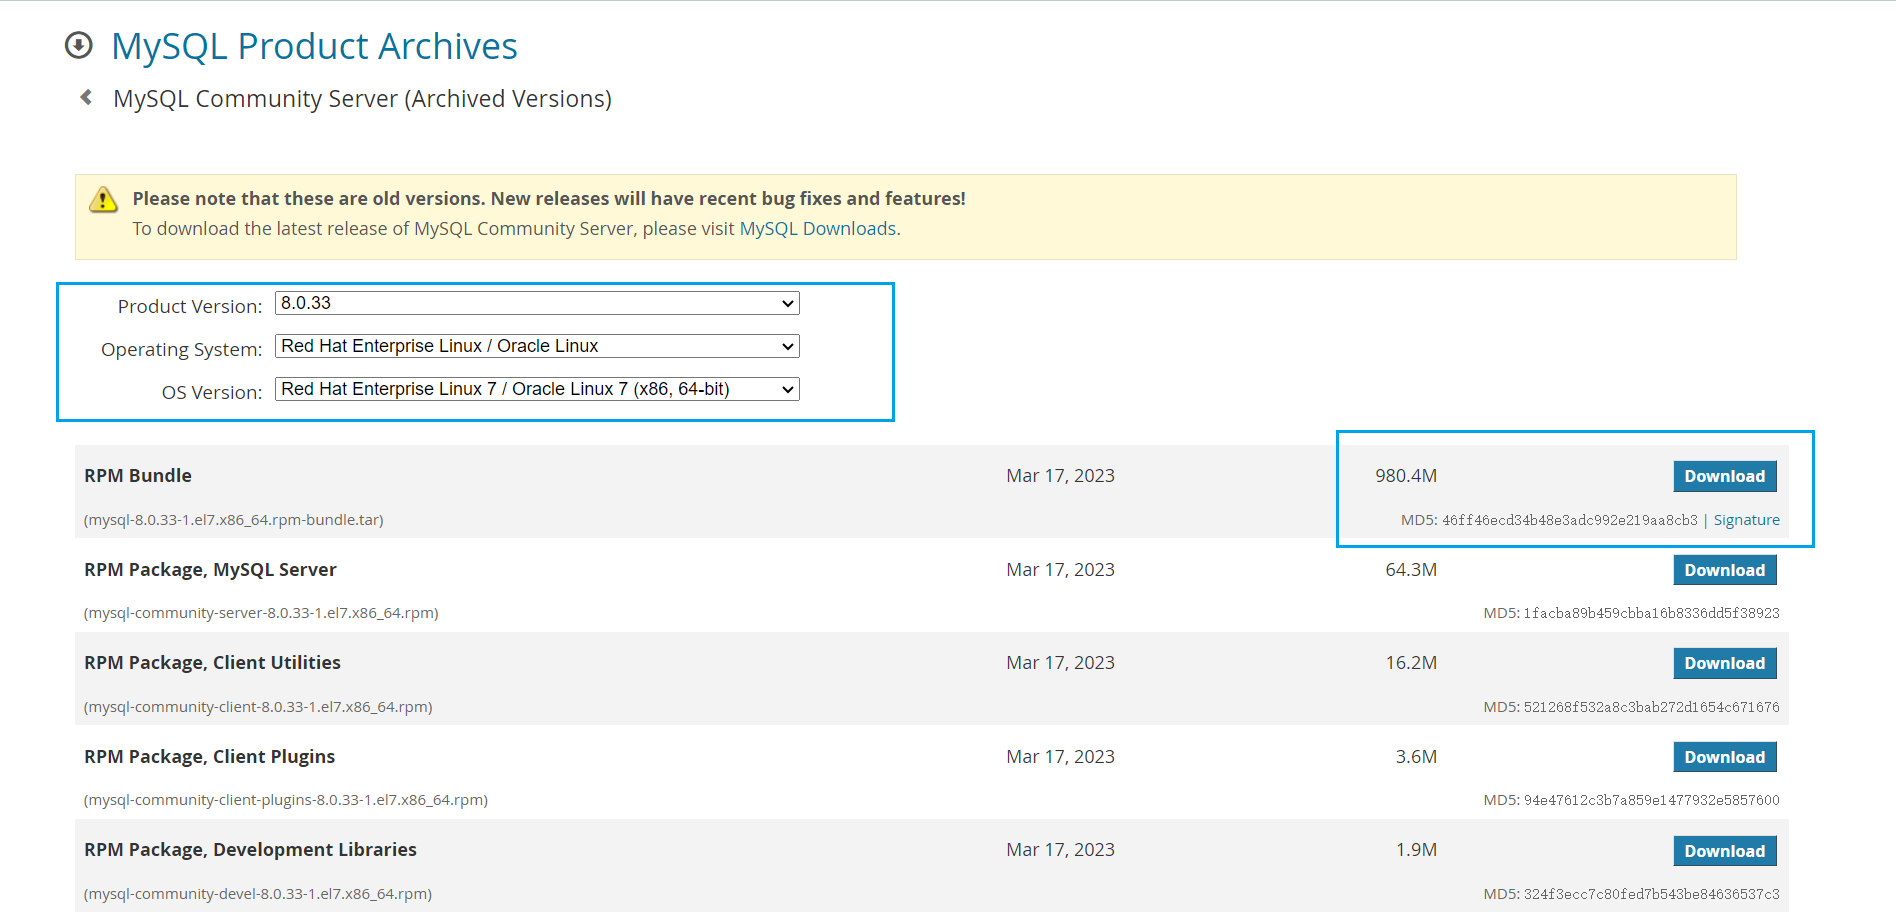
second step
Use the upload tool that comes with FinalShell to upload the MySQL compressed package to Linux
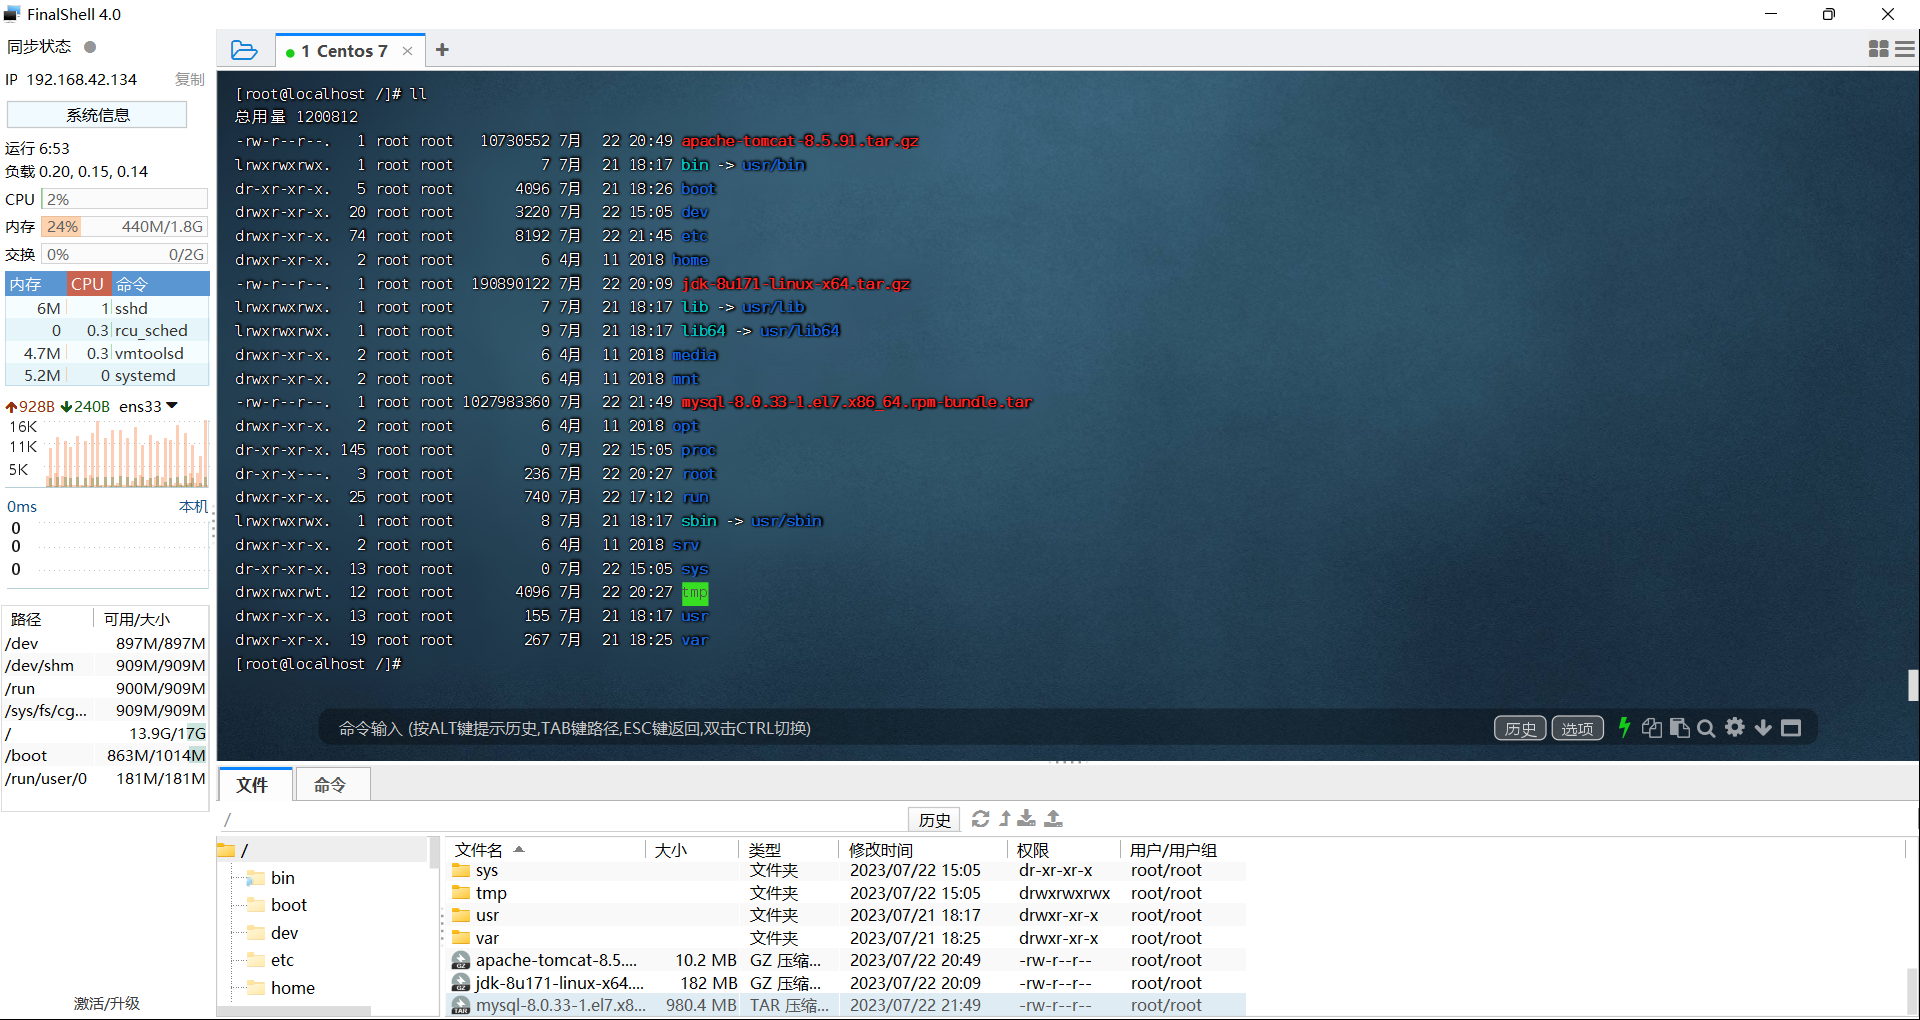
third step
Move the mysql compressed package to the created directory

the fourth step
Decompress the mysql compressed package
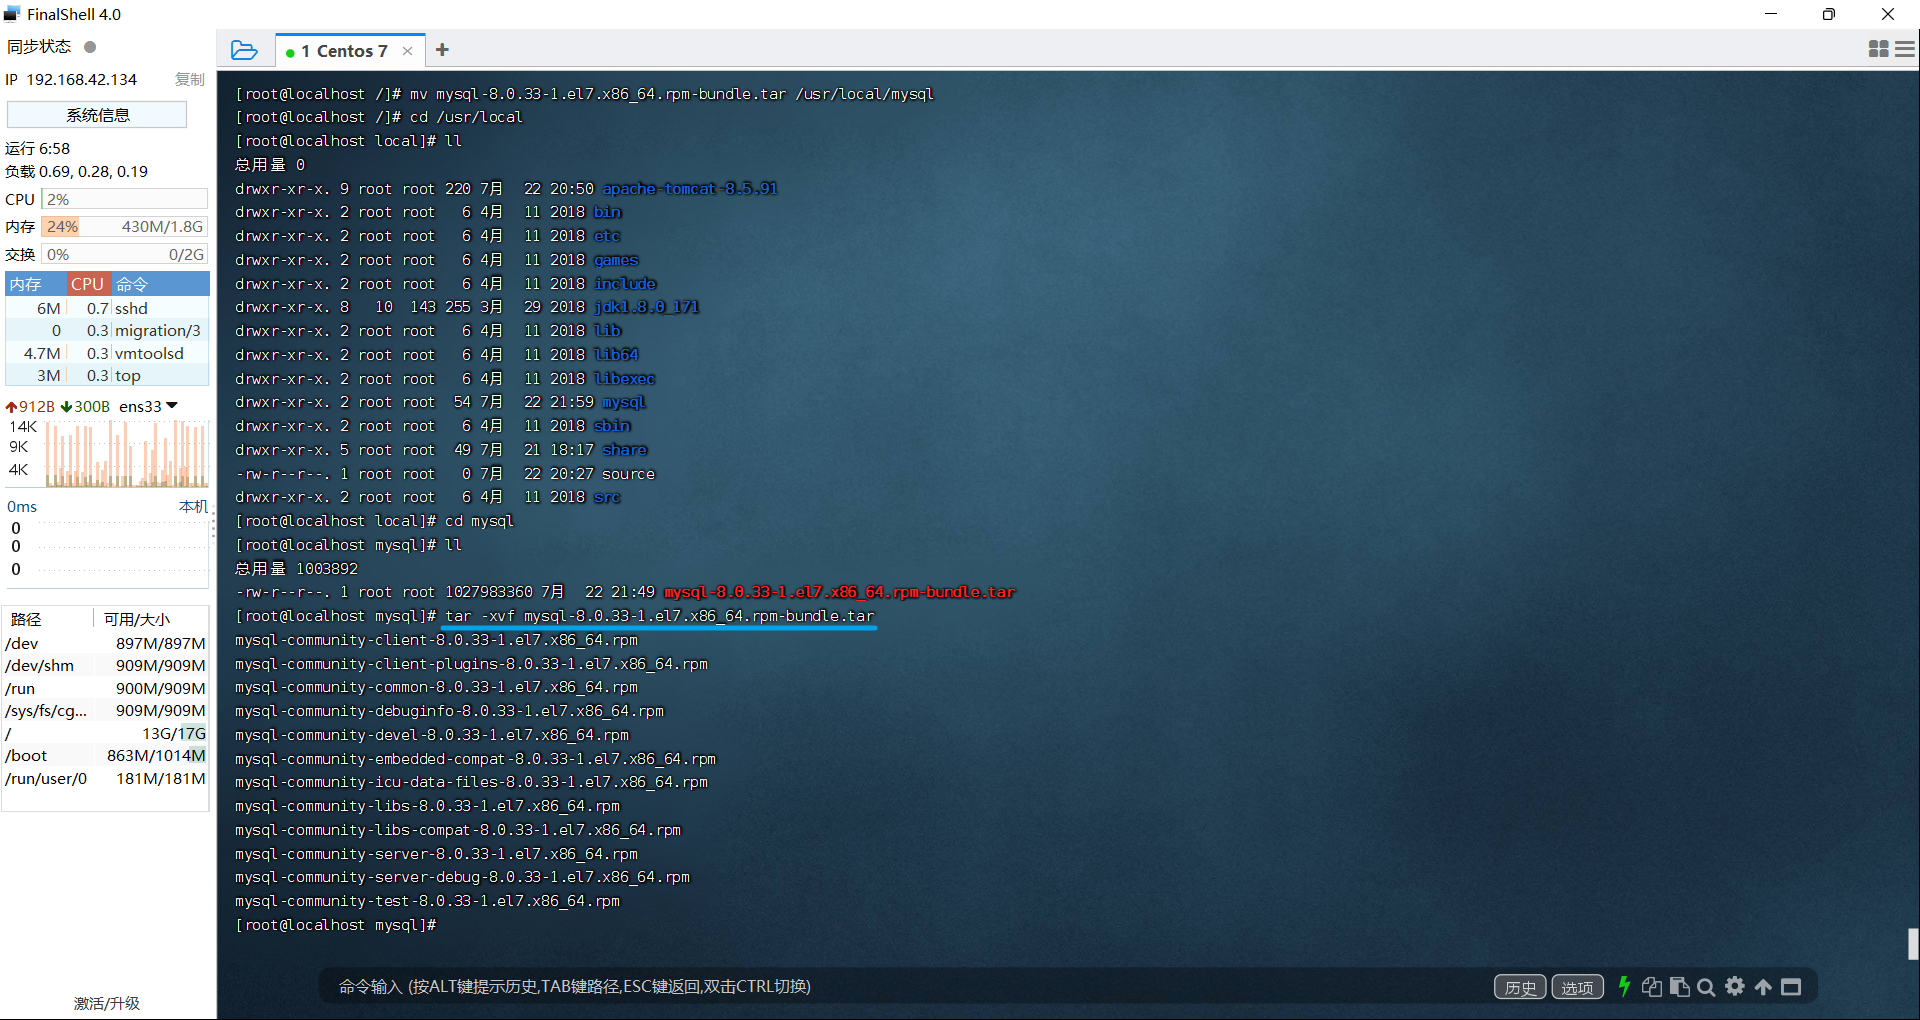
the fifth step
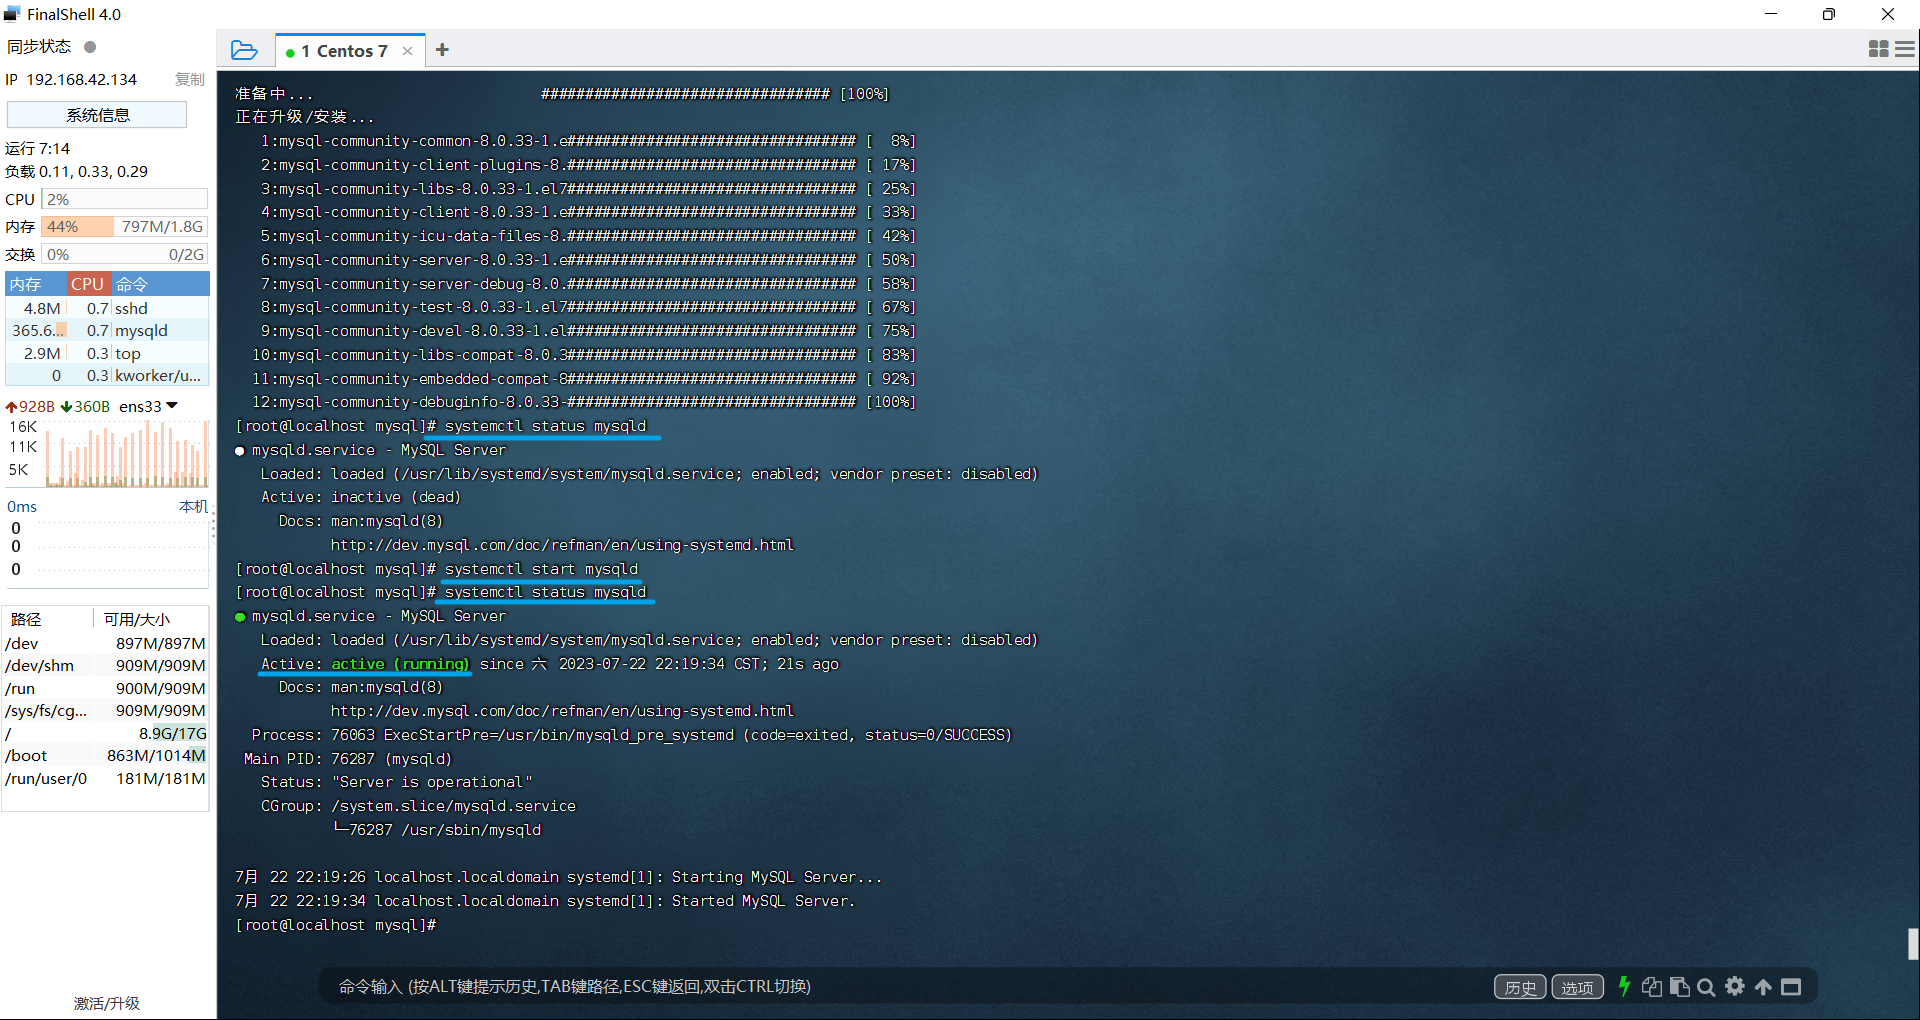
Install the rpm package
rpm -ivh *.rpm --nodeps --force

step six
start mysql
systemctl status mysqld: View mysql service status
systemctl start mysqld: start the mysql service
Description: You can set the mysql service to start at boot time to avoid starting mysql every time you boot
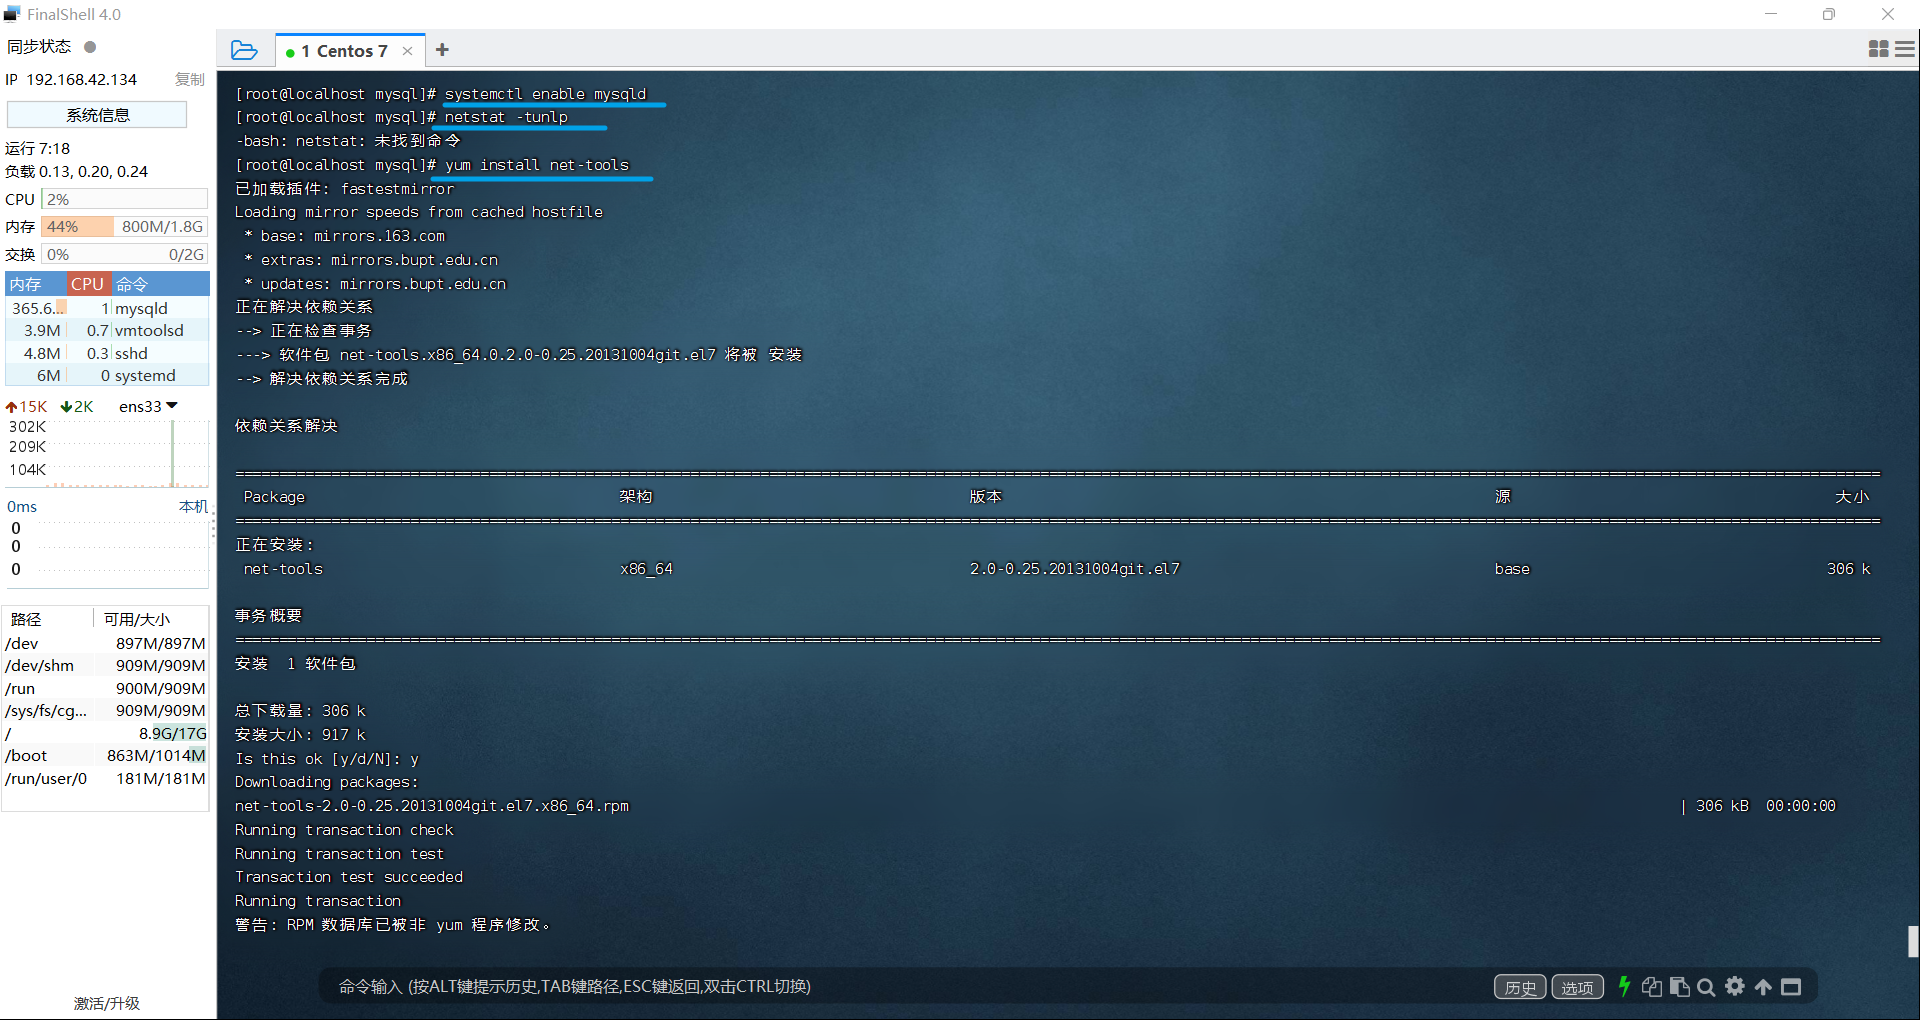
systemctl enable mysqld: Start the mysql service on boot
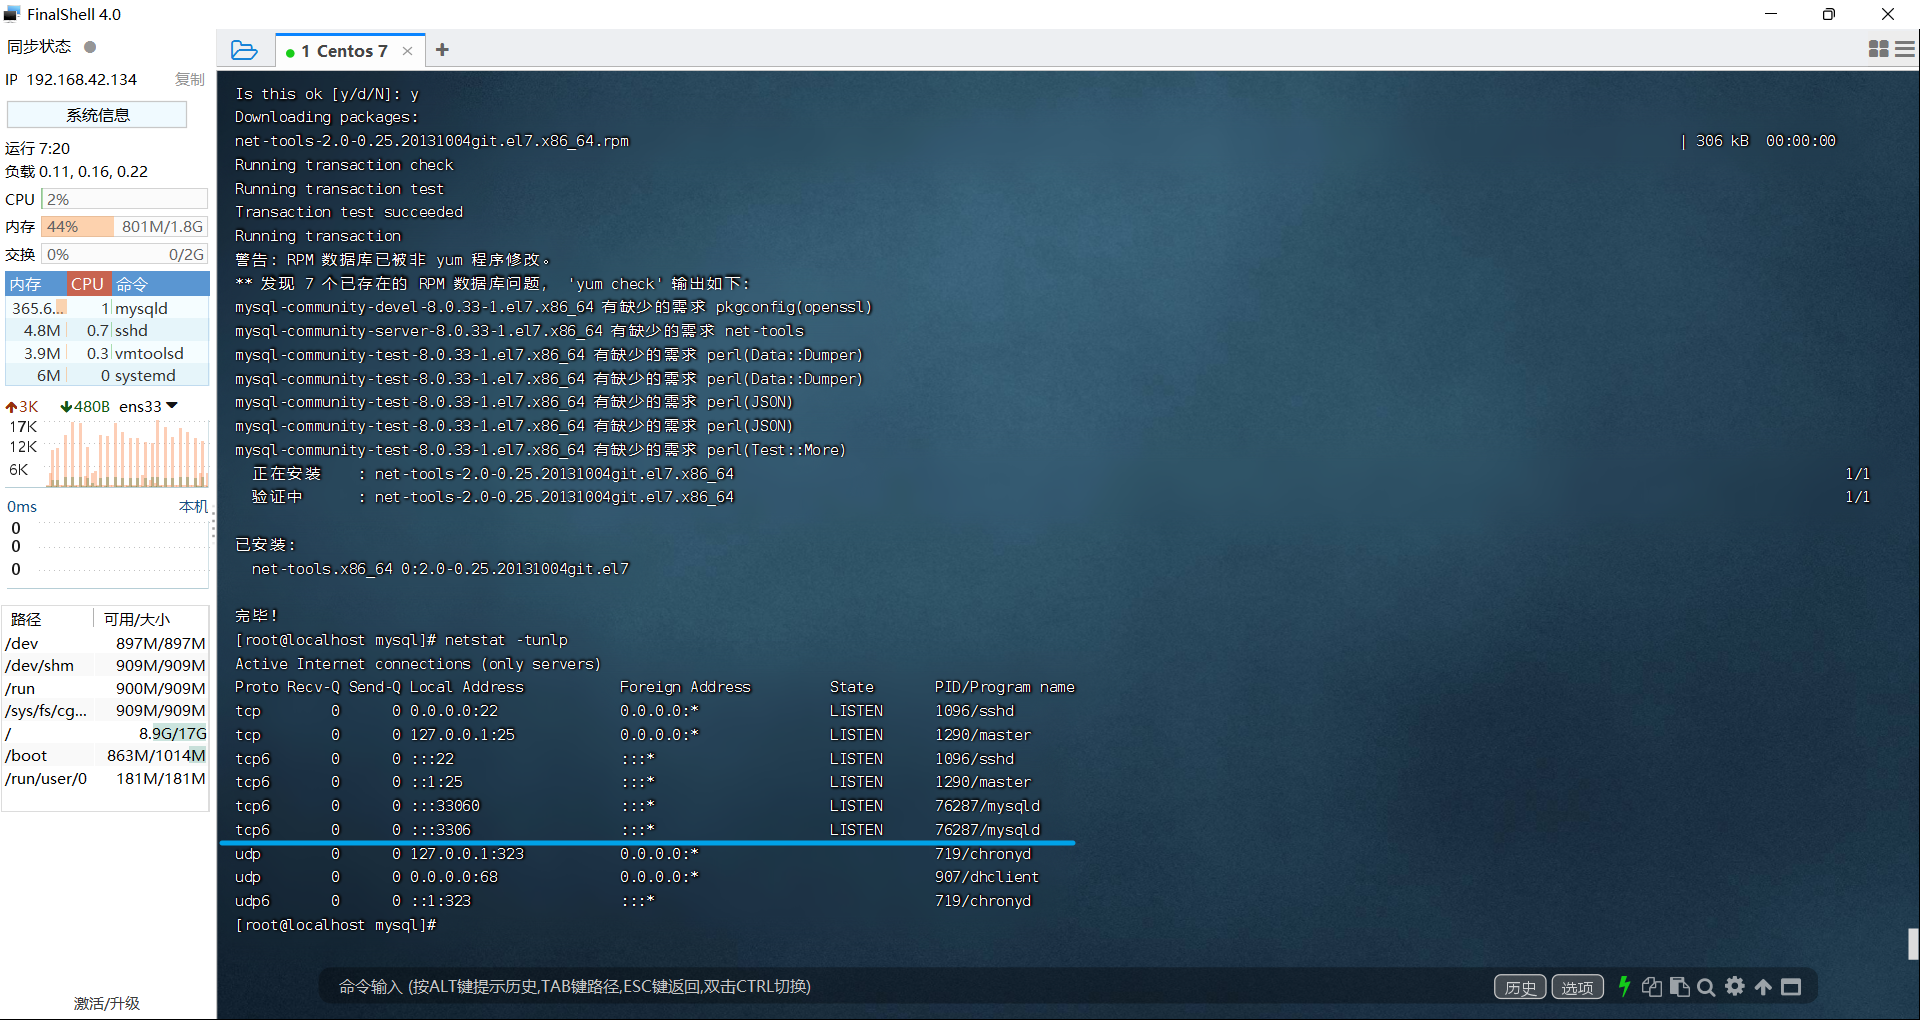
netstat -tunlp: View started services
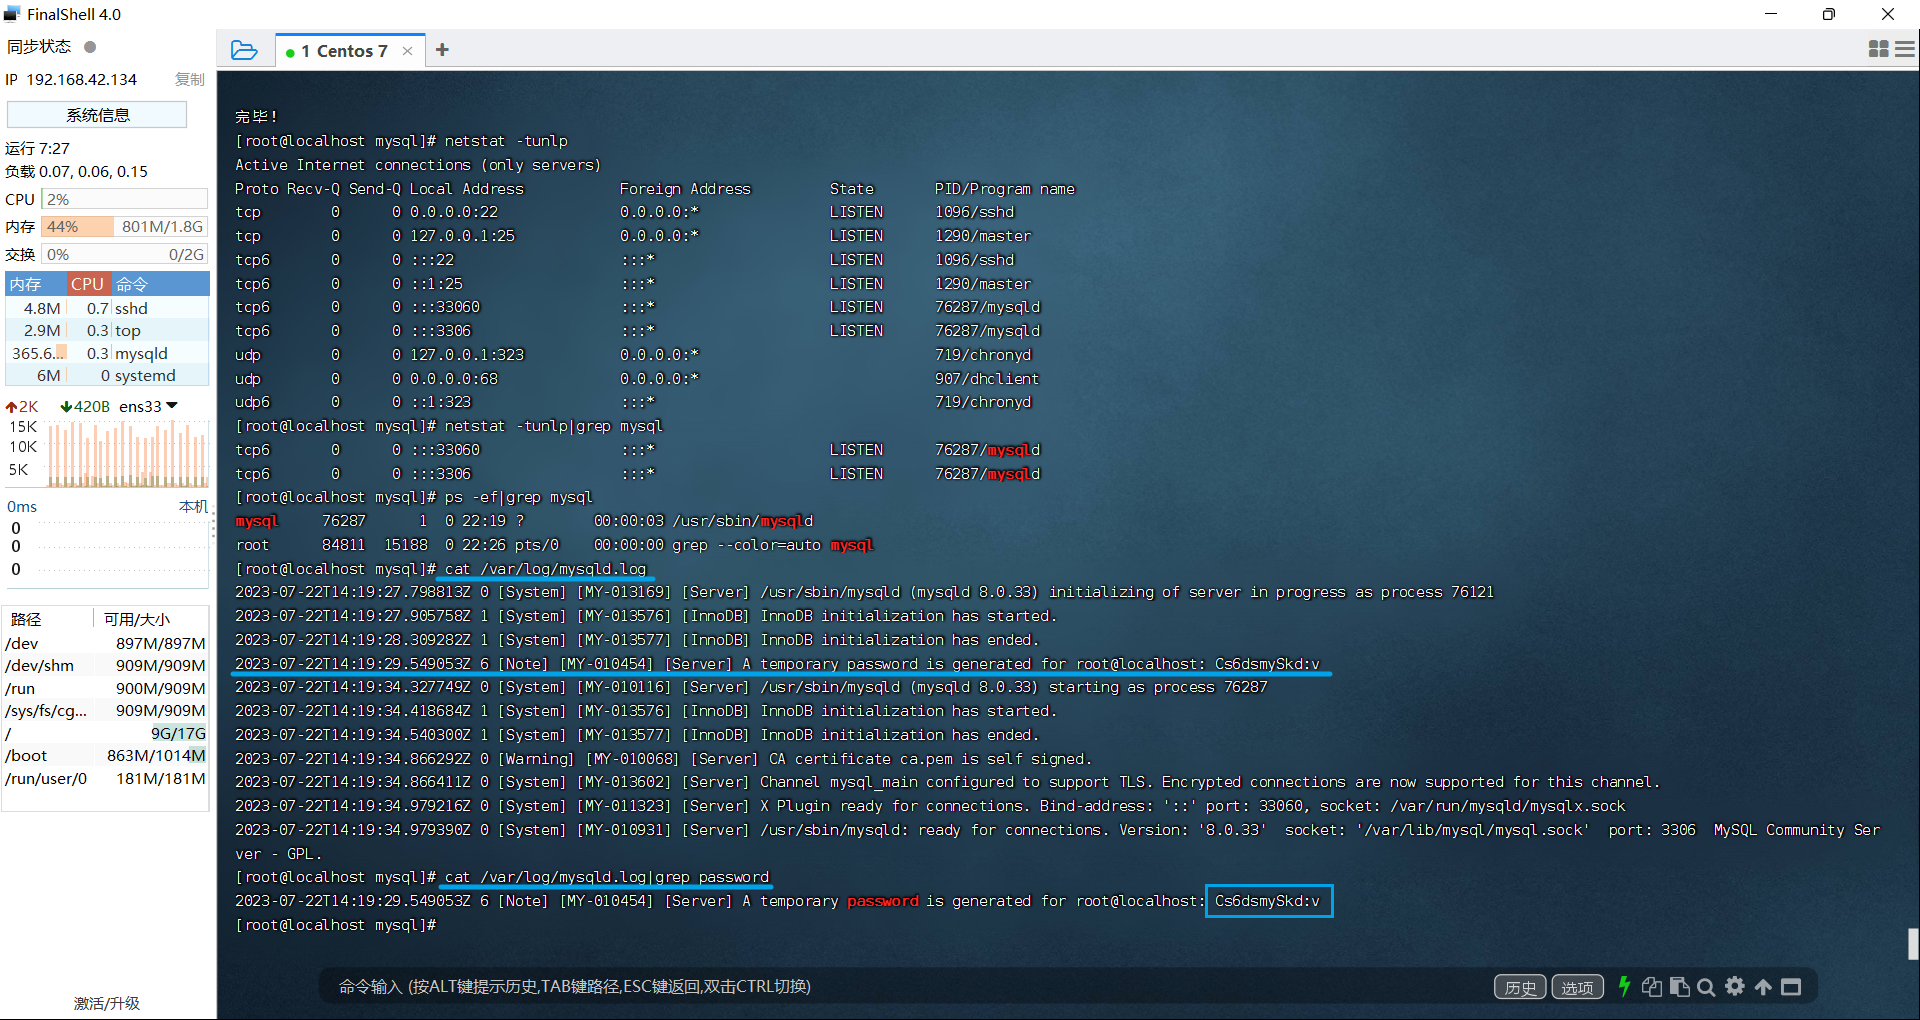
netstat -tunlp|grep mysql
ps -ef|grep mysql: View the mysql process
Note: net-tools needs to be installed
3. Log in to the MySQL database
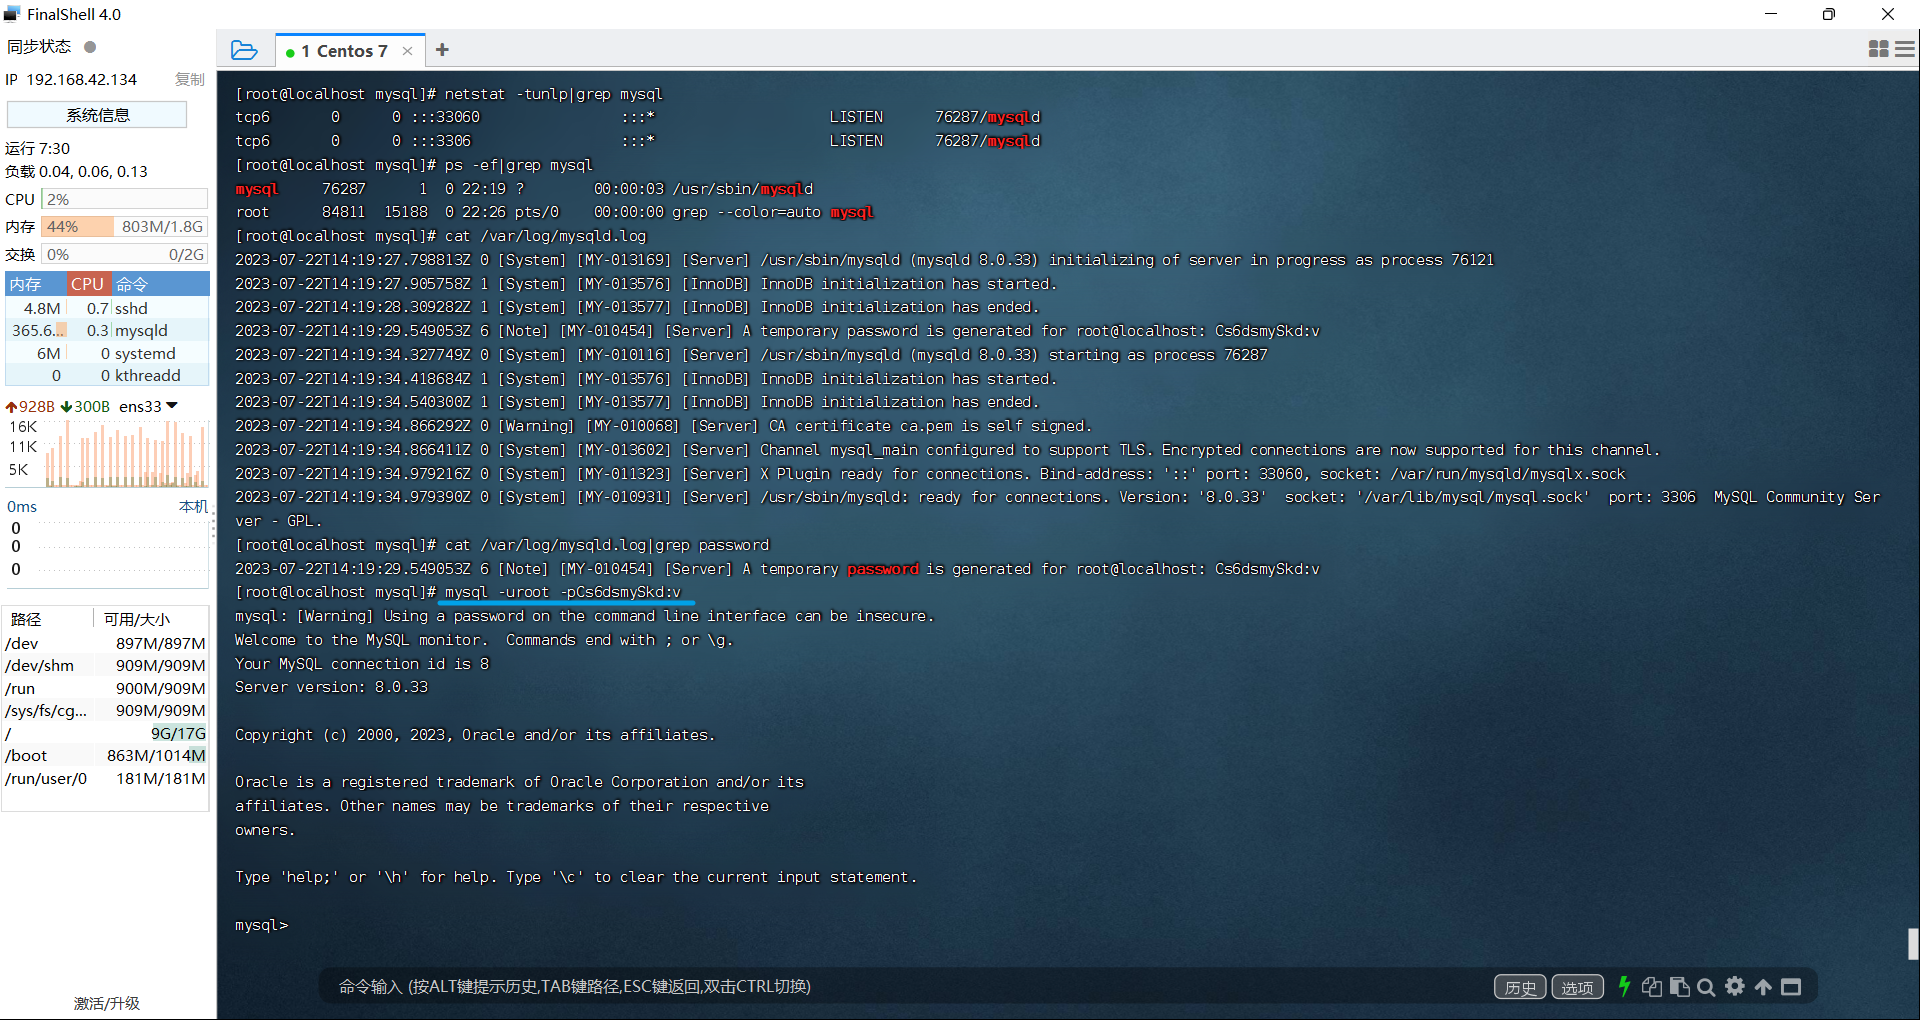
View Temporary Password
cat /var/log/mysqld.log: view file content
cat /var/log/mysqld.log|grep password: View the line information containing password in the file content
Modify temporary password
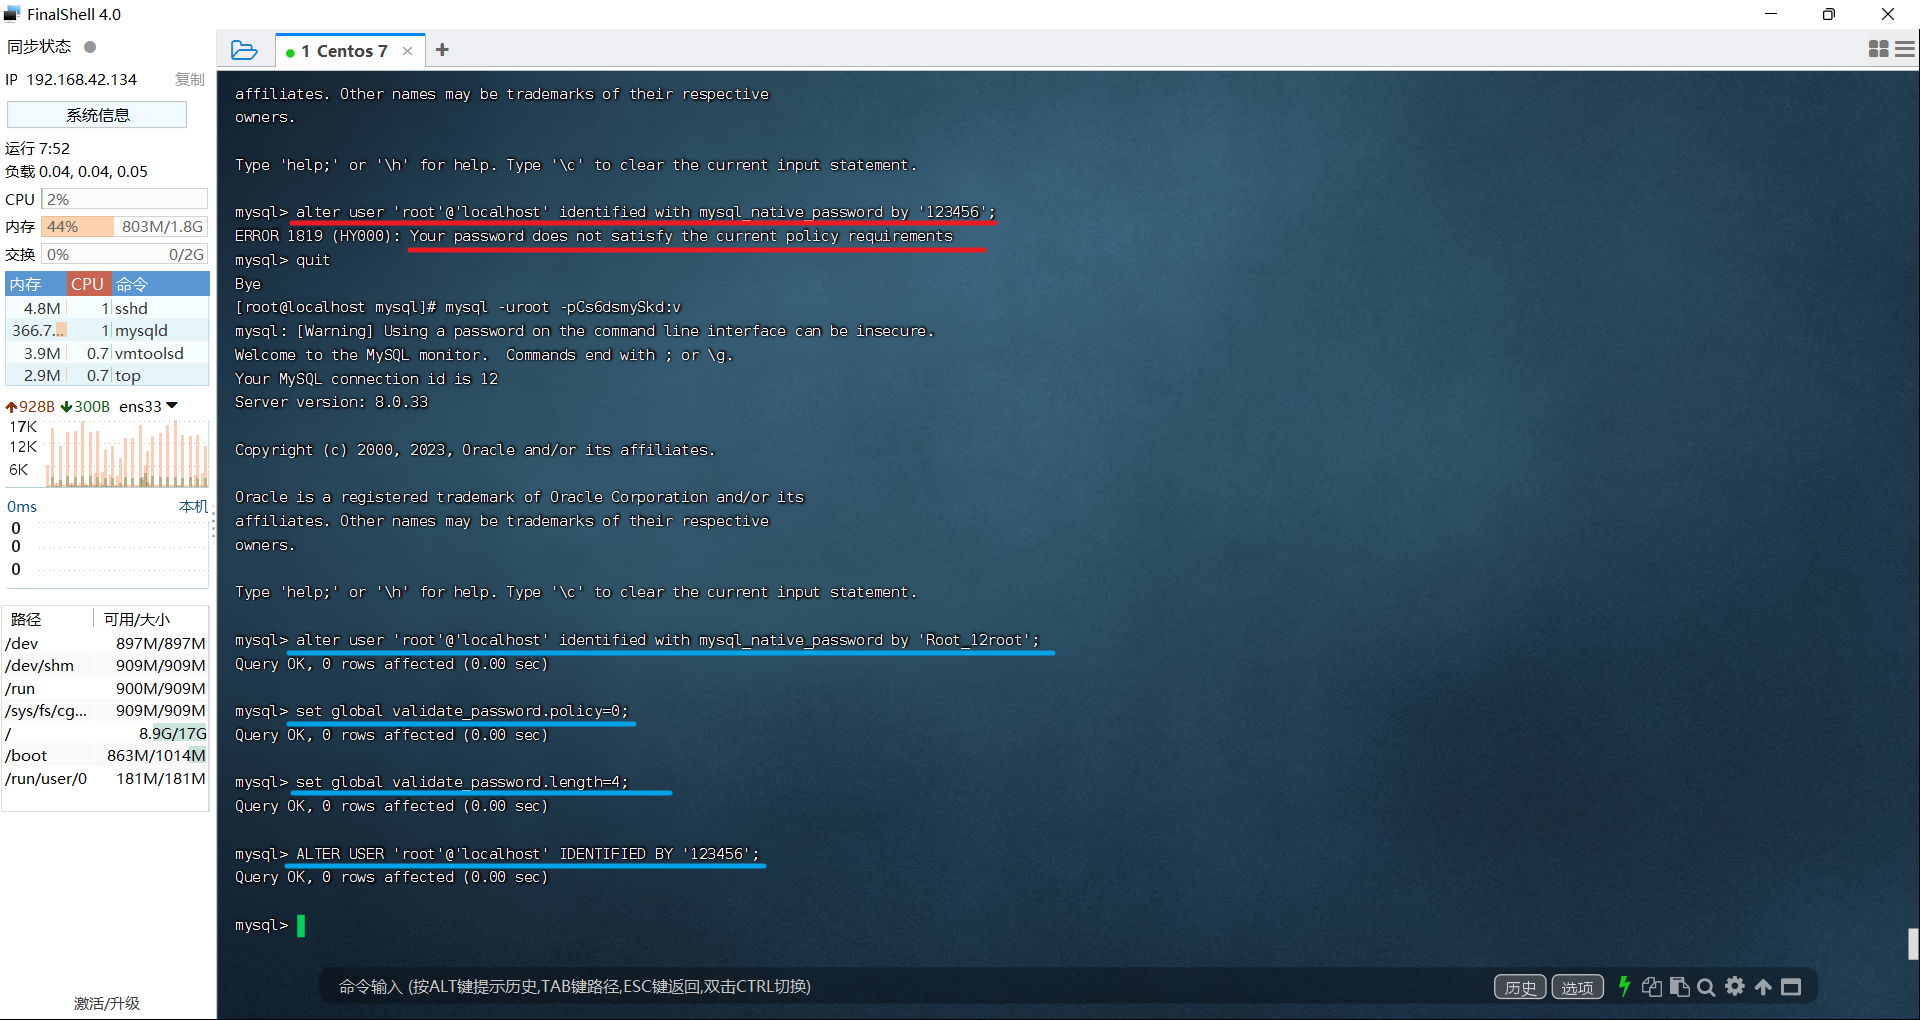
Modify the password first and then set the verification rules and password length
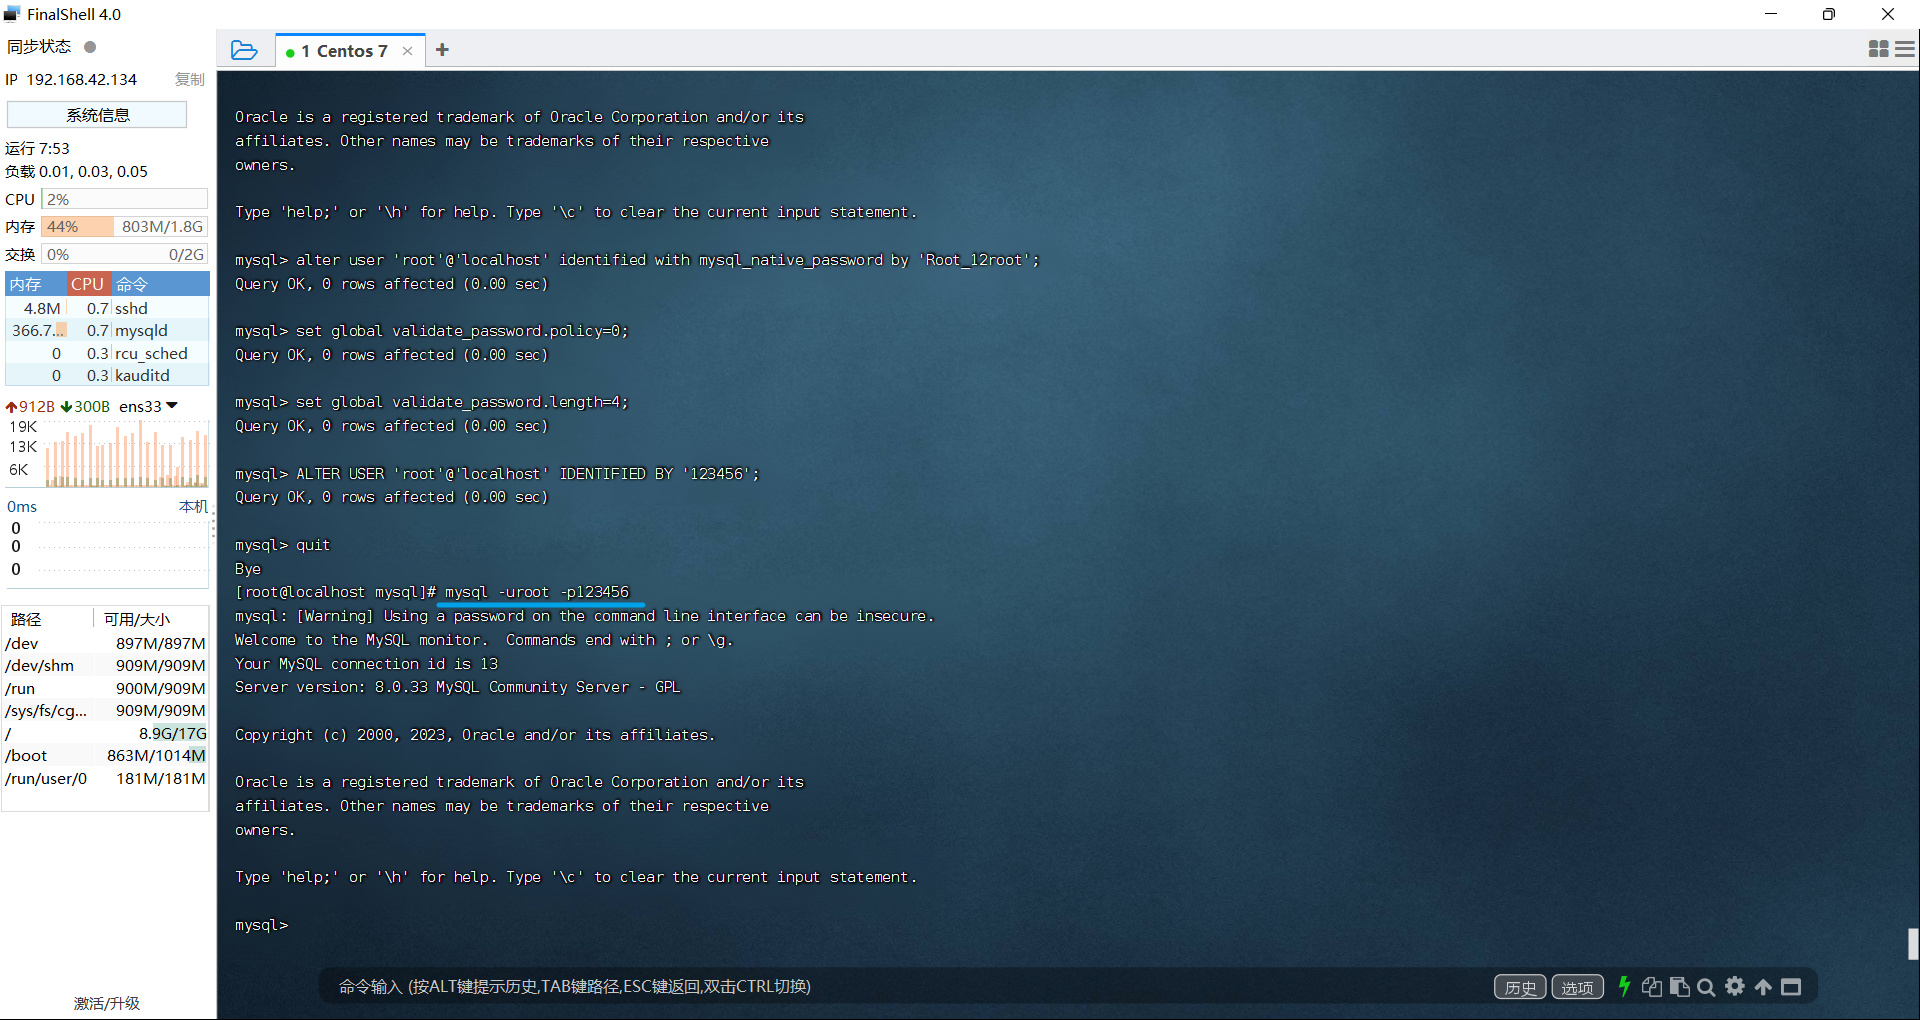
alter user 'root'@'localhost' identified with mysql_native_password by 'Root_12root';: The modified password must contain numbers, uppercase and lowercase letters, and special characters, and the length must be more than 8
set global validate_password.policy=0;: Set the password with a low security level, which is convenient for password modification
set global validate_password.length=4;: Set the minimum number of digits in the password length
ALTER USER 'root'@'localhost' IDENTIFIED BY '123456';: Change the password to a simple password
Turn on access
Create a user first, assign user permissions to the user, and then refresh permissions
CREATE USER 'root'@'%' IDENTIFIED BY '123456';
GRANT ALL PRIVILEGES ON *.* TO 'root'@'%' WITH GRANT OPTION;
FLUSH PRIVILEGES;
Note: CREATE USER 'root'@'%' IDENTIFIED BY '123456'; The middle '123456'is the access password of the remote connection

Open port 3306: firewall-cmd --zone=public --add-port=3306/tcp --permanent, firewall-cmd --reload,firewall-cmd --zone=public --list-ports

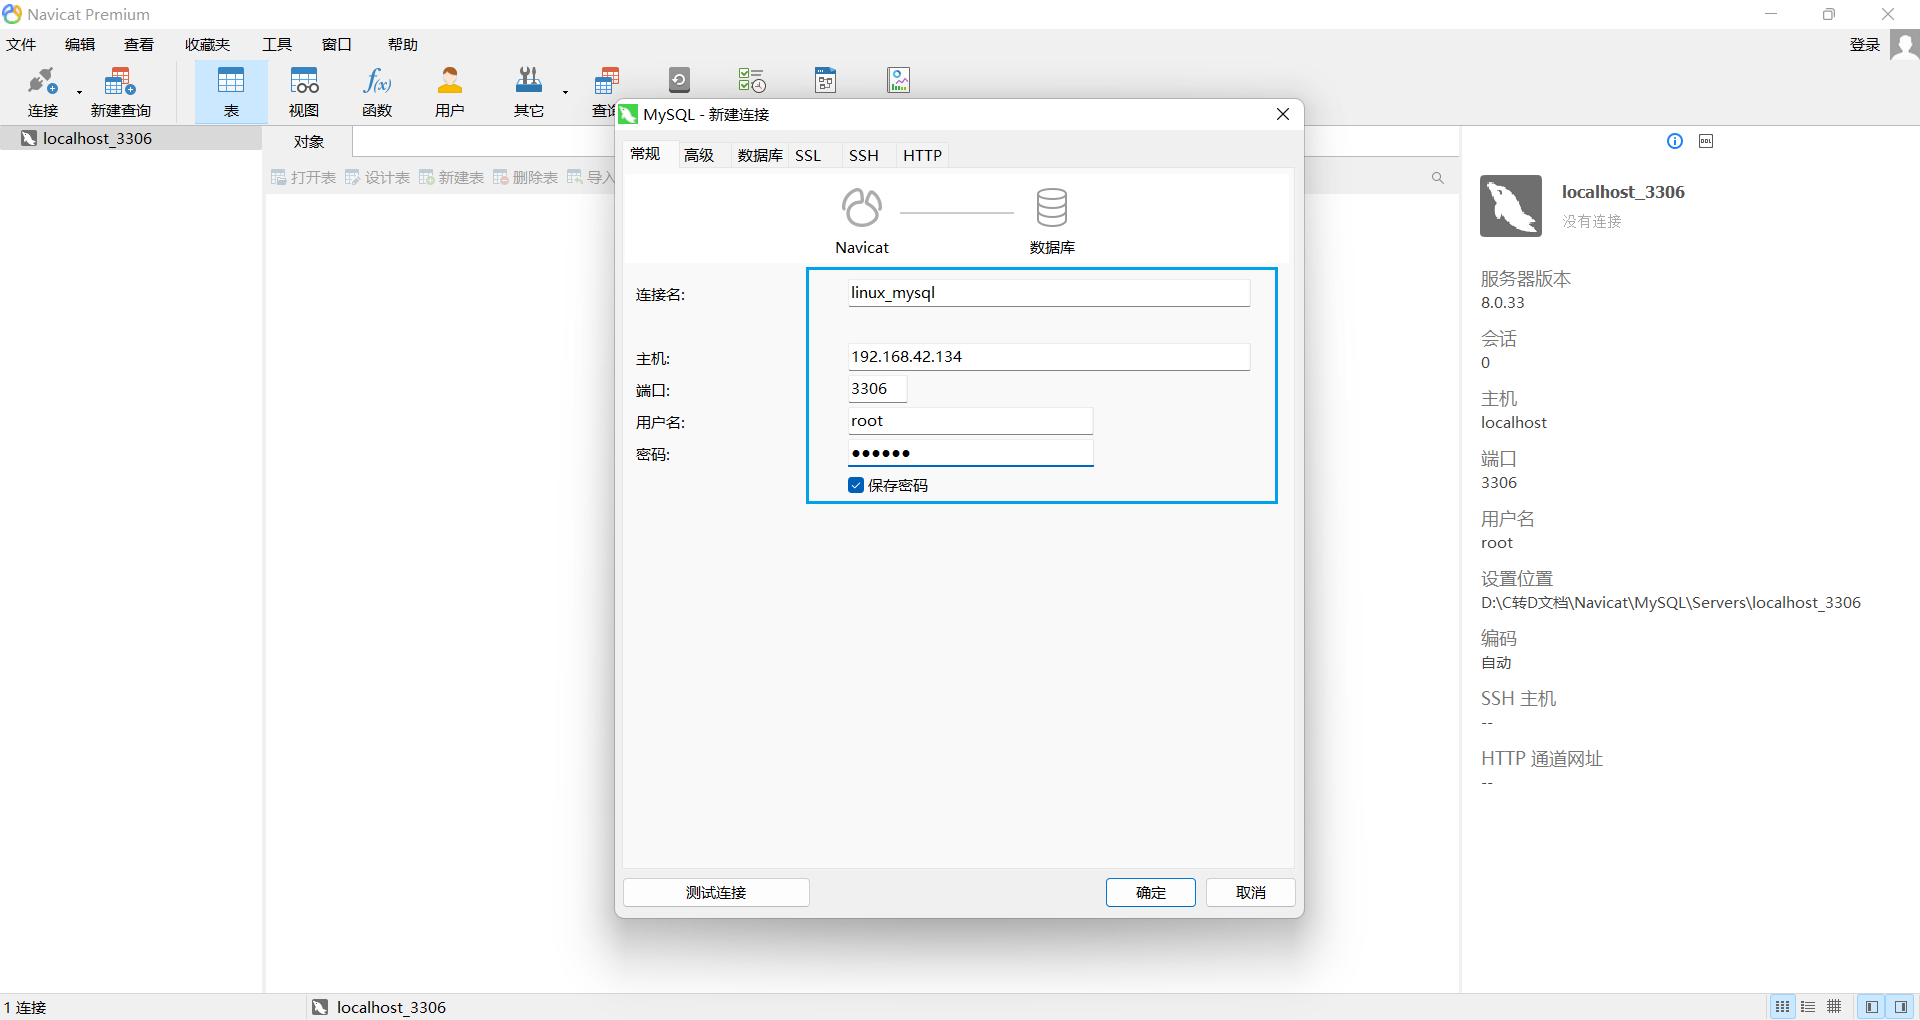
Use navicat to test remote connection to mysql on Linux, or use DataGrip to test remote connection to mysql on Linux