VS2019 tutorial (use VS2019 to write C language program)
Following the "VS2019 Download Address and Installation Tutorial", this section will explain how to write and run C language programs with VS2019.
For example, write and run the following C language code in VS2019:
#include <stdio.h>
int main()
{
    puts("C语言");
    return 0;
}
Need to go through the following steps.
1. Create a project
Open VS2019 and enter the following interface:
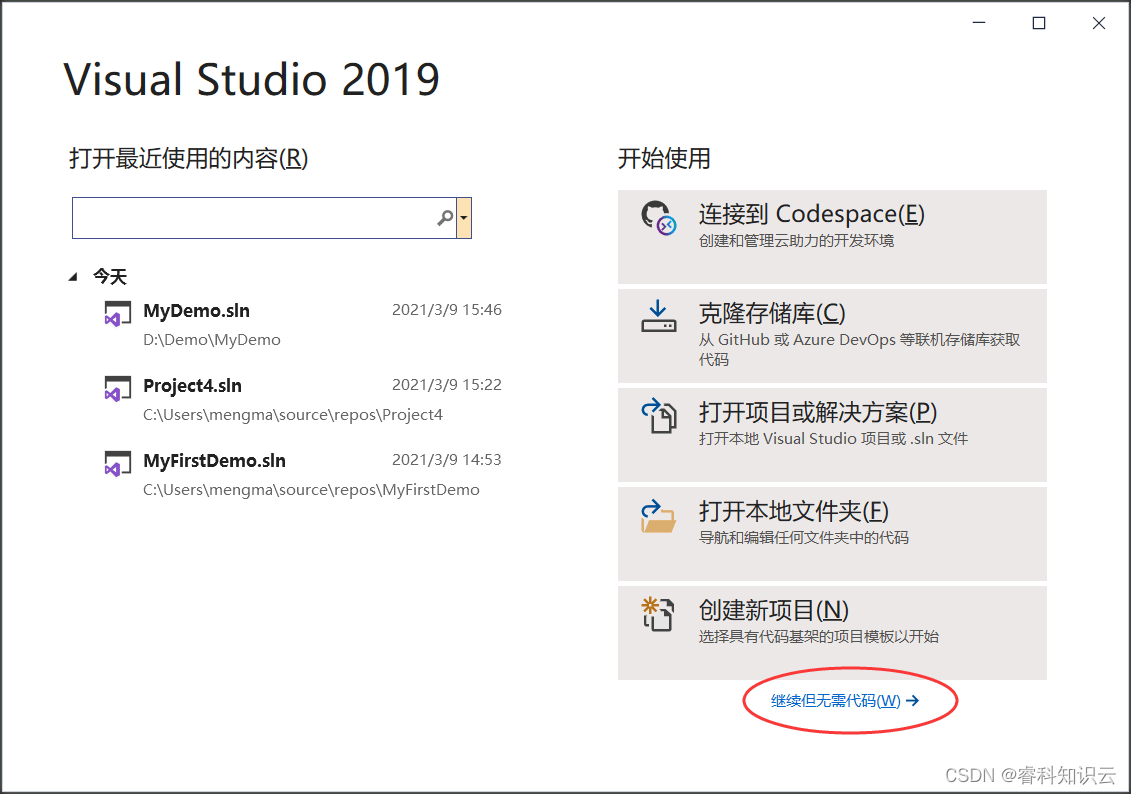
Figure 1 VS2019 startup interface
Select "Continue without code" to enter the main interface of VS, as shown in the following figure:

Figure 2 VS2019 main interface
Select "File->New->Project" in the menu, and the following window will pop up:
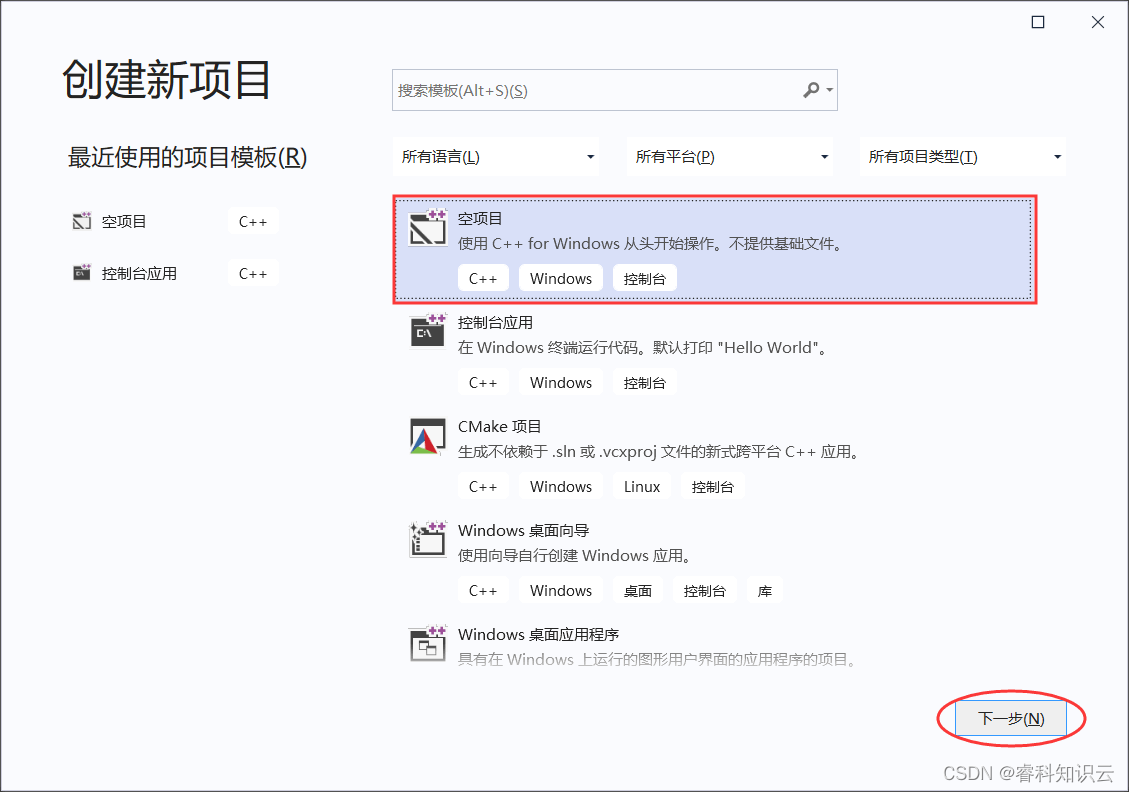
Figure 3 Create an empty project
Select "Empty Project" and click "Next" to enter the "Configure Empty Project" window, as shown below:
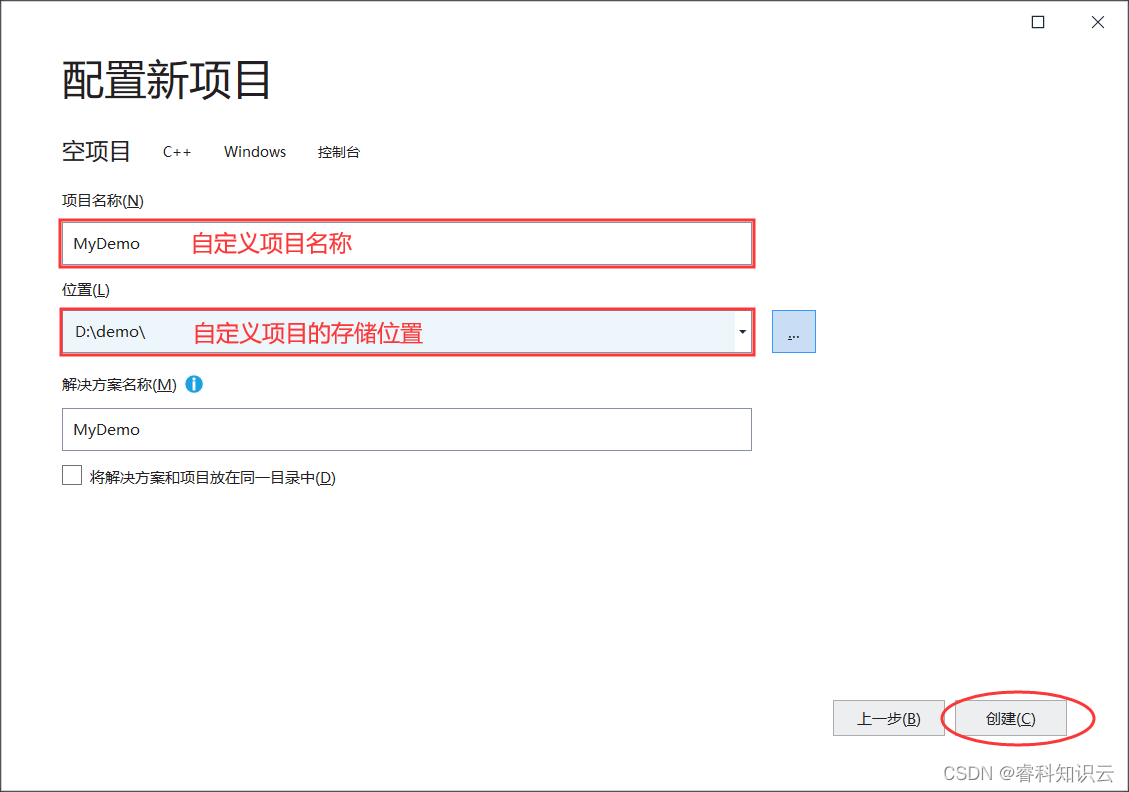
Figure 4 Configure an empty project
Here you can customize the name and storage location of the project, and then click the "Create" button to successfully create an empty project, as shown in the following figure:

Figure 5 MyDemo empty project created
2. Add source files
Right-click on the "source file" and select "Add --> New Item" from the pop-up menu, as shown in the figure below:

Figure 6 Adding source files
In the pop-up window, select "C++ file" and modify the name of the newly created file (for example, the source file I created is demo.c), as shown in the figure below:
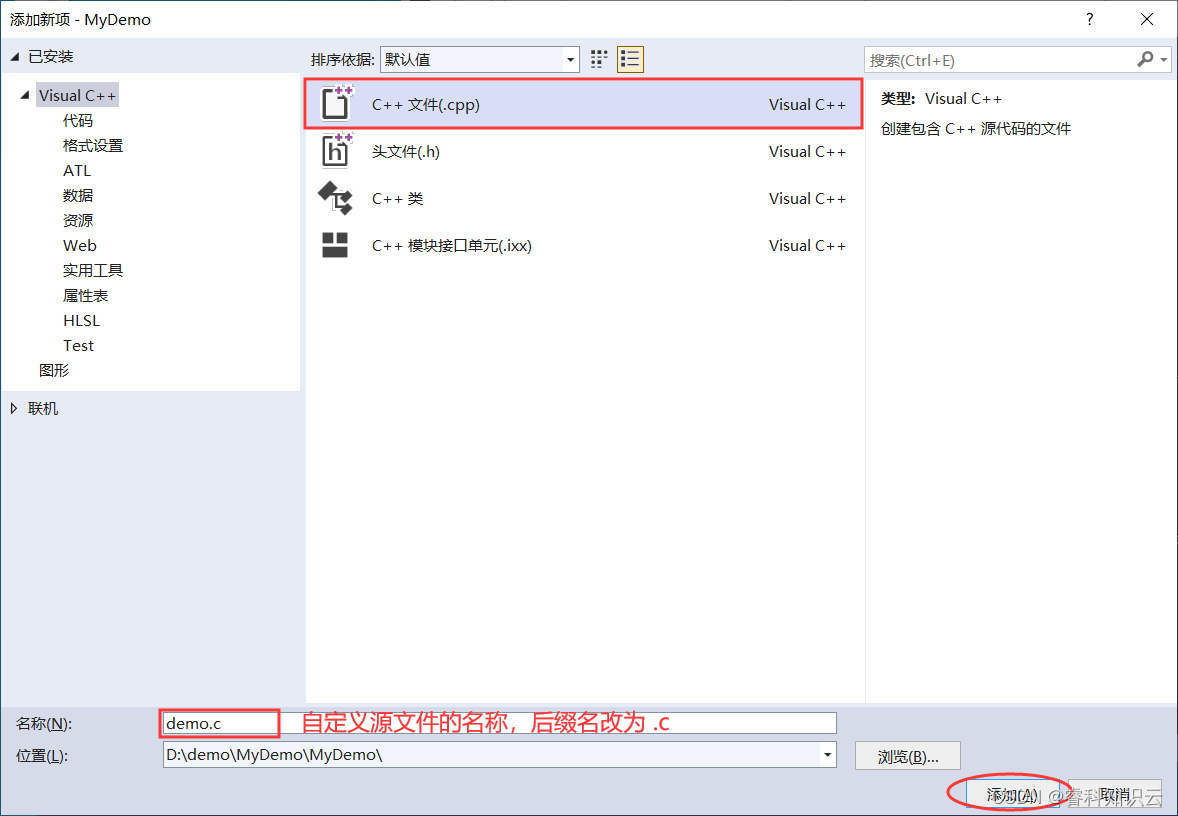
Figure 7 Custom created source files
Click the "Add" button to successfully create a source file named demo.c, as shown in the figure below:
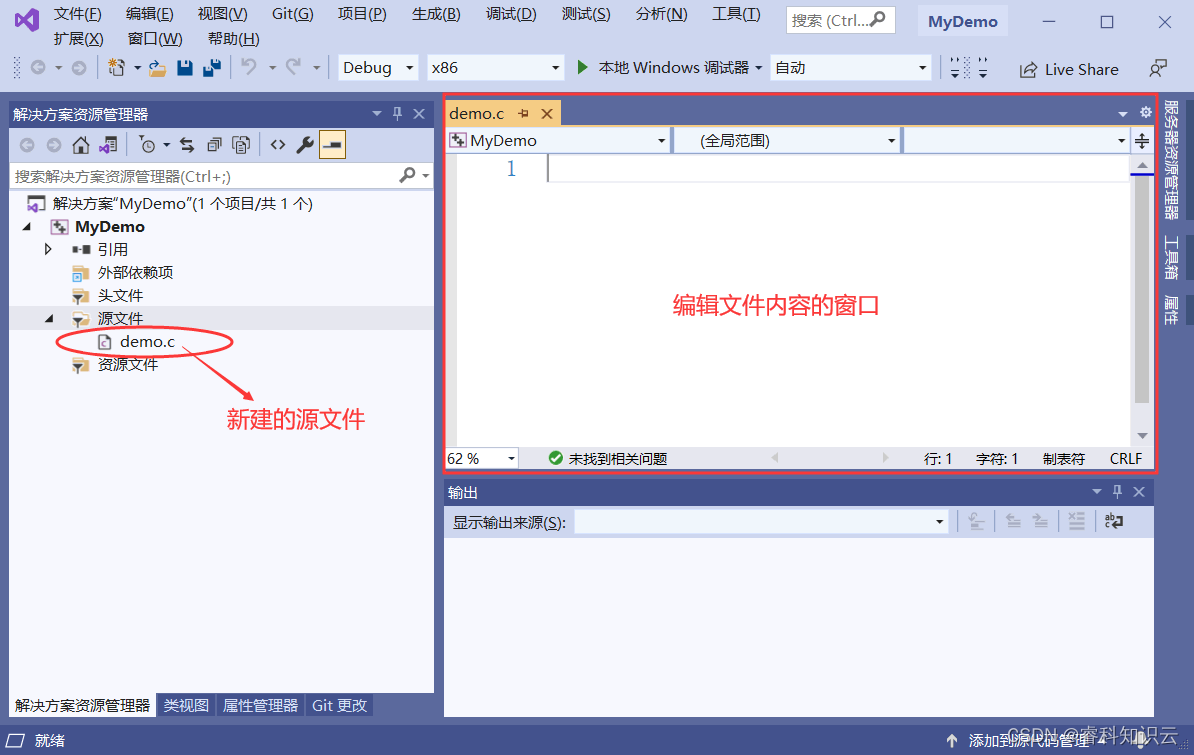
Figure 8 C language source file created successfully
3. Write code and run the program
Add the C language program at the beginning of this article to the demo.c file shown in Figure 8, as shown in the following figure:
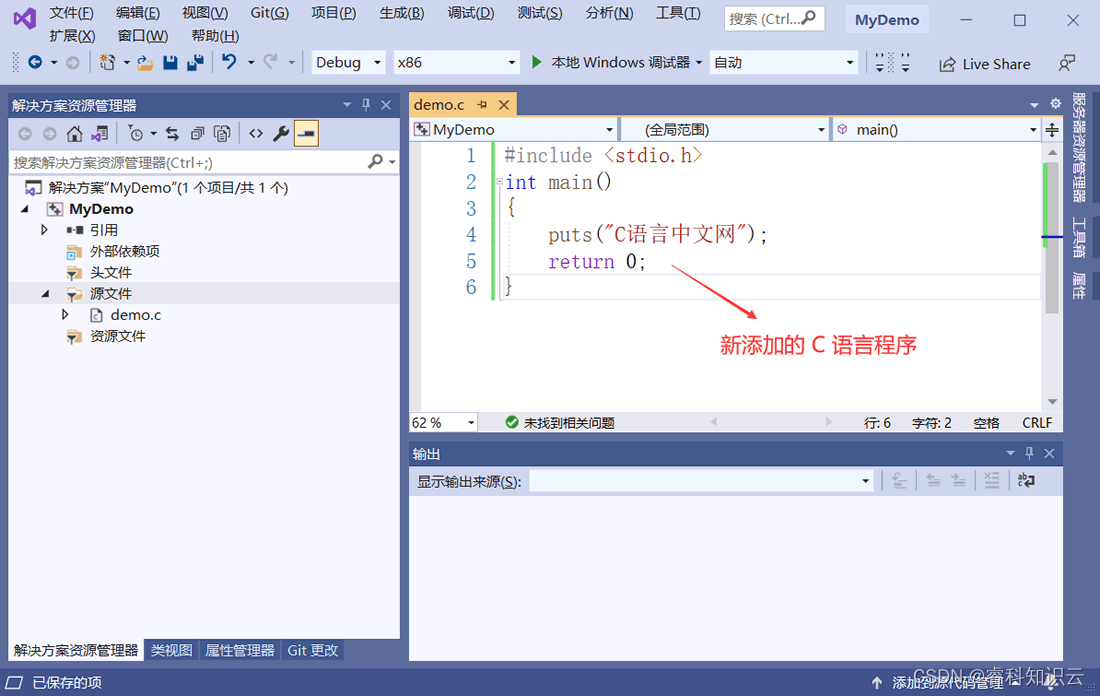
Figure 9 Edit source code
Click "Local Windows Debugger" to start running the demo.c file, as shown in the figure below:
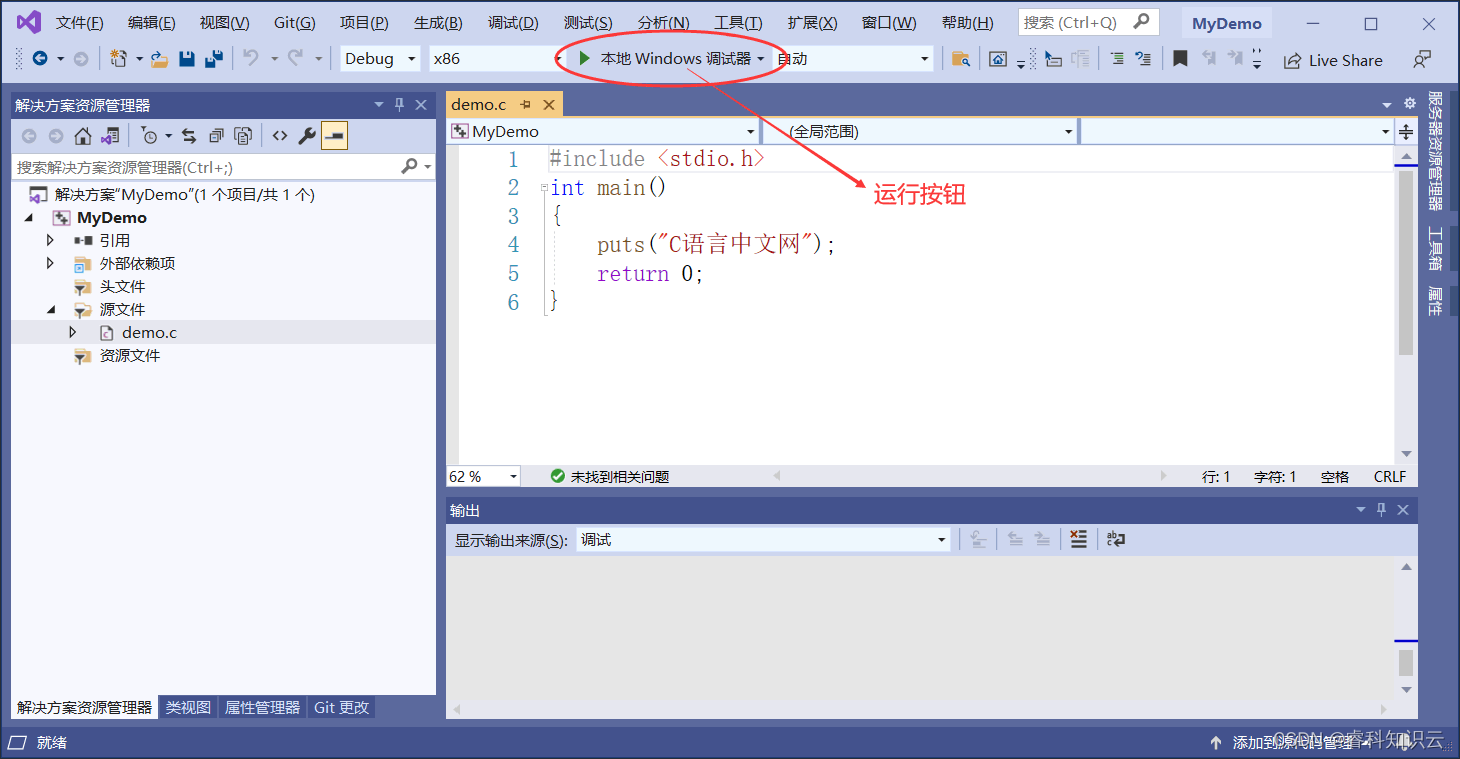
Figure 10 Running the program
Summarize
Now, you can share MyDemo.exe with your friends and tell them that this is the first C language program you have written. Although this program is very simple, you have already passed the first hurdle, learned how to write code, and how to generate an executable program from code, which is a complete experience.
In the basic part of this tutorial, the programs I teach you to write are all such "black windows", which are different from the software we usually use. They have no beautiful interface, no complicated functions, and only some text can be seen. This is the control A console program (Console Application), which is very similar to DOS, and early computer programs are like this.
Although the console program looks boring, it is very simple, suitable for getting started, and can let everyone learn the basic knowledge of programming; only by solidifying the basic skills can we develop a robust GUI (Graphical User Interface) program, that is, with interface program.