In this section, we will explain in detail how to use IDEA to create a Spring Boot project.
Configure the development environment
Before using Spring Boot for development, the first thing is to configure the development environment. Here we take the Windows operating system as an example. If you are using other operating systems, please refer to their related settings.
If a worker wants to do a good job, he must first sharpen his tools. The choice of IDE (Integrated Development Environment) is very important. There are many excellent IDE development tools on the market, such as IntelliJ IDEA, Spring Tools, Visual Studio Code and Eclipse, etc., then How should we choose?
Here we strongly recommend that you use IntelliJ IDEA, because IntelliJ IDEA provides better support for Spring Boot than other IDEs.
The Spring Boot version and its environment configuration requirements are as follows.
| Spring Boot | 2.x |
|---|---|
| JDK | 8.0 and above |
| Maven | 3.x |
| I understand the idea | 14.0 or higher |
- Download JDK 8.0 and above from the official Java website . For JDK installation and environment configuration, please refer toJava JDK download and installation tutorial and Java JDK environment variable configuration .
- For the download, installation and configuration process of Maven 3.x, please refer to Maven Installation and Configuration .
- Browser to visit the official download page of IntelliJ IDEA , download and install IntelliJ IDEA.
Create a Spring Boot project
After the development environment is configured, next, we can create a Spring Boot project through Intellij IDEA.
Intellij IDEA can generally create Spring Boot projects in two ways:
- Created using Maven
- Created using Spring Initializr
Created using Maven
1. Use IntelliJ IDEA to create a Maven project named helloworld. For the creation process, please refer to Creating a Maven Project in IDEA .
2. Add the following configuration to the pom.xml of the Maven project to import Spring Boot-related dependencies.
<project>
    ...
  <parent>
        <groupId>org.springframework.boot</groupId>
        <artifactId>spring-boot-starter-parent</artifactId>
        <version>2.4.5</version>
        <relativePath/> <!-- lookup parent from repository -->
    </parent>

    <dependencies>
        <dependency>
            <groupId>org.springframework.boot</groupId>
            <artifactId>spring-boot-starter-web</artifactId>
        </dependency>
        <dependency>
            <groupId>org.springframework.boot</groupId>
            <artifactId>spring-boot-starter-test</artifactId>
            <scope>test</scope>
        </dependency>
    </dependencies>
...
</project>
3. Under the net.biancheng.www package, create a main program named helloWorldApplication to start the Spring Boot application. The code is as follows.
package net.biancheng.www;
import org.springframework.boot.SpringApplication;
import org.springframework.boot.autoconfigure.SpringBootApplication;
@SpringBootApplication
public class helloWorldApplication {
    public static void main(String[] args) {
        SpringApplication.run(helloWorldApplication.class, args);
    }
}
The directory structure of the Spring Boot project is shown in the figure below.

Figure 1: Spring Boot project structure
Created using Spring Initializr
IntelliJ IDEA supports users to use the Spring project creation wizard (Spring Initializr) to quickly create a Spring Boot project, the steps are as follows.
1. Select Project on the left side of the IntelliJ IDEA welcome page, and then select New Project on the right side, as shown below.
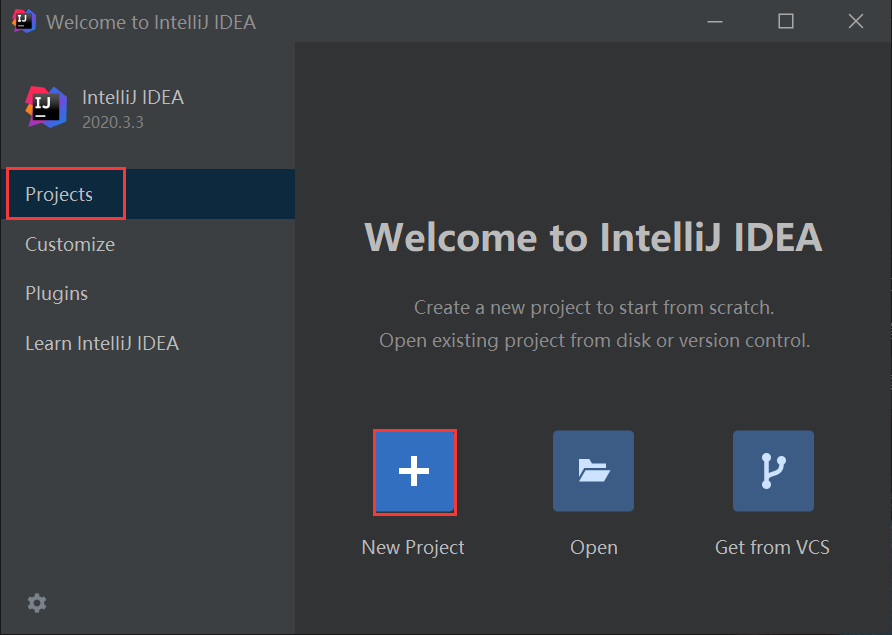
Figure 2: Create a new project on the IDEA welcome page
Or select File in the menu bar above the IntelliJ IDEA workspace, select New in the drop-down menu, and then select Project, as shown below.

Figure 3: Create a new Maven project in the IDEA workspace
2. On the left side of the new project interface, select Spring Initializr, select the project SDK as 1.8, select the starter service URL as http://start.spring.io (default), and finally click the Next button below to proceed to the next step.
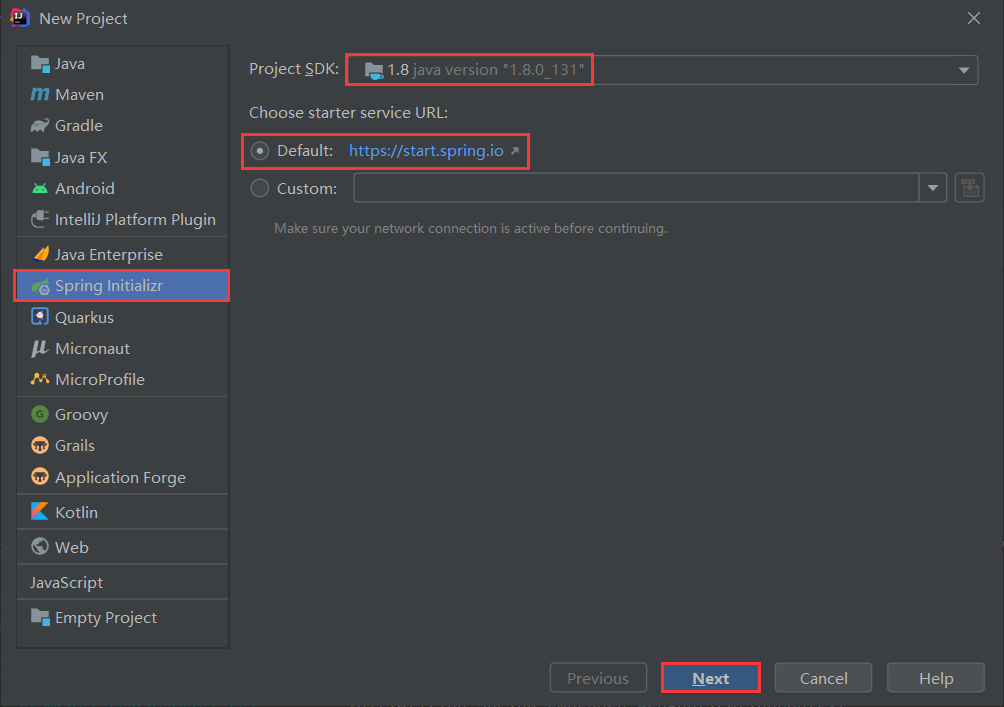
Figure 4: Spring Intializr creation wizard
3. IDEA will connect to the network and query the current available version and component list of Spring Boot according to the starter service URL, as shown in the figure below.

Figure 5: IDEA online query Springboot available version and component list
4. In the Spring Initializr Project Settings, enter the GroupId, ArtifactId, etc. of the project. Note that the Type is Maven, the packaging is jar, and the Java version is switched to 8 (the default is 11). Finally, click the Next button below to proceed to the next step.
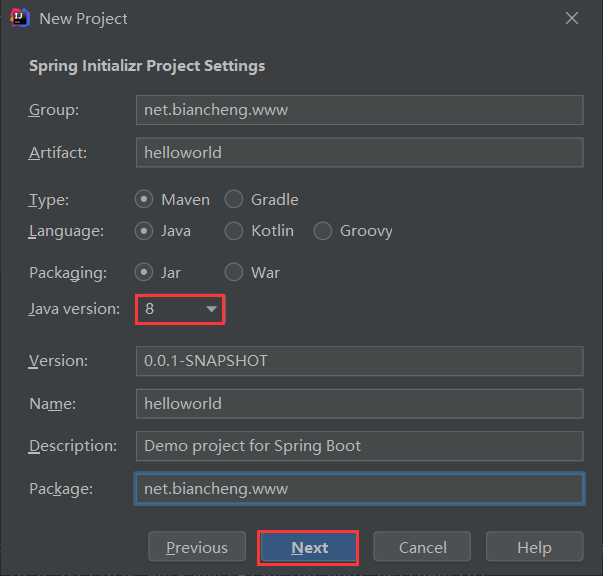
图6:Spring Boot Initializr Settings
5. In the dependency interface, select the version of Spring Boot and the dependent Spring Boot components (for example, the version of Spring Boot is 2.4.5, and the Spring Boot component is Web), and then click the Next button below.
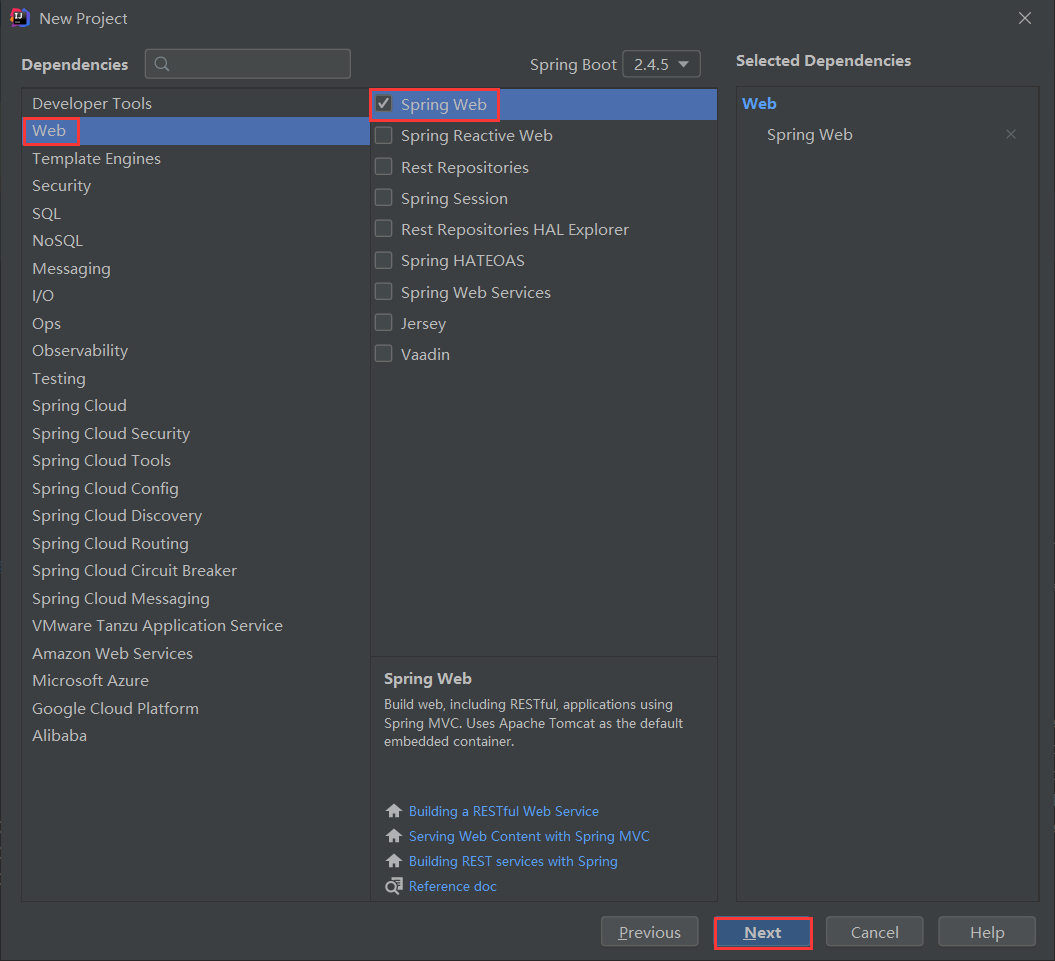
Figure 7: Spring Boot components and version selection
6. Modify the project name and project storage location and other information as needed, and finally click the Finish button to complete the creation of the Spring Boot project, as shown in the figure below.

Figure 8: Initializr finished creating the Spring Boot project
7. Return to the IDEA workspace, and you can see that the Spring Boot project helloworld has been created. The project not only has a complete directory structure, but also a complete Maven configuration, and generates a main startup program named HelloworldApplication by default.
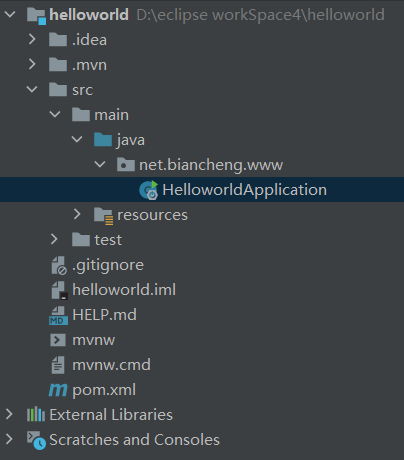
Figure 9: Spring Boot project structure
At this point, almost all the preparations are ready, and we can run the Spring Boot project directly without writing any code.
Start Spring Boot
By default, the Spring Boot project will create a main program startup class named ***Application, which uses a combined annotation @SpringBootApplication to enable the automatic configuration of Spring Boot. In addition, the startup class contains a main () method to start the project.
Run the main() method in the startup class HelloworldApplication directly to start the project, and the result is as shown in the figure below.
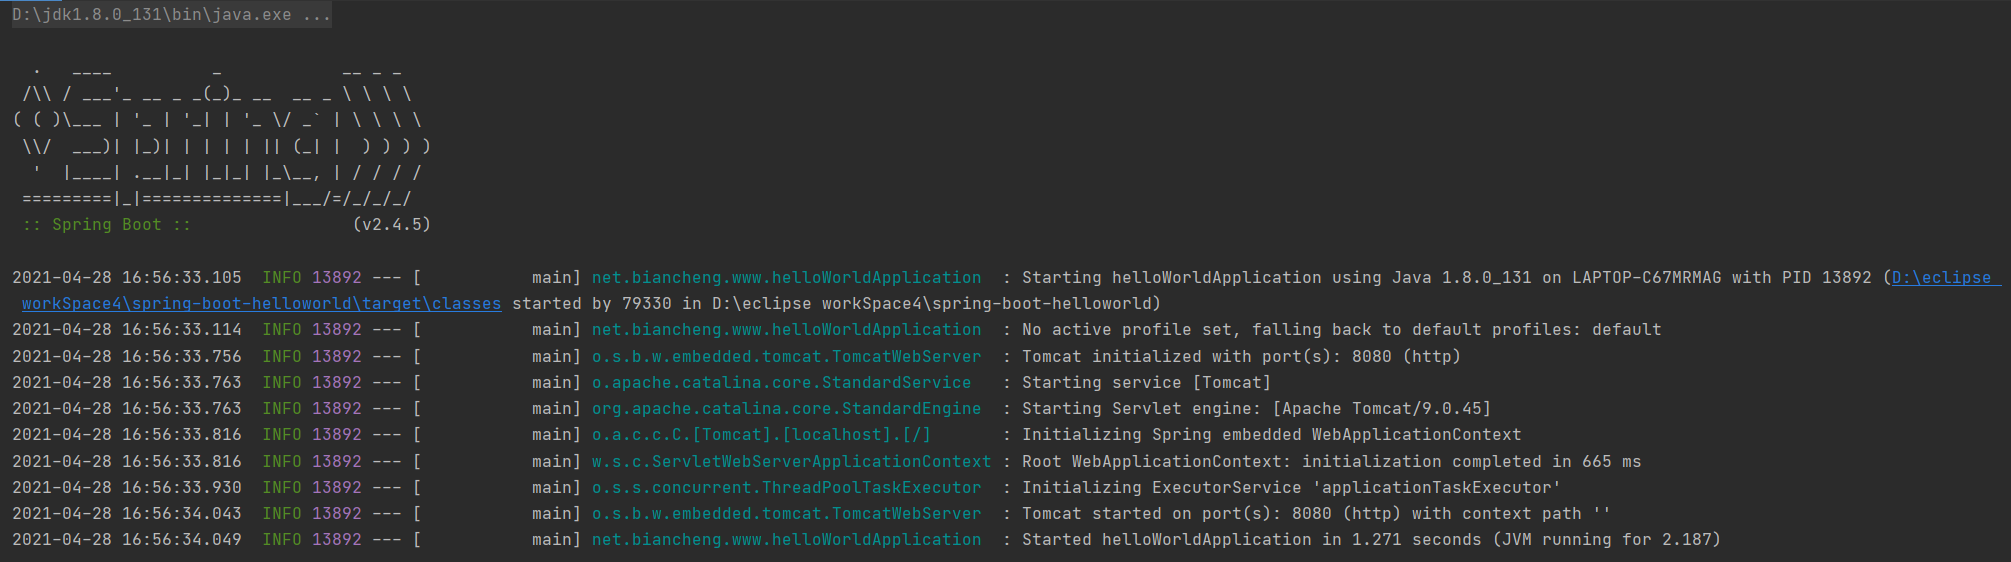
Figure 10: Spring Boot project helloWorld run log
Note: Spring Boot integrates Tomcat internally, and there is no need to manually configure Tomcat. Developers only need to pay attention to specific business logic.
In order to see the effect more clearly, we create a controller package under the net.biancheng.www package, and create a Controller named HelloController in this package, the code is as follows.
package net.biancheng.www.controller;
import org.springframework.stereotype.Controller;
import org.springframework.web.bind.annotation.RequestMapping;
import org.springframework.web.bind.annotation.ResponseBody;
@Controller
public class HelloController {
    @ResponseBody
    @RequestMapping("/hello")
    public String hello() {
        return "Hello World!";
    }
}
Restart the Spring Boot project, and then access "http://localhost:8080/hello" in the address bar, the result is as shown below.
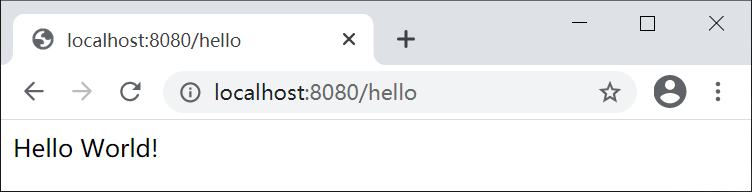
Figure 11: Spring Boot project helloWorld access results