
Many developers have arrived at a new company, and the company has issued a new computer, and they are confused about the environment installation. Today I will show you how to restore, get the company computer, and how to install the various environments you need.
1. Node installation
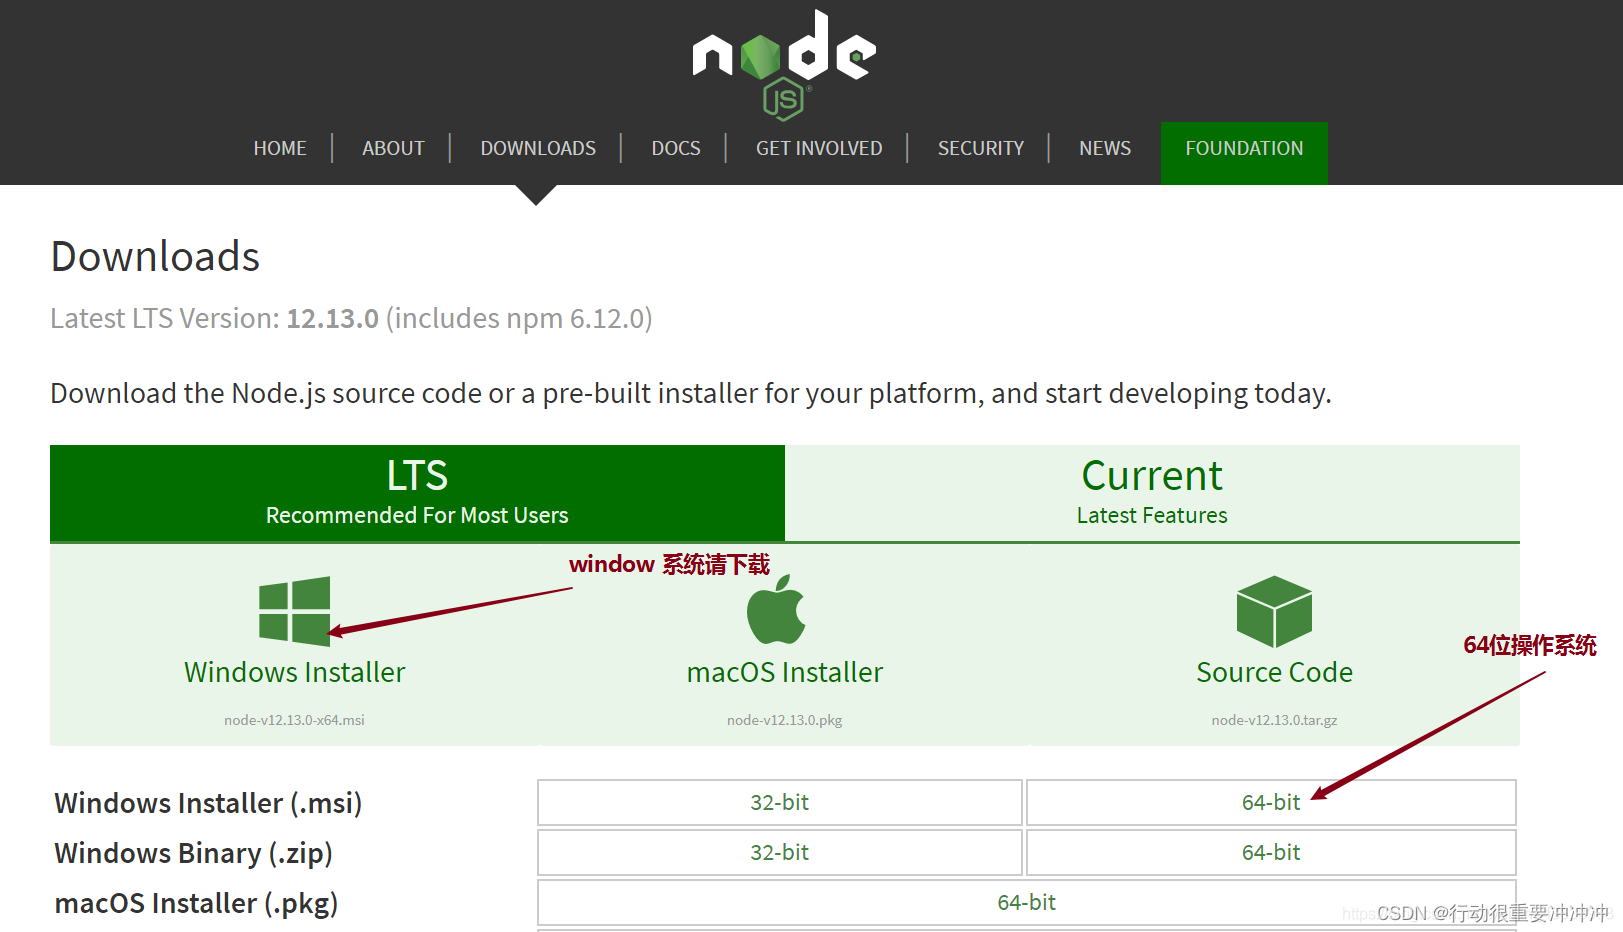
Official website download address:
Download the corresponding version according to your own needs. I downloaded the 64-bit version of the windows system.
For details, see the link: node follows the process
1. What is nodejs?
A scripting language needs a parser to run. JavaScript is a scripting language, and there are different parsers in different locations, such as the js language written into html, and the browser is its parser role. For JS that needs to run independently, nodejs is a parser. Simply put, node.js is the official website address
running on the server : http://nodejs.cn/JavaScript
2. Node concept (three major concepts)
Node.jsIs a JavaScript runtime environment based on the Chrome V8 engine.
Node.jsAn event-driven, non-blocking I/O model is used.
NodeIt is a development platform that allows JavaScript to run on the server.
Event-driven: task execution, publisher, subscriber, event-driven (on emit) Non-blocking: while executing a certain task, other tasks can also be executed Blocking: execute a certain task,
if the task is not completed, other tasks must wait I/O: input/output (database operations, file system operations, etc.) Non-blocking I/O model:
when we use Node.js to implement database operations, file system operations, etc., the asynchronous operations to be performed, the core of asynchronous operations The traditional implementation is the callback function
3. Node installation steps
Node.js official installation package and source code download address: https://nodejs.org/en/download/
Installation Environment:Windows7 x64
installation steps:
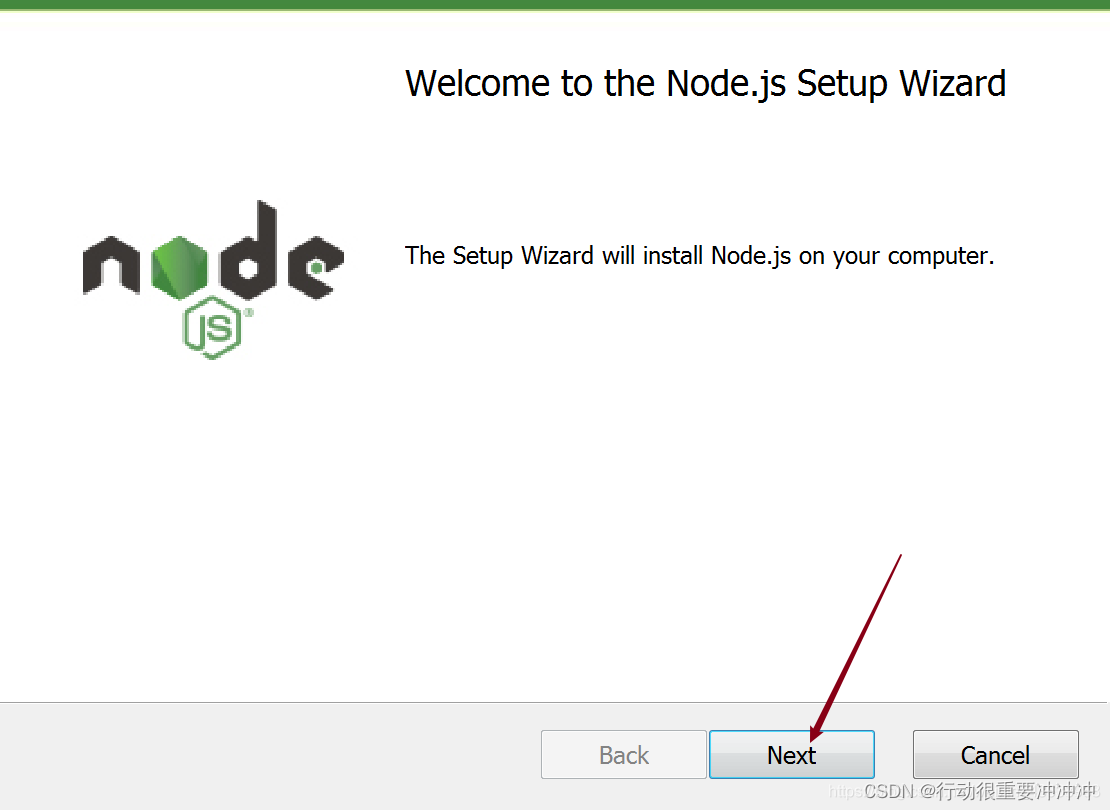
Step 1: Double-click the downloaded installation package " node-v12.13.0-x64.msi" to display the welcome interface, as shown below:
Step 2: Double-click the downloaded file node-v12.13.0-x64.msi, the following interface pops up, click Next:
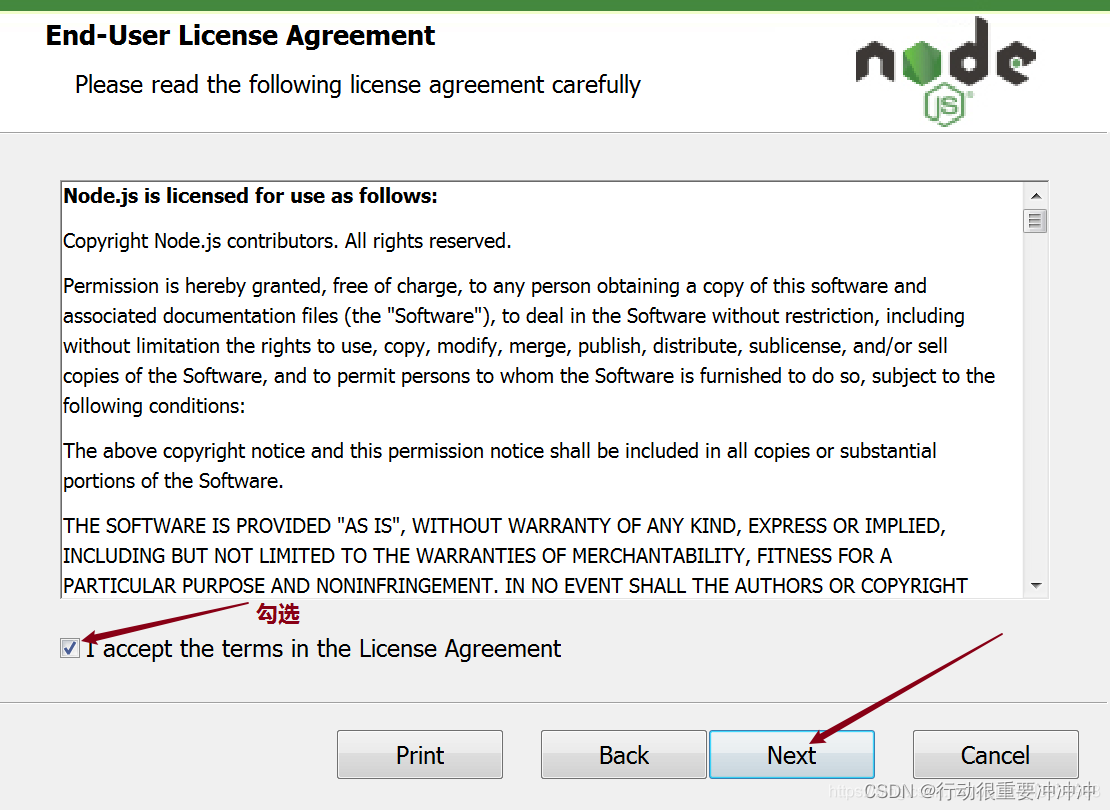
Step 3: Check " I accept the terms in the License Agreement" to agree to the license agreement, and click Next, the following interface appears:
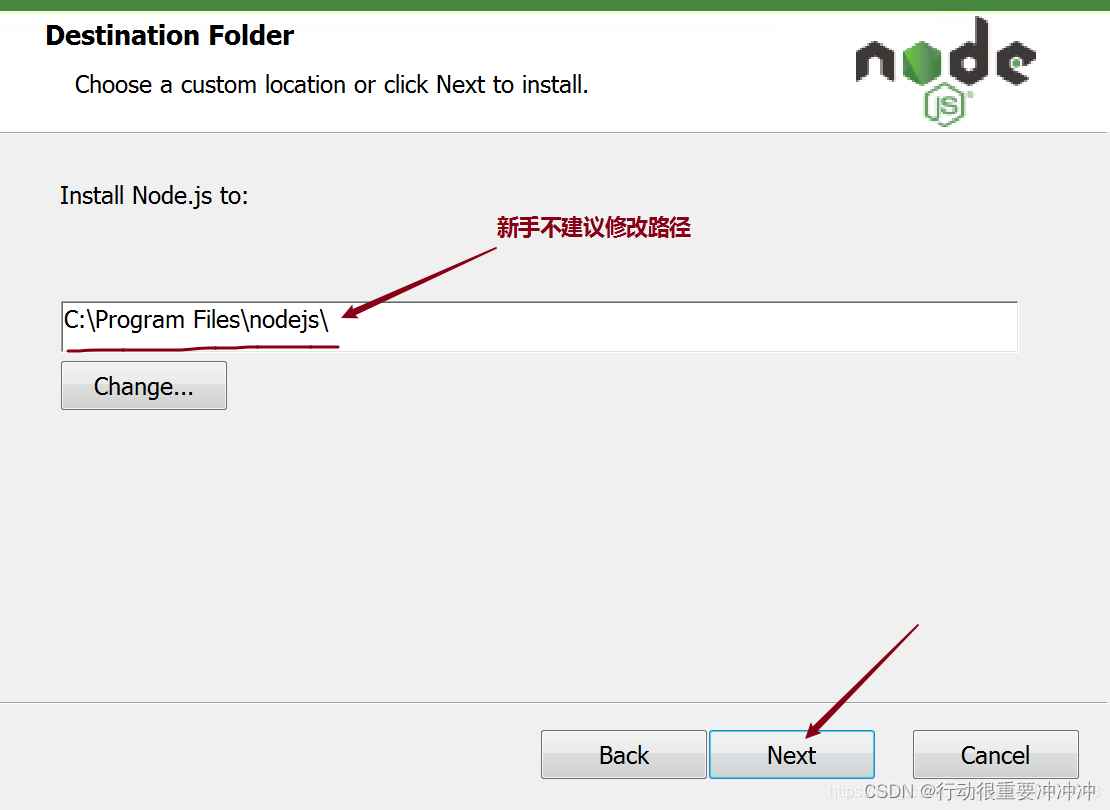
Step 4: The default installation path of Node.js is " C:\Program Files\nodejs\”, Click Next,
Step 6: After confirming that it is correct, click Nextto start the installation:

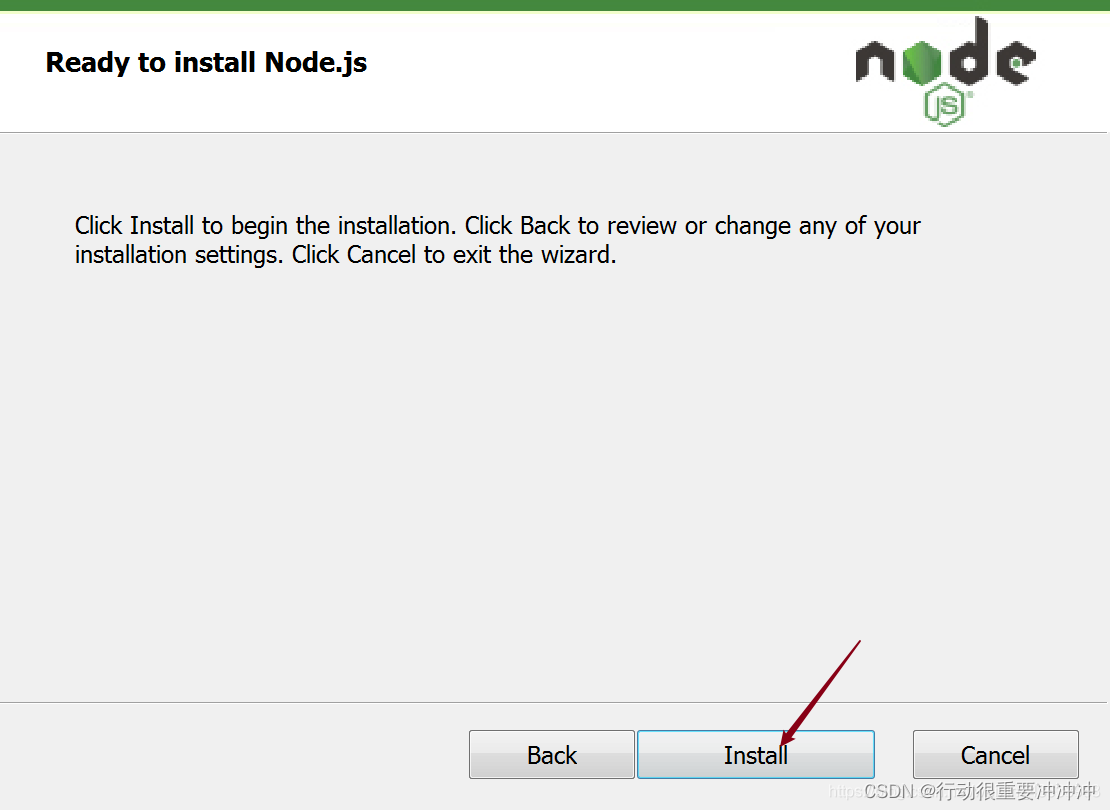
Step 7: Click Installto start the installation:
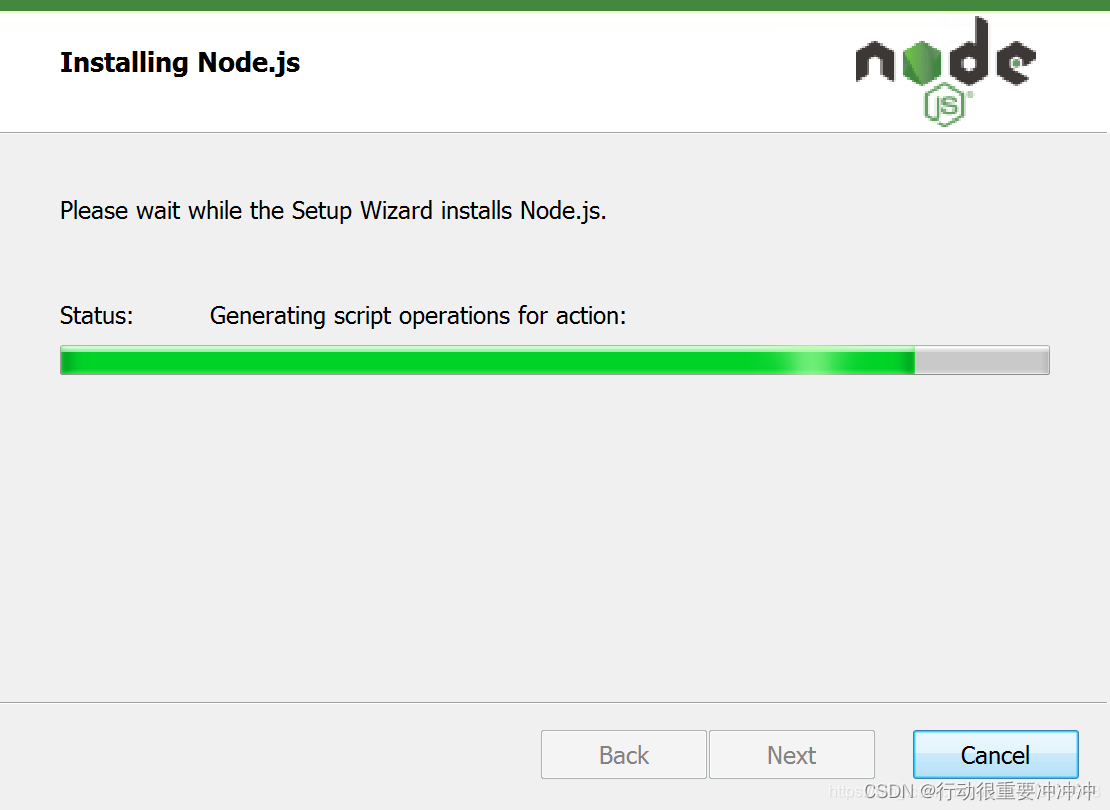
Step 8: The installation progress page, wait for half a minute to automatically jump to the installation completion interface:
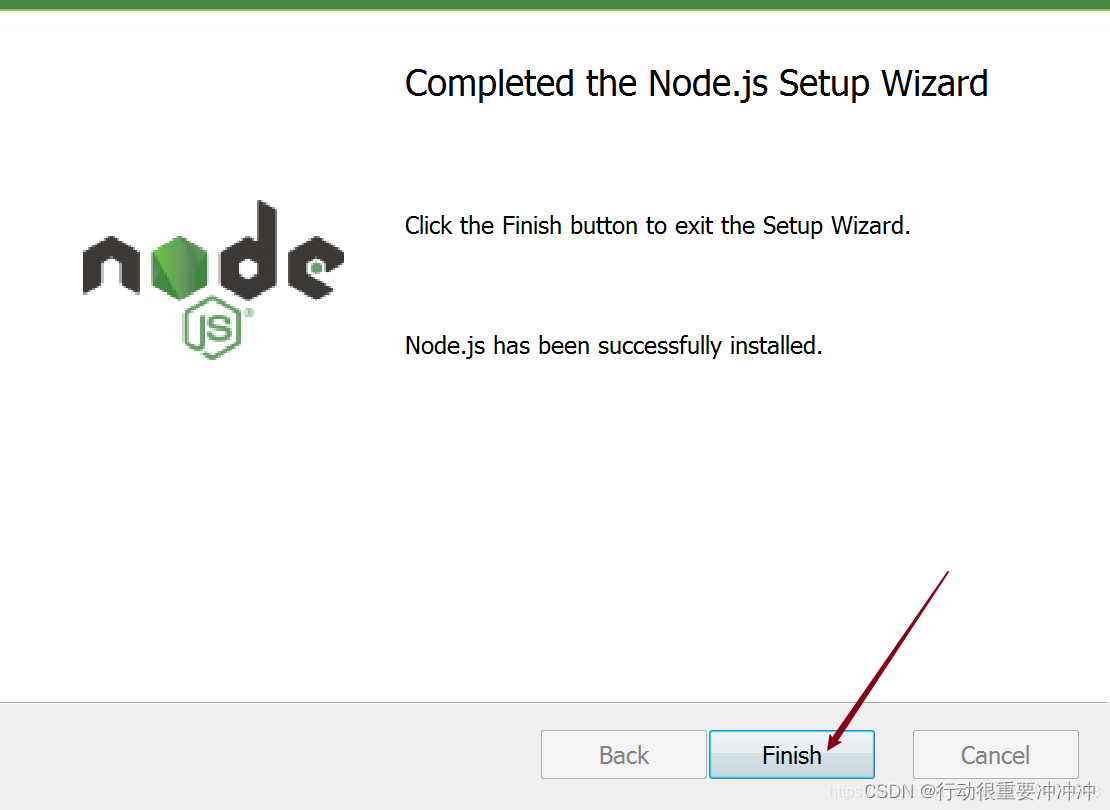
Step 9: After half a minute, the installation is complete, Finishjust click:
Step 10: Check whether the node is installed successfully:
DOS window Enter node -vor node --versioncheck nodeversion
Two, cnpm
Three, yarn
1. Introduction to yarn:
Yarn is a package management tool released by facebook that replaces npm.
2. Features of yarn
- Super fast.
- Yarn caches every downloaded package, so there is no need to download it again when it is used again. Also utilizes parallel downloads to maximize resource utilization, so installs are faster.
- super safe.
- Before executing the code, Yarn will verify the integrity of each installation package through an algorithm. Super reliable.
- Using a detailed, concise lock file format and an explicit installation algorithm, Yarn is able to guarantee indiscriminate work on different systems.
3. Yarn installation:
windows system
npm install -g yarn 或者 cnpm install -g yarn
mac/linux system
sudo npm install -g yarn 或者sudo cnpm install -g yarn
Remark:
Mac computers need to be followed with administrator privileges, because a file directory needs to be created during the process. Non-administrators do not have permission to create directories.
After the installation is complete, enter the following command to verify whether the installation is successful
yarn -v
4. Common commands of yarn:
安装包:

yarn install //安装package.json里所有包,并将包及它的所有依赖项保存进yarn.lock
yarn install --flat //安装一个包的单一版本
yarn install --force //强制重新下载所有包
yarn install --production //只安装dependencies里的包
yarn install --no-lockfile //不读取或生成yarn.lock
yarn install --pure-lockfile //不生成yarn.lock 添加包(会更新package.json和yarn.lock):

yarn add [package] // 在当前的项目中添加一个依赖包,会自动更新到package.json和yarn.lock文件中
yarn add [package]@[version] // 安装指定版本,这里指的是主要版本,如果需要精确到小版本,使用-E参数
yarn add [package]@[tag] // 安装某个tag(比如beta,next或者latest)
//不指定依赖类型默认安装到dependencies里,你也可以指定依赖类型:

yarn add --dev/-D // 加到 devDependencies
yarn add --peer/-P // 加到 peerDependencies
yarn add --optional/-O // 加到 optionalDependencies
//默认安装包的主要版本里的最新版本,下面两个命令可以指定版本:

yarn add --exact/-E // 安装包的精确版本。例如yarn add [email protected]会接受1.9.1版,但是yarn add [email protected] --exact只会接受1.2.3版
yarn add --tilde/-T // 安装包的次要版本里的最新版。例如yarn add [email protected] --tilde会接受1.2.9,但不接受1.3.0

发布包

yarn publish  //移除一个包
yarn remove <packageName>://移除一个包,会自动更新package.json和yarn.lock

更新一个依赖

yarn upgrade //用于更新包到基于规范范围的最新版本

运行脚本

yarn run // 用来执行在 package.json 中 scripts 属性下定义的脚本

显示某个包的信息

yarn info <packageName>  // 可以用来查看某个模块的最新版本信息

缓存

yarn cache
yarn cache list // 列出已缓存的每个包
yarn cache dir // 返回 全局缓存位置
yarn cache clean // 清除缓存

安装yarn
npm install -g yarn
安装成功后,查看版本号:
yarn --version
创建文件夹 yarn
md yarn
进入yarn文件夹
cd yarn
初始化项目
yarn init // 同npm init,执行输入信息后,会生成package.json文件
yarn的配置项:
yarn config list // 显示所有配置项
yarn config get <key> //显示某配置项
yarn config delete <key> //删除某配置项
yarn config set <key> <value> [-g|--global] //设置配置项
Four, npm yarn difference yarn.lock file
比如说你的项目中三个模块依赖有依赖关系,@1.2.1代表这个模块的版本。在你安装A的时候需要安装依赖C和D,很多依赖不会指定版本号,默认会安装最新的版本,这样就会出现问题:比如今天安装模块的时候C和D是某一个版本,而当以后C、D更新的时候,再次安装模块就会安装C和D的最新版本,如果新的版本无法兼容你的项目,你的程序可能就会出BUG,甚至无法运行。这就是npm的弊端,而yarn为了解决这个问题推出了yarn.lock的机制,这就是项目中的yarn.lock文件。注意:这个文件不要手动修改它,当你使用一些操作如yarn add时,yarn会自动更新yarn.lock
5. Switch mirror source [nrm]
Since the original source of npm is abroad, the download speed is relatively slow, so it is best to switch to the domestic mirror source, here choose the Taobao mirror source.
1. Press install nrm
First, let's install nrm, which can manage npm sources
npm install -g nrm --registry https://registry.npmmirror.com/
nrmAfter installation , you can view the currently available sources with the following command
nrm ls
Running results:

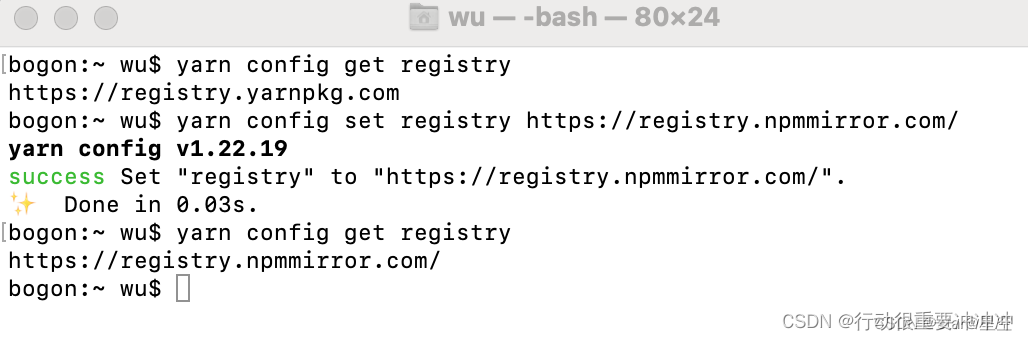
2. Set the mirror source of npm
1. View the current mirror source of npm
npm config get registry

2. Set npm to use Taobao mirror source
npm config set registry https://registry.npmmirror.com/
The https://registry.npmmirror.com/Taobao mirror source address here is
obtained by copying the address behind taobao from the current available source through the nrm ls command above, and you can switch other mirror sources from the currently available source by yourself

As long as you persist, you will not be eliminated