- Record the complete steps of yolov5-5.0 model deployment here, and make notes for subsequent reuse and learning. It took more than a week to complete the liver
- If you want to use ONNX Runtime for deployment, please refer to the article:
Detailed introduction of Yolov5 to ONNX model + Python deployment using ONNX Runtime
Detailed introduction of Yolov5 to ONNX model + C++ deployment using ONNX Runtime - You can also directly use QT or C++ to call Python. There are a lot of information on the Internet, you can find it yourself. Note that if you want to call the Python script multiple times, you need to open the global lock.
Preconditions
Make sure that you have completed the environment configuration of yolov5 and implemented your own training data set, and obtained the weight file. The
overall structure and process reference of this article: Yolov5 training your own data set + TensorRT acceleration + Qt deployment
Improve the knowledge of the knowledge system: win32 and x86 and x64 The difference of
the environment record I use: the version of TensorRT is different, the corresponding lib library will be different
Win10
cuda 11.1
cudnn 8.5.0
TensorRT 8.2.1.8
Visual Studio 2019
Opencv 4.5.5
Qt 5.14.2
- Notes made for the environment variables that may be required for configuring your own computer, easy to copy
Header file include directory:
D:\Program Files\TensorRT-8.2.1.8\include
D:\Program Files\NVIDIA GPU Computing Toolkit\CUDA\v11.1\include
D:\OpenCV\v455\opencv\build\include
D:\OpenCV\v455\opencv\build\include\opencv2
lib library directory: TensorRT's lib folder is not divided into x64 and Win32, Ohttps://blog.csdn.net/qq_22487889/article/details/127040950penCV only has x64, CUDA is divided into x64 and Win32
D:\Program Files\TensorRT-8.2.1.8\lib
D:\OpenCV\v455\opencv\build\x64\vc15\lib
D:\Program Files\NVIDIA GPU Computing Toolkit\CUDA\v11.1\lib\x64
D:\Program Files\NVIDIA GPU Computing Toolkit\CUDA\v11.1\lib\Win32
//一般不用最后一行的Win32
Additional dependencies: Depending on the environment, the lib files that need to be relied on may be different ( Note: Do not add dll files in the additional dependencies!!!! )
//前5个(一般不用)是CUDA/vxx.x/lib/Win32拥有的,5-8是x64所拥有的
//再后面除了opencv以外都是TensorRT拥有的,但是我用的
cuda.lib
cudadevrt.lib
cudart_static.lib
OpenCL.lib
cudart.lib
cublas.lib
cudnn.lib
cudnn64_8.lib
myelin64_1.lib
nvinfer.lib
nvinfer_plugin.lib
nvonnxparser.lib
nvparsers.lib
opencv_world455.lib	//opencv版本不同就不一样
Since TensorRT8.2.18 does not have myelin64_1.lib, an error will be reported: the input file "myelin64_1.lib" cannot be opened . If there is no such library file, delete the line myelin64_1.lib
1. Using TenbsorRT to accelerate the model
.pt文件→.wts文件→.engine文件
1.1 Generate .wts file
Here you can refer to Section 3.1 of Yolov5 training your own data set + TensorRT acceleration + Qt deployment
1.2 Generate .engine file
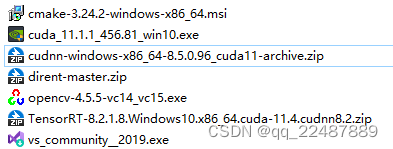
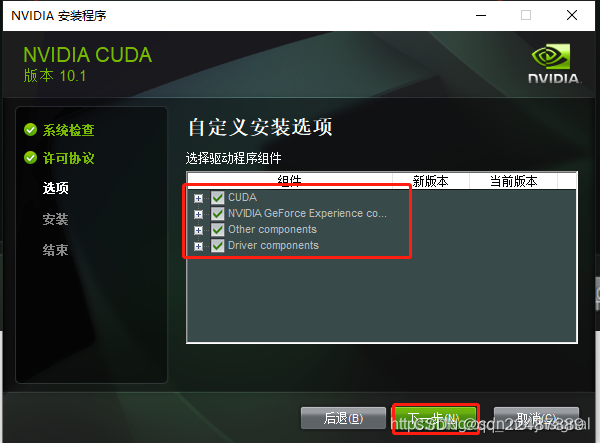
1.2.1 Download the CUDA version supported by the computer and the corresponding cuDNN and TensorRT
- I downloaded the CUDA 11.1.1 version, and check the CUD supported by my computer [A version can be searched online. Remember to use VS2019 and below versions are better.
Pytorch, check Pytorch version, check CUDA version, check cudnn version, check pytorch availability, check cuda availability, check cudnn availability
Cuda and cuDNN installation tutorial (super detailed)
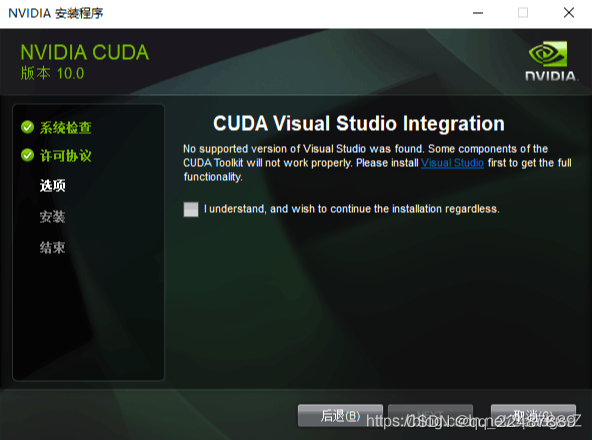
If you install it on a computer without a graphics card, only the intel core display does not appear The second line
also has the following problem: Win10 system installed CUDA10.0 and cuDNN
uninstalled VS2022, and then installed VS2019, the problem was solved.
- Then install TensorRT : Install TensorRT on
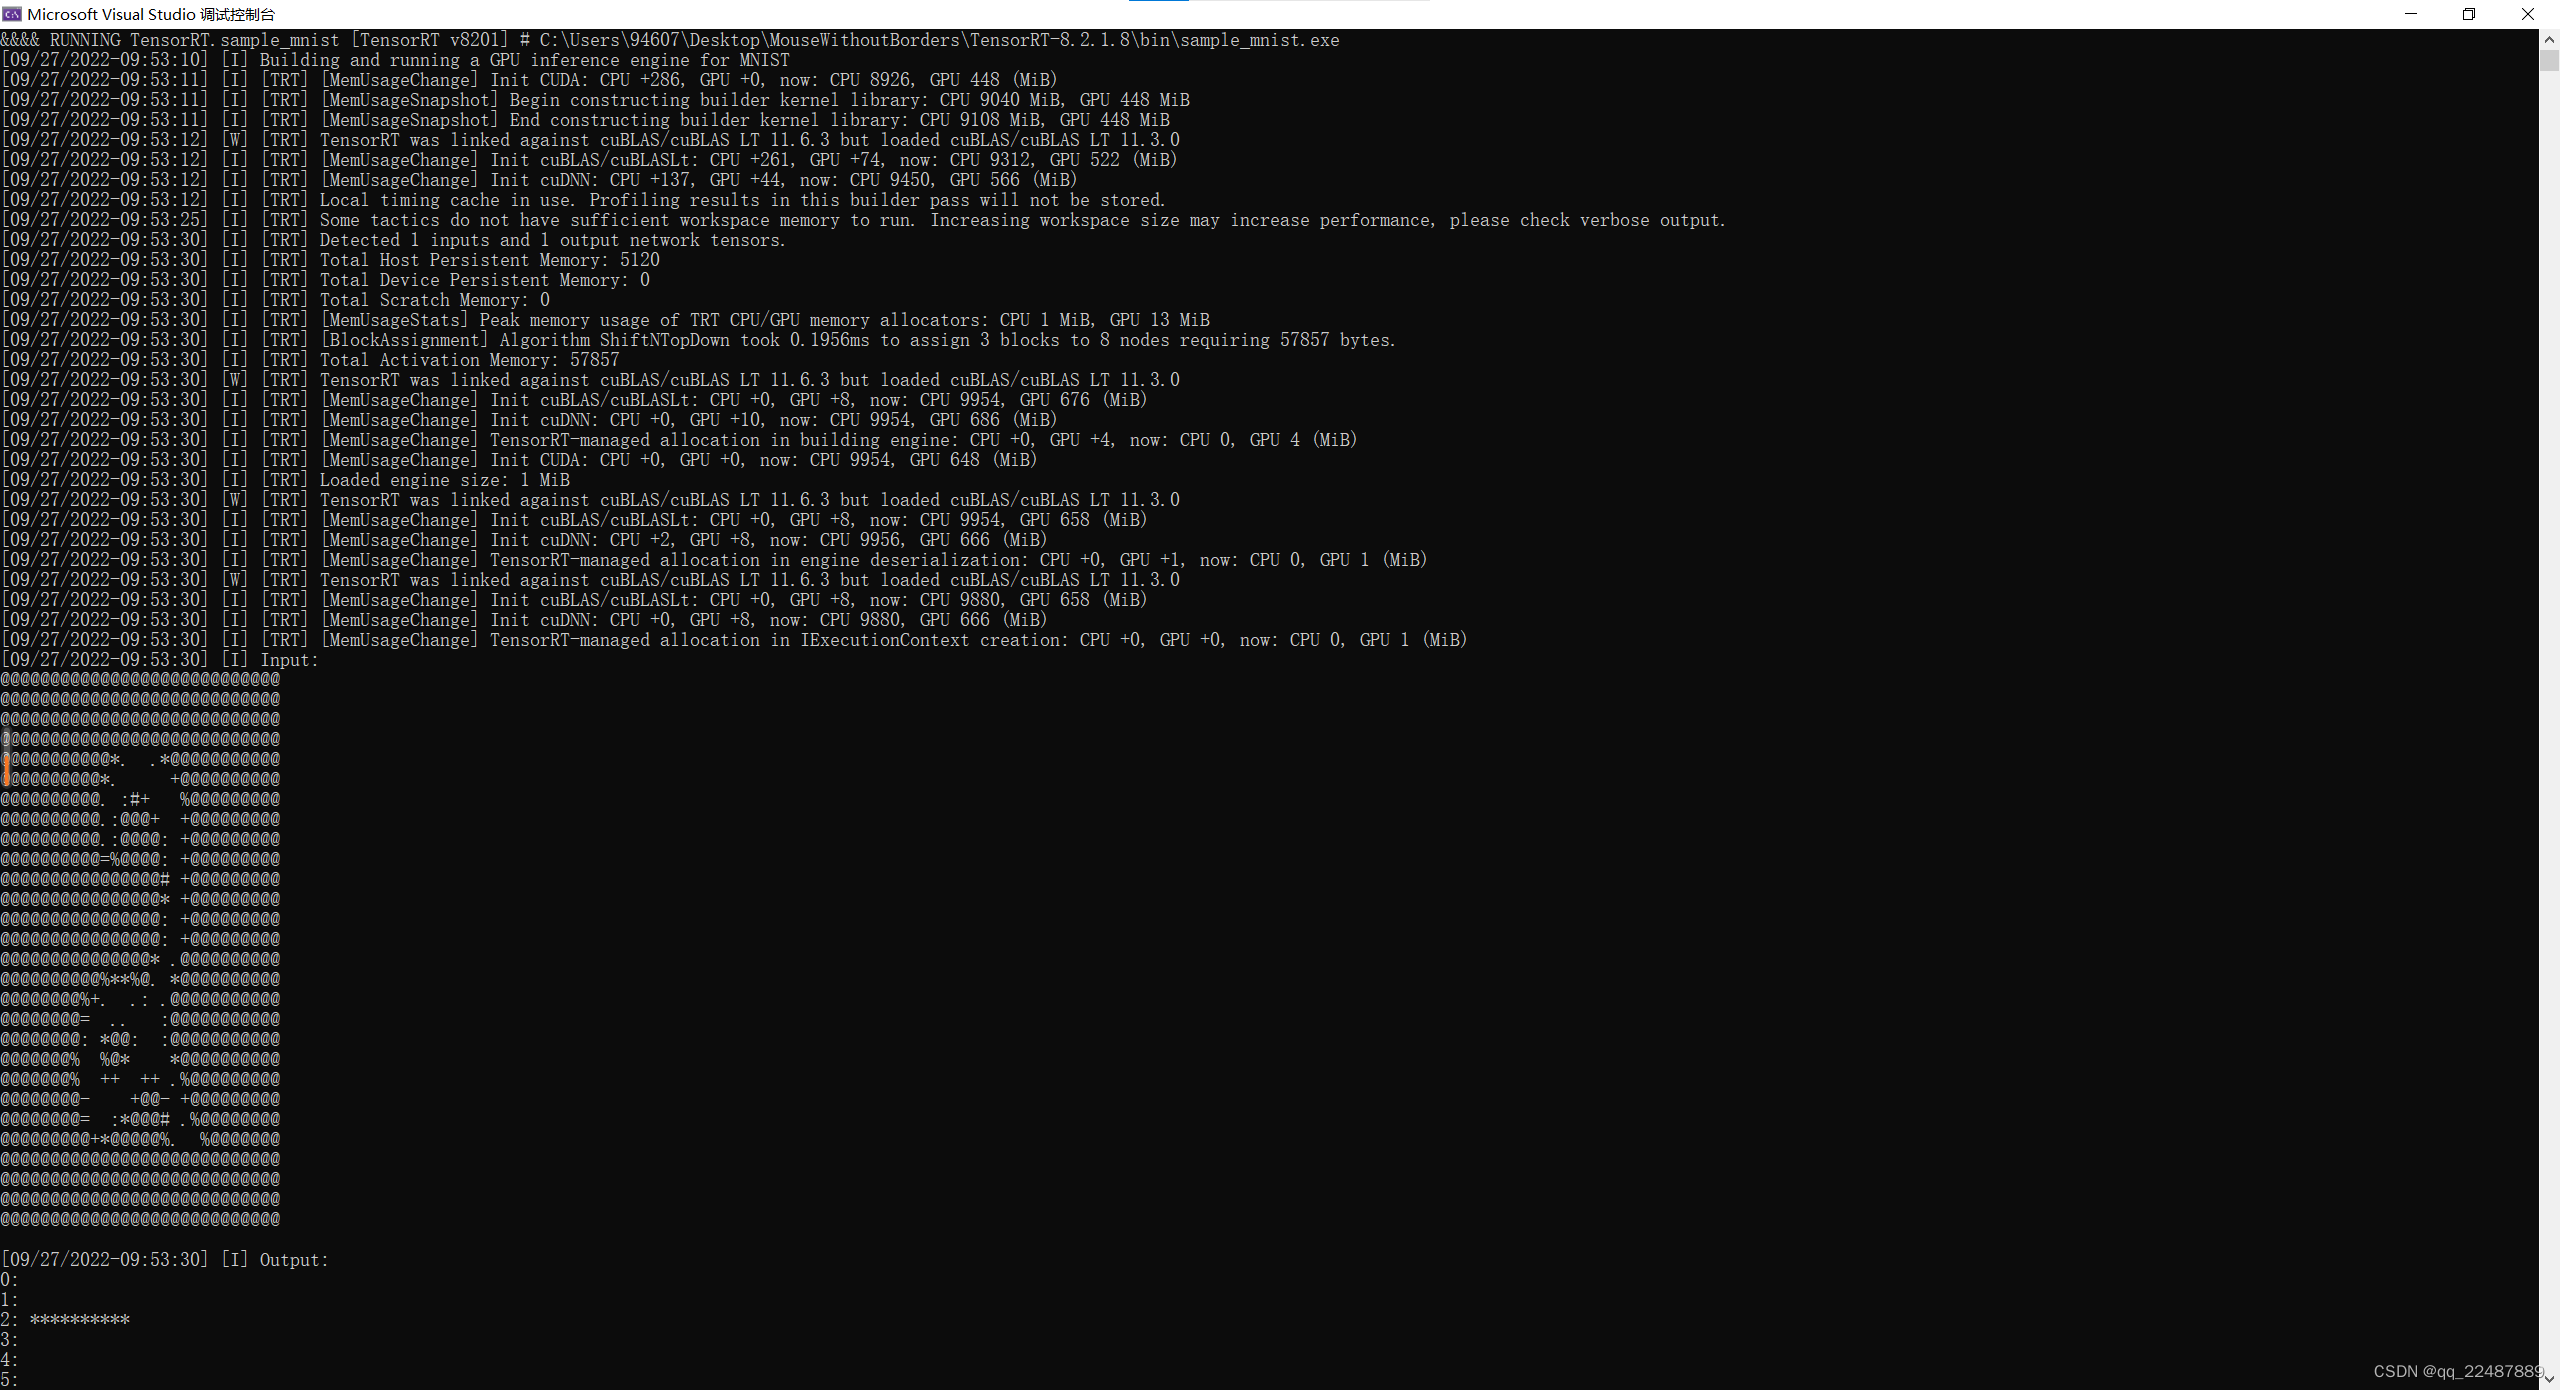
the TensorRT download website windows under sample_mnist.sln, regenerate the solution, and then perform some problem solving:
- Unable to find build tools for v143
- Unable to open the input file "cudnn.lib":
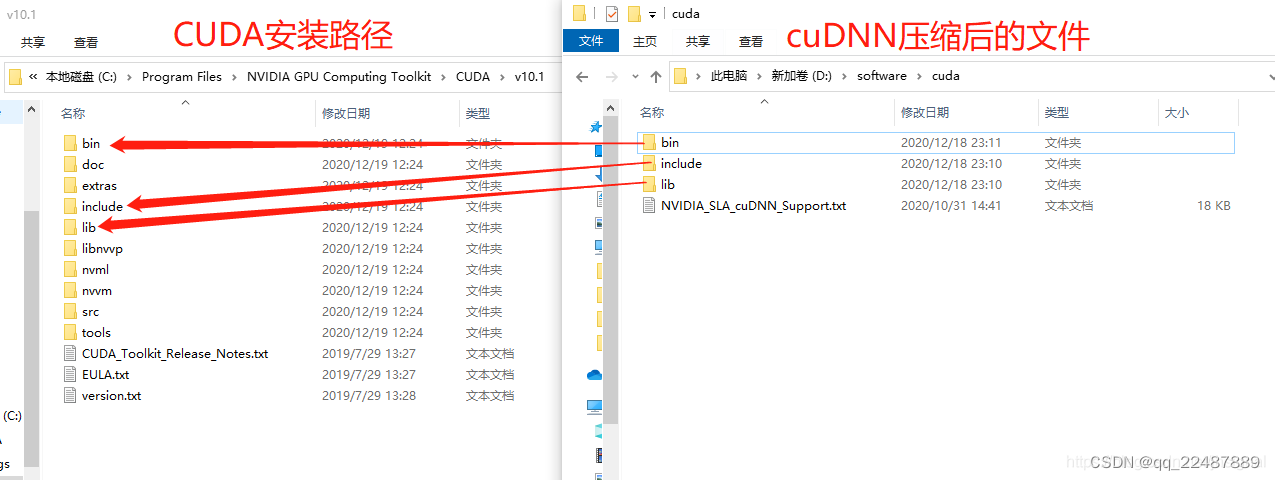
the file in the lib in cudnn, put it directly into the x64 folder in the lib of CUDA, instead of directly putting it into the lib folder in the above picture, it can run normally - 问题:Could not locate zlibwapi.dll. Please make sure it is in your library path!
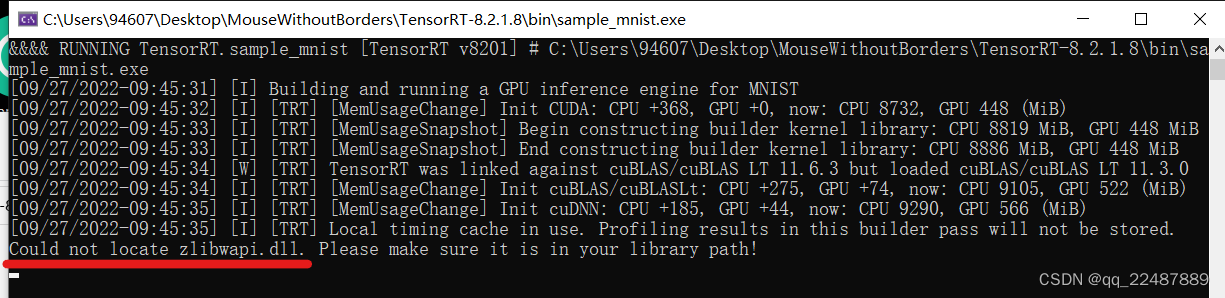
解决:Could not locate zlibwapi.dll. Please make sure it is in your library path - You're done:
1.2.2 Download the corresponding version of OpenCV according to the VS version you use
- Install and configure OpenCV environment parameters under VS2022
Note : When creating a new project, do not check the solution and put it in the same directory.

Add it in "General Properties-Linker-Input-Additional Dependencies", pay attention to ****d .lib, because only d.lib corresponds to the dubug version
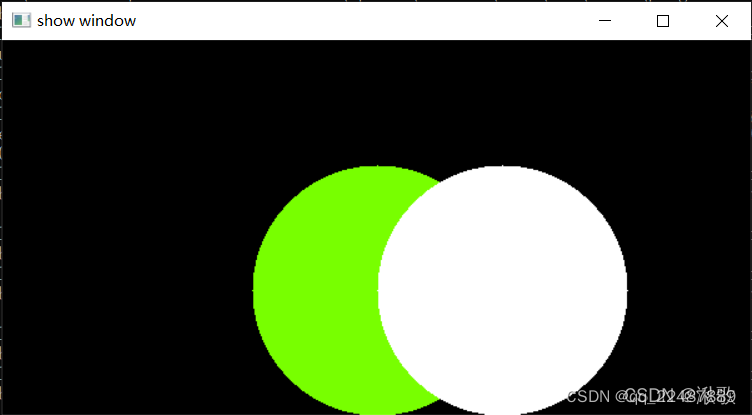
Test code: Detailed process of downloading and configuring OpenCV4.5.5 in Visual Studio 2022
#include<opencv2/core/core.hpp>
#include<opencv2/highgui/highgui.hpp>
#include<opencv2/imgproc.hpp>
#include<iostream>
using namespace cv;
using namespace std;

int main() {


	Mat image = Mat::zeros(300, 600, CV_8UC3);
	circle(image, Point(300, 200), 100, Scalar(0, 255, 120), -100);
	circle(image, Point(400, 200), 100, Scalar(255, 255, 255), -100);
	imshow("show window", image);
	waitKey(0);
	return 0;
}
result:
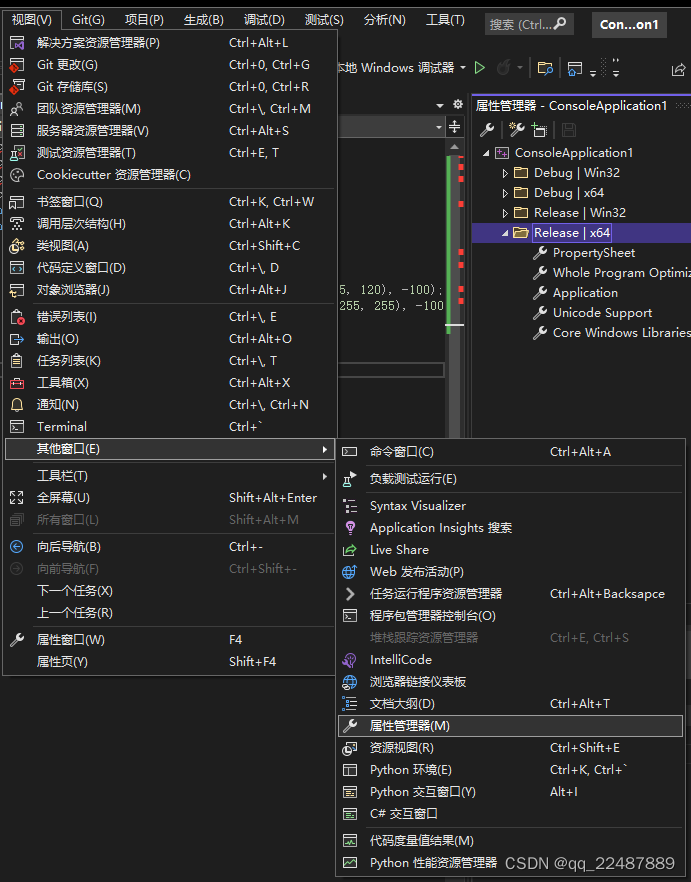
- Configure Release mode : what we configured just now can only run in Debug|x64. Next, we configure the attribute table of Release|x64, which can run in Release|x64.
Find the property manager
VS2022 in visual studio and permanently configure the OpenCV development environment
. Pay attention to configuring the release version. Add in "General Properties-Linker-Input-Additional Dependencies" must be ****.lib, not in the debug version ****d.lib, because only .lib corresponds to the Release version
1.2.3 Compile and generate executable files
Reference:
BiliBili: Win10 Deploy yolov5-v4.0 (C++) using TensorRT (2)
CSDN: Win10 Deploy yolov5-v4.0 (C++) using TensorRT
If you are using your own data set, remember to modify the yololayer.h header file, It is mainly to modify

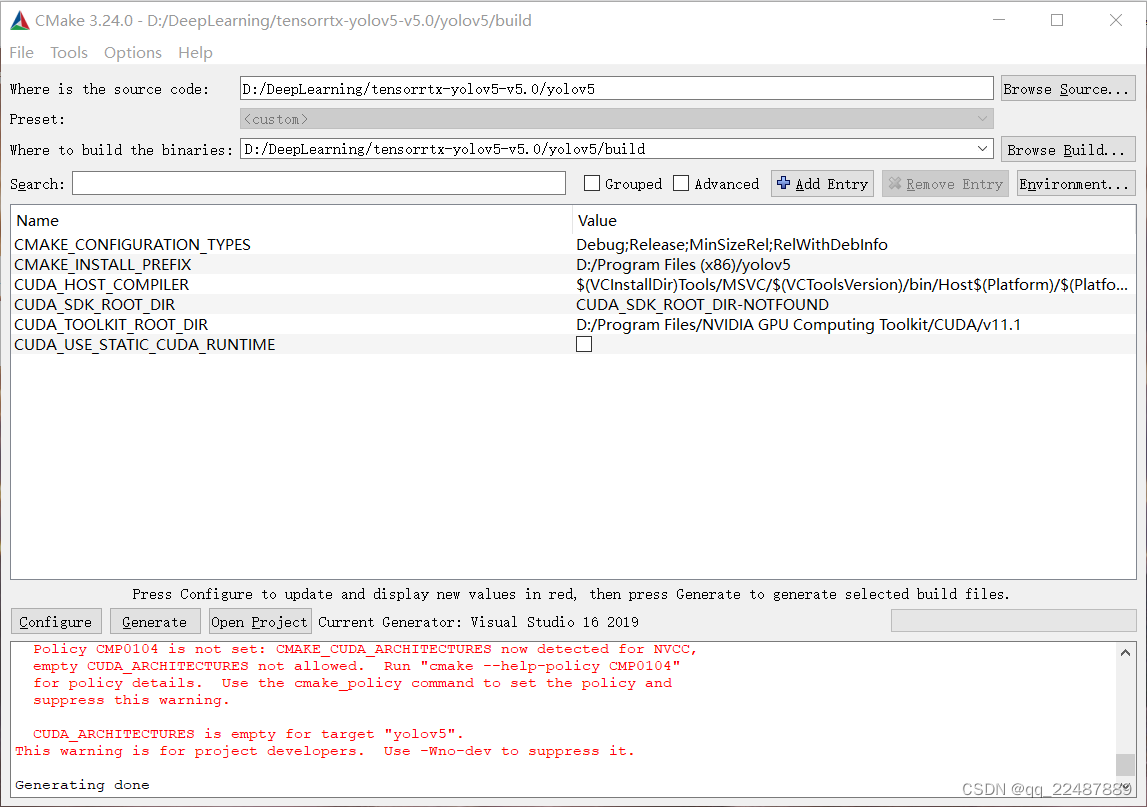
the error record of the classification and recognition box : directly using the CMakeLists of the reference blog will cause errors, and tensorrtx/yolov5/CMakeLists.txt needs to be added
add_definitions(-DAPI_EXPORTS)
Note that it is yolov5-5.0 version, and finally my CMakeLists are as follows: the file directory should correspond to my own
cmake_minimum_required(VERSION 2.8)

#=========================================================
project(yolov5)                                 #1 工程名
set(OpenCV_DIR "D:\\OpenCV\\v455\\opencv\\build")    #2 opencv目录
set(OpenCV_INCLUDE_DIRS ${OpenCV_DIR}\\include) #3
set(OpenCV_LIB_DIRS ${OpenCV_DIR}\\x64\\vc15\\lib) #4
set(OpenCV_Debug_LIBS "opencv_world455d.lib")     #5
set(OpenCV_Release_LIBS "opencv_world455.lib")    #6
set(TRT_DIR "D:\\Program Files\\TensorRT-8.2.1.8")  #7
set(TRT_INCLUDE_DIRS ${TRT_DIR}\\include) #8
set(TRT_LIB_DIRS ${TRT_DIR}\\lib)         #9
set(Dirent_INCLUDE_DIRS "D:\\DeepLearning\\tensorrtx-yolov5-v5.0\\yolov5")  #10
#=========================================================

add_definitions(-std=c++11)
add_definitions(-DAPI_EXPORTS)
option(CUDA_USE_STATIC_CUDA_RUNTIME OFF)
set(CMAKE_CXX_STANDARD 11)
set(CMAKE_BUILD_TYPE Debug)

set(THREADS_PREFER_PTHREAD_FLAG ON)
find_package(Threads)

# setup CUDA
find_package(CUDA REQUIRED)
message(STATUS "    libraries: ${CUDA_LIBRARIES}")
message(STATUS "    include path: ${CUDA_INCLUDE_DIRS}")

include_directories(${CUDA_INCLUDE_DIRS})

####
enable_language(CUDA)  # add this line, then no need to setup cuda path in vs
####
include_directories(${PROJECT_SOURCE_DIR}/include) #11
include_directories(${TRT_INCLUDE_DIRS}) #12
link_directories(${TRT_LIB_DIRS}) #13
include_directories(${OpenCV_INCLUDE_DIRS}) #14
link_directories(${OpenCV_LIB_DIRS}) #15
include_directories(${Dirent_INCLUDE_DIRS}) #16


# -D_MWAITXINTRIN_H_INCLUDED for solving error: identifier "__builtin_ia32_mwaitx" is undefined
set(CMAKE_CXX_FLAGS "${CMAKE_CXX_FLAGS} -std=c++11 -Wall -Ofast -D_MWAITXINTRIN_H_INCLUDED")

# setup opencv
find_package(OpenCV QUIET
    NO_MODULE
    NO_DEFAULT_PATH
    NO_CMAKE_PATH
    NO_CMAKE_ENVIRONMENT_PATH
    NO_SYSTEM_ENVIRONMENT_PATH
    NO_CMAKE_PACKAGE_REGISTRY
    NO_CMAKE_BUILDS_PATH
    NO_CMAKE_SYSTEM_PATH
    NO_CMAKE_SYSTEM_PACKAGE_REGISTRY
)

message(STATUS "OpenCV library status:")
message(STATUS "    version: ${OpenCV_VERSION}")
message(STATUS "    lib path: ${OpenCV_LIB_DIRS}")
message(STATUS "    Debug libraries: ${OpenCV_Debug_LIBS}")
message(STATUS "    Release libraries: ${OpenCV_Release_LIBS}")
message(STATUS "    include path: ${OpenCV_INCLUDE_DIRS}")

add_executable(yolov5 ${PROJECT_SOURCE_DIR}/yolov5.cpp ${PROJECT_SOURCE_DIR}/common.hpp ${PROJECT_SOURCE_DIR}/yololayer.cu ${PROJECT_SOURCE_DIR}/yololayer.h)   #17
target_link_libraries(yolov5 "nvinfer" "nvinfer_plugin") #18
target_link_libraries(yolov5 debug ${OpenCV_Debug_LIBS}) #19
target_link_libraries(yolov5 optimized ${OpenCV_Release_LIBS}) #20
target_link_libraries(yolov5 ${CUDA_LIBRARIES}) #21
target_link_libraries(yolov5 Threads::Threads)
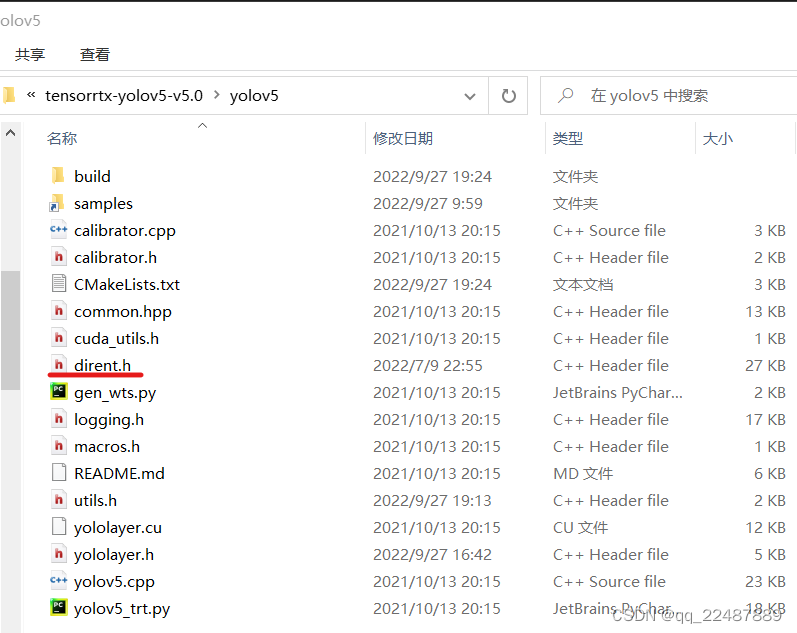
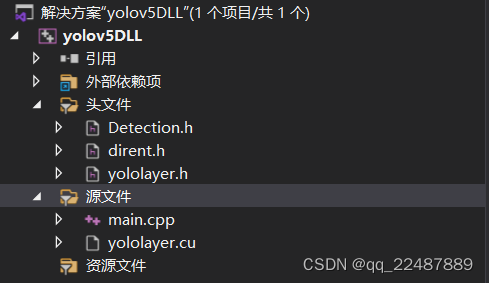
- The final project structure is as follows:
- The difference between Debug and Release modes: What is the meaning of the Debug and Release options in the compilation toolbar?
Debug is usually called the debug version, which contains debugging information and does not make any optimizations, which is convenient for programmers to debug programs. Release is called a release version, which is often optimized to make the program optimal in code size and running speed, so that users can use it well. Debug has a large amount of debugging code, and the corresponding runtime library is required when running. The release mode program is compact and does not contain debugging code and information, and can be run directly (if no runtime library is required).
By the way, add the knowledge of gcc and g++,
GCC's DEBUG and release version compilation method
1.2.4 wts file to generate engine file
- Use the command for the previously generated .wts file: exe file and wts specific name and folder to modify by yourself. You
can also directly copy the weight file to the generated directory (Debug or Release) and execute as follows
yolov5.exe -s best20220918.wts best20220918.engine s
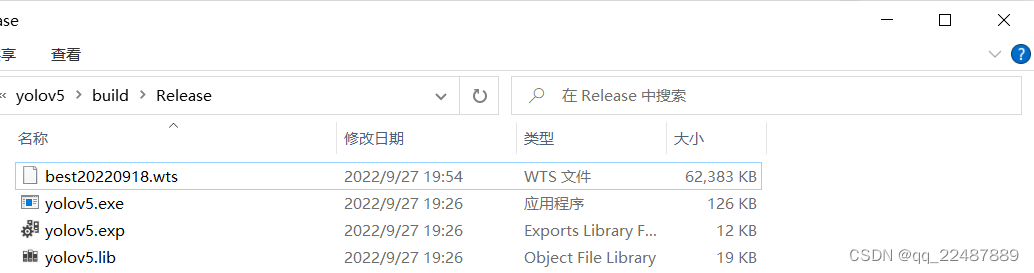
Generated successfully:

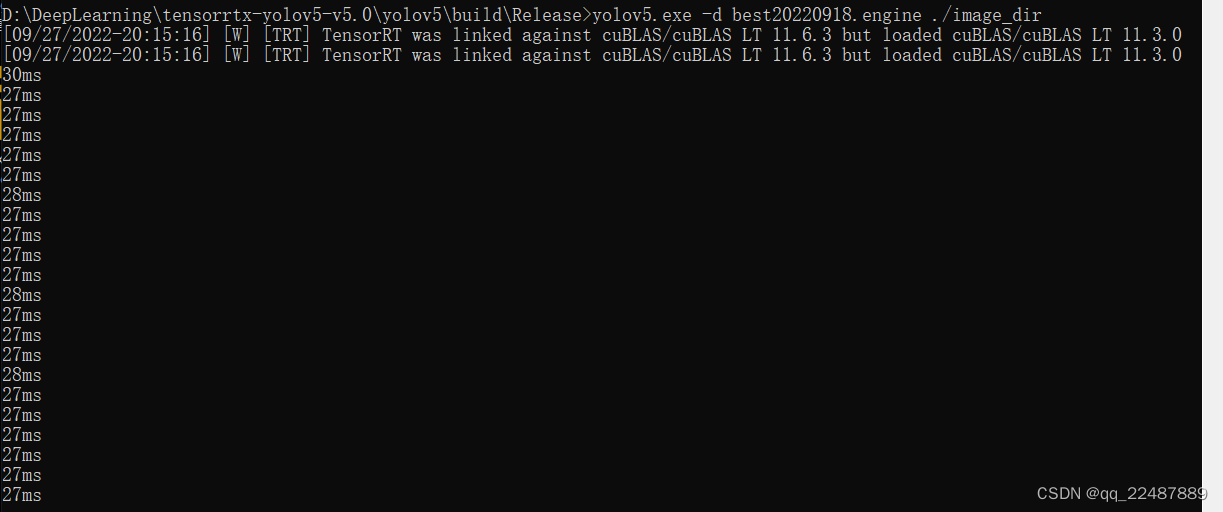
- Test: model prediction
Create a new folder directly in the place just now to store the predicted image,

then enter the command: process the image in the image_dir folder, you can see the processing speed, and the processed image will display the identification box and the id of the label
yolov5.exe -d best20220918.engine ./image_dir
2. Model packaging
Encapsulate the model into the form of a dynamic link library (.dll), so as to be called in Qt.
The knowledge used to improve one's own knowledge system:
the difference between VS hollow project, win32 project, and console program
2.1 VS2019 creates dll and calls dynamic library method
The content of this section is relatively long, and a new article has been written. For the content, please see: VS2019 - Writing and Calling Dynamic Libraries References
in this section:
CSDN: C++ Dynamic Link Library (DLL) Creation and Calling in VS2019 Environment
BIliBili: Visual Studio 2019 -Write C++ dynamic link library
BiliBili: Visual Studio 2019-explicitly call C++ dynamic library
2.2 Encapsulate yolov5 into an export class to generate a dynamic link library dll
For the content of this section, please see: (win10) yolov5-v5.0 export dynamic link library-TensorRT+VS2019+CMake
This section adds reference reference: CSDN: yolov5 dynamic link library DLL export (TensorRT)
BiliBili: win10 use TensorRT to deploy yolov5 -v4.0 (C++) (3)
The above uses yolov5-v4.0, and mine is yolov5-v5.0, so the code needs to be changed according to its own version
2.3 Check whether the packaged model can run in VS
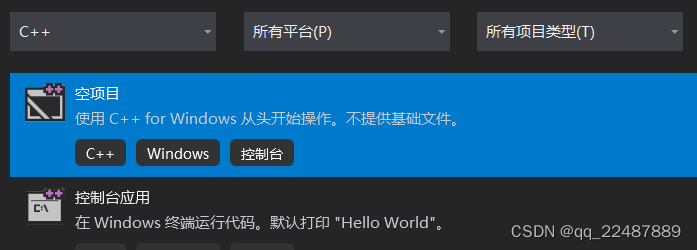
- create empty project
- Put the required files into the project, and the files can not be placed in the folder included in the properties
- Documents needed

- The project content is as follows: main.cpp is written by myself, refer to: 3. Test
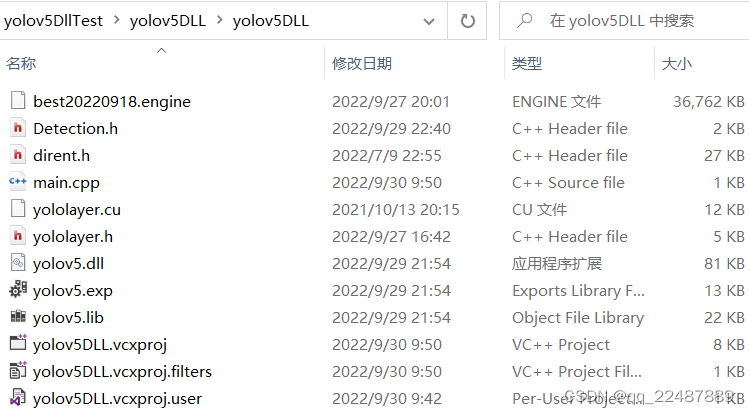
- The project structure and code are as follows: Note that the properties should be the same as the export properties of the dll, mine are all implemented under Release | x64
//main.cpp
#pragma once
#include <iostream>
#include <opencv2/opencv.hpp>
#include <opencv2/dnn.hpp>
#include "Detection.h"
#include "dirent.h"
#include "yololayer.h"

using namespace std;

int main()
{


	Connect connect;
	YOLOV5* yolo_dll = connect.Create_YOLOV5_Object();

	cv::VideoCapture capture(0);
	if (!capture.isOpened()) {


		std::cout << "Error opening video stream or file" << std::endl;
		return -1;
	}
	yolo_dll->Initialize("./best20220918.engine", 0);
	while (1)
	{


		cv::Mat frame;
		capture >> frame;
		vector<cv::Rect> Boxes;
		vector<const char*> ClassLables;

		yolo_dll->Detecting(frame, Boxes, ClassLables);
		cv::imshow("output", frame);
		cv::waitKey(1);
	}
	connect.Delete_YOLOV5_Object(yolo_dll);
	return 0;
}
- The configuration environment needs to be configured, not necessarily every line, I am one size fits all
#将此路径加入项目属性包含目录中
D:\DeepLearning\tensorrtx-yolov5-v5.0_dll\yolov5
D:\Program Files\TensorRT-8.2.1.8\include
D:\Program Files\NVIDIA GPU Computing Toolkit\CUDA\v11.1\include
D:\OpenCV\v455\opencv\build\include
D:\OpenCV\v455\opencv\build\include\opencv2
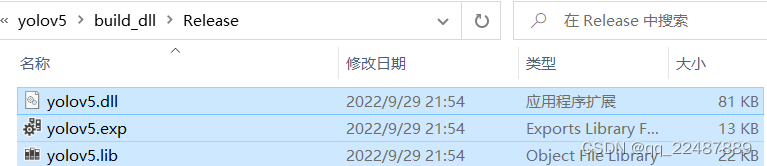
#将此路径加入项目属性的库目录中,也就是我们刚刚生成dll的文件目录
#TensorRT的lib文件夹不分x64和Win32,OpenCV只有x64,CUDA分x64和Win32
D:\DeepLearning\tensorrtx-yolov5-v5.0_dll\yolov5\build_dll\Release
D:\Program Files\TensorRT-8.2.1.8\lib
D:\OpenCV\v455\opencv\build\x64\vc15\lib
D:\Program Files\NVIDIA GPU Computing Toolkit\CUDA\v11.1\lib\x64
D:\Program Files\NVIDIA GPU Computing Toolkit\CUDA\v11.1\lib\Win32
#在输入链接器添加依赖库
yolov5.lib
#前5个(一般不用)是CUDA/vxx.x/lib/Win32拥有的,5-8是x64所拥有的
#再后面除了opencv以外都是TensorRT拥有的
cuda.lib
cudadevrt.lib
cudart_static.lib
OpenCL.lib
cudart.lib
cublas.lib
cudnn.lcucuda
cudnn64_8.lib
nvinfer.lib
nvinfer_plugin.lib
nvonnxparser.lib
nvparsers.lib
opencv_world455.lib
opencv_world455d.lib //opencv版本不同就不一样
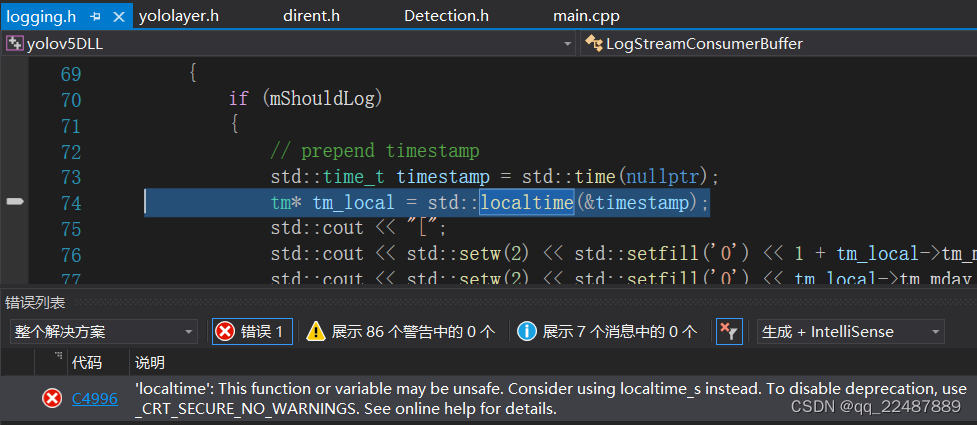
- Error resolution
1. 'localtime': This function or variable may be unsafe. Consider using localtime_s instead.
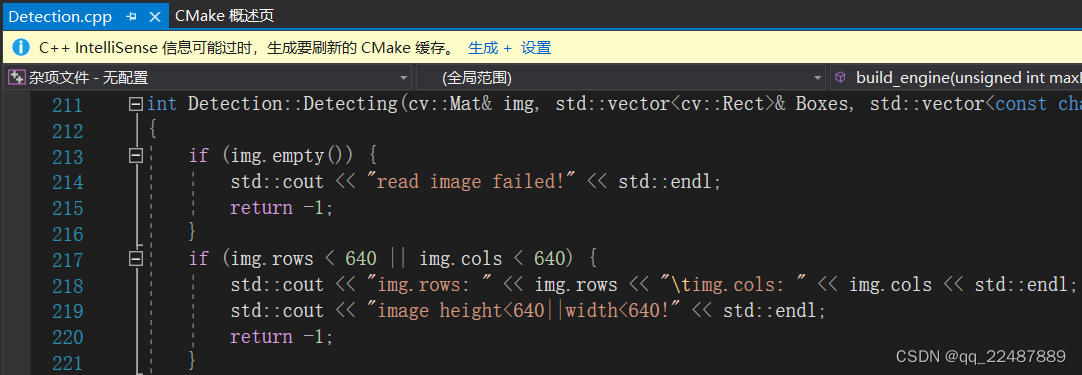
2. The operation is successful, but there are still problems:
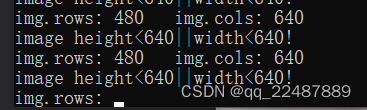
the problem lies in: Detection.cpp, just adjust it according to your own size, I changed it becameif (img.rows < 320 || img.cols < 320)
- Run successfully:

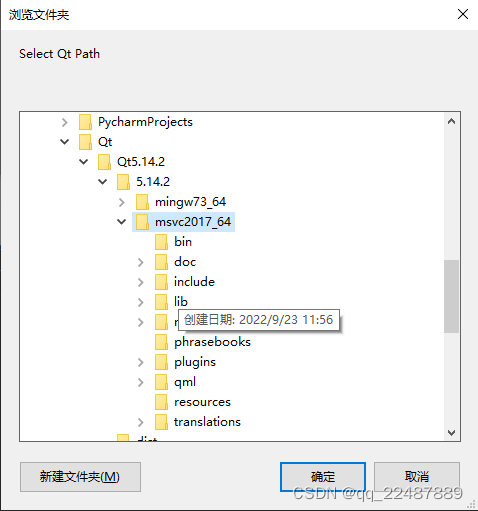
3. Use QT deployment
Method 1 (I didn't use it): Visual Studio 2019 configures the Qt5.14.2 development environment and deploys it, refer to: Five of this blog, using Qt to deploy
this method Note : the compiler (MinGW or MSVC) used in Qt must be compiled with The compiler used by the library is the same! ! !
- Environment configuration reference, look at it in comparison: VS2019 Qt development environment construction and configuration
QT from entry to entry (1) - Qt5.14.2 installation tutorial and VS2019 environment configuration
Visual Studio 2019 configuration qt development environment
If you need to update Qt components, please refer to: Add, update, and remove QT components
The location of the VS configuration plug-in is as follows:
The header files and library directories required by QT refer to: How to add QT header files and library directories in VS2017 and how to set the relative path of the VS include directory
porting To use on qt creator, refer to: visual studio 2019 configure qt development, and transplant to use on qt creator - My method : package the project of the test dll file in section 2.3 , and then use QT to call and read the parameters. Proceed as follows:
3.1 Visual Studio 2019's project is packaged and passed parameters with Qt
3.1.1 Modify the main.cpp file to obtain parameters
Reference: Common operations and detailed explanations of the Rect() function in OpenCV (including drawing examples) + Rectangle() function usage Select parameters according to your needs.
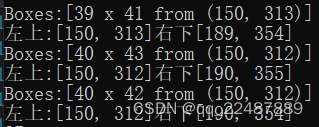
The code I added is as follows:
for (auto r : Boxes) {


			cout << "Boxes:" << r << endl;
			cout << "左上:" << r.tl() << "右下" << r.br() << "\t";
		}
The output is shown in the figure: It can be seen that the parameters of Boxes are [width × length from upper left corner]
3.1.2 Package the VS project
- First modify the properties of the project:
vs2019 generates an exe containing dll
https://blog.csdn.net/love521963/article/details/107326320
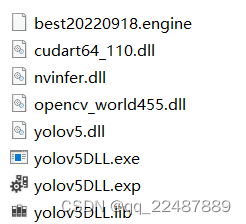
and then generates a solution Because the environment in which I tested the dll is Release | x64 environment, I changed it Create multithreading (/MT) , click Generate Solution, and find the exe file according to the project path below:

- Then go into the folder and add the files, finally all the content needed for the folder is as follows:
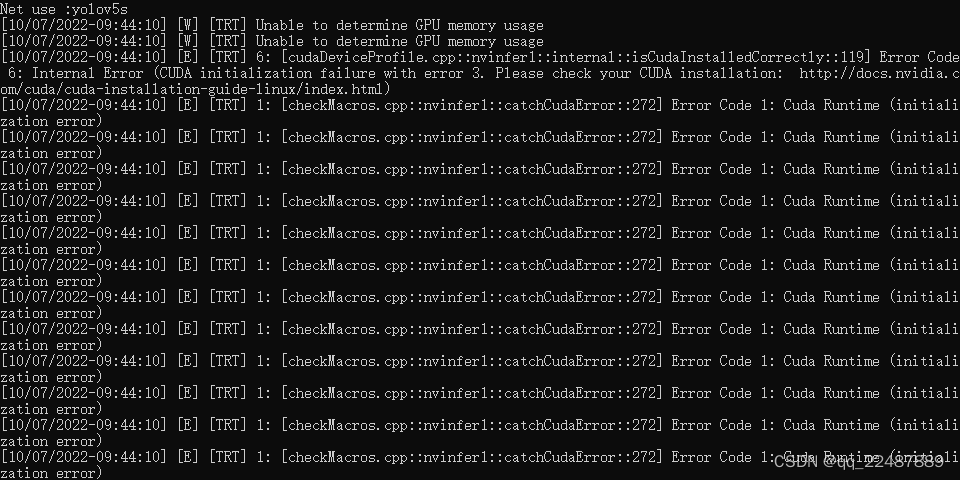
- The following problems will occur on other people's computers: This is because the running computer must have the same environment as the computer that configures the environment