Table of contents
Conda installation using miniconda
There are two ways to switch the conda image source:
Modify the configuration file:
Conda installation using miniconda
conda install jupyterIf the mirror is not easy to use, switch the conda mirror source
There are two ways to switch the conda image source:
1.
[shuqiq@shuqiq bin]$ ./conda config --add default_channels https://mirrors.tuna.tsinghua.edu.cn/anaconda/pkgs/main
[shuqiq@shuqiq bin]$ ./conda config --add default_channels https://mirrors.tuna.tsinghua.edu.cn/anaconda/pkgs/r
[shuqiq@shuqiq bin]$ ./conda config --add default_channels https://mirrors.tuna.tsinghua.edu.cn/anaconda/pkgs/msys2
#查看一下源
[shuqiq@shuqiq bin]$ ./conda config --show
#设置安装包时,显示镜像来源,建议显示
[shuqiq@shuqiq bin]$ ./conda config --set show_channel_urls yes
#恢复默认源
[shuqiq@shuqiq bin]$ ./conda config --remove-key channels
#删除一条镜像源
[shuqiq@shuqiq bin]$ ./conda config --remove-key channels
2.
Execute the conda config command once to automatically create the .condarc file, that is, the .condarc file appears in the /home/user directory
Modify the configuration file content:
[shuqiq@shuqiq ~]$ vi ./.condarc

show_channel_urls: true
ssl_verify: true
channels:
  - https://mirrors.tuna.tsinghua.edu.cn/anaconda/cloud/msys2/
  - https://mirrors.tuna.tsinghua.edu.cn/anaconda/cloud/conda-forge
  - https://mirrors.tuna.tsinghua.edu.cn/anaconda/pkgs/free/
  - defaults
set password:
Need to use ipython
Install ipython linux Install ipython_ Shuqi Q's blog - CSDN blog ![]() https://blog.csdn.net/qq_53368181/article/details/130685413
https://blog.csdn.net/qq_53368181/article/details/130685413
[shuqiq@shuqiq bin]$ ./ipython
In [1]: from notebook.auth import passwd
In [2]: passwd()
Enter password:
Verify password:
Out[2]: 'sha1:7a75f56c1667:34209c98504382b676d726efb9ba7af95a28465f'
The returned sha1 string of hash values should be used when modifying the configuration file
The password can also be set using from IPython.lib import passwd
Modify the configuration file:
Open配置文件jupyter_notebook_config.py,这个文件在用户的家目录下的.jupyter目录里
Append directly to the end, or back up a copy of the original file
[shuqiq@shuqiq ~]$ vi /home/shuqiq/.jupyter/jupyter_notebook_config.py

# Nginx访问时会出现跨域访问,需要在这里允许
c.NotebookApp.allow_origin = '*'
# 禁止随意修改密码
c.NotebookApp.allow_password_change = False
# 是否允许远程访问
c.NotebookApp.allow_remote_access = True
# IP自己的ip
c.NotebookApp.ip = 'ip'
# 端口,自定义
c.NotebookApp.port = 9820
# 工作目录,自定义
c.NotebookApp.notebook_dir = '/jupyter/'
# 启动Jupyter Notebook之后是否打开浏览器
c.NotebookApp.open_browser = False
# 客户端打开Jupyter Notebook的密码哈希值
c.NotebookApp.password = 'sha1:7a75f56c1667:34209c98504382b676d726efb9ba7af95a28465f'
start up
[shuqiq@shuqiq bin]$ ./jupyter notebook
#root用户使用下面的命令启动
jupyter notebook --allow-root
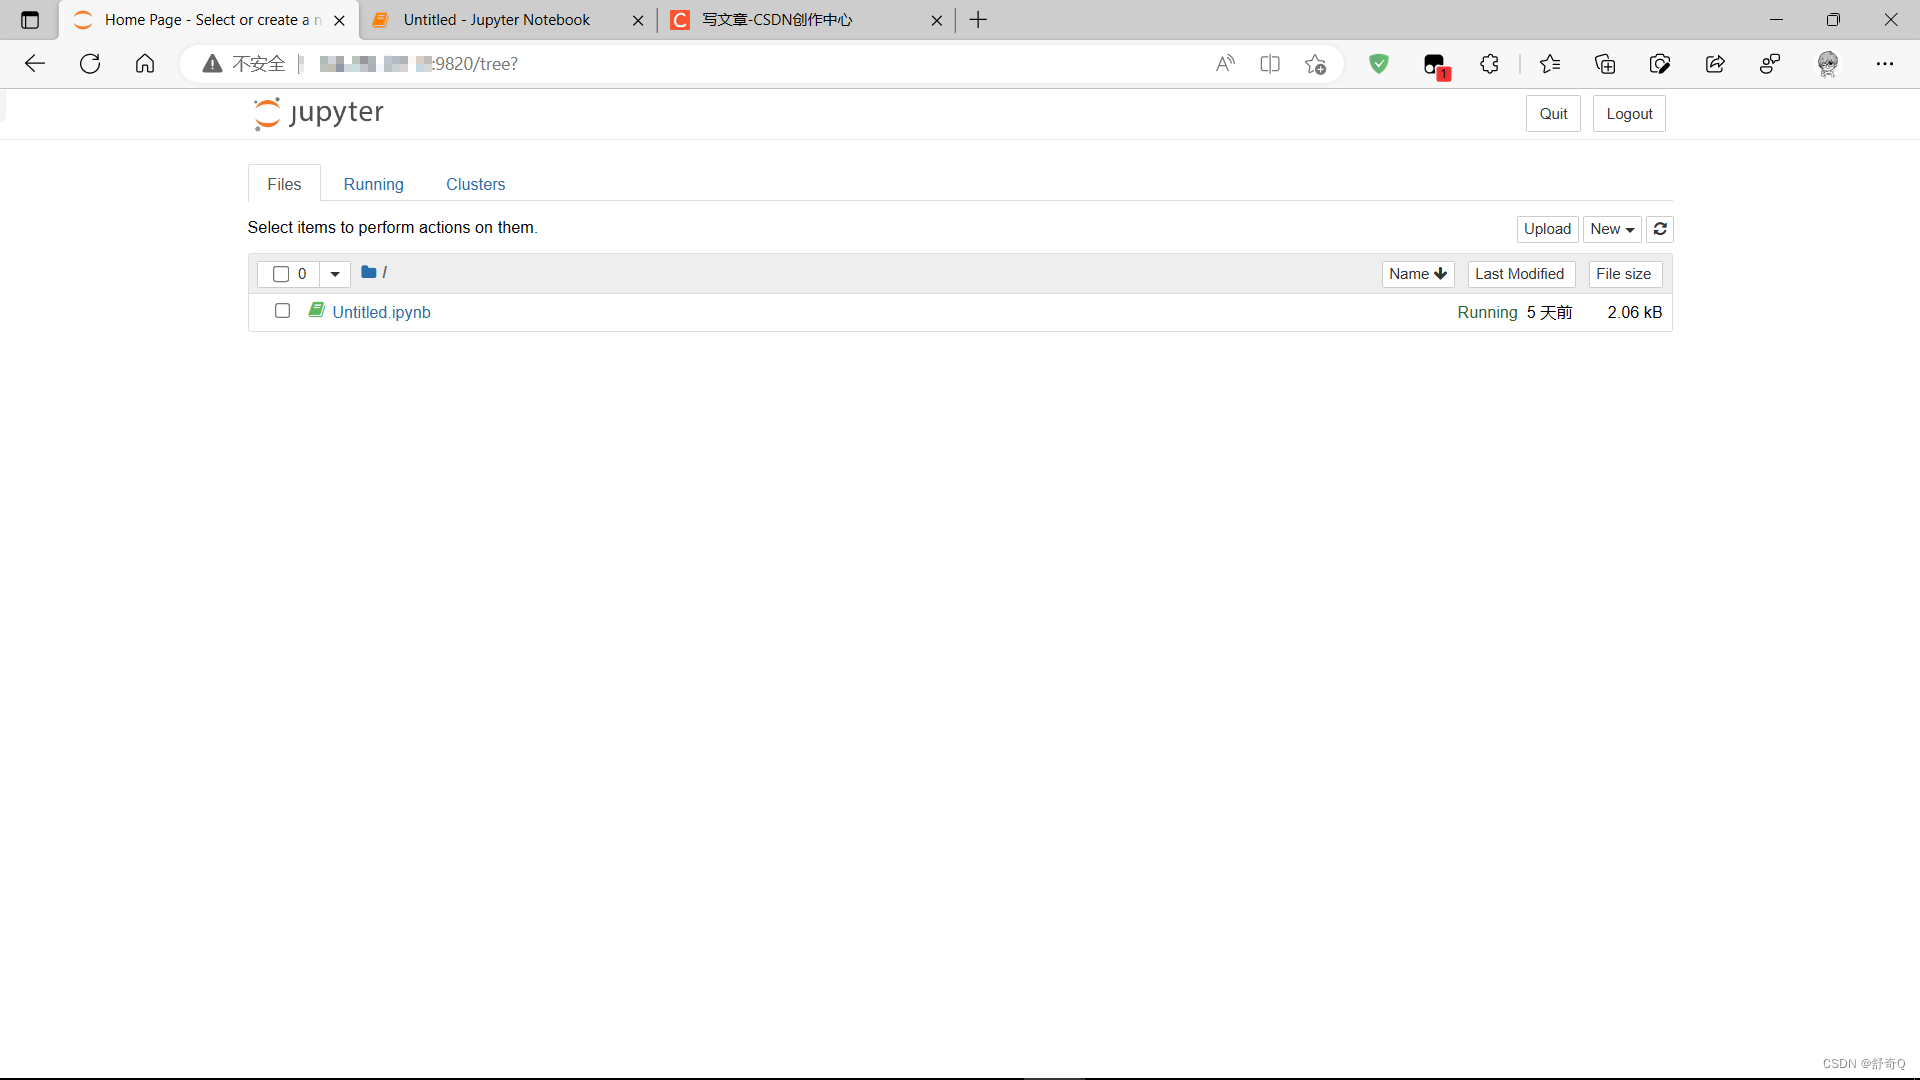
Go to the browser to view, the following figure proves success:

If jupyter notebook cannot be opened, check your firewall
#查看防火墙
systemctl status firewalld
#关闭防火墙命令
sudo systemctl stop firewalld
Or the ip has not been modified
Or set the password incorrectly and use from IPython.lib import passwd in ipython to reset the password
Close process:
使用 ctrl+c 然后输入 y 结束
#lsof是需要安装的插件,是查看端口被哪个进程占用
[shuqiq@shuqiq ~]$ kill -9 `lsof -n -i:9820 | grep jupyter | awk '{print $2}'`
###
[shuqiq@shuqiq ~]$ kill -9 `ps -aux | grep jupyter | grep -v "grep" | awk '{print $2}'`