1. Open Microsoft SQL Server Management Studio
Find the icon on the desktop  , double-click to run
Open Microsoft SQL Server Management Studio 17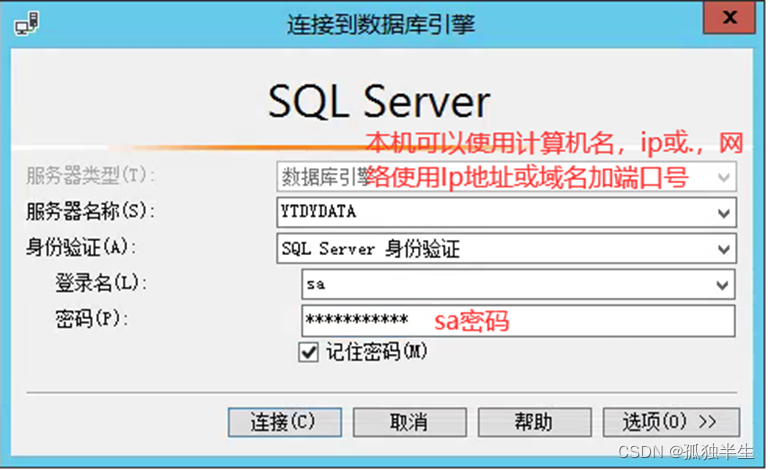
Enter the server name, select SQL Server authentication, sa and sa password, you can check the remember password for future login, click connect, and enter the Microsoft SQL Server Management Studio manager
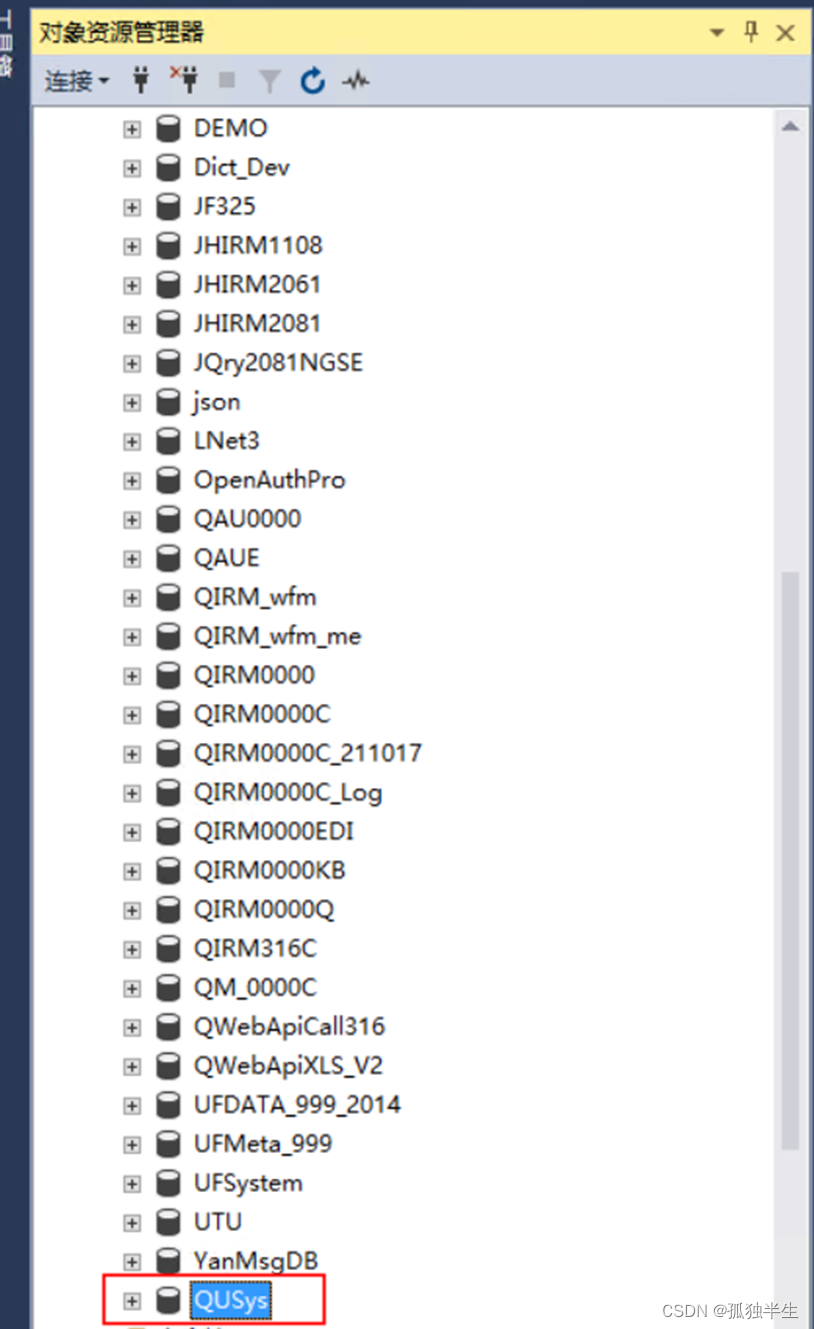
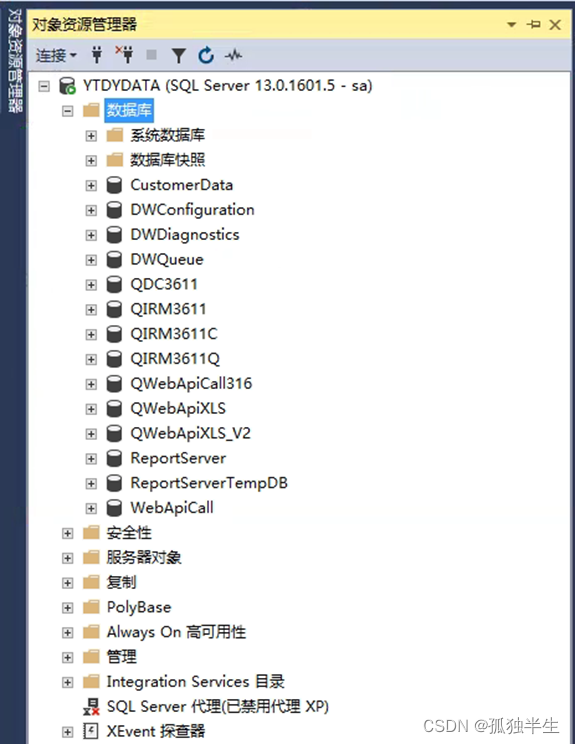
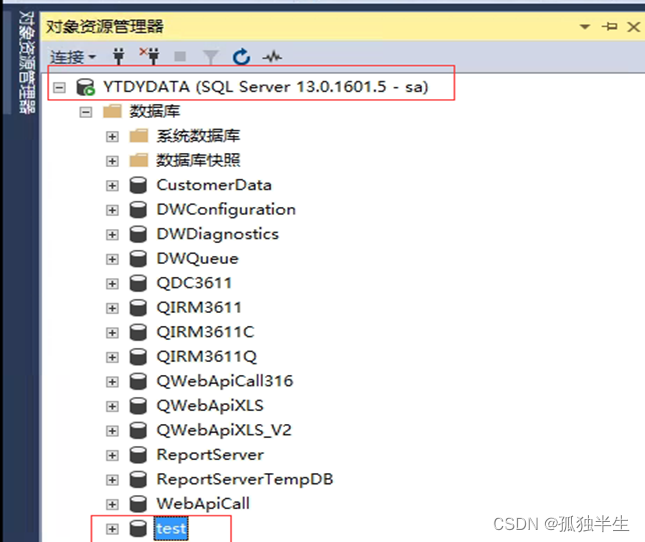
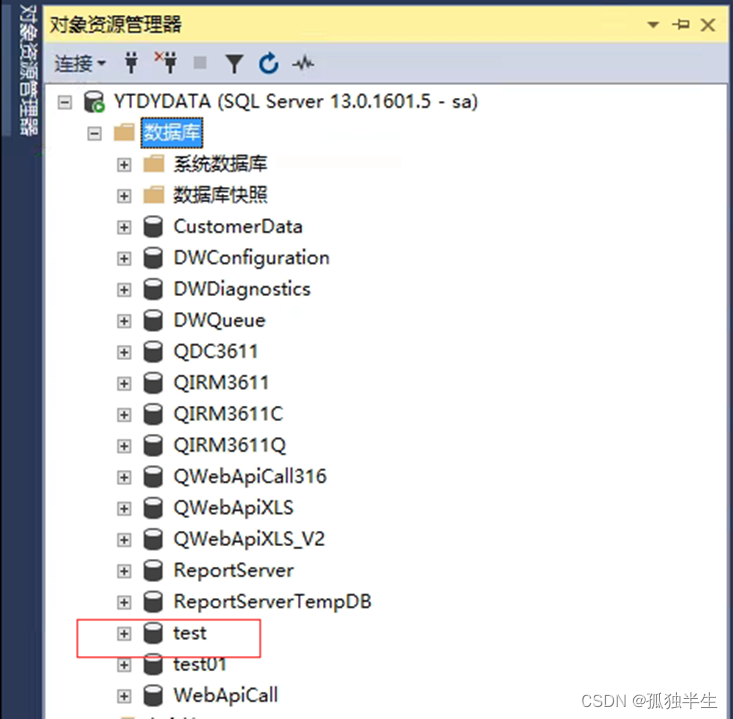
On the left is the object explorer tree directory
expand database
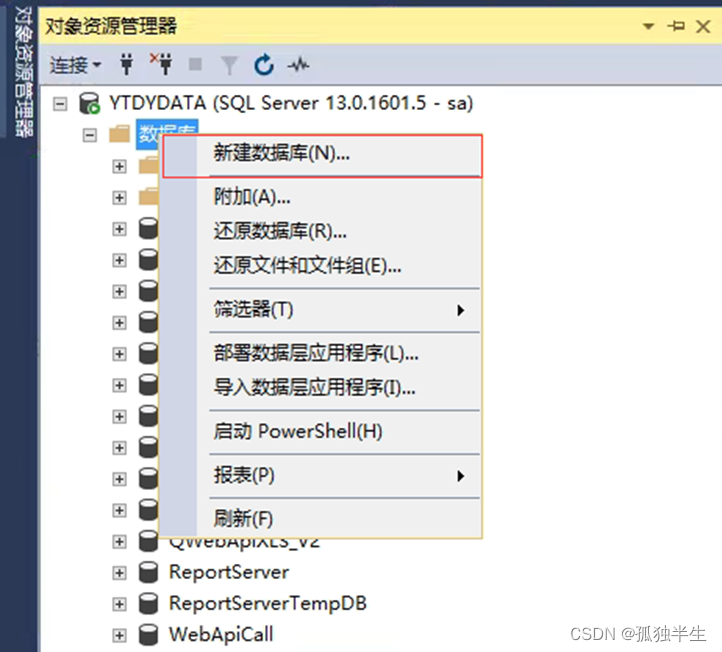
2. Create a new database
Click on the database, right click → New Database
Open the New Database dialog box, enter the database name test

Click OK, the database test is successfully created, as shown in the figure

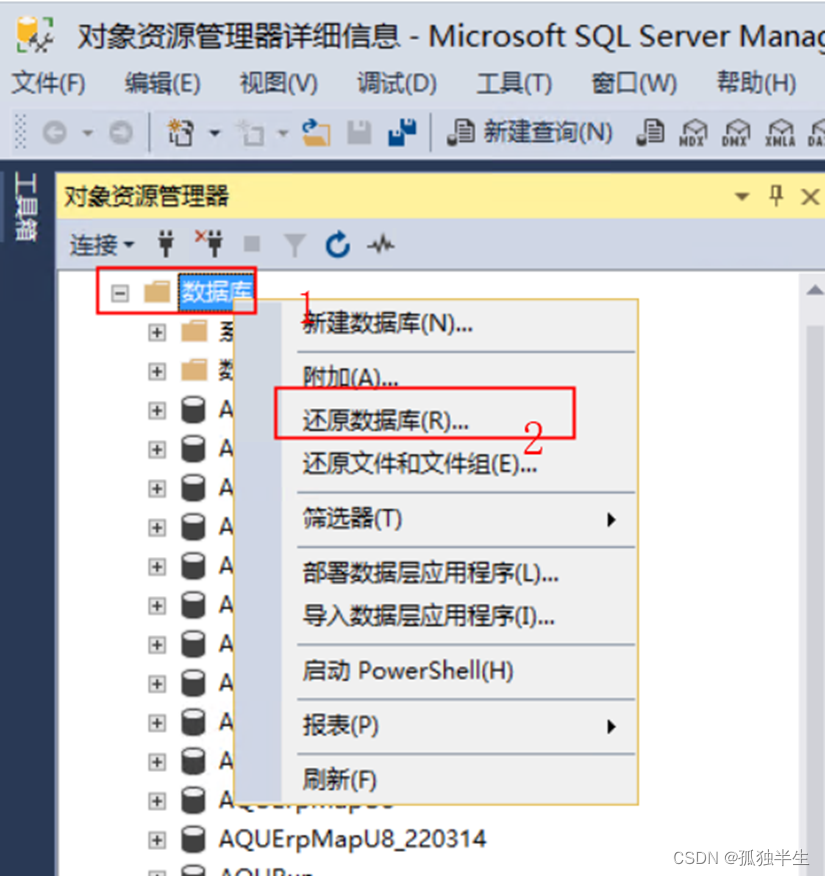
3. Separate the database
Select the database to be detached, right click → task → detach

Open the Detach Database dialog
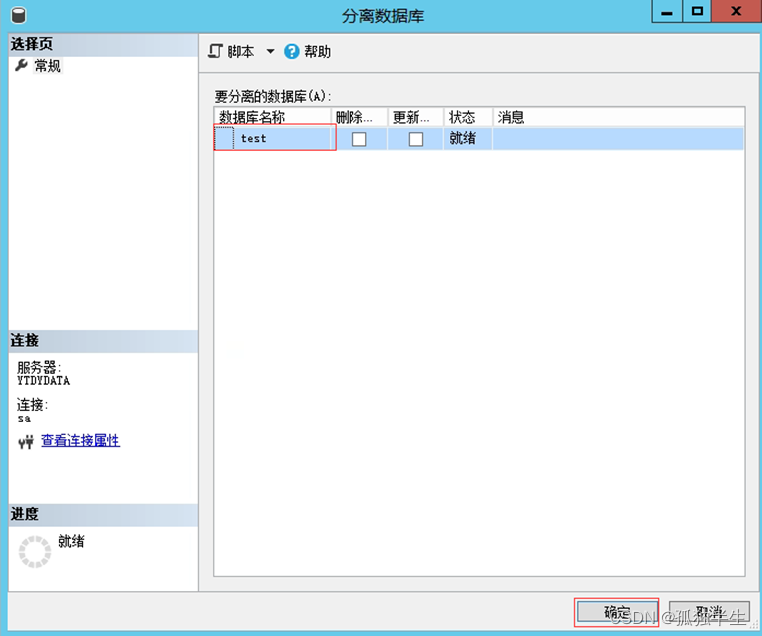
Check the name of the database to be detached, click OK

The database is separated successfully, as shown above
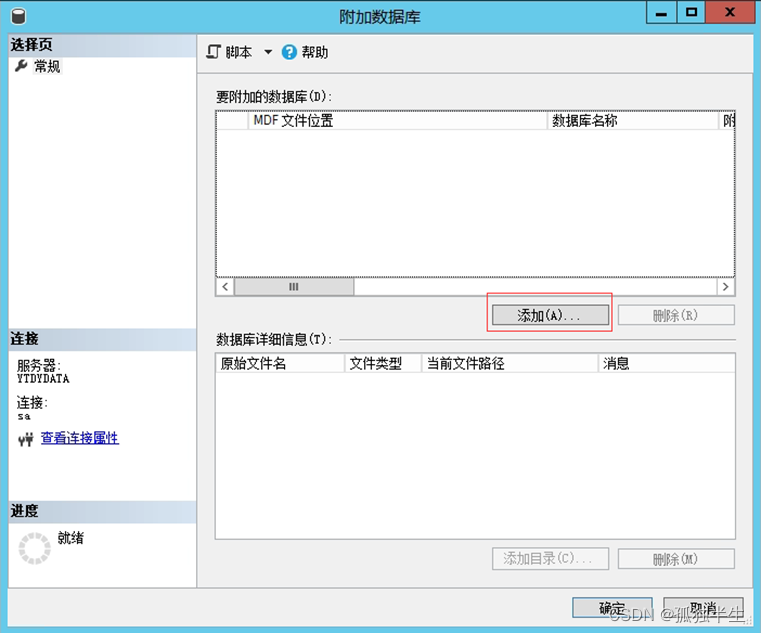
4. Additional database
Click on the database, right click → Attach

Open the Additional Database dialog box, click Add
Open the storage path of the database to be attached, select the database to be attached, double-click to select or click the OK button

Check the path of the attached database
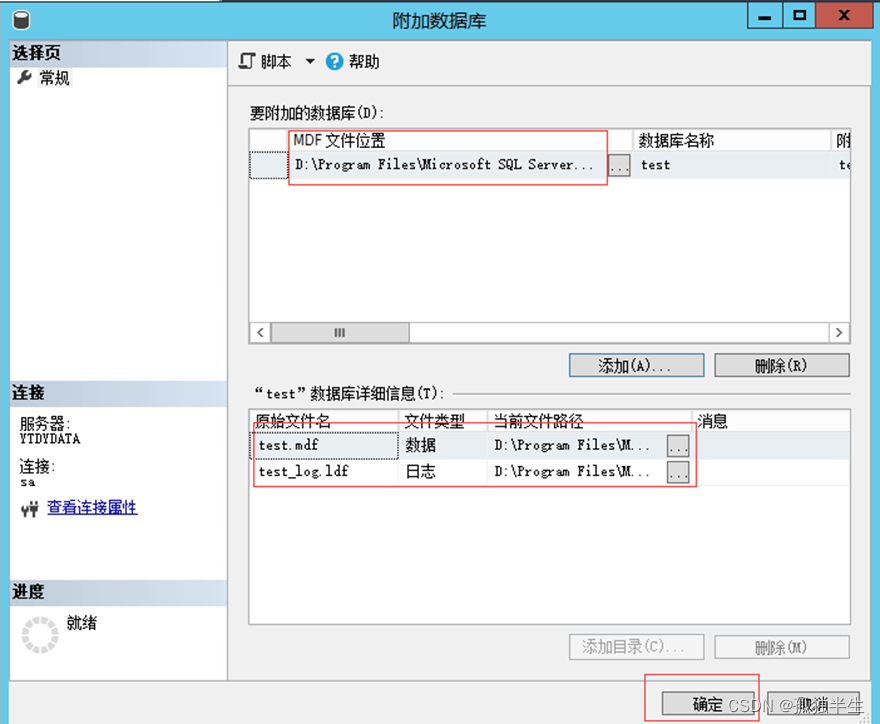
Click OK, the database is attached successfully, as shown in the figure below
5. Back up the database
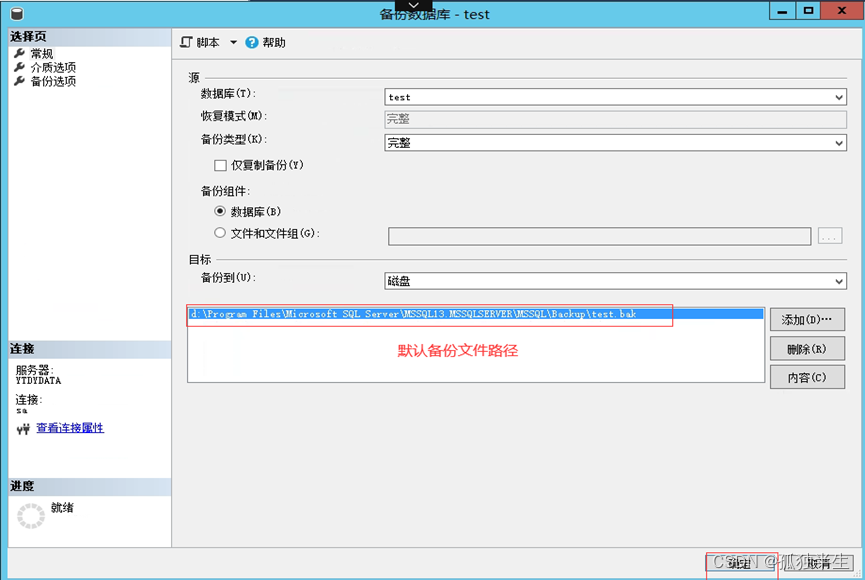
Click to select the database to be backed up, right-click Task→Backup

Open the backup database dialog box, which shows the default backup file path, or the last backup file storage path, if you do not need to modify the backup file path or backup file name, just click OK to overwrite the last backup.
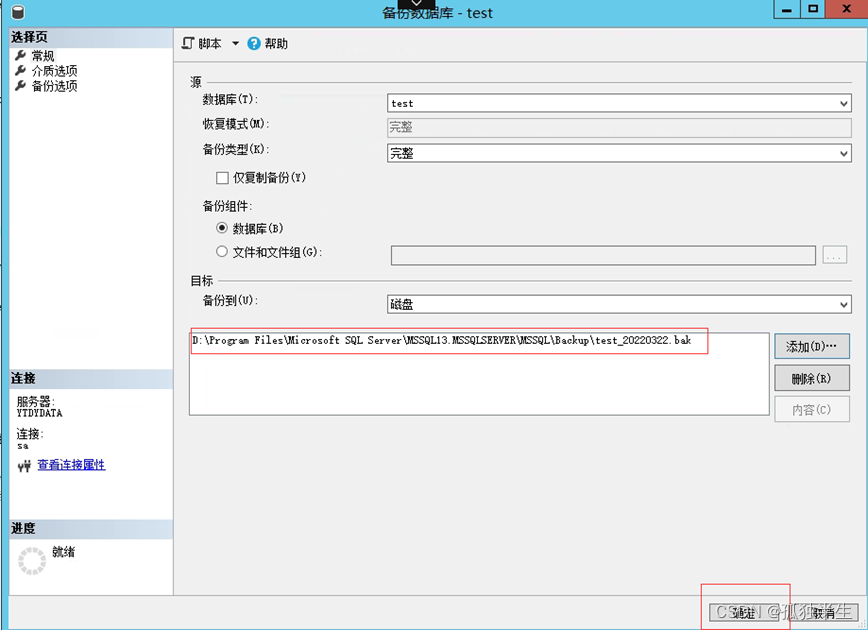
If you need to modify the backup file path or backup file name, first click Delete to delete the current backup file path

then click add

Find the path to store the backup file, and name the backup file. Generally, add the backup date to the database name. If you need to back up several copies on the same day, add the time after the date to distinguish them. Finally, don’t forget to add the extension of the backup file.bak , click OK, as shown in the figure below

click ok

Return to the backup database dialog box, check the backup file path and folder name, click OK
A dialog box prompting that the backup was successfully completed

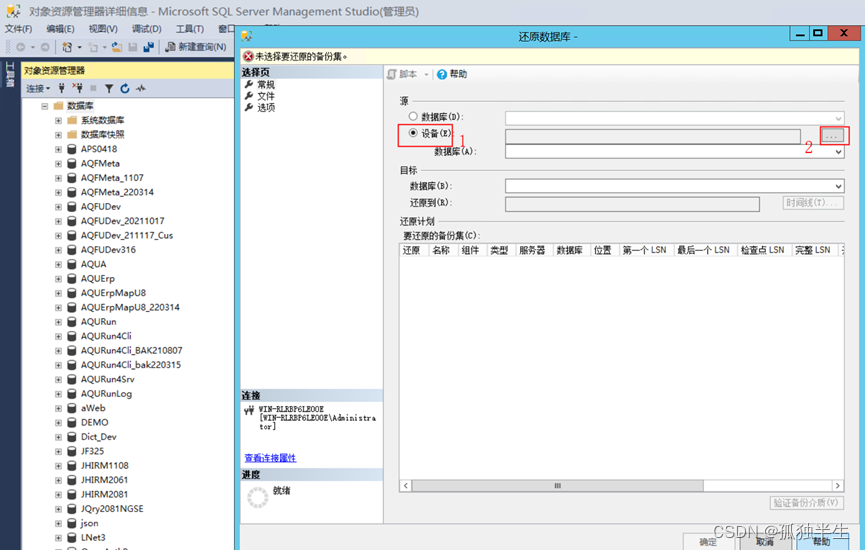
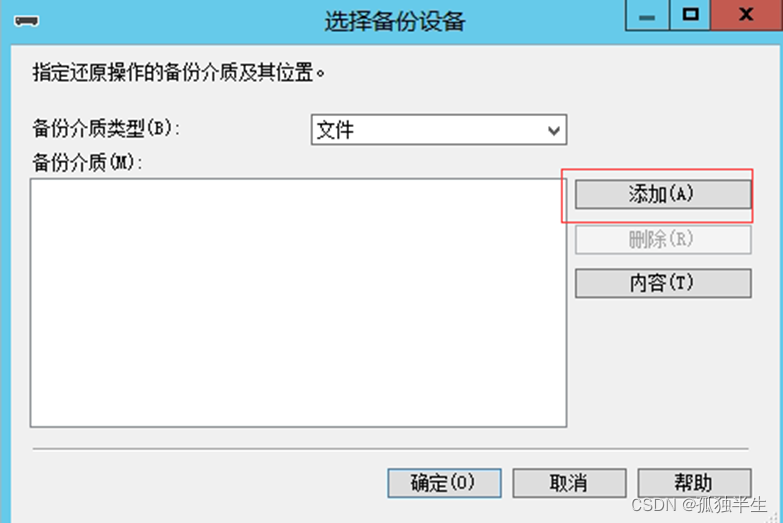
6. Restore the database
Click to select the database to restore, right click→task→restore→database

Open the Restore Database dialog box, click Devices, click...
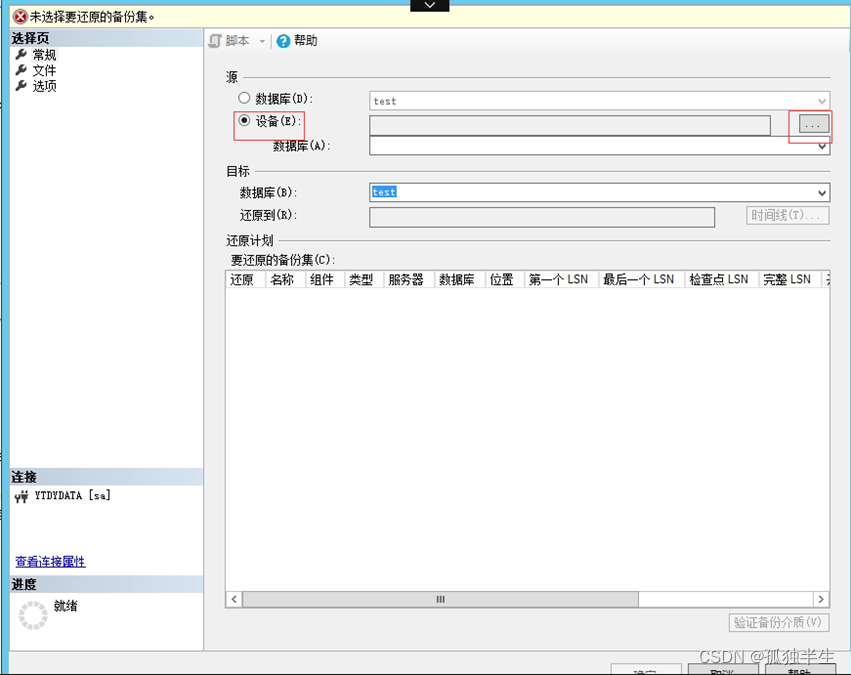
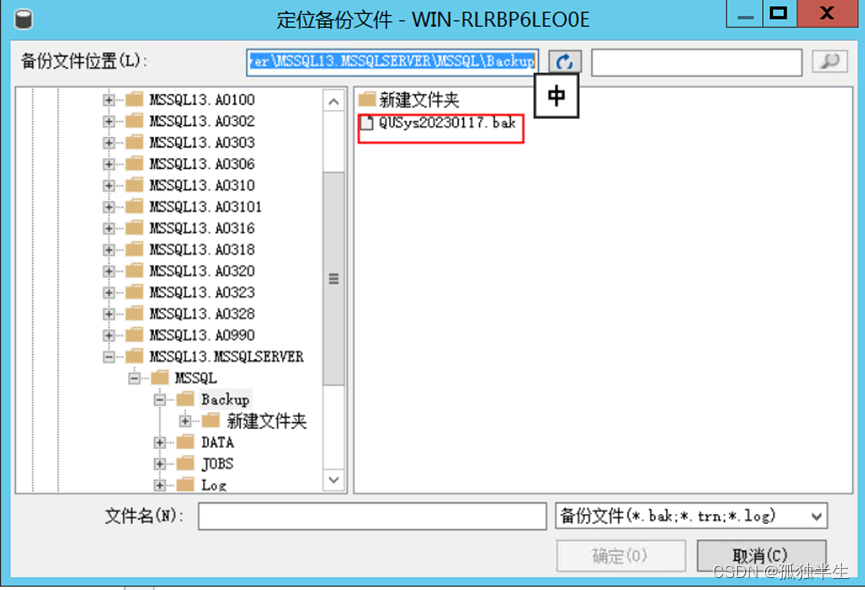
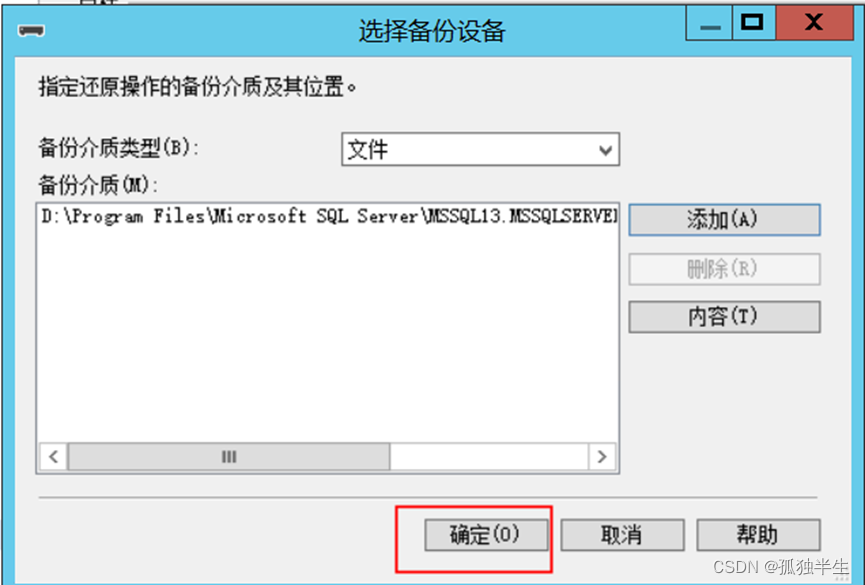
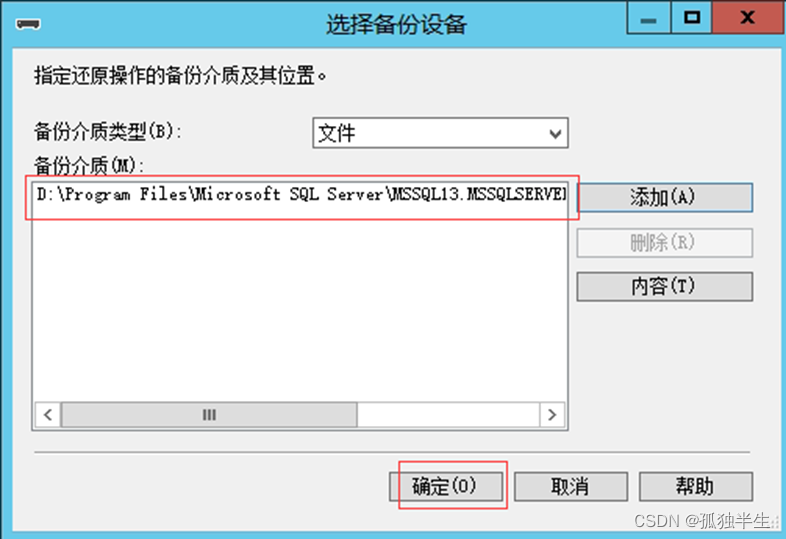
Open the Select Backup Device dialog box, click Add
Open and find the path where the backup file is stored, find and select the database backup to be restored, double-click to select or click OK

click ok
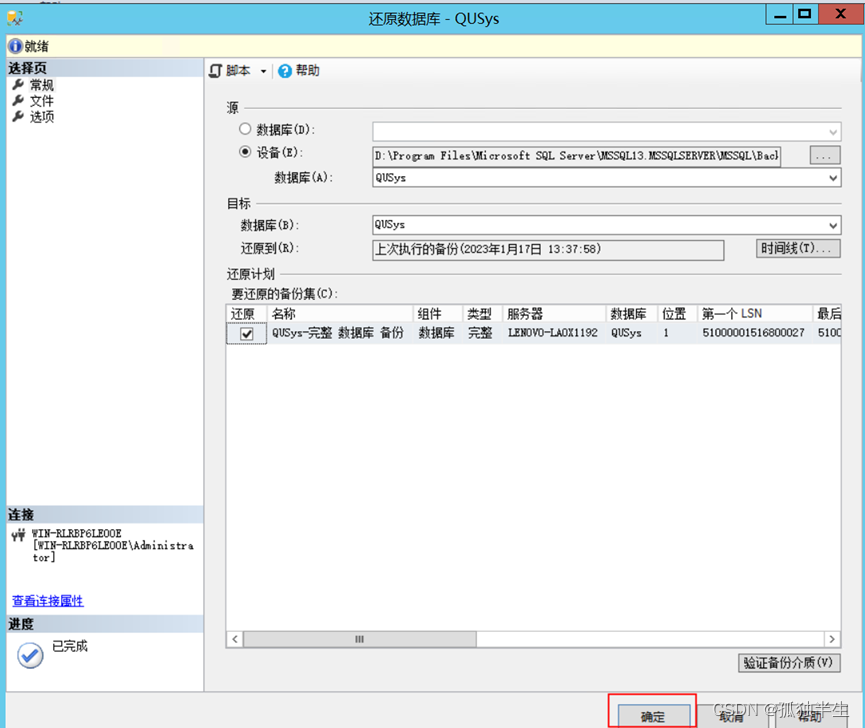
Return to the restore database window

Switch to options page

Check the [Select to overwrite existing database] check box, uncheck the [Take a tail log backup before restoring], click OK

Prompt that the restoration is successful.

Supplementary Note: If the restoration fails, it may be that the database is in use. At this time, you need to communicate with the user to confirm that it can be restored. You can operate according to the following methods.
Method 1: Stop the SQL server service first


, and then restore the database
After the restoration is complete, start the SQL server service
This method will affect the normal use of the program, use with caution! ! !
Method 2: Operate the database separately, first separate the database, then attach the database, and finally restore the database
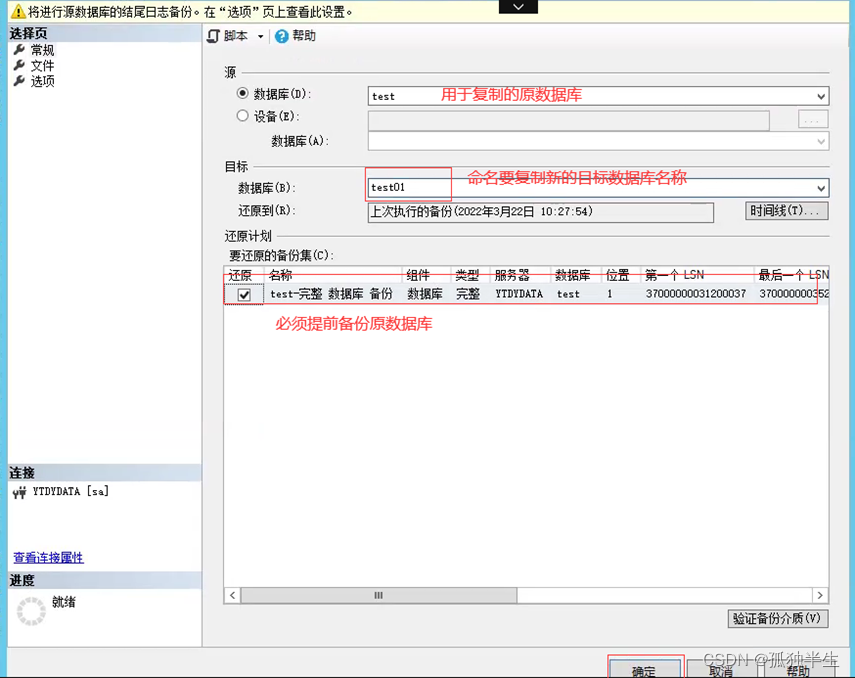
Seven, copy the database
Use the existing database to quickly copy a new database. You can use the method of restoring the database to copy the database. The premise is that the current database must be backed up first. Since it has been backed up before, the operation of backing up the database will not be repeated here.
To copy a database, click to select an existing database, right-click → Task → Restore → Database, open the Restore Database dialog box, in the target database, name the new database to be copied, and confirm that the existing database has been backed up, click Sure
Prompt that the new database has been successfully restored, as shown below

In the object explorer, in the database list, the newly copied database is displayed, as shown in the figure below

Note that [Restore] is usually displayed behind the original database at this time, as shown in the figure below

Click [New Query] to open the query analyzer, enter a statement, and then execute
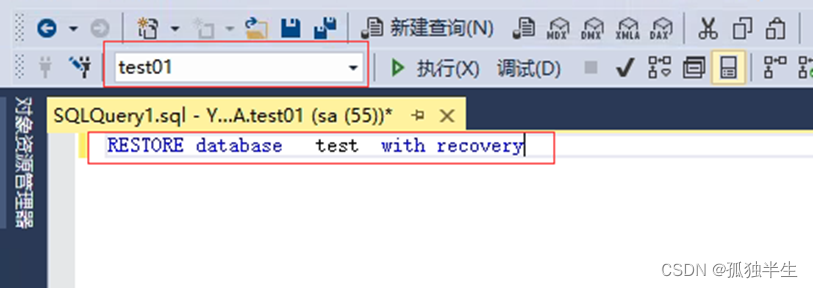
RESTORE database test with recovery
After execution, refresh the database

[Restored] has been canceled, as shown below
8. Restore the database without the original database file
In some cases, we only have database backup files and no database source files. In this case, we need to restore the database backup files to create a database.
method one:
First, create a new blank database, refer to [2. Create a new database]
Then restore the database file, refer to 【6. Restore the database】
I won't repeat it here
Method Two:
No need to create a blank database
Right-click [Database], click [Restore Database]
The following steps refer to [6. Restore the database]