Author: yx
Article directory
foreword
For the registration and login module, iPortal allows users to access self-developed pages through iFrame, and completely rewrites the elements and styles of the registration and login pages to achieve highly customized customization.
The process of expanding and developing iPortal registration login module generally includes: docking with iPortal REST API interface, realizing page content and style, configuring and enabling customized pages, etc. The iPortal product package provides a set of simple sample codes (located %SuperMap iPortal_HOME%\webapps\iportal\resources\web-ui\extend\loginunder the directory) to guide you how to develop registration and login page extensions.
1. Introduction to sample code
The structure of the sample code is shown in the figure below:

where login.html and register.html are customized HTML pages, config.json is an extension development configuration file (this file is a required file and cannot be renamed), and the js folder is for registration and login with iPortal JavaScript files for APIs related to resetting passwords.
Note:
1. The rootUrl in the sample code below refers to http://{ip}/{port}/{contextPath}/(for example: http://127.0.0.1:8190/iportal/), and the definition method can refer to:
var index = window.location.href.indexOf('resources');
var rootUrl = window.location.href.slice(0,index).replace(window.location.origin,'');
2. Since the customized page is introduced through iFrame, the window.parent object of the customized page corresponds to the window object in the web-ui page. If you need to switch between the login and registration pages, you can call window.parent.changeRoute(param)the method, where the value of param is "login"/"register".
2. Connect to iPortal REST API interface
iPortal provides a full-featured REST API interface of the portal, and provides the portal function to the client in the form of resources. You can call the REST API related to registration and login to realize the interaction between the custom-developed page and the iPortal backend. The following describes the login, Register the REST API involved in the two modules and the specific usage method.
2.1. Login module extension development
Connect to the iPortal login interface login (http://{ip}:{port}/iportal/web/login.json), and log in to the iPortal by sending a POST request with the user name and password in the request body. For the specific request parameters of the login interface, please refer to the REST API: login
The iPortal demo code ( SuperMap iPortal_HOME%\webapps\iportal\resources\web-ui\login\jsindex.js file in the directory) defines the login login method, which is used to obtain the account and password entered by the user and send a login request to iPortal, and iPortal returns the login Success or failure information, and return to the home page if the login is successful. The following is the code related to the login module in the index.js file:
function login(name, pass) {


    var url = rootUrl + 'web/login.json';
    var param = {


        username: $(".login_name").val(),
        password: $(".login_password").val(),
        rememberme: $(".login_remember").is(':checked')
    };
    if (name && pass) {


        param.username = name;
        param.password = pass;
    }
    $.ajax({


        type : "POST",
        url : url,
        data : JSON.stringify(param),
        dataType: 'json',
        success: function(result) {


            console.log(result);
            if ( result.succeed ) {


                window.parent.open(rootUrl + "web-ui/home", "_self");
            } else {


                alert("登录失败!");
            }
        },
        error: function () {


            alert("登录失败!");
        }
    });
}
2.2. Registration module extension development
http:// {ip}:{port}/iportal/web/config/portal.jsonStep 1 (optional): If you have some restrictions on the registration function, if you need to fill in the department, email and other information when the user registers, you can get whether the relevant registration configuration is enabled from the response of the portal configuration interface portalConfig ( ) For details, please refer to REST API: portalConfig.
If the function of selecting departments during registration is enabled, you need to send a departments request ( http://{ip}:{port}/iportal/manager/iportalconfig/departments.json) to obtain all department information of iPortal. For details, please refer to REST API: departments . You can skip this step if you have unlimited registration capabilities.
Step 2: Connect to the relevant interfaces registered with iPortal, including:
- Register a new user interface users (
http://{ip}:{port}/iportal/web/users.json), send a POST request to the users interface to register a new user, please refer to the REST API for the request parameters and response body of the user interface: users - Verify the user name interface isRegistered (
http://{ip}:{port}/iportal/web/users/registered.json), iPortal does not allow duplicate user names, send a GET request to the isRegistered interface to obtain whether the input user name is already occupied, please refer to the REST API for the request parameters and response body of the isRegistered interface: isRegistered - Verify the nickname interface isNickRegistered (
http://{ip}:{port}/iportal/web/users/nickname/isregistered.json), iPortal does not allow user nicknames to be duplicated. Send a GET request to the isNickRegistered interface to obtain whether the input nickname is already occupied. For the request parameters and response body of the isRegistered interface, please refer to the REST API: isNickRegistered
The sign_up registration method is defined in the iPortal demonstration code ( SuperMap iPortal_HOME%\webapps\iportal\resources\web-ui\login\jsindex.js file in the directory), which records the information entered by the user on the registration interface and verifies its legitimacy. After the verification is passed, a registration user request is sent to iPortal, and iPortal returns the registration success or failure information .
3. Realization of page content and style
The login.html, register.html, and resetPwd.html files in the sample code are custom-developed page examples, implemented with the HTML+JavaScript+CSS technology stack, and include the most basic elements required for registration, login, and password reset pages. Here is an example of the login page:
<!DOCTYPE html>
<html >
<head>
<meta charset="UTF-8">
<title>登录示例</title>
</head>
<body bgcolor="#ffffff">
<div class="login">
  <h2>LOGIN</h2>
  <input type="name" placeholder="Name" class="login_name"/>
  <input type="password" placeholder="Password" class="login_password"/>
  <span class="reset">
    <input type="checkbox" class="login_remember"/>Remember Me
    <a href="javascript:void(0)" class="openResetPwd" onclick="openResetPwdPage()">Forgot Password?</a>
  </span><br/>
  <button class="btn_login" onClick="login()">LOGIN</button>
</div>
<script src="js/jquery-3.4.1.min.js"></script>
<script src="js/index.js"></script>
<style>
    .login {


        margin: 100px auto;
        width: 280px;
        height: 400px;
        }
    h2{


        text-align: center;
        }
    .login > input{


        width: 280px;
        height: 30px;
        margin-bottom: 20px;
        }
    .reset{


        display: inline-block;
        width: 280px;
        margin-bottom: 20px;
        font-size: 14px;
        text-align: left
        }
    .reset > a{


        display: inline-block;
        float: right;
        color: #000;
        cursor: pointer;
        }
    .btn_login {


        width: 285px;
        height: 35px;
        }
</style>
</body>
</html>
Among them, login_name, login_password, login_remember, openResetPwdPage(), login() and other ids and method names need to be consistent with the names defined in the above section 2.1 "Login Module Extension Development". is the path to the JavaScript file.
The effect is as follows:
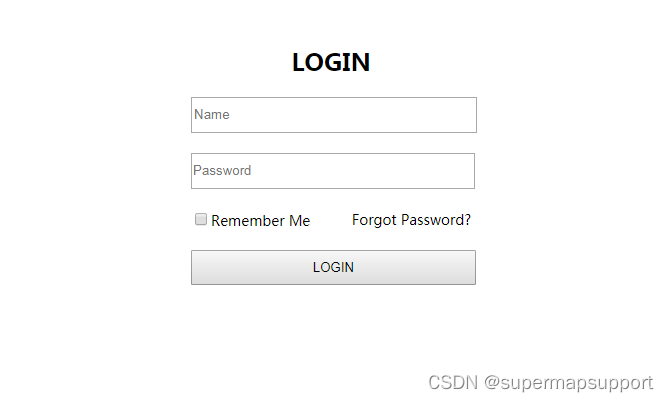
the above is an introductory tutorial, and the page elements and styles are relatively simple. Since iPortal introduces extended pages in the form of iFrame, you can use richer front-end technology stacks and visualization libraries to customize exclusive pages.
Fourth, configure and enable custom pages
After you have completed the custom development of the registration login and password reset pages, you need to modify the %SuperMap iPortal_HOME%\webapps\iportal\resources\web-ui\extend\loginconfig.json file in the directory to apply the customized page to iPortal. The config.js code is as follows:
{


  "enable": true,
  "extendType": "IFRAME",
  "loginUrl": "{portalRoot}/resources/web-ui/extend/login/login.html",
  "registerUrl": "{portalRoot}/resources/web-ui/extend/login/register.html"
}
Parameter introduction:
enable: Whether to use the login, registration and reset password pages customized by the user extension. Default value: false, use iPortal's built-in login registration page. When using pages developed by user extensions, you need to set this value to: true.extendType: The way of expansion, currently supports expansion in the form of iFrame.loginUrl: Customized login page path.registerUrl: Customized registration page path.
After modifying and saving the above configuration, the custom-developed registration and login interface can be used in iPortal.