Preface
Segment Anything Model (SAM) is an advanced image segmentation model based on the Foundation Model3 released by Facebook AI in 2020, which can accurately segment any object in an image based on simple input prompts (such as points or boxes), and Adapt to unfamiliar objects and images without additional training4. It utilizes traditional computer vision techniques and deep learning algorithms, trained on a huge dataset covering 11 million images and 1.1 billion masks, and exhibits excellent zero-shot performance.
1: Environment and software
win10
Miniconda3 (self-installation, a bunch of online tutorials, not introduced here)
GPU (rtx 3060TI 8G)
2: Installation
Official Instructions

1> Download segment-anything
Download address: https://github.com/facebookresearch/segment-anything
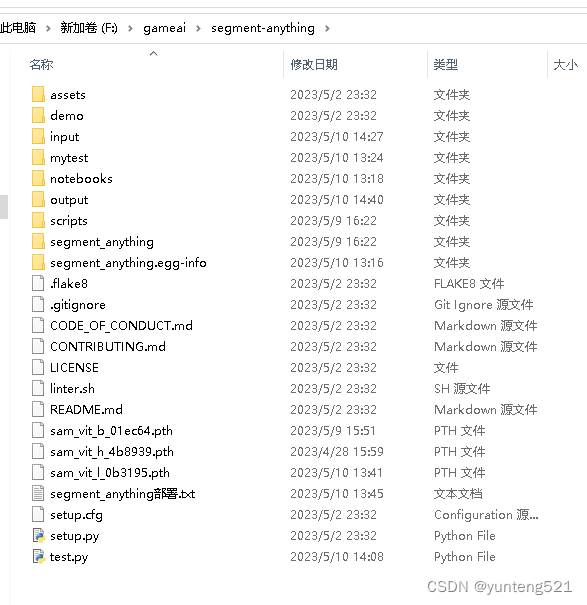
Unzip it and put it in a directory,
put it here in F:\gameai\segment-anything
2> Model data download address
Model file download to default or vit_h in the segment-anything directory
:
https://dl.fbaipublicfiles.com/segment_anything/sam_vit_h_4b8939.pth
vit_l:
https://dl.fbaipublicfiles.com/segment_anything/sam_vit_l_0b3195.pth
vit_b:
https://dl.fbaipublicfiles.com/segment_anything/sam_vit_b_01ec64.pth
3 weight files, the base is the smallest, the large is medium, and the huge is the largest. Choose one according to the video memory of the graphics card.
vit_b video memory 6G, others are 8G, haven't tried it (no 6G graphics card)
3> Create a conda environment
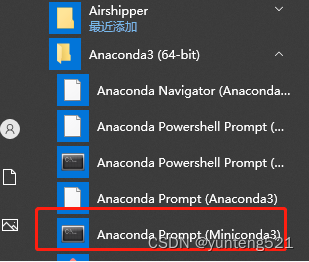
<1> Click Anaconda Prompt (Miniconda3) to open the conda command interface
<2> Create a virtual environment (environment name segment-anything)
conda create -n segment-anything python=3.10 #Create environment and install python3.10
conda activate segment-anything #Enter the environment
[1] Go to https://pytorch.org/get-started/locally/ to generate running commands according to your own configuration.
The local use is cuda11.7
to view the local cuda version
cmd
nvidia-smi


Execute pip3 install torch torchvision torchaudio --index-url https://download.pytorch.org/whl/cu117 in the segment-anything environment

to test whether Pytorch is enabled GPU
display True means OK 
to exit python command exit()
 cd segment-anything
 pip install -e .
 pip install opencv-python pycocotools matplotlib onnxruntime onnx
The input and output models of 2 innovative directories
are also placed here

Put a chapter picture in the input (put segment-anything\assets\notebook2.png here first)
**3:测试**
 如果GPU 显存小  --checkpoint sam_vit_h_4b8939.pth --model-type vit_h 换下  --checkpoint sam_vit_b_01ec64.pth --model-type vit_b
 如果显存 更小  参考 https://github.com/gaomingqi/Track-Anything/issues/4
```bash
python scripts/amg.py --checkpoint sam_vit_h_4b8939.pth --model-type vit_h --input F:\gameai\segment-anything\input --output F:\gameai\segment-anything\output
A script I found online (I forgot the specific address, it was written by someone else) Click to select the area
test.py The content is as follows
import cv2
import os
import numpy as np
from segment_anything import sam_model_registry, SamPredictor

input_dir = 'input'
output_dir = 'output'
crop_mode=True#是否裁剪到最小范围
#alpha_channel是否保留透明通道
print('最好是每加一个点就按w键predict一次')
os.makedirs(output_dir, exist_ok=True)
image_files = [f for f in os.listdir(input_dir) if f.lower().endswith(('.png', '.jpg', '.jpeg','.JPG','.JPEG','.PNG'))]

sam = sam_model_registry["vit_b"](checkpoint="sam_vit_b_01ec64.pth")
_ = sam.to(device="cuda")#注释掉这一行,会用cpu运行,速度会慢很多
predictor = SamPredictor(sam)#SAM预测图像
def mouse_click(event, x, y, flags, param):#鼠标点击事件
    global input_point, input_label, input_stop#全局变量,输入点,
    if not input_stop:#判定标志是否停止输入响应了!
        if event == cv2.EVENT_LBUTTONDOWN :#鼠标左键
            input_point.append([x, y])
            input_label.append(1)#1表示前景点
        elif event == cv2.EVENT_RBUTTONDOWN :#鼠标右键
            input_point.append([x, y])
            input_label.append(0)#0表示背景点
    else:
        if event == cv2.EVENT_LBUTTONDOWN or event == cv2.EVENT_RBUTTONDOWN :#提示添加不了
            print('此时不能添加点,按w退出mask选择模式')


def apply_mask(image, mask, alpha_channel=True):#应用并且响应mask
    if alpha_channel:
        alpha = np.zeros_like(image[..., 0])#制作掩体
        alpha[mask == 1] = 255#兴趣地方标记为1,且为白色
        image = cv2.merge((image[..., 0], image[..., 1], image[..., 2], alpha))#融合图像
    else:
        image = np.where(mask[..., None] == 1, image, 0)
    return image

def apply_color_mask(image, mask, color, color_dark = 0.5):#对掩体进行赋予颜色
    for c in range(3):
        image[:, :, c] = np.where(mask == 1, image[:, :, c] * (1 - color_dark) + color_dark * color[c], image[:, :, c])
    return image

def get_next_filename(base_path, filename):#进行下一个图像
    name, ext = os.path.splitext(filename)
    for i in range(1, 101):
        new_name = f"{

      name}_{

      i}{

      ext}"
        if not os.path.exists(os.path.join(base_path, new_name)):
            return new_name
    return None

def save_masked_image(image, mask, output_dir, filename, crop_mode_):#保存掩盖部分的图像(感兴趣的图像)
    if crop_mode_:
        y, x = np.where(mask)
        y_min, y_max, x_min, x_max = y.min(), y.max(), x.min(), x.max()
        cropped_mask = mask[y_min:y_max+1, x_min:x_max+1]
        cropped_image = image[y_min:y_max+1, x_min:x_max+1]
        masked_image = apply_mask(cropped_image, cropped_mask)
    else:
        masked_image = apply_mask(image, mask)
    filename = filename[:filename.rfind('.')]+'.png'
    new_filename = get_next_filename(output_dir, filename)

    if new_filename:
        if masked_image.shape[-1] == 4:
            cv2.imwrite(os.path.join(output_dir, new_filename), masked_image, [cv2.IMWRITE_PNG_COMPRESSION, 9])
        else:
            cv2.imwrite(os.path.join(output_dir, new_filename), masked_image)
        print(f"Saved as {

      new_filename}")
    else:
        print("Could not save the image. Too many variations exist.")

current_index = 0

cv2.namedWindow("image")
cv2.setMouseCallback("image", mouse_click)
input_point = []
input_label = []
input_stop=False
while True:
    filename = image_files[current_index]
    image_orign = cv2.imread(os.path.join(input_dir, filename))
    image_crop = image_orign.copy()#原图裁剪
    image = cv2.cvtColor(image_orign.copy(), cv2.COLOR_BGR2RGB)#原图色彩转变
    selected_mask = None
    logit_input= None
    while True:
        #print(input_point)
        input_stop=False
        image_display = image_orign.copy()
        display_info = f'{

      filename} | Press s to save | Press w to predict | Press d to next image | Press a to previous image | Press space to clear | Press q to remove last point '
        cv2.putText(image_display, display_info, (10, 30), cv2.FONT_HERSHEY_SIMPLEX, 0.7, (0, 255, 255), 2, cv2.LINE_AA)
        for point, label in zip(input_point, input_label):#输入点和输入类型
            color = (0, 255, 0) if label == 1 else (0, 0, 255)
            cv2.circle(image_display, tuple(point), 5, color, -1)
        if selected_mask is not None :
            color = tuple(np.random.randint(0, 256, 3).tolist())
            selected_image = apply_color_mask(image_display,selected_mask, color)

        cv2.imshow("image", image_display)
        key = cv2.waitKey(1)

        if key == ord(" "):
            input_point = []
            input_label = []
            selected_mask = None
            logit_input= None
        elif key == ord("w"):
            input_stop=True
            if len(input_point) > 0 and len(input_label) > 0:
                #todo 预测图像
                predictor.set_image(image)#设置输入图像
                input_point_np = np.array(input_point)#输入暗示点,需要转变array类型才可以输入
                input_label_np = np.array(input_label)#输入暗示点的类型
                #todo 输入暗示信息,将返回masks
                masks, scores, logits= predictor.predict(
                    point_coords=input_point_np,
                    point_labels=input_label_np,
                    mask_input=logit_input[None, :, :] if logit_input is not None else None,
                    multimask_output=True,
                )

                mask_idx=0
                num_masks = len(masks)#masks的数量
                while(1):
                    color = tuple(np.random.randint(0, 256, 3).tolist())#随机列表颜色,就是
                    image_select = image_orign.copy()
                    selected_mask=masks[mask_idx]#选择msks也就是,a,d切换
                    selected_image = apply_color_mask(image_select,selected_mask, color)
                    mask_info = f'Total: {

      num_masks} | Current: {

      mask_idx} | Score: {

      scores[mask_idx]:.2f} | Press w to confirm | Press d to next mask | Press a to previous mask | Press q to remove last point | Press s to save'
                    cv2.putText(selected_image, mask_info, (10, 30), cv2.FONT_HERSHEY_SIMPLEX, 0.7, (0, 255, 255), 2, cv2.LINE_AA)
                    #todo 显示在当前的图片,
                    cv2.imshow("image", selected_image)

                    key=cv2.waitKey(10)
                    if key == ord('q') and len(input_point)>0:
                        input_point.pop(-1)
                        input_label.pop(-1)
                    elif key == ord('s'):
                        save_masked_image(image_crop, selected_mask, output_dir, filename, crop_mode_=crop_mode)
                    elif key == ord('a') :
                        if mask_idx>0:
                            mask_idx-=1
                        else:
                            mask_idx=num_masks-1
                    elif key == ord('d') :
                        if mask_idx<num_masks-1:
                            mask_idx+=1
                        else:
                            mask_idx=0
                    elif key == ord('w') :
                        break
                    elif key == ord(" "):
                        input_point = []
                        input_label = []
                        selected_mask = None
                        logit_input= None
                        break
                logit_input=logits[mask_idx, :, :]
                print('max score:',np.argmax(scores),' select:',mask_idx)

        elif key == ord('a'):
            current_index = max(0, current_index - 1)
            input_point = []
            input_label = []
            break
        elif key == ord('d'):
            current_index = min(len(image_files) - 1, current_index + 1)
            input_point = []
            input_label = []
            break
        elif key == 27:
            break
        elif key == ord('q') and len(input_point)>0:
            input_point.pop(-1)
            input_label.pop(-1)
        elif key == ord('s') and selected_mask is not None :
            save_masked_image(image_crop, selected_mask, output_dir, filename, crop_mode_=crop_mode)

    if key == 27:
        break
The result of the operation is as follows
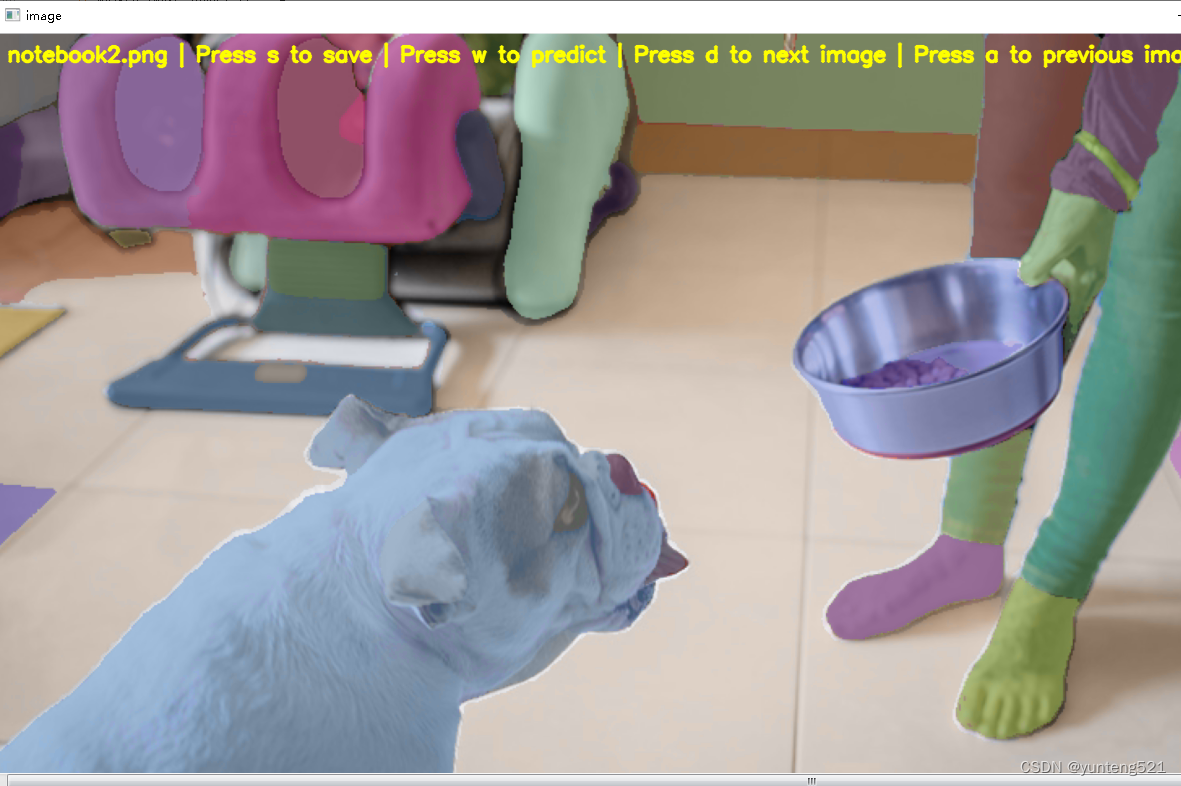
Operation First press the left mouse button
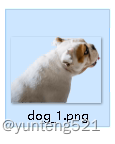
w to select the point, you can click the right mouse button to select the background and choose the background according to the above prompts When the outline flashes, press w to confirm/press d to next outline/ Score The bigger the score, the better After confirming, press s to save the outline to output In the category (here I choose a dog, click on the dog’s head) is still relatively accurate, but not too smooth, a little improved
If you find it useful, please like it and add a favorite