OpenMV provides both threshold setting schemes. Threshold compiler and histogram way to choose threshold respectively.
Threshold Compiler: Advantages, the target color found is more reasonable, and the interference of other similar color areas is relatively small. The disadvantage is that it takes time to adjust the maximum and minimum values of LAB.
The vertical cubic diagram is just the opposite. It is easy to find the general interval of the maximum and minimum values of LAB, but it is easy to be interfered by similar color areas. Therefore, it is recommended to use the two together. First use the upright cube to find the approximate interval of the maximum and minimum values of the LAB, and then use the threshold compiler to fine-tune the maximum and minimum values of the LAB.
First we use the upright cube plot:
Open the OpenMV IDE software --> There is a vertical cube in the lower right corner --> In color recognition, only the LAB color space is needed.

To select green tea as the target object, we only need to drag the left mouse button in the frame buffer. According to the histogram, we choose 75 for the maximum value of L and 30 for the minimum value. The maximum value of A is 0, and the minimum value is -70. B has a maximum value of 70 and a minimum value of -10. (Note: This only needs to include most of it)

Threshold compiler settings afterwards:
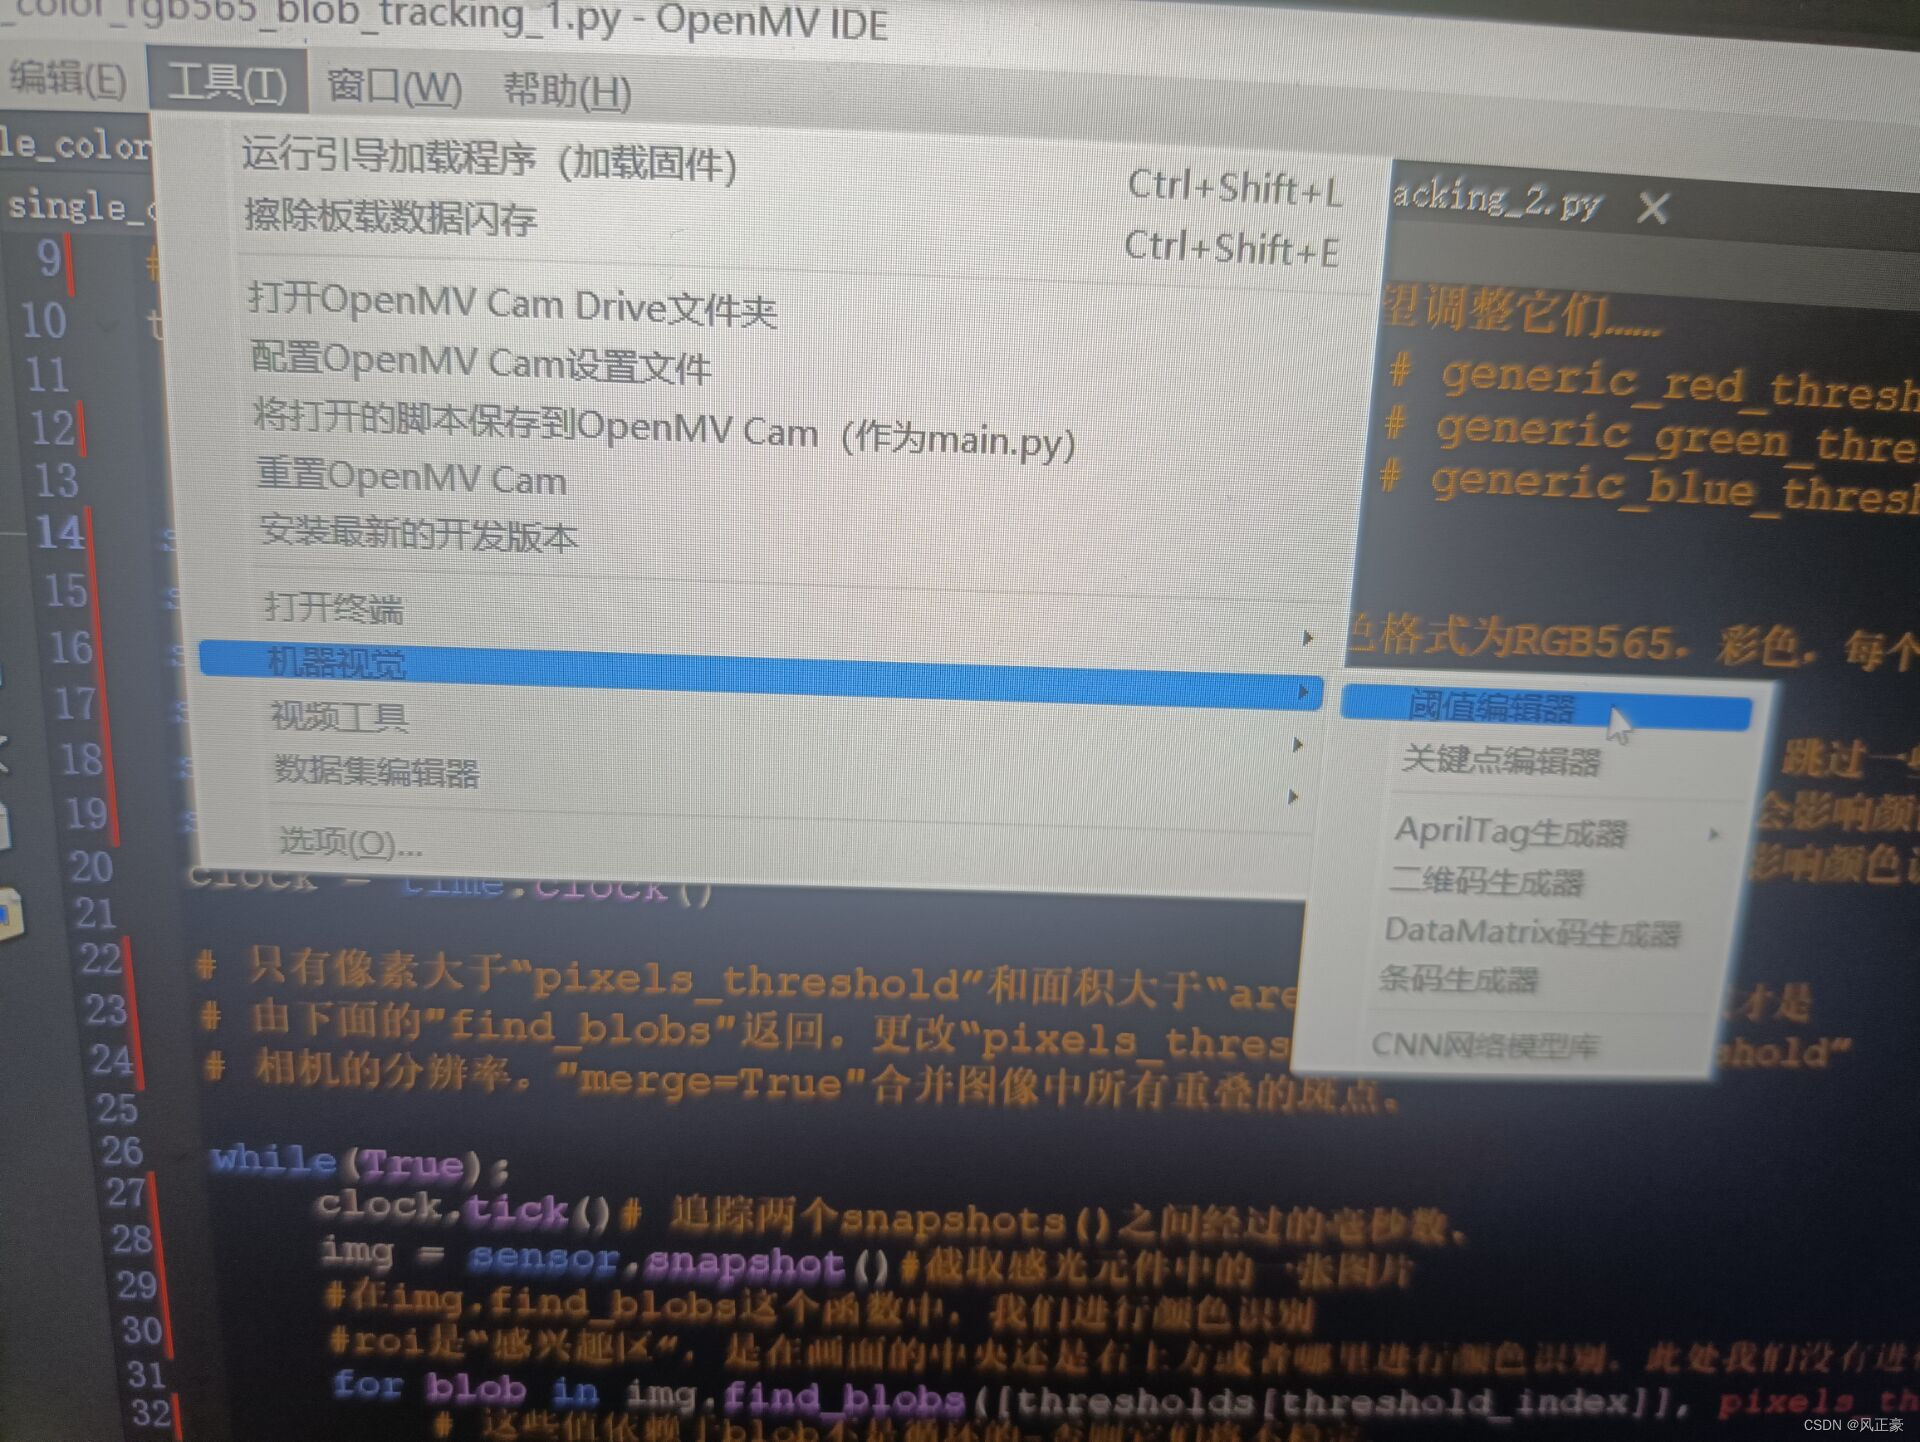
Top left Tools --> Machine Vision --> Threshold Compiler --> Frame Buffer. The LAB value of the image to be judged can be adjusted. Note: At this time, OpenMV will capture the current picture as the LAB value adjustment. So when we use the threshold compiler, we need to place the target recognition unit in front of the OpenMV camera in advance. Then perform the above operation

According to the value of the vertical histogram, we adjust the LAB maximum and minimum values to make the object to be recognized as completely white as possible. (Note: Even if it does not turn all white, it will not affect it, anyway, it will turn all white areas that are not filtered out into a large frame) and then copy the LAB threshold below.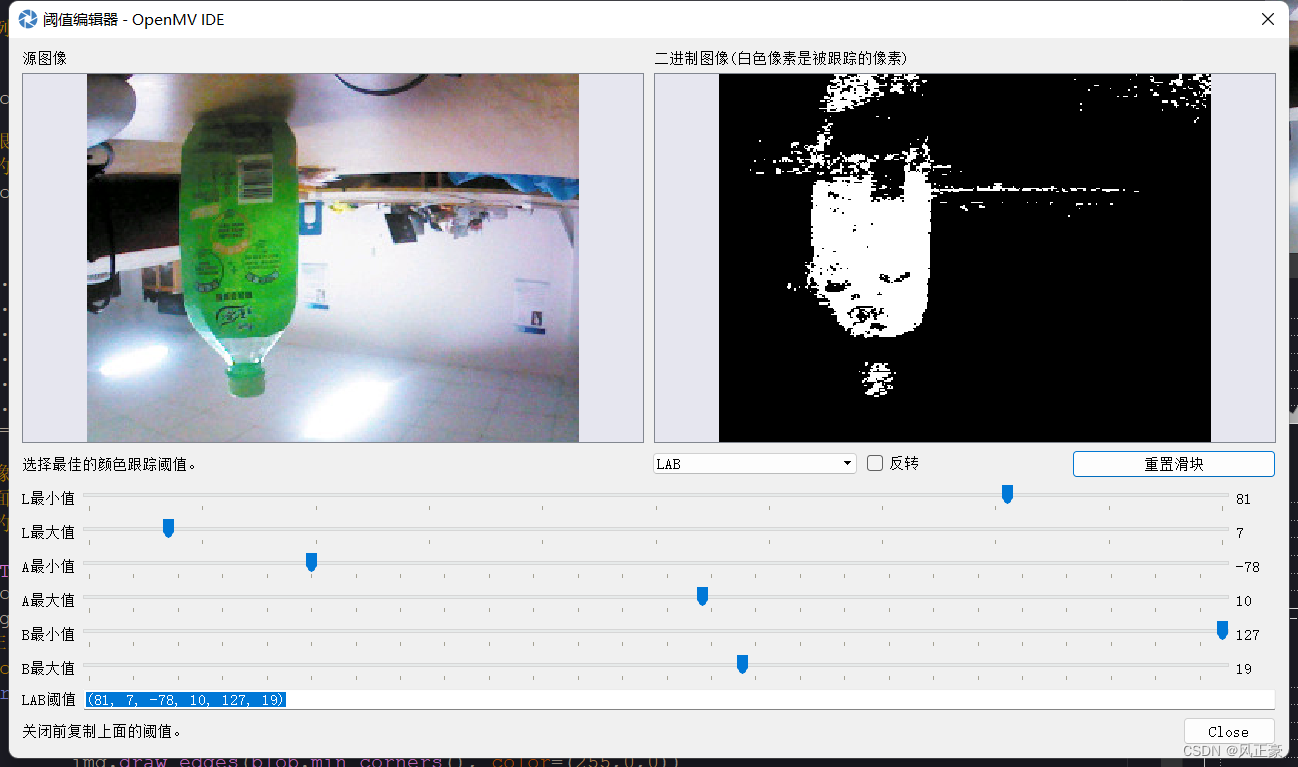
Put the copied LAB threshold into thresholds. Note: We see that thresholds has multiple values, in fact, because we used [thresholds[threshold_index]] in the for statement, and threshold_index is 0, that is to say, we choose red first. Because our threshold_index=0, the threshold we copied is required to be placed in the first position of thresholds (before # generic_red_thresholds). If threshold_index=1, the threshold value we copied is required to be placed in the second position of thresholds (before #generic_green_thresholds). threshold_index=2, similarly placed in the third position.
threshold_index = 0 # 0 for red, 1 for green, 2 for blue
thresholds = [(30, 100, 15, 127, 15, 127), # generic_red_thresholds
              (30, 100, -64, -8, -32, 32), # generic_green_thresholds
              (0, 30, 0, 64, -128, 0)] # generic_blue_thresholds

.....(中间的代码省略)

for blob in img.find_blobs([thresholds[threshold_index]], pixels_threshold=200, area_threshold=200, merge=True):
But in the official tutorial of OpenMV, we can see that his code is like this, which is actually the same. It's just that the LAB threshold here doesn't need to pay so much attention. Just change the value behind green_threshold directly.
green_threshold   = (   0,   80,  -70,   -10,   -0,   30)

.....(中间的代码省略)

blobs = img.find_blobs([green_threshold])