(Creating is not easy, thank you, your support is the biggest motivation for me to move forward, if it is helpful to you after reading it, please leave your footprints)

Table of contents
Build a development environment
Frontend - Inject environment variables
Development environment error - source map
optimization - split common code
Build a development environment
Problem: Before changing the code, it needs to be repackaged to run and view, the efficiency is very lowDevelopment environment: configure webpack-dev-server to quickly develop applicationsFunction: start the web service, automatically detect code changes, and hot update to the web pageNote: The dist directory and packaged content are in memory (updated quickly)step:1. Download the webpack-dev-server package to the current project 2. Set the mode to development mode and configure custom commands
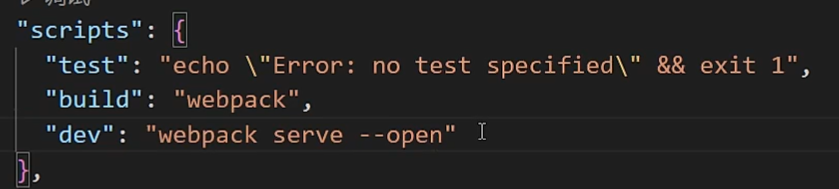 3. Use npm run dev to start the development server and try the hot update effect
packaged mode
Bundle mode : tells Webpack to use the built-in optimizations for the corresponding mode
Classification:
set up:Method 1: Set the mode option in the webpack.config.js configuration file Method 2: Set the mode parameter on the package.json command line
 Note : The priority of the command line setting is higher than that in the configuration file, and it is recommended to use the command line setting

Application of packaged mode
Requirement: Embedding with style-loader is faster in development mode, extracting css code in production modeSolution 1: webpack.config.js configures the export function, but it has great limitations (only accepts 2 modes)Solution 2 : Use the cross-env (cross-platform common) package command to set parameters to distinguish the environmentstep:1. Download the cross-env package to the current project 2. Configure a custom command, pass in the parameter name and value (will be bound to the process.env object)
 3. Use different configurations in webpack.config.js to distinguish different environments4. Repackage and observe the difference between the two configurationsSolution 3: Configure different webpack.config.js (applicable to situations with large differences in multiple modes)
Frontend - Inject environment variables
Requirements: In the front-end project, the print statement is valid in the development mode, and the print statement is invalid in the production modeProblem: The cross-env settings only take effect in the Node.js environment, and the front-end code cannot access process.env.NODE_ENVSolution : Use Webpack's built-in DefinePlugin pluginFunction: At compile time, replace the matching variable name in the front-end code with a value or expression
DefinePlugin
DefinePluginAllows you to replace variables in your code with other values or expressions at compile time . This is useful when you need to operate differently depending on development mode versus production mode. For example, if you want to log in development builds but not in production builds, you can define a global constant to determine whether to log. This isDefinePluginwhere the IDE shines, set it up and forget about build rules for development and production environments.new webpack.DefinePlugin({ // 定义... });
Usage
Each key passed to
DefinePluginis an identifier or multiple.identifiers concatenated.
- If the value is a string, it will be used as a code snippet.
- If the value is not a string, it will be converted to a string (including function methods).
- If the value is an object, all its keys will be defined using the same method.
- If the key is added
typeofas a prefix, it will be defined as a typeof call.These values will be inlined into the code, allowing code compression to remove redundant conditionals
new webpack.DefinePlugin({
  PRODUCTION: JSON.stringify(true),
  VERSION: JSON.stringify('5fa3b9'),
  BROWSER_SUPPORTS_HTML5: true,
  TWO: '1+1',
  'typeof window': JSON.stringify('object'),
  'process.env.NODE_ENV': JSON.stringify(process.env.NODE_ENV),
});
Development environment error - source map
Problem: The code is compressed and obfuscated, and the source code location (number of lines and columns) cannot be correctly locatedsource map: can accurately track the position of error and warning in the original codeSettings: webpack.config.js configure devtool optionsinline-source-map option: package the location information of the source code together in the js file Note: source map is only applicable to the development environment, do not use it in the production environment (to prevent easy viewing of the source code location)
Parse alias alias
Parsing aliases: configure how modules are parsed, and create aliases for import import paths to ensure that module imports become easierFor example: the original path is as shown in the figure, it is relatively long and the relative path is not safeSolution: Configure the parsing alias @ in webpack.config.js to represent the absolute path of src
Optimization - CDN usage
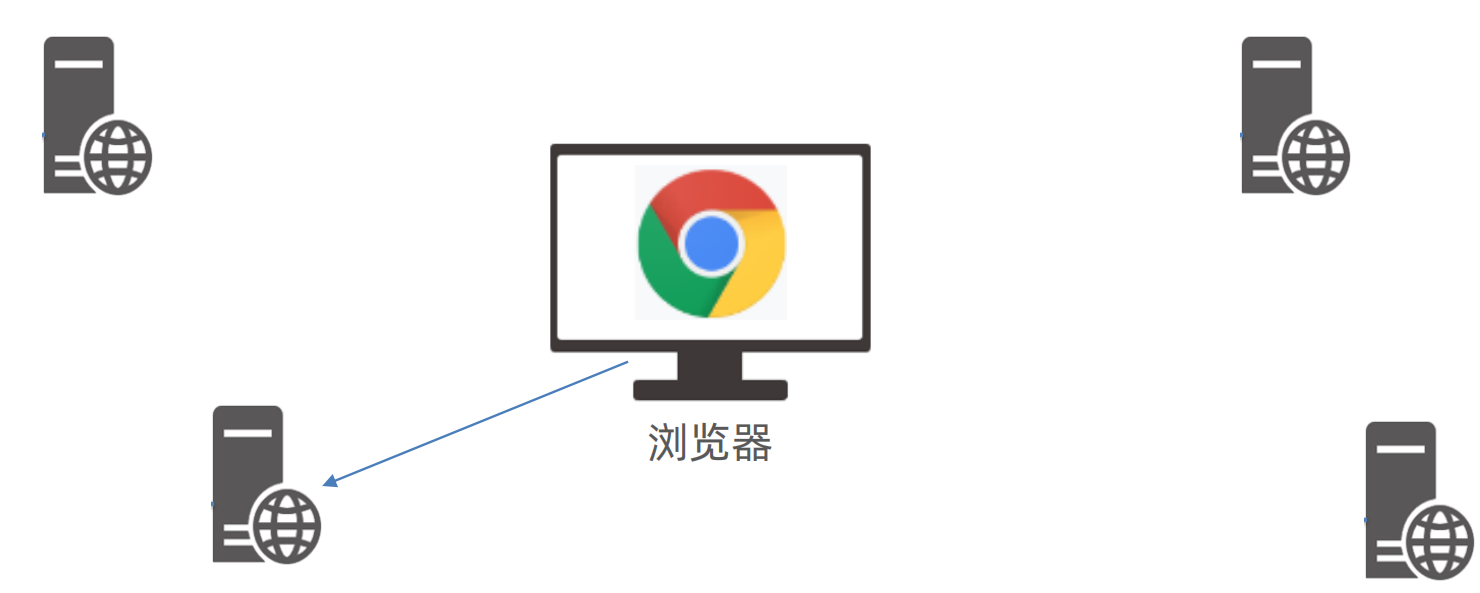 Definition of CDN : content distribution network, which refers to a group of servers distributed in various regionsFunction: Put static resource files/third-party libraries in each server in the CDN network for users to request and obtain nearbyBenefits: Reduce the request pressure of your own server, the physical delay of the nearest request is low, and the matching caching strategy
step:1. Introduce the CDN address of the third-party library in html and use the template syntax to judge 2. Configure the externals external extension option in webpack.config.js (to prevent some imported packages from being packaged)
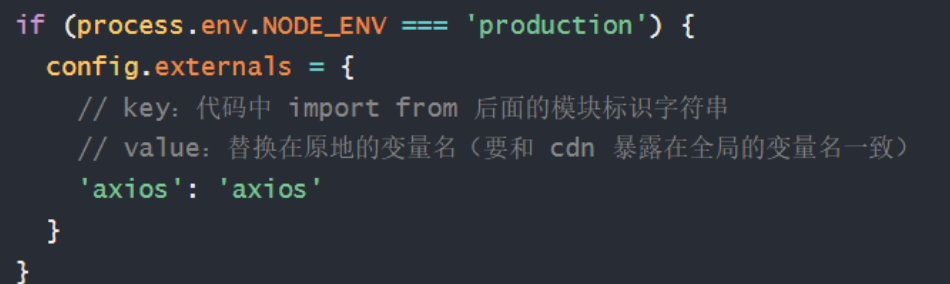
 3. Package observation effect in two modes

Multi-page pack
Single page : a single html file, switch DOM to achieve different business logic display, follow-up Vue/React will learnMulti-page: multiple html files, switching pages to achieve different business logic displayRequirement: Introduce Heima Toutiao - data management platform - content page together into a packagestep:1. Prepare the source code (html, css, js) and put it in the corresponding location, and use the modular syntax to export2. Download the form-serialize package and import it into the core code for use3. Configure webpack.config.js multi-entry and multi-page settings4. Repackage observation effect
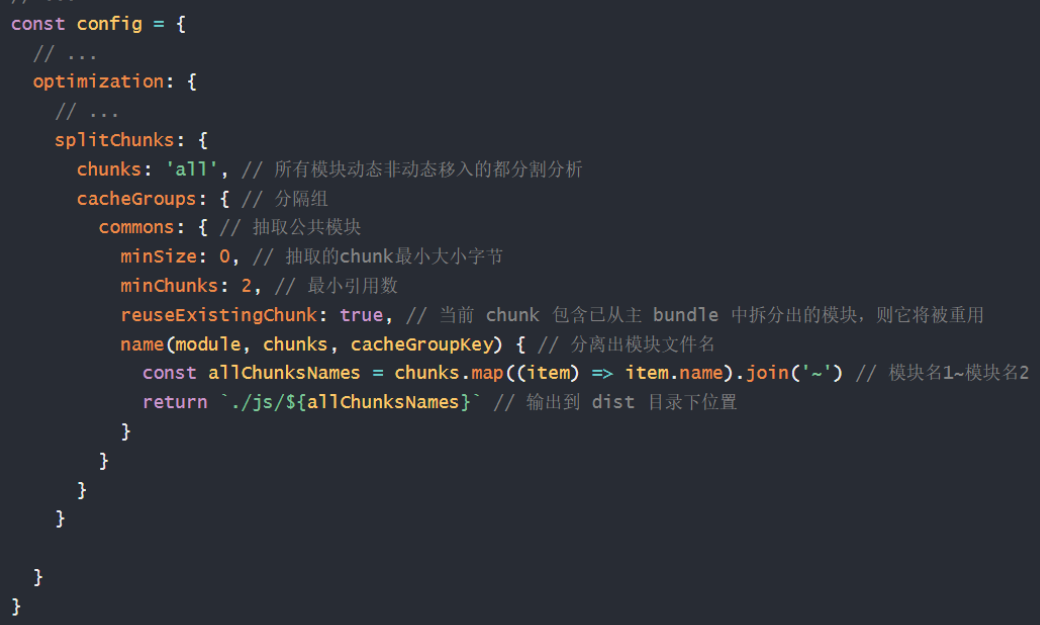
optimization - split common code
Requirement: Extract the common code referenced by more than 2 pagesstep:1. Configure the splitChunks split function of webpack.config.js2. Package observation effect