InputSystem practical tutorial
1 Introduction
In the last article, we shared with you the basic operation of InputSystem (how to use 5 different ways to obtain the input check information of InputSystem). Then let's continue to share how to use the detected information to realize our corresponding input function after we obtain the InputSystem input information.
The Unity editor version we used this time is 2021.3LTS (if you use different versions, the operation interface may be different).
If you feel that the graphic tutorial is not detailed enough, you can move to [InputSystem Practical Tutorial] to watch the video tutorial.
2. A variety of input signal acquisition
In the sharing of the previous article, we learned 5 different input detection calling methods. In this sharing, we will mainly use script calls to complete the function realization (friends who don’t understand can go back to the previous article to check - [InputSystem Basic Tutorial] ) .
2-1. PC terminal - mouse button
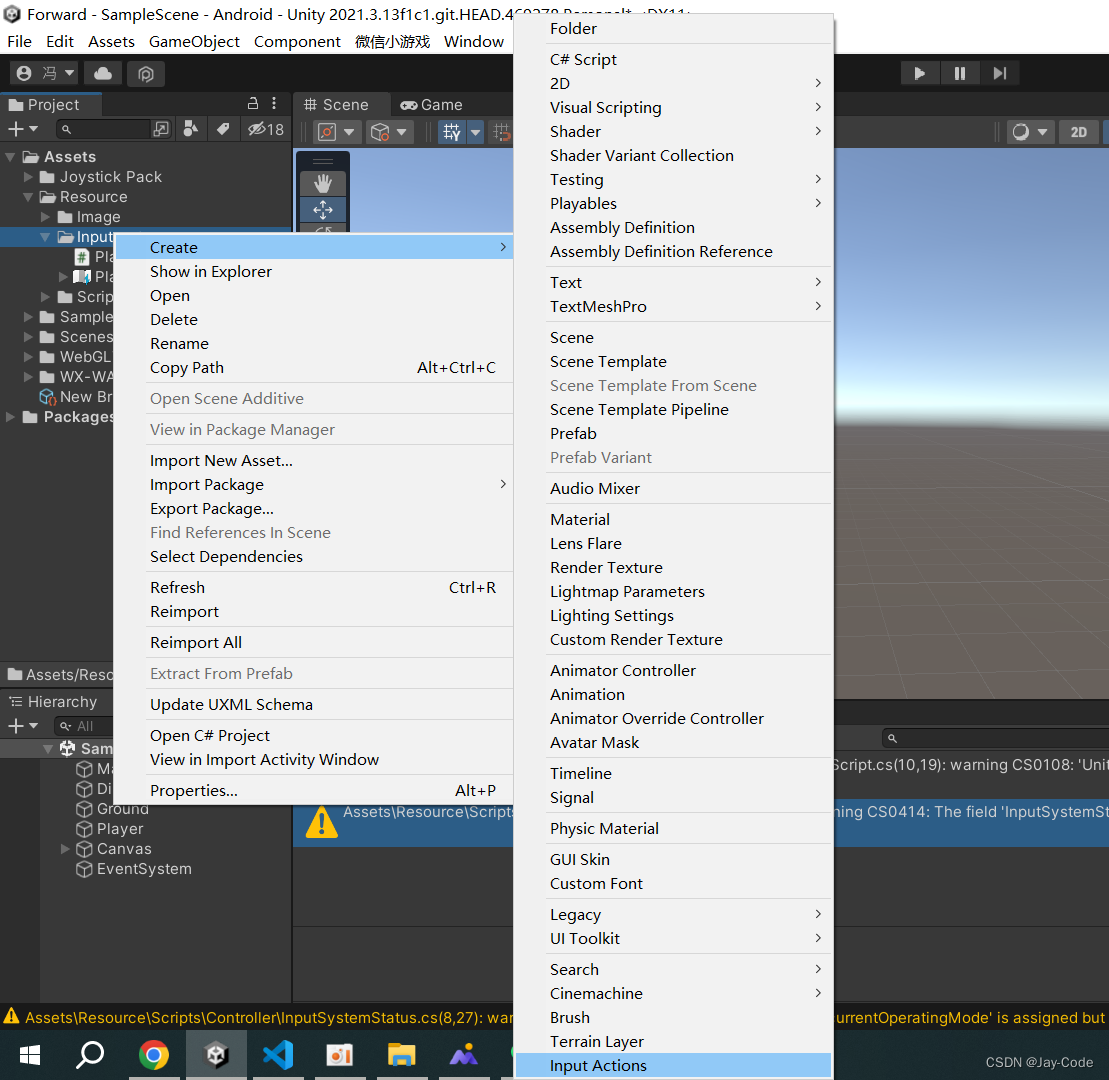
After installing InputSystem, we first create InputActions in the project.
After successfully creating InputActions, double-click to open the InputActions editing page, create an ActionMaps and name it PC, and then create several corresponding Actions in the Map and name them Move, CameraControl, and Jump respectively.
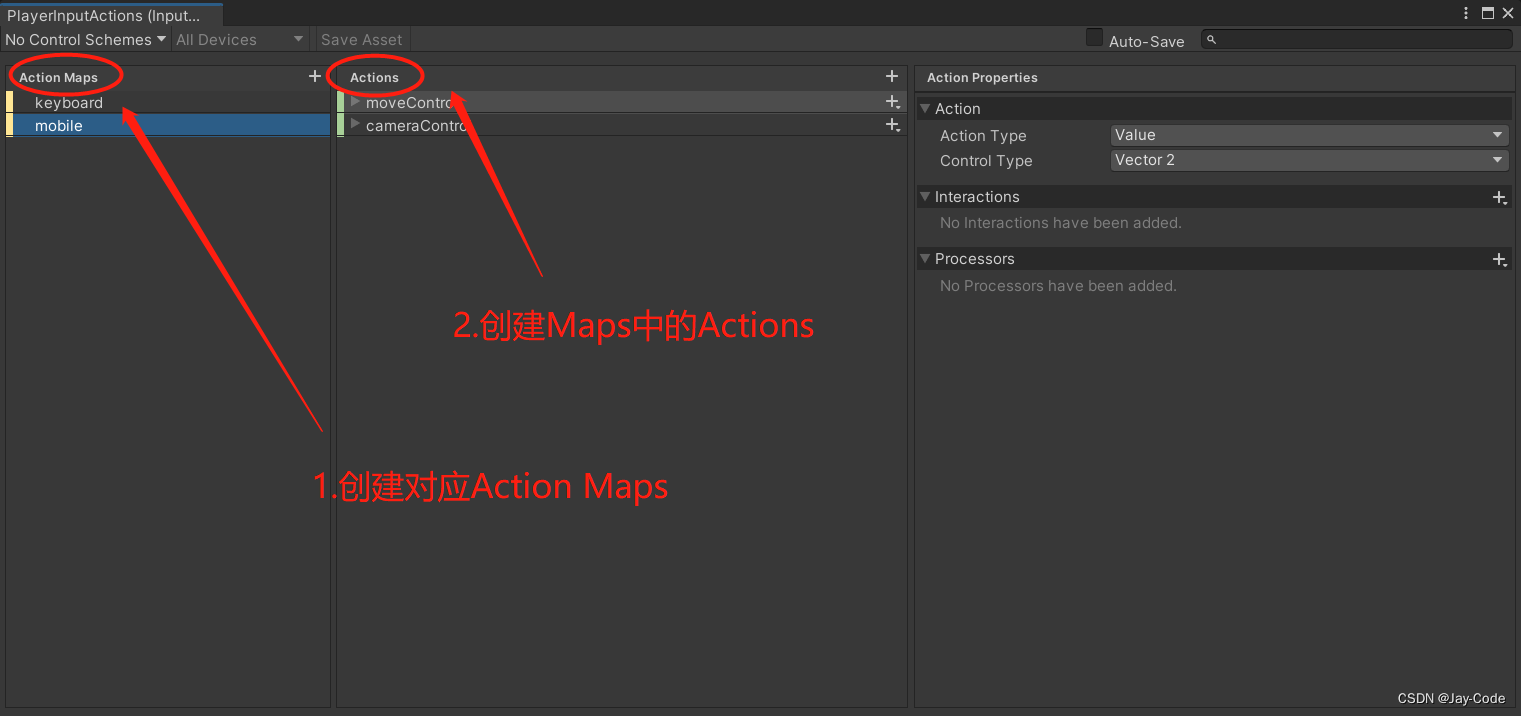
Select Value for Action Type of Move and CameraControl, and select Vector2 for Control Type as the return value type. 
In the input binding of MoveAction, we need to perform the following operations:
select the mixed binding of the arrow keys,
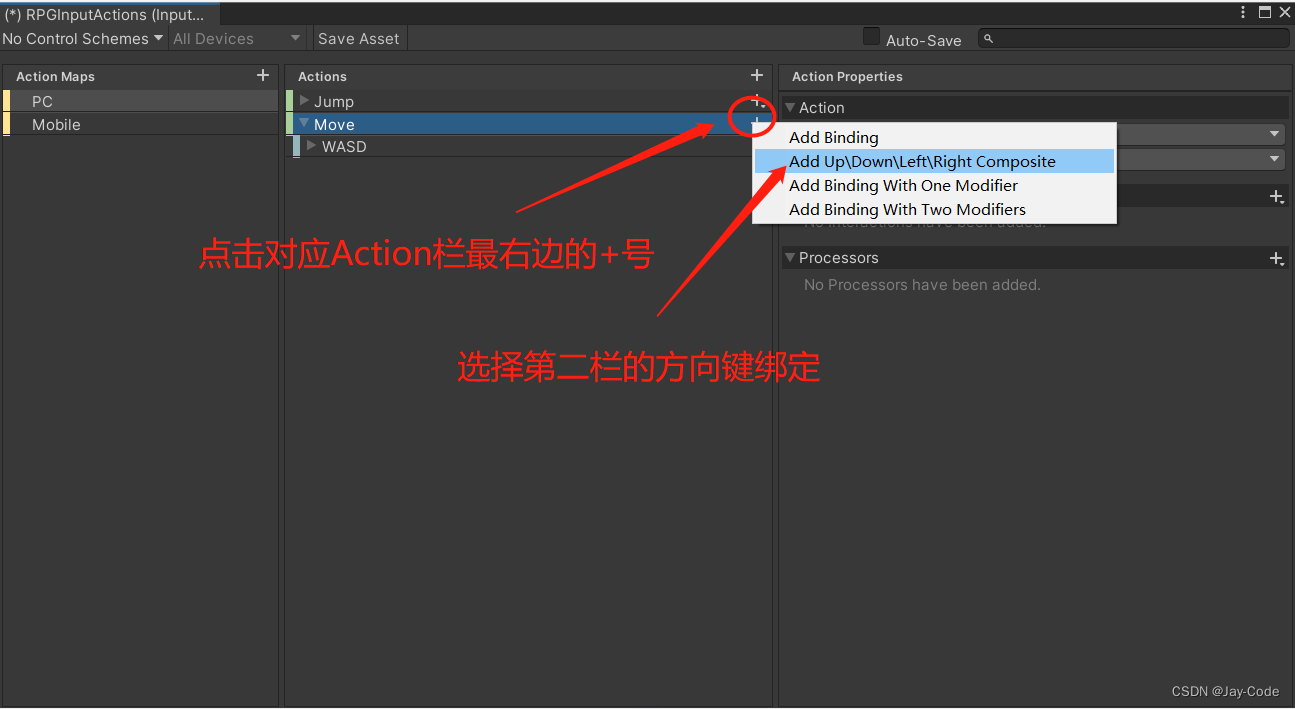
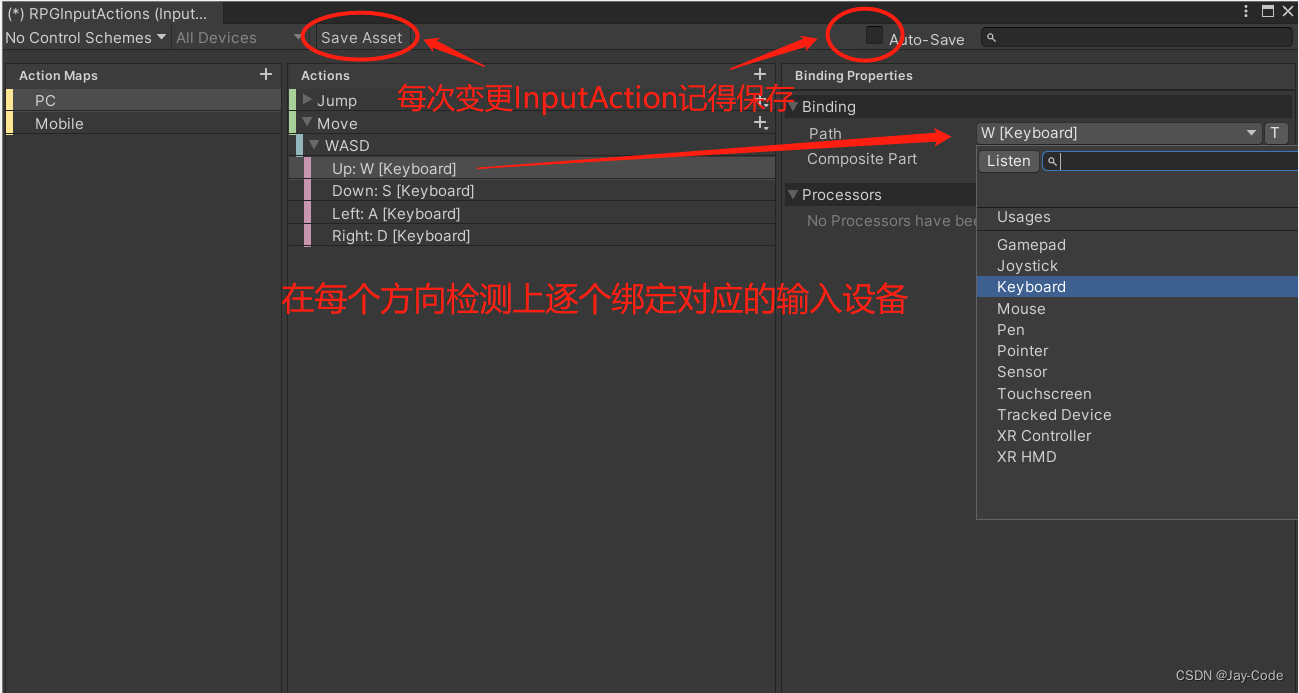
and then bind the corresponding input detection method on each direction detection. After changing the InputAction, remember to click Save Asset to save (or check the Auto Save on the right to automatically save)
Here, the input detection binding of Jump and CameraControl is similar, if you are not clear, you can check the dog in the daydrunk night - [Unity] InputSystem tutorial series video for more detailed binding tutorials and sharing.
After creating InputActions, we can find Generate C# Class in the InputActions property panel and check it, then click Apply to generate the corresponding script, and then we can call the script in our own PlayerController class. After everything is ready, we need to start writing

code
PC script call initialization
Before getting our corresponding input detection, we need to write some initialization scripts
using UnityEngine;
using UnityEngine.InputSystem;

public class RPGController : MonoBehaviour
{


    public RPGInputActions rpgInputActions;
    private void Awake() {


    	//实例化我们刚刚生成的rpgInputActions脚本
        rpgInputActions = new RPGInputActions();
    }
    void OnEnable()
    {


    	//使用前需要将该rpgInputActions开启
        rpgInputActions.PC.Enable();
    }
    void OnDisable()
    {


    	//使用完需要将该rpgInputActions关闭
        rpgInputActions.PC.Disable();
    }
    //Update生命周期函数
    private void Update() {


    }
}
PC gets Move Action input
	//将获取Move输入方法写在Update方法中逐帧调用
    private void Update() {


        getMoveInput();
    }
    //获取Move输入方法
    private void getMoveInput(){


        //将读取到的Move返回值赋值给moveVector2
        Vector2 moveVector2 = rpgInputActions.PC.Move.ReadValue<Vector2>();
    	//判断是否有按下对应的Move按键
        if (moveVector2  != Vector2.zero) {


        	//将获取到的返回值打印出来
            Debug.Log(moveVector2);
        }
    }
PC gets Jump Action input
	//将获取Jump输入方法写在Update方法中逐帧调用
    private void Update() {


        getJumpInput();
    }
    //获取Jump输入方法
    private void getJumpInput(){


        //将读取到的Jump返回值赋值给isJump
    	bool isJump = rpgInputActions.PC.Jump.IsPressed();
    	//判断是否有按下对应的Jump按键
        if (isJump) {


        	//将获取到的返回值打印出来
            Debug.Log(isJump);
        }
    }
PC gets CameraControl Action input
	//将获取CameraControl输入方法写在Update方法中逐帧调用
    private void Update() {


        getCameraControlInput();
    }
    //获取CameraControl输入方法
    private void getCameraControlInput(){


        //将读取到的CameraControl返回值赋值给cameraOffset
        Vector2 cameraOffset = rpgInputActions.PC.CameraControl.ReadValue<Vector2>();
    	//判断是否有鼠标是否有产生偏移
        if (cameraOffset != Vector2.zero) {


        	//将获取到的鼠标偏移值打印出来
            Debug.Log(cameraOffset );
        }
    }
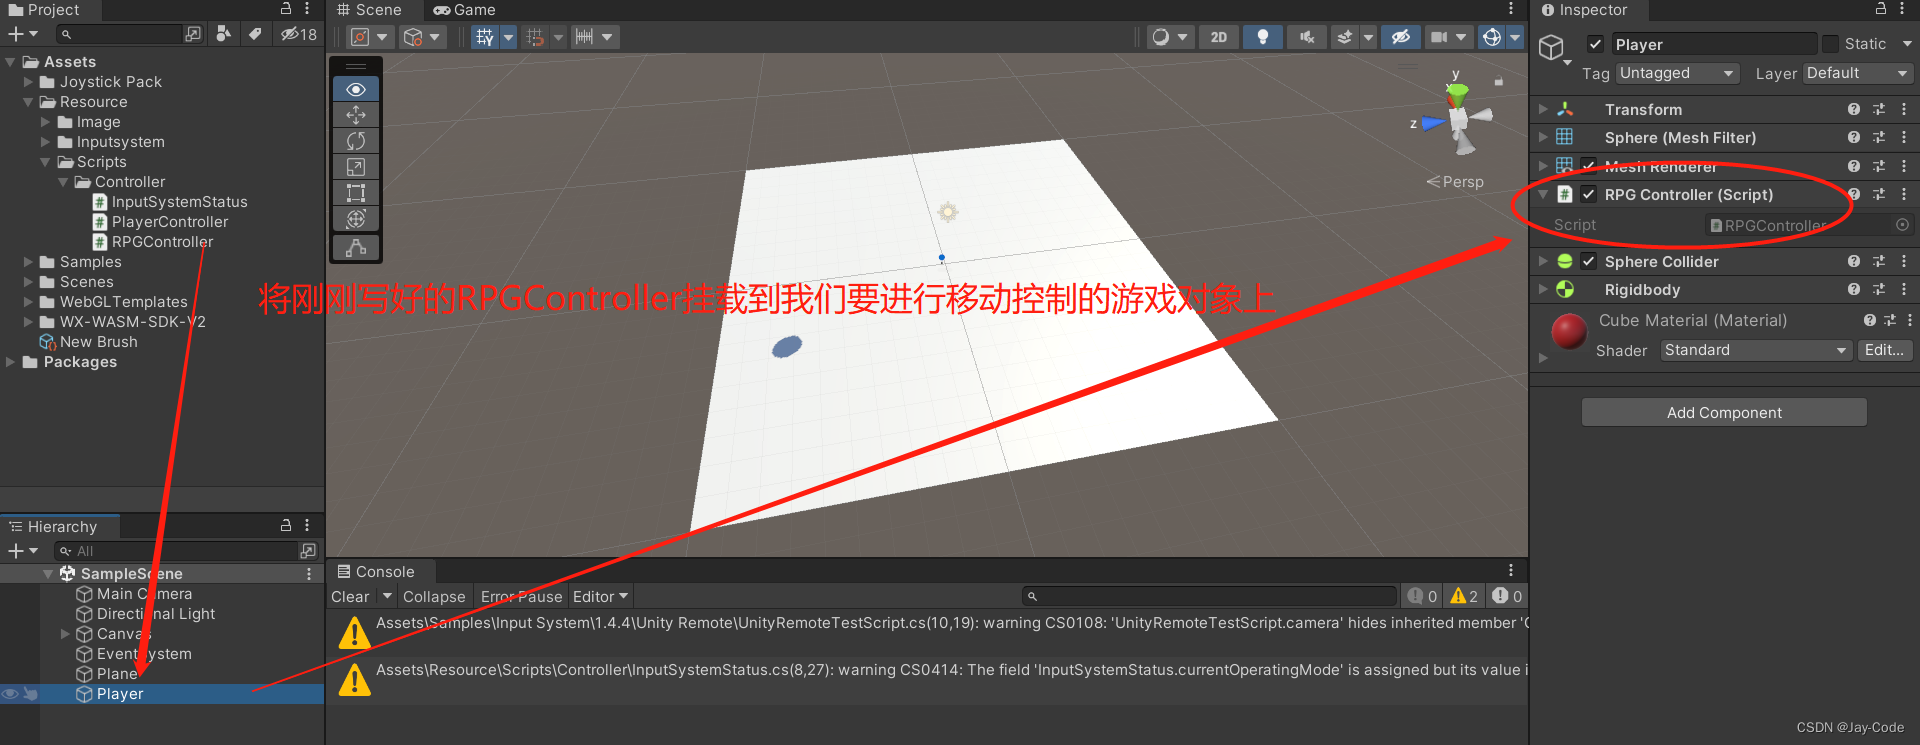
Mount the script we wrote above to the corresponding game object, click start and we can trigger the input detection acquisition method we wrote through the button just bound to the Action when the project is running.
2-2. Host-handle
pending upgrade…
2-3. Mobile terminal - touch screen
If we want to obtain the mobile terminal touch screen input detection, there are two ways.
Before obtaining it, we need to do a few corresponding preparations.
PC mouse simulates touch
Use the mouse on the PC to simulate clicking on the touch screen to achieve simulated touch (only single-finger touch can be simulated).
We need to click Window=>Analysis =>Input Debugger
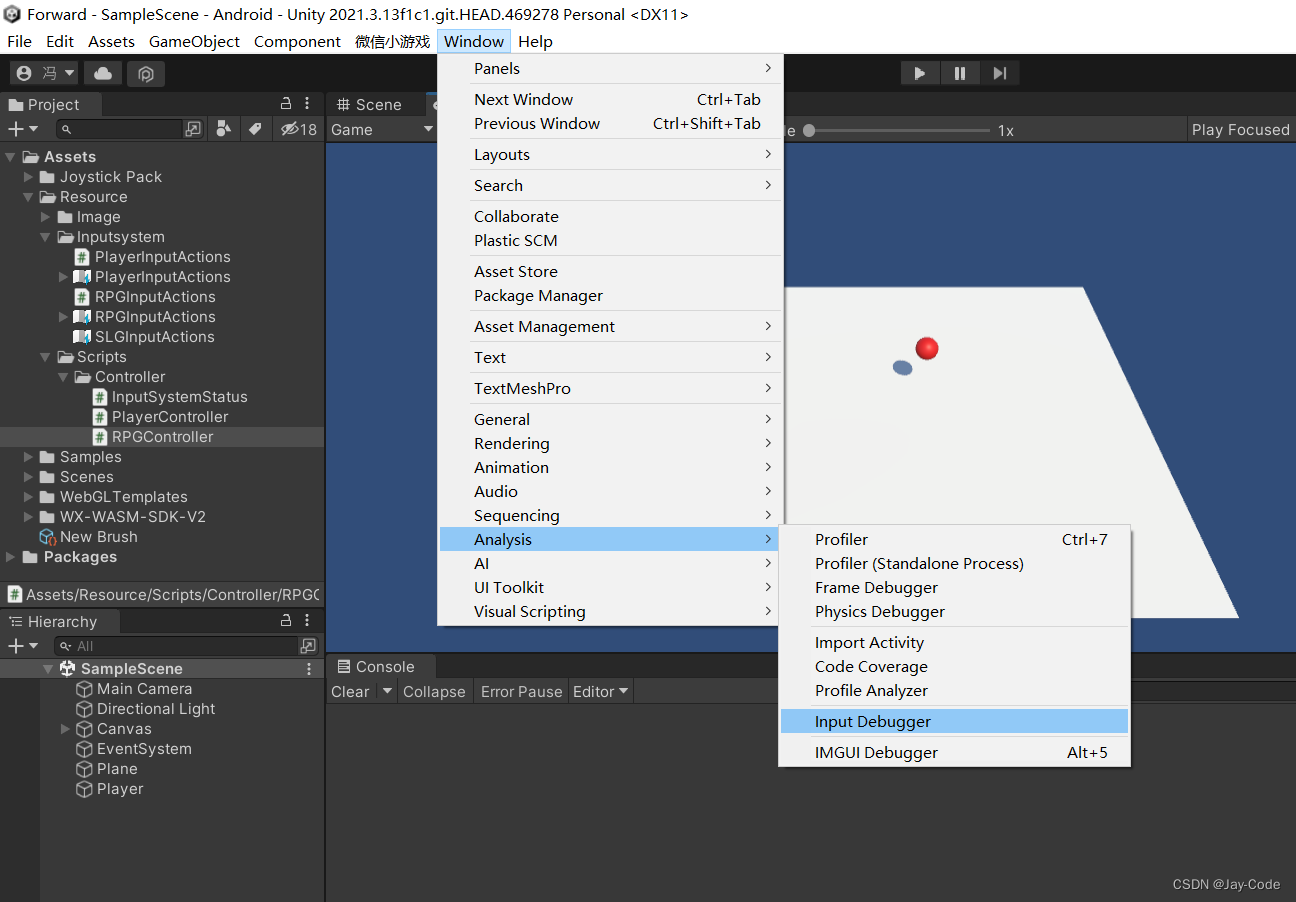
to open the Debugger window, then click Options in the upper left corner and select Simulate Touch Input
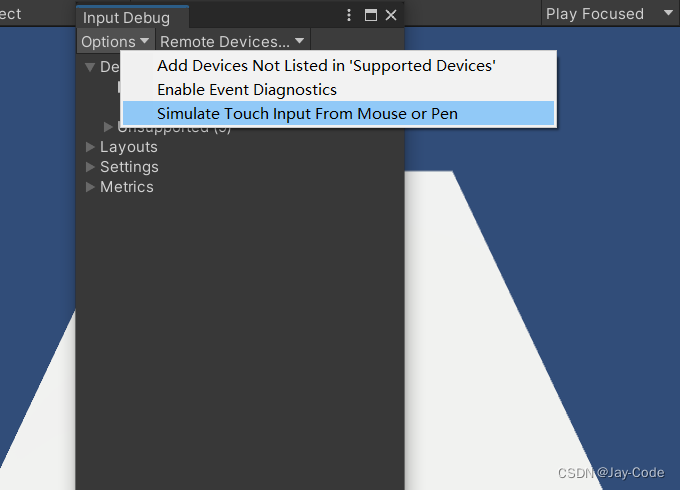
to add a new input device.
After that, we use the mouse to click, which is equivalent to simulating the effect of our fingers clicking on the touch screen

Unity Remote real machine touch
Use Unity Remote to realize real machine touch (real machine simulation is completely real).
There are detailed Unity Remote usage tutorials in this article
3. Function realization
Now that we can get the input detection of different hardware devices, we need to associate the detected input signal with our actual execution method to realize the specific functions in our project. The implementation of our specific functions will take the mouse key input detection on the PC as an example.
3-1. Keyboard control character movement
According to the operation of mouse button detection on the PC side in the above chapter 2-1, we can obtain a return value of type Vector2 through the WASD of the keyboard or the arrow keys of the small keyboard. Next, we make a small change to this method to realize the function of character movement.
public class RPGController : MonoBehaviour
{


    public RPGInputActions rpgInputActions;
    //声明一个移动速度属性初始值可以自行安排,我这里给个2
    private float moveSpeed = 2f;
    private void Update() {


        getMoveInput();
    }
    private void getMoveInput(){


    	//将读取到的Move返回值赋值给moveVector2
        Vector2 moveVector2 = rpgInputActions.PC.Move.ReadValue<Vector2>();
    	//因为我们的playerMove会在Update生命周期函数中逐帧执行,所以在执行前需要判断是否有按下对应的按键
        if (moveVector2 != Vector2.zero) {


        	//使用获取到的Vector2返回值作为角色移动的参数
            transform.Translate(new Vector3(moveVector2.x,0,moveVector2.y)*Time.deltaTime*moveSpeed,Space.World);
        }
    }
}
In this code, we have implemented the control of character movement through Move input detection, so let's do a little optimization to make the code more concise
public class RPGController : MonoBehaviour
{


    public RPGInputActions rpgInputActions;
    //声明一个移动速度属性初始值可以自行安排,我这里给个2
    private float moveSpeed = 2f;
    //表达式用于初始化moveAxis获取rpgInputActions.PC.Move的返回值赋值给moveAxis
    private Vector2 moveAxis => rpgInputActions.PC.Move.ReadValue<Vector2>();
    private void Update() {


        getMoveInput();
    }
    private void getMoveInput(){


    	//因为我们的playerMove会在Update生命周期函数中逐帧执行,所以在执行前需要判断是否有按下对应的按键
        if (moveAxis!= Vector2.zero) {


        	//使用moveAxis作为角色移动的参数
            transform.Translate(new Vector3(moveAxis.x,0,moveAxis.y)*Time.deltaTime*moveSpeed,Space.World);
        }
    }
}
3-2. Keyboard control character jumping
We get a return value of type bool through the space bar on the keyboard. Next, we use this return value to realize the function of character jumping.
public class RPGController : MonoBehaviour
{


    public RPGInputActions rpgInputActions;
    //获取对象刚体用于实现跳跃功能时给其施加一个向上的力
    public Rigidbody playerRigidbody;
    //表达式用于初始化isJump 获取rpgInputActions.PC.Jump是否有按下赋值给cameraOffset
    private bool isJump => rpgInputActions.PC.Jump.IsPressed();
    private void Update() {


        getJumpInput();
    }
    private void getJumpInput(){


        if (isJump) {


        	//判断Jump输入设备被按下时给游戏刚体施加一个向上的力实现跳跃的效果
            playerRigidbody.AddForce(Vector3.up * 5);
        }
    }
}
3-3. The mouse controls the rotation of the viewing angle
We get a return value of type Vector2 through the mouse offset. Next, we use the return value to realize the function of controlling the lens.
public class RPGController : MonoBehaviour
{


    public RPGInputActions rpgInputActions;
    //获取围绕旋转对象的Transform
    public Transform targetFollowTransform;
    //获取需要控制旋转的相机Transform
    public Transform cameraTransform;
    //表达式用于初始化moveAxis获取rpgInputActions.PC.CameraControl的返回值赋值给cameraOffset
    private Vector2 cameraOffset => rpgInputActions.PC.CameraControl.ReadValue<Vector2>();
    private void Update() {


        getCameraControlInput();
    }
    private void getCameraControlInput(){


        {


        	//判断获取cameraControl的输入设备是否触发偏移值
            if(cameraOffset != Vector2.zero){


            	//控制相机以targetFollowTransform对象为中心围绕世界坐标垂直轴进行水平旋转,旋转角度为cameraOffset水平方向返回的偏移值
                cameraTransform.RotateAround(targetFollowTransform.position, Vector3.up, cameraOffset.x);
            	//控制相机以targetFollowTransform对象围绕相机自身水平轴进行垂直旋转,旋转角度为cameraOffset垂直方向返回的偏移值
                cameraTransform.RotateAround(targetFollowTransform.position, cameraTransform.right, -cameraOffset.y);
            }
        }
    }
}
3-4.Mouse controls character movement
We obtain the corresponding coordinates by clicking on the map with the mouse to realize the movement of the character.
pending upgrade…
4. Summary
The above is the sharing of some practical skills of our InputSystem. If you feel that the graphic sharing is not detailed enough, you can click on the link Drunken Night Dog-【Unity】InputSystem Tutorial Series to watch more detailed video sharing! In addition, there are more detailed and practical tutorial series videos in my Unity Chinese classroom channel. Welcome everyone to learn together!