
Related gauss database installation packages that may be used:
https://pan.baidu.com/s/1l6mza570Ze2VmYkrn-_SZQ
Extraction code: 92z7
1. Preliminary preparation
1. There are some installation packages that will be used later, which need to be deployed first
yum -y install gcc net-tools wget openssl-devel bzip2-devel expat-devel gdbm-devel readline-devel sqlite-devel libaio-devel flex bison ncurses-devel glibc-devel patch redhat-lsb-core libnsl vim lrzsz bzip2
2. The gauss database depends on the python3.6 environment, install one here
Download version 3.6.5
wget https://www.python.org/ftp/python/3.6.5/Python-3.6.5.tgz
Unzip the configuration and install the python version
tar -zxvf Python-3.6.5.tgz
cd Python-3.6.5
mkdir /usr/local/python3
./configure --prefix=/usr/local/python3 --enable-shared --with-ssl
make && make install
cp /usr/local/python3/lib/libpython3.6m.so.1.0 /usr/lib64/
Create a system soft link for python3
ln -s /usr/local/python3/bin/python3 /usr/bin/python3
ln -s /usr/local/python3/bin/pip3 /usr/bin/pip3
Enter python3 to verify

3. Linux sem value modification
First modify the semni value of the system. The default value is 128. Huawei’s Gaussian database requires a higher maximum semaphore value. Here I changed it to 2048.
vim /etc/sysctl.conf

Use sysctl -p to view the modified value

4. openssl version modification
The openssl version of Huawei Gaussian database is required to be above 1.1, and my centos defaults to version 1.0.2, which also needs to be upgraded.
First download a version 1.1 compressed package on the official website
wget https://www.openssl.org/source/openssl-1.1.1g.tar.gz --no-check-certificate
Unzip the tarball and configure, compile and install it
tar -xvf openssl-1.1.1g.tar.gz
cd openssl-1.1.1g
./config shared --openssldir=/usr/local/openssl --prefix=/usr/local/openssl
make && make install
Update the original version in the system and replace the soft link of the system openssl
mv /usr/bin/openssl /usr/bin/openssl.old
ln -s /usr/local/openssl/bin/openssl /usr/bin/openssl
ln -s /usr/local/openssl/include/openssl /usr/include/openssl
echo "/usr/local/openssl/lib" >> /etc/ld.so.conf
ldconfig -v
Finally, you can verify whether it is successful
openssl version

2. Install Huawei GAUSS database enterprise version (single node server)
1. Create /opt/software/openGauss folder
mkdir -p /opt/software/openGauss
2. Upload the enterprise version installation package to this directory and decompress it
Because I uploaded the installation package to the /home directory at the beginning, I first did a mv cut operation:
mv /home/openGauss-3.0.0-CentOS-64bit-all.tar.gz /opt/software/openGauss/
cd /opt/software/openGauss/
tar -zxvf openGauss-3.0.0-CentOS-64bit-all.tar.gz
tar -zxvf openGauss-3.0.0-CentOS-64bit-om.tar.gz
3. Modify the hostname of the server
hostnamectl set-hostname master
4. Turn off and delete the server's firewall settings
service firewalld stop
chkconfig firewalld off
5. Modify the /etc/selinux/config file, modify the value of SELINUX, and change the value to disabled
SELINUX=disabled
Restart the server after the modification is complete.
reboot
6. Modify the time zone information of the server
cp /usr/share/zoneinfo/Asia/Shanghai /etc/localtime
7. Turn off the server's swap memory
swapoff -a
8. Set the mtu value of the network card to 1500
ifconfig ens33 mtu 1500
9. Set root user remote login
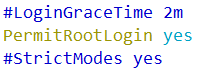
Modify the ssd_config file: Change the PermitRootLogin option inside to yes, find this line, and remove the # comment in front of PermitRootLogin.
vim /etc/ssh/sshd_config
service sshd restart
10. Re-login as root user
ssh 192.168.2.203
11. Copy the xml configuration file of the server
cp /opt/software/openGauss/script/gspylib/etc/conf/cluster_config_template.xml /opt/software/openGauss/cluster_config.xml
12. Modify the /opt/software/openGauss/cluster_config.xml file
Delete all the contents of the file, paste the following content into your own cluster_config.xml file, and replace the host name and ip address, and then save the file
<?xml version="1.0" encoding="UTF-8"?>
<ROOT>
<!-- openGauss整体信息 -->
<CLUSTER>
<!-- 数据库名称 -->
<PARAM name="clusterName" value="dbCluster" />
<!-- 数据库节点名称(hostname) -->
<PARAM name="nodeNames" value="master" />
<!-- 数据库安装目录-->
<PARAM name="gaussdbAppPath" value="/opt/huawei/install/app" />
<!-- 日志目录-->
<PARAM name="gaussdbLogPath" value="/var/log/omm" />
<!-- 临时文件目录-->
<PARAM name="tmpMppdbPath" value="/opt/huawei/tmp" />
<!-- 数据库工具目录-->
<PARAM name="gaussdbToolPath" value="/opt/huawei/install/om" />
<!-- 数据库core文件目录-->
<PARAM name="corePath" value="/opt/huawei/corefile" />
<!-- 节点IP,与数据库节点名称列表一一对应 -->
<PARAM name="backIp1s" value="192.168.222.134"/>
</CLUSTER>
<!-- 每台服务器上的节点部署信息 -->
<DEVICELIST>
<!-- 节点1上的部署信息 -->
<DEVICE sn="node1_hostname">
<!-- 节点1的主机名称 -->
<PARAM name="name" value="master"/>
<!-- 节点1所在的AZ及AZ优先级 -->
<PARAM name="azName" value="AZ1"/>
<PARAM name="azPriority" value="1"/>
<!-- 节点1的IP,如果服务器只有一个网卡可用,将backIP1和sshIP1配置成同一个IP -->
<PARAM name="backIp1" value="192.168.222.134"/>
<PARAM name="sshIp1" value="192.168.222.134"/>
<!--dbnode-->
<PARAM name="dataNum" value="1"/>
<PARAM name="dataPortBase" value="15400"/>
<PARAM name="dataNode1" value="/opt/huawei/install/data/dn"/>
<PARAM name="dataNode1_syncNum" value="0"/>
</DEVICE>
</DEVICELIST>
</ROOT>
13. Use gs_preinstall to execute the installation environment in interactive mode
/opt/software/openGauss/script/gs_preinstall -U omm -G dbgrp -X /opt/software/openGauss/cluster_config.xml
Here omm is the system user who prepares the database for use, and dbgrp is the user group to which this user belongs.
14. Give the omm user permission to the opt folder
chmod -R 775 /opt
15. Create a script mutual trust file and write your own ip address in the hostfile file
cd /opt/software/openGauss/
vim hostfile
16. Switch to the omm user and start installing the gauss database
su - omm
17. Install the gauss database
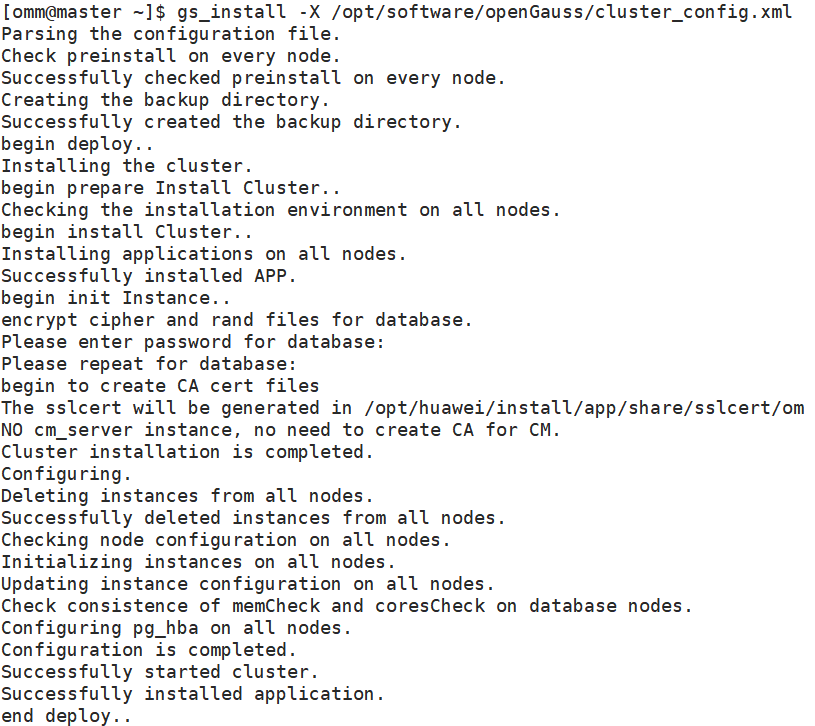
gs_install -X /opt/software/openGauss/cluster_config.xml
During the installation process, you need to enter the database password. The password should be composed of symbols, uppercase and lowercase English, and the length should be at least 8 characters. For example, Test@123
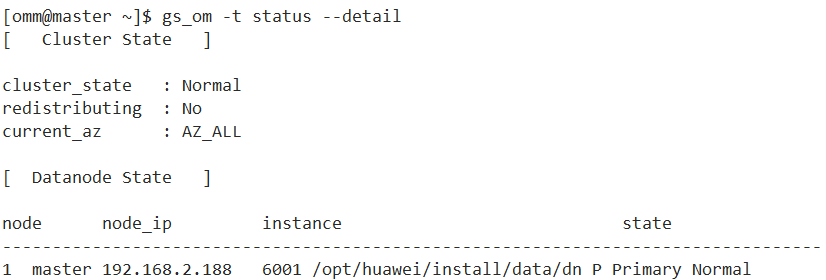
18. Verify after database installation
gs_om -t status --detail
19. Starting the database
gs_om -t start
20. Use commands to log in and enter the database
gsql -d postgres -p 15400 -r

21. Create your own database
create database database name with encoding 'encoding format' template=template0;

22. Create a user with its own account
create user username password 'password';

23. Authorize users and assign default administrator privileges to new users
grant admin_name to username;

Use the alter statement to grant permissions to your own users:
alter user jack sysadmin;
At the end of this step, your GAUSS database is ready to use.